Alfa Romeo Giulia 2019 Owner's Manual
Manufacturer: ALFA ROMEO, Model Year: 2019, Model line: Giulia, Model: Alfa Romeo Giulia 2019Pages: 232, PDF Size: 4.87 MB
Page 211 of 232
Button(2)
Action Function
SHORT PRESSInRadio mode: selects the previous radio station.
In Media mode: selects the previous track.
LONG PRESSIn Radio mode: scan lower frequencies until released.
In Media mode: fast rewind track.
Voice command button (3)
Action Function
SHORT PRESS Activate voice commands.
L
ONG PRESS Close the voice session immediately.
Phone button (4)
Answers / closes call or shows the recent calls list.
Volume Control (5)
Action Function
ROTATIONUpwards:increases the volume.
Downwards: decreases the volume.
SHORT PRESSIn Radio mode: activates/deactivates the Mute function.
In Media mode: activates play/pause.
In Phone mode: activates/deactivates the microphone Mute function.
209
Page 212 of 232
INTRODUCTION
The system can be managed using the
Rotary Pad. Turn it to navigate the menus,
press it to activate/confirm the
selections, push it leftwards to go back to
the previous screen.
RADIO MODE
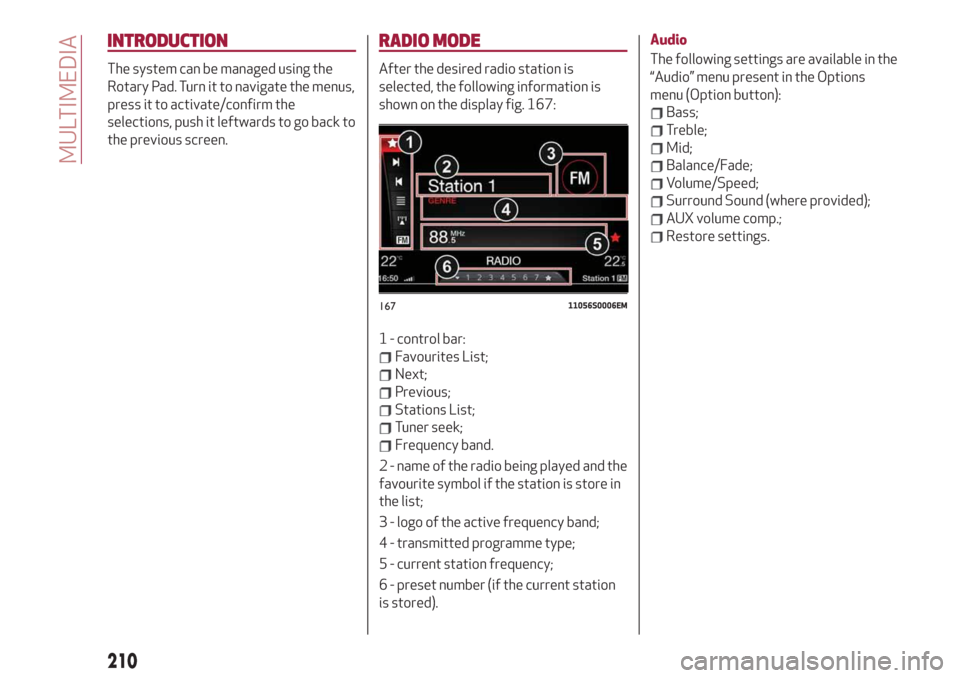
After the desired radio station is
selected, the following information is
shown on the display fig. 167:
1 - control bar:
Favourites List;
Next;
Previous;
Stations List;
Tuner seek;
Frequency band.
2 - name of the radio being played and the
favourite symbol if the station is store in
the list;
3 - logo of the active frequency band;
4 - transmitted programme type;
5 - current station frequency;
6 - preset number (if the current station
is stored).Audio
The following settings are available in the
“Audio” menu present in the Options
menu (Option button):
Bass;
Treble;
Mid;
Balance/Fade;
Volume/Speed;
Surround Sound (where provided);
AUX volume comp.;
Restore settings.
16711056S0006EM
210
MULTIMEDIA
Page 213 of 232
MEDIA MODE
IMPORTANT Applications used on
portable devices may be not compatible
with the Connect system.
Track selection (Browse)
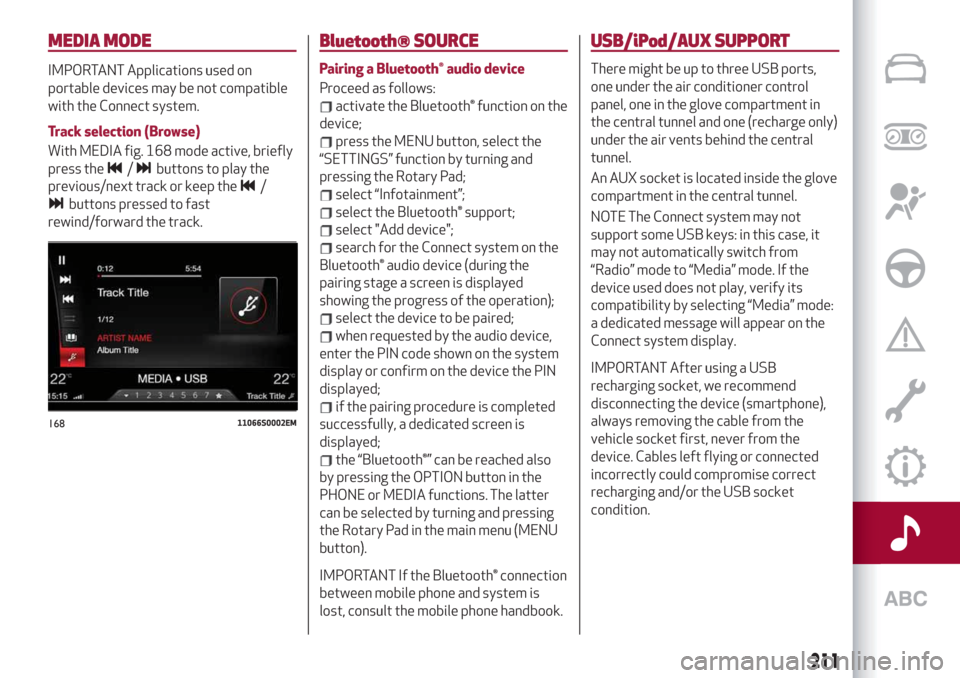
With MEDIA fig. 168 mode active, briefly
press the
/buttons to play the
previous/next track or keep the
/
buttons pressed to fast
rewind/forward the track.
Bluetooth® SOURCE
Pairing a Bluetooth® audio device
Proceed as follows:
activate the Bluetooth® function on the
device;
press the MENU button, select the
“SETTINGS” function by turning and
pressing the Rotary Pad;
select “Infotainment”;
select the Bluetooth® support;
select "Add device";
search for the Connect system on the
Bluetooth® audio device (during the
pairing stage a screen is displayed
showing the progress of the operation);
select the device to be paired;
when requested by the audio device,
enter the PIN code shown on the system
display or confirm on the device the PIN
displayed;
if the pairing procedure is completed
successfully, a dedicated screen is
displayed;
the “Bluetooth®” can be reached also
by pressing the OPTION button in the
PHONE or MEDIA functions. The latter
can be selected by turning and pressing
the Rotary Pad in the main menu (MENU
button).
IMPORTANT If the Bluetooth® connection
between mobile phone and system is
lost, consult the mobile phone handbook.
USB/iPod/AUX SUPPORT
There might be up to three USB ports,
one under the air conditioner control
panel, one in the glove compartment in
the central tunnel and one (recharge only)
under the air vents behind the central
tunnel.
An AUX socket is located inside the glove
compartment in the central tunnel.
NOTE The Connect system may not
support some USB keys: in this case, it
may not automatically switch from
“Radio” mode to “Media” mode. If the
device used does not play, verify its
compatibility by selecting “Media” mode:
a dedicated message will appear on the
Connect system display.
IMPORTANT After using a USB
recharging socket, we recommend
disconnecting the device (smartphone),
always removing the cable from the
vehicle socket first, never from the
device. Cables left flying or connected
incorrectly could compromise correct
recharging and/or the USB socket
condition.
16811066S0002EM
211
Page 214 of 232
PHONE MODE
PHONE mode can be activated from the
main menu (MENU button) by turning and
pressing the Rotary Pad.
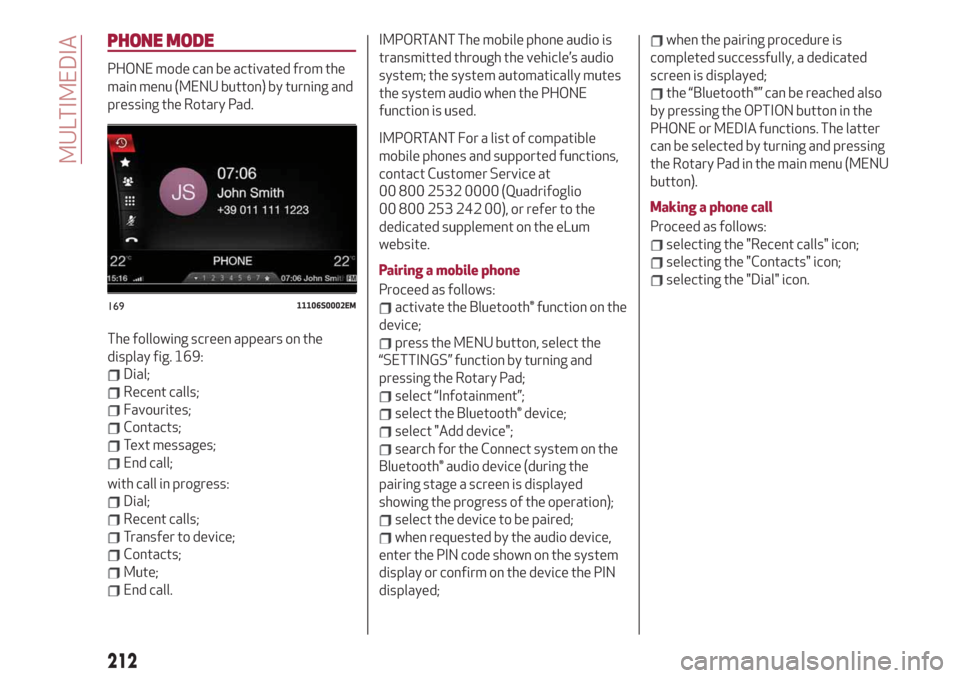
The following screen appears on the
display fig. 169:
Dial;
Recent calls;
Favourites;
Contacts;
Text messages;
End call;
with call in progress:
Dial;
Recent calls;
Transfer to device;
Contacts;
Mute;
End call.
IMPORTANT The mobile phone audio is
transmitted through the vehicle’s audio
system; the system automatically mutes
the system audio when the PHONE
function is used.
IMPORTANT For a list of compatible
mobile phones and supported functions,
contact Customer Service at
00 800 2532 0000 (Quadrifoglio
00 800 253 242 00), or refer to the
dedicated supplement on the eLum
website.
Pairing a mobile phone
Proceed as follows:
activate the Bluetooth® function on the
device;
press the MENU button, select the
“SETTINGS” function by turning and
pressing the Rotary Pad;
select “Infotainment”;
select the Bluetooth® device;
select "Add device";
search for the Connect system on the
Bluetooth® audio device (during the
pairing stage a screen is displayed
showing the progress of the operation);
select the device to be paired;
when requested by the audio device,
enter the PIN code shown on the system
display or confirm on the device the PIN
displayed;
when the pairing procedure is
completed successfully, a dedicated
screen is displayed;
the “Bluetooth®” can be reached also
by pressing the OPTION button in the
PHONE or MEDIA functions. The latter
can be selected by turning and pressing
the Rotary Pad in the main menu (MENU
button).
Making a phone call
Proceed as follows:
selecting the "Recent calls" icon;
selecting the "Contacts" icon;
selecting the "Dial" icon.
16911106S0002EM
212
MULTIMEDIA
Page 215 of 232
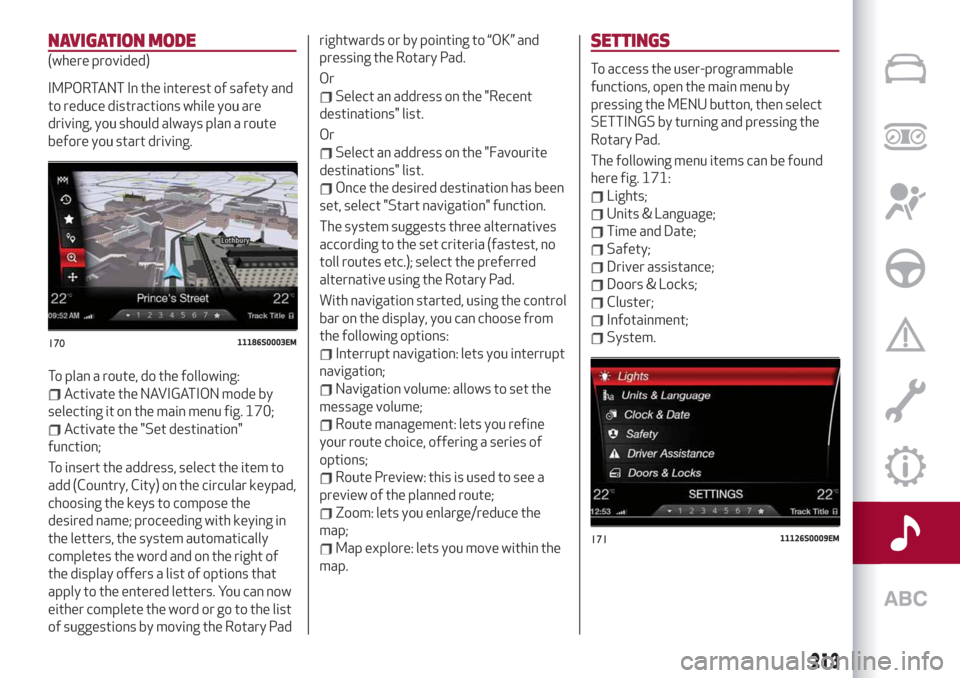
NAVIGATION MODE
(where provided)
IMPORTANT In the interest of safety and
to reduce distractions while you are
driving, you should always plan a route
before you start driving.
To plan a route, do the following:
Activate the NAVIGATION mode by
selecting it on the main menu fig. 170;
Activate the "Set destination"
function;
To insert the address, select the item to
add (Country, City) on the circular keypad,
choosing the keys to compose the
desired name; proceeding with keying in
the letters, the system automatically
completes the word and on the right of
the display offers a list of options that
apply to the entered letters. You can now
either complete the word or go to the list
of suggestions by moving the Rotary Padrightwards or by pointing to “OK” and
pressing the Rotary Pad.
Or
Select an address on the "Recent
destinations" list.
Or
Select an address on the "Favourite
destinations" list.
Once the desired destination has been
set, select "Start navigation" function.
The system suggests three alternatives
according to the set criteria (fastest, no
toll routes etc.); select the preferred
alternative using the Rotary Pad.
With navigation started, using the control
bar on the display, you can choose from
the following options:
Interrupt navigation: lets you interrupt
navigation;
Navigation volume: allows to set the
message volume;
Route management: lets you refine
your route choice, offering a series of
options;
Route Preview: this is used to see a
preview of the planned route;
Zoom: lets you enlarge/reduce the
map;
Map explore: lets you move within the
map.
SETTINGS
To access the user-programmable
functions, open the main menu by
pressing the MENU button, then select
SETTINGS by turning and pressing the
Rotary Pad.
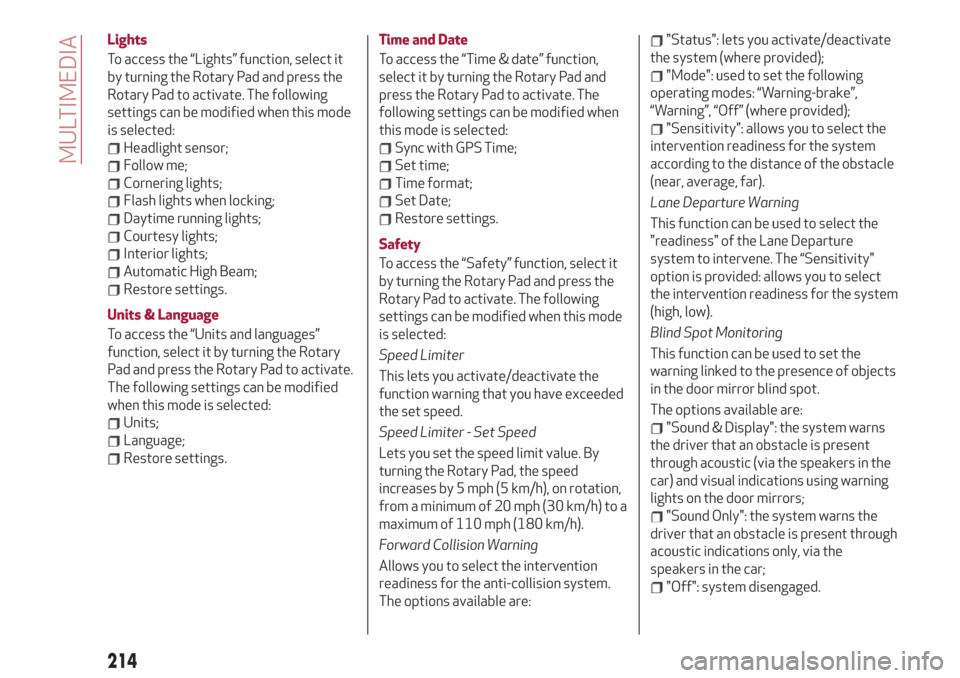
The following menu items can be found
here fig. 171:
Lights;
Units & Language;
Time and Date;
Safety;
Driver assistance;
Doors & Locks;
Cluster;
Infotainment;
System.17011186S0003EM
17111126S0009EM
213
Page 216 of 232
Lights
To access the “Lights” function, select it
by turning the Rotary Pad and press the
Rotary Pad to activate. The following
settings can be modified when this mode
is selected:
Headlight sensor;
Follow me;
Cornering lights;
Flash lights when locking;
Daytime running lights;
Courtesy lights;
Interior lights;
Automatic High Beam;
Restore settings.
Units & Language
To access the “Units and languages”
function, select it by turning the Rotary
Pad and press the Rotary Pad to activate.
The following settings can be modified
when this mode is selected:
Units;
Language;
Restore settings.Time and Date
To access the “Time & date” function,
select it by turning the Rotary Pad and
press the Rotary Pad to activate. The
following settings can be modified when
this mode is selected:
Sync with GPS Time;
Set time;
Time format;
Set Date;
Restore settings.
Safety
To access the “Safety” function, select it
by turning the Rotary Pad and press the
Rotary Pad to activate. The following
settings can be modified when this mode
is selected:
Speed Limiter
This lets you activate/deactivate the
function warning that you have exceeded
the set speed.
Speed Limiter - Set Speed
Lets you set the speed limit value. By
turning the Rotary Pad, the speed
increases by 5 mph (5 km/h), on rotation,
from a minimum of 20 mph (30 km/h) to a
maximum of 110 mph (180 km/h).
Forward Collision Warning
Allows you to select the intervention
readiness for the anti-collision system.
The options available are:
"Status": lets you activate/deactivate
the system (where provided);
"Mode": used to set the following
operating modes: “Warning-brake”,
“Warning”, “Off” (where provided);
"Sensitivity": allows you to select the
intervention readiness for the system
according to the distance of the obstacle
(near, average, far).
Lane Departure Warning
This function can be used to select the
"readiness" of the Lane Departure
system to intervene. The “Sensitivity"
option is provided: allows you to select
the intervention readiness for the system
(high, low).
Blind Spot Monitoring
This function can be used to set the
warning linked to the presence of objects
in the door mirror blind spot.
The options available are:
"Sound & Display": the system warns
the driver that an obstacle is present
through acoustic (via the speakers in the
car) and visual indications using warning
lights on the door mirrors;
"Sound Only": the system warns the
driver that an obstacle is present through
acoustic indications only, via the
speakers in the car;
"Off": system disengaged.
214
MULTIMEDIA
Page 217 of 232
Passenger's airbag
(where provided)
The options available are:
"Sound & Display": the system warns
the driver that an obstacle is present
through acoustic (via the speakers in the
car) and visual (on the instrument panel)
warnings;
"Sound Only": the system warns the
driver that an obstacle is present through
acoustic indications only, via the
speakers in the car;
"Off": system disengaged.
Lets you activate/deactivate the front
passenger airbag function. When the
function is accessed, the system will
detect the activation/deactivation status
of the airbags and confirm change of
status. Press the Rotary Pad to continue.
The air bag status is visible through the
LEDs next to the status icon on the
dashboard.
Passenger protection activated: the ON
LED switches on with a steady light.
Passenger protection deactivated: the
OFF LED switches on with a steady light.
Seat belt reminder
This function appears only if the seat belt
reminder was deactivated and allows to
reactivate it.Driver assistance
To access the “Driver assistance”
function, select it by turning the Rotary
Pad and press the Rotary Pad to activate.
This function can be used to carry out the
following adjustments:
ParkSense
This function can be used to select the
type of warning provided by the
ParkSense system.
The options available are:“Mode”: the following options are
available in this function: “Sound”, the
system notifies the driver of the
presence of an obstacle by means of
auditory signals only, by means of the
speakers in the car or “Sound and
Display”, the system notifies the driver of
the presence of an obstacle by means of
auditory signals (by means of the
speakers in the vehicle) and visual
signals, on the instrument panel display.
"Audio": allows to select the volume of
the acoustic warnings provided by the
ParkSense system, the available options
are: "High", "Medium" or "Low".Rear view camera
(where provided)
This function can be used to carry out the
following adjustments:
"View": lets you activate viewing the
video camera on the display;
“Switch-Off Delay”: allows you to delay
switching the camera off by a few
seconds when reverse gear is
disengaged.
“Camera Guidelines”: Allows you to
enable the dynamic guidelines on the
display to indicate the vehicle’s path.
Automatic parking brake
This function allows you to
activate/deactivate the automatic
parking brake engagement upon
switching off the engine.
Brake service
(where provided)
This function permits the activation of
the procedure to carry out braking
system maintenance.
Easy Entry
(where provided)
This function can be used to
activate/deactivate front seat retraction
(Easy Entry function). The default setting
is “Off”.
215
Page 218 of 232
Automatic mirror closing
(where provided)
This function activates/deactivates
automatic folding of the mirrors when the
doors are locked/unlocked. The default
setting is “Off”.
Restore settings
This function allows you to delete the
settings from this menu and restore the
default settings. Access the functions
and select the setting by turning and
pressing the Rotary Pad.
Doors & Locks
To access the “Doors & Locks” function,
select it by turning the Rotary Pad and
press the control to activate it. The
following settings can be modified when
this mode is selected:
Door lock in motion;
Unlock all doors on exit;
Passive Entry (where provided);
Door Unlock On Entry (where
provided);
Horn with remote start (where
provided)
Sound Horn with Lock (where
provided);
Auto Relock (where provided);
Restore settings.Control panel
To access the “Control panel” function,
select it by turning the Rotary Pad and
press the Rotary Pad to activate. The
following settings can be modified when
this mode is selected:
Warning buzzer volume;
Trip B;
Show telephone info;
Show audio info;
Show Navi info;
Restore settings.
Infotainment
To access the “Infotainment” function,
select it by turning the Rotary Pad and
press the Rotary Pad to activate. The
following settings can be modified when
this mode is selected:
Screen Off;
Splitscreen (where provided);
Audio;
Bluetooth®;
Radio;
Media;
Phone;
Navigation (where provided);
Apps.
System
To access the “System” function, select it
by turning the Rotary Pad and press the
Rotary Pad to activate. The following
settings can be modified when this mode
is selected:
Automatic activation;
Cam Delay;
Update Software;
Map update;
Clear personal data;
Restore settings.
IMPORTANT For further information
about the map update procedure, refer to
the Connect system supplement on the
uLum website.
MAP UPDATE
To ensure optimal performance, the
navigation system must be updated
periodically.
For this, the Mopar Map Care service
offers a new map update every three
months.
The updates can be downloaded from the
maps.mopar.eu website and installed
directly on the Connect system. All
updates are free of charge for 3 years
from the start of the warranty on the car.
The navigation system can also be
updated at the Alfa Romeo Dealership.
NOTE The dealer may charge for
updating the navigation system.
216
MULTIMEDIA
Page 219 of 232
CAR
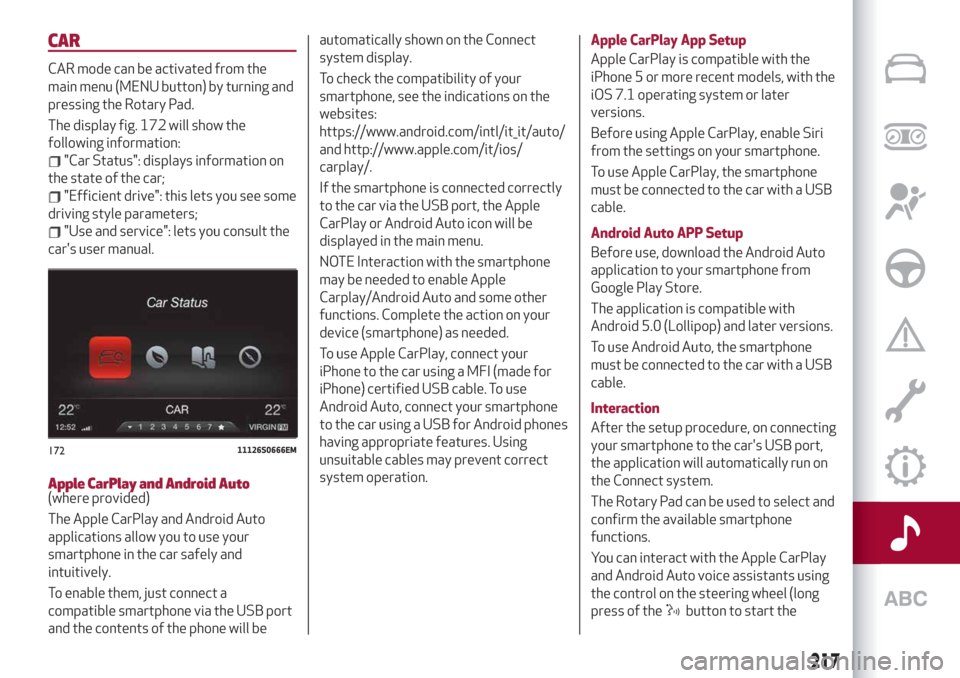
CAR mode can be activated from the
main menu (MENU button) by turning and
pressing the Rotary Pad.
The display fig. 172 will show the
following information:
"Car Status": displays information on
the state of the car;
"Efficient drive": this lets you see some
driving style parameters;
"Use and service": lets you consult the
car's user manual.
Apple CarPlay and Android Auto(where provided)
The Apple CarPlay and Android Auto
applications allow you to use your
smartphone in the car safely and
intuitively.
To enable them, just connect a
compatible smartphone via the USB port
and the contents of the phone will beautomatically shown on the Connect
system display.
To check the compatibility of your
smartphone, see the indications on the
websites:
https://www.android.com/intl/it_it/auto/
and http://www.apple.com/it/ios/
carplay/.
If the smartphone is connected correctly
to the car via the USB port, the Apple
CarPlay or Android Auto icon will be
displayed in the main menu.
NOTE Interaction with the smartphone
may be needed to enable Apple
Carplay/Android Auto and some other
functions. Complete the action on your
device (smartphone) as needed.
To use Apple CarPlay, connect your
iPhone to the car using a MFI (made for
iPhone) certified USB cable. To use
Android Auto, connect your smartphone
to the car using a USB for Android phones
having appropriate features. Using
unsuitable cables may prevent correct
system operation.Apple CarPlay App Setup
Apple CarPlay is compatible with the
iPhone 5 or more recent models, with the
iOS 7.1 operating system or later
versions.
Before using Apple CarPlay, enable Siri
from the settings on your smartphone.
To use Apple CarPlay, the smartphone
must be connected to the car with a USB
cable.
Android Auto APP Setup
Before use, download the Android Auto
application to your smartphone from
Google Play Store.
The application is compatible with
Android 5.0 (Lollipop) and later versions.
To use Android Auto, the smartphone
must be connected to the car with a USB
cable.
Interaction
After the setup procedure, on connecting
your smartphone to the car's USB port,
the application will automatically run on
the Connect system.
The Rotary Pad can be used to select and
confirm the available smartphone
functions.
You can interact with the Apple CarPlay
and Android Auto voice assistants using
the control on the steering wheel (long
press of the
button to start the
17211126S0666EM
217
Page 220 of 232
interaction and short press to close the
voice assistant).
The Telephone application of the
smartphone can be accessed directly
using the control on the steering wheel
.
Multimedia contents on the smartphone
can be accessed directly via “MEDIA”
mode of Connect.
Navigation
With the Apple CarPlay and Android Auto
applications, the user can choose to use
the navigation system on their
smartphone.
Exiting the Android Auto and Apple
CarPlay apps
To end the Apple CarPlay or Android Auto
session, physically disconnect the
smartphone from the USB port.
VOICE COMMANDS
IMPORTANT For languages not
supported by the system, voice
commands are not available.
To use the voice commands, press the
button on the steering wheel controls
and say the function you want to activate
aloud.
The following lists give the main word for
each command.
Radio functions
The
button lets you activate the
following functions:
Tune to Station
Tune by Frequency
Add to favourites
Show Available Stations
Show Favourite Stations
FM
AM
DAB (where provided)
SiriusXM (where provided)
Media function
The
button lets you activate the
following functions:
Display Album
Play Album
Display Artist
Play Artist
Display Composer
Play Composer
Display Genre
Play Genre
Display Playlist
Play Playlist
Play song
Play All
Display all the albums
Display all the artists
Display all the composers
Display all the genres
Display all the playlists
View all songs
Activate shuffle
Deactivate shuffle
Change Source to Aux
Change Source to USB 1
Change Source to USB 2
Change Source to Bluetooth
NOTE These controls are valid on devices
connected to the system via USB ports
and not through the
Bluetooth®
system.
Telephone function
The
button lets you activate the
following functions:
Dial
Call
Redial
Show contacts
Show all calls
Show missed calls
Search
218
MULTIMEDIA