ALFA ROMEO GIULIA 2023 Manual Online
Manufacturer: ALFA ROMEO, Model Year: 2023, Model line: GIULIA, Model: ALFA ROMEO GIULIA 2023Pages: 248, PDF Size: 9.62 MB
Page 81 of 248
79
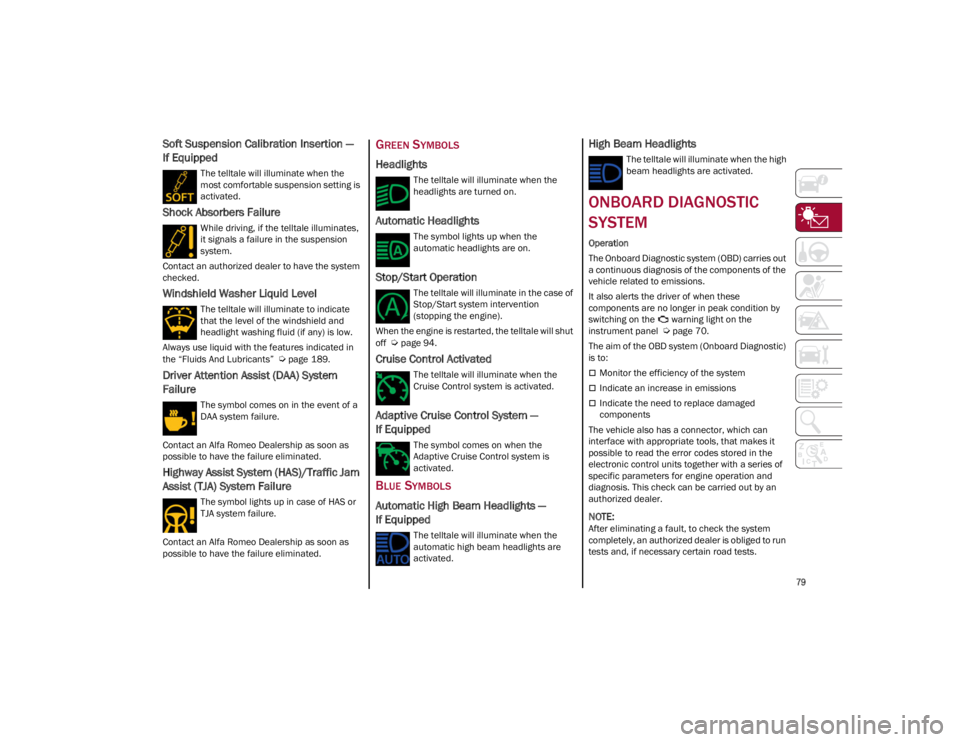
Soft Suspension Calibration Insertion —
If Equipped
The telltale will illuminate when the
most comfortable suspension setting is
activated.
Shock Absorbers Failure
While driving, if the telltale illuminates,
it signals a failure in the suspension
system.
Contact an authorized dealer to have the system
checked.
Windshield Washer Liquid Level
The telltale will illuminate to indicate
that the level of the windshield and
headlight washing fluid (if any) is low.
Always use liquid with the features indicated in
the “Fluids And Lubricants”
Ú
page 189.
Driver Attention Assist (DAA) System
Failure
The symbol comes on in the event of a
DAA system failure.
Contact an Alfa Romeo Dealership as soon as
possible to have the failure eliminated.
Highway Assist System (HAS)/Traffic Jam
Assist (TJA) System Failure
The symbol lights up in case of HAS or
TJA system failure.
Contact an Alfa Romeo Dealership as soon as
possible to have the failure eliminated.
GREEN SYMBOLS
Headlights
The telltale will illuminate when the
headlights are turned on.
Automatic Headlights
The symbol lights up when the
automatic headlights are on.
Stop/Start Operation
The telltale will illuminate in the case of
Stop/Start system intervention
(stopping the engine).
When the engine is restarted, the telltale will shut
off
Ú
page 94.
Cruise Control Activated
The telltale will illuminate when the
Cruise Control system is activated.
Adaptive Cruise Control System —
If Equipped
The symbol comes on when the
Adaptive Cruise Control system is
activated.
BLUE SYMBOLS
Automatic High Beam Headlights —
If Equipped
The telltale will illuminate when the
automatic high beam headlights are
activated.
High Beam Headlights
The telltale will illuminate when the high
beam headlights are activated.
ONBOARD DIAGNOSTIC
SYSTEM
Operation
The Onboard Diagnostic system (OBD) carries out
a continuous diagnosis of the components of the
vehicle related to emissions.
It also alerts the driver of when these
components are no longer in peak condition by
switching on the warning light on the
instrument panel
Ú
page 70.
The aim of the OBD system (Onboard Diagnostic)
is to:
Monitor the efficiency of the system
Indicate an increase in emissions
Indicate the need to replace damaged
components
The vehicle also has a connector, which can
interface with appropriate tools, that makes it
possible to read the error codes stored in the
electronic control units together with a series of
specific parameters for engine operation and
diagnosis. This check can be carried out by an
authorized dealer.
NOTE:
After eliminating a fault, to check the system
completely, an authorized dealer is obliged to run
tests and, if necessary certain road tests.
23_GA_OM_EN_USC_t.book Page 79
Page 82 of 248
GETTING TO KNOW YOUR INSTRUMENT PANEL
80
ONBOARD DIAGNOSTIC SYSTEM (OBD II)
C
YBERSECURITY
Your vehicle is required to have OBD II and a
connection port to allow access to information
related to the performance of your emissions
controls. Authorized service technicians may
need to access this information to assist with the
diagnosis and service of your vehicle and
emissions system.
EMISSIONS INSPECTION
AND MAINTENANCE
PROGRAMS
In some localities, it may be a legal requirement
to pass an inspection of your vehicle's emissions
control system. Failure to pass could prevent
vehicle registration.
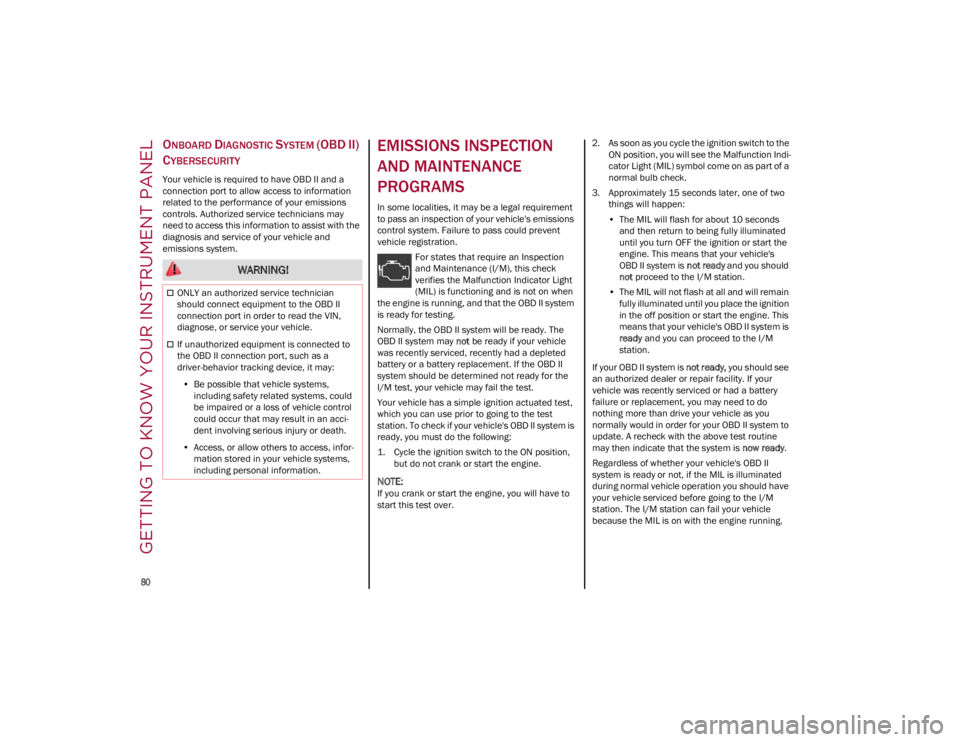
For states that require an Inspection
and Maintenance (I/M), this check
verifies the Malfunction Indicator Light
(MIL) is functioning and is not on when
the engine is running, and that the OBD II system
is ready for testing.
Normally, the OBD II system will be ready. The
OBD II system may not be ready if your vehicle
was recently serviced, recently had a depleted
battery or a battery replacement. If the OBD II
system should be determined not ready for the
I/M test, your vehicle may fail the test.
Your vehicle has a simple ignition actuated test,
which you can use prior to going to the test
station. To check if your vehicle's OBD II system is
ready, you must do the following:
1. Cycle the ignition switch to the ON position, but do not crank or start the engine.
NOTE:
If you crank or start the engine, you will have to
start this test over. 2. As soon as you cycle the ignition switch to the
ON position, you will see the Malfunction Indi -
cator Light (MIL) symbol come on as part of a
normal bulb check.
3. Approximately 15 seconds later, one of two things will happen:
• The MIL will flash for about 10 seconds
and then return to being fully illuminateduntil you turn OFF the ignition or start the engine. This means that your vehicle'sOBD II system is not ready and you should
not proceed to the I/M station.
• The MIL will not flash at all and will remain
fully illuminated until you place the ignition
in t
he off position or start the engine. This
means that your vehicle's OBD II system is ready and you can proceed to the I/M
station.
If your OBD II system is not ready, you should see
an authorized dealer or repair facility. If your
vehicle was recently serviced or had a battery
failure or replacement, you may need to do
nothing more than drive your vehicle as you
normally would in order for your OBD II system to
update. A recheck with the above test routine
may then indicate that the system is now ready.
Regardless of whether your vehicle's OBD II
system is ready or not, if the MIL is illuminated
during normal vehicle operation you should have
your vehicle serviced before going to the I/M
station. The I/M station can fail your vehicle
because the MIL is on with the engine running.
WARNING!
ONLY an authorized service technician
should connect equipment to the OBD II
connection port in order to read the VIN,
diagnose, or service your vehicle.
If unauthorized equipment is connected to
the OBD II connection port, such as a
driver-behavior tracking device, it may:
• Be possible that vehicle systems,
including safety related systems, couldbe impaired or a loss of vehicle controlcould occur that may result in an acci-dent involving serious injury or death.
• Access, or allow others to access, infor-
mation stored in your vehicle systems,including personal information.
23_GA_OM_EN_USC_t.book Page 80
Page 83 of 248
81
STARTING THE ENGINE
Before starting the engine, be sure to adjust the
seat, the interior rearview mirror, the door
mirrors, and fasten the seat belt correctly.
Never press the accelerator pedal before starting
the engine.
If necessary, messages indicating the starting
procedure will be shown in the display.
STARTING PROCEDURE
Proceed as follows:
1. Apply the Electric Park Brake and set the gear selector to PARK (P) or NEUTRAL (N).
2. Fully press the brake pedal without touching the accelerator.
3. Briefly push the ignition button.
4. If the engine doesn't start within a few seconds, you need to repeat the procedure. If
the problem persists, contact an authorized
dealer.
REMOTE STARTING SYSTEM
This system uses the key fob to start the engine
conveniently from outside the vehicle while still
maintaining security. The system has a range of
at least 300 feet (91 meters).
The remote starting system also activates the
climate control, the heated seats (if equipped),
and the heated steering wheel (if equipped),
depending on temperatures outside and inside of
the vehicle.
NOTE:
Obstructions between the vehicle and key fob
may reduce this range.
How to use Remote Start
All of the following conditions must be met before
the engine will remote start:
Gear selector in PARK (P).
Doors closed.
Hood closed.
Trunk closed.
Hazard switch off.
Brake switch inactive (brake pedal not
pressed).
WARNING!
When leaving the vehicle, always remove the
key fob from the vehicle and lock your
vehicle.
Never leave children alone in a vehicle, or
with access to an unlocked vehicle.
Allowing children to be in a vehicle
unattended is dangerous for a number of
reasons. A child or others could be seriously
or fatally injured. Children should be warned
not to touch the parking brake, brake pedal
or the transmission gear selector.
Do not leave the key fob in or near the
vehicle, or in a location accessible to
children. A child could operate power
windows, other controls, or move the vehicle.
Do not leave children or animals inside
parked vehicles in hot weather. Interior heat
buildup may cause serious injury or death.
WARNING!
Never pour fuel or other flammable liquid
into the throttle body air inlet opening in an
attempt to start the vehicle. This could result
in flash fire causing serious personal injury.
Do not attempt to push or tow your vehicle to
get it started. Vehicles equipped with an
automatic transmission cannot be started
this way. Unburned fuel could enter the
catalytic converter and once the engine has
started, ignite and damage the converter and
vehicle.
If the vehicle has a discharged battery,
booster cables may be used to obtain a start
from a booster battery or the battery in
another vehicle
Ú
page 177. This type of
start can be dangerous if done improperly.
CAUTION!
To prevent damage to the starter, do not
continuously crank the engine for more than
25 seconds at a time. Wait 60 seconds before
trying again.
23_GA_OM_EN_USC_t.book Page 81
Page 84 of 248
STARTING AND OPERATING
82
Battery at an acceptable charge level.
PANIC button not pushed.
System not disabled from previous remote
start event.
Vehicle alarm system indicator flashing.
Ignition in the OFF position.
Fuel level meets minimum requirement.
Remote Start Comfort Systems — If Equipped
When Remote Start is activated, the heated
steering wheel and driver heated seat features
will automatically turn on in cold weather.
These features will stay on through the duration
of remote start until the ignition is placed in the
ON/RUN position.
Remote Start Windshield Wiper De–Icer
Activation — If Equipped
When remote start is active and the outside
ambient temperature is less than 39°F (4°C),
the Windshield Wiper De-Icer will be enabled.
Exiting remote start will resume previous
operation, except if the Windshield Wiper De-Icer
is active.
The Windshield Wiper De-Icer timer and
operation will continue.
COLD WEATHER OPERATION
To prevent possible engine damage while starting
at low temperatures, this vehicle will inhibit
engine cranking when the ambient temperature
is less than –22°F (–30°C) and the oil
temperature sensor reading indicates an engine
block heater has not been used. An
externally-powered electric engine block heater is
available as optional equipment or from an
authorized dealer. The message “Plug In Engine Heater” will be
displayed in the instrument cluster when the
ambient temperature is below 5°F (–15°C) at
the time the engine is shut off as a reminder to
avoid possible crank delays at the next cold start.
EXTENDED PARK STARTING
If the vehicle has not been started or driven for at
least 30 days, see the following instructions:
To start the engine, proceed as follows:
1. Install a battery charger or jumper cables to
the battery to ensure a full battery charge
during the crank cycle
Ú
page 177.
2. Briefly push the ignition button.
3. If the engine does not start, wait five seconds and let the starter cool down and then repeat
the starting procedure.
4. If the engine does not start after eight attempts, let the starter cool down for at least
10 seconds, and then repeat the starting
procedure. If the problem persists, contact
an authorized dealer.
IF ENGINE FAILS TO START
Starting the Engine with Key Fob Battery Run
Down or Drained
If the ignition does not respond when the button
is pushed, the key fob battery might be run down or drained. Therefore, the system does not detect
the presence of the key fob in the vehicle, and will
display a dedicated message.
For more information on starting with a
discharged key fob battery
Ú
page 22.
CAUTION!
Use of the recommended oil and adhering to
the prescribed oil change intervals is
important to prevent engine damage and
ensure satisfactory starting in cold conditions.
WARNING!
Never pour fuel or other flammable liquid
into the throttle body air inlet opening in an
attempt to start the vehicle. This could result
in flash fire causing serious personal injury.
Do not attempt to push or tow your vehicle to
get it started. Vehicles equipped with an
automatic transmission cannot be started
this way. Unburned fuel could enter the
catalytic converter and once the engine has
started, ignite and damage the converter
and vehicle.
If the vehicle has a discharged battery,
booster cables may be used to obtain a start
from a booster battery or the battery in
another vehicle
Ú
page 177. This type of
start can be dangerous if done improperly.
CAUTION!
To prevent damage to the starter, do not
continuously crank the engine for more than
25 seconds at a time. Wait 60 seconds before
trying again.
23_GA_OM_EN_USC_t.book Page 82
Page 85 of 248
83
AFTER STARTING — WARMING UP THE
E
NGINE
Proceed as follows:
Travel slowly, letting the engine run at a
reduced RPM, without accelerating suddenly.
It is recommended to wait until the digital
engine coolant temperature indicator starts to
rise for maximum performance.
STOPPING THE ENGINE
To stop the engine, proceed as follows:
1. Park the vehicle in a position that is not
dangerous for oncoming traffic.
2. Engage the PARK (P) mode.
3. With engine idling, push the ENGINE START/ STOP button on the steering wheel to stop the
engine.
NOTE:
Do not leave the ignition in ACC position when the
engine is off.
To shut off the engine with vehicle speed greater
than 5 mph (8 km/h), you must push and hold
the ignition or push the ENGINE START/STOP
button three times consecutively within a few
seconds. The engine will shut down, and the
ignition will be placed in the ACC position.
With the keyless ignition system, it is possible to
leave the vehicle taking the key fob with you
without the engine switching off. The vehicle will
inform the absence of the key on board, only if the
doors are closed. After stopping the engine (cycling from the ACC to
the OFF position), the accessories are still
powered for about three minutes, or until a door
is opened.
When the ignition is in the OFF position, the
window switches remain active for three minutes.
Opening a front door will cancel this function.
After severe driving, idle the engine to allow the
temperature inside the engine compartment to
cool before shutting off the engine.
TURBOCHARGER COOL DOWN
It is recommended before switching the vehicle
off, to keep the engine idling for a few minutes so
that the turbocharger can be suitably lubricated.
This procedure is particularly recommended after
severe driving.
After a full load operation, keep the engine idling
for three to five minutes before switching it off.
This time allows the lubricating oil and the engine
coolant to eliminate the excessive heat from
combustion chamber, bearings, inner
components and turbocharger.
ENGINE BLOCK HEATER —
IF EQUIPPED
The engine block heater warms the engine and
permits quicker starts in cold weather.
Connect the cord to a 110-115 Volt AC electrical
outlet with a grounded, three-wire extension cord.
For ambient temperatures below 0°F (-18°C),
the engine block heater is recommended. For
ambient temperatures below -20°F (-29°C), the
engine block heater is required.See the following steps to properly use the engine
block heater:
1. Locate the engine block heater cord (access
door on the passenger side wiper cowl).
2. Pull the cord to the front of the vehicle and plug it into a grounded, three-wire extension
cord.
3. After the vehicle is running, properly stow away behind access door on the passenger
side wiper cowl.
NOTE:
The engine block heater cord is a factory
installed option. If your vehicle is not equipped,
heater cords are available from an authorized
dealer.
The engine block heater will require 110 Volts
AC and 6.5 Amps to activate the heater
element.
The engine block heater must be plugged in at
least one hour to have a warming effect on the
engine and at least four hours to have a
warming effect when ambient temperatures
are below -20°F (-29°C).
WARNING!
Remember to disconnect the engine block
heater cord before driving. Damage to the
110-115 Volt electrical cord could cause
electrocution.
23_GA_OM_EN_USC_t.book Page 83
Page 86 of 248
STARTING AND OPERATING
84
ENGINE BREAK-IN
RECOMMENDATIONS
ENGINE BREAK-IN
For both engines, use the following engine
break-in recommendations:
NOTE:
A new engine may consume some oil during its
first few thousand miles (kilometers) of opera-
tion. This should be considered a normal part of
the break-in period and not interpreted as an indi -
cation of a problem. Please monitor your oil level
during the break-in period and add oil as
required.
It is recommended for the operator to observe the
following driving behaviors during the new vehicle
break-in period:
0 to 100 miles (0 to 160 km):
Do not allow the engine to operate at idle for
an extended period of time.
Press the accelerator pedal slowly and not
more than halfway to avoid rapid acceleration.
Avoid aggressive braking.
Drive with the engine speed less than
3,500 RPM.
Maintain vehicle speed below 55 mph
(88 km/h) and observe local speed limits. 100 to 300 miles (160 to 483 km):
Press the accelerator pedal slowly and not
more than halfway to avoid rapid acceleration
in lower gears (FIRST to THIRD gears).
Avoid aggressive braking.
Drive with the engine speed less than
5,000 RPM.
Maintain vehicle speed below 70 mph
(112 km/h) and observe local speed limits.
300 to 500 miles (483 to 805 km):
Exercise the full engine RPM range, shifting
manually (paddles or gear shift) at higher RPM
when possible.
Do not perform sustained operation with the
accelerator pedal at wide open throttle.
Maintain vehicle speed below 85 mph
(136 km/h) and observe local speed limits.
For the first 1,500 miles (2,414 km):
Do not participate in track events, sport driving
schools, or similar activities during the first
1,500 miles (2,414 km).
NOTE:
Monitor engine oil with every refueling and add if
necessary. Oil and fuel consumption may be
higher through the first oil change interval.
ELECTRIC PARK BRAKE
(EPB)
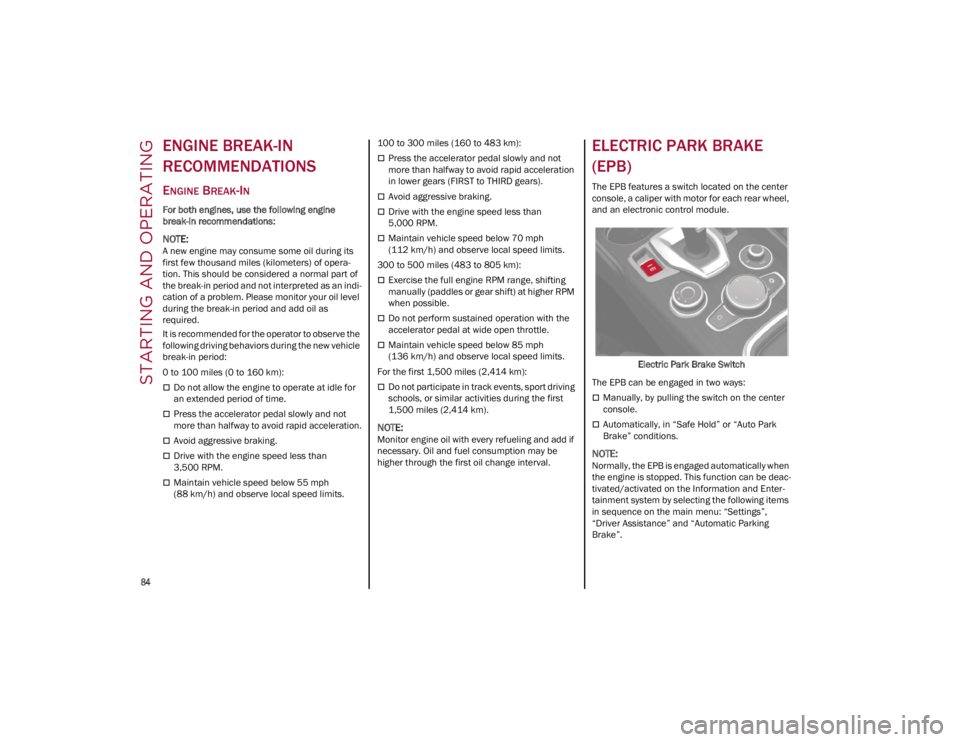
The EPB features a switch located on the center
console, a caliper with motor for each rear wheel,
and an electronic control module.
Electric Park Brake Switch
The EPB can be engaged in two ways:
Manually, by pulling the switch on the center
console.
Automatically, in “Safe Hold” or “Auto Park
Brake” conditions.
NOTE:
Normally, the EPB is engaged automatically when
the engine is stopped. This function can be deac -
tivated/activated on the Information and Enter -
tainment system by selecting the following items
in sequence on the main menu: “Settings”,
“Driver Assistance” and “Automatic Parking
Brake”.
23_GA_OM_EN_USC_t.book Page 84
Page 87 of 248
85
In addition to engaging the EPB, along with
steering and positioning chocks in front of the
wheels (when on a steep slope), you must always
place the vehicle in the PARK (P) mode before
leaving.
Should the vehicle battery be faulty, the battery
must be replaced in order to unlock the EPB.
Engaging The EPB Manually
Briefly pull the switch located on the center
console to manually engage the EPB when the
vehicle is stationary.
Noise may be heard from the rear of the vehicle
when engaging the EPB.
A slight movement of the brake pedal may be
detected when engaging the EPB with the brake
pedal pressed.
With the EPB engaged, the Brake Warning Light
on the instrument panel and the switch will
illuminate.
If, under exceptional circumstances, the use of
the brake is required with the vehicle in motion,
keep the switch on the center console pulled as
long as the brake action is necessary.
The Brake Warning Light may turn on with the
hydraulic system temporarily unavailable; in this
case braking is controlled by the motors.The brake lights will also automatically turn on in
the same way as for normal braking with the use
of the brake pedal.
Release the switch on the center console to stop
the braking action with the vehicle in motion.
If, through this procedure, the vehicle is braked
until a speed below 1.9 mph (3 km/h) is reached
and the switch is kept pulled, the parking brake
will definitively engage.
Disengaging The EPB Manually
In order to manually release the parking brake,
the ignition should be in the ACC position. Press
the brake pedal, and then push the switch on the
center console briefly.
Noise may be heard from the rear of the vehicle,
and a slight movement of the brake pedal may be
detected during disengagement.
After disengaging the Electric Park Brake, the
Brake Warning Light on the instrument panel and
the light on the switch will turn off.
If the Brake Warning Light on the instrument
panel remains on with the EPB disengaged, this
indicates a fault: in this case, contact an
authorized dealer.
CAUTION!
With the EPB failure warning light on, some
functions of the EPB are deactivated. In this
case the driver is responsible for engaging the
EPB manually to ensure the vehicle is safely
and properly parked.
WARNING!
Driving the vehicle with the parking brake
engaged, or repeated use of the parking brake
to slow the vehicle may cause serious damage
to the brake system. Be sure the parking brake
is fully disengaged before driving; failure to do
so can lead to brake failure and a collision.
WARNING!
Never use the PARK position as a substitute
for the parking brake. Always apply the
parking brake fully when parked to guard
against vehicle movement and possible
injury or damage.
When exiting the vehicle, always turn the
ignition OFF, secure the key fob, and lock
your vehicle.
Never leave children alone in a vehicle, or
with access to an unlocked vehicle. Allowing
children to be in a vehicle unattended is
dangerous for a number of reasons. A child
or others could be seriously or fatally injured.
Children should be warned not to touch the
parking brake, brake pedal or the gear
selector.
Do not leave the key fob in or near the
vehicle, or in a location accessible to
children, and do not leave a vehicle
equipped with a keyless ignition system in
the ON/RUN position. A child could operate
power windows, other controls, or move the
vehicle.
Be sure the parking brake is fully disengaged
before driving; failure to do so can lead to
brake failure and a collision.
Always fully apply the parking brake when
leaving your vehicle, or it may roll and cause
damage or injury. Also be certain to leave the
transmission in PARK. Failure to do so may
allow the vehicle to roll and cause damage or
injury.
23_GA_OM_EN_USC_t.book Page 85
Page 88 of 248
STARTING AND OPERATING
86
(Continued)
ELECTRIC PARK BRAKE (EPB)
O
PERATING MODES
The EPB may operate as follows:
“Dynamic Operating Mode”: this mode is
activated by pulling the switch repeatedly
while driving.
“Static Engagement and Release Mode”: with
the vehicle stationary, the EPB can be
activated by pulling the switch on the center
console once. Push the switch and the brake
pedal at the same time to disengage the
brake.
“Drive Away Release”: the EPB will automat -
ically disengage with the driver side seat belt
fastened and the detection of an action
performed by the driver to move the vehicle
(forward gear or reverse gear). This feature can
be turned on or off in the Information and
Entertainment System.
“Safe Hold”: engages if the gear selector is not
in PARK (P) position and the driver's intention
of leaving the vehicle is detected. The EPB will
automatically engage the EPB.
SAFE HOLD
Safe Hold is a safety function that automatically
engages the EPB if the driver attempts to leave
the vehicle while the ignition is in ON/RUN.
The EPB engages automatically to prevent
vehicle movement if:
The vehicle speed is below 2 mph (3 km/h).
A transmission operating mode different from
PARK (P) is activated.
The driver's seat belt is not fastened.
The driver side door is open.
No attempts to apply pressure on the brake
pedal have been detected.
The vehicle is parked on roads with a slope of
more than 4%.
The “Safe Hold” function can be temporarily
disabled by pushing the switch located on the
center console and the brake pedal at the same
time, with the vehicle stationary and the driver
side door open.
Once disabled, the function will activate again
when the vehicle speed reaches 12 mph (20 km/h)
or the ignition is cycled to OFF and then to ACC.
AUTOMATIC
TRANSMISSION
The vehicle is equipped with an electronically
controlled 8-speed automatic transmission
where gear shifting automatically takes place,
depending on the vehicle usage instantaneous
parameters (vehicle speed, grade, and
accelerator pedal position).
Manual gear shifting can still occur thanks to the
“sequential mode” position for the gear selector.
WARNING!
It is dangerous to shift out of PARK or
NEUTRAL if the engine speed is higher than
idle speed. If your foot is not firmly pressing
the brake pedal, the vehicle could accelerate
quickly forward or in reverse. You could lose
control of the vehicle and hit someone or
something. Only shift into gear when the
engine is idling normally and your foot is
firmly pressing the brake pedal.
Unintended movement of a vehicle could
injure those in or near the vehicle. As with all
vehicles, you should never exit a vehicle
while the engine is running. Before exiting a
vehicle, always apply the parking brake, shift
the transmission into PARK, and turn the
ignition OFF. When the ignition is in the OFF
position, the transmission is locked in PARK,
securing the vehicle against unwanted
movement.
When leaving the vehicle, always make sure
the ignition is in the OFF position, remove the
key fob from the vehicle, and lock the
vehicle.
Never leave children alone in a vehicle, or
with access to an unlocked vehicle. Allowing
children to be in a vehicle unattended is
dangerous for a number of reasons. A child
or others could be seriously or fatally injured.
Children should be warned not to touch the
parking brake, brake pedal or the
transmission gear selector.
23_GA_OM_EN_USC_t.book Page 86
Page 89 of 248
87
DISPLAY
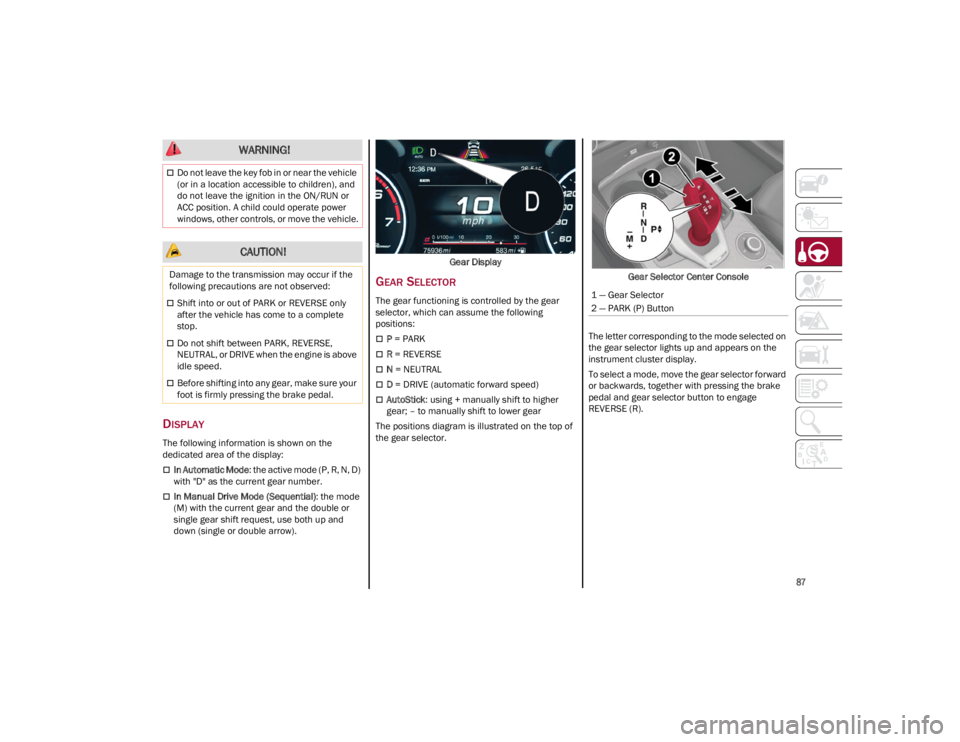
The following information is shown on the
dedicated area of the display:
In Automatic Mode: the active mode (P, R, N, D)
with "D" as the current gear number.
In Manual Drive Mode (Sequential) : the mode
(M) with the current gear and the double or
single gear shift request, use both up and
down (single or double arrow). Gear Display
GEAR SELECTOR
The gear functioning is controlled by the gear
selector, which can assume the following
positions:
P
= PARK
R = REVERSE
N = NEUTRAL
D = DRIVE (automatic forward speed)
AutoStick : using + manually shift to higher
gear; – to manually shift to lower gear
The positions diagram is illustrated on the top of
the gear selector. Gear Selector Center Console
The letter corresponding to the mode selected on
the gear selector lights up and appears on the
instrument cluster display.
To select a mode, move the gear selector forward
or backwards, together with pressing the brake
pedal and gear selector button to engage
REVERSE (R).
Do not leave the key fob in or near the vehicle
(or in a location accessible to children), and
do not leave the ignition in the ON/RUN or
ACC position. A child could operate power
windows, other controls, or move the vehicle.
CAUTION!
Damage to the transmission may occur if the
following precautions are not observed:
Shift into or out of PARK or REVERSE only
after the vehicle has come to a complete
stop.
Do not shift between PARK, REVERSE,
NEUTRAL, or DRIVE when the engine is above
idle speed.
Before shifting into any gear, make sure your
foot is firmly pressing the brake pedal.
WARNING!
1 — Gear Selector
2 — PARK (P) Button
23_GA_OM_EN_USC_t.book Page 87
Page 90 of 248
STARTING AND OPERATING
88
(Continued)
(Continued)
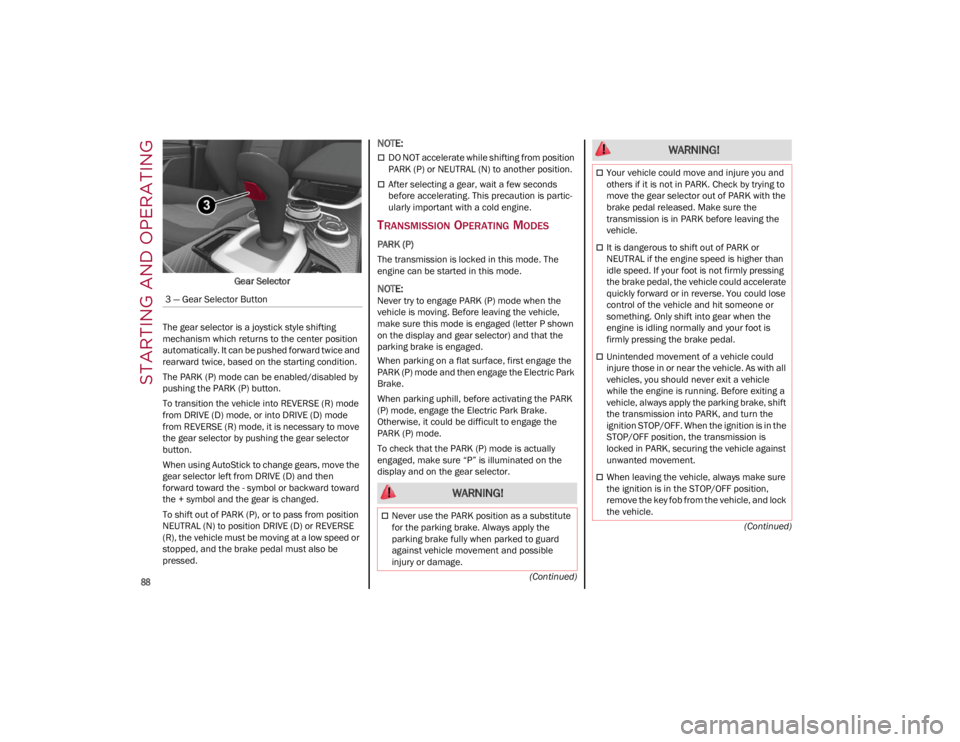
Gear Selector
The gear selector is a joystick style shifting
mechanism which returns to the center position
automatically. It can be pushed forward twice and
rearward twice, based on the starting condition.
The PARK (P) mode can be enabled/disabled by
pushing the PARK (P) button.
To transition the vehicle into REVERSE (R) mode
from DRIVE (D) mode, or into DRIVE (D) mode
from REVERSE (R) mode, it is necessary to move
the gear selector by pushing the gear selector
button.
When using AutoStick to change gears, move the
gear selector left from DRIVE (D) and then
forward toward the - symbol or backward toward
the + symbol and the gear is changed.
To shift out of PARK (P), or to pass from position
NEUTRAL (N) to position DRIVE (D) or REVERSE
(R), the vehicle must be moving at a low speed or
stopped, and the brake pedal must also be
pressed.
NOTE:
DO NOT accelerate while shifting from position
PARK (P) or NEUTRAL (N) to another position.
After selecting a gear, wait a few seconds
before accelerating. This precaution is partic -
ularly important with a cold engine.
TRANSMISSION OPERATING MODES
PARK (P)
The transmission is locked in this mode. The
engine can be started in this mode.
NOTE:
Never try to engage PARK (P) mode when the
vehicle is moving. Before leaving the vehicle,
make sure this mode is engaged (letter P shown
on the display and gear selector) and that the
parking brake is engaged.
When parking on a flat surface, first engage the
PARK (P) mode and then engage the Electric Park
Brake.
When parking uphill, before activating the PARK
(P) mode, engage the Electric Park Brake.
Otherwise, it could be difficult to engage the
PARK (P) mode.
To check that the PARK (P) mode is actually
engaged, make sure “P” is illuminated on the
display and on the gear selector.
3 — Gear Selector Button
WARNING!
Never use the PARK position as a substitute
for the parking brake. Always apply the
parking brake fully when parked to guard
against vehicle movement and possible
injury or damage.
Your vehicle could move and injure you and
others if it is not in PARK. Check by trying to
move the gear selector out of PARK with the
brake pedal released. Make sure the
transmission is in PARK before leaving the
vehicle.
It is dangerous to shift out of PARK or
NEUTRAL if the engine speed is higher than
idle speed. If your foot is not firmly pressing
the brake pedal, the vehicle could accelerate
quickly forward or in reverse. You could lose
control of the vehicle and hit someone or
something. Only shift into gear when the
engine is idling normally and your foot is
firmly pressing the brake pedal.
Unintended movement of a vehicle could
injure those in or near the vehicle. As with all
vehicles, you should never exit a vehicle
while the engine is running. Before exiting a
vehicle, always apply the parking brake, shift
the transmission into PARK, and turn the
ignition STOP/OFF. When the ignition is in the
STOP/OFF position, the transmission is
locked in PARK, securing the vehicle against
unwanted movement.
When leaving the vehicle, always make sure
the ignition is in the STOP/OFF position,
remove the key fob from the vehicle, and lock
the vehicle.
WARNING!
23_GA_OM_EN_USC_t.book Page 88