brake fluid ALFA ROMEO GIULIA 2023 Owners Manual
[x] Cancel search | Manufacturer: ALFA ROMEO, Model Year: 2023, Model line: GIULIA, Model: ALFA ROMEO GIULIA 2023Pages: 248, PDF Size: 9.62 MB
Page 14 of 248
12
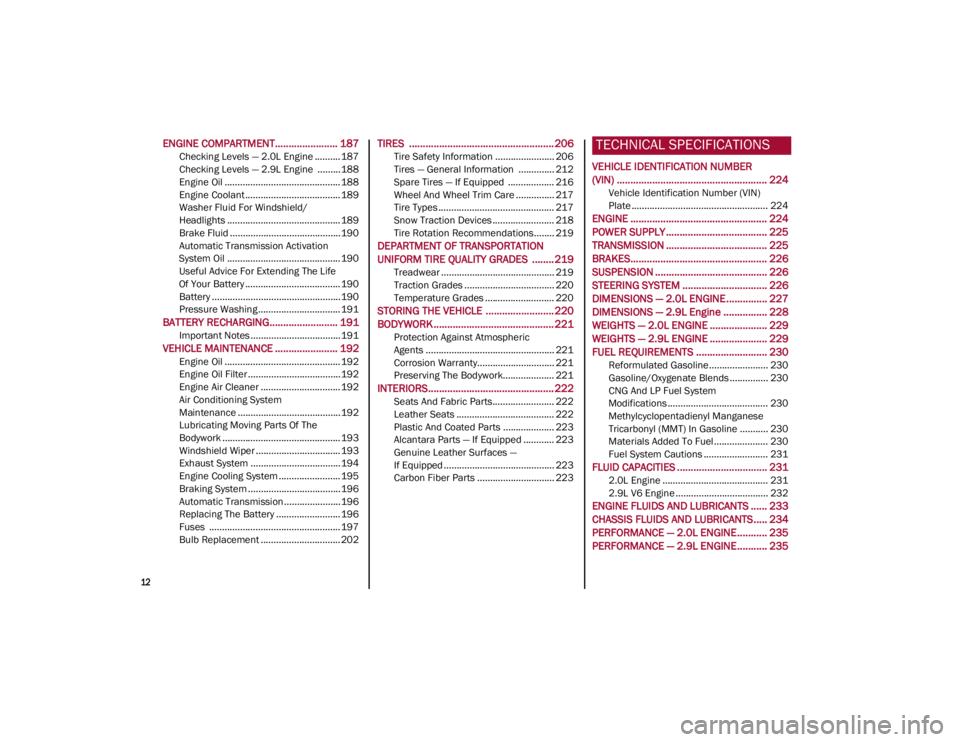
ENGINE COMPARTMENT....................... 187
Checking Levels — 2.0L Engine .......... 187
Checking Levels — 2.9L Engine .........188
Engine Oil ............................................. 188
Engine Coolant ..................................... 189
Washer Fluid For Windshield/
Headlights ............................................ 189 Brake Fluid ...........................................190
Automatic Transmission Activation
System Oil ............................................ 190 Useful Advice For Extending The Life
Of Your Battery ..................................... 190 Battery ..................................................190
Pressure Washing ................................ 191
BATTERY RECHARGING......................... 191
Important Notes ...................................191
VEHICLE MAINTENANCE ....................... 192
Engine Oil ............................................. 192
Engine Oil Filter ....................................192
Engine Air Cleaner ............................... 192
Air Conditioning System
Maintenance ........................................192 Lubricating Moving Parts Of The
Bodywork ..............................................193 Windshield Wiper .................................193
Exhaust System ...................................194
Engine Cooling System ........................ 195
Braking System ....................................196
Automatic Transmission ......................196
Replacing The Battery ......................... 196
Fuses ................................................... 197
Bulb Replacement ............................... 202
TIRES ..................................................... 206
Tire Safety Information ....................... 206
Tires — General Information .............. 212
Spare Tires — If Equipped .................. 216
Wheel And Wheel Trim Care ............... 217
Tire Types ............................................. 217
Snow Traction Devices ........................ 218
Tire Rotation Recommendations........ 219
DEPARTMENT OF TRANSPORTATION
UNIFORM TIRE QUALITY GRADES ........ 219
Treadwear ............................................ 219
Traction Grades ................................... 220
Temperature Grades ........................... 220
STORING THE VEHICLE ......................... 220
BODYWORK ............................................ 221
Protection Against Atmospheric
Agents .................................................. 221 Corrosion Warranty.............................. 221
Preserving The Bodywork.................... 221
INTERIORS.............................................. 222
Seats And Fabric Parts........................ 222
Leather Seats ...................................... 222
Plastic And Coated Parts .................... 223
Alcantara Parts — If Equipped ............ 223
Genuine Leather Surfaces —
If Equipped ........................................... 223 Carbon Fiber Parts .............................. 223
TECHNICAL SPECIFICATIONS
VEHICLE IDENTIFICATION NUMBER
(VIN) ....................................................... 224
Vehicle Identification Number (VIN)
Plate ..................................................... 224
ENGINE .................................................. 224
POWER SUPPLY ..................................... 225 TRANSMISSION ..................................... 225BRAKES.................................................. 226
SUSPENSION ......................................... 226
STEERING SYSTEM ............................... 226DIMENSIONS — 2.0L ENGINE ............... 227
DIMENSIONS — 2.9L Engine ................ 228
WEIGHTS — 2.0L ENGINE ..................... 229
WEIGHTS — 2.9L ENGINE ..................... 229
FUEL REQUIREMENTS .......................... 230
Reformulated Gasoline....................... 230
Gasoline/Oxygenate Blends ............... 230
CNG And LP Fuel System
Modifications ....................................... 230 Methylcyclopentadienyl Manganese
Tricarbonyl (MMT) In Gasoline ........... 230 Materials Added To Fuel ..................... 230
Fuel System Cautions ......................... 231
FLUID CAPACITIES ................................. 231
2.0L Engine ......................................... 231
2.9L V6 Engine .................................... 232
ENGINE FLUIDS AND LUBRICANTS ...... 233
CHASSIS FLUIDS AND LUBRICANTS..... 234 PERFORMANCE — 2.0L ENGINE........... 235PERFORMANCE — 2.9L ENGINE........... 235
23_GA_OM_EN_USC_t.book Page 12
Page 18 of 248
SYMBOL GLOSSARY
16
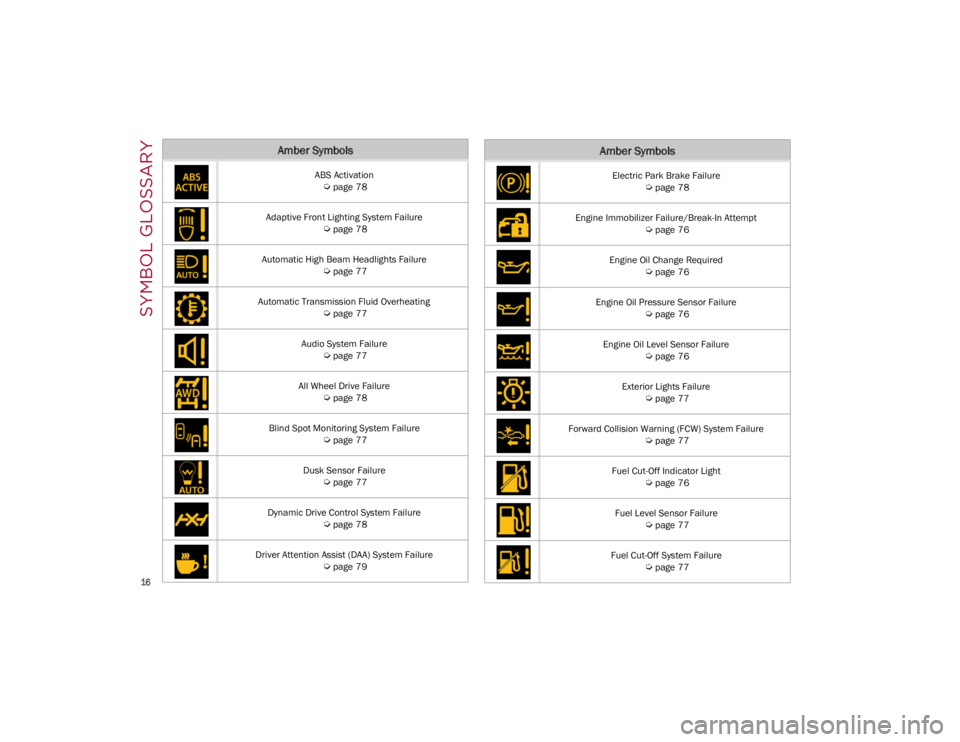
Amber Symbols
ABS Activation
Ú
page 78
Adaptive Front Lighting System Failure
Ú
page 78
Automatic High Beam Headlights Failure
Ú
page 77
Automatic Transmission Fluid Overheating
Ú
page 77
Audio System Failure
Ú
page 77
All Wheel Drive Failure
Ú
page 78
Blind Spot Monitoring System Failure
Ú
page 77
Dusk Sensor Failure
Ú
page 77
Dynamic Drive Control System Failure
Ú
page 78
Driver Attention Assist (DAA) System Failure
Ú
page 79
Electric Park Brake Failure
Ú
page 78
Engine Immobilizer Failure/Break-In Attempt
Ú
page 76
Engine Oil Change Required
Ú
page 76
Engine Oil Pressure Sensor Failure
Ú
page 76
Engine Oil Level Sensor Failure
Ú
page 76
Exterior Lights Failure
Ú
page 77
Forward Collision Warning (FCW) System Failure
Ú
page 77
Fuel Cut-Off Indicator Light
Ú
page 76
Fuel Level Sensor Failure
Ú
page 77
Fuel Cut-Off System Failure
Ú
page 77
Amber Symbols
23_GA_OM_EN_USC_t.book Page 16
Page 73 of 248
71
RED WARNING LIGHTS
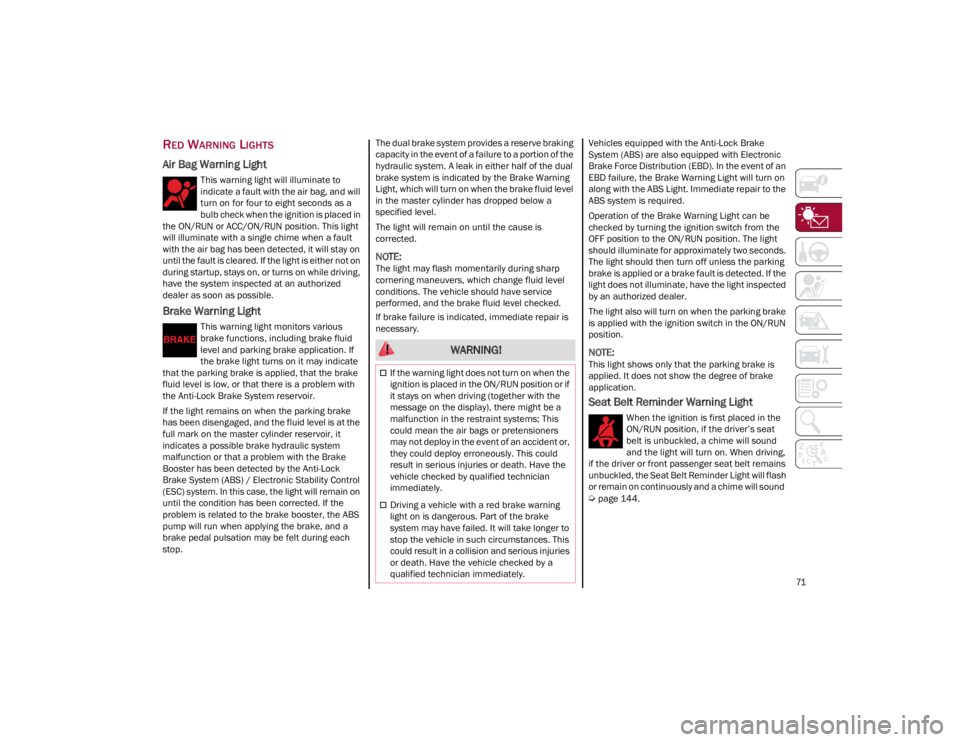
Air Bag Warning Light
This warning light will illuminate to
indicate a fault with the air bag, and will
turn on for four to eight seconds as a
bulb check when the ignition is placed in
the ON/RUN or ACC/ON/RUN position. This light
will illuminate with a single chime when a fault
with the air bag has been detected, it will stay on
until the fault is cleared. If the light is either not on
during startup, stays on, or turns on while driving,
have the system inspected at an authorized
dealer as soon as possible.
Brake Warning Light
This warning light monitors various
brake functions, including brake fluid
level and parking brake application. If
the brake light turns on it may indicate
that the parking brake is applied, that the brake
fluid level is low, or that there is a problem with
the Anti-Lock Brake System reservoir.
If the light remains on when the parking brake
has been disengaged, and the fluid level is at the
full mark on the master cylinder reservoir, it
indicates a possible brake hydraulic system
malfunction or that a problem with the Brake
Booster has been detected by the Anti-Lock
Brake System (ABS) / Electronic Stability Control
(ESC) system. In this case, the light will remain on
until the condition has been corrected. If the
problem is related to the brake booster, the ABS
pump will run when applying the brake, and a
brake pedal pulsation may be felt during each
stop. The dual brake system provides a reserve braking
capacity in the event of a failure to a portion of the
hydraulic system. A leak in either half of the dual
brake system is indicated by the Brake Warning
Light, which will turn on when the brake fluid level
in the master cylinder has dropped below a
specified level.
The light will remain on until the cause is
corrected.
NOTE:
The light may flash momentarily during sharp
cornering maneuvers, which change fluid level
conditions. The vehicle should have service
performed, and the brake fluid level checked.
If brake failure is indicated, immediate repair is
necessary.
Vehicles equipped with the Anti-Lock Brake
System (ABS) are also equipped with Electronic
Brake Force Distribution (EBD). In the event of an
EBD failure, the Brake Warning Light will turn on
along with the ABS Light. Immediate repair to the
ABS system is required.
Operation of the Brake Warning Light can be
checked by turning the ignition switch from the
OFF position to the ON/RUN position. The light
should illuminate for approximately two seconds.
The light should then turn off unless the parking
brake is applied or a brake fault is detected. If the
light does not illuminate, have the light inspected
by an authorized dealer.
The light also will turn on when the parking brake
is applied with the ignition switch in the ON/RUN
position.
NOTE:
This light shows only that the parking brake is
applied. It does not show the degree of brake
application.
Seat Belt Reminder Warning Light
When the ignition is first placed in the
ON/RUN position, if the driver’s seat
belt is unbuckled, a chime will sound
and the light will turn on. When driving,
if the driver or front passenger seat belt remains
unbuckled, the Seat Belt Reminder Light will flash
or remain on continuously and a chime will sound
Ú
page 144.
WARNING!
If the warning light does not turn on when the
ignition is placed in the ON/RUN position or if
it stays on when driving (together with the
message on the display), there might be a
malfunction in the restraint systems; This
could mean the air bags or pretensioners
may not deploy in the event of an accident or,
they could deploy erroneously. This could
result in serious injuries or death. Have the
vehicle checked by qualified technician
immediately.
Driving a vehicle with a red brake warning
light on is dangerous. Part of the brake
system may have failed. It will take longer to
stop the vehicle in such circumstances. This
could result in a collision and serious injuries
or death. Have the vehicle checked by a
qualified technician immediately.
23_GA_OM_EN_USC_t.book Page 71
Page 77 of 248
75
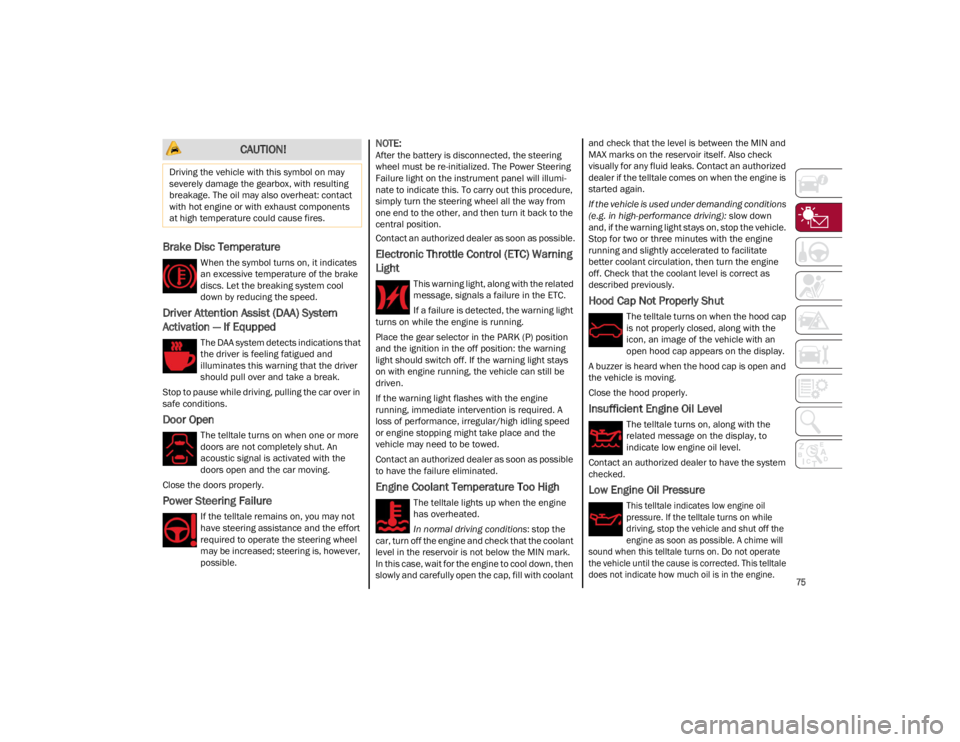
Brake Disc Temperature
When the symbol turns on, it indicates
an excessive temperature of the brake
discs. Let the breaking system cool
down by reducing the speed.
Driver Attention Assist (DAA) System
Activation — If Equpped
The DAA system detects indications that
the driver is feeling fatigued and
illuminates this warning that the driver
should pull over and take a break.
Stop to pause while driving, pulling the car over in
safe conditions.
Door Open
The telltale turns on when one or more
doors are not completely shut. An
acoustic signal is activated with the
doors open and the car moving.
Close the doors properly.
Power Steering Failure
If the telltale remains on, you may not
have steering assistance and the effort
required to operate the steering wheel
may be increased; steering is, however,
possible.
NOTE:
After the battery is disconnected, the steering
wheel must be re-initialized. The Power Steering
Failure light on the instrument panel will illumi -
nate to indicate this. To carry out this procedure,
simply turn the steering wheel all the way from
one end to the other, and then turn it back to the
central position.
Contact an authorized dealer as soon as possible.
Electronic Throttle Control (ETC) Warning
Light
This warning light, along with the related
message, signals a failure in the ETC.
If a failure is detected, the warning light
turns on while the engine is running.
Place the gear selector in the PARK (P) position
and the ignition in the off position: the warning
light should switch off. If the warning light stays
on with engine running, the vehicle can still be
driven.
If the warning light flashes with the engine
running, immediate intervention is required. A
loss of performance, irregular/high idling speed
or engine stopping might take place and the
vehicle may need to be towed.
Contact an authorized dealer as soon as possible
to have the failure eliminated.
Engine Coolant Temperature Too High
The telltale lights up when the engine
has overheated.
In normal driving conditions : stop the
car, turn off the engine and check that the coolant
level in the reservoir is not below the MIN mark.
In this case, wait for the engine to cool down, then
slowly and carefully open the cap, fill with coolant and check that the level is between the MIN and
MAX marks on the reservoir itself. Also check
visually for any fluid leaks. Contact an authorized
dealer if the telltale comes on when the engine is
started again.
If the vehicle is used under demanding conditions
(e.g. in high-performance driving):
slow down
and, if the warning light stays on, stop the vehicle.
Stop for two or three minutes with the engine
running and slightly accelerated to facilitate
better coolant circulation, then turn the engine
off. Check that the coolant level is correct as
described previously.
Hood Cap Not Properly Shut
The telltale turns on when the hood cap
is not properly closed, along with the
icon, an image of the vehicle with an
open hood cap appears on the display.
A buzzer is heard when the hood cap is open and
the vehicle is moving.
Close the hood properly.
Insufficient Engine Oil Level
The telltale turns on, along with the
related message on the display, to
indicate low engine oil level.
Contact an authorized dealer to have the system
checked.
Low Engine Oil Pressure
This telltale indicates low engine oil
pressure. If the telltale turns on while
driving, stop the vehicle and shut off the
engine as soon as possible. A chime will
sound when this telltale turns on. Do not operate
the vehicle until the cause is corrected. This telltale
does not indicate how much oil is in the engine.
CAUTION!
Driving the vehicle with this symbol on may
severely damage the gearbox, with resulting
breakage. The oil may also overheat: contact
with hot engine or with exhaust components
at high temperature could cause fires.
23_GA_OM_EN_USC_t.book Page 75
Page 79 of 248
77
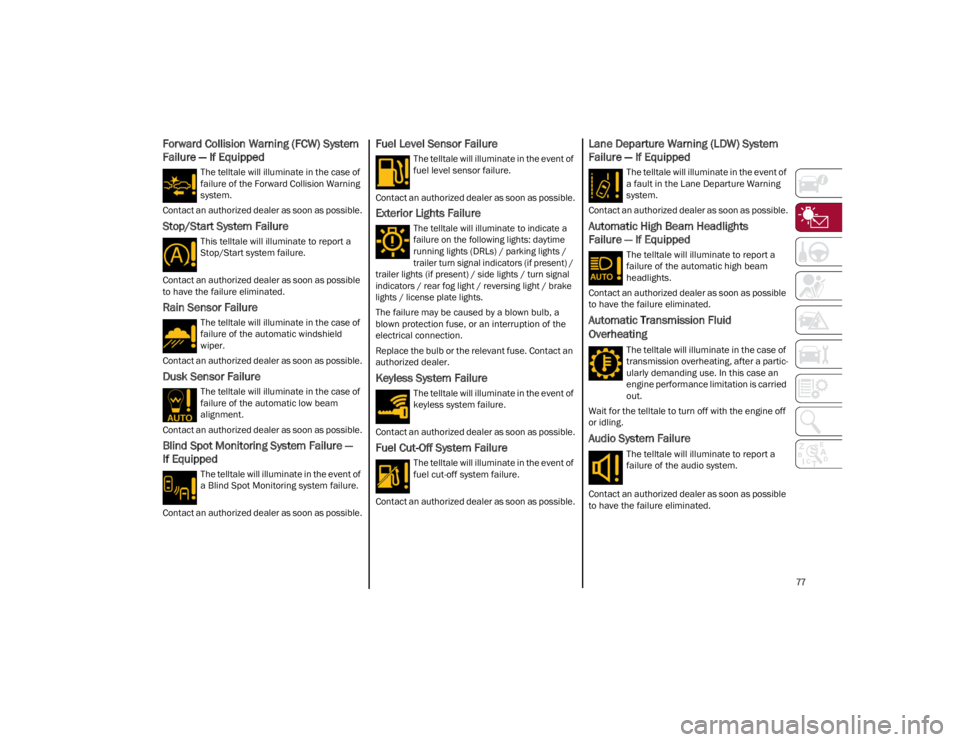
Forward Collision Warning (FCW) System
Failure — If Equipped
The telltale will illuminate in the case of
failure of the Forward Collision Warning
system.
Contact an authorized dealer as soon as possible.
Stop/Start System Failure
This telltale will illuminate to report a
Stop/Start system failure.
Contact an authorized dealer as soon as possible
to have the failure eliminated.
Rain Sensor Failure
The telltale will illuminate in the case of
failure of the automatic windshield
wiper.
Contact an authorized dealer as soon as possible.
Dusk Sensor Failure
The telltale will illuminate in the case of
failure of the automatic low beam
alignment.
Contact an authorized dealer as soon as possible.
Blind Spot Monitoring System Failure —
If Equipped
The telltale will illuminate in the event of
a Blind Spot Monitoring system failure.
Contact an authorized dealer as soon as possible.
Fuel Level Sensor Failure
The telltale will illuminate in the event of
fuel level sensor failure.
Contact an authorized dealer as soon as possible.
Exterior Lights Failure
The telltale will illuminate to indicate a
failure on the following lights: daytime
running lights (DRLs) / parking lights /
trailer turn signal indicators (if present) /
trailer lights (if present) / side lights / turn signal
indicators / rear fog light / reversing light / brake
lights / license plate lights.
The failure may be caused by a blown bulb, a
blown protection fuse, or an interruption of the
electrical connection.
Replace the bulb or the relevant fuse. Contact an
authorized dealer.
Keyless System Failure
The telltale will illuminate in the event of
keyless system failure.
Contact an authorized dealer as soon as possible.
Fuel Cut-Off System Failure
The telltale will illuminate in the event of
fuel cut-off system failure.
Contact an authorized dealer as soon as possible.
Lane Departure Warning (LDW) System
Failure — If Equipped
The telltale will illuminate in the event of
a fault in the Lane Departure Warning
system.
Contact an authorized dealer as soon as possible.
Automatic High Beam Headlights
Failure — If Equipped
The telltale will illuminate to report a
failure of the automatic high beam
headlights.
Contact an authorized dealer as soon as possible
to have the failure eliminated.
Automatic Transmission Fluid
Overheating
The telltale will illuminate in the case of
transmission overheating, after a partic -
ularly demanding use. In this case an
engine performance limitation is carried
out.
Wait for the telltale to turn off with the engine off
or idling.
Audio System Failure
The telltale will illuminate to report a
failure of the audio system.
Contact an authorized dealer as soon as possible
to have the failure eliminated.
23_GA_OM_EN_USC_t.book Page 77
Page 93 of 248
91
(Continued)
ALFA DNA / PRO SELECTOR
ALFA DNA SYSTEM
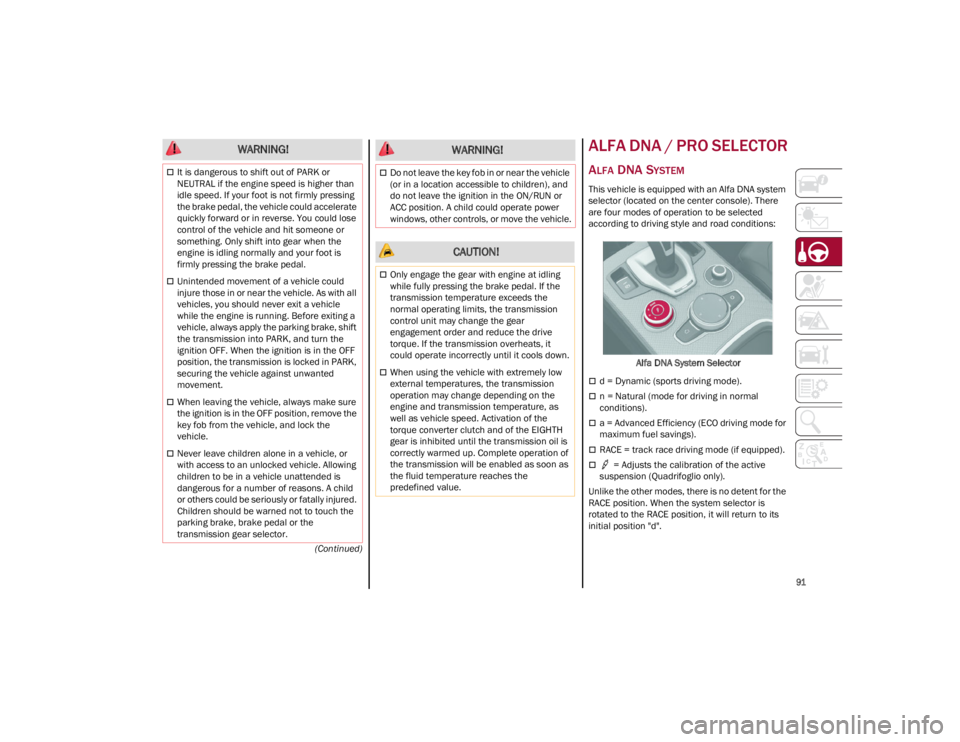
This vehicle is equipped with an Alfa DNA system
selector (located on the center console). There
are four modes of operation to be selected
according to driving style and road conditions:Alfa DNA System Selector
d = Dynamic (sports driving mode).
n = Natural (mode for driving in normal
conditions).
a = Advanced Efficiency (ECO driving mode for
maximum fuel savings).
RACE = track race driving mode (if equipped).
= Adjusts the calibration of the active
suspension (Quadrifoglio only).
Unlike the other modes, there is no detent for the
RACE position. When the system selector is
rotated to the RACE position, it will return to its
initial position "d".
WARNING!
It is dangerous to shift out of PARK or
NEUTRAL if the engine speed is higher than
idle speed. If your foot is not firmly pressing
the brake pedal, the vehicle could accelerate
quickly forward or in reverse. You could lose
control of the vehicle and hit someone or
something. Only shift into gear when the
engine is idling normally and your foot is
firmly pressing the brake pedal.
Unintended movement of a vehicle could
injure those in or near the vehicle. As with all
vehicles, you should never exit a vehicle
while the engine is running. Before exiting a
vehicle, always apply the parking brake, shift
the transmission into PARK, and turn the
ignition OFF. When the ignition is in the OFF
position, the transmission is locked in PARK,
securing the vehicle against unwanted
movement.
When leaving the vehicle, always make sure
the ignition is in the OFF position, remove the
key fob from the vehicle, and lock the
vehicle.
Never leave children alone in a vehicle, or
with access to an unlocked vehicle. Allowing
children to be in a vehicle unattended is
dangerous for a number of reasons. A child
or others could be seriously or fatally injured.
Children should be warned not to touch the
parking brake, brake pedal or the
transmission gear selector.
Do not leave the key fob in or near the vehicle
(or in a location accessible to children), and
do not leave the ignition in the ON/RUN or
ACC position. A child could operate power
windows, other controls, or move the vehicle.
CAUTION!
Only engage the gear with engine at idling
while fully pressing the brake pedal. If the
transmission temperature exceeds the
normal operating limits, the transmission
control unit may change the gear
engagement order and reduce the drive
torque. If the transmission overheats, it
could operate incorrectly until it cools down.
When using the vehicle with extremely low
external temperatures, the transmission
operation may change depending on the
engine and transmission temperature, as
well as vehicle speed. Activation of the
torque converter clutch and of the EIGHTH
gear is inhibited until the transmission oil is
correctly warmed up. Complete operation of
the transmission will be enabled as soon as
the fluid temperature reaches the
predefined value.
WARNING!
23_GA_OM_EN_USC_t.book Page 91
Page 96 of 248
STARTING AND OPERATING
94
“RACE” Mode (Quadrifoglio Only)
Activation
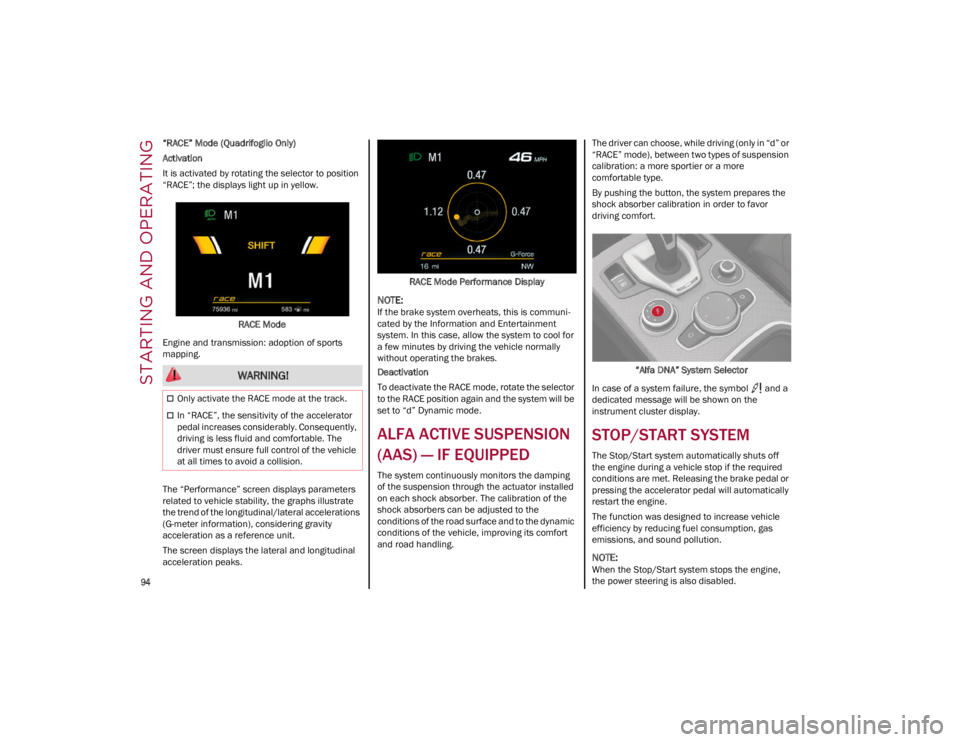
It is activated by rotating the selector to position
“RACE”; the displays light up in yellow.RACE Mode
Engine and transmission: adoption of sports
mapping.
The “Performance” screen displays parameters
related to vehicle stability, the graphs illustrate
the trend of the longitudinal/lateral accelerations
(G-meter information), considering gravity
acceleration as a reference unit.
The screen displays the lateral and longitudinal
acceleration peaks. RACE Mode Performance Display
NOTE:
If the brake system overheats, this is communi
-
cated by the Information and Entertainment
system. In this case, allow the system to cool for
a few minutes by driving the vehicle normally
without operating the brakes.
Deactivation
To deactivate the RACE mode, rotate the selector
to the RACE position again and the system will be
set to “d” Dynamic mode.
ALFA ACTIVE SUSPENSION
(AAS) — IF EQUIPPED
The system continuously monitors the damping
of the suspension through the actuator installed
on each shock absorber. The calibration of the
shock absorbers can be adjusted to the
conditions of the road surface and to the dynamic
conditions of the vehicle, improving its comfort
and road handling. The driver can choose, while driving (only in “d” or
“RACE” mode), between two types of suspension
calibration: a more sportier or a more
comfortable type.
By pushing the button, the system prepares the
shock absorber calibration in order to favor
driving comfort.
“Alfa DNA” System Selector
In case of a system failure, the symbol and a
dedicated message will be shown on the
instrument cluster display.
STOP/START SYSTEM
The Stop/Start system automatically shuts off
the engine during a vehicle stop if the required
conditions are met. Releasing the brake pedal or
pressing the accelerator pedal will automatically
restart the engine.
The function was designed to increase vehicle
efficiency by reducing fuel consumption, gas
emissions, and sound pollution.
NOTE:
When the Stop/Start system stops the engine,
the power steering is also disabled.
WARNING!
Only activate the RACE mode at the track.
In “RACE”, the sensitivity of the accelerator
pedal increases considerably. Consequently,
driving is less fluid and comfortable. The
driver must ensure full control of the vehicle
at all times to avoid a collision.
23_GA_OM_EN_USC_t.book Page 94
Page 128 of 248
STARTING AND OPERATING
126
A Month-Day-Hour (MDH) number is included on
this label and indicates the Month, Day and Hour
of manufacture. The bar code that appears on
the bottom of the label is your VIN.
Gross Vehicle Weight Rating (GVWR)
The GVWR is the total permissible weight of your
vehicle including driver, passengers, vehicle,
options and cargo. The label also specifies
maximum capacities of front and rear axle
systems (GAWR). Total load must be limited so
GVWR and front and rear GAWR are not
exceeded.
Payload
The payload of a vehicle is defined as the
allowable load weight a truck can carry, including
the weight of the driver, all passengers, options
and cargo.
Gross Axle Weight Rating (GAWR)
The GAWR is the maximum permissible load on
the front and rear axles. The load must be
distributed in the cargo area so that the GAWR of
each axle is not exceeded.
Each axle GAWR is determined by the
components in the system with the lowest load
carrying capacity (axle, springs, tires or wheels).
Heavier axles or suspension components
sometimes specified by purchasers for increased
durability do not necessarily increase the
vehicle's GVWR.
Tire Size
The tire size on the Vehicle Certification Label
represents the actual tire size on your vehicle.
Replacement tires must be equal to the load
capacity of this tire size.
Rim Size
This is the rim size that is appropriate for the tire
size listed.
Inflation Pressure
This is the cold tire inflation pressure for your
vehicle for all loading conditions up to full GAWR.
Curb Weight
The curb weight of a vehicle is defined as the total
weight of the vehicle with all fluids, including
vehicle fuel, at full capacity conditions, and with
no occupants or cargo loaded into the vehicle.
The front and rear curb weight values are
determined by weighing your vehicle on a
commercial scale before any occupants or cargo
are added.
Loading
The actual total weight and the weight of the front
and rear of your vehicle at the ground can best be
determined by weighing it when it is loaded and
ready for operation.
The entire vehicle should first be weighed on a
commercial scale to ensure that the GVWR has
not been exceeded. The weight on the front and
rear of the vehicle should then be determined
separately to be sure that the load is properly
distributed over the front and rear axle. Weighing
the vehicle may show that the GAWR of either the
front or rear axles has been exceeded but the
total load is within the specified GVWR. If so,
weight must be shifted from front to rear or rear
to front as appropriate until the specified weight
limitations are met. Store the heavier items down
low and be sure that the weight is distributed
equally. Stow all loose items securely before
driving.Improper weight distributions can have an
adverse effect on the way your vehicle steers and
handles and the way the brakes operate.
TRAILER TOWING
Trailer towing is not recommended for this
vehicle.
SUGGESTIONS FOR
DRIVING
SAVING FUEL
The following are some suggestions which may
help you save fuel and lower the amount of
harmful emissions released into the atmosphere.
Vehicle Maintenance
Checks and operations should be carried out in
accordance with the Maintenance Plan
Ú
page 182.
Tires
Check the tire pressures at least once every four
weeks: if the pressure is too low, consumption
levels increase as resistance to rolling is higher.
WARNING!
Do not load your vehicle any heavier than the
GVWR or the maximum front and rear GAWR. If
you do, parts on your vehicle can break, or it
can change the way your vehicle handles. This
could cause you to lose control. Overloading
can shorten the life of your vehicle.
23_GA_OM_EN_USC_t.book Page 126
Page 170 of 248

SAFETY
168
PERIODIC SAFETY CHECKS YOU SHOULD
M
AKE OUTSIDE THE VEHICLE
Tires
Examine tires for excessive tread wear and
uneven wear patterns. Check for stones, nails,
glass, or other objects lodged in the tread or
sidewall. Inspect the tread for cuts and cracks.
Inspect sidewalls for cuts, cracks, and bulges.
Check the wheel nuts for tightness. Check the
tires (including spare) for proper cold inflation
pressure.
Lights
Have someone observe the operation of brake
lights and exterior lights while you work the
controls. Check turn signal and high beam
indicator lights on the instrument panel.
Door Latches
Check for proper closing, latching, and locking.
Fluid Leaks
Check area under the vehicle after overnight
parking for fuel, coolant, oil, or other fluid leaks.
Also, if gasoline fumes are detected or if fuel or
brake fluid leaks are suspected the cause should
be located and corrected immediately.
EXHAUST GAS
The best protection against carbon monoxide
entry into the vehicle body is a properly
maintained engine exhaust system.
Whenever a change is noticed in the sound of the
exhaust system, when exhaust fumes can be
detected inside the vehicle, or when the
underside or rear of the vehicle is damaged, have
an authorized dealer inspect the complete
exhaust system and adjacent body areas for
broken, damaged, deteriorated, or mispositioned
parts. Open seams or loose connections could permit exhaust fumes to seep into the passenger
compartment. In addition, inspect the exhaust
system each time the vehicle is raised for
lubrication or oil change. Replace as required.
CARBON MONOXIDE WARNINGS
It is recommended to only use mild soap and
water to clean your floor mats. After cleaning,
always check your floor mat has been
properly installed and is secured to your
vehicle using the floor mat fasteners by
lightly pulling mat.
WARNING!
WARNING!
Exhaust gases can injure or kill. They contain
carbon monoxide (CO), which is colorless and
odorless. Breathing it can make you
unconscious and can eventually poison you. To
avoid breathing (CO), follow these safety tips:
Do not run the engine in a closed garage or in
confined areas any longer than needed to
move your vehicle in or out of the area.
If you are required to drive with the trunk/
liftgate/rear doors open, make sure that all
windows are closed and the climate control
BLOWER switch is set at high speed. DO NOT
use the recirculation mode.
If it is necessary to sit in a parked vehicle with
the engine running, adjust your heating or
cooling controls to force outside air into the
vehicle. Set the blower at high speed.
WARNING!
Carbon monoxide (CO) in exhaust gases is
deadly. Follow the precautions below to
prevent carbon monoxide poisoning:
Do not inhale exhaust gases. They contain
carbon monoxide, a colorless and odorless
gas, which can kill. Never run the engine in a
closed area, such as a garage, and never sit
in a parked vehicle with the engine running
for an extended period. If the vehicle is
stopped in an open area with the engine
running for more than a short period, adjust
the ventilation system to force fresh, outside
air into the vehicle.
Guard against carbon monoxide with proper
maintenance. Have the exhaust system
inspected every time the vehicle is raised.
Have any abnormal conditions repaired
promptly. Until repaired, drive with all side
windows fully open.
When exiting the vehicle, always make sure
the ignition is in the OFF position, remove the
key fob from the vehicle, and lock your
vehicle.
23_GA_OM_EN_USC_t.book Page 168
Page 174 of 248
IN CASE OF EMERGENCY
172
(Continued)
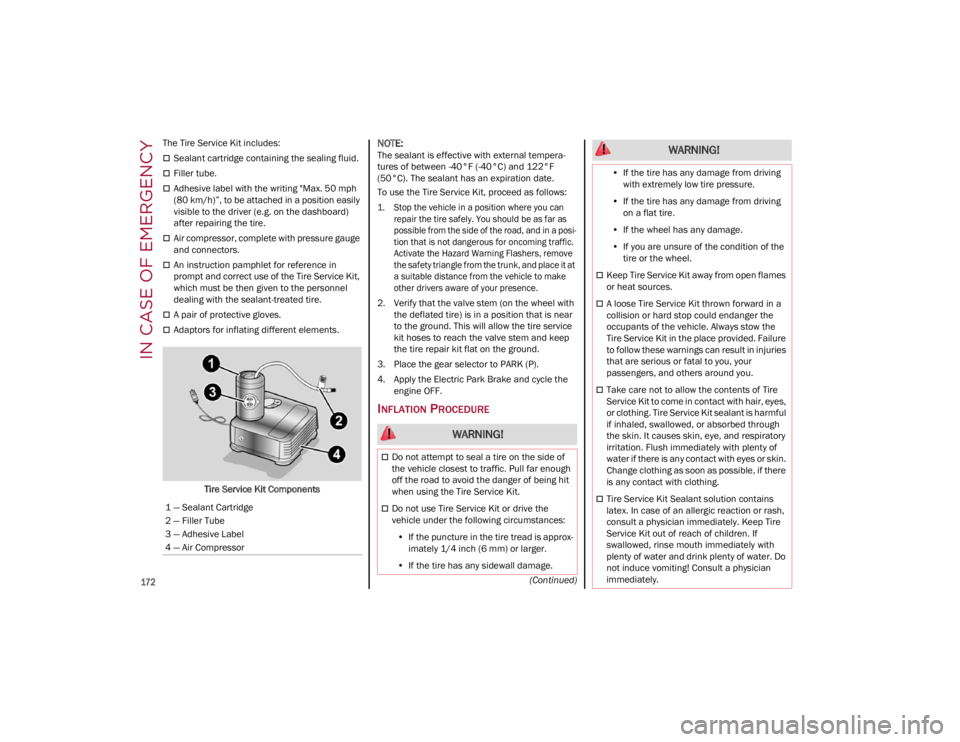
The Tire Service Kit includes:
Sealant cartridge containing the sealing fluid.
Filler tube.
Adhesive label with the writing "Max. 50 mph
(80 km/h)”, to be attached in a position easily
visible to the driver (e.g. on the dashboard)
after repairing the tire.
Air compressor, complete with pressure gauge
and connectors.
An instruction pamphlet for reference in
prompt and correct use of the Tire Service Kit,
which must be then given to the personnel
dealing with the sealant-treated tire.
A pair of protective gloves.
Adaptors for inflating different elements.
Tire Service Kit Components
NOTE:
The sealant is effective with external tempera -
tures of between -40°F (-40°C) and 122°F
(50°C). The sealant has an expiration date.
To use the Tire Service Kit, proceed as follows:
1. Stop the vehicle in a position where you can repair the tire safely. You should be as far as
possible from the side of the road, and in a posi -
tion that is not dangerous for oncoming traffic.
Activate the Hazard Warning Flashers, remove
the safety triangle from the trunk, and place it at
a suitable distance from the vehicle to make
other drivers aware of your presence.
2. Verify that the valve stem (on the wheel with the deflated tire) is in a position that is near
to the ground. This will allow the tire service
kit hoses to reach the valve stem and keep
the tire repair kit flat on the ground.
3. Place the gear selector to PARK (P).
4. Apply the Electric Park Brake and cycle the engine OFF.
INFLATION PROCEDURE
1 — Sealant Cartridge
2 — Filler Tube
3 — Adhesive Label
4 — Air Compressor
WARNING!
Do not attempt to seal a tire on the side of
the vehicle closest to traffic. Pull far enough
off the road to avoid the danger of being hit
when using the Tire Service Kit.
Do not use Tire Service Kit or drive the
vehicle under the following circumstances:
• If the puncture in the tire tread is approx-
imately 1/4 inch (6 mm) or larger.
• If the tire has any sidewall damage.
•If the tire has any damage from driving
with extremely low tire pressure.
• If the tire has any damage from driving
on a flat tire.
• If the wheel has any damage.
• If you are unsure of the condition of the
tire or the wheel.
Keep Tire Service Kit away from open flames
or heat sources.
A loose Tire Service Kit thrown forward in a
collision or hard stop could endanger the
occupants of the vehicle. Always stow the
Tire Service Kit in the place provided. Failure
to follow these warnings can result in injuries
that are serious or fatal to you, your
passengers, and others around you.
Take care not to allow the contents of Tire
Service Kit to come in contact with hair, eyes,
or clothing. Tire Service Kit sealant is harmful
if inhaled, swallowed, or absorbed through
the skin. It causes skin, eye, and respiratory
irritation. Flush immediately with plenty of
water if there is any contact with eyes or skin.
Change clothing as soon as possible, if there
is any contact with clothing.
Tire Service Kit Sealant solution contains
latex. In case of an allergic reaction or rash,
consult a physician immediately. Keep Tire
Service Kit out of reach of children. If
swallowed, rinse mouth immediately with
plenty of water and drink plenty of water. Do
not induce vomiting! Consult a physician
immediately.
WARNING!
23_GA_OM_EN_USC_t.book Page 172