filter ASTON MARTIN DB7 1997 Workshop Manual
[x] Cancel search | Manufacturer: ASTON MARTIN, Model Year: 1997, Model line: DB7, Model: ASTON MARTIN DB7 1997Pages: 421, PDF Size: 9.31 MB
Page 14 of 421
Electrics
Starter Motor / Steering Wheel - Removal Procedures ^n:M3^^2?
6.3.02 Starter Motor
Procedure
1.
Disconnect the battery.
2.
Remove the inlet air trunkins
Figure 1. Starter Motor Mountings
3. Disconnect the starter solenoid connector and the
starter motor power lead at the solenoid.
4.
Remove the top starter motor securing bolt.
Note:
The
top bolt is from tlie
engine
side on auto
cars
and from ttie gearbox side on manual cars.
5. Raise the car on a hoist and whilst supporting the
motor, remove the lower starter motor securing
bolt.
6. Lift the motor from the bell housing and remove it
from the vehicle by positioning it vertically and
lowering it down in front of the oil filter.
6.5.01 Steering
Wheel and Horn
Switches
Procedure
1.
Remove the steering wheel centre pad.
Figure 1. Steering Wheel and Horn
2. Mark the position of the steering wheel relative to
the steering column to ensure correct replacement.
3. Removethesteeringwheelsecuringnutand remove
the steering wheel.
6.5.02 Column Switches
Procedure
1.
Remove the steering wheel.
2.
Remove three screws and the column switch cover.
1^
Figure 1. Column Mounted Switches
3. Cut the tywraps securing the switch loom to the
steering column. Disconnect the loom plugs.
4.
Release 4 screws and
1
ift the switch assembly off the
steering column.
6-6 May 1996
Page 218 of 421
Electrics //—>> ^^^^^^ • >^
Seat Belt Pretensioner I'•—
-"i-t.
^-^
JH—X
System Fault Strategy
No single fault may cause an unexpected deployment. The controller will supervise the pretensioner electrical
system in order to warn the driver should a fault occur. Any fault detected by the self diagnostics shall cause the SRS/
airbag warning lamp to be activated, and in some cases the pretensioner control module to enter shutdown mode.
In shutdown mode, the energy of the reserve capacitors shall be discharged to avoid unintended deployment.
As the ignition is switched on, the pretensioner controller will directly discharge the energy capacitors. When the
start up procedure is completed without detecting any faults, the DC/DC converter will be activated allowing the
capacitors to be charged. The system shall be fully active within
11
secondsafterswitchingthe ignition on providing
that no faults are detected.
All system faults monitored by the controller are filtered in software to avoid fault warnings due to transient electrical
disturbances.
If a fault which could lead to inadvertent deployment is detected by the microprocessor, a software shutdown will
be generated. However, a leakage to an earth or positive potential in the pretensioner output circuit shall not cause
the controller to enter shutdown mode.
If a permanent short of the ignition transistor occurs, a shutdown shall be generated by the hardware circuit. If a
shutdown occurs, the system shall be unable to deploy the pretensioner after a period of 3 seconds (i.e. capacitors
discharged to under minimum deployment voltage).
WARNING: To avoid the possibility of personal injury caused by accidental deployment of the pretensioner,
disconnect the vehicle battery and wait at least 10 minutes for all voltages to fully discharge before working on
the pretensioner
system.
This
covers the possibility of the normal capacitor discharge circuits being inoperative
and failing to discharge the capacitor when instructed to do so.
WA RNING: Do not make any electrical measurements on the pretensioner squib. Electrical measurement devices
can induce sufficient voltage to cause unintentional firing of the pretensioner assembly
If the module enters shutdown mode, all diagnostic functions are stopped, but the communications link remains
active.
A fault code corresponding to the cause of the problem may be read by the PDU.
Assembly/Removal/Service I nstructions
WARNING: In the event of a vehicle impact where the airbags and the seatbelt pretensioner (if fitted) are
deployed, the following actions MUST be performed:
Check the condition of the
seatbelts,
steering wheel, steering column, all connections to airbags, and the column
switchgear connectors for integrity and damage. If in any doubt, replace suspected parts for new parts.
Replace both crash
sensors,
the safing sensor and the seatbelt pretensioner module (if fitted).
On completion of all repair procedures, switch on the ignition and check that the Airbag/SRS warning light
comes
on when the ignition is switched on and extinguishes after approximately six seconds indicating satisfactory
completion of the airbag and pretensioner
system
self
tests.
Vehicles for the North American, Australian and Japanese markets are fitted with drivers seat belt pretensioner
systems and are fitted with a shorting plug in the yellow connector adjacent to the pretensioner control module.
Vehicles for other markets do not have drivers seat belt pretensioners fitted but have a blanking plug in the yellow
connector adjacent to the pretensioner control module.
6-102 September 1996
Page 231 of 421
^"^
Body and Trim
Body Repair
Precautions
Paint
Ensure that there is efficient ventilation at all times. Paint spraying should be confined to spray booths.
Anyone with a history asthma should not be engaged in any process which involves the use of isocyanates.
Any operator working inside a spray booth where isocyanates are present must use air-fed breathing equipment.
Supplied air to the visor should be fed at the recommended pressure and filtered to remove oil, water and fumes.
Operators involved in handling, mixing or spraying should wear protective clothing, gloves and goggles to avoid
skin and eye contact. A Paticle mask or canister typr respirator should be worn when sanding.
Applied heat
When welding, flame cutting or brazing and so on, goggles, a mask or fume extractor and flameproof protective
clothing should be used always.
It is especially important when working with polyurethane compounds to use air-fed breathing equipment.
Ensure that at all times the appropriate fire fighting equipment isavailableand that personnel are trained in its use.
Metal repair
Wear appropriate eye and hand protection when sanding, drilling, cutting, chiselling, flatting or welding. Wear a
face mask or air-fed visor when sanding or flatting either body solder or
fillers.
When a soldering operation has been
completed,
remove swarf from the work area and wash your hands thoroughly.
General Repair Notes
The following precautions should be noted before any work is carried out:
• disconnect the vehicle battery ground
lead,
taking note of the reconnection procedures
• Make sure that you have read and understood the safety related procedures in this section.
Caution:
Electric arc
welding must not
be
used on the
vehicle as the high
voltages produced by
this process
will
cause
irreparable
damage
to the electrical control and
microprocessor
systems.
All trim and electrical components in the locality of the repair must be removed or disconnected prior to panel
removal or replacement.
Welding and Gas Process Special Notes
Resistance spot welding, MIG welding and all gas processes may only be carried out on bare, unpainted or unplated
metal.
The flanges of panels, which are to be welded together, must be clean, corrosion free and treated as
appropriate with either weld-through or inter-weld sealer.
The resistance spot welding equ ipment used in vehicle repair does not always produce
a
weld of
equ
ivalent strength
to that produced in manufacturing. This means that a single row of spot welds should be spaced on a pitch of 19-
25 mm, which will usually result in more spot welds than found in the original factory joint.
Use a resistance spot weld cutter to remove resistance spot welds. Where a new joint is to be MIC welded, cut the
old resistance spot welds from the panel that is to be retained; the resulting holes are then used for plug welding.
Suitable holes may be drilled or punched as follows:
• 8.0 mm for sections up to 1.5 mm thickness
• 10.0 mm for thicker sections.
Always refer to the welding equipment manufacturers diagrams and tables for the relevant procedure.
May 1996 7-3
Page 282 of 421
Em^^^?
Air Conditioning
General Description
General Description
Specifications
Refrigerant
Designation
Refrigerant R134A
(HFCUAA)
Compressor
Type
&
model
SD-7H15
Charge weight
1050g±50g
Configuration
7 cylinder
Compressor Lubricants
Designation
Polyalkylene glycol
(PAG)
Standard
for
Recovery, Recharge
and
Recycle Equipment,
System Capacity
120-150
ml
Manufacturer and Type
ICI Klea
or
equivalent
Manufacturer
Sanden
155 cm^
per
revolution
Manufacturer and Type
Sanden SP
20
Feature
Recovery rate
Cleaning capability
Oil separator
Vacuum pump
Filter
Charge
Hoses
Charge pressure
Compressor Belt Tension
Type
Vee belt
Burroughs method
Clavis method
Requirement
0.014-0.062
mVmin.
(1.36 kg in 20
minutes)
15
ppm
moisture; 4000
ppm oil; 330 ppm
non-condensable gases
in air
With hermetic compressor and automatic
oil
return
2 stage
0.07
-0.127 mVmin.
Replaceable with moisture indicator
Selectable charge weight and automatic delivery
Dedicated Refrigerant R134A port connections.
Heating element
to
increase pressure
Condition and range
All figures apply
to a
cold belt.
New belt
578 to 623 N
If tension
is
below
356 N,
reset
at 512 to 534 N
New belt
147 to 153 Hz
If tension
is
below
110 Hz,
reset
at 132 to 138 Hz
Note:
The
tension
is
measured
midway between the
compressor
and crankshaft pulleys. For a new
belt,
rotate engine three
revolutions minimum and then re-check the tension.
May 1996
8-5
Page 289 of 421
Air Conditioning //~-->> ^/zz:^^ • ^ ^
General Svstem Procedures ' —"^ ^ '^ General System Procedures
From the condenser the liquid passes into the Receiver-Drier which has three functions:
• Storage vessel for varying system refrigerant demands.
• Filter to remove system contaminants.
• Moisture removal via the desiccant.
With the passage through the receiver-drier completed the, still high pressure liquid refrigerant, enters the Expansion
Valve where it is metered through a controlled orifice which has the effect of reducing the pressure and temperature.
The refrigerant, now in a cold atomised state, flows into the Evaporator and cools the air which is passing through
the matrix.
As heat is absorbed by the refrigerant it once again changes state, into a vapour, and returns to the compressor for
the cycle to be repeated (Fig. 5).
There is an automatic safety valve incorporated in the compressor which operates should the system pressure be
in excess of
41
bar. The valve re-seats when the pressure drops below 35 bar.
Note: The division of HIGH and LOW side is simply the
system pressure
differential created by the
compressor
discharge
(pressure),
suction
(inlet)
ports and
the
relative inlet and outlet
ports
of the
expansion
valve.
This
differential is critical to
system
fault
diagnosis
and efficiency checks.
System Protection
The trinary pressure switch, located in the liquid line, cuts electrical power to the compressor clutch if the system
pressure is outside of the range of 2 Bar
(1
st Function) to 27 Bar (2nd Function). The third function is to switch on
the cooling fans when pressure exceeds 20 bar.
General System Procedures
Leak Test
Faults associated with low refrigerant charge weight and low pressure may be caused by leakage. Leaks traced to
mechanical connections may be caused by torque relaxation or joint face contamination. Evidence of oil around
such areas is an indicator of leakage. When checking for non visible leaks use only a dedicated Refrigerant El 34A
electronic analyser and apply the probe all round the joint connection. Should a leak be traced to a joint, check that
the fixing is secured to the correct tightening torque before any other action is taken.
Do not forget to check the compressor shaft seal and evaporator.
Note: Never
use
a dedicated
CFC 12
or
naiced
flame type
analyser.
Charge Recovery (System Depressurisation)
The process of refrigerant recovery depends on the basic characteristics of your chosen recovery-recycle-recharge
equipment, therefore, follow the manufacturers instructions carefully. Remember that compressor oil may be drawn
out of the system by this process, take note of the quantity recovered so that it may be replaced.
CAUTION: Observe all relevant safety requirements.
• Do not vent refrigerant directly to atmosphere and always use approved recovery-recycle-recharge
equipment.
• Wear suitable eye and skin protection.
• Do not mix the refrigerant with CFC 12.
• Take note of the amount of recovered refrigerant, it indica
tes the
state of the
system
and
thus the
magnitude
of any problem.
8-12 May 1996
Page 294 of 421
^=2?
Air Conditioning
System Trouble Shooting
System Trouble Shooting
There are five basic symptoms associated with air conditioning fault diagnosis. It is very important to identify the area of
concern before starting a rectification procedure. Spend time with your customer on problem identification, and use the
following trouble shooting guide.
The following conditions are not in order of priority.
No Cooling
1.
Is the electrical circuit to the compressor clutch functional?
2.
Is the electrical circuit to the blower motor(s) functional?
3. Slack or broken compressor drive belt.
4.
Compressor partially or completely seized.
5. Compressor shaft seal leak (see 9).
6. Compressor valve or piston damag^ (may be indicated by small variation between HIGH & LOW side pressures
relative to engine speed).
7. Broken refrigerant pipe (causing total loss of refrigerant).
8. Leak in system (causing total loss of refrigerant).
9. Blocked filter in the receiver drier.
10.
Evaporator sensor disconnected?
11.
Dual pressure switch faulty?
Note:
Should a
leak or low
refrigerant be established as
the
cause,
follow
the procedures
for
Recovery-Recycle
-Recharge,
and
observe all refrigerant and oil handling instructions.
insufficient Cooing
1.
Blower motor(s) sluggish.
2.
Restricted blower inlet or outlet passage
3. Blocked or partially restricted condenser matrix or fins.
4.
Blocked or partially restricted evaporator matrix.
5. Blocked or partially restricted filter in the receiver drier.
6. Blocked or partially restricted expansion valve.
7. Partially collapsed flexible pipe.
8. Expansion valve temperature sensor faulty (this sensor is integral with valve and is not serviceable).
9. Excessive moisture in the system.
10.
Air in the system.
11.
Low refrigerant charge.
May 1996 8-17
Page 324 of 421
^?
Air Conditioning
Torque Settings / Depressurising the System
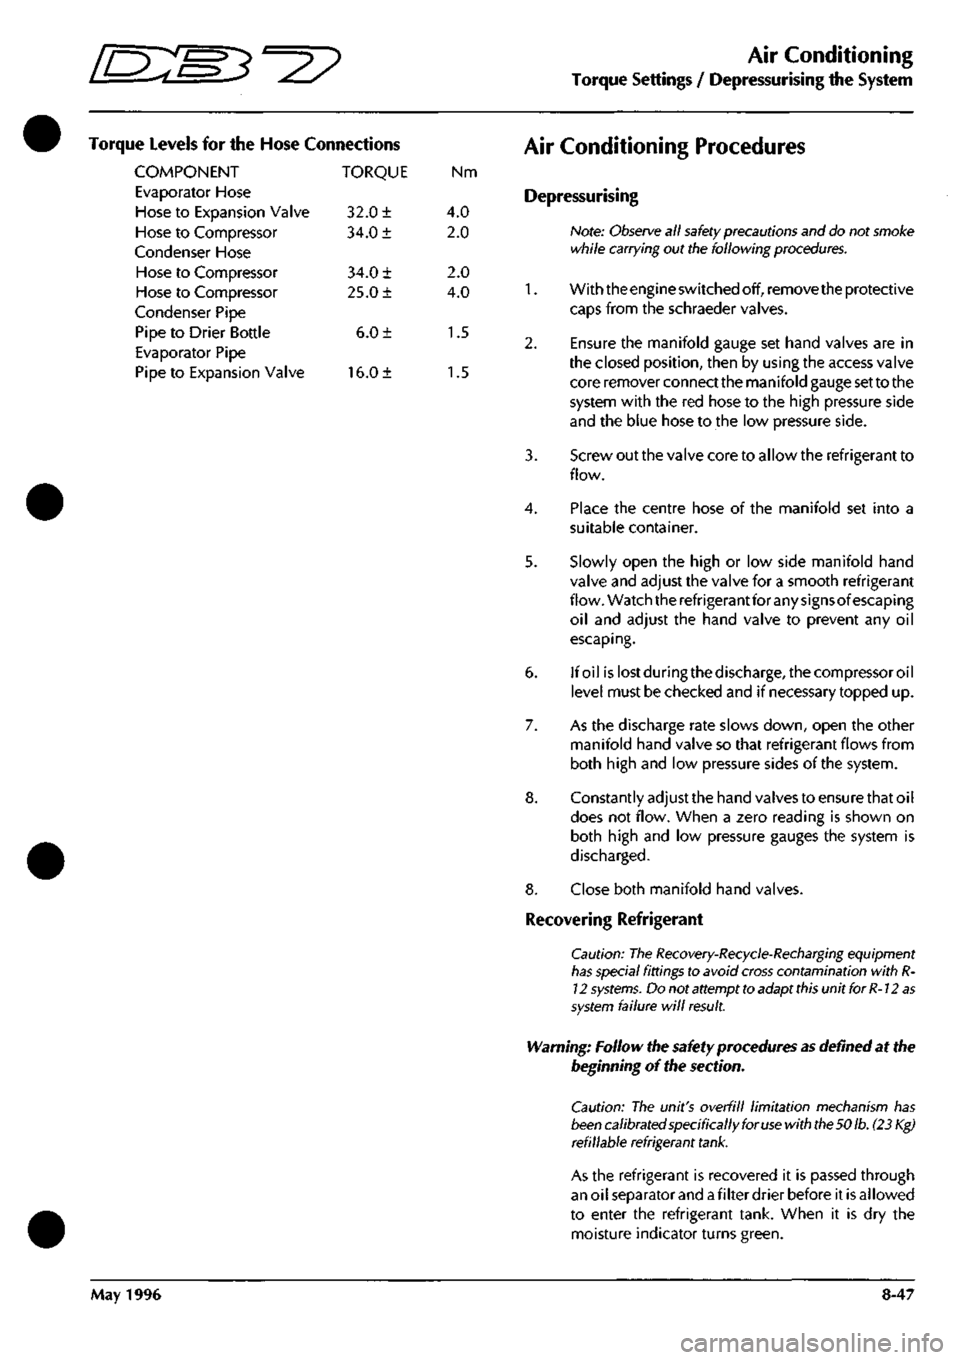
Torque Levels for the Hose Connections
COMPONENT TORQUE Nm
Evaporator Hose
Hose to Expansion Valve 32.0 ± 4.0
Hose to Compressor 34.0 ± 2.0
Condenser Hose
Hose to Compressor 34.0 ± 2.0
Hose to Compressor 25.0 ± 4.0
Condenser Pipe
Pipe to Drier Bottle 6.0 ± 1.5
Evaporator Pipe
Pipe to Expansion Valve 16.0 ± 1.5
Air Conditioning Procedures
Depressurising
Note:
Observe
all
safety
precautions and do not smoke
while carrying out the following
procedures.
1.
With the engine switched off, remove the protective
caps from the schraeder valves.
2.
Ensure the manifold gauge set hand valves are in
the closed position, then by using the access valve
core remover connect the manifold gauge set to the
system with the red hose to the high pressure side
and the blue hose to the low pressure side.
3. Screw out the valve core to allow the refrigerant to
flow.
4.
Place the centre hose of the manifold set into a
suitable container.
5. Slowly open the high or low side manifold hand
valve and adjust the valve for a smooth refrigerant
flow. Watch the refrigerant for any signsof escaping
oil and adjust the hand valve to prevent any oil
escaping.
6. If oil islostduringthedischarge,thecompressoroil
level must be checked and if necessary topped up.
7. As the discharge rate slows down, open the other
manifold hand valve so that refrigerant flows from
both high and low pressure sides of the system.
8. Constantly adjust the hand valves to ensure that oil
does not flow. When a zero reading is shown on
both high and low pressure gauges the system is
discharged.
8. Close both manifold hand valves.
Recovering Refrigerant
Caution: The
Recovery-Recycle-Recharging
equipment
has
special fittings to avoid
cross
contamination with
R-
12
systems.
Do not attempt to adapt
this
unit for
R-12
as
system
failure will
result.
Warning: Follow the safety procedures
as
defined at the
beginning of the section.
Caution: The unit's overfill limitation mechanism has
been
calibrated specifically for
use
with
the 50
lb.
(23 Kg)
refillable refrigerant
tank.
As the refrigerant is recovered it is passed through
an oil separator and
a
filter drier before it is allowed
to enter the refrigerant tank. When it is dry the
moisture indicator turns green.
May 1996 8-47
Page 325 of 421
Air Conditioning
Refrigerant Recovery and Recycling ^=2?
Recovery Procedure
Hote:
Run the
air-conditioning
system
for
a
few
minutes
before starting the
recovery
procedure as
this will
enable
more refrigerant to be recovered. Turn the
system
off
before
starting
the procedure.
1.
Attach the red (high side) hose oftheunittothe high
side fitting of the system on the vehicle then fit the
blue (low side) fitting to the low side on the vehicle.
Note: Make sure that the Air conditioning
system
has
pressure in it before beginning the recovery
process;
if
there is no
system
pressure there is no refrigerant to
recover.
Also
make sure that the
oil
drain
valve
is
closed.
2. Open both the high and low side valves on the
control panel.
3. Open the red CAS (vapour) valve and the blue
LIQUID valve on the tank.
4.
Turn on the MAIN POWER switch.
5. Press the RECOVERY key on the key-pad. The
display shows that the unit in the RECOVER mode
and AUTOMATIC cycle. After the compressor starts
the display shows the weight of refrigerant being
recovered.
The compressor shuts off automatically
when the recovery is complete and the display
shows the message 'CPL' and the final weight of the
recovered refrigerant.
6. Wait for five minutes and watch the manifold
gauges for a rise above 0. If a rise occurs press the
HOLD/CONT key. Repeat as needed until the
system pressure holds for two minutes.
Note: Drain the oil
separator
after
each
job.
7. Slowly open the oil drain valve and drain the oil
into the oil catch bottle. When all the recovered oil
has completely drained close the valve.
8. Replace oil lost during the recovery procedure by
measuringthe amount of oil inthe catch bottle and
adding the same amount of new oil to the system.
Note:
Dispose
of the
recovered
oil in an approved way.
9. When the recovery tank is full the compressor is
shut off and the display shows the message FULL.
Evacuating and Recycling the Refrigerant
1.
Open the red (high side) and the blue (low side)
valves on the unit and open the red GAS (vapour)
valve and the blue LIQUID valve on the tank.
2.
Enter the required time using the key-pad, press
enter,thedisplayshowstheenteredtime in minutes.
3. Start the vacuum pump by pressing the VACUUM
KEY again. The recycling process begins
approximately five seconds after the vacuum pump
starts and the message RECYCLE is displayed.
Note: If the vacuum pump
has
run for ten hours or
over
without an oil change the
message
OIL
flashes
on the
display.
Change
the pump oil and
then press
the
SHIFT/
RESET key and
the
zero key to
reset the
oil
change
timer
to zero.
The digital display counts down the evacuation
time.
4.
Check for non-condensibles after five minutes
recycling.
Ifthegauge needles are more than lOpsi
apart purge the non-condensibles from the tank by
open
i ng
the purge valve on the back of the
un
it and
continue to bleed until both needles show the same
reading.
The vacuum sequence continues until the
programmed time has elapsed at which point the
message CPL is displayed.
5. If the moisture indicator turns green recharge with
refrigerant.
or
5. If the moisture indicator has not turned green
replace the unit's filter-drier, which is probably
saturated.
Note:
Pressing
any key at this point allows the next
function to be
accessed.
To recycle the refrigerant only without pulling a
vacuum for an indefinite period of time press the
SHIFT/RESET key and the RECYCLE key on the key
pad.
Press the SHIFT/RESET key to cancel.
For vacuum only press the SHIFT/RESET key and
the ENTER key and then press
"1".
Run the vacuum
pump as long as required and then press
"1"
or
press SHIFT/RESET to cancel.
8-48 May 1996
Page 365 of 421
The Aston Martin Lagonda Diagnostic System
Installation Instructions 5^27
Battery Charging
The PDU is fitted with internal NICAD batteries
which allow the PDU to be transported whilst
retaining programs. The batteries are not designed
to be used as a general power source. A special
circuit monitorstheamountofcharge in the batteries
so that they cannot be overcharged.
From the time when first operating the system or a
PDU fitted with substitute batteries, it will take up
to 36 hours to achieve full charge. In the meantime,
the PDU can be used whilst connected to the base
station or to the vehicle battery. Keep transit times
to and from the vehicle as short as reasonably
possible to preserve battery charge.
Subsequent battery charges
shou Id
take six to seven
hours from fully discharged. The PDU must always
be left connected to the base station when not in
use in order to keep the batteries fully charged.
CAUTION: The rechargeable NICAD batteries
fitted to the PDU are of a special type and must
only be replaced with GenRad approved parts. Do
not substitute the batteries with any other type.
Always
dispose
of old batteries in compliance with
local recycling regulations. The procedure for
changing the battery pack
is
described later in this
installation guide.
Operating Procedures
Refer to the Aston Martin Diagnostic System Users
Guide for detail on each of the PDU software
options
Selecting Diagnostics
1.
Switch on the PDU, the main menu will be
displayed.
2.
Select 'Run Diagnostic' from the main menu and
confirm the selection by pressing the 'tick'
icon.
A
sequence of menus will be displayed requesting
identification of the vehicle under test.
3. The system will load the appropriate software.
4.
On completion of software loading, disconnect the
PDU from the base station and transfer it in its
carrying case to the vehicle. The additional pockets
in the carrying case may be used for carrying any
interface cables required.
5. If the VIA is required, also transfer it in its carrying
case to the vehicle together with any vehicle
interface cable required.
Using the PDU on the Vehicle
At the vehicle, the PDU may be removed from its
carrying case if required. The PDU should always
be connected to the vehicle using the Vehicle
Battery Adaptor (VBA) (0024). The PDU will
continue to charge from the vehicle battery.
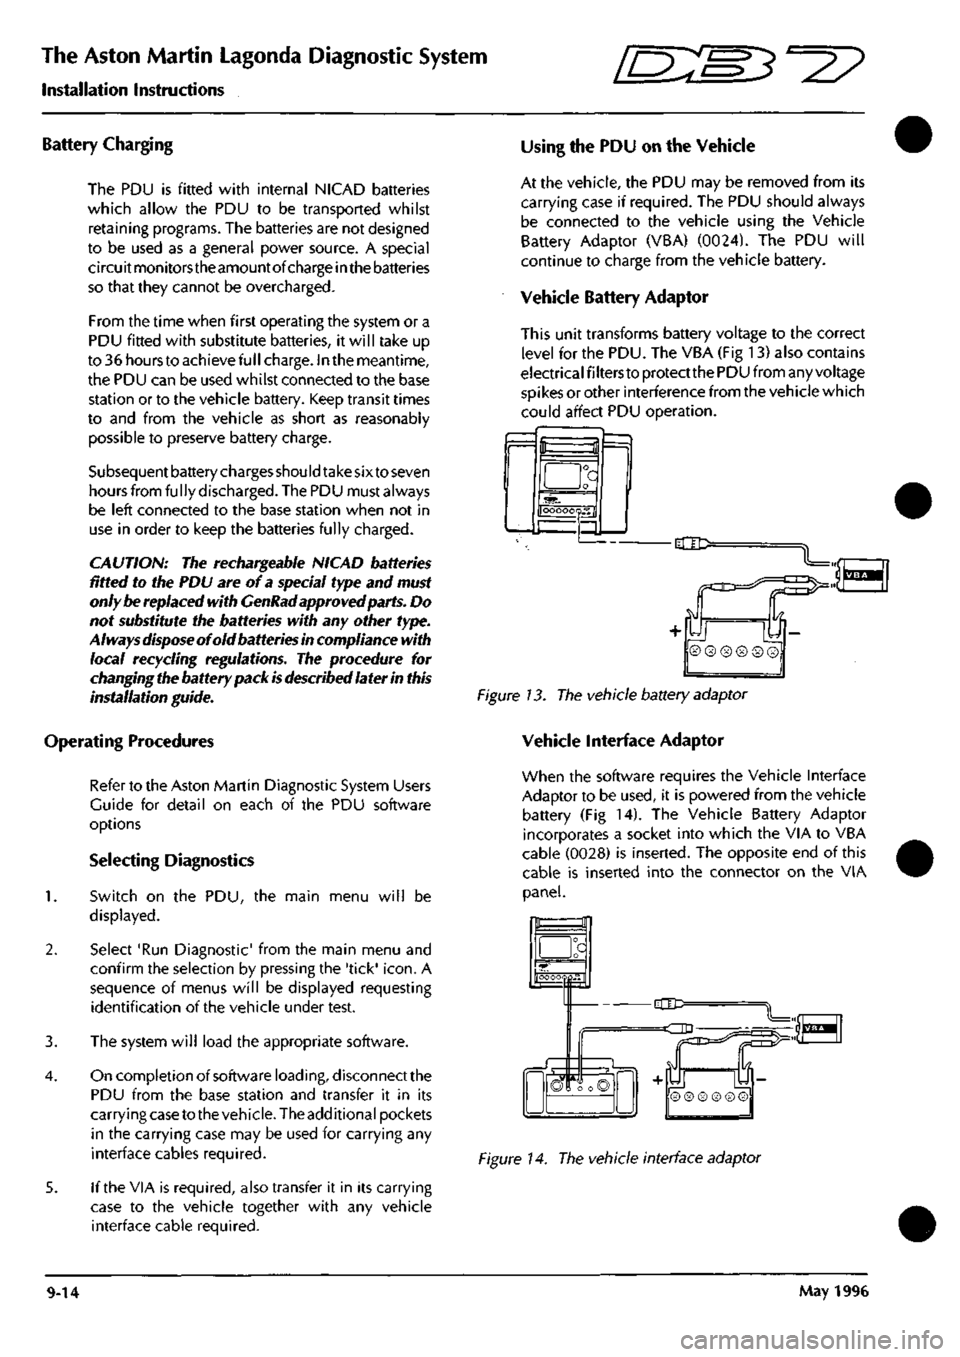
Vehicle Battery Adaptor
This unit transforms battery voltage to the correct
level for the PDU. The VBA (Fig 13) also contains
electrical filters to protect the PDU from any voltage
spikes or other interference from the vehicle which
could affect PDU operation.
f=l
a
OOOOOQS.fl
-dlD:
Figure 13. The vehicle battery adaptor
Vehicle Interface Adaptor
When the software requires the Vehicle Interface
Adaptor to be used, it is powered from the vehicle
battery (Fig 14). The Vehicle Battery Adaptor
incorporates a socket into which the VIA to VBA
cable (0028) is inserted. The opposite end of this
cable is inserted into the connector on the VIA
panel.
_a
hOOOOQpH"
-CIC=
=dD
n
S
© ® ® ® © ©
Figure 14. The vehicle interface adaptor
9-14 May 1996
Page 374 of 421
^?
The Aston Martin Lagonda Diagnostic System
Installation Instructions
1.
Switch off the PDU and remove all cables.
2.
Remove the cover screw (Fig 23) and remove the cover.
3. If damaged, remove the old foam gasket from the cover and replace with the new one supplied.
4.
Note the orientation of the connector. Disconnect the connector and remove the old battery pack.
5. Fit and connect the new battery pack (Fig 24) with the black cable towards the touch screen.
6. Refit the cover and cover screw.
7. Refer to the Battery Charging instructions for recharging times.
Changing the Dust Filter
The electronic module has a dust filter fitted to the underside of the module. Every three months a new filter wil
be supplied. To change the filter, proceed as follows:
1.
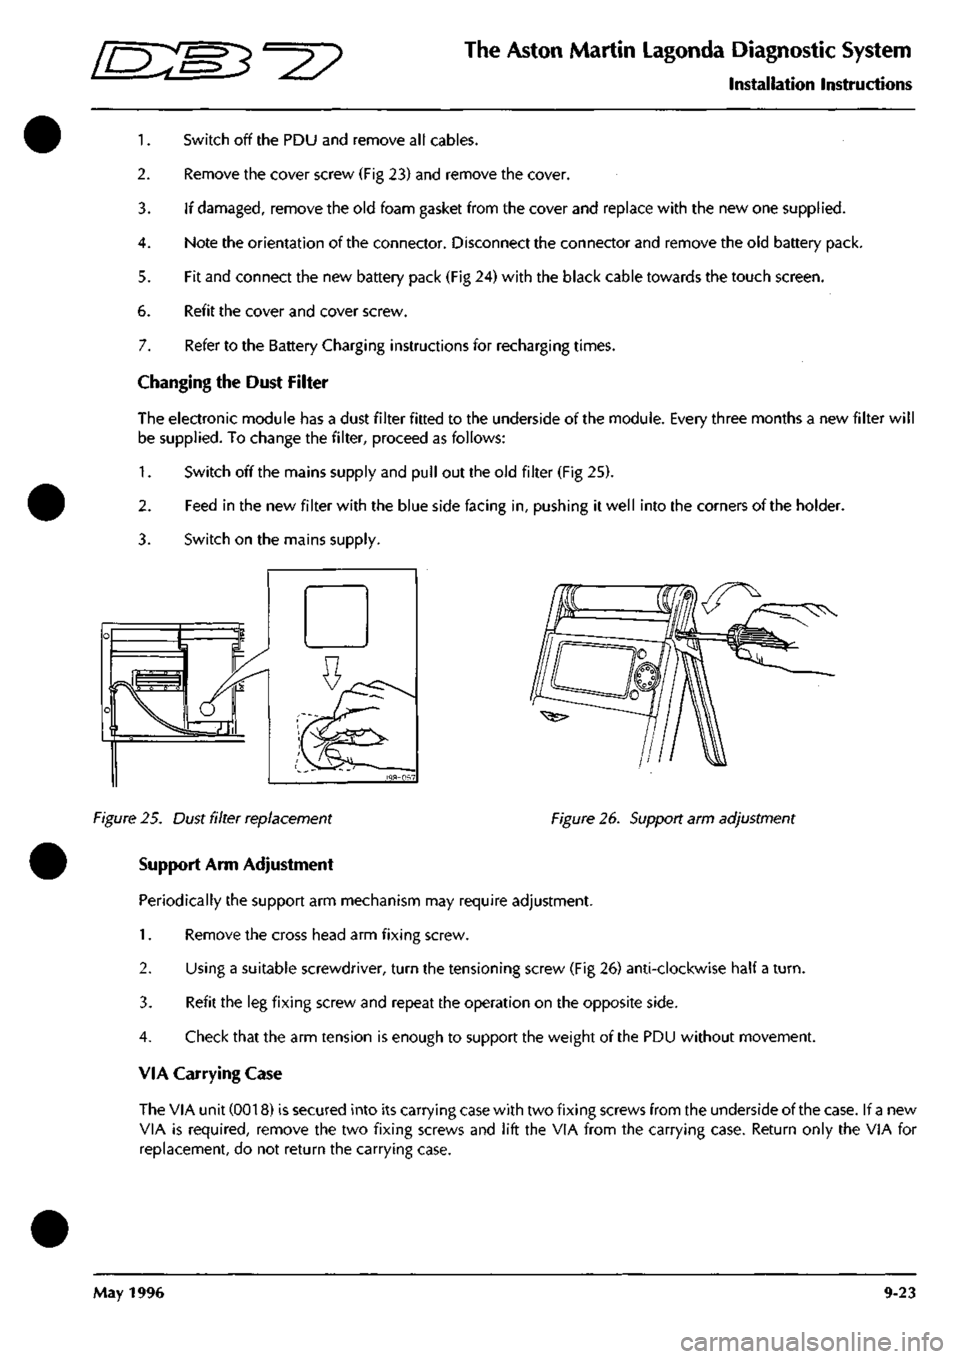
Switch off the mains supply and pull out the old filter (Fig 25).
2.
Feed in the new filter with the blue side facing in, pushing it well into the corners of the holder.
3. Switch on the mains supply.
Figure 25. Dust filter replacement Figure 26. Support arm adjustment
Support Arm Adjustment
Periodically the support arm mechanism may require adjustment.
1.
Remove the cross head arm fixing screw.
2.
Using a suitable screwdriver, turn the tensioning screw (Fig 26) anti-clockwise half a
turn.
3. Refit the leg fixing screw and repeat the operation on the opposite side.
4.
Check that the arm tension is enough to support the weight of the PDU without movement.
VIA Carrying Case
The VIA unit (0018) is secured into its carrying case with two fixing screws from the underside of the case. If a new
VIA is required, remove the two fixing screws and lift the VIA from the carrying case. Return only the VIA for
replacement, do not return the carrying case.
May 1996 9-23