reset AUDI A3 2011 Owner´s Manual
[x] Cancel search | Manufacturer: AUDI, Model Year: 2011, Model line: A3, Model: AUDI A3 2011Pages: 320, PDF Size: 75.79 MB
Page 30 of 320

Driver information display
tional mileage driven or the elapsed days will be shown as negative
numbers.•
Speed warning system
Overview
The speed warning system helps you to keep your driving
speed below a set speed limit.
Fig . 21 Di splay: speed
warning system
The speed warning system warns the driver if he exceeds a previously
stored maximum speed. A warning tone will sound as soon as the
vehicle speed exceeds the set speed by about 3 mph (3 km/h). At the
same time, a warning symbol appears in the display => fig. 21.
The speed warning system has
two warning thresholds that function
independently of each other and that have somewhat different
purposes:
Speed warning 1 "" / (Canada
models)
You can use speed warning 1 to set the maximum speed wh ile you are
driving. This setting will remain in effect until you turn off the igni
tion, assuming that you have not changed or reset the setting. The speed warning symbol
(
I (Canada models) in the warning 1
display appears when you exceed the maximum speed.
It goes out
when the speed falls below the stored maximum speed.
Th e speed warning symbol will also go out if the speed
exceeds the
stored maximum speed by more than about 25 mph (40 km/h) for at
least 10 seconds. The stored maximum speed is deleted.
Sett ing speed warn ing 1 =>
page 29.
Speed warning 2 I (Canada models)
Storing warning 2 is recommended if you always want to be reminded
of a certain speed, for example when you are traveling in a country
that has a general maxim um speed limit, or if you do not want to
exceed a specified speed for winter tires.
The speed warning 2 symbo l, / (Canada models) appears in the
display when you exceed the stored speed lim it. Unlike warning 1, it
will not go out until the vehicle speed drops below the stored speed
limit.
Setting speed warn ing 2 =>
page 29.
[ i ] Tips
Even though your vehicle is equipped with a speed warning system,
you should still watch the speedometer to make sure you are not driving faster than the speed limit .•
Page 31 of 320
Speed warning 1: setting a speed Limit
Warning threshold 1 is set by the button.
Storing the maximum speed
- Drive at the desired maximum speed.
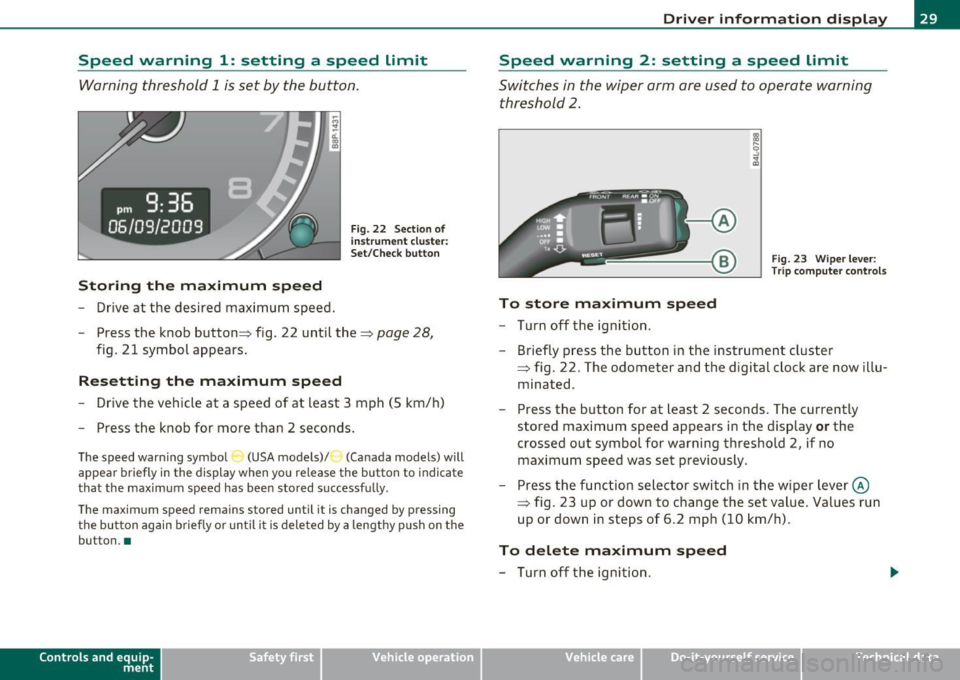
Fig. 22 Section o f
in st rum ent cluster:
Set/Check button
- Press the knob button :::} fig. 22 until the :::} page 28,
fig. 21 symbol appears.
Resetting the maximum speed
- Drive the vehicle at a speed of at least 3 mph (5 km/h)
- Press the knob for more than 2 seconds.
The speed warning symbo l (USA models) /') (Canada models) will
appear briefly in the display when you release the button to indicate
that the maximum speed has been stored successfully .
The maximum speed remains stored until it is changed by pressing the button again briefly or until it is deleted by a lengthy push on the
button. •
Contro ls a nd e quip
m en t Vehicle
OP-eration
Driver information display
Speed warning 2: setting a speed Limit
Switches in the wiper arm are used to operate warning
threshold
2.
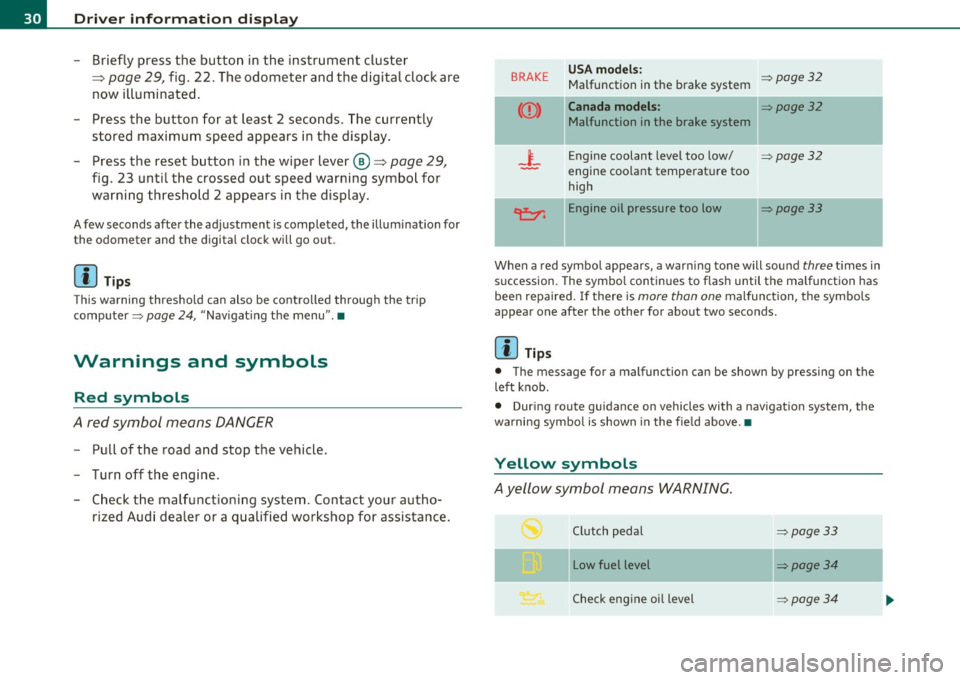
Fig. 23 Wiper lever:
Trip computer controls
To store maximum speed
- Turn off the ignition.
- Briefly press the button in the instrument cluster
=> fig. 22. The odometer and the d igital clock are now illu
minated .
- Press the button for at least 2 seconds. The currently
stored maximum speed appears in the display
or the
crossed out symbol for warning threshold 2, if no maximum speed was set previously .
- Press the function selector switch in the wiper lever@
=> fig. 23 up or down to change the set value . Values run
up or down in steps of 6.2 mph (10 km/h).
To delete maximum speed
- Turn off the ignition.
Vehicle care Do-it-yourselt service iTechnical data
Page 32 of 320
Driver info rmation d isplay
- Briefly press the button in the instrument cluster
=>
page 29, fig . 22. The odometer and the digital clock are
now i lluminated .
- Press the button for at least 2 seconds . The currently
stored maximum speed appears in the display.
- Press the reset button in the wiper lever@=>
page 29,
fig. 23 until the crossed out speed warning symbol for
warning th reshold 2 appears in the display.
A few seconds after the ad justment is completed, the illuminat io n for
the odometer and the digital clock will go out.
[ i J Tips
This warning thresho ld can also be contro lled through the trip
computer~
page 24, "Navigat ing the menu" .•
Warnings and symbols
Red symbols
A red symbol means DANGER
- P ull of the road and stop the vehicle .
- Turn off the engine.
- Check the malfunctioning syst em. Contact you r au tho-
rized Audi dealer or a qualified workshop for assistance.
BRAKE USA models : ~page32 Malfunction in the brake system
Canada models : ~page32
Malfunction in the brake system
_i_ Engine coolant level too low/ ~page32
-engine coolant temperat ure too
high
~ Engine oil pressure too low ~page33
When a red symbo l appears , a warn ing tone will sound three t imes in
succession. The symbo l continues to flash until the malfunction has
bee n repaired. If there is
more than one malfunction , the symbols
appear one after the other for about two seconds.
[ i J Tips
• The message for a malfunction can be shown by pressing on the
left knob.
• During route guidance on vehicles with a navigat ion system, the
wa rni ng symbo l is shown in the fie ld above. •
Yellow symbols
Ayellow symbol means WARNING.
Clutch pedal ~page33
- -
Low fuel level ~page34
Check eng ine oi l level ~ page34
Page 45 of 320

• In order to make sure the locking funct ion is working, you should
a lways keep your eye on t he vehicle to ma ke sure it is p roperly lo ck ed.
• Do not use the remote contro l if you are inside the car, otherwise
yo u may u nintent ionally loc k the veh icle, and then you would set off
the ant i-theft a larm when you try open a door . In case t his happens
anyhow, push the unl ock button@.
• Use the panic function on ly if you are in an emergency situation. •
Resetting the remote control
The remote control must be reset if the vehicle does not
unlock .
- Press the unlock but ton en on the remote control.
- Manually un lock the driver's door lock with t he mechanical
key w ithin 30 seconds.
- Press either the lock-
rn or the unlock m b utton to
complete the reset sequence .•
Con tro ls a nd e quip
m en t Vehicle
OP-eration
Opening and closing
Doors, power locks
Operating the Locks with the fold-out key
To lock and unlock the vehicle from th e outside, turn the
key in the lock of the driver's door .
N
-N
-a:. gi
Fig. 30 Key turn s for
o pe ning and closing .
To unlock all doors and the rear lid
- Turn the key to positi on @ :::::> fig. 30 to unlock the vehi cle
To lock the vehicle
- Close all windows and doors properly .
- Tu rn t he key in the lock of the driver's door to the lock
posi tion @=>
& in "General descr iption" on page 40.
When you unlock yo ur vehicle:
• The a nti -theft alarm system is deactivated .
• Th e vehicle interior lights illumina te for approximate ly 30
seco nds.
When you
lock the vehicle:
• All doors and the rear lid are loc ked.
• The anti-theft alarm system is activated.
• The vehicle inter ior lights turn off .
Vehicle care Do-it-yourselt service iTechnical data
Page 58 of 320

Clear vision
Clear vision
Lights
Switching the headlights on and off ·"ti-·
!
-ti. ID
panel: light switch
Fig. SO Instrument
panel: Light swit ch
with daytime running
lights (DRL )
The light switch must not be overturned past the stops in
either direction.
Switching on automatic headlight control*
-Turn the light switch to AUTO* =:> fig. 49.
Switching on the side marker lights
- Turn the light switch to ~oo~.
Switching on the headlights and high beam
-Turn the light switch to io.
Push the high beam lever forward towards the instrument
panel=:>
page 59 .
Switching off the lights
-Turn the light switch to 0.
The headlights only work when the ignition is switched on . While
starting the engine or when switching off the ignition, the headlights
w ill go off and only the side marker lights will be on.
Daytime running lights (DRL) (USA models)
The daytime running lights can be turned on or off using this func
tion. If the function is active, the daytime running lights are turned
on automat ically when the ignition is switched on .
The daytime running lights are activated
only when the light switch is
at the
AUTO* or DRL * position .
Daytime running lights (Canada models only)
The daytime running lights are act ivated only when the light switch
~ fig. 49 is either at the O or the ~oa; position.
The daytime running lights function cannot be turned off.
Automatic headlight control*
In the switch position AUTO the automatic headlight control is
turned on . The low beams are turned on automatically through a light
sensor as soon as ambient brightness (e.g . when driving into a
tunnel) falls below a value preset at the factory. When ambient .,_
Page 104 of 320
ffl..__w __ a _r _m __ a_n _ d_ c_ o_ ld ________________________________________________ _
Key coded settings
When the ignition is switched on, the air conditioner
settings are automatically assigned to the key being used .
The air conditioner settings selected are automatically stored and
assigned to the key being used . When the vehicle is started, the air
conditioner automatically selects the settings assigned to that key.
Th is way every driver will maintain his/her own personal settings and
does not have to reset them manually.
[ i J Tips
If a different driver uses your key and changes the a ir conditioner
sett ings, the latest adjustments wi ll erase and replace the settings
you have stored. •
Rear window defogger [ffi)
The rear window defogger clears the rear window of
condensation.
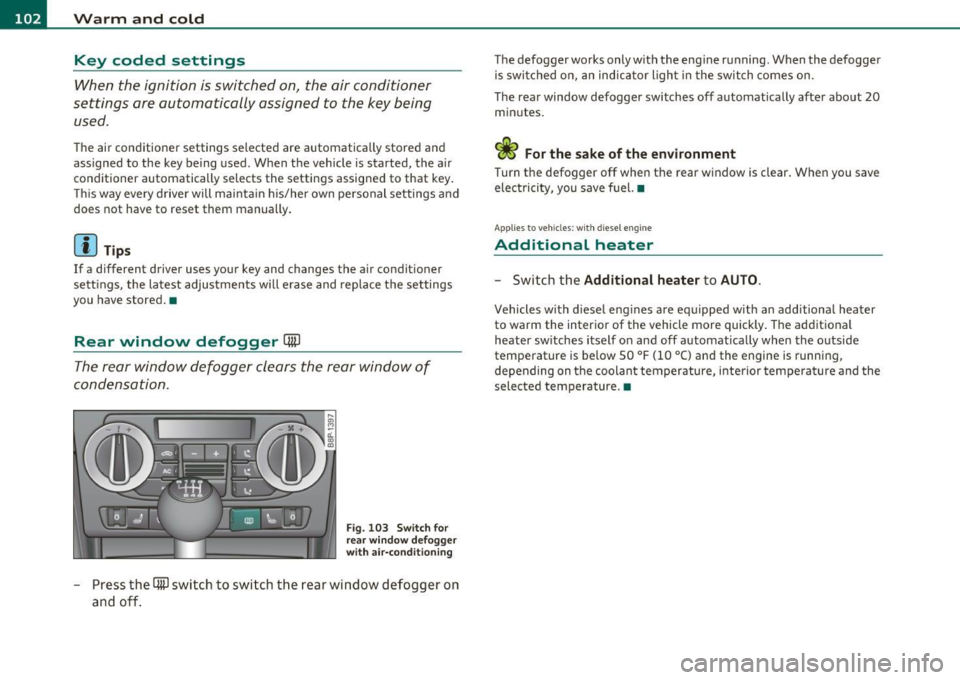
F ig. 103 Swi tch for
rea r w in dow defogg er
wit h air -conditioni ng
- Press the [ml switch to switch the rear window defogger on
and off.
The defogger works only with the eng ine running . When the defogger
is switched on, an indicator ligh t in the switch comes on .
The rear window defogger switches off automatically after about 20 min utes.
elec tricity, you save fuel. •
Applies to veh icles: wit h diesel eng ine
Additional heater
- Switch the
Additional heater to AU TO .
Vehicles w ith d iesel eng ines are equipped with an additional heater
to warm the interior of the vehicle more quickly . T he additional
heater sw itches itself on and off automatically when the outside
temperature is be low 50 °F (10 °C) and the engine is running,
depending on the coolant temperature, i nterior temperature a nd the
selected temperature. •
Page 113 of 320
________________________________________________ ..::O :::.:.,: n:...t~ h :...!.::: e:...!.. ro~ a:_::d!..,_ __
- Drive at the sp eed yo u wish to set.
- Press button © to set that speed .
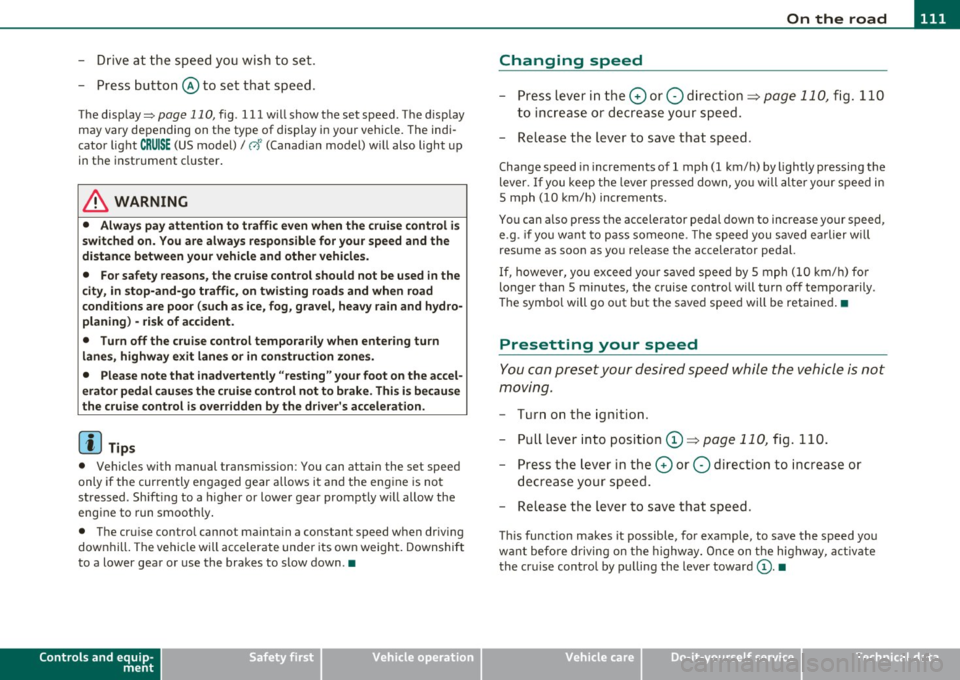
The disp lay=> page 110, fig . 111 w ill show the set speed. T he d is p lay
may vary depending on the type of display in your veh icle. The ind i
cator light
CRUISE (US mode l) I 0" (Canadian model) w ill also light up
in the instr ument cluster .
& WARNING
• Alway s pay attention to traffi c even wh en the cruise control i s
switch ed on. You are always responsible for your speed and the
distance between your vehicle and other vehicle s.
• For safety reasons , the cruise control should not be used in the
city, in stop-and-go traffi c, on twi sting road s and when road
conditions are poor (such as ice , fog, gravel, heavy rain and hydro
planing ) · risk of accident .
• Turn off the cruise control temporarily when entering turn
lanes, highway exit lane s or in con struction zone s.
• Please note that inadvertently "resting" your foot on the accel ·
erator pedal cau ses the crui se control not to brake . This i s becau se
the cruise control is ove rridden by the driver 's accele rat ion .
[ i ] Tips
• Vehicles with manual transmission : You can atta in the set speed
only if the curren tly engaged gear allows i t and the eng ine is no t
stressed . Shift ing to a higher or lowe r gear promptly w ill allow the
eng ine to run smooth ly .
• The cru ise contro l cannot ma inta in a constant speed when driving
downhil l. The vehi cle will accelerate under its own weigh t. Downshift
to a lower gear or use the brakes to slow down .•
Controls and equip
ment Safety first
Changing speed
- Press lev
er i n t he 0 or O directio n=:::;, page 110, fig. 110
to inc rease or d ecr eas e yo ur sp eed.
- Release the lever to save t hat speed .
Change speed in increments o f 1 mph (1 km/h) by lightly pressing the
lever. If you keep the leve r presse d down, yo u will alte r your s peed in
S mph (10 km/h) increments .
You can also press t he accelerator pedal down to increase your s peed,
e .g . if you want to p ass someone. The speed you save d earlier wi ll
resume as soon as yo u re lease the accelerator pedal.
If, however, you exceed yo ur saved speed by 5 mph (1 0 km/h) fo r
longer than S m inutes, the cruise contro l will turn off temporarily .
Th e symbo l will go out b ut the save d speed will be retaine d.•
Presetting your speed
You can preset your d esir ed sp eed whil e the vehicle is not
moving.
- Turn on the ignition.
- Pull leve r into positio n
CD~ page 110, fig . 110.
- Press the lever in the
0 or O di rec tion to increase or
d ecr eas e y our sp eed.
- Release the lever to save t hat spe ed .
Thi s fu nction makes it possible, for example, to save the speed yo u
w ant befo re drivi ng on the highway . Once on t he highw ay, act ivate
the cruise contro l by pu lling the leve r toward
(D . •
Vehicle care Technical data
Page 268 of 320
-~_T_ ir_e_ s_ a_ n_ d_ w_ h_e_ e_ ls _______________________________________________ _
The ti re pr essure mon itor ing must be reset in the m enu display each
t im e th e pre ssur es a re adjust ed (e .g . w hen sw itching b etwee n parti al
and full load press ure) o r afte r ch angi ng or r eplac ing a tir e on yo ur
vehicle => page
26 7. You ca n find t he recommen ded tire pr essures
for your veh icle o n th e labe l o n the dr ive r's door pillar=> page
249 .
Tire tread circ umference and vibrat ion characterist ics ca n change and
c a us e a tir e pre ssure w arni ng if:
• t he tire pressure in one o r more tires is to o low,
• t he tire has st ru ctu ral damag e,
• the ti re press ure was changed , wh eels ro tate d or r ep laced but the
TPM S was not re set=> page
267 .
Warning symbols
1..1' Loss of p ress ure in at least on e tir e => & . Check th e tir e or tir es
and rep lace or re pair i f necessary. T he in dicator lig ht (• in th e ins tru
men t cluster al so illu mina tes=> page
11. Che ck/co rrect the pre s
sures of a ll four tires an d reset TP MS in t he menu display.
rr :; (T ire Pre ss ure M on itor ing Syst em) Tire pressure! System
malfunction.
I f T ,.;> ap pears a fter swi tc hi ng t he ignition o n or w hile
dr iv ing => page
265 , fig. 177 a nd t he in dic ator lig ht 'in th e i nstr u
m en t clus ter bli nks fo r ap prox ima tely one minute and th en stays o n,
t h ere is a system ma lf u nct io n. S ee your authorized Audi dealer as
soon as poss ible.
& WARNING
• If the tire pressure indicator appears in the instrument cluster
display, one or more of your tires is significantly under-inflated. Reduce your speed immediately and avoid any hard steering or
braking maneuvers. Stop as soon as possible and check the tires
and their pressures . Inflate the tire pressure to the proper pres
sure as indicated on the vehicle's tire pressure label=>
page 249.
Driving on a significantly under-inflated tire causes the tire to
overheat and can lead to tire failure. Under-inflation also is likely
to impair the vehicle's handling and stopping ability.
& WARNING (co ntinued )
• The driver is responsible for maintaining the correct tire pres
sures . You must check the tire pressures regularly .
• Under certain conditions (such as a sporty driving style, winter
conditions or unpaved roads), the pressure monitor indicator may
be delayed.
• Ask your authorized Audi dealer if run-flat tires may be used on
your vehicle. Your vehicle registration becomes invalid if you use
these tires when not permitted. Damage to your vehicle or acci dents could also result.
[ i ] Tips
• Th e tire pressu re monito ring system stops wor king when the re is
a n E SP/ABS malfu nct io n.
• U sin g s now c hains may res ult in a system ma lf u n ct io n.
• Tire s with t he ident ification "AO" or "RO" have been specially
m atched w ith yo ur Audi. We recommend usin g onl y these t ires
b ecause they mee t the hig hest standards regard ing safe ty a nd
dr iving charac ter is ti cs when used cor rec tly . Yo ur au thori ze d Audi
dea ler will g lad ly provi de you wi th mor e info rmation. •
Page 269 of 320
________________________________________________ T_ i_ re _ s_ a_ n_d_ w_ h_ e_ e_l _s _ ....... fflll
Applies to vehicles : with tir e pressure monitor ing syste m
Reset tire pressure monitoring system
(Stepl)
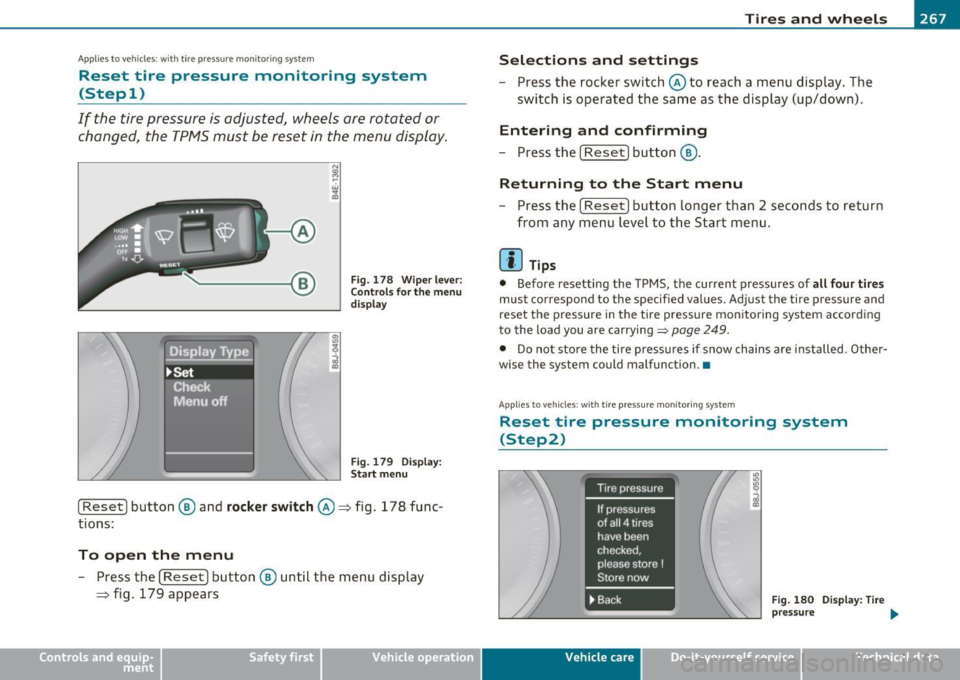
If the tire pressure is adjusted, wheels are rotated or
changed, the TP MS must be reset in the menu display.
Fig. 1 78 Wip er l ev er:
C ont rol s f or the m enu
display
Fi g. 17 9 Disp la y:
Sta rt me nu
[ Reset) button ® and rocke r switch @=> fig. 178 func
tions:
To open the menu
- Press the (Reset] button ® until the menu disp lay
=> fig. 179 appears
Vehicle OP-eration
Selections and settings
-Press the rocker switch @ to reach a menu display. The
swi tch is operated the sa me as the display (up/down).
Entering and confirming
- Press the [ Reset) button®·
Returning to the Start menu
- Press the [Reset) b ut ton longer than 2 seconds to return
f rom any m enu lev el to th e Start menu .
[ i ] Tips
• Before resetting the TPMS, t he cur rent pressures of a ll four tires
must correspond to the specified values. Adjust the tire pressure and
reset the p ressure in the tire pressure mon ito ring system according
to the load you are carrying=>
page 249.
• Do not sto re the ti re press ures if snow chains are i nstalled . Othe r
wise the system could malfunction .•
App lies to vehicles : w ith t ire pressure monitoring system
Reset tire pressure monitoring system
(Step2)
Fig . 18 0 D ispla y: Ti re
p ress ure
Vehicle care Do-it-yourselt service iTechnical data
Page 270 of 320
![AUDI A3 2011 Owner´s Manual ffl __ T_ i_ r _e _s_ a_n_ d_ w_ h_ e_e_ l_ s _______________________________________________ _
Fig . 181 Display : T ir e
p res su re
[ Rese t] button @ and rocker switch @=> page 267,
fig. AUDI A3 2011 Owner´s Manual ffl __ T_ i_ r _e _s_ a_n_ d_ w_ h_ e_e_ l_ s _______________________________________________ _
Fig . 181 Display : T ir e
p res su re
[ Rese t] button @ and rocker switch @=> page 267,
fig.](/img/6/40268/w960_40268-269.png)
ffl __ T_ i_ r _e _s_ a_n_ d_ w_ h_ e_e_ l_ s _______________________________________________ _
Fig . 181 Display : T ir e
p res su re
[ Rese t] button @ and rocker switch @=> page 267,
fig. 178 functions:
Storing tire pressures
- Turn on the ignition.
- Select the menu:
>Adjusting *> Tire pressure > Store .
Entering and confirming
- Sele ct t he menu : Store now
- Press the [
Reset] button@.
- Select the menu: Confirm
- Press the [
Reset I button @.
Returning to the Start menu
- Press the [Reset] button longer than 2 seconds to re turn
from a ny menu level to the Start menu .
(I) Tips
Before resetti ng the TPM S, the cur rent pressures of all four tires
must correspond to the specified values . Adjust the tire pressure and reset the pressure i
n the t ire pressure mon itoring system accord ing
t o the loa d you are ca rrying =>
page 249. •