battery AUDI A3 SEDAN 2017 Owners Manual
[x] Cancel search | Manufacturer: AUDI, Model Year: 2017, Model line: A3 SEDAN, Model: AUDI A3 SEDAN 2017Pages: 400, PDF Size: 67.32 MB
Page 4 of 400
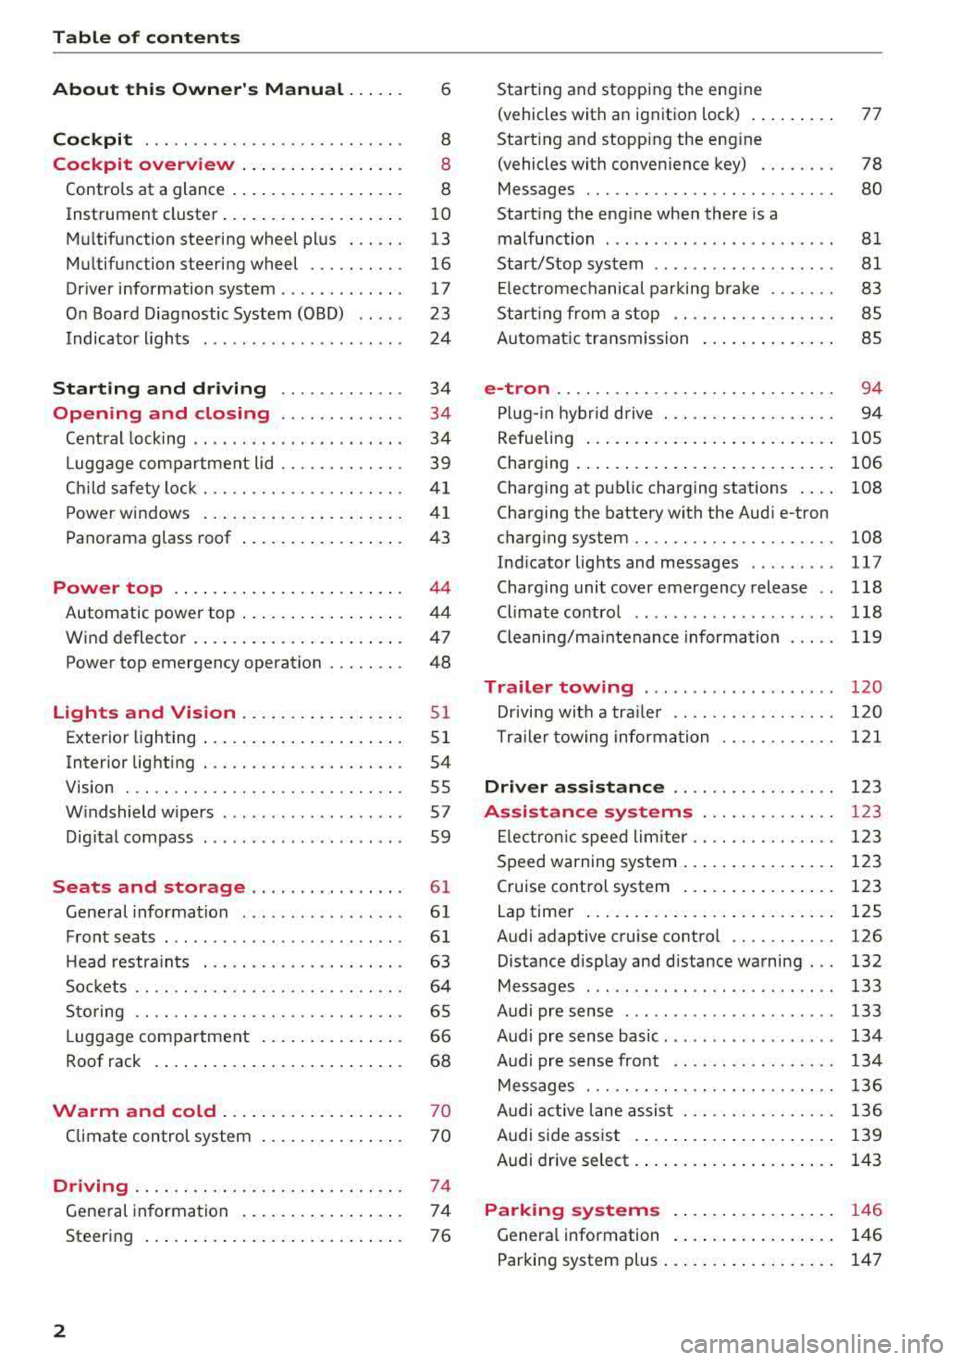
Table of content s
About this Owne r's Manual . .. .. .
6
Cockpi t ... .. ............... .... .. . 8
Cockpit overview . . . . . . . . . . . . . . . . . 8
Controls at a glance . . . . . . . . . . . . . . . . . . 8
Instrument cluster . . . . . . . . . . . . . . . . . . . 10
Mu ltifunction steering wheel plus . . . . . . 13
Mu ltifunction steering wheel . . . . . . . . . . 16
Driver information system . . . . . . . . . . . . . 17
On Board Diagnostic System (OBD) . . . . . 23
Indicato r lights . . . . . . . . . . . . . . . . . . . . . 24
Start ing and dr iving . . . . . . . . . . . . . 34
Opening and closing . . . . . . . . . . . . . 34
Central lock ing . . . . . . . . . . . . . . . . . . . . . . 34
L uggage compartment lid . . . . . . . . . . . . . 39
Ch ild safety lock . . . . . . . . . . . . . . . . . . . . . 41
Power w indows . . . . . . . . . . . . . . . . . . . . . 41
Panorama glass roof . . . . . . . . . . . . . . . . . 43
Power top . . . . . . . . . . . . . . . . . . . . . . . . 44
Automatic power top . . . . . . . . . . . . . . . . . 4 4
Wind deflector . . . . . . . . . . . . . . . . . . . . . . 47
Power top emergency operation . . . . . . . . 48
Lights and Vision .. ..... ... .. .. .. .
Exterior lighting ... .. ...... ... .. .. .. .
Interior lighting ... ........... .... .. .
V1s1on ... .. .. ... ............ .... .. .
W indshield wipers ............... ... .
Dig ital compass ........... ...... ... . 51
5 1
54
55
57
59
Seats and storage . . . . . . . . . . . . . . . . 61
General information . . . . . . . . . . . . . . . . . 61
Front seats . . . . . . . . . . . . . . . . . . . . . . . . . 61
H ead restra ints . . . . . . . . . . . . . . . . . . . . . 63
So ckets . . . . . . . . . . . . . . . . . . . . . . . . . . . . 64
S to ring . . . . . . . . . . . . . . . . . . . . . . . . . . . . 65
L uggage compar tment . . . . . . . . . . . . . . . 66
R oof rack . . . . . . . . . . . . . . . . . . . . . . . . . . 68
Warm and cold . . . . . . . . . . . . . . . . . . . 70
Climate control system . . . . . . . . . . . . . . . 70
Driving . . . . . . . . . . . . . . . . . . . . . . . . . . . . 74
General in formation . . . . . . . . . . . . . . . . . 74
Steering . . . . . . . . . . . . . . . . . . . . . . . . . . . 76
2
Starting and stopping the eng ine
(vehicles with an ignition lock) . . . . . . . . . 77
Start ing and stopping the eng ine
(vehicles with conven ience key) . . . . . . . . 78
Messages . . . . . . . . . . . . . . . . . . . . . . . . . . 80
Start ing the engine whe n there is a
malfunction . . . . . . . . . . . . . . . . . . . . . . . . 81
Start/Stop system . . . . . . . . . . . . . . . . . . . 81
El ectromechanical parking brake . . . . . . . 83
Start ing from a stop . . . . . . . . . . . . . . . . . 8S
Automa tic transmission . . . . . . . . . . . . . . 8S
e-tron ...... .. .. .. .. .. ........... .. 94
P lu g- in hybrid drive . . . . . . . . . . . . . . . . . . 94
Re fueling . . . . . . . . . . . . . . . . . . . . . . . . . . lOS
Charging . . . . . . . . . . . . . . . . . . . . . . . . . . . 106
Charging at pub lic charging stations . . . . 108
Charging the battery with the Aud i e-tron
charg ing system . . . . . . . . . . . . . . . . . . . . . 108
Ind icator lights and messages ......... 117
Charg ing unit cover emergency release . . 118
Climate contro l . . . . . . . . . . . . . . . . . . . . . 118
Cleaning/ma intenance information 119
Trailer towing . . . . . . . . . . . . . . . . . . . . 120
D rivi ng with a tra ile r .. ... ........... .
T ra ile r t owing information .......... . .
D . . nver assi
stance .. ... ... .... ... . .
Assis tance systems ............ . .
El ectron ic speed limite r ............. . .
Speed warning system ... .. .. .... ... . . 120
1 2 1
123
123
1 23
123
Cruise control system . . . . . . . . . . . . . . . . 123
Lap timer . . . . . . . . . . . . . . . . . . . . . . . . . . 125
Audi adaptive cruise contro l . . . . . . . . . . . 126
Distance disp lay and distance warning . . . 132
Messages . . . . . . . . . . . . . . . . . . . . . . . . . . 133
Audi pre sense . . . . . . . . . . . . . . . . . . . . . . 133
Audi pre sense basic . . . . . . . . . . . . . . . . . . 134
Audi pre sense front . . . . . . . . . . . . . . . . . 134
Messages . . . . . . . . . . . . . . . . . . . . . . . . . . 136
Audi active lane assist . . . . . . . . . . . . . . . . 136
Audi s ide ass ist . . . . . . . . . . . . . . . . . . . . . 139
Audi drive select . . . . . . . . . . . . . . . . . . . . . 143
Parking systems . . . . . . . . . . . . . . . . . 146
Genera l information . . . . . . . . . . . . . . . . . 146
Parking system plus . . . . . . . . . . . . . . . . . . 147
Page 6 of 400
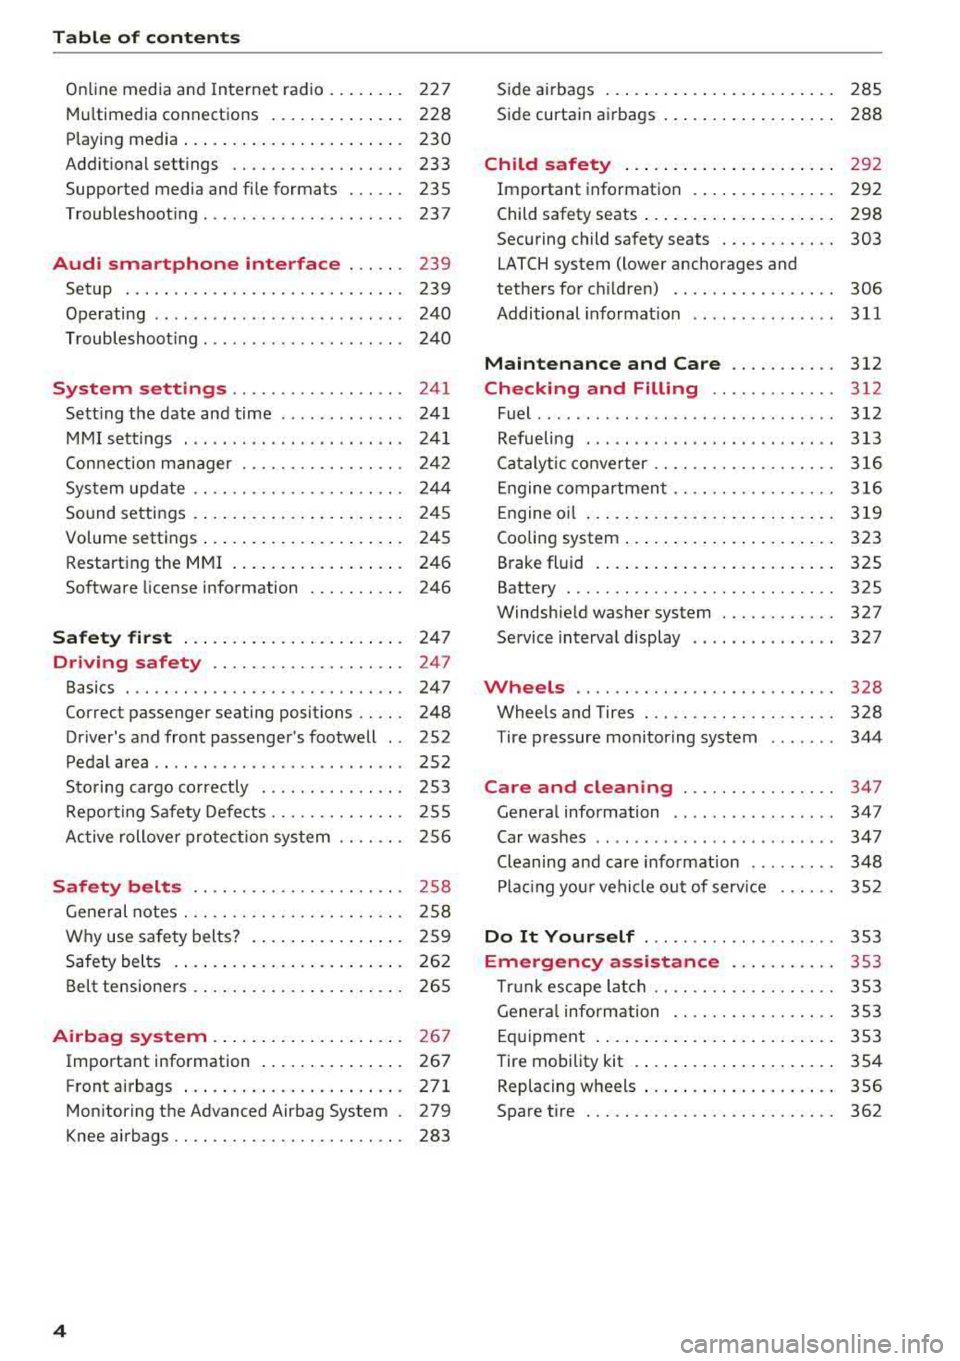
Table of content s
Online media and Internet radio . . . . . . . . 227
Mu ltim edia connections . . . . . . . . . . . . . . 228
Playing media . . . . . . . . . . . . . . . . . . . . . . . 230
Addit ional se ttings . . . . . . . . . . . . . . . . . . 233
Supported media and file formats . . . . . . 235
Troubleshoot ing ................. ... . 237
Audi smartphone interface . . . . . . 239
Setup . . . . . . . . . . . . . . . . . . . . . . . . . . . . . 239
Operating . . . . . . . . . . . . . . . . . . . . . . . . . . 240
Troubleshoot ing . . . . . . . . . . . . . . . . . . . . . 240
System settings . . . . . . . . . . . . . . . . . . 241
Sett ing the date and time . . . . . . . . . . . . . 24 1
MMI se ttings . . . . . . . . . . . . . . . . . . . . . . . 241
Con nection ma nager . . . . . . . . . . . . . . . . . 242
System update . . . . . . . . . . . . . . . . . . . . . . 244
Sound settings . .... .. ..... ... .. .. .. .
Volume settings .... .. ..... ... .. .. .. .
Restarting the
MMI . .. ..... ... .. .. .. .
Software license information 2
4 5
245
246
246
Safety first . . . . . . . . . . . . . . . . . . . . . . . 247
Driving safety . . . . . . . . . . . . . . . . . . . . 247
Basics . . . . . . . . . . . . . . . . . . . . . . . . . . . . . 247
Correct passenger seating positions . . . . . 248
Driver 's and front passenger's footwell . . 252
Pedal area . . . . . . . . . . . . . . . . . . . . . . . . . . 252
Sto ring cargo co rrectly . . . . . . . . . . . . . . . 253
R epo rting Safety Defects . . . . . . . . . . . . . . 255
Ac tive rollove r prote ct io n system 256
Safety belts . . . . . . . . . . . . . . . . . . . . . . 258
Gene ral notes . . . . . . . . . . . . . . . . . . . . . . . 258
W hy use safety belts? . . . . . . . . . . . . . . . . 259
Safety belts . . . . . . . . . . . . . . . . . . . . . . . . 262
Belt tensione rs . . . . . . . . . . . . . . . . . . . . . . 265
Airbag system . . . . . . . . . . . . . . . . . . . . 26 7
Important information . . . . . . . . . . . . . . . 267
Front airbags ... ... ... .... ... .. .. .. . 271
Mon itor ing the Advanced Airbag System . 279
K nee airbags . . . . . . . . . . . . . . . . . . . . . . . . 283
4
S ide a irbags . . . . . . . . . . . . . . . . . . . . . . . . 285
Side curtain airbags . . . . . . . . . . . . . . . . . . 288
Child safety . . . . . . . . . . . . . . . . . . . . . . 292
Important information . . . . . . . . . . . . . . . 292
Child safety seats . . . . . . . . . . . . . . . . . . . . 298
Securing child safety seats . . . . . . . . . . . . 303
LATCH system (lower anchorages and
tethers for c hildren) . . . . . . . . . . . . . . . . . 306
Additional informat ion ........ ..... .. 311
Maintenance and Care ........... 312
Checking and Filling . . . . . . . . . . . . . 312
Fuel ......... .... ... ............... 312
Refueling . . . . . . . . . . . . . . . . . . . . . . . . . . 313
Ca talytic conve rter .. .. .. ........... .. 316
Engine compar tment .. ... .......... .. 316
Engine o il . . . . . . . . . . . . . . . . . . . . . . . . . . 3 19
Cooling system . . . . . . . . . . . . . . . . . . . . . . 323
Brake fluid . . . . . . . . . . . . . . . . . . . . . . . . . 325
Battery . . . . . . . . . . . . . . . . . . . . . . . . . . . . 325
Windshie ld washer system . . . . . . . . . . . . 327
Service interva l display 327
Wheels .... .. . ... .. .. ........... .. 328
Wheels and Tires . . . . . . . . . . . . . . . . . . . . 328
Tire pressure monitoring system 344
Care and cleaning . . . . . . . . . . . . . . . . 347
Genera l information . . . . . . . . . . . . . . . . . 347
Car washes . . . . . . . . . . . . . . . . . . . . . . . . . 347
Cleaning and care informat ion . . . . . . . . . 348
Plac ing your vehi cle ou t of serv ice 352
Do It Yourself . . . . . . . . . . . . . . . . . . . . 353
Emergency assistance . . . . . . . . . . . 353
T ru nk escape la tch . . . . . . . . . . . . . . . . . . . 353
Genera l info rmation . . . . . . . . . . . . . . . . . 353
Eq uipment . . . . . . . . . . . . . . . . . . . . . . . . . 353
T ire mobility kit . . . . . . . . . . . . . . . . . . . . . 354
Replacing wheels . . . . . . . . . . . . . . . . . . . . 356
Spare t ire . . . . . . . . . . . . . . . . . . . . . . . . . . 362
Page 20 of 400
Cockpit over view
Resetting values to zero
Req uirement: the Fuel consumption , Short- term
m emor y or Long-term memo ry
display must be
selected .
~ To reset the value for the respective memo ry to
zero, press and hold the left th umbwheel
Q)
c:> page 13, fig. 7 on the m ultifunction steering
whee l for one second. Or
~ On the multifunction steering whee l, select:
the right control button
> Re set values *.
Adjusting th e additional di splay
~ On the m ultif unct ion steer ing whee l, select the
right control button
> Additional di sp la y .
~ Se lect the desired additiona l display.
Opening the vehicle funct ions
~ Open the first Vehicle tab (trip computer) using
the
l<1 t>I button on t he mult if u nct ion steer ing
whee l.
The fo llow ing displays a re available, depending
on vehicle equipmen t:
- Date and
time ¢ page 241
-Plug- in hybrid drive : Range c:> page 99
- Average consumption
- Short-term memory overview
- Long-term memory overview
- Energy cons umers
c:> page 18
- Driver assistance ¢ page 123
The short-term memory collects driving informa
tion from the t ime the ignition is switched on un
til it is switc hed off. If you cont inue driv ing with
in two hours after switching the ignition off, the
new values are in clu ded when calculat ing the cur
rent tr ip informat ion.
Unlike the short-term memory, the long-term memory is not erased automat ica lly . You can se
lect the time period fo r evaluat ing trip informa
tion you rself .
Fuel consumption
The cu rrent fuel consumption can be shown us
ing a bar graph
c:> fig. 14 . The average consump
tion stored in the short-te rm memory is also dis-
18
played. If the bar is green, your vehicle is saving
fuel through the following function:
- Re cup eration : electrical energy can be stored in
the vehicle battery when the vehicle is coast ing
or dr iving downh il l. T he bar will move toward
0.
Energy consumers*
The Energ y consum ers v iew lists othe r equip
ment that is cu rrent ly affecting fue l cons ump
tion . The d isplay shows up to three energy con
s u mers . The equipment using the most power is
li sted first . If more than three items using power
are switched on, the equipment that is current ly
us ing the most power is displayed. A chart also
shows you the current total of all other consum
ers .
(D Tips
The date, time of day and time and date for
mat can be set in the Infota inment system
¢ page 241.
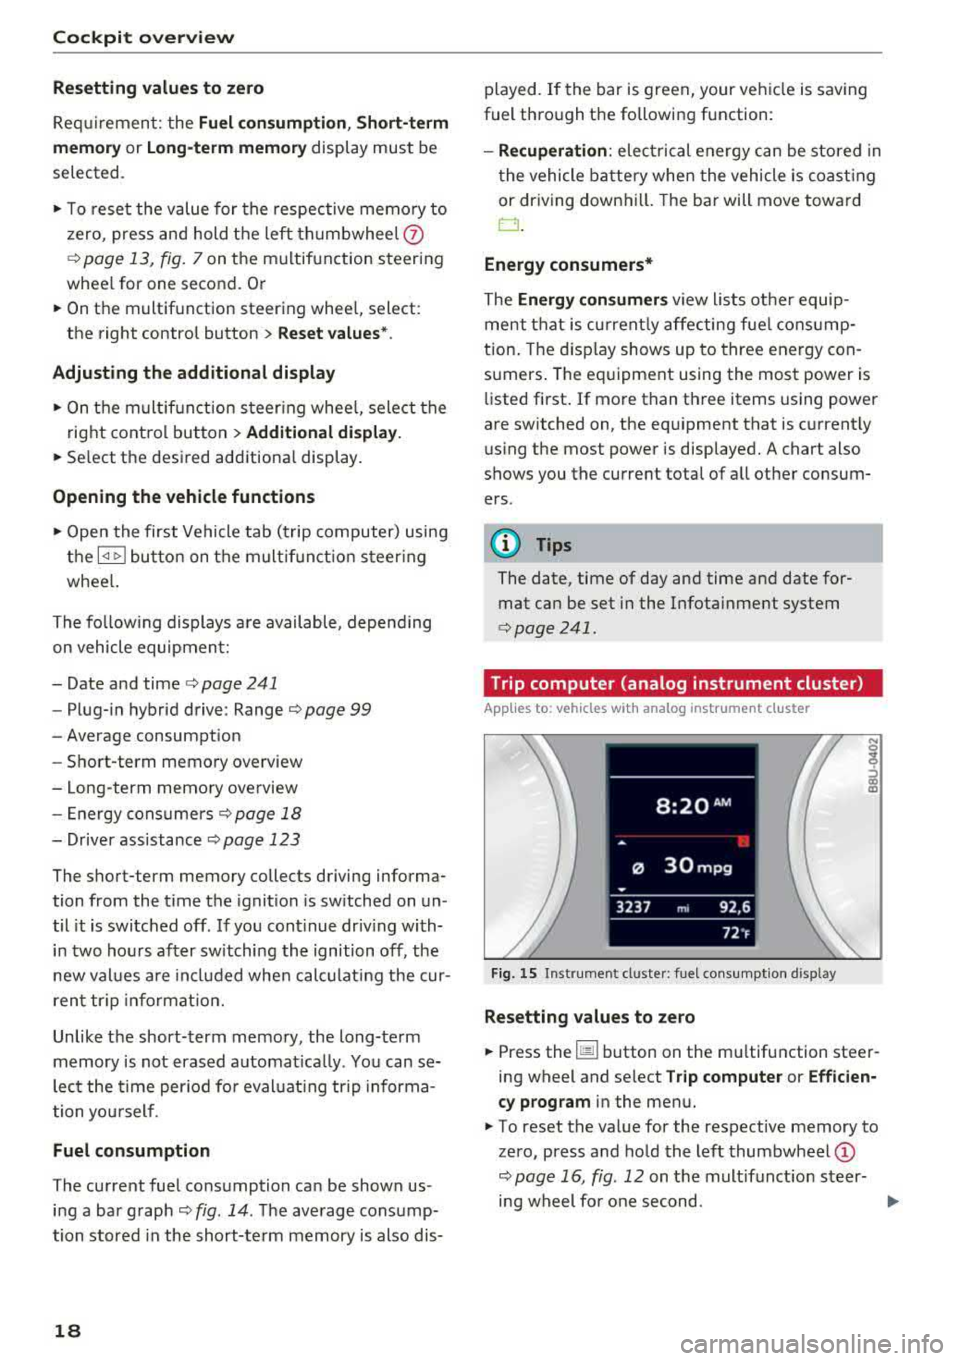
· Trip computer (analog instrument cluster)
Applies to: vehicles with analog instrument cluster
Fig. 15 Inst rument cluster : fuel consumpt ion d isp lay
Resetting values to zero
~ Press the 1§11 button on the mu ltifunction steer
ing wheel and se lect
Tr ip computer or Efficien
c y prog ram
in the menu.
~ To reset the value for the respective memory to
zero, press and hold the left
thumbwheel @
c:>page 16, fig. 12 on the multifunct io n steer-
ing wheel fo r one second.
..,.
Page 27 of 400
CXl CXl .... N ,.__
N .... 0 N > 00
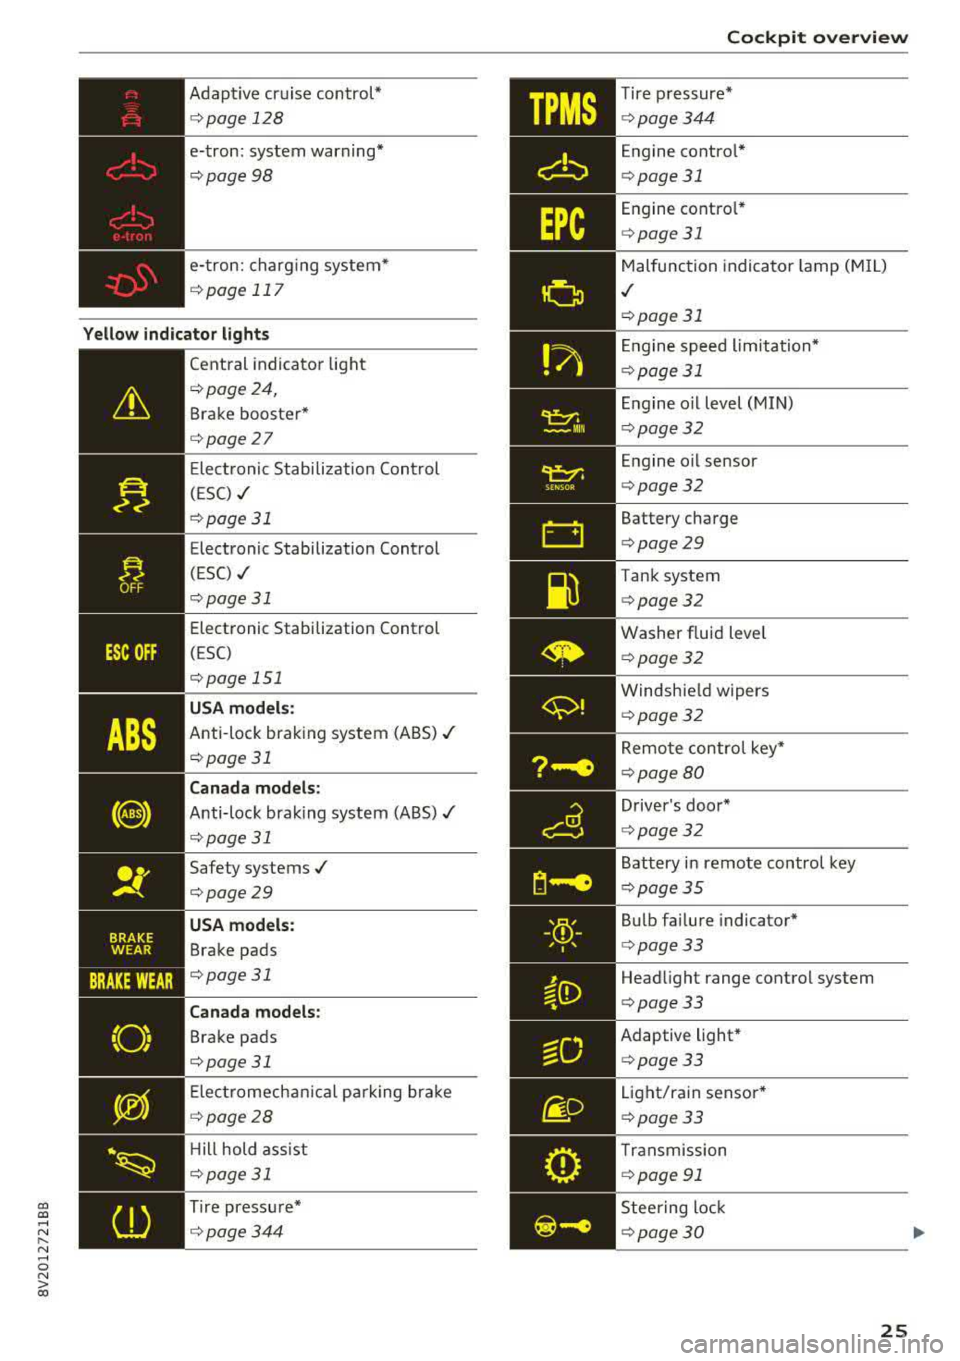
Adaptive cr uise control*
¢ page 128
e-tron: system warning *
¢page98
e- tron: charg ing system*
¢ page 117
Yellow indicator lights
--------------
Cent ral indicato r light
¢page 24,
Brake booster*
¢page27
Ele ct ronic Stabi lization Con trol
( E SC)
./
¢ page 31
Electronic Stabilization Control
(ESC)
./
¢ pag e 31
Elect ronic Stabilization Control
(ESC)
opage 151
USA models:
Anti-loc k bra king system (ABS) ./
¢page 31
Canada models :
Anti-lock bra king system (A BS)./
¢ page 31
Safety systems ./
¢page29
USA models:
Brake pads
. , ¢page31
Canada models :
Brake pads
¢page31
Ele ctr omech anical pa rk ing bra ke
¢ page28
Hill hold ass ist
¢ page 31
Tire press ure*
¢ page344
Cockpit o verview
Tire p ressure*
¢ page 344
Engine contro l*
¢ page 31
Engine co ntro l*
¢ page 31
Malfunc tion indica to r l amp (M IL)
./
¢ page 31
En gine speed limitation*
¢page 31
En gine o il level (MIN)
¢ page 32
En gine o il sensor
¢ page 32
Battery charge
¢page 29
Tank system
¢page 32
Washer f lu id level
¢ page 32
Windsh ie ld w ipers
¢ page 32
Remo te contro l key*
¢ page 80
D river 's doo r*
¢ page 32
Battery i n remote control key
¢ page35
Bu lb fa ilure indicator*
¢ page 33
Head light range control system
¢ page 33
Adaptive light *
¢page 33
Lig ht/rain senso r*
¢page 33
Transmission
¢ page 91
Stee ring lock
¢ page 30
25
Page 31 of 400
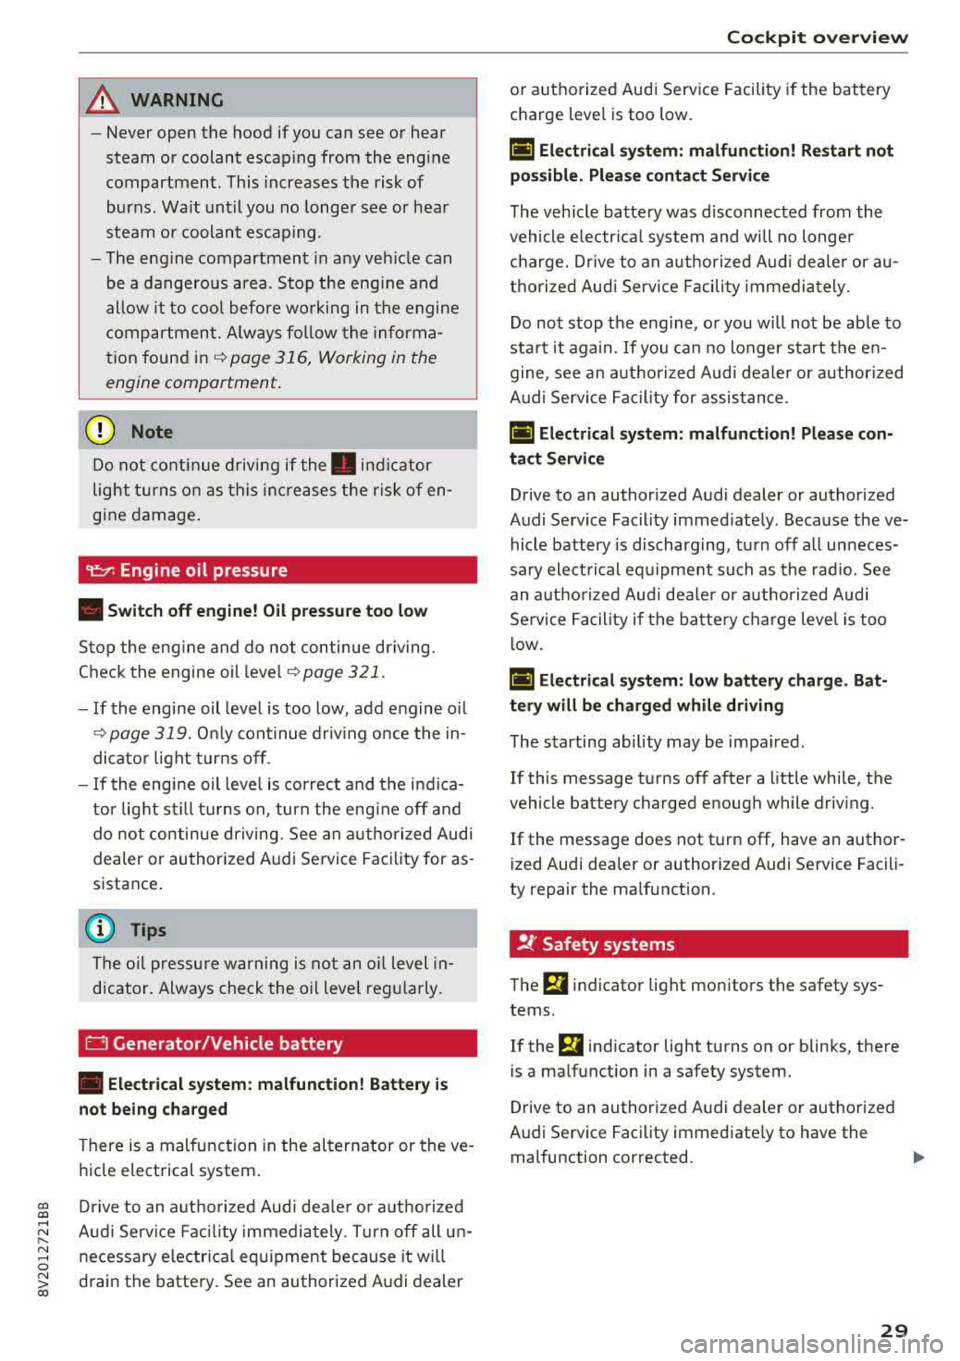
A WARNING 1=
- Never open the hood if you can see or hear
steam or coolant escap ing from the engine
compartment. This increases the risk of
burns . Wa it until you no longer see or hea r
steam o r coolant escap ing .
- The e ngine compartment in any veh icle can
be a dangerous area. Stop the eng ine and
allow it to cool before wo rking in the engine
c ompar tment. A lways fo llow the informa
t ion found in
r=:> page 316, Working in the
engine comportment .
(D Note
Do not co nti nu e d riving if t he . ind icator
light t urns o n as this increases the risk of en
gine damage .
~ Engine oil pressure
• Switch off engine! Oil pre ssure too low
Stop the eng ine and do not continue driving.
Check the engine oil leve l r=:> page 321.
-If the engine oil level is too low, add engine o il
r=:> page 319. Only cont inue dr iv ing o nce the in
dicato r light turn s off.
- If the engine oil level is correct and the indica
tor light st ill tur ns on, turn the eng ine off and
do not con tinue driving. See an a utho rized Aud i
dealer or author ized A udi Service Facility for as
sistance .
(D Tips
The oil pressure w arning is not an o il level in
dicator. Always check the oil level regu la rly.
0 Generator/Vehicle battery
• Ele ctrical system: malfunction! B atter y is
not being charged
There is a malfunction in the alternator or the ve
h icle electrical system .
cc Drive to an authorized Aud i dea le r or a uthorized CXl
~ Aud i Service Fac ility immediately . Tur n off all u n-
~ necessary electr ica l equipment because it w ill 0
~ drain the battery. See an authorized Audi dealer 00
Cockpit o ve rv iew
or authorized Audi Service Facility if the battery
charge level is too low.
(•] Electri cal sy stem: malfun ction! Re start not
po ssible. Plea se cont act Servi ce
T he vehicle battery was disconnected from the
vehicle e lectr ica l system and will no longer
c h arge. Dr ive to an a uthorized Aud i dea ler or au
thorized Audi Serv ice Facili ty immedia tely.
Do not stop t he eng ine, o r you w ill not be ab le to
sta rt it again.
If you can no longer start the en
gine, see an a uth o rized Aud i dea ler or authori zed
A udi Service Facility for assis tance .
(•j Electrical system: malfunction! Plea se con
tac t Service
Drive to an authorized Audi dealer or authorized
Audi Se rvice Facility immed iately. Because the ve
hicle battery is discharging, tu rn off a ll unneces
sa ry elect rical eq uipment such as the rad io. See
an a uth orized Aud i dea le r or a uth orized Aud i
Service Facility if the batte ry charge leve l is too
l ow .
(•] Electrical system: low battery charge . Bat
tery will be charged while driving
T he starting ab ility may be impa ired .
If this message t urns off after a little whi le, the
vehicle battery charged enough while driving.
If the message does not turn off, have an author
ized Audi dea ler or authorized Audi Service Facili
ty repair the malfunction .
!f Safety systems
The fll indicator light monitors the safety sys
tems .
If the
fll ind icator light turns on or blinks, there
is a ma lfunction in a safety system .
Drive to an authorized A udi dealer or authorized
Audi Se rvice Facility immediate ly to have the
malfunction corrected.
.,,.
29
Page 32 of 400
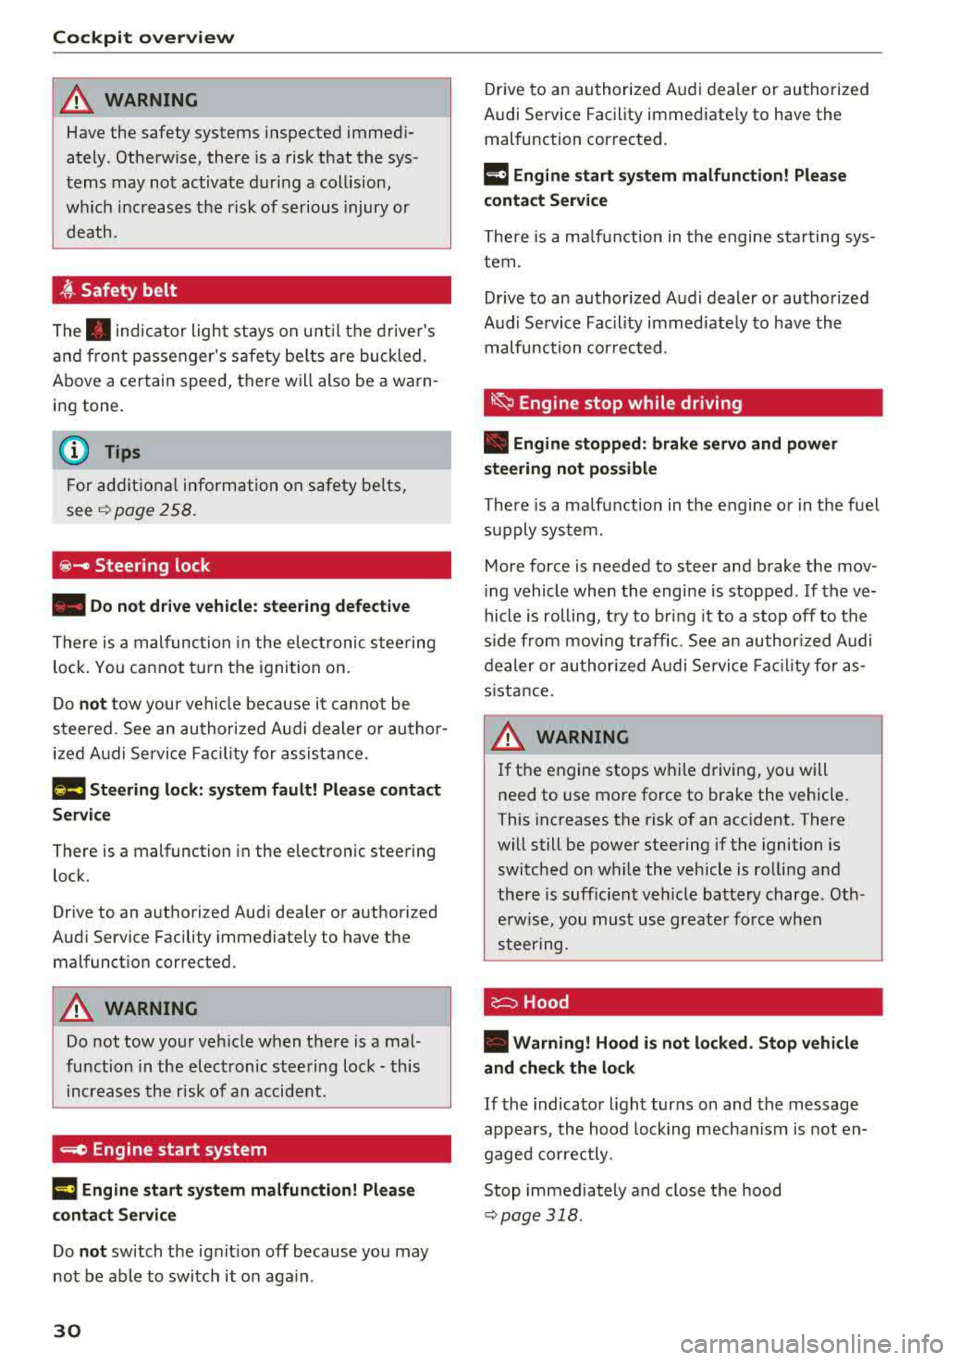
Cockpit over view
A WARNING
Have the safety systems i nspected immed i
ately . Otherw ise, there is a risk that the sys
tems may not activate during a collision,
wh ich increases the risk of serious injury or
death.
~ Safety belt
The . indicator light stays on unti l the d rive r's
and fron t passenger's safety be lts are buckled .
Above a certain speed, there will also be a wa rn
ing tone.
(D Tips
For add it iona l information on safety be lts ,
see
~ page 258.
@ -Steering lock
• Do not d rive vehicle: steering defecti ve
There is a malfunc tion in the elect ronic stee ring
loc k. You ca nnot t urn the ignition on .
D o
not tow your veh icle because it cannot be
steered . See an authorized A udi dealer or au tho r
i z ed A udi Servi ce Fa cili ty for assistance.
1;11 Steering lock: sy stem fault! Pleas e contact
Servic e
There is a malfunction in the elec tronic steering
lock .
Drive to an a uthor ized Audi dea ler or authori zed
Aud i Serv ice Fa cili ty immediately to have the
malfunct io n corrected.
A WARNING
Do not tow your veh icle when there is a mal
function in the electronic stee ring lock
-this
increases the risk of an accident.
....e Engine start system
M ·I t-:ngin e start system ma lfun ction! Plea se
c ontact Servic e
Do not switch the ignit ion off because you may
not be able to switc h it o n aga in .
30
Drive to an au thorized A udi dealer or authori zed
Audi Se rvice Facility immediate ly to have the
malfunction corrected.
IIJ Engine s tart system malfunction! Plea se
contact Service
There is a ma lf u nction in the engine sta rting sys
tem.
Drive to an authorized Audi dealer or authorized
Audi Se rvice Facility immed iate ly to have the
malfunction corrected .
~ Engine stop while driving
• Engine stopped: brake servo and power
steering not po ssible
There is a ma lfunction in the engine or in t he fuel
s u pp ly system.
More force is needed to steer and brake the mov
i ng vehicle whe n the engi ne is stopped . If the ve
hicle is rolling, t ry to bring it to a stop off to the
s ide from moving traffic. See an author ized Audi
dealer or authori zed A udi Service Fac ility for as
s istance .
A WARNING -
If the engine stops while driving, you will
need to use more force to brake the vehicle.
This increases the risk of an acc ident . There
will still be powe r steering if the ignition is
switched on while the vehicle is ro lling and
there is suff ic ient veh icle battery charge . Oth
e rw ise, you must use greate r force when
steering .
c:::::::> Hood
• Warning! Hood i s no t lo cked. Stop vehicle
and che ck the lo ck
If the indicator light turns on and the message
appears , the hood lock ing mechan ism is not en
gaged co rrectly .
Stop immediately and close the hood
~ page 318 .
Page 37 of 400
a, a, ..... N
" N ..... 0 N > 00
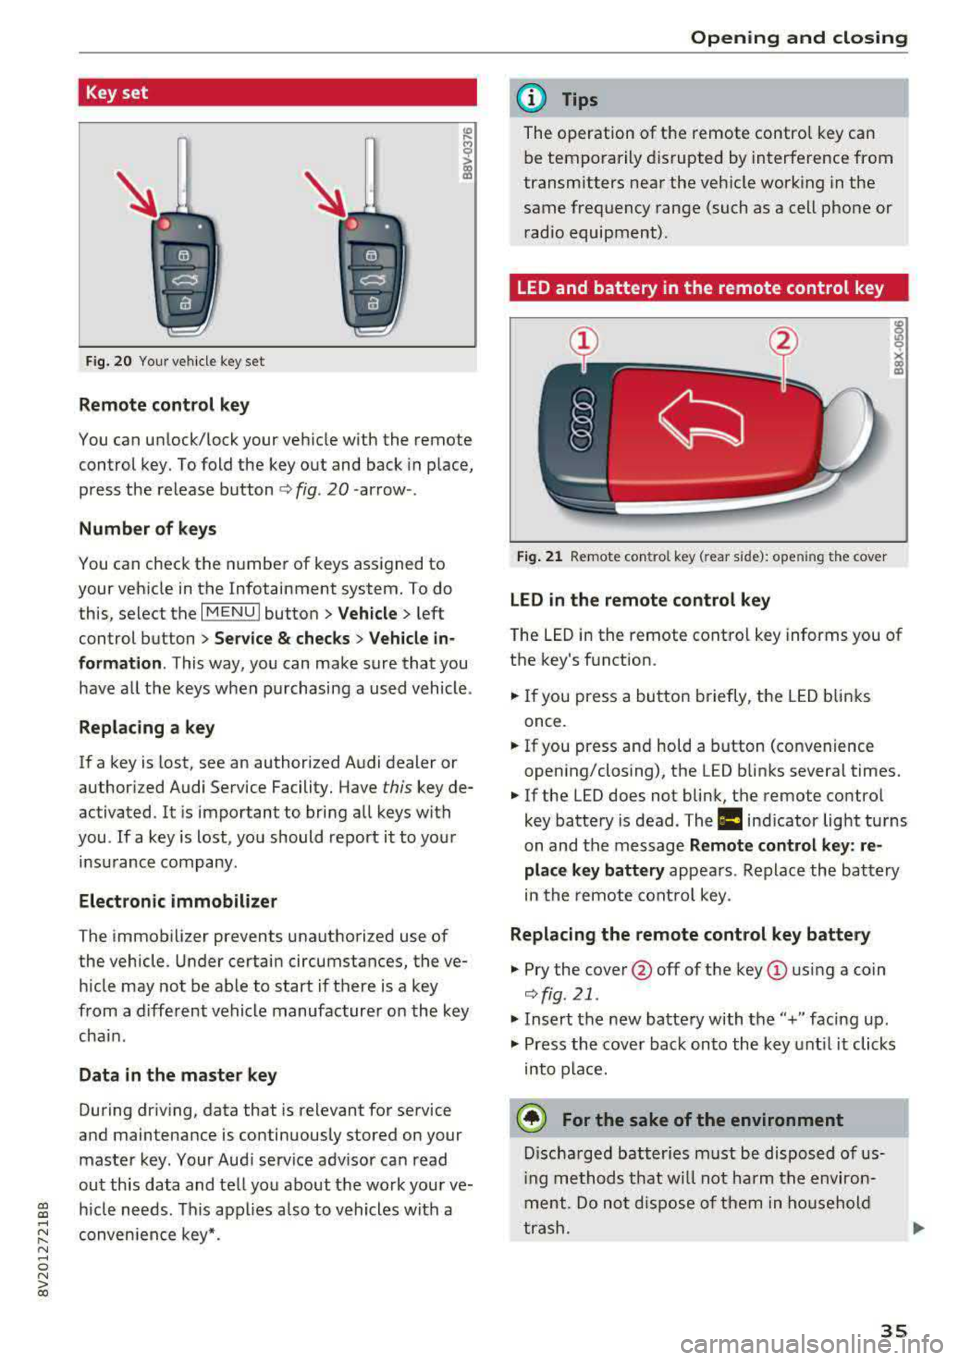
Key set
Fig. 2 0 Your vehi cle key se t
Remote control key
You can un lock/lock your veh icle with the remote
control key. To fold the key out and back in p lace,
p ress the release
b utton <=> fig. 20 -arrow -.
Number of keys
You can check the numbe r of keys ass igned to
your vehicle in the Infotainment system. To do
this, select the
I MENU I button > Vehicle > left
control button
> Service & checks > Veh icle in
formation .
This way, you can make sure that you
have a ll the keys w hen p urchasing a used vehicle .
Replacing a key
If a key is lost, see an author ized A udi dealer or
author iz ed Audi Service Facility. Have
this key de
ac tivated . It is important to bring all keys with
you .
If a key is lost, you should report it to your
in surance company.
Electronic immobilizer
The immob ilizer prevents unauthori zed use of
the vehicle . U nder certain circumstances, the ve
hi cle may not be able to start if there is a key
from a different vehicle manufacture r o n the key
cha in.
Data in the master key
During dr iv ing , data that is relevant for se rvice
and maintenance is continuously stored on your
maste r key . Your Aud i service adv isor can read
out th is data and te ll yo u about the work your ve
h icle needs. This app lies a lso to vehicles with a
conven ience key*.
Open ing and closing
(D Tips
The operation of t he remote contro l key ca n
b e temporarily disrupted by interference from
transmitters near the veh icle work ing in the
same frequency range (such as a cell pho ne or
r ad io equipment).
LED and battery in the remote control key
Fig. 21 Re mote co ntro l key (rear s ide): ope ning the cover
LED in the remote control key
T he LED in the remote cont ro l key informs you of
the key's function.
.,. If you press a bu tto n briefly, t he LED b link s
once .
.. If you press and hold a button (convenience
open ing/closing), the LED b links severa l times.
.. If the LED does not blin k, the remote control
key batte ry is dead. The
la ind icator lig ht tu rns
on and t he message
Remote control key : re
place key battery
appea rs . Re place th e ba ttery
in the remote cont ro l key .
Replacing the remote control key battery
.. Pry the cove r@ off of the key (!) usi ng a coin
<=> fig. 21 .
.. Insert the new batte ry with the" +" faci ng up .
.,. Press the cove r bac k on to the key unt il it clicks
into p la ce.
@ For the sake of the environment
D isc ha rge d batt er ies must be di sp osed of us
i ng methods t hat w ill not harm t he env iro n
me nt. Do not dispos e of th em in hous ehol d
t ras h .
35
Page 38 of 400
Opening and closing
@ Tips
The replacement battery must meet the same
specifications as the orig inal battery in the re
mote control key.
Synchronizing the remote control key
The remote control key must be synchronized if
the vehicle does not lock/unlock with the remote
control.
• Press the remote control key button [@].
• Insert the key in the driver's door lock within 30
seconds¢
page 38 .
• Press the !ill button or~ button.
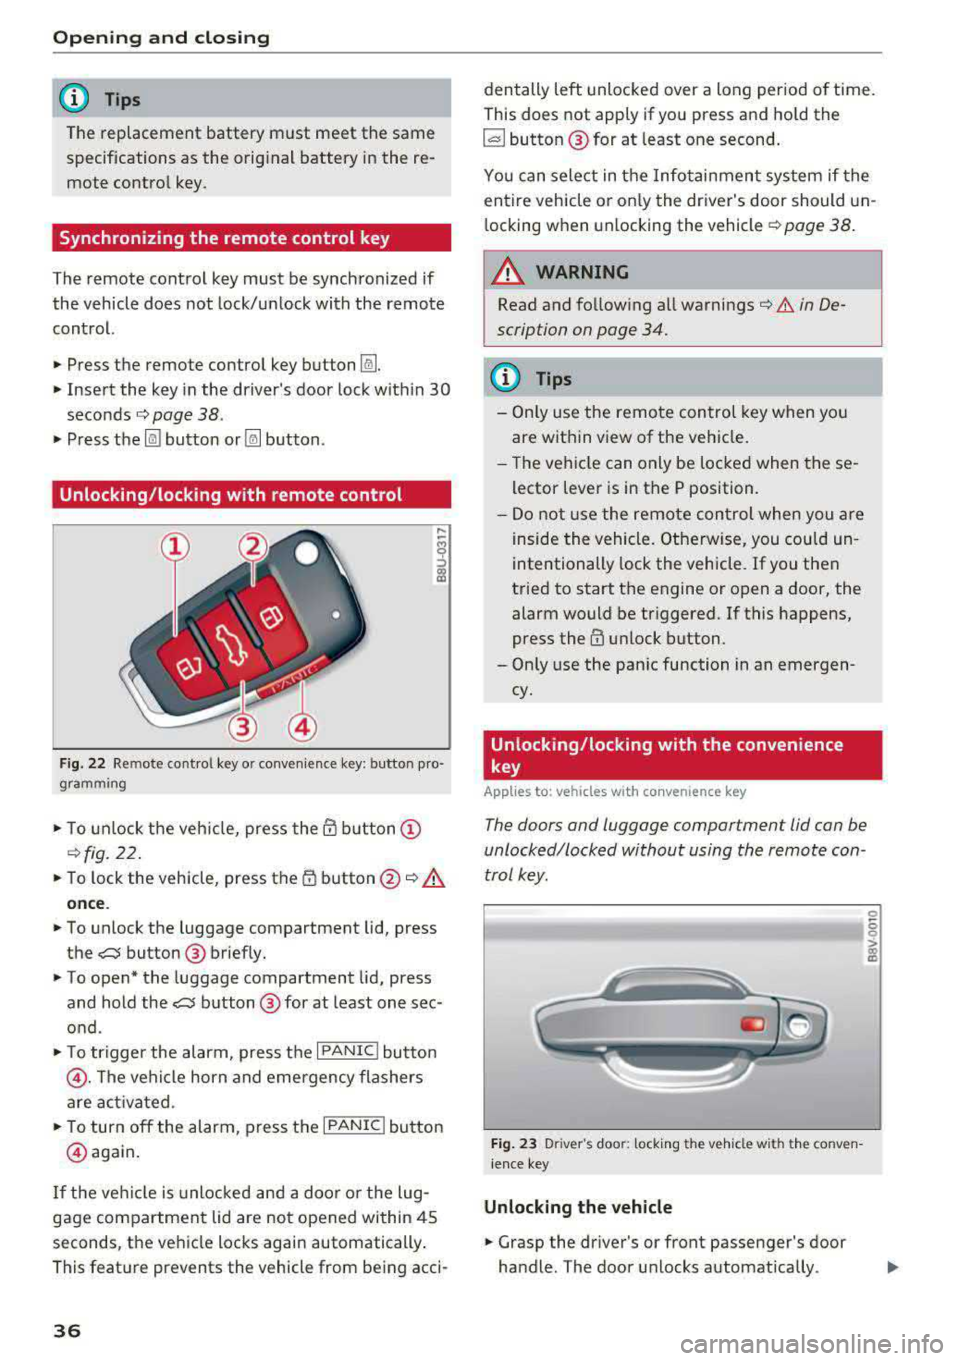
Unlocking /locking with remote control
Fig . 22 Remote contro l key or conven ience key: button pro
gramming
• To unlock the vehicle, press the @ button @
¢fig. 22.
• To lock the vehicle, press the 1D button @~.&.
once .
• To unlock the luggage compartment lid, press
the
,c::j button @ briefly.
• To open* the luggage compartment lid, press
and hold the
,c::j button @ for at least one sec
ond .
• To tr igger the alarm, press the I PANIC I button
@ . The vehicle horn and emergency flashers
are activated .
• To turn off the alarm, press the I PANIC ! button
@ aga in.
If the vehicl e is unlocked and a door o r the lug
gage compartment lid are not opened within 45
seconds, the vehicle locks again automatically .
This feat ure prevents the vehicle from being acci-
36
den tally left unlocked over a long period of time.
This does not apply if you press and hold the
~button ® for at least one second.
You can select in the Infotainmen t system if the
entire vehicle or on ly the driver's door should un
l ocking when unlocking the vehicle ¢
page 38.
A WARNING
Read and fo llowing all warnings¢ .& in De
scription on page 34.
(D Tips
-Only use the remote control key when you
are within view of the veh icle.
-Th e vehicle can only be locked when the se
lector lever is in the P position.
- Do not use the remote control when you are
inside the vehicle. Otherwise, you could un
intentionally lock the vehicle. If you then
tried to start the engine or open a door, the
alarm would be triggered. If this happens,
press
the@ unlock button.
-Only use the panic function in an emergen
cy.
Unlocking /locking with the convenience
key
App lies to: vehicles wit h co nvenience key
The doors and luggage compartment lid can be
unlocked/locked without using the remote con
trol key.
Fig. 23 Driver's door: lock ing t he ve hicle w ith th e conve n
i ence key
Unlocking the vehicle
• Grasp the driver's or front passenger's door
handle. The door unlocks automatically .
-
0
6
I
Page 39 of 400
a, a, ..... N
" N .... 0 N > 00
"'Pull on the door handle to open the door.
Locking the vehicle
"'Place the selector lever in the P position (auto
matic transmissions), or e lse the vehicle will
not be able to lock.
"'To lock the vehicle, close the door and touch
the sensor on the door handle
once ¢ fig. 23,
¢_& .Do not hold the door hand le while doing
this.
Unlocking and locking the vehicle can only be
done at the front doors . The remote contro l key
cannot be more than approx imately 5 ft ( 1.5 m)
away from the door handle. It makes no differ
ence whether the remote control key is in you r
jacket pocket, purse or br iefcase .
If you hold the door handle while locking, this
can impair the locking function .
The door cannot be opened for a br ief period di
rect ly after locking it. This allows you the oppor
tunity to check that the driver's door is locked .
The settings in the Infotainment system deter
mine if the enti re vehicle or only one of the doors
is unlocked when unlocking the vehicle
¢page 38.
A WARNING
Read and following all warnings ¢ A in De
scription on page 34.
(!j) Tips
If your vehicle is left stand ing for a long peri
od of time, note the following:
-The proximity sensor switches off after a
few days to save energy. You then have to pull once on the door handle to unlock the
vehicle and a second time to open it.
-The energy management system gradually turns off unnecessary convenience functions
to prevent the vehicle battery from draining
and to maintain the vehicle's ab ility to start
for as long as possib le . You may not be able
to unlock your vehicle using the convenience
key.
-
Open ing and closing
Central locking switch
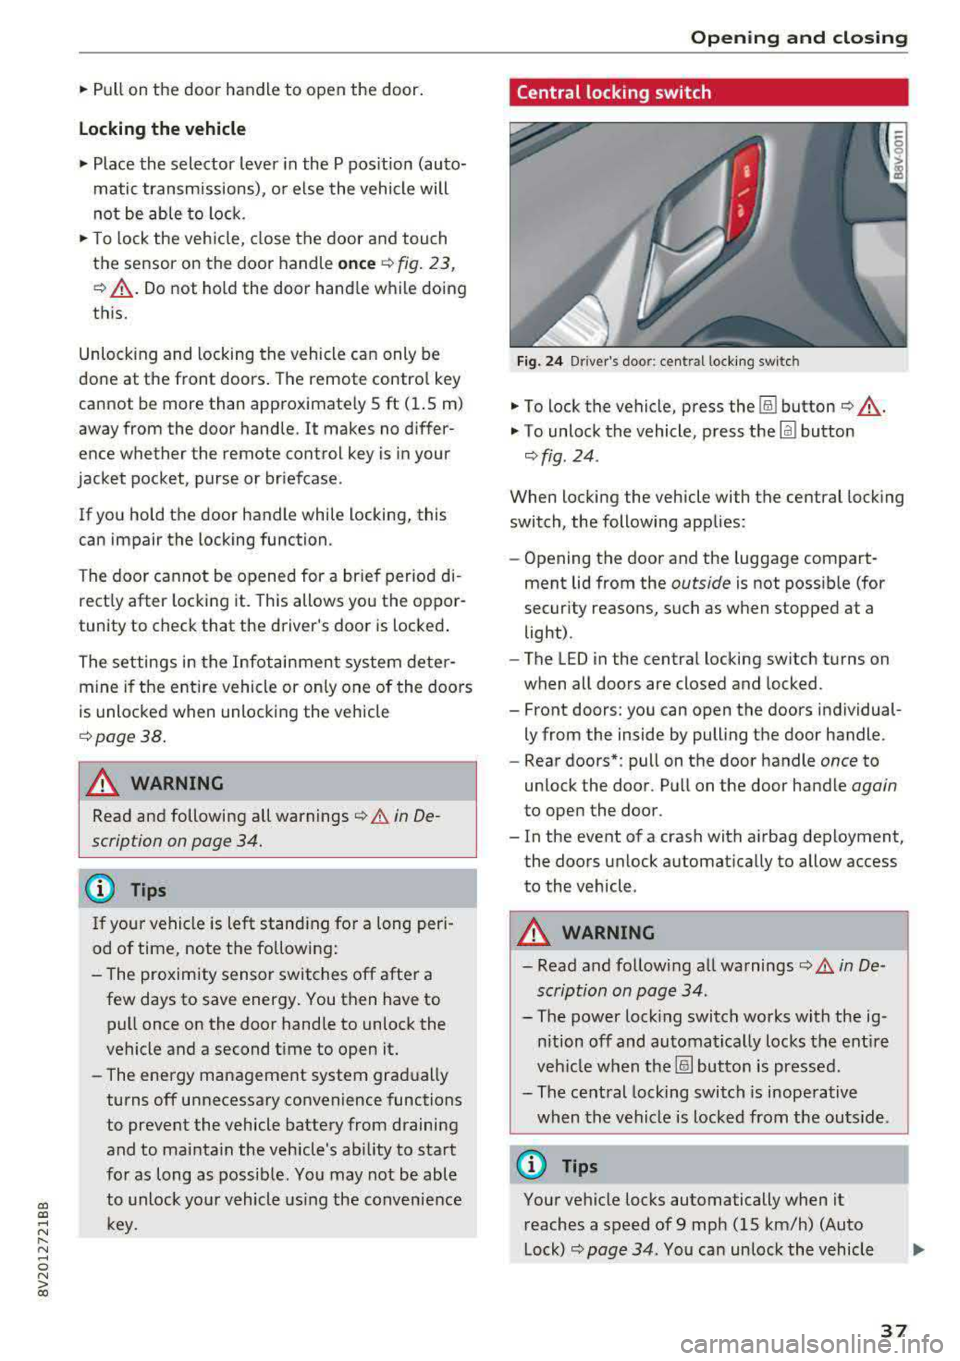
Fig. 24 Drive r's doo r: centra l lock ing switc h
"'To lock the vehicle, press the !ill button ¢_& .
"'To unlock the vehicle, press the Im button
¢ fig . 24.
When locking the vehicle with the central locking
switch, the following applies:
-Opening the door and the luggage compart
ment lid from the
outside is not possible (for
security reasons, such as when stopped at a
light) .
- The L ED in the central locking sw itch turns on
when all doors are closed and locked.
- Front doors: you can open the doors individual ly from the inside by pulling the door handle.
- Rear doors*: pull on the door handle
once to
unlock the door . Pull on the door handle
again
to open the door .
- In the event of a crash with airbag deployment, the doors unlock automatically to allow access
to the vehicle.
A WARNING
-- Read and following all warnings¢ A in De-
scription on page 34 .
- The power locking switch works with the ig
nition off and automatical ly locks the entire
veh icle when the[§] button is pressed.
- The central locking switch is inoperative
when the vehicle is locked from the outs ide.
@ Tips
Your vehicle locks automatically when it
reaches a speed of 9 mph (15 km/h) (Auto
Lock) ¢
page 34. You can unlock the vehicle
37
Page 47 of 400
a, a, ..... N
" N ..... 0 N > 00
-When operating the power top, visibility to
the rear is limited. Avoid operating the top
while driving in reverse.
(D Note
- To prevent damage to the power top:
- do not store any objects in the power top
storage compartment .
- make sure there is enough space above
the vehicle when opening or closing the
power top.
- To reduce the risk of damage, make sure
there are no sensit ive objects in the power
top storage compartment's range of mo
tion.
(D Tips
- To prevent the vehicle battery from draining unnecessarily, do not open or close the pow
er top repeatedly when the engine is switch
ed off.
- A message will appear in the instrument
cluster if there is a malfunction in the powe r
top
¢ page 46 .
-The powe r top can also be operated manual
l y temporari ly if there is a malfunc tion
¢ page 48, Power top emergen cy opera
tion .
An authorized A udi dealer or author
ized Audi Service Facility should diagnose
and correct the cause of the ma lfunction as
soon as possible.
- If the vehicle is parked with the power top
open, the vehicle interior is not protected
from damaging weather or unauthorized ac
cess. lock any items you leave behind in the
luggage compartment. Close the power top
before leaving the vehicle .
- The side windows automat ically lower
slight ly when opening or closing the power
top.
P owe r top
Power top convenience opening/closing
Applies to: vehicles with power top
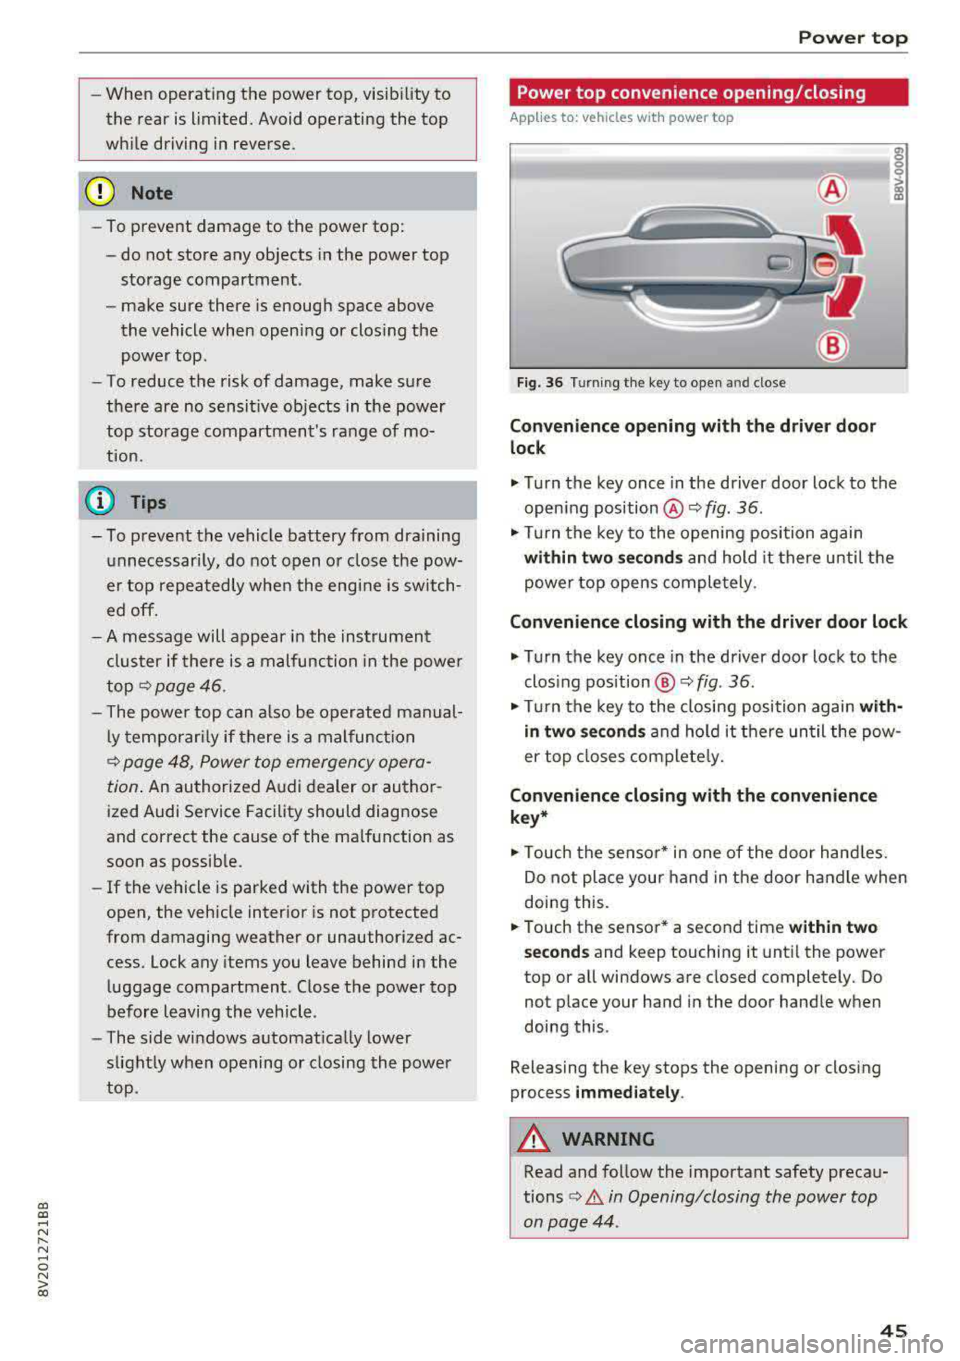
Fig. 36 Turning the key to open and close
Conven ie nce opening with the dri ver do or
lock
.,. Tu rn the key once in the driver door lock to the
open ing position @¢
fig. 36.
.,. Tur n the key to the opening position again
within tw o second s and hold it there until the
power top opens comple tely.
C onvenienc e closing with the driver door lock
.,. Turn the key once in the driver door lock to the
clos ing position @¢
fig. 36.
"Tu rn the key to the closing position again wit h
in two se co nd s
and hold it there until the pow
er top closes completely.
Con ven ienc e closing with the con venienc e
k ey *
.,. Touch the sensor* in one of the door hand les.
Do not place your hand in the door handle when
doing this.
.. Touch the sensor* a second time w ithin tw o
s ec ond s
and keep touching it until the power
top or all windows are closed completely. Do not place your hand in the door handle when
doing this .
Releasing the key stops the opening or closing
process
i mmed iatel y.
A WARNING
-
Read and follow the important safety precau-
tions
¢ A in Opening/closing the power top
on page 44 .
45