AUDI A4 1997 B5 / 1.G Seatbelts User Guide
A4 1997 B5 / 1.G
AUDI
AUDI
https://www.carmanualsonline.info/img/6/901/w960_901-0.png
AUDI A4 1997 B5 / 1.G Seatbelts User Guide
Trending: trunk, seat adjustment, ECU, airbag, tow, width, warning
Page 11 of 41
69-8
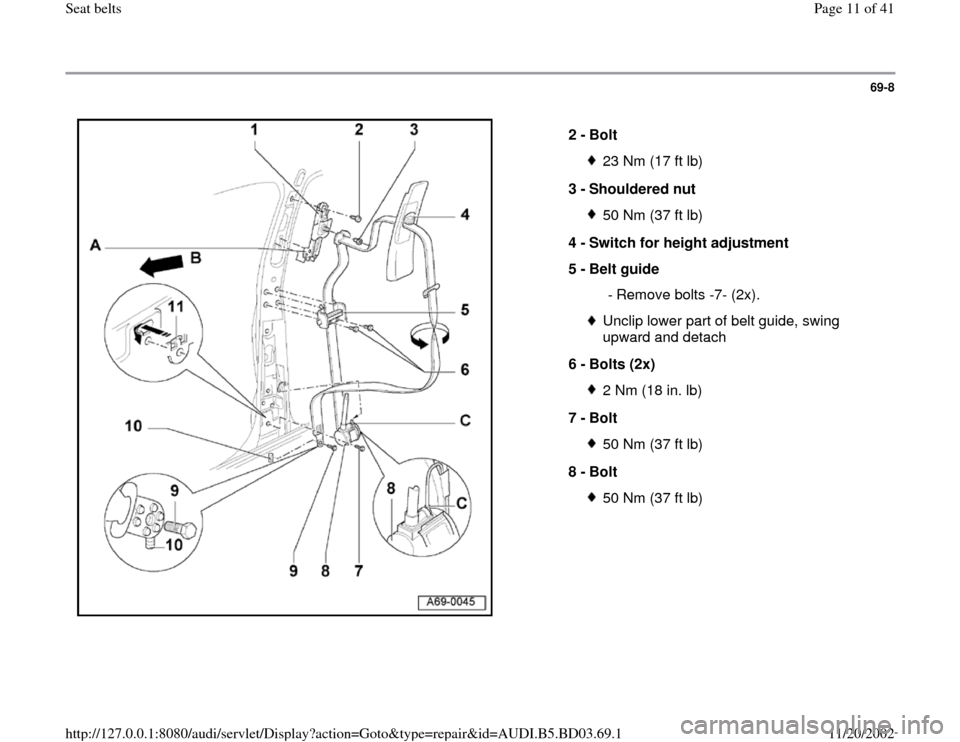
2 -
Bolt
23 Nm (17 ft lb)
3 -
Shouldered nut 50 Nm (37 ft lb)
4 -
Switch for height adjustment
5 -
Belt guide
- Remove bolts -7- (2x).Unclip lower part of belt guide, swing
upward and detach
6 -
Bolts (2x) 2 Nm (18 in. lb)
7 -
Bolt 50 Nm (37 ft lb)
8 -
Bolt 50 Nm (37 ft lb)
Pa
ge 11 of 41 Seat belts11/20/2002 htt
p://127.0.0.1:8080/audi/servlet/Dis
play?action=Goto&t
yp
e=re
pair&id=AUDI.B5.BD03.69.1
Page 12 of 41
69-9
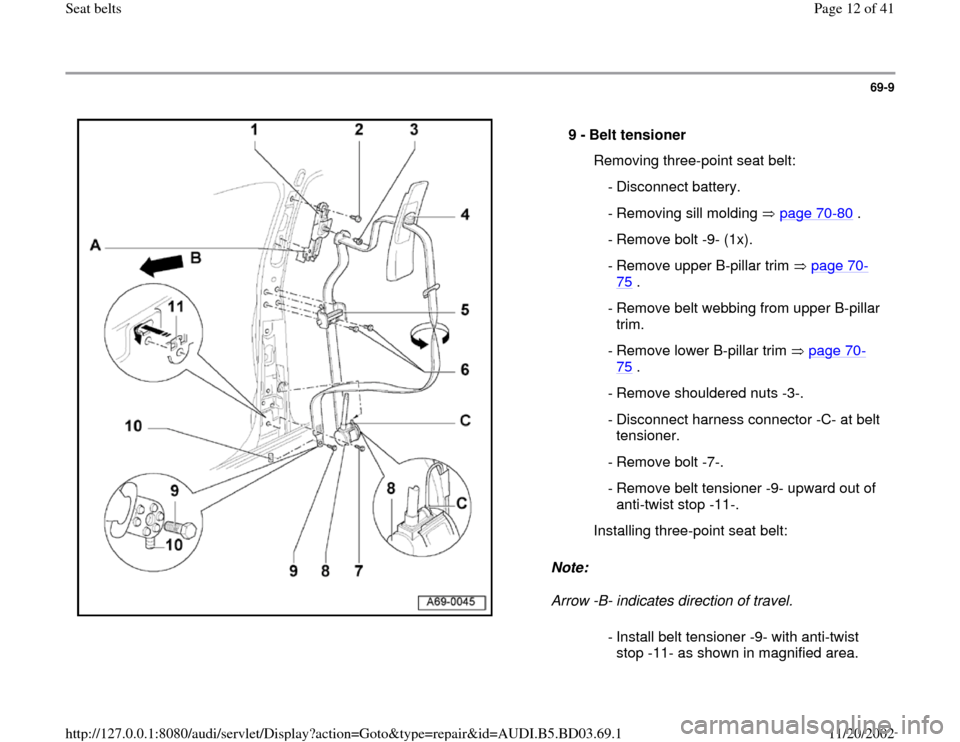
Note:
Arrow -B- indicates direction of travel. 9 -
Belt tensioner
Removing three-point seat belt:
- Disconnect battery.
- Removing sill molding page 70
-80
.
- Remove bolt -9- (1x).
- Remove upper B-pillar trim page 70
-
75
.
- Remove belt webbing from upper B-pillar
trim.
- Remove lower B-pillar trim page 70
-
75
.
- Remove shouldered nuts -3-.
- Disconnect harness connector -C- at belt
tensioner.
- Remove bolt -7-.
- Remove belt tensioner -9- upward out of
anti-twist stop -11-.
Installing three-point seat belt:
- Install belt tensioner -9- with anti-twist
stop -11- as shown in magnified area.
Pa
ge 12 of 41 Seat belts11/20/2002 htt
p://127.0.0.1:8080/audi/servlet/Dis
play?action=Goto&t
yp
e=re
pair&id=AUDI.B5.BD03.69.1
Page 13 of 41
-
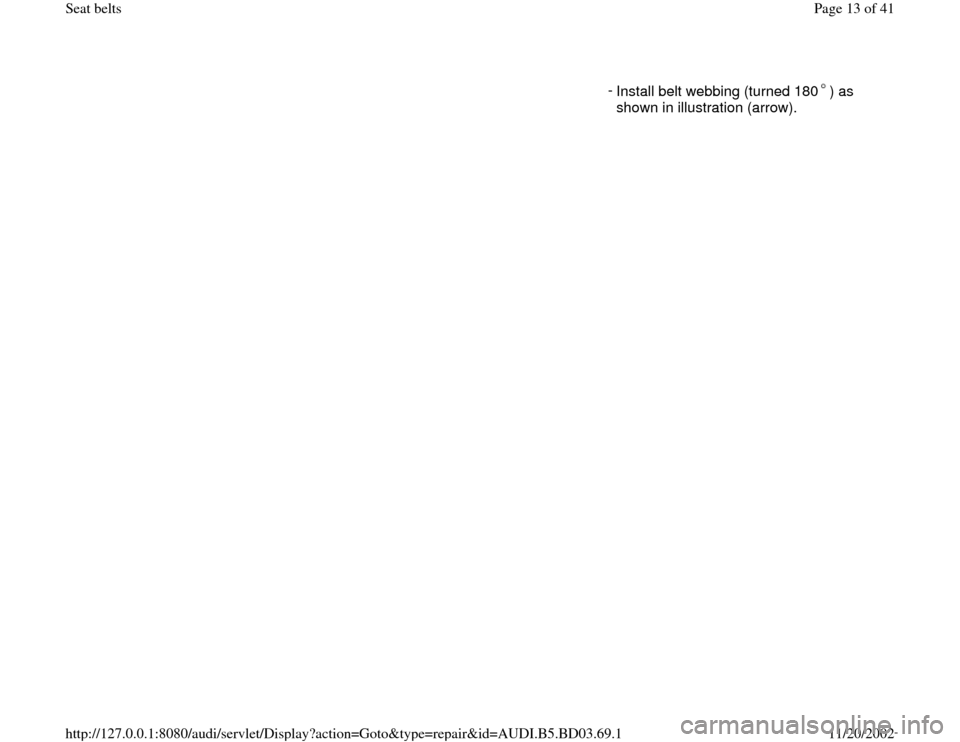
Install belt webbing (turned 180 ) as
shown in illustration (arrow).
Pa
ge 13 of 41 Seat belts11/20/2002 htt
p://127.0.0.1:8080/audi/servlet/Dis
play?action=Goto&t
yp
e=re
pair&id=AUDI.B5.BD03.69.1
Page 14 of 41
69-10
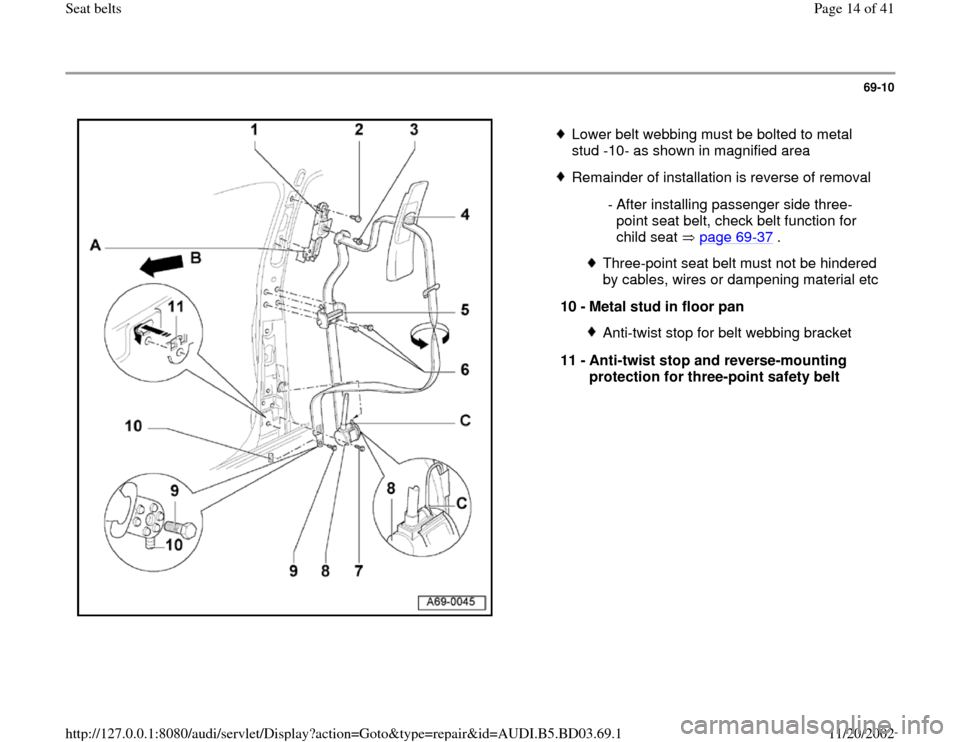
Lower belt webbing must be bolted to metal
stud -10- as shown in magnified area
Remainder of installation is reverse of removal
- After installing passenger side three-
point seat belt, check belt function for
child seat page 69
-37
.
Three-point seat belt must not be hindered
by cables, wires or dampening material etc
10 -
Metal stud in floor pan Anti-twist stop for belt webbing bracket
11 -
Anti-twist stop and reverse-mounting
protection for three-point safety belt
Pa
ge 14 of 41 Seat belts11/20/2002 htt
p://127.0.0.1:8080/audi/servlet/Dis
play?action=Goto&t
yp
e=re
pair&id=AUDI.B5.BD03.69.1
Page 15 of 41
69-11
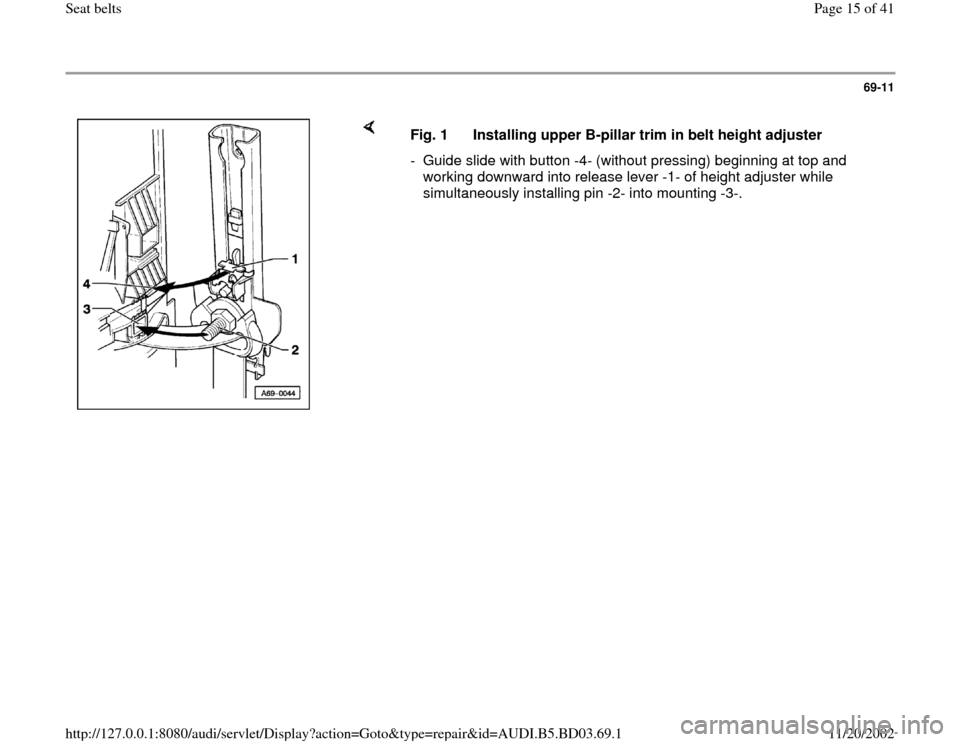
Fig. 1 Installing upper B-pillar trim in belt height adjuster
- Guide slide with button -4- (without pressing) beginning at top and
working downward into release lever -1- of height adjuster while
simultaneously installing pin -2- into mounting -3-.
Pa
ge 15 of 41 Seat belts11/20/2002 htt
p://127.0.0.1:8080/audi/servlet/Dis
play?action=Goto&t
yp
e=re
pair&id=AUDI.B5.BD03.69.1
Page 16 of 41
69-12
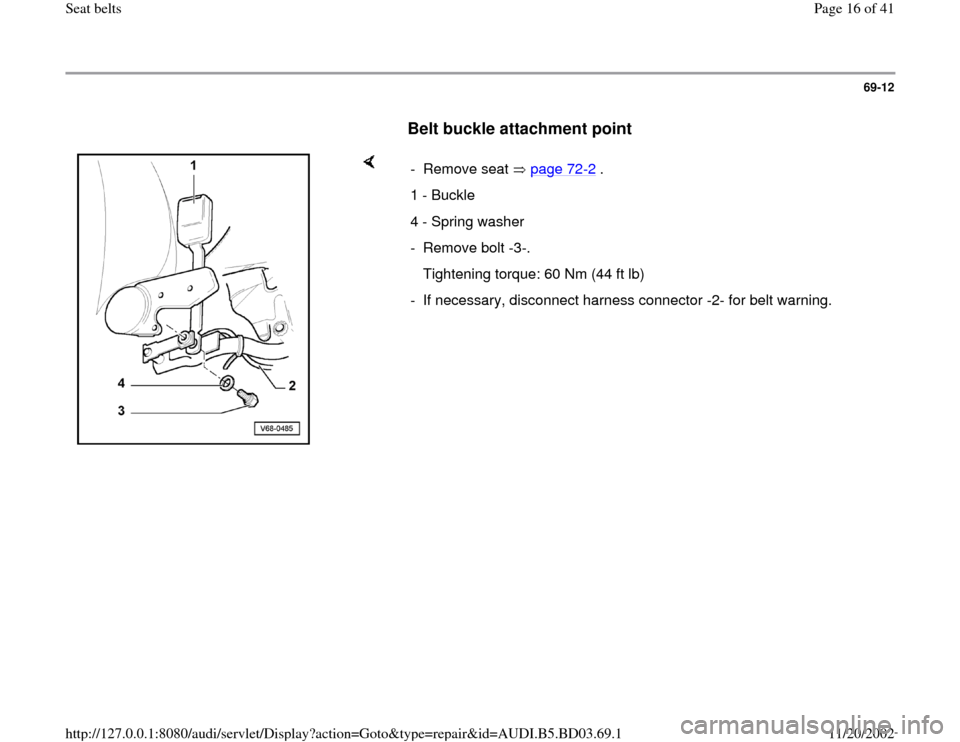
Belt buckle attachment point
- Remove seat page 72
-2 .
1 - Buckle
4 - Spring washer
- Remove bolt -3-.
Tightening torque: 60 Nm (44 ft lb)
- If necessary, disconnect harness connector -2- for belt warning.
Pa
ge 16 of 41 Seat belts11/20/2002 htt
p://127.0.0.1:8080/audi/servlet/Dis
play?action=Goto&t
yp
e=re
pair&id=AUDI.B5.BD03.69.1
Page 17 of 41
69-13
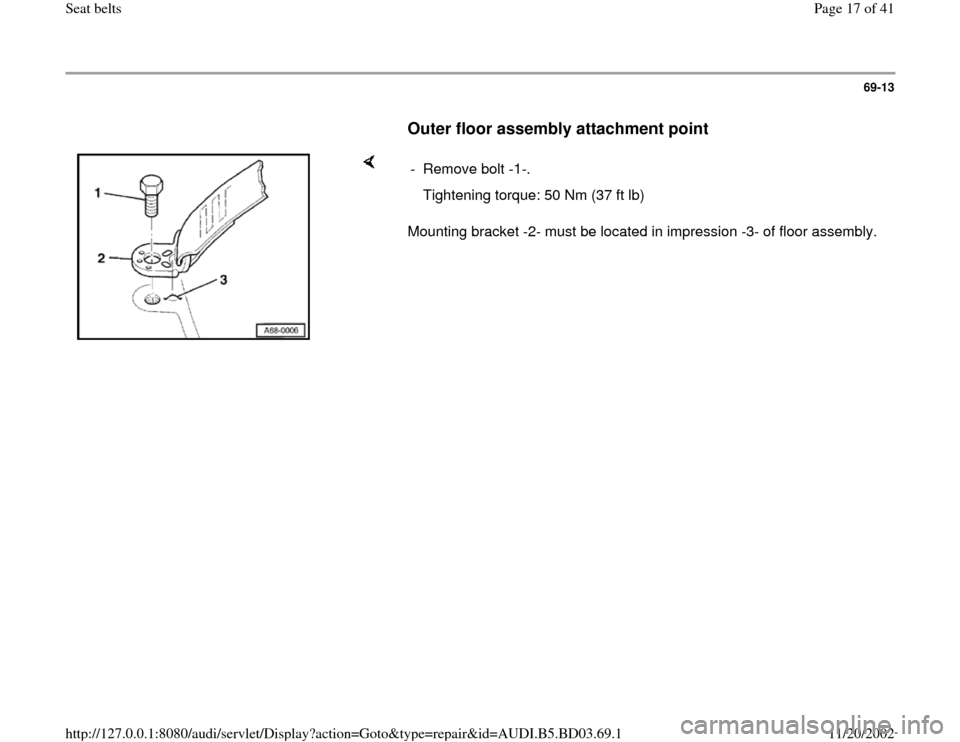
Outer floor assembly attachment point
Mounting bracket -2- must be located in impression -3- of floor assembly. - Remove bolt -1-.
Tightening torque: 50 Nm (37 ft lb)
Pa
ge 17 of 41 Seat belts11/20/2002 htt
p://127.0.0.1:8080/audi/servlet/Dis
play?action=Goto&t
yp
e=re
pair&id=AUDI.B5.BD03.69.1
Page 18 of 41
69-14
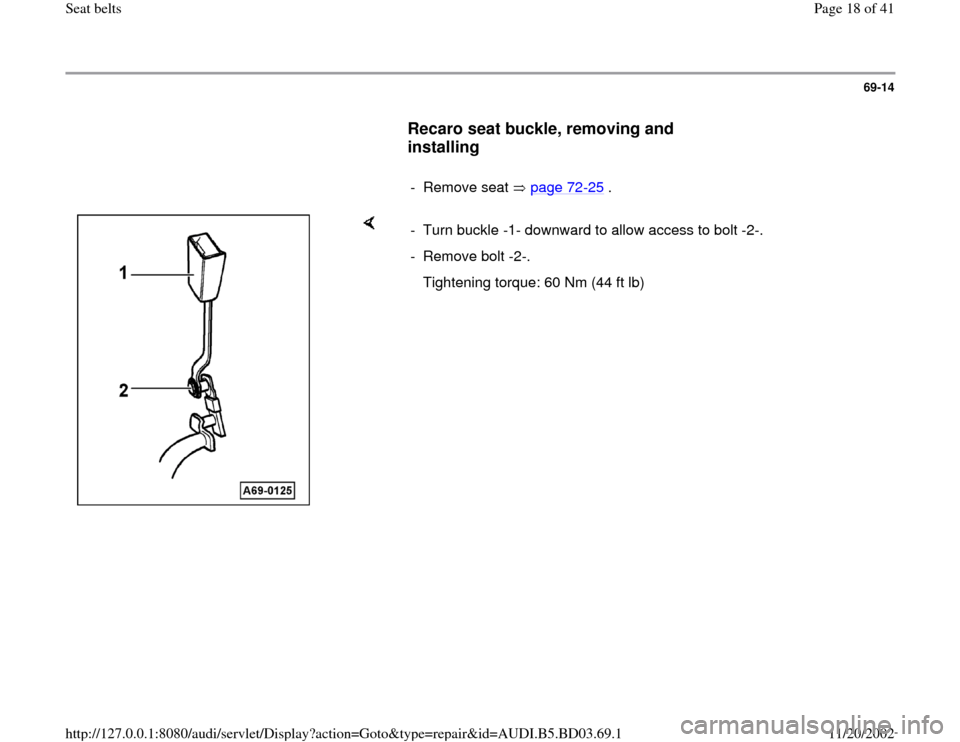
Recaro seat buckle, removing and
installing
- Remove seat page 72
-25
.
- Turn buckle -1- downward to allow access to bolt -2-.
- Remove bolt -2-.
Tightening torque: 60 Nm (44 ft lb)
Pa
ge 18 of 41 Seat belts11/20/2002 htt
p://127.0.0.1:8080/audi/servlet/Dis
play?action=Goto&t
yp
e=re
pair&id=AUDI.B5.BD03.69.1
Page 19 of 41
69-15
Left and right-rear three-point seat belts,
removing and installing
Sedan
1 -
Belt guide trim
Large symbol must always point toward
vehicle center
2 -
Belt adjuster cover
3 -
Retaining tab
4 -
Belt adjuster Removing and installing page 69
-20
5 -
Three-point seat belt
Removing:
- Remove rear seat page 72
-57
.
- Remove bolt -7-.
- Unclip belt guide trim -1-.
- Detach belt adjuster cover -2- at left and
right of retaining tab -3-.
- Remove rear shelf page 70
-83
.
- Open cover for side trunk trim.
Pa
ge 19 of 41 Seat belts11/20/2002 htt
p://127.0.0.1:8080/audi/servlet/Dis
play?action=Goto&t
yp
e=re
pair&id=AUDI.B5.BD03.69.1
Page 20 of 41
69-16
Note:
The igniter wire -11- must not be located near the
belt webbing. Vehicles with CD player and/or subwoofer or
similar:
- Remove side trunk trim page 70
-87
.
Vehicles with belt tensioners:
- Unclip igniter wire -11- at clip -10-.
- Detach harness connector for igniter wire
at clip -9-.
- Remove bolt -6- (1x).
- Detach seat belt against direction of
arrow.
Installing:
Make sure harness connector for igniter
wire -11- engages
- Clip igniter wire -11- into clip -10-.For vehicles with belt tensioner, check belt-
fastened sensor page 69
-38
After installing rear three-point seat belt,
check belt function for child seat page 69
-37
Pa
ge 20 of 41 Seat belts11/20/2002 htt
p://127.0.0.1:8080/audi/servlet/Dis
play?action=Goto&t
yp
e=re
pair&id=AUDI.B5.BD03.69.1
Trending: child seat, tow, light, seat adjustment, battery, ECU, warning
