AUDI A4 1998 B5 / 1.G APB Engine Cylinder Block Crankshaft And Flywheel Assembly Manual
A4 1998 B5 / 1.G
AUDI
AUDI
https://www.carmanualsonline.info/img/6/962/w960_962-0.png
AUDI A4 1998 B5 / 1.G APB Engine Cylinder Block Crankshaft And Flywheel Assembly Manual
Page 2 of 26
13-15
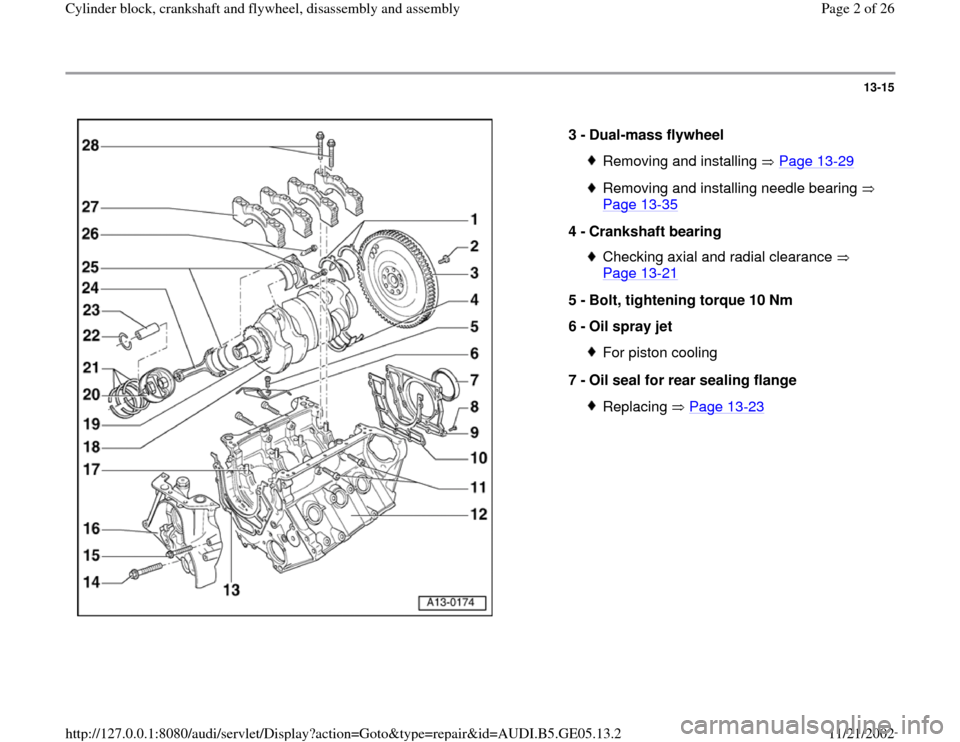
3 -
Dual-mass flywheel
Removing and installing Page 13
-29
Removing and installing needle bearing
Page 13
-35
4 -
Crankshaft bearing
Checking axial and radial clearance
Page 13
-21
5 -
Bolt, tightening torque 10 Nm
6 -
Oil spray jet
For piston cooling
7 -
Oil seal for rear sealing flange Replacing Page 13
-23
Pa
ge 2 of 26 C
ylinder block, crankshaft and fl
ywheel, disassembl
y and assembl
y
11/21/2002 htt
p://127.0.0.1:8080/audi/servlet/Dis
play?action=Goto&t
yp
e=re
pair&id=AUDI.B5.GE05.13.2
Page 4 of 26
13-17
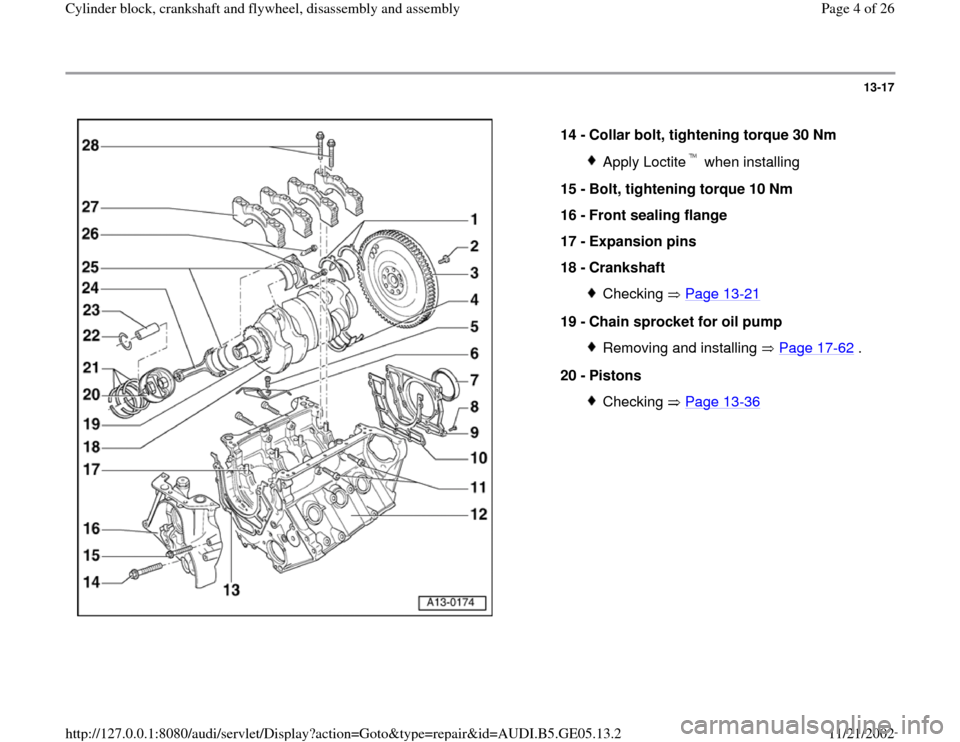
14 -
Collar bolt, tightening torque 30 Nm
Apply Loctite when installing
15 -
Bolt, tightening torque 10 Nm
16 -
Front sealing flange
17 -
Expansion pins
18 -
Crankshaft
Checking Page 13
-21
19 -
Chain sprocket for oil pump
Removing and installing Page 17
-62
.
20 -
Pistons
Checking Page 13
-36
Pa
ge 4 of 26 C
ylinder block, crankshaft and fl
ywheel, disassembl
y and assembl
y
11/21/2002 htt
p://127.0.0.1:8080/audi/servlet/Dis
play?action=Goto&t
yp
e=re
pair&id=AUDI.B5.GE05.13.2
Page 6 of 26
13-19
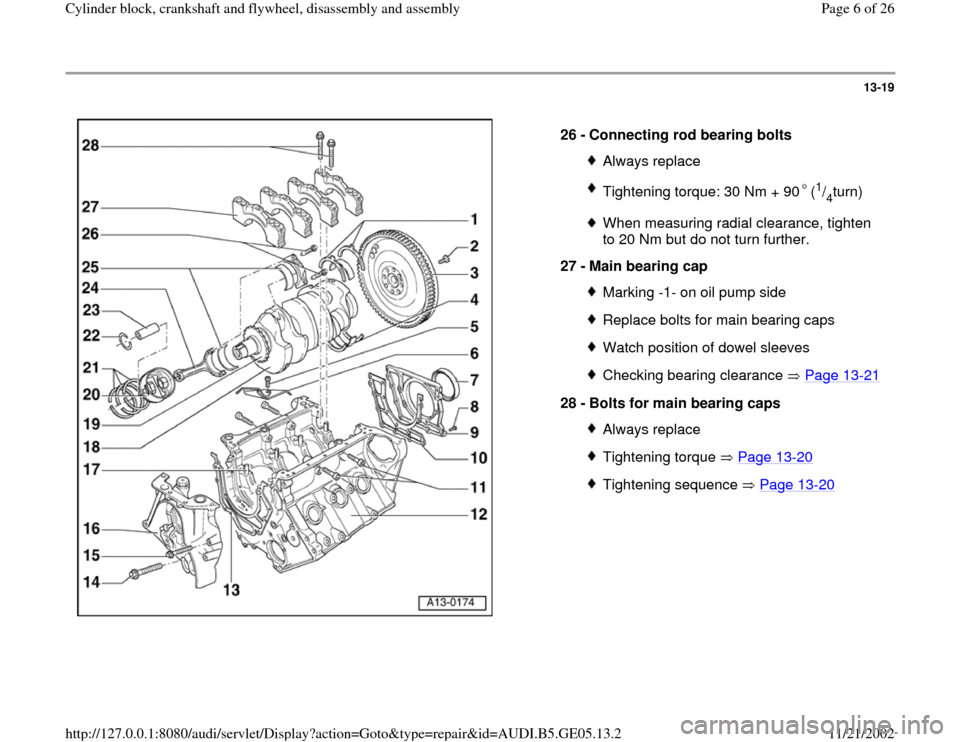
26 -
Connecting rod bearing bolts
Always replaceTightening torque: 30 Nm + 90 (
1/4turn)
When measuring radial clearance, tighten
to 20 Nm but do not turn further.
27 -
Main bearing cap Marking -1- on oil pump sideReplace bolts for main bearing capsWatch position of dowel sleevesChecking bearing clearance Page 13
-21
28 -
Bolts for main bearing caps
Always replaceTightening torque Page 13
-20
Tightening sequence Page 13
-20Pa
ge 6 of 26 C
ylinder block, crankshaft and fl
ywheel, disassembl
y and assembl
y
11/21/2002 htt
p://127.0.0.1:8080/audi/servlet/Dis
play?action=Goto&t
yp
e=re
pair&id=AUDI.B5.GE05.13.2
Page 8 of 26
13-21
Crankshaft axial and radial clearance,
measuring
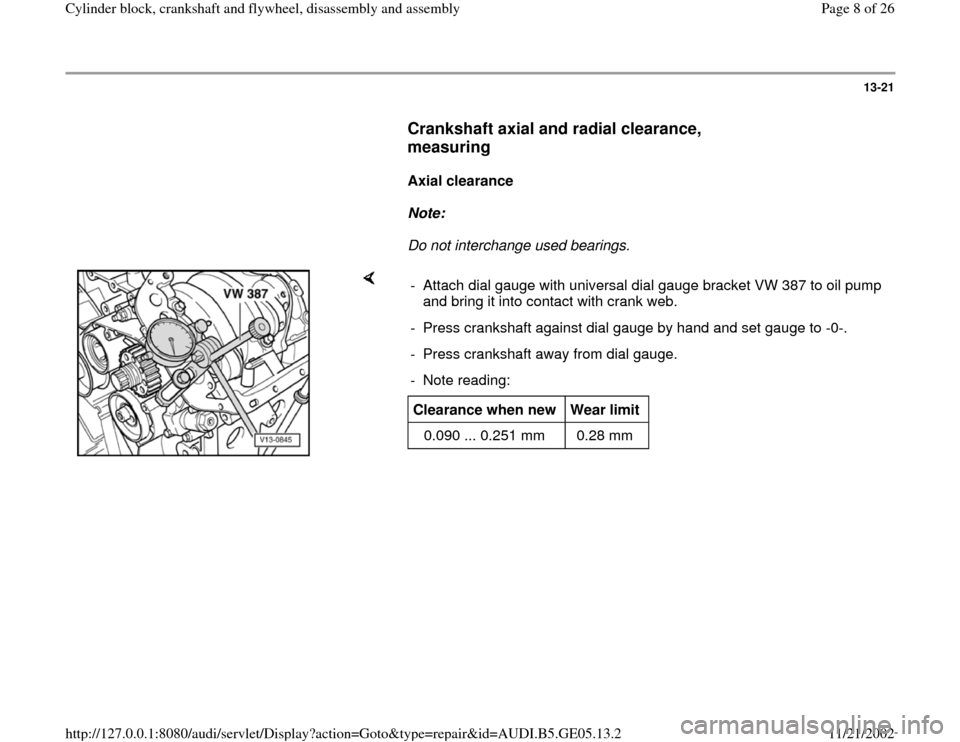
Axial clearance
Note:
Do not interchange used bearings.
- Attach dial gauge with universal dial gauge bracket VW 387 to oil pump
and bring it into contact with crank web.
- Press crankshaft against dial gauge by hand and set gauge to -0-.
- Press crankshaft away from dial gauge.
- Note reading:Clearance when new
Wear limit
0.090 ... 0.251 mm 0.28 mm
Pa
ge 8 of 26 C
ylinder block, crankshaft and fl
ywheel, disassembl
y and assembl
y
11/21/2002 htt
p://127.0.0.1:8080/audi/servlet/Dis
play?action=Goto&t
yp
e=re
pair&id=AUDI.B5.GE05.13.2
Page 10 of 26
13-23
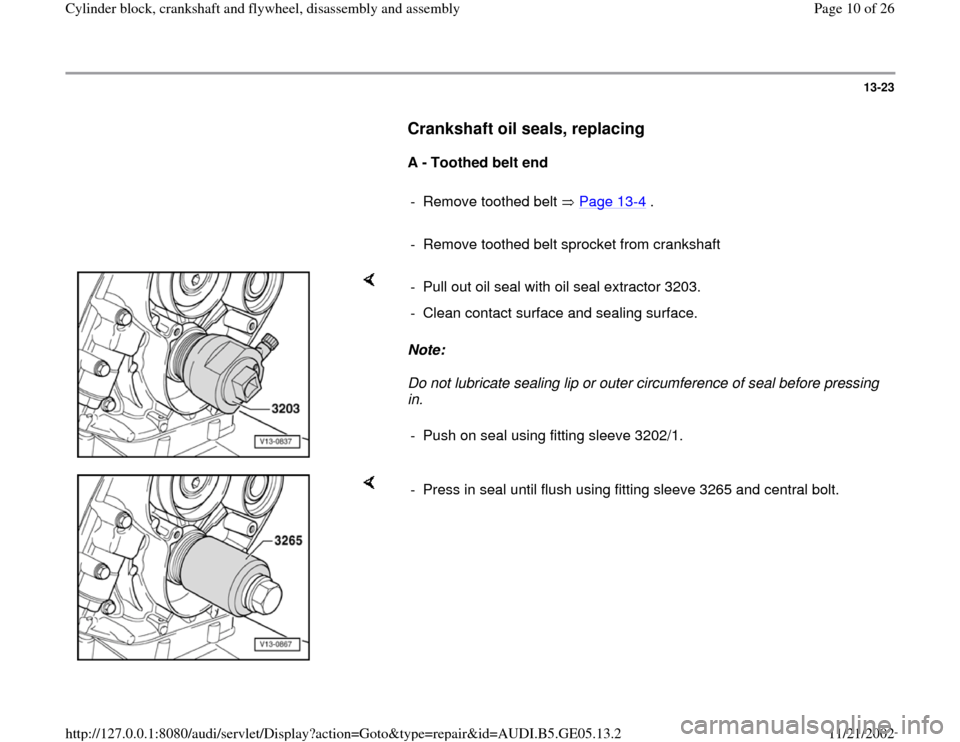
Crankshaft oil seals, replacing
A - Toothed belt end
- Remove toothed belt Page 13-4 .
- Remove toothed belt sprocket from crankshaft
Note:
Do not lubricate sealing lip or outer circumference of seal before pressing
in. - Pull out oil seal with oil seal extractor 3203.
- Clean contact surface and sealing surface.
- Push on seal using fitting sleeve 3202/1.
- Press in seal until flush using fitting sleeve 3265 and central bolt.
Pa
ge 10 of 26 C
ylinder block, crankshaft and fl
ywheel, disassembl
y and assembl
y
11/21/2002 htt
p://127.0.0.1:8080/audi/servlet/Dis
play?action=Goto&t
yp
e=re
pair&id=AUDI.B5.GE05.13.2
Page 11 of 26
13-24
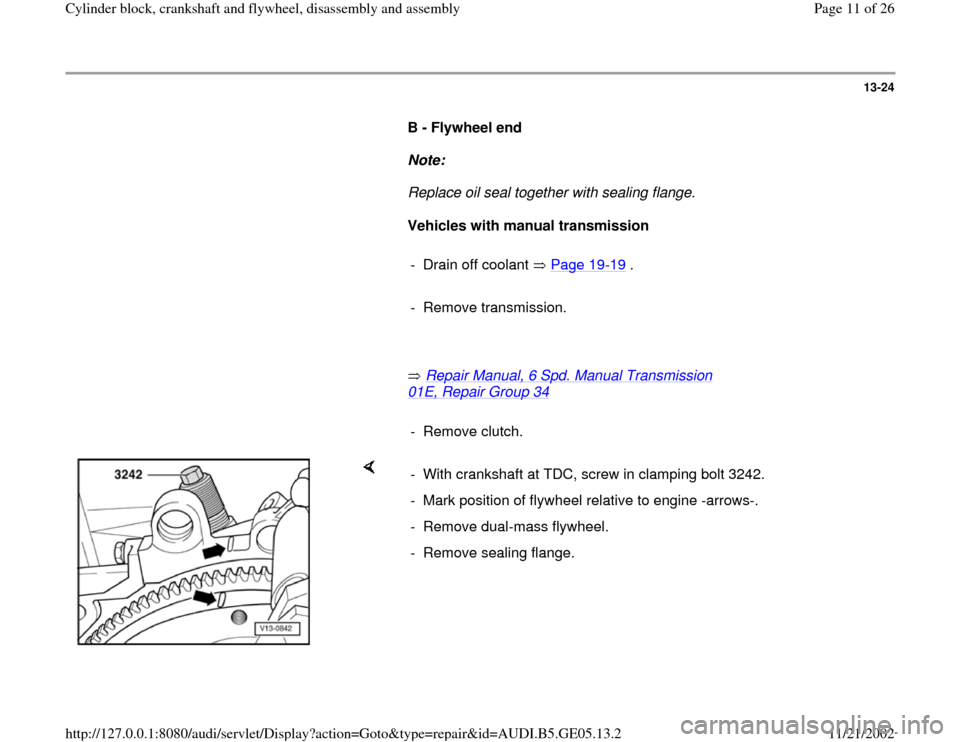
B - Flywheel end
Note:
Replace oil seal together with sealing flange.
Vehicles with manual transmission
- Drain off coolant Page 19
-19
.
- Remove transmission.
Repair Manual, 6 Spd. Manual Transmission
01E, Repair Group 34
- Remove clutch.
- With crankshaft at TDC, screw in clamping bolt 3242.
- Mark position of flywheel relative to engine -arrows-.
- Remove dual-mass flywheel.
- Remove sealing flange.
Pa
ge 11 of 26 C
ylinder block, crankshaft and fl
ywheel, disassembl
y and assembl
y
11/21/2002 htt
p://127.0.0.1:8080/audi/servlet/Dis
play?action=Goto&t
yp
e=re
pair&id=AUDI.B5.GE05.13.2
