AUDI A4 AVANT 2008 Workshop Manual
Manufacturer: AUDI, Model Year: 2008, Model line: A4 AVANT, Model: AUDI A4 AVANT 2008Pages: 368, PDF Size: 46.19 MB
Page 51 of 368
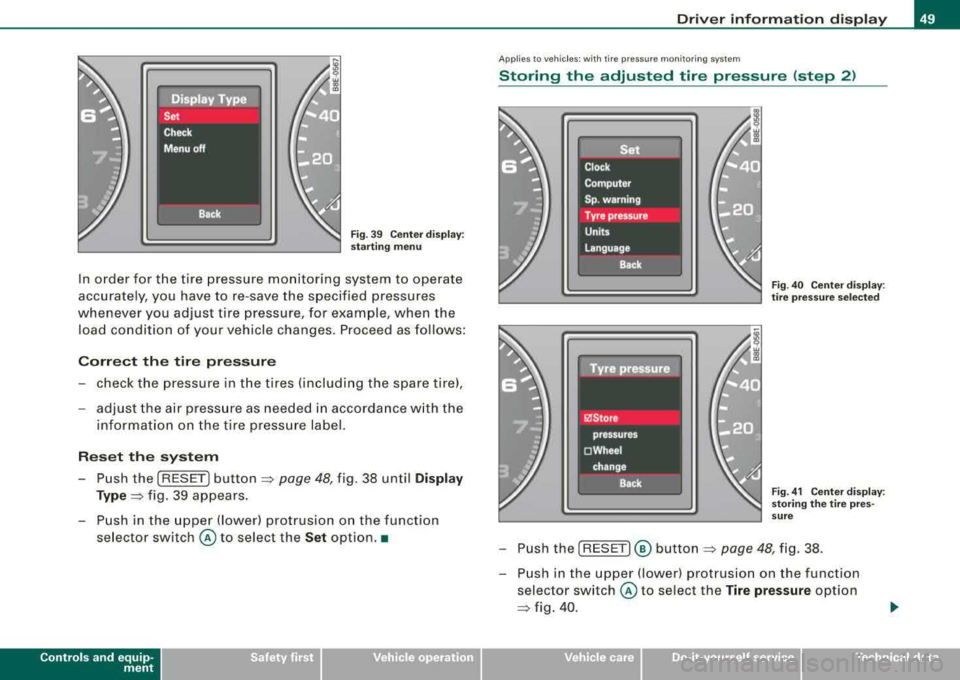
Fig. 39 Center display :
starting menu
In order for the tire pressure monitoring system to operate
accurately, you have to re-save the specified pressures
whenever you adjust tire pressure, for example, when the load condition of your vehicle changes. Proceed as follows:
Correct the tire pressure
- check the pressure in the tires (including the spare tire),
- adjust the air pressure as needed in accordance with the
information on the tire pressure label.
Reset the system
Push the [RESET] button=> page 48, fig. 38 until Display
Type=> fig. 39 appears.
- Push in the upper (lower) protrusion on the function selector switch
@ to select the Set option. •
Controls and equip
ment
Driver information display
Applies to veh ic les : w ith tir e pressure mon itoring system
Storing the adjusted tire pressure (step 2)
Fig . 40 Center display :
tire pressure selected
Fig. 41 Center display:
storing the tire pres
sure
- Push the [RESET]® button => page 48, fig. 38.
- Push in the upper (lower) protrusion on the function
selector switch
@ to select the Tire pressure option
=> fig. 40.
irechnical data
Page 52 of 368
Driver inf orma tion di spl ay
-Push the I RESET I button.
-Push in the upper (lower) protrusion on the function
se lector switch
@ to select the Sto re pre ssure s option
~ page 49, fig. 41.
Following each intentional change in specified pressures , tire pres
sures must be resaved .
Af ter the pressures are saved, the tire pressure monitoring system
measures the current tire pressures and saves them as the new
specified pressures .
[ i] Tips
• The tire pressure is shown on the tire pressure label. On USA
vehic les, the tire pressure label is located on the driver's side 8-
pillar. On Canada vehicles, the tire pressure labe l is located either on
the driver's side 8 -pillar or inside the fuel filler flap . The tire pressure
label lists the recommended cold tire inflation pressures for the
vehicle at its maximum capacity weight and the tires that were on
your vehicle at the time it was manufactured. For recommended tire
pressures for normal load cond itions, please see chapter
~ page 297.
• The tire pressure monitoring system he lps the driver to keep an
eye on tire pressures. But the driver stil l has the responsibility for
mainta ining the correct tire pressure. •
Applies to vehic les : w it h tir e press ure m onit oring sys te m
Changing a wheel
When you change a wheel, the new tire mus t be initial
ized.
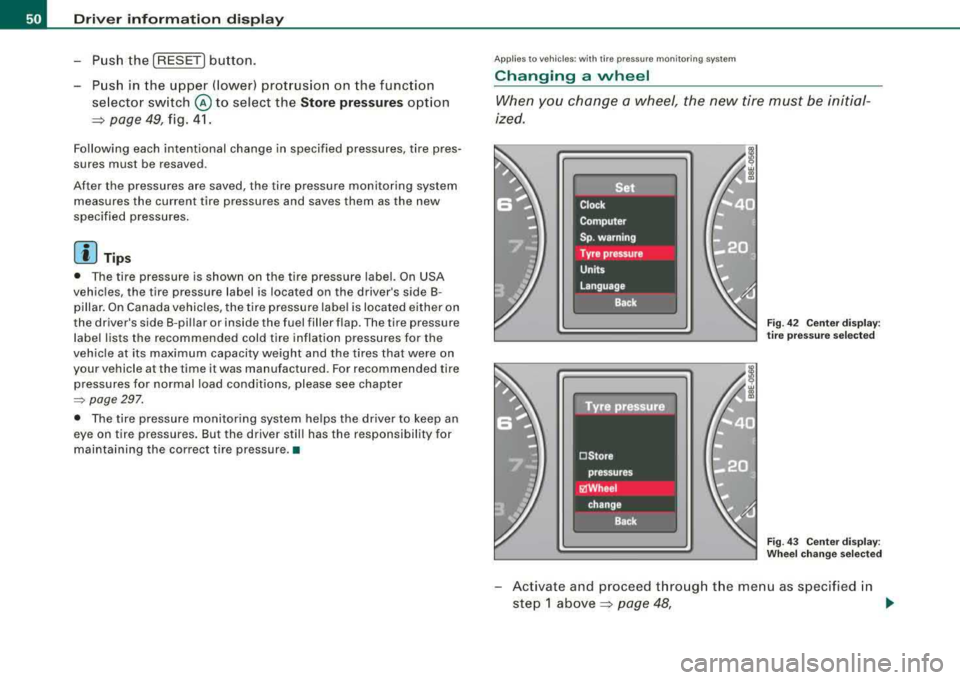
Fi g. 4 2 C enter display :
t ir e pr ess ure se lected
Fig . 4 3 Ce nter displa y:
W heel ch ang e se lecte d
-Act ivate and proceed through the menu as specified in
step 1
above~ page 48, .,
Page 53 of 368

-select Whe el ch ange in the Tir e pr ess ure menu.
Programming is necessary:
• aft e r rotating th e wh eels on the vehicle,
• if whee ls with new wheel sensors are used .
Your tire change is incomplet e if you do no t access the Driver Infor
mation System menu, and select and confirm
Wh eel ch ang e. You
mus t do this each time to change a tire. The procedure can take up
to 20 minutes driving time. During this time, the sensors are read
justing to the new wheel/tire combination, and the new pressures are stored .
During the learning phase, the tire pressure monitoring system is
not availabl e.•
App lies to veh ic les: w ith tir e p ressure monitor in g sys tern
Malfunctions
A ma/function can have various causes.
F ig . 44 D isplay:
Syste m malfun ction
If the warning light in the instrument cluster flashes for approxi
mately one minute and then remains continuously illuminated and
Controls and equip
ment
Dri ver inf orma tio n di spl ay
additional ly the => fig. 44 symbol appears in the display, the
tire pressure monitoring system is not available . This can have
various causes.
• If the message appears at the end of the learning phase, the
system cannot recognize the wheels insta lled on the vehicle . This
can be because one or more wheels without a wheel sensor were
installed .
• A wheel sensor or other component may have failed.
• The system has detected more than 4 wheels in the vehicle, for
example while driving beneath another car with tire pressure moni
toring system .
• A tire was changed but
the => page 50, "Changing a wheel"
procedure was not activated
=> page 50.
• Audi replacement parts were not used .
• If snow chains are being used , system function can be compro
mised due to the shie lding properties of the chains .
• The tire pressure monitoring system may not be available
because of a radio malfunction .
• Transmitters with the same frequency , such as radio head
phones in the vehicle or radio equipment, can cause a temporary
dis ruption of the system through excessive el ectromagn etic fie lds.
• Try to find the cause of the interference, and then perform the
=> page 50, "Changing a wheel" procedure one more time . If this not
e liminate the prob lem , contact your authorized Audi dea ler for
assistance .
• Do not use commercially available tire sealants. Otherwise , the
electrica l components of the tire pressure monitoring system will
no longer work properly and the sensor for the tire pressure moni
toring system will have to be replac ed by a qualified workshop. •
Technical data
Page 54 of 368
Opening and closing
Opening and closing
Keys
Key set
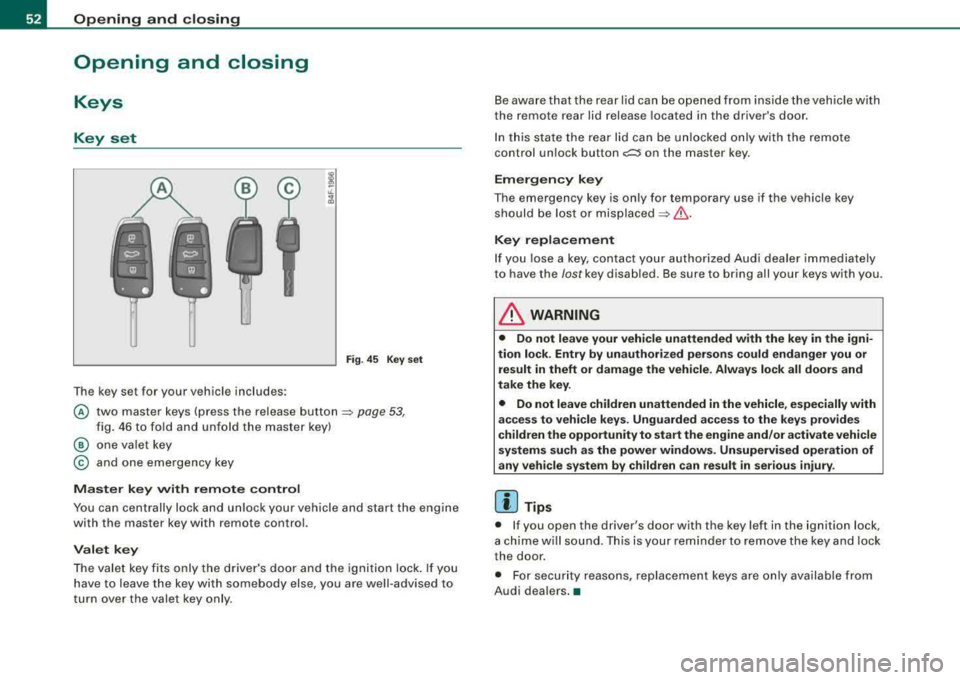
The key set for your vehicle includes:
Fig. 45 K ey set
@ two master keys (press the release button ~ page 53,
fig. 46 to fo ld and unfold the master key)
@ one valet key
© and one emergency key
Master key with remote control
You can centrally lock and unlock your vehicle and start the engine
with the master key with remote control.
Valet key
The valet key fits only the driver's door and the ignition lock. If you
have to leave the key with somebody else, you are well-advised to
turn over the valet key only. Be
aware that the rear lid can be opened from inside the vehicle with
the remote rear lid release located in the driver's door .
In this state the rear lid can be unlocked only with the remote
control un lock bu tton
c:::::5 on the master key.
Emergency key
The emergency key is only for temporary use if the vehicle key
should be lost or
misplaced~ &.
Key replacement
If you lose a key, contact your authorized Audi dealer immediately
to have the
lost key disabled. Be sure to bring all your keys with you .
L1}. WARNING
• Do not leave your vehicle unattended with the key in the igni
tion lock . Entry by unauthorized persons could endanger you or
result in theft or damage the vehicle. Always lock all doors and
take the key.
• Do not leave children unattended in the vehicle , especially with
access to vehicle keys . Unguarded access to the keys provides
children the opportunity to start the engine and/or activate vehicle
systems such as the power windows. Unsupervised operation of
any vehicle system by children can result in serious injury .
[ i ] Tips
• If you open the driver's door with the key left in the ignition lock,
a chime will sound. This is your reminder to remove the key and lock
the door.
• For security reasons, replacement keys are only available from
Audi dealers.
•
Page 55 of 368
Master key with remote control
The remote control allows you to lock or unlock the
vehicle electronically.
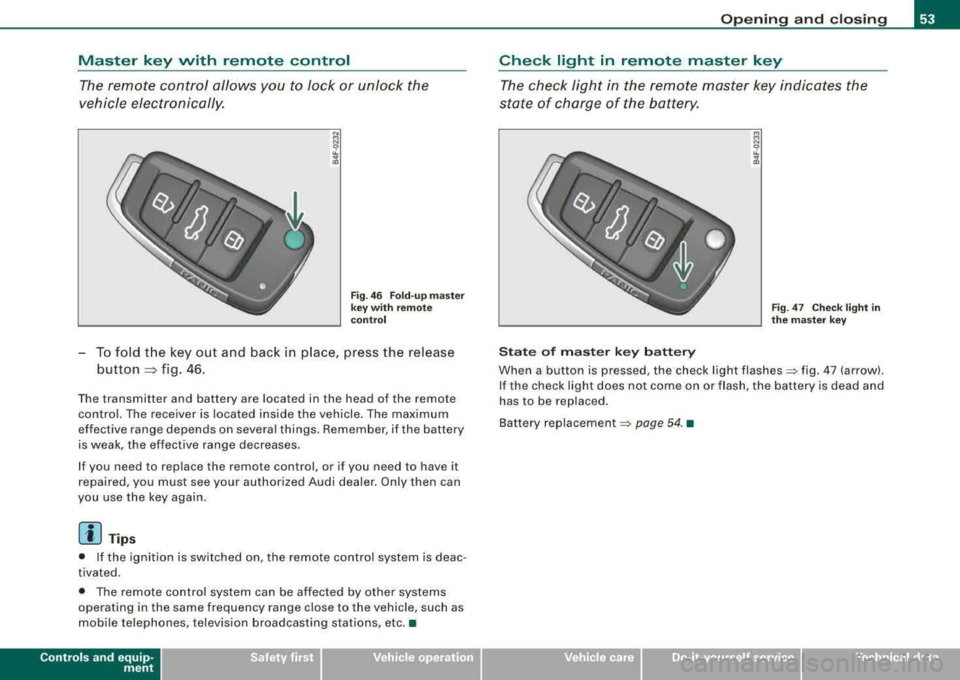
Fig . 46 Fold-up master
key with remote
control
-To fold the key out and back in place, press the release
button
~ fig . 46 .
Th e transmitt er and battery are located in the head o f the remo te
control. The receiver is located inside the vehicle. The maximum
effec tive range depends on several things. Remember, if the battery
is weak, the effective range decreases.
If you need to replace the remote control , o r if you need to have it
repaired, you must see your authorized Audi dealer. Only then can
you use the key again.
[ i] Tips
• If the ignition is switched on, the remote control system is deac
tivated .
• The remote control system can be affected by other systems
operating in the same frequency range close to the vehicle, such as
mobile telephones, television broadcasting stations, etc. •
Controls and equip
ment
Opening and closing
Check light in remote master key
The check light in the remote master key indicates the
state of charge of the battery.
State of master key battery
Fig . 47 Check light in
the master key
When a button is pressed , the check light flashes=:. fig . 47 (arrow) .
If the check light does not come on or flash, the battery is dead and
has to be replaced.
Ba ttery
replacem ent =:. page 54. •
irechnical data
Page 56 of 368
Opening and clo sing
Master key battery replacement
Each master key contains a battery housed under the
cover.
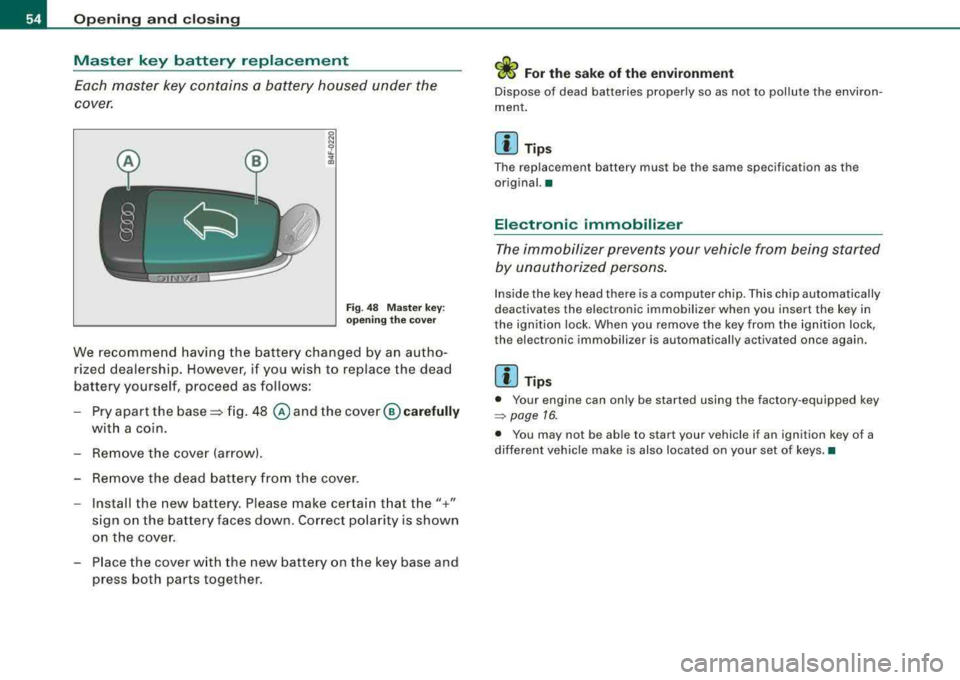
F ig. 48 Mas ter key:
o p enin g the cover
We recommend having the battery changed by an autho
rized dealership. However, if you wish to replace the dead
battery yourself, proceed as follows:
- Pry apart the
base~ fig. 48 @ and the cover ® car efully
with a coin .
- Remove the cover (arrow).
- Remove the dead battery from the cover .
- Install the new battery. Please make certain t hat the"+"
sign on the battery faces down . Correct polarity is shown
on the cover.
- Place the cover w ith the new battery on the key base and
press both parts together.
ffi For the sake of the environment
Dispose of dead batteries properly so as not to pollute the environ
ment .
[ i ] Tip s
The replacement battery must be the same specification as the
original. •
Electronic immobilizer
The immobilizer prevents y our vehicle from being started
b y u nau thor ized pers ons.
Inside the key head there is a computer ch ip. Th is ch ip automatically
deactivates the e lectronic immobilizer when you insert the key in
the ignit ion lock. When you remove the key from t he ignition lock,
the electron ic immobili zer is automatical ly activated once again .
[ i ] Tips
• Your engine can only be started using the factory -equipped key
=> page 16.
• You may not be able to start your vehicle if an ignition key of a
different vehicle make is also located on your set of keys. •
Page 57 of 368
Power locking system
General description The power Jocking system J ocks all the vehicle d oors and
rear lid simultaneously or allows you to unlock either just the driver's door or all the vehicle doors and rear lid
simultaneously.
The power locking system in your vehic le incorporates the following
f unctions:
• Central locking function
• Remote contro l feature
:::::, page 56 .
• Anti -theft alarm system :::::, page 64 .
All the doors and the rear lid are locked by the central locking
system when you lock the vehicle .
Unlo cking th e vehicle
You can un lock the vehicle from outside either by using the remote
control
or by inserting and turning the key in the driver's door lock.
When you
unlo ck your vehicle:
• The anti-the ft alarm sys tem is deactivated briefly.
• The vehicle interior l ights illuminate for approximate ly 30
seco nds.
• All turn signal lights will flash twice when the car is unlocked.
• After unlocking the vehic le, you have 60 seconds to open a door
or the rear lid. After 60 seconds, t he vehicle automatically locks and
the anti -theft a larm system activates again .
The rear lid can be locked or unlocked either by using the remote
co ntr ol
or by insert ing and turning the key in the driver's door lock .
Unlocking the vehicle with the remote contro l wi ll only
unlock the
rear lid, t o
open it, the lid handle needs to be pressed .
Controls and equip
ment
Op ening and clo sin g
Lo cking the vehicle
You can lock the veh icle from outside e ithe r by using the remote
control
or by inserting and turning the key in the drivers 's door lock.
When you
lock the ve hicle:
• All doors and the rear lid are locked .
• All tu rn signal lights will flash once when the car is locked.
• The anti -theft alarm system is activated . The horn of the anti
theft alarm sys tem wi ll sound and the anti -theft a larm sys tem read i
ness light, located in t he upper part of the driver's door panel, w ill
start to blink.
• The vehicle interior lights turn off .
Automati c locking *
The automatic locking feature locks all the vehicle doors and the rear lid when you drive faster t han 9 mph (15 km/h).
You can unlock the vehicle from the inside by :
• removing the key from the ignition switch (the vehicle wil l auto
mat ically un lock itself) or
• pressing the unlock part of the power lock switch
(l::[) or
pull ing the door handle (twice to open the door!.
If you wish, you can have an authorized Audi dea ler convert your
power doo r loc k system to au tomatic locking .
LJ}. WARNING
• When you lo ck your vehicle from out side , nobody -especially
c hildren - sho uld remain in side the vehi cle . Remember , when you
lock the vehicle from the out side the windows c annot be opened
from the in side .
• When you leave the vehicle , alway s remove the ignition key and
take it with you . Thi s will pre vent pa ssenger s (children , for
example ) from accidentally being locked in the vehicle should the y
a ccidentally pre ss the power locking swit ch on the center con sole . .,_
Page 58 of 368
Opening and clo sing
& W ARNI NG (c onti nued )
• Do not le ave ch ildr en in side th e vehicle uns upervi sed. In an
em erge ncy it would be i mpos sible to open t he doors from the
out side w it h out the key .
[ i] Tips
• In the event of a crash with airbag deployment all locked doors
wi ll be automatically unlocked to give access to the vehicle occu
pants from the outside .
• If the power locking system should fail, you can still open the
fue l tank flap in an emergency =>
page 271.
• You are well advised not to keep va luables inside an unattended
vehicle, visible or not. Even a properly locked vehicle cannot provide
the security of a safe!
•
Keyless entry remote control
General description
The remote controls allows you to :
• lock or unlock the vehicle
• selectively unlock the rear lid.
The turn signals will flash briefly whenever you lock or unlock the
veh ic le . Also, the interior light will come on or go off whenever you
open or close the driver's door.
T he transmitter and battery are located in the head of the remote
control. The receiver is located inside the vehicle. The maximum
effective range depends on several things. Remember, if the battery
is weak, the effective range decreases .
The remote-contro l key contains a fold-out key that you can use to
manually lock or unlock the vehicle and to start the engine . I
f you need to replace the remote control, or if you need to have it
repaired, you must see your authorized Audi dealer. Only then can
you use the key again .•
Unlocking and locking the vehicle with the
remote control
How the remote cont rol works.
To unlock the vehicle 0
- Press button @.
Fig. 4 9 Rem ote
co ntrol: fu nct ion
b utto ns
- Press bu tton @ two times within two seconds to unlock
all doors and th e rear lid .
To lock the v ehi cle 6
- Press button ® => & in "General description" on
page
55.
- Watch that a ll turn signal lights flash once .
Page 59 of 368
To unlock rear lid only ~
- Press button © for approximately one second.
PANIC Button Push the red
butto n@) to activate the panic function. The
horn sounds and t he turn signals flash.
- P ush the
button @) again to deact ivate the panic fu nc
t io n.
& WARNING
R ead and fo llow all WARNIN GS=> & in "G eneral de scr iption " on
page 5 5.
[ i] Tip s
• In orde r to make sure the locking function is working, you should
always keep your eye on the vehic le to make sure it is proper ly
locked .
• Do not use the remote control if you are inside the car, otherwise
you may uninten tiona lly lo ck the vehicle, and then you would set off
the anti -t heft alarm when you try to s tart the engine or open a door.
In case this happens anyhow, push the unlock button
ft .
• Use the panic funct ion only if you are in an emergency
situation .•
Controls and equip
ment
Op ening and closing
Resetting the remote control
The remote control must be reset if the vehicle does not
unlock .
0
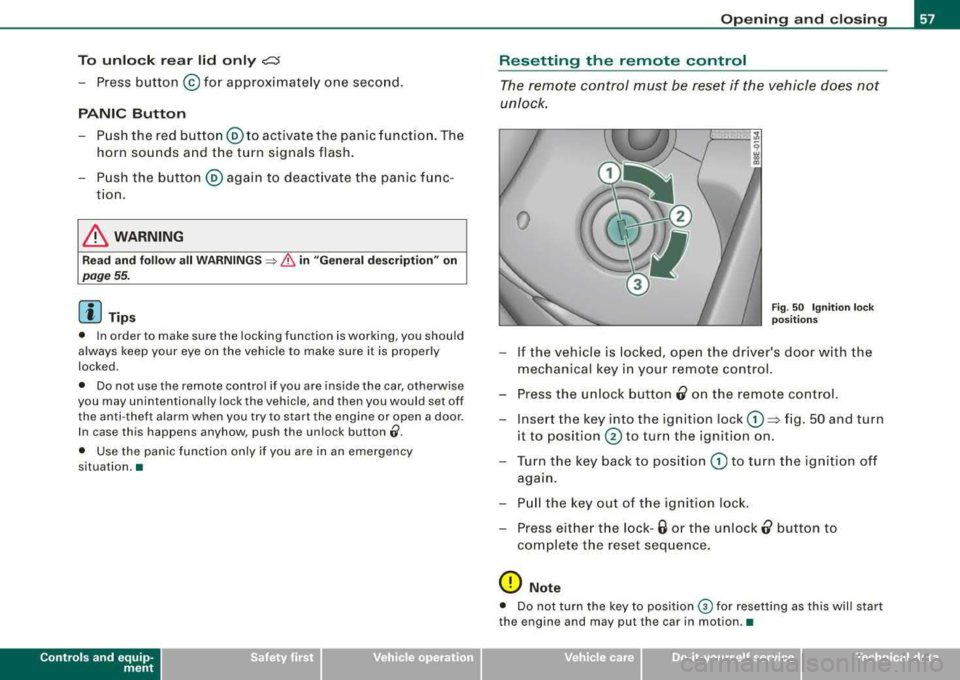
Fig . 50 Ig ni tio n l ock
p ositi ons
- If the vehicle is locked, ope n the driver's door w ith the
mechanical key in your remote control.
- Press the u nlock button
0 on the remote co ntrol.
- Inse rt the key into the ignition lock
G) => fig. 50 and turn
it to
position @ to turn the ignition on .
- T urn the key back to posit ion
G) to turn t he ignition off
aga in.
- P ull the key out of the igniti on lock.
- Press eithe r the lock -
6 or the unlock 0 button to
co mplete t he reset seque nce .
0 Note
• Do not turn the key to position ® for resetting as this will start
the engine and may pu t the car in motion .•
irechnical data
Page 60 of 368

Opening and clo sing
Certification
The remote control device comp lies with
• USA model s: Part 15 of the FCC Rules.
• Cana da models : RSS-210 of Industry Canada .
Operation is subject to the following conditions:
• this device may not cause harmful interference, and
• this device must accept any interference received, including
interference that may cause undesired operation.
0 Note
The manufacturer is not responsible for ANY RADIO OR TV interfer ence caused by unauthorized modifications to this equipment .
Changes or modifications to this unit not expressly app roved by the
party responsible for compliance cou ld void the user's authority to
operate the equipment .•
Doors, power locks
Operating locks from with key
To lock a nd unl ock the vehicle from the outside, turn the
key in the lock of the driver's do or.
To unlo ck the driver 's door only
F ig . 51 Key turns for
o pening and clo sing .
-Insert the key into the lock of dr iver's door.
- Tur n t he key
one time onl y to position @=> fig. 5 1 to
unlock the driver's door.
To unlo ck all doors and th e re ar lid
- Turn the key two times to position @=> fig. 51 to unlock
the vehicle .
To lock the vehicle
-Close all windows and doors proper ly.
- Tur n the key in the l ock o f the driver's door t o th e lo ck
po sit ion @ => & in "General desc rip tio n" on page 55. ~