AUDI A4 CABRIOLET 2009 Service Manual
Manufacturer: AUDI, Model Year: 2009, Model line: A4 CABRIOLET, Model: AUDI A4 CABRIOLET 2009Pages: 340, PDF Size: 77.32 MB
Page 41 of 340
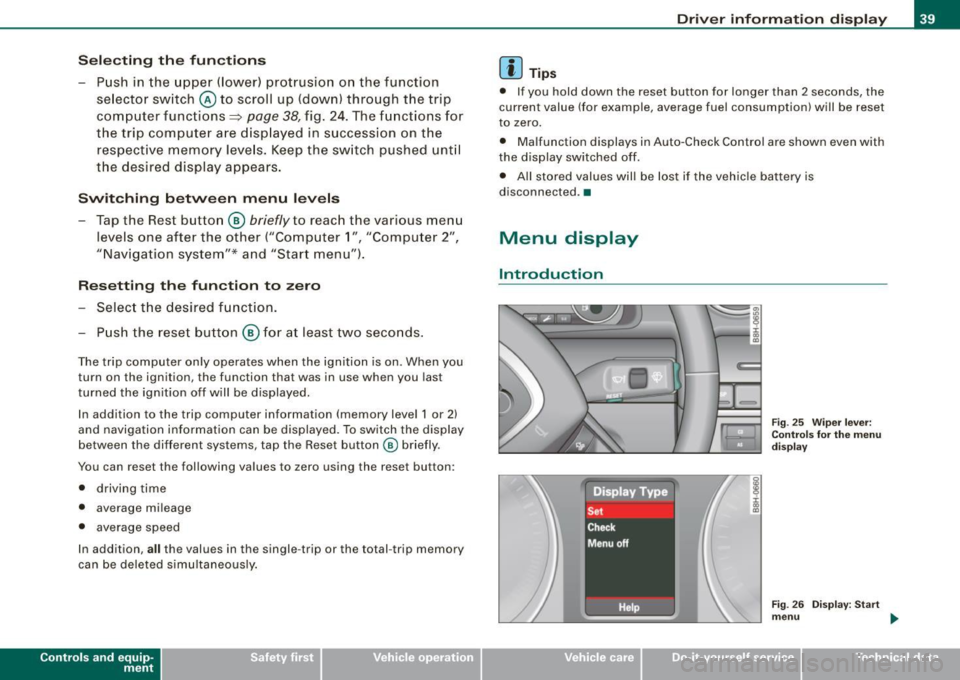
Sele cting th e fun ctions
- Push in the uppe r (lower) protrusion on the function
se lector switch @to scroll up (down) through the trip
computer functions~
page 38, fig. 24. The fu nctions for
the trip computer a re d isp layed in succession on the
respective memory leve ls. Keep the switch pushed unt il
the desired display appears .
Swi tching b etw een m enu levels
- Tap the Rest button @
briefly to reach the various menu
levels one after the other ("Computer 1 ", "Computer 2",
"Navigation system"* and "Start menu") .
Res etting th e function to zero
- Selec t the desired func tion.
Push the reset button @for at least two seco nds .
The trip computer on ly operates when the ignition is on. When you
turn on the ignition, the function that was in use when you last
turned the ignition off will be displayed.
In addition to the trip computer information (memory level 1 or 2)
and navigation information can be displayed. To switch the d isp lay
between the different systems, tap the Reset button
@ briefly.
You can reset the fol lowing va lues to zero using the reset button:
• driving time
• average mileage
• average speed
In addition,
a ll the values in the single -trip or the total -trip memory
can be deleted s imu ltaneously .
Controls and eq uip
ment
Dri ver informa tio n di spl ay
[ i ] Tip s
• If you hold down the reset button for longer than 2 seconds, the
current value (for example, average fuel consumption) will be reset
to zero.
• Malfunction displays in Auto-Check Control are shown even with
the display sw itched off.
• All stored values will be lost if the vehic le battery is
disconnected. •
Menu display
Introduction
~ehicle care
Fig. 25 W iper leve r:
Con trols fo r the menu
d isp lay
F ig . 2 6 Di splay: Start
m enu
Technical data
Page 42 of 340
Driver inf orma tion d ispl ay
Some functions in your vehicle can be set, activated, and controlled
by
M enu s (e.g. Acoustic Park Assist*). With these menus you can
a lso select the information shown in the DIS disp lay, which operates
only with the ignition switched on. Operation is controlled by the
!Reset) button and the rocker switch on the wiper lever~
page 39,
fig. 25.
The
Start m enu shows you the different disp lay types :
Set
Check
Menu off
H el p
Each display type in the Start menu contains a submenu with addi
tional options.
S et
Check
Me nu off
H elp
Clock ~ page40
Computer
Speed alarm (speed
~ page35
warning)
Language (6 languages)
=> page40
Units (distance, fuel con-~ page40
sumption, temperature)
Service
~ page 17
All of the messages shown in vehicles without menu disp lay appear on the display screen.
The Help function helps you to make the right selection.
•
Navigating the menu
Use the rocker switch on the windshield wiper lever and
the[ResetJ button to operate the menu and carry out
inquiries and selections.
F ig . 27 Wipe r leve r:
Con trols for t he m en u
d is pl ay
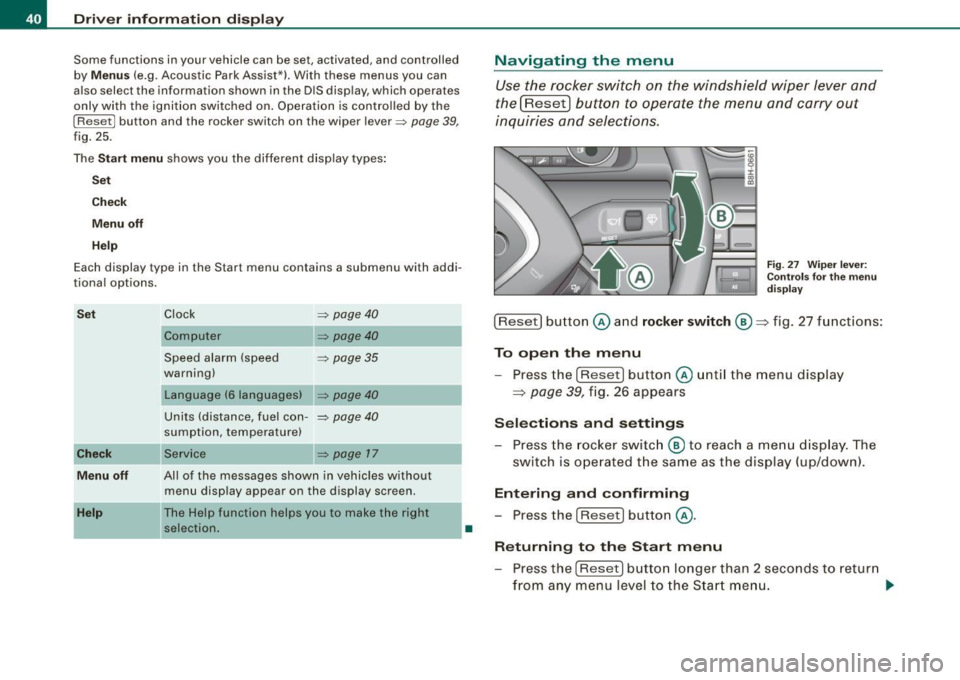
!Reset] button @and rocker switch @=> fig. 27 functions:
To op en th e menu
- Press the
!Reset! button @unti l the menu display
=> page 39, fig. 26 appears
Sele ctions and setting s
- Press the rocker switc h
@ to reach a me nu display . The
switch is ope rated the sam e as the display (up/down).
Entering and confirming
- Press the
I Reset I button @.
R eturning to th e Start menu
- Press the
[Reset) butto n longer than 2 seconds to retur n
from any menu level to the Star t m en u. •
Page 43 of 340
![AUDI A4 CABRIOLET 2009 Service Manual Using the rocker switch, you can select the menus in the display or
change settings. A cursor appears on the left in front of the selected
values .
By pressing the [Reset] b AUDI A4 CABRIOLET 2009 Service Manual Using the rocker switch, you can select the menus in the display or
change settings. A cursor appears on the left in front of the selected
values .
By pressing the [Reset] b](/img/6/57553/w960_57553-42.png)
Using the rocker switch, you can select the menus in the display or
change settings. A cursor appears on the left in front of the selected
values .
By pressing the [Reset] button, you activate the selection you made
or confir m the values you set.
Sel ecte d funct ions are identified with
a check mark or are carried out directly.
Meanings of the symbo ls in the display:
Selection bar Selected function
> Cursor
Check mark
D
Box
-
Meaning
Current Selection
Selected o r Function
active
Not selected
Triangle pointing up Previous page
Triangle pointing down
Next page
-
Tire pressure monitoring system
App lies to vehicles: with tire pressu re mon itoring system
General notes C.. ~
Each tire, including the spare (if provided), should be checked
month ly when cold and inflated to the inflat ion pressure recom
mended by the vehicle manufacturer on the vehicle placard or tire
inf lation pressure label. ( If your vehicle has tires of a different size
than the size indicated on the vehicle placard or tire inflation pres
sure label, you should determine the proper tire inflation pressure
for those tires.)
As an added safety feature, your vehicle has been equipped with a
tire pressure monitoring system (TPMS) that illuminates a low tire
Controls and equip
ment
•
Driv er inf ormati on di spl ay
pressure telltale when one or more of your tires is significant ly
under -inflated. Accord ingly, when the low tire pressure tel ltale illu
minates, you shou ld stop and check your tires as soon as possible,
and inflate them to the proper pressure . Driving on a significan tly
under-inflated tire causes the tire to overheat and can lead to tire
failure . Under-inflation also reduces fuel efficiency and tire tread
life, and may affect the vehic le's handling and stopping ability .
Please note that the TPMS is not a substitute for proper tire mainte
nance, and it is the driver's responsibility to maintain correct t ire
pressure, even if under -inflation has not reached the leve l to trigger
il lumination of the TPMS low tire pressure te lltale .
Your veh ic le has a lso been equipped w ith a TPMS malfunction indi
cator to indicate when the system is not operating properly . The
TPMS malfunction indicator is combined with the low tire p ressure
telltale . When the system detects a malfunction, the telltale wil l
flash for approx imately one minute and then remain cont inuously
il luminated . This sequence will continue upon subsequent vehicle
start -ups as long as the malfu nction exists.
When the ma lfunction indicator is illuminated , the system may not
be able to detect or signal low tire pressure as intended. TPMS
malfunctions may occur for a variety of reasons , including the
insta llation of replacement or alternate tires or wheels on the
vehicle that prevent the TPMS from functioning prope rly . A lways
check the TPMS malfunction telltale after replacing one or more
tires or whee ls on your vehicle to ensure that the replacement or
alternate tires and wheels allow the TPMS to continue to function
p roper ly .•
App lies to ve hic les : with tire pressu re mon ito ring system
Introduction
The tire pressure m onitoring system monit ors air pressure
in all four road wheels while t he vehicle is moving.
As soon as the tire pressure monitoring system senses a significant
loss of air pressure in one or seve ra l tires, text messages and yellow
~
Page 44 of 340
Driver information display
symbols appear in the instrument cluster display to alert the driver.
The warning light in the instrument cluster comes on when the
tire is significantly underinflated .
The warning light _, also lights up during a system failure.
When the wheel is turning, the system receives radio signals from
sensors located inside each tire .
A factory spare wheel is delivered with sensor. However, the spare
wheel is not checked by the tire pressure monitoring system. Such monitoring can only occur after the spare wheel has been installed
and initialized ~
page 45.
Be aware that tire pressure is also dependent on the temperature of
the tire. For every 18 °F (10 °C) increase in tire temperature, tire pres
sure increases by about 1.5 psi (0.1 bar). The tire warms up while the
vehicle is moving and tire pressure rises. So you should adjust tire
pressure only when they are
cold, when tire temperature is roughly
the same as ambient air temperature.
In order to keep the tire pressure monitoring system properly cali
brated, tire pressure on all four tires should be checked at regular
intervals, adjusted if necessary and saved in the proper setting
(recommended pressure)~
page 43.
The tire pressure is shown on the tire pressure label. On USA vehi
cles, the tire pressure label is located on the driver's side B-pillar. On
Canada vehicles, the tire pressure label is located either on the
driver's side B-pillar or inside the fuel filler flap. The tire pressure
label lists the recommended cold tire inflation pressures for the
vehicle at its maximum capacity weight and the tires that were on
your vehicle at the time it was manufactured . For recommended tire
pressures for normal load conditions, please see chapter
~ page 277.
& WARNING
• When the tire pressure monitoring system warning light is lit,
one or more of your tires is significantly under -inflated. You should
stop and check your tires as soon as possible, and inflate them to
& WARNING (continued)
the proper pressure as indicated on the vehicle's tire pressure
label
~ page 271. Driving on a significantly under-inflated tire
causes the tire to overheat and can lead to tire failure. Under-infla
tion also is likely to impair the vehicle's handling and stopping ability .
• Do not adjust tire pressure when tire temperature is excessive.
This could lead to serious tire damage and even cause the tire to
burst, with the additional danger of an accident.
For the sake of the environment
Driving with under-inflated tires reduces fuel efficiency and tire
tread life.
[ i] Tips
• Each tire should be checked monthly when cold and set to the
recommended inflation pressure as specified on the tire pressure
table~
page 277 .
• The tire pressure monitoring system helps the driver to keep
track of the tire pressures . But the driver still has the responsibility
for maintaining the correct tire pressure.
• Tire pressure must only be adjusted when the temperature of the
tires is about the same as ambient air temperature.
• When tires are replaced, the sensors and valves must not be
detached or exchanged. Only the valve core needs to be replaced
and, if necessary, the valve and the wheel electronics replaced.
• If you should put different wheels and tires on your vehicle (e.g.
winter wheels and tires), you must be certain that the wheels and
tires are compatible with the tire pressure monitoring system.
Otherwise the system will register a malfunction and a fault
message will be displayed. For more information, contact your Audi
dealer. .,
Page 45 of 340
• For Declarat ion of Compliance to United States FCC and Industry
Canada regulations ~ page
320. •
App lies to ve hicles: w ith tir e p res sure mon it o ring syst em
Significant loss of air pressure
The yellow symbol appears in the event of a significant
Joss of air pressure.
i :c co CD
Fig . 28 Disp lay : ye llow
sy mbo l w ith message
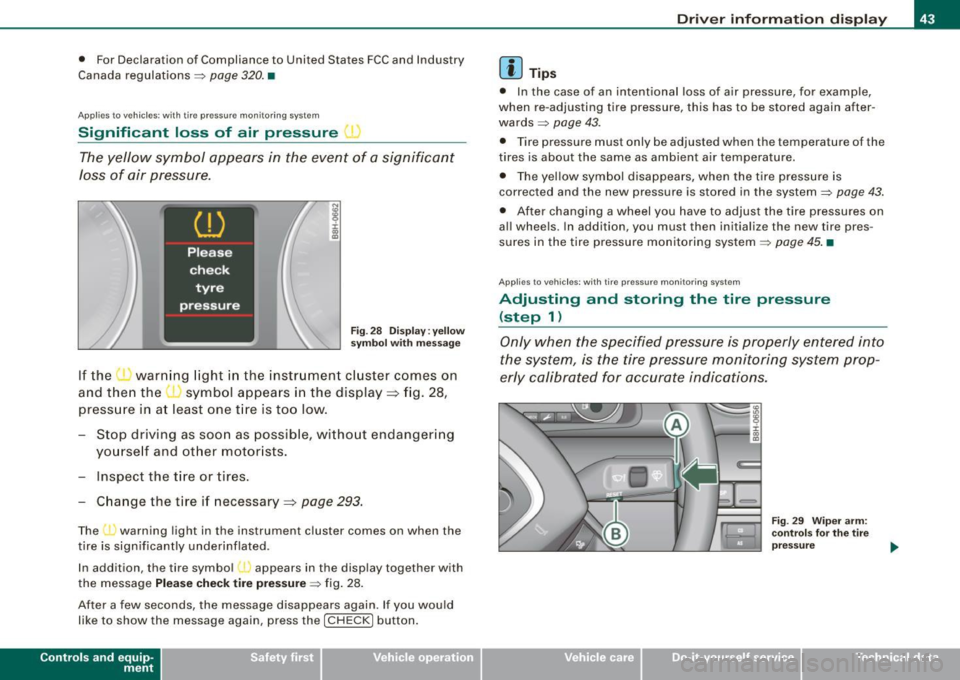
If the warn ing light in the instr ument cl uster comes on
and then the ' symbol appears in the display => fig. 28,
press ure in a t least one t ire is too low .
- Stop driv ing as soon as possible, witho ut endange ring
yo urse lf and o ther motor ists .
- Inspect the tire or t ires .
Change the tire
if necessary =:, page 293.
The J warning light in the instrum ent cluster comes on when the
tire is significantly underinflated .
In addition , the tire symbo l l appears in the display together with
the message Please check tire pre ssur e~ fig . 28.
After a few seconds, the message disappears again . If you would
l i ke to show the message aga in, press the [ CH ECK] button .
Contro ls and eq uip
ment
Dri ver informa tio n di spl ay
[ i ] Tip s
• In the case of an intentional loss of air pressure, for examp le,
when re -adjusting tire pressure, th is has to be stored again after
wards ~ page
43.
• Tire pressure must only be adjusted wh en the temperature of the
tires is about the same as ambient air temperature.
• The yellow symbol disappears, when the tire pressure is
corrected and the new pressure is stored in the system~ page
43.
• After changing a wheel you have to adjust the tire pressures on
a ll whee ls . In addi tion , you must then initialize the new tire pres
sures in the tire pressure mon itoring system ~ page
45. •
Applie s to veh ic le s: w ith tir e p re ss ure mon ito rin g syste m
Adjusting and storing the tire pressure
(step 1)
Only when the specified pressure is properly entered into
the system, is the tire pressure monit oring system prop
erly calibrated for accurate indications.
~ehicle care
Fig . 2 9 Wip er arm :
co ntr ols for th e tir e
pr ess ure
Technical data
Page 46 of 340
Driver information display
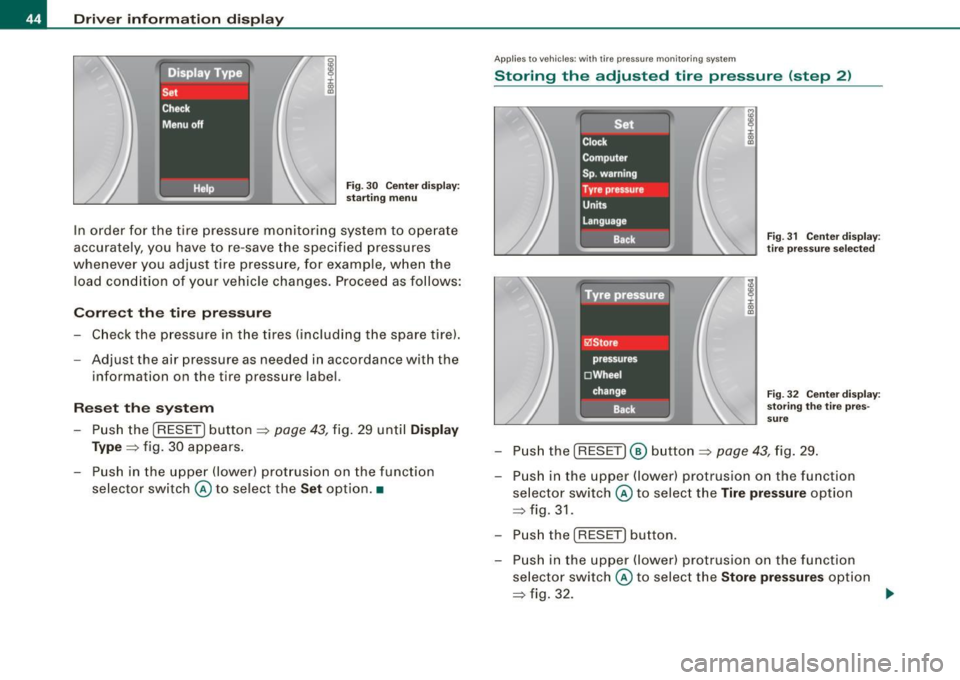
Fig. 30 Center display :
starting menu
In order fo r the t ire pressure monitoring system to operate
accurately , you have to
re-save the specified pressures
whenever you adjust t ire pressure, for example , when t he
l oad conditio n of you r vehicle changes . Proceed as follows :
Correct the tire pressure
Check the pressure in the t ires (i ncluding the spare tire).
Adjust the air pressure as needed in accordance w ith the
i nformation on the tire pressure label.
Reset the system
- Push the (RESET ] button=> page 43, fig. 29 until Display
Type =>
fig. 30 appears.
- Push in the upper (lower) protrusion on the function
selector switch @to select the
Set option. •
Applies to veh ic les : w it h tir e pressu re mon ito ring sys tem
Storing the adjusted tire pressure (step 2)
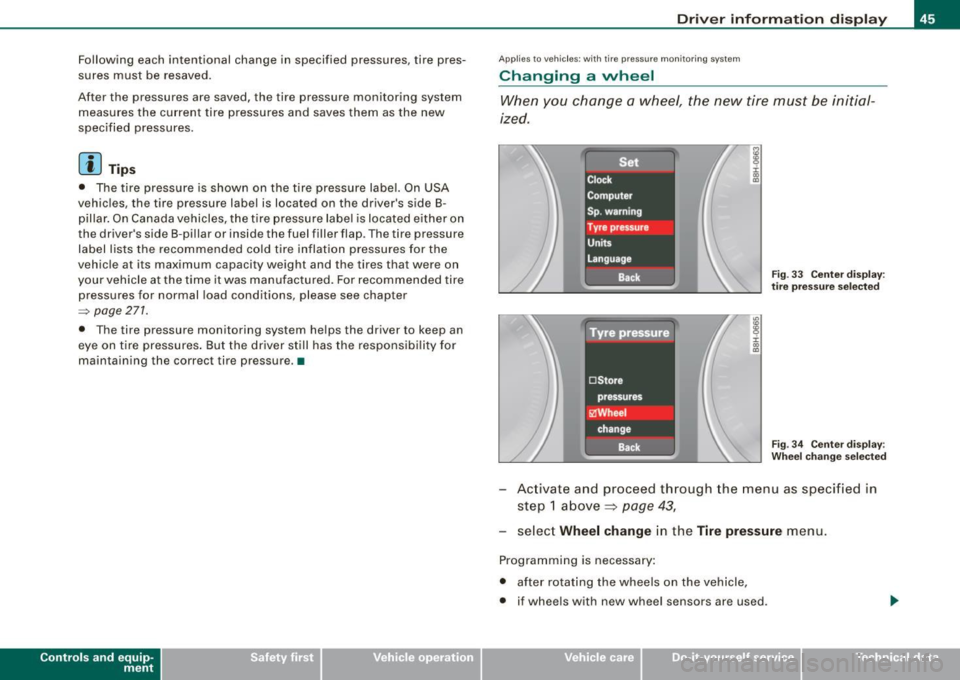
Fig. 31 Center display :
tire pressure selected
Fig. 32 Center display:
storing the tire pres
sure
- Push the (RESET] @ button=> page 43, fig. 29.
Push in the uppe r (lower) protrusion on the functio n
selector switch @ to select the
Tire pressure option
=> fig. 31.
- Push the
( RESE T] button .
- Push in the upper (lower) protrusion on the function selector switch @ to select the
Store pressures option
=> fig. 32. _.,
Page 47 of 340
Following each intentional change in specified pressures, tire pres
sures must be resaved .
After the pressures are saved, the tire pressure monitoring system measures the current tire pressures and saves them as the new
specified pressures.
[ i ] Tips
• The tire pressure is shown on the tire pressure label. On USA
vehic les, the tire pressure label is located on the driver 's side 8-
pillar. On Canada vehicles, the tire pressure label is located either on
the driver's side 8 -pi llar or insid e the fuel filler flap . The tire pressure
label lists the recommended cold tire inflation pressures for the
vehicle at its maximum capacity weight and the tires that were on
your vehicle at the time it was manufactured . For recommended tire
pressures for normal load conditions , please see chapter
=> page 271.
• The tire pressure monitoring system he lps the driver to keep an
eye on tire pressures . But the driver st ill has t he responsibi lity for
maintaining the correct tire pressure .•
Contro ls and eq uip
ment
Dri ver informa tio n di spl ay
Ap plies to veh icles : w it h tir e pr essure mo nito ring syste m
Changing a wheel
When you change a wheel, the new tire must be initial
ized .
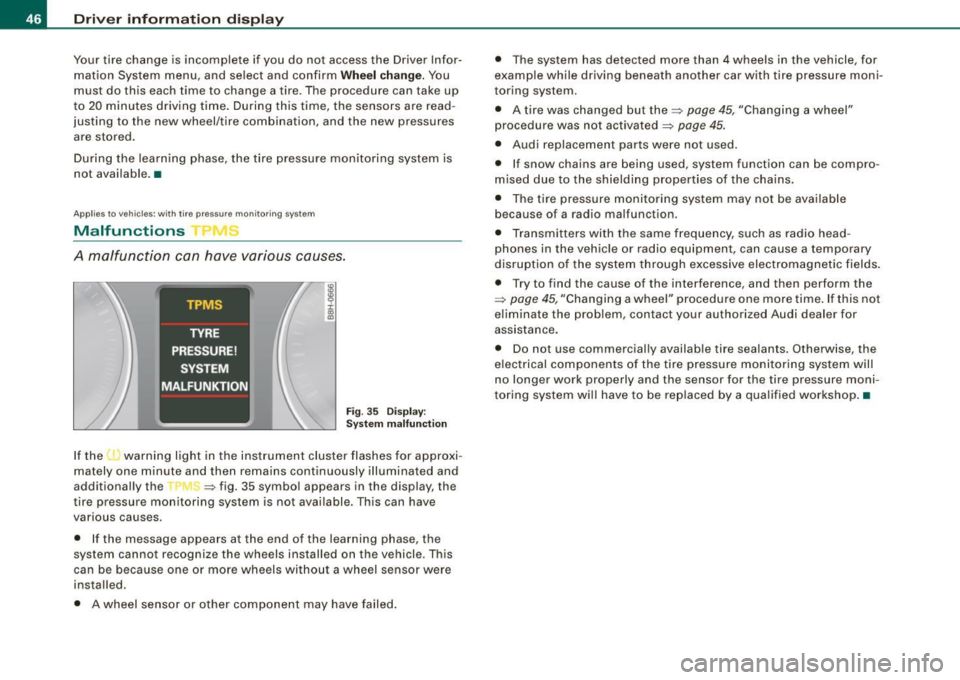
Fig . 33 Ce nter disp lay :
t ir e pr essur e se lecte d
Fi g. 3 4 Center disp lay :
W heel c hang e se lecte d
Activate and proceed through the menu as specified in
step 1 above ~
page 43,
select Wheel change in the Tire pres sure menu.
Programming is necessary:
• after rotating the wheels on the vehicle,
• if wheels with new wheel sensors are used .
~ehicle care Technical data
Page 48 of 340
Driver inf orma tion d ispl ay
Your tire change is incomplete if you do not access the Driver Infor
mation System menu, and select and confirm
Wh eel ch ange. You
must do this each time to change a tire . The procedure can take up
to 20 minutes driving time. During this time, the sensors are read
justing to the new wheel/tire combination, and the new pressures are stored.
During the learning phase, the tire pressure monitoring system is
not available. •
Applies to vehic les: with tire pressure monitor ing system
Malfunctions
A malfunction can have various causes.
Fig . 35 Dis pl ay:
Syst em m alfu nct ion
If the 'warning light in the instrument cluster flashes for approxi
mately one minute and then remains continuously illuminated and
additional ly the --, -=> fig. 35 symbol appears in the display, the
tire pressure monitoring system is not available. This can have
various causes.
• If the message appears a t the end of the learning phase, the
system cannot recognize the wheels installed on the vehicle . This
can be because one or more wheels without a wheel sensor were
installed.
• A wheel sensor or other component may have failed. •
The system has detected more than 4 wheels in the vehicle, for
example while driving beneath another car with tire pressure moni
toring system.
• A tire was changed but the=>
page 45, "Changing a wheel"
procedure was not activated =>
page 45.
• Audi replacement parts were not used.
• If snow chains are being used, system function can be compro
m ised due to the shielding properties of the chains.
• The tire pressure monitoring system may not be ava ilable
because of a radio malfunction.
• Transmi tters with the same frequency, such as radio head
phones in the vehicle or radio equipment, can cause a temporary
disruption of the system through excessive electromagnetic fields.
• Try to find the cause of the interference, and then perform the
=>
page 45 , "Changing a wheel" procedure one more time . If this not
e liminate the prob lem, contact your authorized Audi dealer for
assistance .
• Do not use commercial ly availab le tire sealants . Otherwise, the
e lec trical components of the tire pressure monitoring system will
no longer work properly and the sensor for the tire pressure moni
toring system wi ll have to be rep laced by a qua lified workshop .•
Page 49 of 340
Opening and closing
Keys
Key set
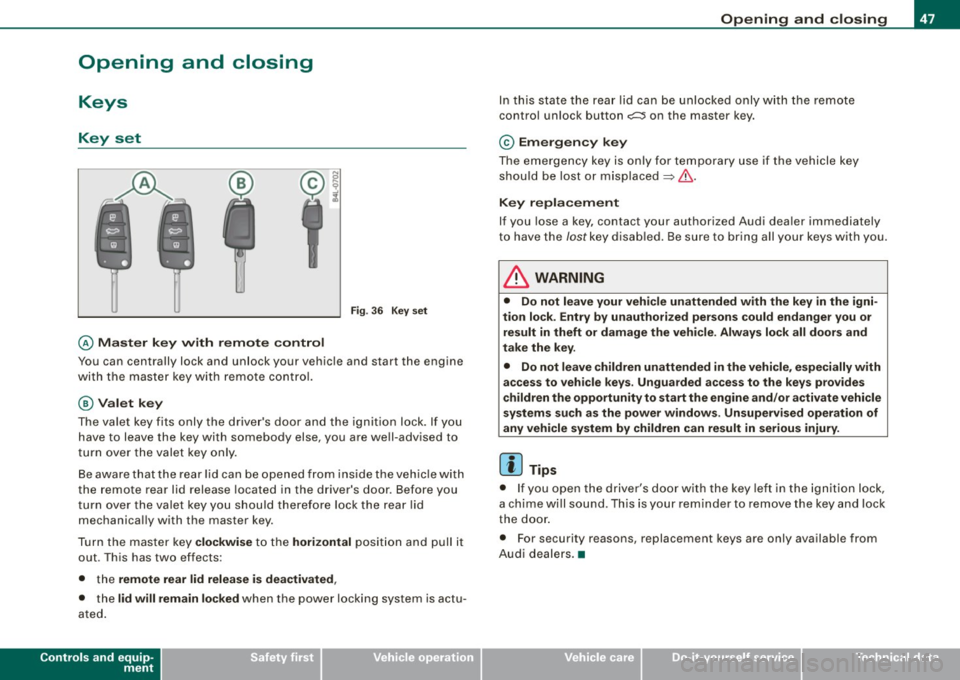
@ Master key w ith rem ote con tro l
Fig . 3 6 Key set
You can centrally lock and unlock your vehicle and start the engine
with the master key with remo te contro l.
@Val et k ey
The va le t key fits only the driver's door and the ignition lock. If you
have to leave the key with somebody else, you are well-advised to
turn over the valet key only.
Be aware that the rear lid can be opened from inside t he veh ic le with
the remote rear lid release located in the driver's door. Before you
turn ove r the valet key you should therefo re lock the rear lid
mechanica lly with the master key.
Turn t he master key
clo ckwi se to the hor izont al posit ion and pull it
out. This has two effects:
• the
remote rear lid release i s dea ctivated ,
• the lid will rem ain lo cked when the power locking system is actu
ated .
Controls and equip
ment
Op ening and clo sing
In this state the rear lid can be unlocked only with the remote
control unlock button
c::::5 on the master key.
© Em erg en cy key
The emergency key is only for temporary use if the vehicle key
should be lost or misplaced
~ & .
Key r epla cemen t
If you lose a key, contact your authorized Audi dea ler immediately
to have the /ostkey disab led. Be sure to bring all your keys with you.
& WARNING
• Do not leave your vehicle unattended wi th the key in the igni
tion lock. Entr y by un auth orized persons could e ndanger you or
re sult in theft or damage the vehi cle . Always lock all door s and
t a ke th e key.
• Do not le ave children unattend ed
in the vehicle , es pecially with
a cce ss to vehic le key s. Unguarded a ccess to the ke ys prov ide s
children th e opportunity to start th e eng ine and /or a ctivate vehicle
s y stem s suc h as the po wer w indo ws. Un sup erv is ed oper atio n of
an y vehi cle sy ste m by children can re sult in seriou s injury .
[ i ] Tips
• If you open the driver's door with the key left in the ignition lock,
a chime will sound . This is your reminder to remove the key and lock
the door .
• For security reasons, replacement keys are only available from
Audi dealers. •
Page 50 of 340
Opening and clos ing
Master key with remote control
The rem ote control allows you to lock or unlock the
vehicle electronically.
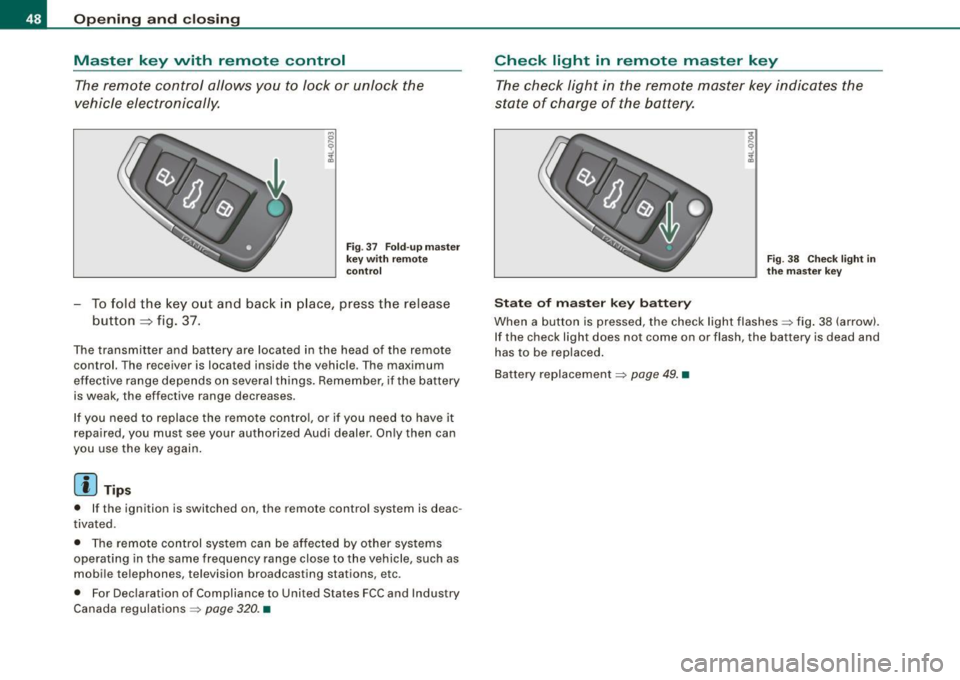
F ig . 37 Fo ld- up ma ster
key with re mote
co ntr ol
- To fold the key out and back i n place, press the release
button ::::, fig. 37.
The transmitter and battery are located in the head of the remote
control. The receiver is located inside the vehicle. The maximum
effective range depends on several things. Remember, if the ba ttery
is weak, the effective range decreases.
I f you need to replace the remote cont ro l, or if you need to have it
repaired, you must see your authorized Audi dealer. Only then can
you use the key again .
[ i ] Tips
• If the ignition is switched on, the remote control system is deac
tivated.
• The remote control system can be affected by other systems
operating in the same frequency range close to the vehicle, such as
mobile telephones, television broadcasting stations, etc.
• For Declaration of Compliance to United States FCC and Industry
Canada regulations =>
page 320. •
Check light in remote master key
The check light in the rem ote master key indic ates the
state of charge of the battery.
S ta te o f m aste r k ey ba tt e ry
F ig . 3 8 Check lig ht in
th e m as ter key
When a button is pressed, the check light flashes=> fig . 38 (arrow).
If the check light does not come on or flash, the battery is dead and
has to be replaced .
Battery replacement =>
page 49. •