tow AUDI A4 SEDAN 2013 Owners Manual
[x] Cancel search | Manufacturer: AUDI, Model Year: 2013, Model line: A4 SEDAN, Model: AUDI A4 SEDAN 2013Pages: 294, PDF Size: 73.71 MB
Page 4 of 294
2 Table of contents Vehicle literature .. .. .. .. .. ... .
5
About this Owner's Manual . . . 6
Controls and equipment .. ... .
Ins truments and controls .. . .
General illus tration .... ... .. .. ... .
Instruments and warning /
indicator lights ........ .. .. .. . .
Ins truments . .. .. ..... ... .. .. ... .
War ning/ indi cator lights ... .. ... .. .
Driver information d isplay .. . .
Introduct ion . .. .. ..... ... .. .. ... .
Trip computer .. .. ..... ... .. .. ... .
Gearshift Indicator ........ .. .. ... .
Efficiency program ........ .. .. .. . .
Service interval d isp lay .. .. .. .. .. . .
On -Board Diagnostic system (OBD) .. .
Opening and closing .... .. .. . .
Power locking system .. ... .. .. .. . .
R ear lid .. .. ................ ... . . 8
8
8
10
1 0
1 3
24
24
25
27
27
29
30
32
32
39
C hil d safety locks . . . . . . . . . . . . . . . . . 40
P ower wi ndows ........ .. .. .. .. . .
Sliding/ tilt ing su nroof ..... .. .. .. . .
Va let par king .. .. ..... ... .. .. ... .
Clear vision .. ........ .. .. .. .. . .
Lig hts ..... ... . ...... ... .. .. ... .
I nter ior lights .. .. ..... ... .. .. ... .
V1s 1on ..... ... .. ..... ... .. .. ... .
W iper and washer system .. .. .. .. . .
Dig ita l compass .............. ... .
Seats and storage ... .. .. ... .. .
General recommendat ions . .. .. ... .
Front seats .............. .. .. ... .
H ead restraints . .......... ... .. . .
Seat memory ............. ... .. . .
Ashtr ay .. .. ... .... ...... .. .. .. . .
C igarette lig hte r .......... .. .. .. . .
12-vo lt socket ........... .... ... .
S torage . ... .. . .. ..... ... .. .. ... .
Roo f rack . .... .. ..... ... .. .. ... .
Luggage compartment . ... .. .. ... . 4
0
42
4 3
44
4 4
47
4 7
so
52
54
54
55
57
58
59
5 9
60
60
63
64
Warm and cold ... .. ..... .... . .
Climate co ntrols . ... ... ..... ... .. .
68
68
On the road . . . . . . . . . . . . . . . . . . . 72
Stee ring . . . . . . . . . . . . . . . . . . . . . . . . 72
Ign it io n lock . . . . . . . . . . . . . . . . . . . . . 72
Convenience key . . . . . . . . . . . . . . . . . . 75
Driver messages . . . . . . . . . . . . . . . . . . 76
E lectromechanical parking brake . . . . 77
Speed warning system . . . . . . . . . . . . . 79
Cru ise cont ro l . . . . . . . . . . . . . . . . . . . . 81
Transmission . . . . . . . . . . . . . . . . . . 83
Manua l transm ission . . . . . . . . . . . . . . 83
mult it ron ic ® , t ipt ron ic . . . . . . . . . . . . . 83
S troni c® . . . . . . . . . . . . . . . . . . . . . . . . 89
Audi adaptive cruise control
and braking guard . . . . . . . . . . . .
97
I n troduc tion . . . . . . . . . . . . . . . . . . . . . 9 7
Genera l informa tion . . . . . . . . . . . . . . 9 7
Audi adaptive cruise contro l . . . . . . . . 99
Audi braking gua rd . . . . . . . . . . . . . . . 103
Messages . . . . . . . . . . . . . . . . . . . . . . . 105
Audi side assist .... ..... ... .. .
Lane change ass istant 107
107
Audi drive select
. . . . . . . . . . . . . . 111
Driving settings . . . . . . . . . . . . . . . . . . 111
Park assist . . . . . . . . . . . . . . . . . . . . . 114
Pa rking system . . . . . . . . . . . . . . . . . . . 114
Pa rking system (rear) . . . . . . . . . . . . . . 114
Pa rking system (rear, with rear view
camera) . . . . . . . . . . . . . . . . . . . . . . . . 115
Homelink ® . . . . . . . . . . . . . . . . . . . . 121
U niversa l remote control........ ... 121
Safety first . . . . . . . . . . . . . . . . . . . . 126
Driving Safely . . . . . . . . . . . . . . . . . 126
Genera l notes . . . . . . . . . . . . . . . . . . . . 126
Proper occupant seating positions . . . 127
Pedal a rea . . . . . . . . . . . . . . . . . . . . . . . 131
Stow ing luggage . ............. .. . 132
Repo rting Safe ty Defe cts . . . . . . . . . . . 13 4
Page 5 of 294
Safety belts . . . . . . . . . . . . . . . . . . . 136
General notes . . . . . . . . . . . . . . . . . . . . 136
Why safety be lts? . . . . . . . . . . . . . . . . 137
Safety belts . . . . . . . . . . . . . . . . . . . . . 139
Safety belt pretens ioners . . . . . . . . . . 142
Airbag system ................ .
Important things to know ......... .
Front airbags ................... .
Mon itor ing the Advanced Airbag
System ........................ .
Side airbags ............. .... .. . .
Side curta in a irbags .............. .
Child Safety ........ .... ... .. . .
Impor tant th ings to know ......... .
C hi ld safety sea ts ................ .
I nstall ing a chi ld safety seat . ... .. . .
L A T CH Lower anchorages and tether
for children ... .... .... ... .. .. .. . .
Addit ional Information
Vehi cle operat ion ..... .. .. .. . .
Intelligent technology .. .. .. . .
Not ice about data recorded by vehicle
control modules .......... .... .. . .
Electronic Stabilization Control (ESC) .
Braking .. ... ................ ... .
E lect ro-mechanical power assist ,
dynamic stee ring ................ .
Driving w ith your qu attro ® ... .. .. . . 144
144
148
155
1 59
162
165
165
17 1
175
179
183
184
184
184
184
187
188
189
E nergy management . . . . . . . . . . . . . . 190
Driving and environment . . . . . 192
The first 1,000 miles (1,500 km) and
afterwards . . . . . . . . . . . . . . . . . . . . . . 192
Avoid damaging the vehicle . . . . . . . . . 192
Driving through water on roads . . . . . 192
Catalytic converter . . . . . . . . . . . . . . . . 193
Operate your vehicle econom ically and
minim ize pollution . . . . . . . . . . . . . . . . 194
Trailer towing . . . . . . . . . . . . . . . . . 196
Driving w ith a trailer . . . . . . . . . . . . . . 196
Trailer towing tips . . . . . . . . . . . . . . . . 198
Table of contents 3
Vehicle care . . . . . . . . . . . . . . . . . . .
199
Cleaning and protection . . . . . . 199
Genera l information . . . . . . . . . . . . . . 199
Care of exterior . . . . . . . . . . . . . . . . . . 199
Care of interior . . . . . . . . . . . . . . . . . . . 205
Fuel supply and filling your
fuel tank ... .. .. .. . .............
210
Gasoline . . . . . . . . . . . . . . . . . . . . . . . . 210
Fuel tank .. .. .. .. .. . .. .... ...... . 212
Checking and filling . . . . . . . . . . . 21S
Engine hood . . . . . . . . . . . . . . . . . . . . . 215
Engine compartment . . . . . . . . . . . . . . 217
E ngine oil . . . . . . . . . . . . . . . . . . . . . . . 217
E ngine cooling system . . . . . . . . . . . . . 222
B ra ke fluid . . . . . . . . . . . . . . . . . . . . . . 224
Battery . . . . . . . . . . . . . . . . . . . . . . . . . 225
Windshie ld/headlight* washer
container . . . . . . . . . . . . . . . . . . . . . . . 229
Tires and wheels . . . . . . . . . . . . . . 230
Tires . . . . . . . . . . . . . . . . . . . . . . . . . . . 230
Tire pressure monitoring system 248
Do-it-yourself service . . . . . . . . . 251
What do I do now? . . . . . . . . . . . . 251
Vehicle tool kit . . . . . . . . . . . . . . . . . . . 251
Space-saving spare tire (compact
spare tir e) . . . . . . . . . . . . . . . . . . . . . . . 251
Changi ng a wheel . . . . . . . . . . . . . . . . . 252
Fuses and bulbs . . . . . . . . . . . . . . . 258
Fuses ... .. .. .. .. .. . .. .... ...... . 258
Bulbs . . . . . . . . . . . . . . . . . . . . . . . . . . . 261
Emergency situations . . . . . . . . . 262
General . . . . . . . . . . . . . . . . . . . . . . . . . 262
Starting by pushing or towing . . . . . . . 262
Star ting with jumpe r cables . . . . . . . . 262
U se of jumpe r cables . . . . . . . . . . . . . . 263
E mergency towing with commercia l
tow truck . . . . . . . . . . . . . . . . . . . . . . . 264
Lifting vehicle . . . . . . . . . . . . . . . . . . . . 266
•
•
Page 20 of 294
18 Instrum ent s and w arn ing /indic ato r light s
...L Engine cooling system
A malfunction in the engine cooling system
must be repaired as soon as possible .
• Turn off engine and chec k coolant le vel
If the indicator light t urns on and the mes
sage appears, the coo lant temperature is too
high or the coo lant level is too low.
> Pu ll off the road.
> Stop the vehicle .
> Turn off the engine.
> Check coolant level ¢ page 222.
> Add coolant if necessary¢ page 223.
> Continue driving only after the eng ine cool
ant warn ing/ indicator light goes out .
> Contact your authorized Audi dealer for as-
s istance if necessary .
If the engine coolant level is correct, then the radiator fan may be the cause of the malfunc
tion .
• Coolan t tempe rature! Let engine run w ith
v eh icl e s tationary
If the indicator light turns on and the mes
sage appears in trailer mode*, let the engine
run at idle for a few m inutes to cool down.
A WARNING
- If your veh icle should break down for
mechanical or other reasons, park at a
safe distance from moving traffic, turn
off the engine and turn on the hazard
wa rning lights ¢
page 46, Emergency
flashers.
-
- Never open the hood if you see or hea r
steam or coolant escap ing from the en
gine compartment - you risk being scald
ed. Wait until you can no longer see or
hear steam or coo lant escaping .
- The engine compartment of any vehicle
is a dangerous area. Before you perform
any work in the engine compartment,
turn of the eng ine and allow it to cool.
Follow the warning stickers¢
page 208,
Engine compartment .
(D Note
Do not continue driving if the . symbol
ill um inates . There is a malfunction in the
engine cooling system -you could damage
your engine.
@ -Steering column lock
• Stee ring d efec tive ! Do not dri ve vehicle!
If the indicator light turns on and the mes
sage appears, there is an electronic steering
column lock malfunct ion. You cannot switch
the ignit ion on .
Do
not tow yo ur vehicle because it cannot be
steered . Seek professional assista nee.
l!J:I Steering lock : Cont act de ale r!
If the indicator light turns on and the mes
sage appears, there is an e lectronic stee ring
co lumn lock malfunct ion .
Drive to your authori zed A udi dealer immedi
ately to have the ma lfunction corrected .
A WARNING
-
Your vehicle must not be towed in the
event of a malfunction in the elect ronic
steering co lumn lock beca use it cannot be
steered due to the loc ked steering . If it is
towed with the steering locked, there is
the r isk of an accident.
© -Ignition lock
• Ignit ion lo ck defecti ve . Contact dealer!
If the indicator light turns on and the mes
sage appears, do
n ot switch the ignit ion off
because you may not be ab le to sw itch it on
again.
Drive to your authorized A udi dealer immedi
ately to have the malfunction corrected .
On vehicles with convenience key*, the engine
shou ld not be switched
off using the
I S TAR T ENGINE ST OPI button beca use the en
gine cannot be started again after the ignition
has been switched
off. ..,.
Page 29 of 294
The values in the single-t rip or the total-trip
memory can a ll be reset to zero at the same
time under
Reset in the menu .
I n addition, you can determine what informa
tion from the trip computer should be shown
in the instrument cluster display. If one of the
p ieces of driver information is turned
Off , that
driver information w ill not be shown in the
display. The information will continue to be
calculated by the trip computer and can be
turned back
On at any t ime.
(D Tips
- This function is not avai lab le on all
vehicles.
- The driving information in the efficiency
program is also reset to zero with the
s ingle-trip memory.
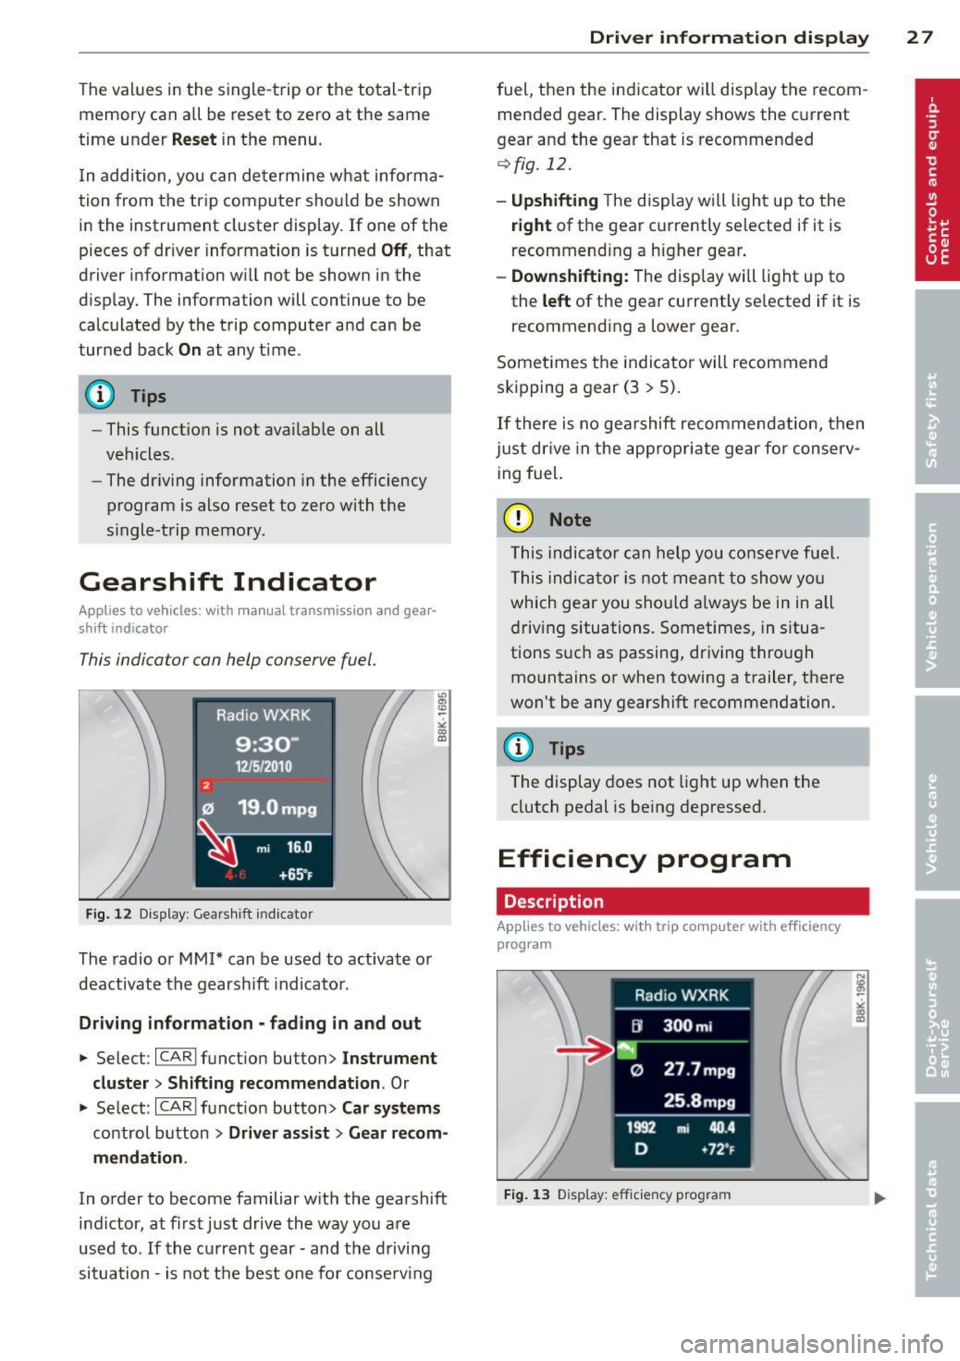
Gearshift Indicator
A ppl ies to vehicles: with manu al transmi ssion a nd gea r·
shi ft indica tor
This indicator con help conserve fuel.
~~~------------~~ ~.;;-
Fig. 12 Display: Gea rs hi ft indicator
The radio or MMI* can be used to activate or
deactivate the gearsh ift indicator.
Driving information -fading in and out
.,. Se lect: ICARlfunction button> Instrument
cluster
> Shifting recommendation . Or
m ~ ~ a, a,
.,. Select: ICARI funct ion button> Car systems
control button > Driver assist > Gear recom
mendation .
In order to become familiar with the gearshift
indictor, at first just drive the way you are
used to.
If the current gear -and the driving
situation -is not th e best one for conserving
Driver information display 2 7
fuel, then the indicator wi ll display the recom
mended gear. The display shows the current
gear and the gear that is recommended
¢fig. 12.
-Upshifting The disp lay wi ll light up to the
right of the gear currently selected if it is
recommend ing a higher gear .
-Downshifting: The display wi ll lig ht up to
the
left of the gear currently se lected if it is
recommending a lower gear .
Sometimes the indicator will recommend
skipping a gear (3
> 5).
If there is no gearshift recommendation, then
just drive in the appropriate gear for conserv
ing fuel.
(D Note
This indicator can help you conserve fuel.
This indicator is not meant to show you
which gear you sho uld always be in in all
driving situations . Sometimes, in situa
tions s uch as passing, dr iv ing through
mountains or when towing a trailer, there
won't be any gearshift recommendation.
(D Tips
The display does not light up when the
clutch pedal is be ing depressed.
Efficiency program
Description
App lies t o vehicles: wi th trip co mp ute r wi th effici ency
prog ram
Fig. 13 D isplay: efficie ncy progra m
Page 30 of 294
28 Driver information d isplay
• Press the I RESET I button @c:::> page 26,
fig. 11 repeatedly until the efficiency pro
gram appears in the display.
The effic iency program can help you to use
less fuel. It evaluates driving information in
reference to fuel consumption and shows oth
er equipment influencing consumption as well
as shift recommendations. Fuel economy messages c:::>
page 29 prov ide tips for effi
cient driving .
The efficiency program uses distance and con
sumption data from trip computer
1. If the
data are deleted in the eff iciency program,
those values are also reset in trip computer
1.
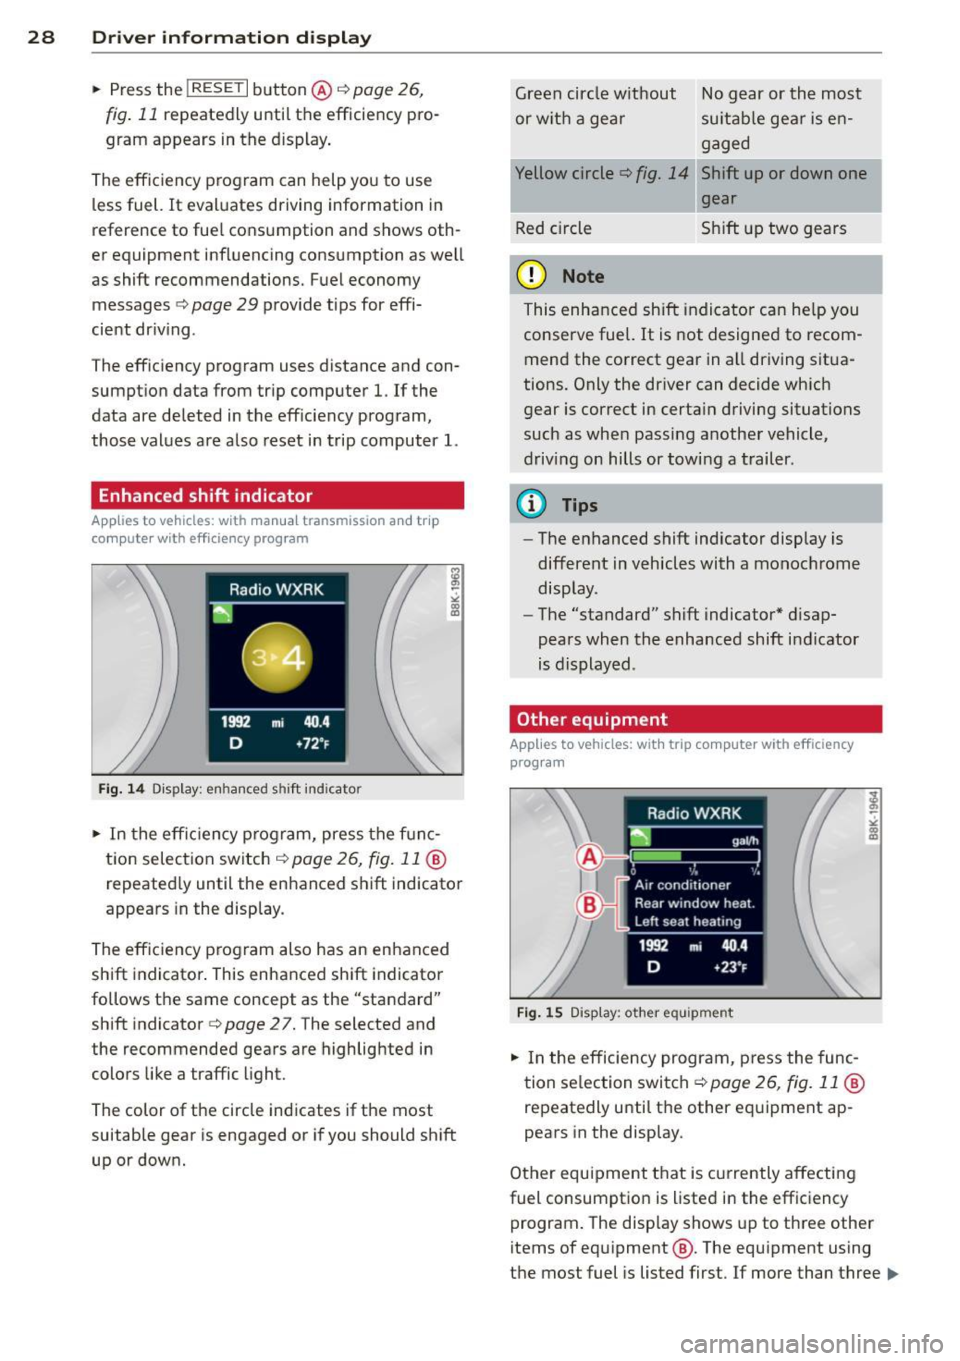
Enhanced shift indicator
Applies to vehicles: with manual transmission and trip
co mpute r with efficiency program
Fig . 14 D is p lay: e nhance d shi ft ind icato r
• In the efficiency program, press the func
tion selection switch c:::>
page 26, fig. 11 @
repeated ly until the enhanced shift indicator
appears in the display.
The effic iency program also has an enhanced
shift indicator. This enhanced shift indicator
follows the same concept as the "standard"
shift indicator
c:::> page 27. The selected and
the recommended gears are highlighted in
colors like a traffic light.
The color of the circle indicates if the most
suitable gear is engaged or if you should shift
up or down. Green
circle w ithout No gear or the most
or w ith a gear su itable gear is en
gaged
Yellow circle
c:::> fig. 14 Shift up or down one
gear
Red circle Shift up two gears
(D Note
This enhanced shift indicator can help you
conserve fuel.
It is not designed to recom
mend the correct gear in all driving situa
tions. Only the driver can decide which
gear is correct in certain driving situations
such as when passing another vehicle,
driving on hills or towing a trailer .
(!) Tips
-The enhanced shift indicator display is
different in vehicles with a monochrome
display .
- The "standard" shift indicator* disap
pears when the-enhanced shift indicator
is displayed .
Other equipment
Applies to vehicles: with trip computer with eff iciency
program
Fig. 15 D isplay : oth er equi pm en t
• In the efficiency program, press the func
tion selection switch ¢
page 26, fig. 11 @
repeatedly until the other equipment ap
pears in the display .
Other equipment that is currently affecting
fuel consumption is listed in the efficiency program. The disp lay shows up to three other
items of equipment @. The equipment using
the most fuel is listed first .
If more than three ""
Page 42 of 294
40 Opening and closing
_&. WARNING
After opening the rear lid using the emer
gency release in vehicles with a fixed rear
seat backrest, make sure the bracket under
the rear bench seat
9 fig. 29 locks securely
into the mounting eye let again.
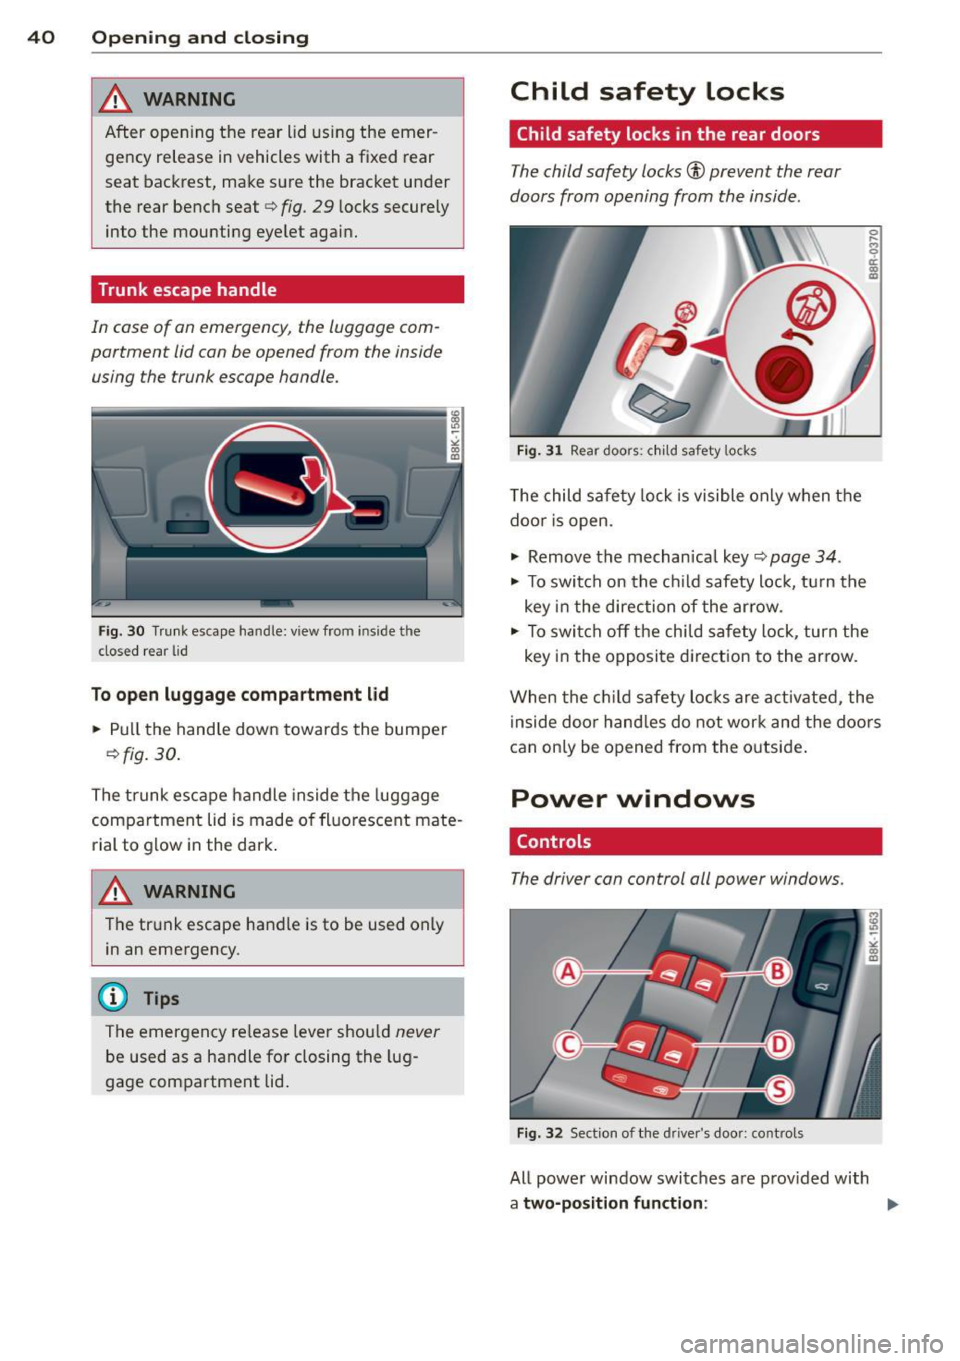
Trunk escape handle
In case of an emergency, the luggage com
partment lid can be opened from the inside using the trunk escape handle.
Fig. 30 Tru nk escape handle: view from inside the
closed rear lid
To open luggage compartment lid
.. Pull the handle down towards the bumper
r=;, fig. 30.
The trunk escape handle inside the luggage
compartment lid is made of fluorescent mate
rial to g low in the dark .
,&. WARNING
The trunk escape handle is to be used only
in an emergency .
@ Tips
The emergency re lease leve r shou ld never
be used as a handle for closing the lug
gage compartment lid.
Child safety locks
Child safety locks in the rear doors
The child safety locks® prevent the rear
doors from opening from the inside.
Fig. 31 Rear doors: chil d safety locks
T he child safety lock is visible only when the
door is open .
.. Remove the mechan ica l key
c:> page 34 .
.,. To switch on the child safety loc k, turn the
key in the direction of the arrow .
0
s ti:
"' "'
.. To switch off the child safety lock, turn the
key in the opposite direction to the arrow.
When the child safety locks are activated, the
inside doo r hand les do not work and the doors
can only be opened from the outside .
Power windows
Controls
The driver can control all power windows.
Fig. 32 Section of the driver's door: con tro ls
All power window switches a re provided with
a two-position function :
Page 48 of 294
46 Clear vis ion
The lea ving home function i lluminates the
area around the vehicle when unlocking it.
This funct ion can be switched on and
off.
The c o ming ho me and leav ing h ome func
tions on ly operate when it is dark and the
light switch is in the AUTO position
c::> page 44, fig. 36 .
Auto headlight s*
When the light switch is in the AUTO
c::> page 44 position, the sw itch-on po int of the
lights can be changed in the automatic driving
light function.
Daytime running lights
USA model s: You can switch the day time run
ni ng lights
on and off .
Canada mod els: The function cannot be
turned off .
It is activated automat ica lly each
time the ign ition is switched o n.
Travel mode*
The headlight beam is asymmetrical. This pro
vides stronger illum ination on the s ide of the
road on wh ich you are driving . If you a re driv
ing i n a count ry that d rives on the opposite
side of the road from you r own country, th is
will cause glare for oncoming dr ivers. To pre
ve nt glare :
- T rave l mode must be selected in vehicles
with Xenon headlights*.
- In vehicles with halogen head lights, certain
areas of the head light lenses must be cov
ered w ith wate rproof adhesive covers tha t
p revent light from passing through. For
more information, p lease see your author
i zed Audi dea ler or author ized repai r fac ility .
@ Tips
When trave l mode is activate d, a display in
the driver information system indicates
this each time you switch t he ignitio n on.
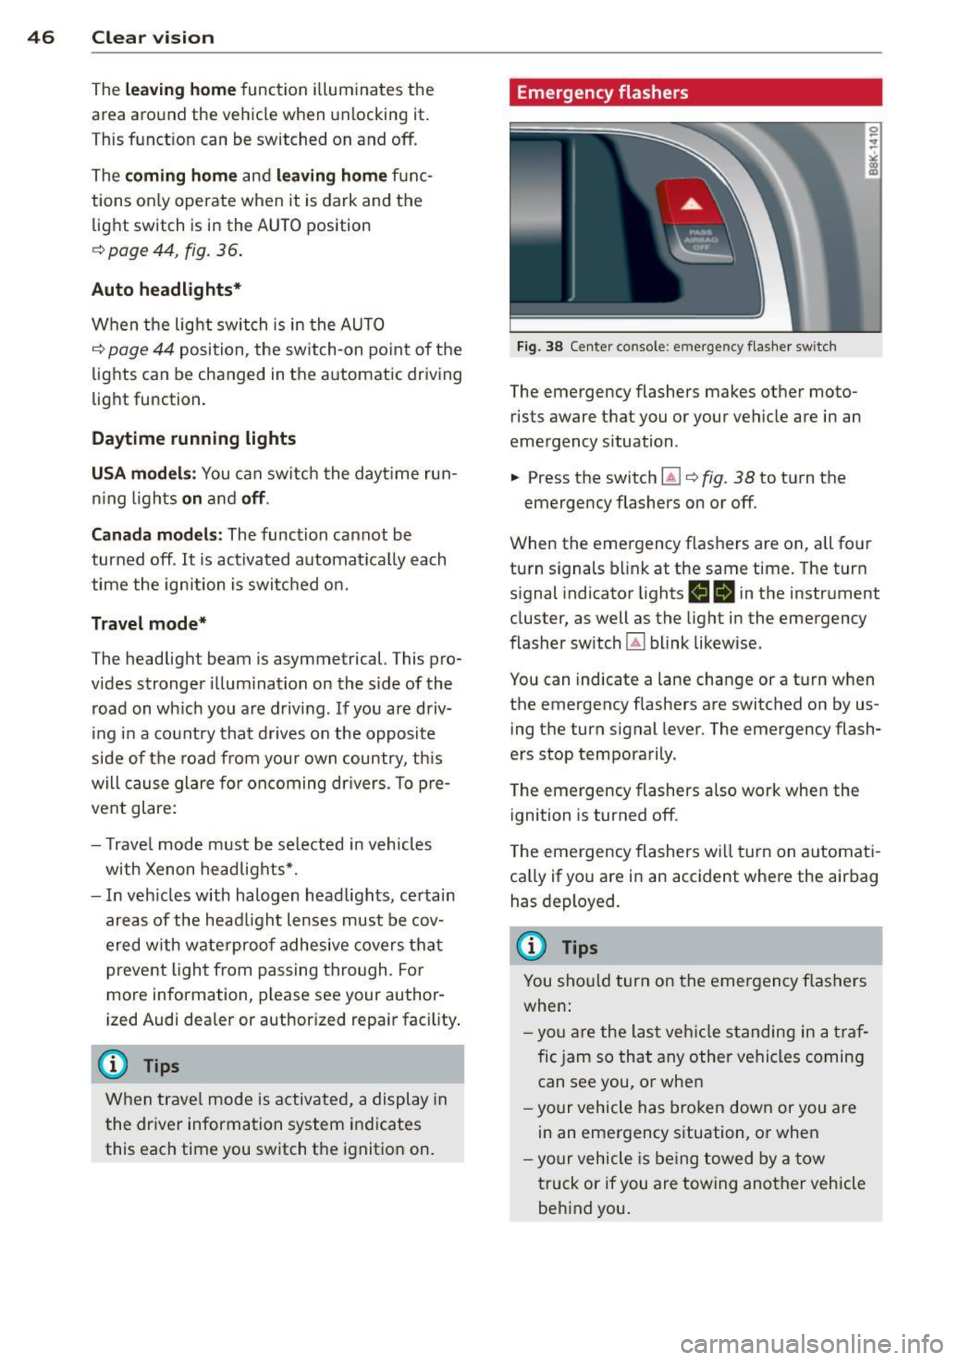
Emergency flashers
Fi g. 38 Center co nsole : em ergency flashe r sw itch
The emergency flashers makes other moto
rists aware that you or your vehicle are in an
emergency situation .
... Press the switch~
c::> fig. 38 to turn the
emergency flashers on or
off.
When the emergency flas hers are on, all fo ur
turn s ignals b link at the same time. The turn
s ignal indicator lights
H II in the instr ument
cluster, as well as the light in the emergency
flasher switch ~ blink likewise.
You can indicate a lane change or a t urn when
the emergency flashers are switched on by us
ing t he turn signal lever. The emergency flash
ers stop temporarily .
T he emergency flashers also work when the
ignition is turned off .
T he emergency flashers wi ll turn on automat i
ca lly if yo u are in an accident where the airbag
has deployed.
(D Tips
You sho uld turn on the emer gency flas hers
whe n:
- yo u are the last veh icle standing in a t ra f
fic jam so that any other vehicles corning can see you, o r whe n
- yo ur vehicle has bro ken down or you are
in an emergency s ituation, o r when
- yo ur vehicle is be ing towed by a tow
tr uck or if you are towing ano ther vehicle
beh ind you .
Page 49 of 294
Interior lights
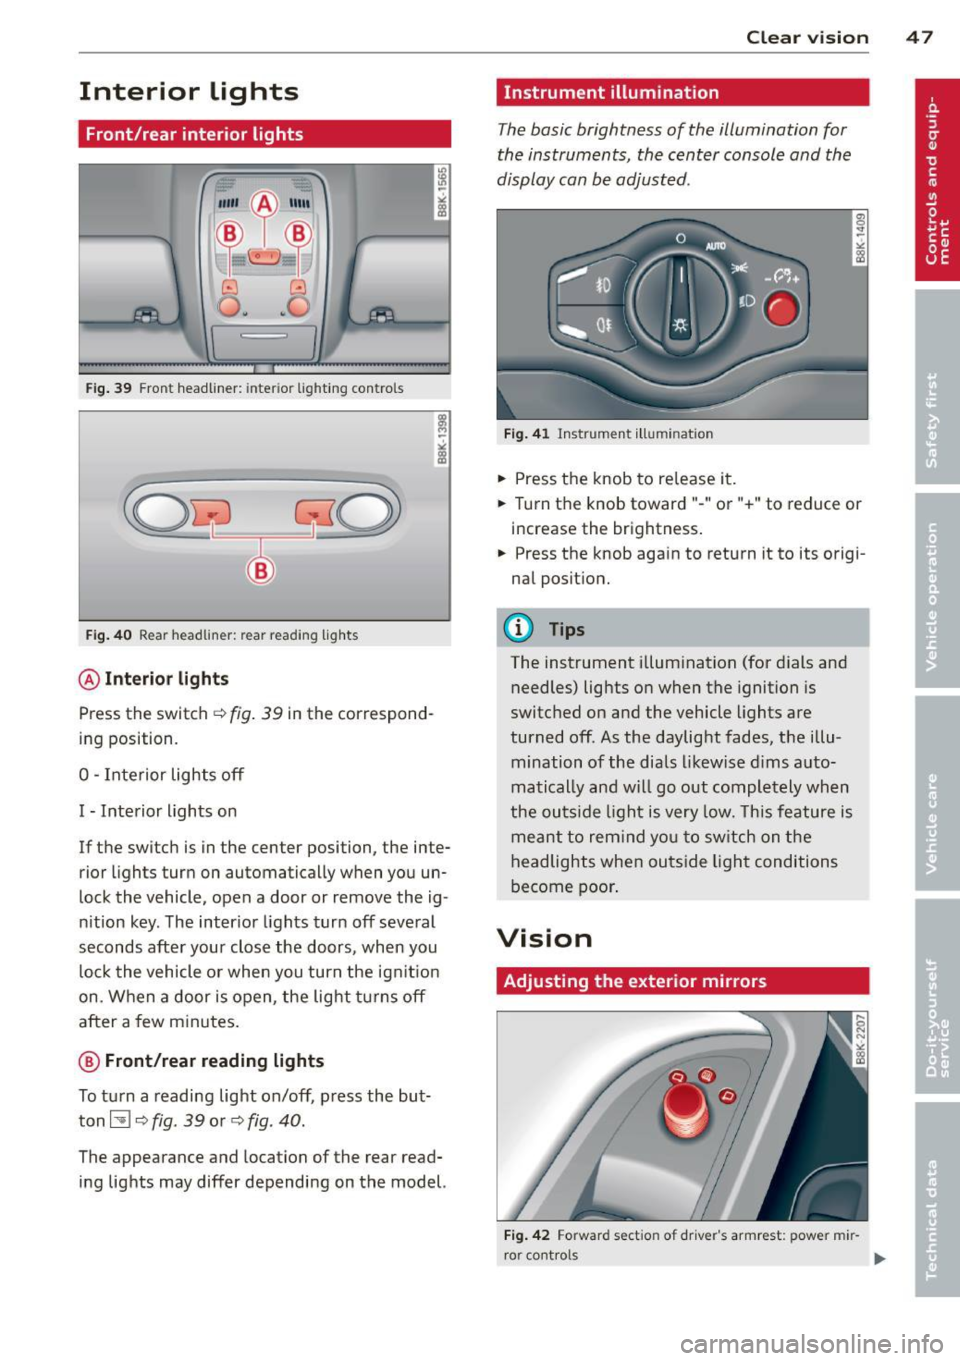
Front/rear interior lights
Fig. 39 Front headliner: inte rior ligh ting con trols
Fig . 40 Rear headlin er: rear rea ding lights
@ Interio r lig ht s
Press the sw itch c:::> fig. 39 in the correspond
ing position.
0 -Interior lights off
I -Interior lights on
If the switch is in the center position, the in te
rior lights turn on automatically when you un
lock the vehicle, open a door or remove the ig
n ition key . The inter ior lights turn
off several
seconds after your close the doors , when you
l ock the vehicle or when you turn the ig nition
on. When a door is open, the light turns
off
after a few minutes.
@ Front /re ar reading lights
To turn a reading light on/off , press the but
ton ~
c:::> fig. 39 or c:::> fig . 40 .
The appearance and location of the rear read
ing lights may differ depending on the model. Clear vi
sion 4 7
Instrument illumination
The basic brightness of the illumination for
the instruments, the center console and the
display can be adjusted.
F ig . 4 1 Ins trum ent ill u min atio n
.,. Press the knob to release it .
.. Turn the knob toward"-" or"+ " to reduce or
i ncrease the brightness .
.,. Press the knob aga in to return it to its origi
nal position.
(D Tips
The instrument illumination (for dials and
needles) lights on when the ignition is
switched on and the vehicle lights are
turned off . As the daylight fades, the illu
mination of the dials likewise d ims auto
matically and w ill go out completely when
the outs ide light is very low. This feature is
meant to rem ind you to sw itch on the
headlights when outs ide light conditions
become poor .
Vision
Adjusting the exterior mirrors
Fig. 42 Forwar d sect io n of dr iv er's armrest : pow er mir
r o r cont rols
Page 51 of 294
-If swallowed and person is conscious ,
r inse mouth with wate r for at least 15
minutes . Do not induce vom iting unless
inst ructed to do so by medical professio
nal. Get medical at tention immediately .
(D Note
Liquid electro lyte leaking from broken mir
ror glass will damage any plastic surfaces
it comes i n contact with . Clean up spilled
electrolyte immed iately w ith clean water
and a sponge .
@ Tips
-Switch ing off the dimming function of
the inside rear view m irror also deact i
vates the automat ic d imm ing f unction of
t h e exte rior m irrors .
- Automat ic dimming for the m irror only
operates properly i f the sun shade* f or
the rear window is no t in use o r the light
str iking the ins ide mir ro r i s no t hindered
by other objects .
- The au tomati c dimm ing mirro rs do no t
dim when the interio r lighting is turned
on or the reverse gear is se lec ted.
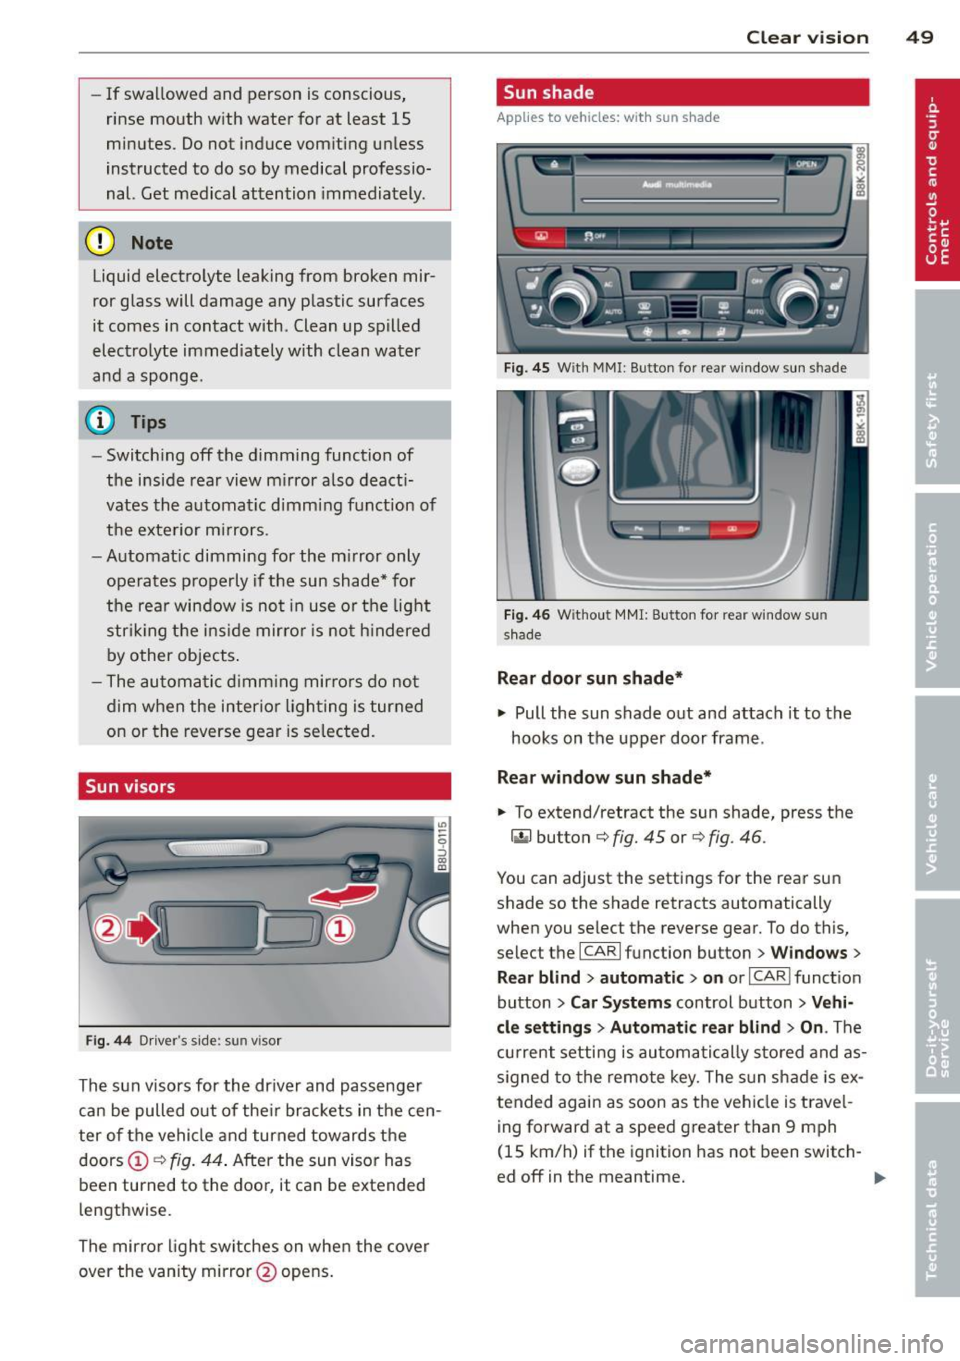
Sun visors
Fi g. 44 D rive r's side : sun viso r
Th e sun v isors for the driver and passenger
can be pulled out of the ir brackets in the cen
ter of the vehicle and turned towards the
doors @¢
fig. 44. After the sun visor has
been turned to the doo r, it can be extended
l e ngthwise.
The mirror light switches on whe n the cover
over the vanity mirror @opens .
Clear vision 49
Sun shade
App lies to veh icles : w ith sun s had e
~ flou , ~---
Fig. 45 W ith MMI: Button for rear w indow s un sh ade
Fi g. 46 Witho ut M MI: But ton for rea r w in d ow s un
s h ade
Rear door sunshade*
.,. Pull the sun shade out and attach it to the
hooks on the upper door frame .
Rear window sun shade*
.,. To extend/retract the sun shade, press the
~ bu tton ¢ fig. 45 or~ fig . 46 .
You can adjust the settings for the rea r su n
shade so the shade retracts automatically
when you selec t the reverse gear. To do this,
selec t the
ICARI func tion bu tton > Windows >
Rear blind > automatic > on
or I CAR I funct ion
button >
Car Sy stem s control button > Vehi
cl e se tting s
> Automatic r ear blind > On . The
c u rrent setti ng is au toma tic al ly s to red and as
s igned to the remote key. The s un shade is ex
tended again as soon as t he veh icle is trave l
ing fo rward at a speed g reater than 9 mph
(15 km/h) if th e ign ition has not been switch-
ed off in the meantime.
11>-
Page 66 of 294
64 Seats and storage
loading the roof rack
Always distribute loads evenly . Make sure
anything on the roof rack is securely tied
down.
,. Always distribute the loads on the roof rack
evenly .
,. Always attach items to the roof rack secure-
ly befo re you dr ive off.
The maximum perm iss ible roof we ight is
2 00 lb (90 kg ). The roof weight is the total of
the we ight of the roof rack, the attachments
and the cargo you are car ry ing. You m ust also
not exceed the maximum load weight for the
roof rack you are using.
When us ing a roof rack system which has a
l owe r load carry ing capac ity, you must not use
up the total max imum pe rm issib le load carry
i ng capac ity specified
above . Instead, you
should load the roof rack system only to the
maximum capacity specified by the manufac
turer of the roof rack system.
A WARNING
Weak, damaged or improper straps used to secure items to the roof rack can fail
during hard braking or in a collision and
cause se rious personal injury .
- Make sure the roof rack is insta lled exact
ly as specified
above ¢ page 63.
- Always use suitable mounting straps for
sec uring items to the roof rack to help
prevent items from shift ing o r fly ing for
wa rd.
- Items on the roof rack must always be sec urely mounted.
- The use of a roof rack can negative ly af
fect the way a vehicle handles . Ca rgo
that is larg e, h eavy, bulky, long o r flat
will have a g reater negative influence on
the vehicle's aerodynamics, center of
gravity and overal l ha ndling. Always
dr ive slowly, avo id sudden braking and
mane uvers when transporting cargo o n
the roof of your vehicle.
- Never exceed the maxim um permissible
load carrying capacity of the roof of your
veh icle, the permissible axle weights and
the permissible total weight of your vehi cle ¢
page 268, Weights.
(D Note
Make sure that the opened rear lid does
not come in contact with the cargo on the
r oof.
@ For the sake of the environment
As a result of the increased wind resist
ance created by a roof rack, your vehicle is
us ing fuel unnecessarily. So
remove the
r oof rack after using it .
Luggage compartment
, General information
A WARNING
-Read and follow the important safety pre-
cautions on¢
page 132, Stowing lug
gage.
Enlarging the luggage compartment
Applies to vehicles: with folding rear seatback
The rear seat backrests can be folded forward
either separately or together .
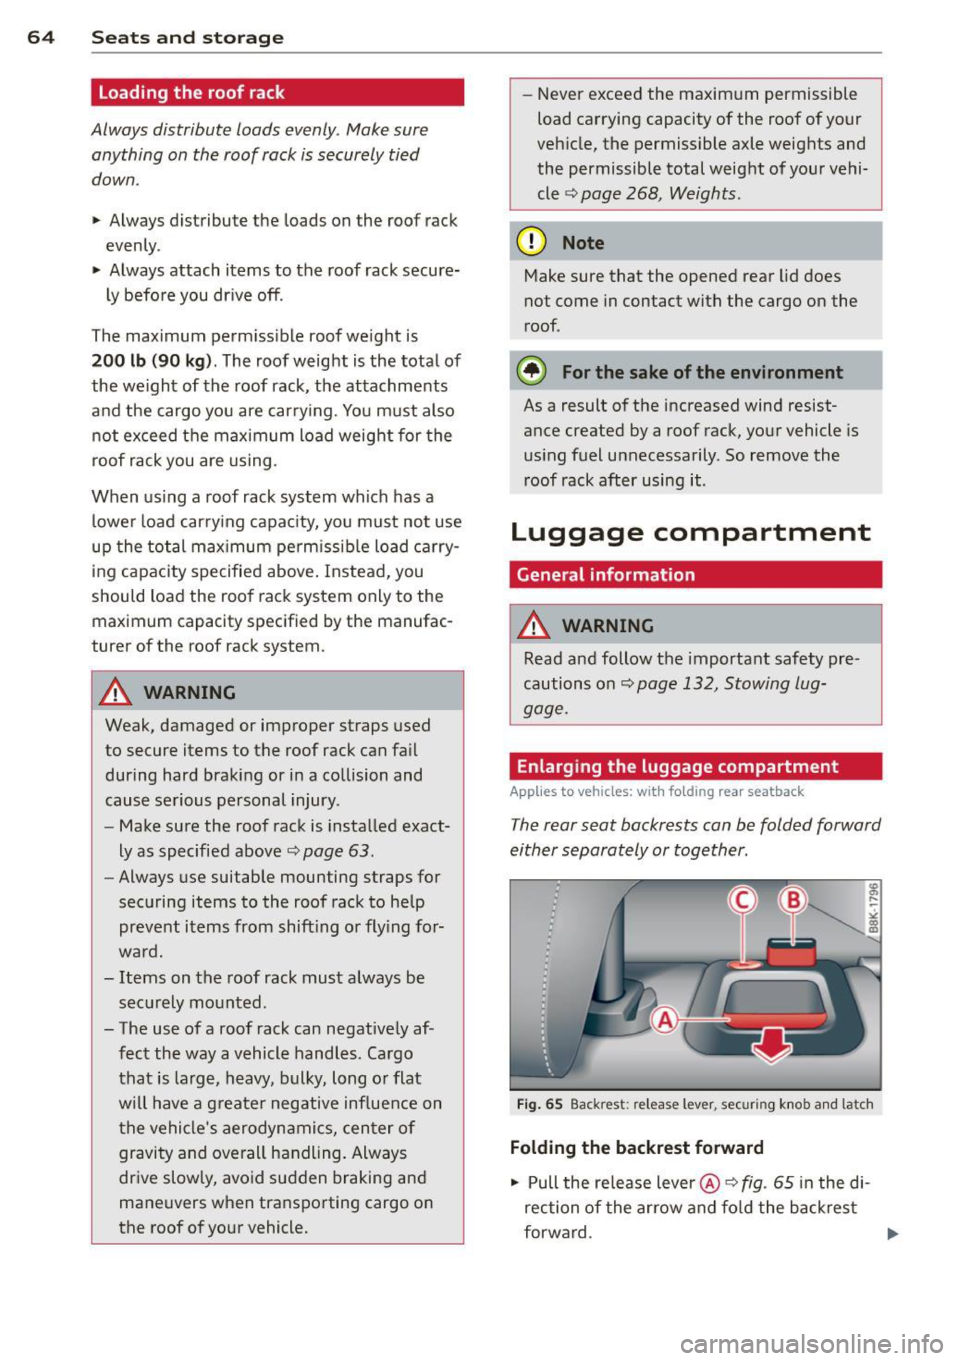
Fig . 65 Back rest : re lease lever , securing knob and latch
Folding the backr est forward
,. Pull the release lever @¢
fig. 65 in the di
rection of the arrow and fo ld the back rest
forward.
IJ,-