light AUDI A5 COUPE 2010 Service Manual
[x] Cancel search | Manufacturer: AUDI, Model Year: 2010, Model line: A5 COUPE, Model: AUDI A5 COUPE 2010Pages: 360, PDF Size: 84.39 MB
Page 68 of 360
![AUDI A5 COUPE 2010 Service Manual Clear vision
[ i ] Tips
If there should be a malfunction in the electrical system, you can
sti ll adjust the outside mirrors by pressing the edge of the mirror. •
Applies to AUDI A5 COUPE 2010 Service Manual Clear vision
[ i ] Tips
If there should be a malfunction in the electrical system, you can
sti ll adjust the outside mirrors by pressing the edge of the mirror. •
Applies to](/img/6/57582/w960_57582-67.png)
Clear vision
[ i ] Tips
If there should be a malfunction in the electrical system, you can
sti ll adjust the outside mirrors by pressing the edge of the mirror. •
Applies to ve hicles: with automatically adjusting outside m irrors
Automatic dimming for the outside mirrors
The outside mirrors dim at the same time as the inside mirror. When
the ignition is switched on, the mirrors automatically dim
depending on the amount of light striking the mirrors (such as head lights shining into the vehic le from the rear).
When the inte rior lighting is switched on and when reve rse gear is
engaged, the mirrors are switched back to their original brightness
{not dimmed) .
& WARNING
Broken glass of automati c dimming mirror can cau se e lectrolyte
fl uid leakage. Ele ctrolyte f luid c an irritate skin , eye s, an d re spir a
tory system .
• Repeated or pr olonged e xposure to electrol yte can cause irrita
tion to the resp iratory sy stem , e specially among people with
a sthma or oth er re spir atory condition s. Get fre sh air immedi ately
by leaving the vehi cle or, if that is not po ssibl e, op en windows and
d o ors all the way .
• If electrolyte get s into the eyes , flush them thoroughly with
large amount s of clea n water for at lea st 15 minute s; medi cal
attention is recommended .
• If electrolyte contact s skin, flush affe cted area w ith clean water
for at least 15 minute s and then wa sh affected area with soap and
water ; m edic al a ttention is recommend ed . Thoroughl y wash
affected clothing and shoes before reuse .
• If swallowed and per son is con sciou s, rinse mout h with water
for at least 15 minute s. Do not induce vomiting unles s ins tructed
& W ARN ING (continued )
to do so by m ed ical p rofess ional. Get medic al attent ion immedi
ately .
0 Note
Liquid electro lyte leaked from a broken mirror glass wi ll damage any
plastic surfaces it comes in contact with. C lean up spilled e lectrolyte
immediately with c lear wate r and a spo nge.
[ i ] Tips
• Switching off the dimming function of the inside rear view
mirror al so dea ctivate s the autom atic dimm ing fun ction of the e xte
rior mirrors .
• Automatic dimming for the mirror only operates properly if the
sun shade* for the rear window is not in use or the light striking the
inside mirror is not hindered by other objects. •
Page 71 of 360
Seats and storage
General recommendations
Why is your seat adjustment so important? The safety belts and the airbag system can only provide
maximum protection if the front seats are correctly
adjusted.
The re are various ways of adjusting the front seats to provide safe
and comfortable support for the driver and the front passenger.
Adjust your seat properly so that:
• you can easily and quickly reach all the switches and controls in
the instrument panel
• your body is properly supported thus reducing physical stress
and fatigue
• the safety belts and airbag system can offer maximum protec
tion
~ page 188.
In the follow ing sections, you will see exactly how you can best
adjust your seats.
There are special regulations and instructions for installing a child safety seat on the front passenger's seat. Always follow the informa
tion regarding child safety provided in~
page 213, "C hild Safety".
& WARNING
Incorrect seating position of the driver and all other passengers
can result in serious personal injury.
• Always keep your feet on the floor when the vehicle is in motion
- never put your feet on top of the instrument panel, out of the
window or on top of the seat cushion. This applies especially to
the passengers. If your seating position is incorrect, you increase
the risk of injury in the case of sudden braking or an accident. If
Controls and equip
ment
Seats and storage
& WARNING (continued)
the airbag inflates and the seating position is incorrect, this could
result in personal injury or even death.
• It is important for both the driver and front passenger to keep
a distance of at least 10 inches (25 cml between themselves and
the steering wheel and/or instrument panel. If you're sitting any closer than this, the airbag system cannot protect you properly. In
addition, the front seats and head restraints must be adjusted to
your body height so that they can give you maximum protection.
• Always try to keep as much distance as possible between your
self and the steering wheel or instrument panel.
• Do not adjust the driver's or front passenger's seat while the
vehicle is moving. Your seat may move unexpectedly, causing
sudden loss of vehicle control and personal injury . If you adjust
your seat while the vehicle is moving, you are out of position. •
Driver's seat
The correct seat position is important for safe and relaxed
driving.
We recommend that you adjust the driver's seat in the
following manner:
Adjust the seat in fore and aft direction so that you can
easily push the pedals to the floor while keeping your
knees slightly bent=>
& in "Why is your seat adjustment
so important?".
- Adjust the seatback so that when you sit with your back
against the seatback, you can still grasp the top of the
steering wheel. ..,
I • •
Page 77 of 360
Storing and recalling settings
With the help of the memory buttons 1 and 2
~ page 74, fig. 75 the
settings for two different drivers can be stored and recalled
~ page 75.
The current settings are also automatically stored on the remote
control key being used when the vehicle is locked. When the vehicle
is unlocked, the settings stored on the remote control key being
used are automatically recalled.
Turning seat memory on and off
If the [ ON /OFF
I switch is depressed, the seat memory is inoperative.
The word
OFF in the [ON/OFF I switch illuminates.
All the stored settings are retained . We recommend using the
I ON/OFF I switch and deactivating the seat memory if the vehicle is
only going to be used
temporarily by a driver whose settings are not
going to be stored. •
Applies to vehicles : w ith seat m emo ry
Storing and recalling settings
Before you can store or recall your settings, the [ON/OFF]
switch on the seat memory must be engaged (not raised).
Storing settings
- Adjust the driver's seat .
- Adjust the two exterior mirrors.
- Press the [SET] button and hold it down. In addition ,
press one of the memory buttons for at least one second.
- Release the buttons. The settings are now stored under
the corresponding memory button.
Controls and equip
ment
Seats and storage
Recalling settings If the driver's door is open, tap the corresponding
memory button briefly.
If the driver's door is closed, press the appropriate
memory button until the stored position is reached.
Successful storage is confirmed audibly and by the light in the [SETI
button illuminating ~ page 74, fig. 75.
When the vehicle is
locked, the current settings are stored and
assigned to the remote control key. But the settings stored on
memory buttons 1 to 2 are not deleted. They can be recalled at any
time. When the vehicle is
unlocked, the settings stored on the
remote control key are restored.
If your vehicle is driven by other persons using your remote control
key, you should save your individual seat position on one of the
memory buttons. You can recall your settings again simply and
conveniently by pressing the corresponding memory button. When
the vehicle is locked, these settings are automatically re-assigned to
the remote control key and stored.
& WARNING
• For safety reasons, the seat setting can only be recalled when
the vehicle is stationary -otherwise you risk having an accident .
• In an emergency the recall procedure can be cancelled by
pressing the [
ON/OFF I switch or by tapping of the the memory
buttons. •
I • •
Page 81 of 360
& WARNING !continued)
• When you transport heavy objects, always remember that a
change in the center of gravity may result in a change in the
vehicle's handling characteristics.
• Follow all warnings=>
page 168, "Driving Safely" .
[ i] Tips
The tire p ressu re must be adjusted to the load -see the tire p ressure
st icker on the edge of the driver's door. •
Applies t o ve hicles: w it h tie -do wn rings
Tie-down rings
The luggage compartment is equipped with four tie -down
rings to secure luggage and other items.
Fig . 82 Location of the
tie-down rings in the luggage compartment
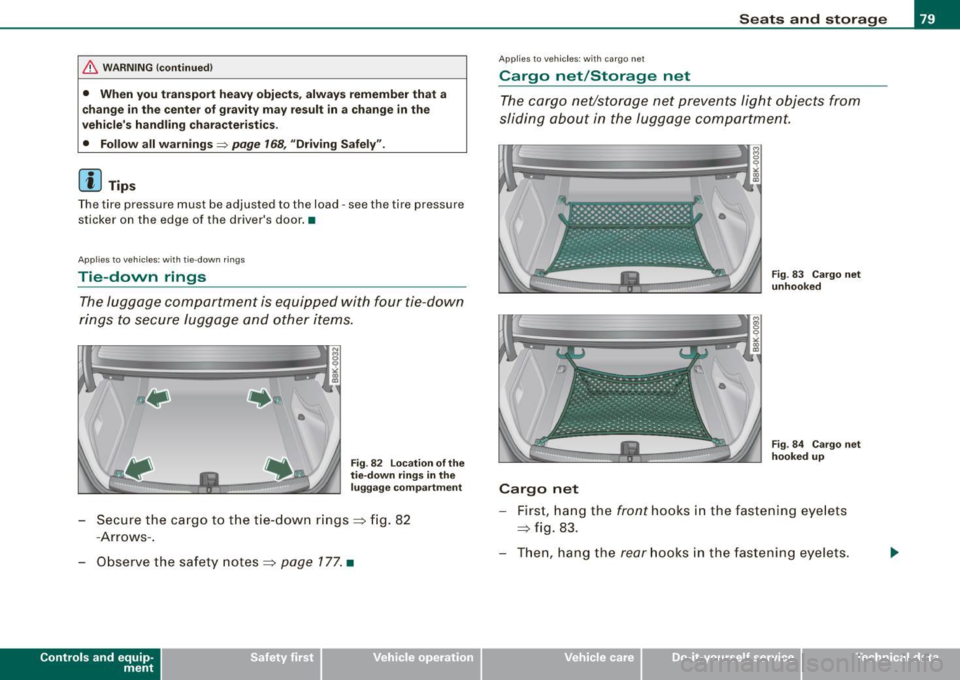
Secure the cargo to the tie-down rings => fig. 82
-A rrows- .
Observe the safety notes =>
page 177. •
Contro ls and eq uip
ment
Seats and storage
A pp lies to vehicles: with ca rgo net
Cargo net /Storage net
The cargo net/storage net prevents light objects from
sliding about in the luggage compartment.
Cargo net
Fig . 83 Cargo net
unhooked
Fig . 84 Cargo net
hooked up
- First, hang the front hooks in the fastening eyelets
::::> fig. 83 .
- Then, hang the
rear hooks in the fastening eyelets.
Vehicle care I I irechnical data
Page 84 of 360
Seats and storage
Applies to vehicles: wi th fo lding seat back
Locking the seatback
Fig. 88 Locking seat
back
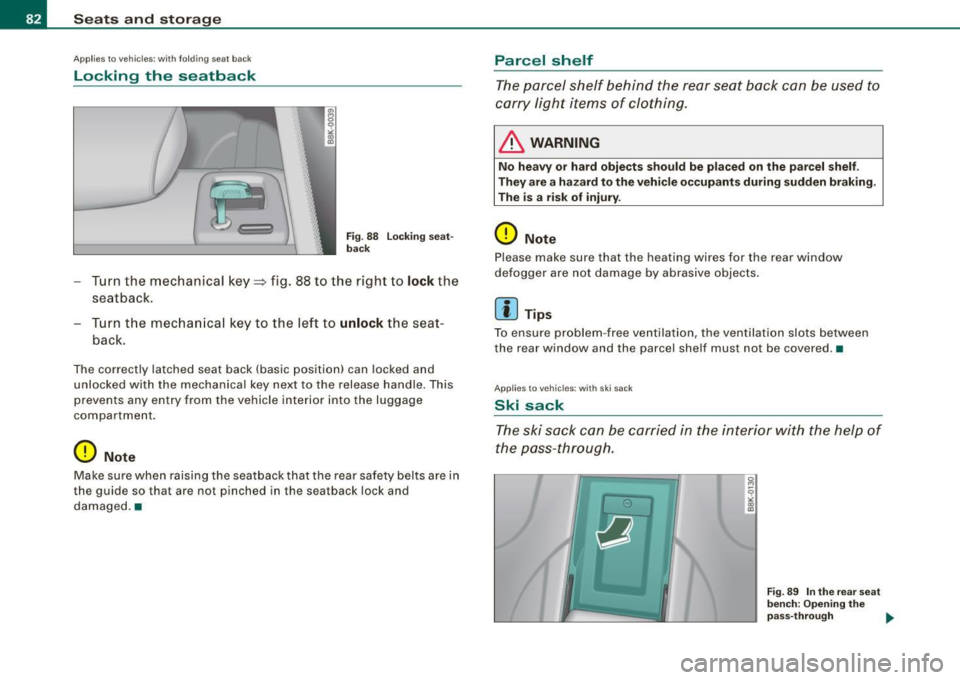
- Turn the mechanical key~ fig . 88 to the right to lock the
seatback.
- Turn the mechanical key to the left to
unlock the seat
back.
The correctly latched seat back (basic position) can locked and
unlocked with the mechanical key next to the release handle . This
prevents any entry from the vehicle interior into the luggage
compartment.
0 Note
Make sure when raising the seatback that the rear safety belts are in
the guide so that are not pinched in the seatback lock and
damaged. •
Parcel shelf
The parcel shelf behind the rear seat bock con be used to
carry light items of clothing.
& WARNING
No heavy or hard objects should be placed on the parcel shelf.
They are a hazard to the vehicle occupants during sudden braking.
The is a risk of injury.
0 Note
Please make sure that the heating wires for the rear window
defogger are not damage by abrasive objects.
[ i ] Tips
To ensure problem -free ventilation, the ventilation slots between
the rear window and the parcel shelf must not be covered. •
Applies to vehicles: with ski sack
Ski sack
The ski sock con be carried in the interior with the help of
the poss-through.
e
Fig. 89 In the rear seat
bench: Opening the
pass-through
~
Page 89 of 360
Ashtray
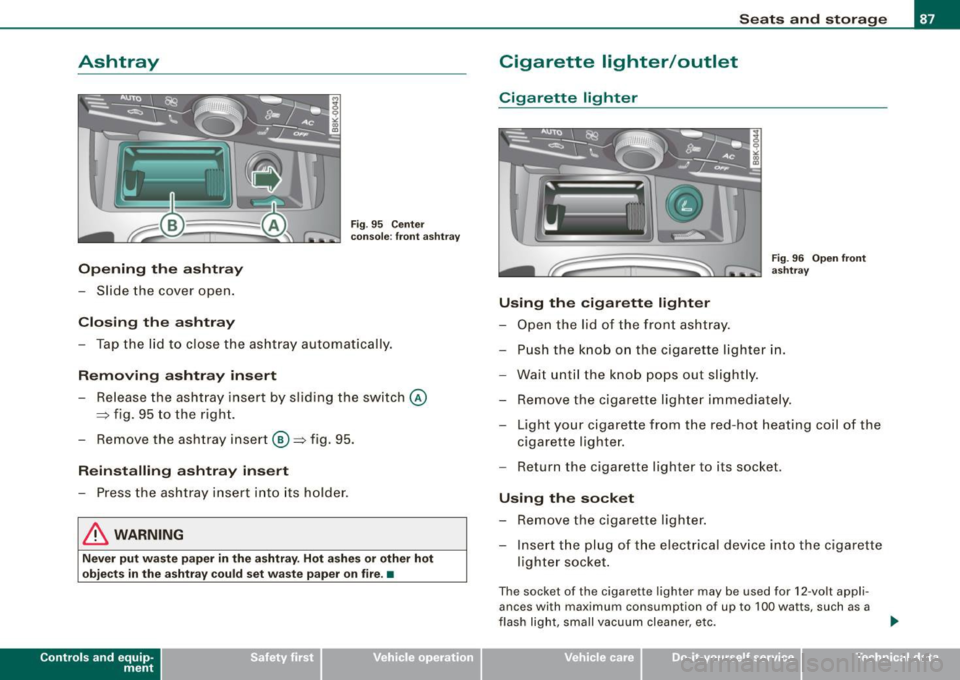
Opening the ashtray
-Slide the cover open.
Closing the ashtray
Fig . 95 Center
console : front ashtray
- Tap the lid to close the ashtray automatically.
Removing ashtray insert
-Release the ashtray insert by sliding the switch ©
=:, fig. 95 to the right.
- Remove the ashtray insert®=:, fig. 95.
Reinstalling ashtray insert
- Press the ashtray insert into its holder.
& WARNING
Never put waste paper in the ashtray. Hot ashes or other hot
objects in the ashtray could set waste paper on fire. •
Con tro ls and eq uip
ment
Seats and storage
Cigarette lighter /outlet
Cigarette lighter
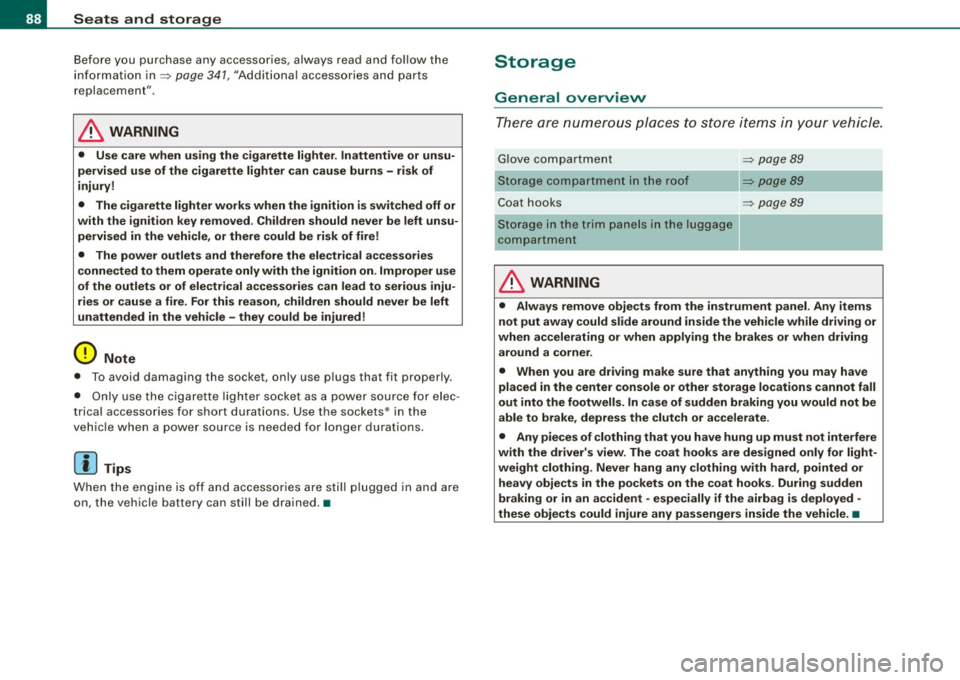
Fig . 96 Open front
ashtray
Using the cigarette lighter
- Open the lid of the front ashtray.
- Push the knob on the cigarette lighter in.
- Wait until the knob pops out slightly.
Remove the cigarette lighter immediately.
- Light your cigarette from the red -hot heating coil of the
cigarette lighter.
- Return the cigarette lighter to its socket.
Using the socket
-Remove the cigarette lighter.
- Insert the plug of the electrical device into the cigarette lighter socket.
The socket of the cigarette lighter may be used for 12-volt appli
ances with maximum consumption of up to 100 watts, such as a
flash light, small vacuum cleaner, etc .
Vehicle care I I irechnical data
Page 90 of 360
Seats and storage
Before you purchase any accessories, always read and follow the
information in=> page 341, "Additional accessories and parts
replacement".
& WARNING
• Use care when using the cigarette lighter. Inattentive or unsu
pervised use of the cigarette lighter can cause burns -risk of
injury!
• The cigarette lighter works when the ignition is switched off or
with the ignition key removed . Children should never be left unsu
pervised in the vehicle, or there could be risk of fire!
• The power outlets and therefore the electrical accessories
connected to them operate only with the ignition on. Improper use
of the outlets or of electrical accessories can lead to serious inju
ries or cause a fire. For this reason, children should never be left
unattended in the vehicle -they could be injured!
0 Note
• To avoid damaging the socket, only use plugs that fit properly .
• Only use the cigarette lighter socket as a power source for elec
trical accessories for short durations . Use the sockets* in the
vehicle when a power source is needed for longer durations.
[ i] Tips
When the engine is off and accessories are still plugged in and are
on, the vehicle battery can still be drained .•
Storage
General overview
There are numerous places to store items in your vehicle.
Glove compartment => page 89
Storage compartment in the roof =>
page 89
Coat hooks => page 89
- -Storage in the trim panels in the luggage
compartment
& WARNING
• Always remove objects from the instrument panel. Any items
not put away could slide around inside the vehicle while driving or
when accelerating or when applying the brakes or when driving around a corner .
• When you are driving make sure that anything you may have
placed in the center console or other storage locations cannot fall
out into the footwells. In case of sudden braking you would not be
able to brake, depress the clutch or accelerate.
• Any pieces of clothing that you have hung up must not interfere
with the driver's view. The coat hooks are designed only for light
weight clothing. Never hang any clothing with hard, pointed or
heavy objects in the pockets on the coat hooks . During sudden
braking or in an accident - especially if the airbag is deployed -
these objects could injure any passengers inside the vehicle . •
Page 91 of 360

Glove compartment
The glove compa rtmen t is illumin ated an d can be Jocke d.
To open glove compartment
Fig . 97 Glov e comp art
m ent
- Pull t he handle i n th e direc tion o f the arrow =:> fig. 97 and
swing t he cover down to open .
To close glove compartment
-Push the glove compartment lid upward unt il the loc k
engages.
T here are holders for a pen and a pad of paper in the glove compart
ment l id .
On the right side in the glove compartment is a holder with the key
b ody into which the emergency key must be clipped to be a ble to
start the vehicle .
& WARNING
To reduce the risk of personal inju ry in an a ccident or sudde n stop ,
alway s keep the glove compartment closed while driving . •
Con tro ls and eq uip
ment
Seats and storag e
Storage compartment in the roof
,.,,,O;E\ 11111
fl([]') G)
o .. o
!.---~\.;;;;;;;;. ] Fig. 98 Storage p ocket
in th e roof
- T o open t he li d yo u have to tou ch the bar =:> fig. 98
(Ar row). T he lid opens a utom atic ally.
- To close the lid, push i t up un til it enga ges.
& WARNING
Alway s keep the lid closed while driving to reduce the risk of injury
during a sudden braking maneuver or in the event of an a ccident. •
Coat hooks
The coat hooks are lo cated on the side on t he pillar in the
rear.
& WARNING
• Make sure that hanging clothing doe s not obscure the view to
the rear .
• Hang only lightweight clothing and be sure that there are no
heavy or sharp -edged object s in the po cket s.
• Do not u se co at hanger s to han g the clothing otherwi se the effi
c a cy of the head a ir b ags* is compromi sed. •
Vehicle care
I I irechnical data
Page 92 of 360
Warm and cold
Warm and cold
Deluxe automatic climate control
App lies to vehicles: with deluxe automat ic climate cont ro l
Description
The climate control system can be used to set a comfort
able temperature inside the vehicle.
The climate control system is a combination of a heating and venti
lation system as we ll a cooling system responsible for dehumid i
fying and cooling the air inside the vehicle.
The au tomatic c limate control system aut omatically mainta ins a
temperature once it has been set. The temperature of the air from
the vents, fan speed (air volume) and ai r distribution are also auto
matical ly adjusted . The system also takes into account strong
sun light so that manual adjustment is not necessary. So in almost
a ll cases,
automati c mode offers the best conditions fo r the com fort
of the occupants at all times of the year =>
page 92.
Please n ote the following :
The cooling mode lowers the humidity level inside the vehicle. This
prevents fogging up of the windows.
In the case of high outside humidi ty a nd temperatures,
condensa
tio n
can drip from the air conditioning system evaporator and form
a po ol under the vehicle . This is normal and not an indica tion of
leaks!
At low outside temperatures, the fan automatica lly switches to a
higher speed when the coolant reaches a sufficient temperature
except in the defroster position .
When star ting with ful l throttle, the compressor of the au toma tic
climate control system is temporari ly switched off to achieve full
engine power. To ensure engine cooling when the engine is under an extreme
load,
the compressor is switched off at high coo lant temperatures.
Pollutant filter
The pollutant filter (pa rticle fi lter) ensu res that impurit ies in the
outside air (e .g . dust, pollen) and odors are significant ly reduced or
stopped. The air is also fi ltered in recirculation mode .
The pol lutant fi lter e leme nt m ust be changed at the i nterva ls spec i
fied in the service plan so that the performance of the automatic
cli mate con trol syste m is not impaired.
If the effectiveness of the filter decreases prematurely due to oper
ation of the vehicle in areas with significant pollution, the f ilter
e lement must be changed between the speci fied s ervice dates.
K ey recognition
The current automatic climate contro l settings are automatica lly
stored and assigned to the mas ter key .
Energy managem ent
To p revent t he ba ttery from being discharged and t o res to re the
balance of energy, components which require large amounts of
ene rgy are temporarily cut back or switched off=>
page 241.
Heating systems in particu lar require a great deal of energy. If you
notice, for examp le, that the rear window heater is not heating, then
it has been temporarily reduced or switched o ff by
energy manage
ment .
These systems are available again as soon as the energy
balance has been restored .
& WARNING
Traffic safety require s all windo ws to be clear of ice , sn ow, and
condensation . Only then c an good visibility be ensured . Famil-
ia rize yourself with the co rre ct operation of the automatic climate
~
Page 97 of 360
You can adjust the air distribution so that air flows from specific
vents. In position
;J air flows only to the windows, in position :,J, it
flows to the driver or passenger, and in position
!,a it flows to the
footwell. There are additional combinations available to adjust air
dist ribution as needed .
To regu late air distribution automatically, switch to
( AU TO] .
When the radio or MMI* is turned on, the air distribution setting
appears for a few seconds on the screen=>
page 94, fig. 105 . •
A pp lies to vehicles: w ith de lu xe a utomat ic c limate co ntro l
Defrost [@ I
The windshield and side windows are defrosted or cleared
of condensation as quickly as possible.
- Press the button [@)to turn on the defroster .
- Press the b utton
(@J again, or press the [AUTO I button to
t ur n it off.
Temperature is control led automatical ly . The maximum amount of
air flows main ly from the vents below the windshield .
Pressing the[@] button sw itches off recirculation mode .•
Ap plies to ve hicles: w ith d elu xe au to m at ic c limate co ntro l
Rear window defogger [[jiiJ )
The rear window def ogger clears the rear window of
condensati on.
- Press the [QWJ button to turn the rear w indow defogger on
and off .
The rear window defogger works only when the engine is running .
T he indicator light in the button illuminates when the rear window
defogger is on .
Controls and equip
ment
W arm and cold
The rear window defogger is switched off automatica lly after 10 to
20 minu tes, depending on the ou tside tempera ture .
The rear window defogger can be turned on permanently by pressing the
[Ciul] button for more than two seconds. This remains
stored until the ignition is switched off . A rear window defogger that
was switched on also remains stored for 15 minutes after the igni
t ion is sw itched off .
I f the engine is restarted within these 15 minutes, the rear window
defogger is activated for 10 to 20 minutes, depending on ou tside
temperature . When a vehic le is parked for a short time , the rear
window defogger does not need to be manually activated again.
ci> For th e sake of the environment
As soon as the rear window is clea r, you shou ld switch the rear
window defogger off . The reduced power consumption has a bene
ficial effect on fuel consumption .•
Ap plies to vehic les: w it h d eluxe au tomat ic c limate co ntro l
AC mode [ACJ
Deactivating
- Press the [AC I button.
Activating
- Press the [AC] button again.
The cooling system is turned on in AC mode. The heating and venti
lation system is controlled automatica lly.
[ i ] Tip s
If the LED in the switch continues to illuminate after AC mode has
been turned off( = turning the AC off), there is a fault in an air -condi -_,.
I • •