light AUDI A5 COUPE 2010 Workshop Manual
[x] Cancel search | Manufacturer: AUDI, Model Year: 2010, Model line: A5 COUPE, Model: AUDI A5 COUPE 2010Pages: 360, PDF Size: 84.39 MB
Page 98 of 360
Warm and cold
tioning component. Please cons ult an authori zed dealersh ip if there
is an operating problem. •
Applies t o ve hicles: w it h d elu xe au to m ati c clim ate con tro l
Rear air vents
The rear air vents are located in the center console.
- Rotate the thumbwheel to open and close the vents.
- To ad just the direction of the airflow from the outlet,
move the tab in the center of the outlet in the desired
direction. The direction of the air delivered from the
vents can be adjusted horizontally and vertically.
The air vents are actuated either automatically or manually d e pending on the op erating mode selec ted . H eated or unh eated
fresh air, or cooled air flows from the vents.
i he ai r ven ts to heat the rear footwell are located under the front
seats.
[ i J Tips
If the climate control is operating in cooling mode, air flows prima
rily from the vents in the center console. To achieve adequate
cooling, you should never close these v ents completely. •
Applies to ve hicles: with delu xe au to m atic c limate con tro l
Economical use of the climate control system
Economical use of the climate control system helps save
fuel.
When the climate control system is working in cooling mode, engine performance is reduced and fuel consump- tion is affected. To keep the time
the climate control system
is on as short as possible, you should do the following:
- To save fuel, turn off cooling mode by pressing the
[AC )
button (ind icator light goes out).
- In addition, if you open the window or the
panorama/tilting sunroof* while driving, turn off cooling
mode by pressing the
[AC) button (indicator light goes
out).
- If the vehicle is extremely hot due to the heat of the sun,
briefly open doors and windows .
c£> For the sake of the environment
When you save fuel, you reduce emissions from the vehicle. •
Deluxe automatic climate control
plus
Applies to vehicle s: with D elu xe a utoma tic cl ima te co ntrol p lus
Description
The air conditioner is fully automatic and is designed to
maintain a comfortable and uniform climate inside the
vehicle.
We recommend the following settings :
- Set the temperature to 75 °F (+23 °Cl.
- Press the [AUTO
I button.
With this setting, you attain maximum comfort in the least amount
of time . Change th is s etting, as des ired, to meet your personal
needs .
~
Page 104 of 360
• .___w __ a _r _m _ a _n_d_ c_ o _ ld __________________________________________________ _
You can adjust the air distribution so that air flows from specif ic
vents. In position
:0 air flows only to the windows, in position :J, it
flows to the driver or passenger , and in position
!-0 it flows to the
footwell. There are additional combinations available to adjust air
dis tribution as needed .
To regulate a ir distribution automat ically, switch to [AUTO] .
When the MMI display is turned on, the air distribution setting appears for a few seconds on the screen=>
page 101, fig. 112. •
Applies to ve hicles: w ith Delu xe automa tic c lima te con tro l plus
Defrost [@ I
The windshield and side windows are defrosted or cleared
of condensation as quickly as possible.
- Press the 1@ 1 button to turn on the defroster .
- Press the
[@ j button again, or press the [ AUTO j button to
turn it off.
Temperature is controlled automatically. The maximum amount of
air flows mainly from the vents below the windshield.
Pressing the [@] button switches off recirculation mode. •
Applies to ve hicles: w ith Deluxe au to m ati c cli mate con tro l plus
Rear window defogger [CiWj
The rear window defogger clears the rear window of
condensation.
- Press the ICiW ] button to turn the rear window defogger on
and off.
The rear window defogger works only when the engine is running.
The indicator light in the button illuminates when the rear window
defogger is on. The
rear window defogger is switched off automatically after 10 to
20 minutes, depending on the outside temperature.
The rear window defogger can be turned on permanently by
pressing the
[Cial] button for more than two seconds. This remains
stored until the ignition is switched off . A rear window defogger that
was switched on also remains stored for 15 m inutes after the igni
tion is switched off.
If the engine is restarted within these 15 minutes , the rear window
defogger is activated for 10 to 20 minutes, depending on outside
temperature. When a vehicle is parked for a short time , the rear
window defogger does not need to be manually activated again.
~ For the sake of the environment
As soon as the rear window is clear, you should switch the rear
window defogger off. The reduced power consumption has a bene
ficial ef fect on fuel consumption .•
Ap plies to veh ic les: w ith Delux e au tomatic c limate co ntrol p lu s
AC mode [AC ]
Turning AC off
- Press the IACI button.
Turning AC on
- Press the IACj button again.
The cooling system is turned on in AC mode. The heating and v enti
lation system is controlled automatically .
[ i] Tips
If the LED in the switch does not illuminate after AC mode has been
turned on( = turning th e AC off), there is a fault in an air -conditioning .,_
Page 106 of 360

• .___w __ a _r _m _ a _n_d_ c_ o _ ld __________________________________________________ _
Applies to vehic les: with Deluxe automatic c limate con tro l plu s
Economical use of the climate control system
Economical use of the climate control system helps save
fuel.
When the climate control system is working in cooling
mode, engine performance is reduced and fuel consump
tion is affected. To keep the time the climate control system
is on as short as possible, you should do the following:
- To save fuel, turn off cooling mode by pressing the AC
button (indicator light goes out).
- In addition, if you open the window or the panoramic
sliding/tilting sunroof * while driving, turn off cooling
mode by pressing the AC button (indicator light goes
outl.
- If the vehicle is extremely hot due to the heat of the sun,
briefly open doors and windows.
c£> For the sake of the environment
When you save fuel, you reduce emissions from the vehicle. •
Deluxe automatic climate control
plus - basic settings
Applies to vehic les : with Deluxe automatic climate contro l plus
General information
The basic climate control settings can be adjusted in the
radio or
MM/* .
Fig . 114 MMI display:
Setup climate control
- Select: Function button [CAR]> Control button AC.
The following functions can be selected:
• Automatic recirculat. =>
page 104
• Synchronization=> page 105 •
Applies to veh icles: w ith Deluxe automatic clima te co ntrol p lus
Automatic recirculation
An air quality sensor detects increased concentrations of
pollutants in the outside air and automatically switches
to recirculation mode.
We recommend that you always keep automatic recirculati on ON to
prevent polluted outside air from entering the vehicle interior. .,_
Page 114 of 360
-On th
e ro ad
..___ ______________ _
& WARN ING (c ontinued )
• For safety rea son s, you sh ould alway s park y our v ehicle with
t he sele ctor le ver in P . Othe rwis e , the vehi cle cou ld in adve rtent ly
roll aw ay .
• Afte r the e ngine h as been s witched off , the radiator f an ca n
c ontinue to run for up to 10 minutes -even w ith the ignition
s wit ched off . It can also swit ch on again after some t im e i f the
c oolant temperatur e rises a s the re sult of a he at buildup or if th e
engin e is hot and the engine compartm ent i s addition ally heated
by the sun's rays .
0 Note
If the engine has been under heavy load for an extended period ,
heat bui lds up in the engine compartment after the engine is
switched off - there is a risk of damaging the engine. Allow the
engine to run a t idle for about 2 minutes before switching it off .•
Electromechanical parking brake
Operation
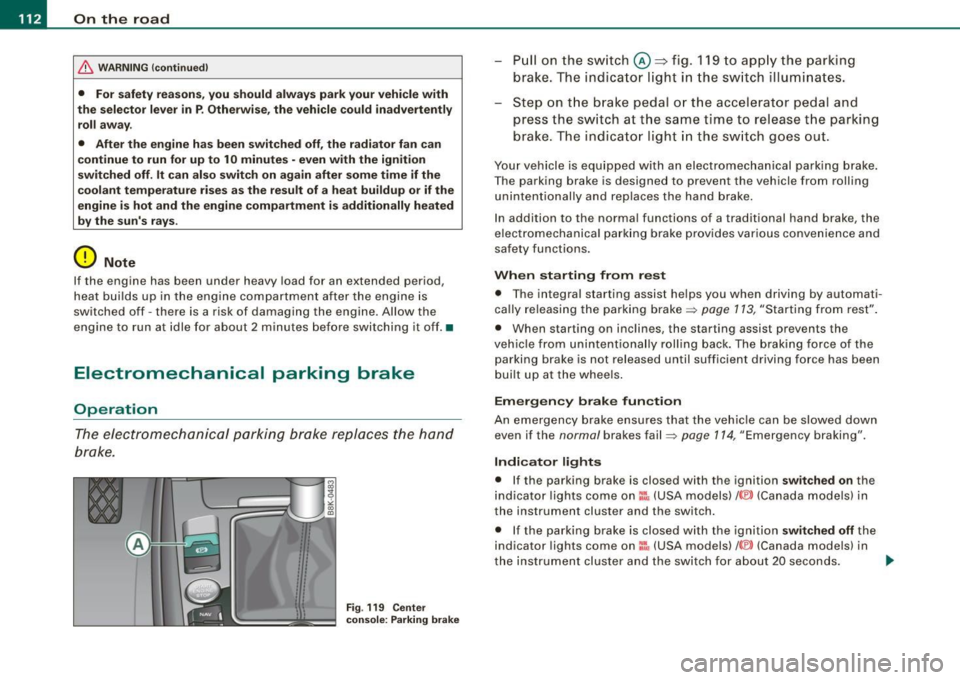
The electromechanical parking brake replaces the hand
brake .
Fig . 119 Cen ter
c onsol e: Park in g br ake
P ull on the sw it c h @ ~fig. 119 to app ly the parking
brake . The indi ca to r light in th e sw itch illum inates.
- Step on t he b rake peda l or the accele rator pedal and
press the switch at the same time to release t he pa rking
brake . The indicato r light in the sw itch goes out .
Your vehicle is equipped with an electromechanical parking brake.
The parking brake is designed to prevent the vehicle from roll ing
unintentionally and replaces the hand brake.
In addition to the normal functions of a traditional hand brake, the
elec tromechanica l pa rk ing brake provides various convenie nce and
safety functions.
When starting from rest
• T he integral starting assist he lps you when driving by automati
cally re leasing the parking brake~ page 113, "Starting from rest" .
• When starting on inclin es, the star ting assist prevents the
vehic le fro m unintentionally rolling back . The braking force of the
parking brake is not released until sufficient driving force has been
built up at the whee ls .
Em erg en cy b rake f uncti on
An emergency brake ensures that the vehic le can be slowed down
even if the normal brakes fail~ page 114, "Emergency braking".
Indicator light s
• If the parking brake is closed with the ignition switched on the
indicator lights come on:!, (USA models)/ ®) (Canada models) in
the instrument cluster and the switch.
• If the parking brake is closed w ith the ignition
s witched off the
indicator lights com e on =:, (USA models) /® ) (Canada models) in
the instrument clus ter and the switch for about 20 seconds. ._
Page 115 of 360

On the road -
----------------
& WARNING
If a gear or a drive range (automatic transmission) is engaged with
the vehicle stationary and the engine running, you must in no
instance accelerate or release the clutch carelessly . Otherwise the
vehicle will start to move immediately -risk of an accident.
0 Note
If the symbol (CD) in the display or the indicator light BRAKE (USA
models)/ {(i)) (Canada models) in the instrument cluster flashes, there
is a malfunction in the brake system. By pressing the
[SET] button,
you can bring up a driver message which explains the malfunction in more detail. If the driver message
Parking brake! appears, there
is an operating malfunction in the parking brake which you should
have repaired immediately by an authorized Audi dealer or other
qualified workshop ~
page 29.
[ i] Tips
• You can apply the parking brake at any time -even with the igni
tion turned off. The ignition must be turned on in order to release
the parking brake.
• Occasional noises when the parking brake is applied and
released are normal and are not a cause for concern.
• When the vehicle is parked, the parking brake goes through a
self -test cycle at regular intervals. Any associated noises are
normal. •
Parking
Various rules apply to prevent the parked vehicle from
rolling away accidentally.
Parking
- Stop the vehicle with the foot brake.
Controls and equip
ment
- Pull the switch to apply the parking brake.
- Automatic transmission*: Move the selector lever to
P.
- Turn the engine off=:,& .
- Manual transmission: Shift into 1st gear.
In addition on inclines and grades
-Turn the steering wheel so that your vehicle will roll
against the curb in case it should start to move.
& WARNING
• When you leave your vehicle -even if only briefly -always
remove the ignition key. This applies particularly when children
remain in the vehicle. Otherwise the children could start the
engine, release the parking brake or operate electrical equipment
(e.g. power windows). There is the risk of an accident.
• When the vehicle is locked, no one -particularly not children
should remain in the vehicle. Locked doors make it more difficult
for emergency workers to get into the vehicle -putting lives at
risk. •
Starting from rest
The starting assist function ensures that the parking
brake is released automatically upon starting.
Stopping and applying parking brake
-Pull the switch to apply the parking brake.
Starting and automatically releasing the parking
brake
-When you start to drive as usual, the parking brake is
automat ically released and your vehicle begins to move . .,..
I • •
Page 118 of 360
• .___O_ n_ t_h _e _ r_o _a_ d __________________________________________________ _
may vary, depending on the type of display in your vehicle. The indi
cator light
CRUISE (US model)/ (7)0 (Canadian model) will also light up
in the instrument cluster .
The speed is kept constant by modifying engine power or through
an active brake intervention.
& WARNING
• Always pay attention to the traffic around you when the cruise
control is in operation. You are always responsible for your speed
and the distance between your vehicle and other vehicles.
• For reasons of safety, cruise control should not be used in the
city, in stop-and-go traffic, on twisting roads and when road condi
tions are poor (such as ice, fog, gravel, heavy rain and hydro
planing) -you could have an accident.
• Switch the cruise control off temporarily when driving in
turning lanes, highway exits or in construction zones.
• Please note that unconsciously "resting" your foot on the
accelerator pedal causes cruise control not to brake. This is due to
the control system being overridden by the driver's acceleration.
[ i] Tips
• Vehicles with manual transmission: You can attain the set speed
only if the gear that is currently engaged will allow it, or if it does not tax the engine and allows it to run smoothly. Therefore shift into
a higher or lower gear in a timely manner.
• The brake lights illuminate as soon as the brakes apply
automatically .•
Changing speed
- Press the lever in the direction of the 0 ~ page 115,
fig. 120 or in the direction of the Q to increase or
decrease your speed. -
Let go of the lever to save that speed.
Change speed in increments of 1 mph (1 km/hi by lightly pressing
the lever . If you keep the lever pressed down, you will alter your
speed in 5 mph (10 km/hi increments.
You can also press the accelerator pedal down to increase your speed, e.g. if you want to pass someone. The speed you saved
earlier will resume as soon as you let off of the accelerator pedal.
If, however, you exceed your saved speed by 5 mph (10 km/h) for
longer than 5 minutes, the cruise control will be turned off tempo
rarily. The green symbol in the display turns white, the saved speed
is retained .•
Pre -selecting speed
You can pre-select your desired speed while the vehicle is
not moving.
Turn on the ignition.
- Pull lever into position 1
~ page 115, fig. 120.
Press the lever in the
0 or Q direction to increase or
decrease your speed.
- Let go of the lever to save that speed.
This function makes it possible, for example, to save the speed you
want before driving on the highway. Once on the highway, activate
the cruise control by pulling the lever toward
(D. •
Switching off
Temporary deactivation
- Step on the brake pedal, or
Page 123 of 360
Adaptive cruise control -____________ ____,_ __ ___.
Applies to vehic les : w ith ada ptive cru ise cont rol
How is the speed stored ?
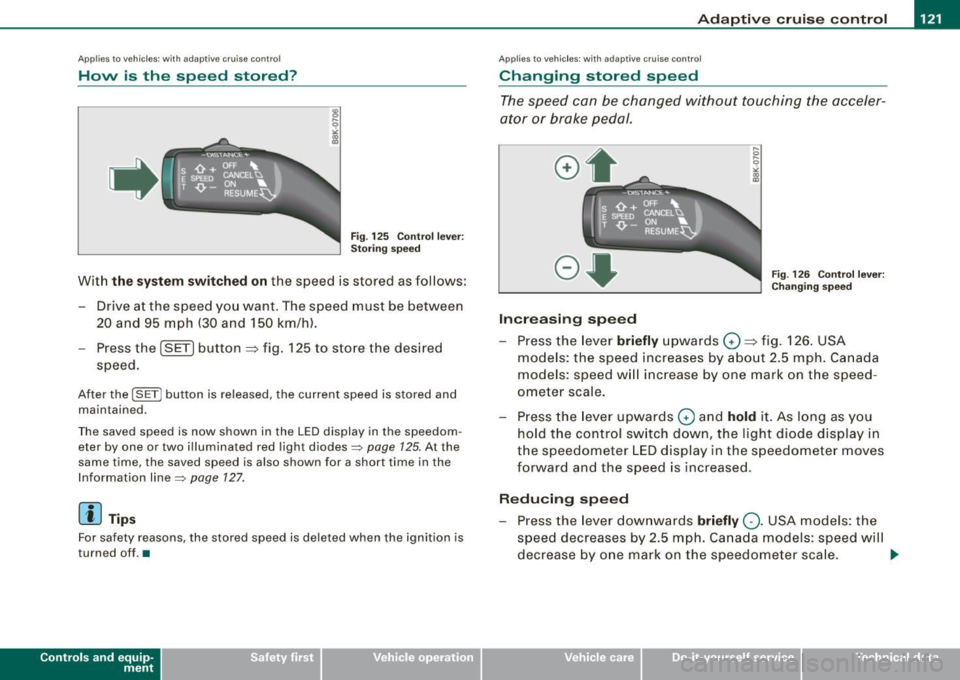
Fig. 125 Control lever:
Storing speed
With the system switched on the speed is stored as follows:
- Drive at the speed you want. The speed must be between
20 and 95 mph (30 and 150 km/hl.
- Press the
I SET I button ~ fig. 125 to store the desired
speed.
After the I SET j button is released , the current speed is stored and
maintained .
The saved speed is now shown in the LED display in the speedom
eter by one or two illuminated red light diodes=>
page 125. At the
same time, the saved spe ed is also shown for a short time in the
Information line::::>
page 127.
[ i J Tips
For safety reasons, the stored speed is deleted when the ignition is
turned o ff . •
Con tro ls and eq uip
ment
A pp lies to veh ic les: with ada ptive cru ise cont rol
Changing stored speed
The speed can be changed without touching the acceler
ator or brake pedal.
Increasing speed
,... 0
~
ill
Fig . 126 Control lever:
Changing speed
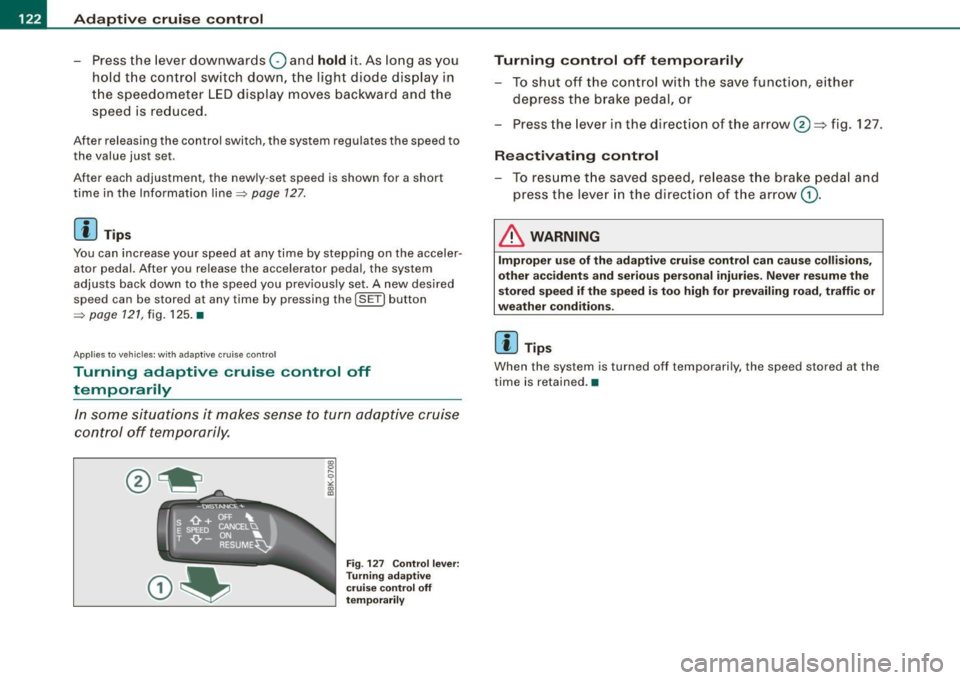
- Press the lever briefly upwards G) ~ fig. 126. USA
models: the speed increases by about 2.5 mph . Canada
models : speed will increase by one mark o n the speed
ometer scale.
- Press the leve r upwards
0 and hold it. As long as you
hold the control switch down , the light diode display in
the speedometer LED display in the speedometer moves
forward and the speed is increased .
Reducing speed
- Press the lever downwards briefly Q. USA models: the
speed decreases by 2.5 mph. Canada models: speed will
decrease by one mark on the speedometer scale. _,.
Vehicle care I I irechnical data
Page 124 of 360
-Adaptive
cruise control "----'-----------------
- Press the lever downwards Q and hold it. As long as you
hold the control sw itch down, the light diode dis play in
the speedometer L ED display moves backward and the
speed is reduced.
After releasing the c ontro l switch, the system regulates the speed to
the value just set .
After each adjustment, the newly -set speed is shown for a short
t ime in the Information line => page 127.
[ i ] Tips
You can increase your speed at any time by stepping on the acceler
ator pedal. After you re leas e the accel erator pedal, the system
adjusts back down to the speed you previously se t.
A new desired
spe ed can be stored at any time by pressing th e [SET] button
~ page 121, fig. 125. •
A pplies to v ehi cles : with ada ptive cruis e contro l
Turning adaptive cruise control off
temporarily
In some situations it makes sense to turn ad aptive cruise
control off temporarily.
Fig . 127 C ontrol l ever :
T urnin g ad aptiv e
c rui se con trol off
temporari ly
Turning control off temporarily
- To shut off the control wit h the save function, either
depress the brake pedal, or
- Press the lever in the direction of the arrow
0 =} fig. 127 .
Reactivating control
- To resume t he save d speed, re lease t he brake peda l and
p ress the lever in the directio n of the arrow
G) .
& WARNING
Improper u se o f the adaptive crui se control can cau se collision s,
other ac cidents and serious personal injur ie s. Never r esume the
s tored speed i f the speed i s too hig h for prevail ing road, traffic or
weathe r cond iti ons.
[ i ] Tip s
When the system is turned off tempo rari ly, the speed stored at the
time is retai ned .•
Page 126 of 360
• ..__A_ d_ a-'- p_t _iv _ e_ c_r _u _ i_s _e _ c_o_ n_t _r _o _l _____________________________________________ _
Driving pro
gram
Di sta nce 1
Distance 2
D ist an ce 3
& WARNING
dynamic
1
2
2
3
standard
2
3
3
4
comfort
3
4
4
5
-
When setting the distance , the driver is responsible for adhering
to the respective national and country -specific regulations.
• Following other vehicles too closely increases the risk of colli
sions and serious personal injury .
• Setting short distances to the traffic ahead reduces the time
and distance available to bring your vehicle to a safe stop and
makes it even more necessary to pay close attention to traffic .
• Always use good judgment and select a safe following distance
for the traffic , road and weather conditions.
[ i J Tips
T he di stance se tting is re set to the factory defa ult DISTANCE 3 the
next time the ignition is turned on. •
Driver information
Applies to vehic les: with adapt ive cruise contro l
Displays in the instrument cluster
Dependin g o n the driving si tuati on, driver inform ation is
dis pla yed in the i nstr umen t clus ter.
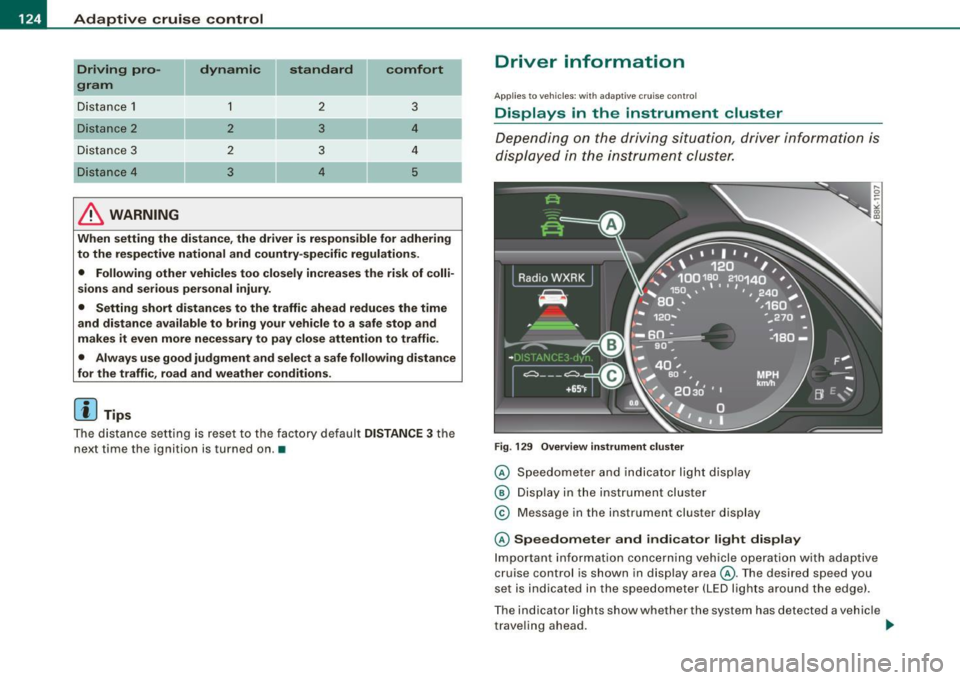
F ig . 129 Overview instrument clu ste r
© Speedome ter and indicator lig ht dis play
® Displ ay in the instru ment clus ter
© M essage in the instr ument clus ter disp lay
© Speedometer and indicator light display
Im port ant inf orm ati on c once rning v ehicle opera tion with a daptiv e
cruise control is shown in display area@. T he desired speed you
s et is in dica ted in the sp eedometer ( LED l igh ts a rou nd th e e dge).
T he indicator lig hts show whether the system has detected a v ehic le
t rave ling ahead . ..,
Page 127 of 360
Adaptiv e c ruis e co ntrol -
--------------=-----
@ Displ ay i n th e instrum ent clu ste r
In disp lay area @information from the navigation system * and the
trip computer is displayed in addi tion to informa tion about adaptive
cruise cont rol.
You can select among the different informat ion by repeated brief
taps on th e [
RESET) button on the w indshi eld wiper lever
=:> page 25 , "Operation" .
© Sta tus in dica tor
The information in area © is not displayed permanently. Informa
tion is displayed only if you set or change the sp eed setting , change
the time interval, when messages are disp layed or if the adaptive
cruise control is turned off for safety reasons. •
Applies to veh ic les: w ith ada ptive cru ise cont ro l
Speedometer and indicator light display
----
- -
- -
@ ®
Desir ed speed
- -
--
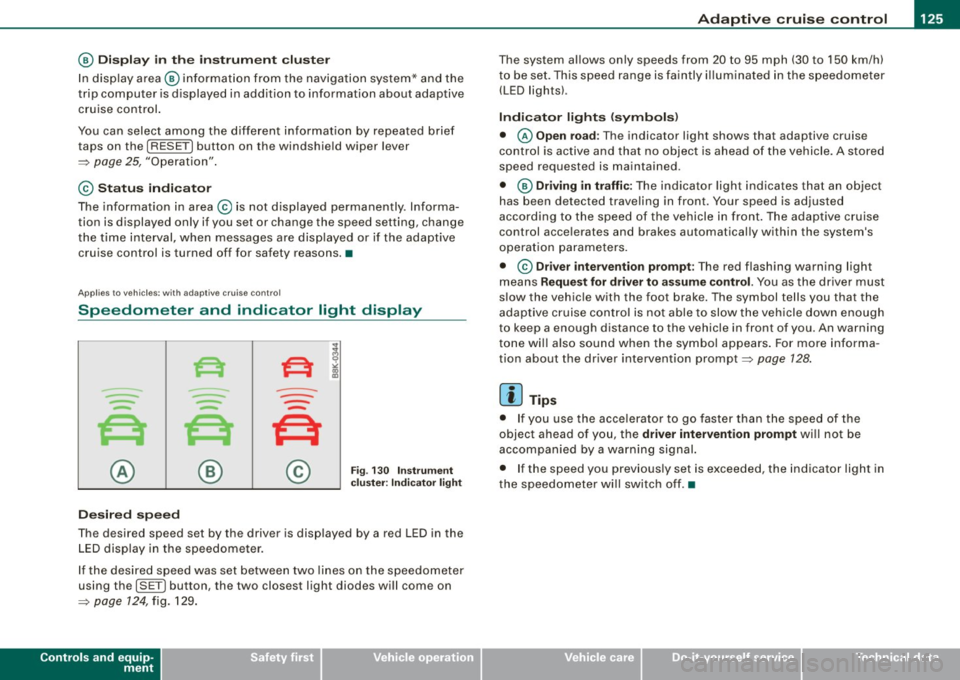
Fig . 130 I nstrum ent
c lus ter : Ind icato r ligh t
The desired speed set by the driver is displayed by a red LED in the
LED display in the speedometer.
If the desired speed was set between two lines on the speedometer
using th e
[S ET) button , the two closest light diodes will come on
=>
page 124 , fig. 129 .
Controls and equip
ment
The system al lows only speeds from 20 to 95 mph (30 to 150 km/h)
to be set. This speed range is faintly i lluminated in the speedometer
(LED ligh ts).
Indicator light s (symbols )
• © Open road : The indicator l ight shows that adaptiv e cruise
control is active and that no object is ahead o f the vehicle. A stored
speed requested is maintained .
• @ Driv ing in traffic : The indicator light indicates tha t an objec t
has been detected traveling in front. Your speed is adjusted
according to the speed of the vehicle in front . The adap tive cruise
control acce lerates and brakes automatical ly within the system's
operat ion parameters.
• ©
Driver inter venti on prompt : The red flashing warning l ight
means
Reque st for driver t o assume control. You as the driver must
slow the vehic le with the foot brake. The symbol tells you that the
adaptive cr uise control is not able to slow the vehicle down enough
to keep a enough distance to the vehicle in front of you . An warning
tone wi ll a lso sound when the symbol appears . For more informa
tion about the driver intervention prompt =>
page 128.
[ i ] Tip s
• If you use the acce lerato r to go faster than the speed of the
object ahead of you, the
dri ver intervent ion prompt wi ll not be
accompanied by a wa rning signal.
• I f the speed you previous ly set is exceeded, the indicator light in
the speedomete r wi ll switch off. •
I • •