instrument panel AUDI A5 COUPE 2010 Owners Manual
[x] Cancel search | Manufacturer: AUDI, Model Year: 2010, Model line: A5 COUPE, Model: AUDI A5 COUPE 2010Pages: 360, PDF Size: 84.39 MB
Page 20 of 360
Driver informati on displ ay
Driver information display
Introduction
General notes
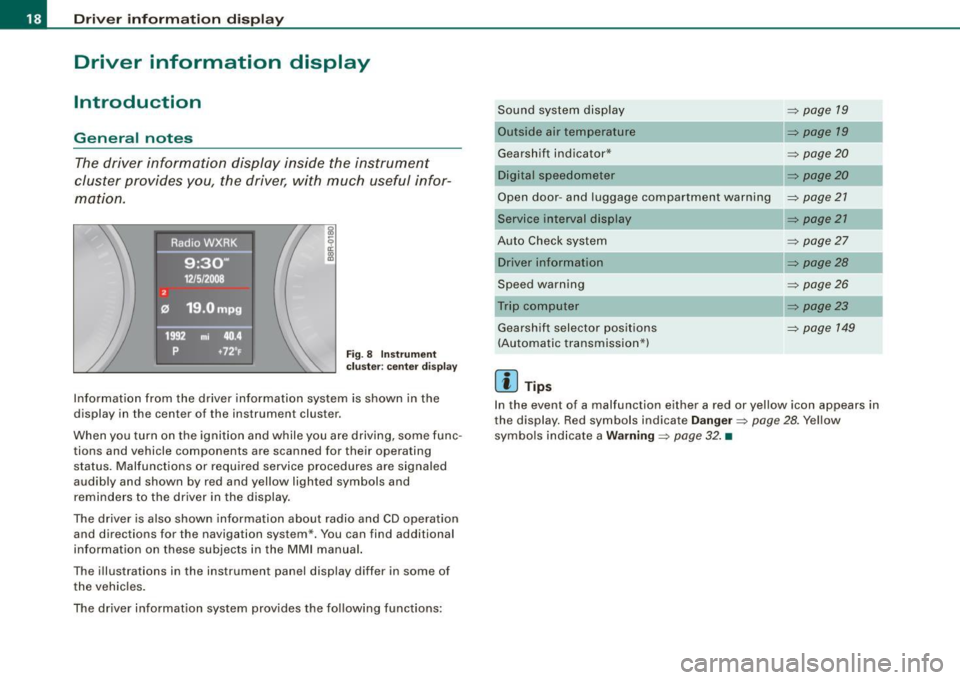
The driver information display inside the instrument
cluster provides you, the driver, with much useful infor
mation.
Fig . 8 Inst rum ent
c lu ster : cente r dis pl ay
Informat ion from the driver information system is shown in the
display in the center of the instrument cluster.
When you turn on the ignition and while you are driving, some func
tions and vehicle components are scanned for their operating status. Malfunctions or required service procedures are signaled
audibly and shown by red and yellow lighted symbols and
reminders to the driver in the display.
The driver is also shown information about radio and CD operation and directions for the navigation system *. You can find additional
information on these subjects in the MMI manual.
The illustrations in the instrument panel display differ in some of
the vehicles.
The driver informat ion system prov ides the following functions: Sound sys
tem display ::::;,
page 19
Outside air temperature ::::;, page 19
Gearshift indicator* _________ ::::;, page 20
Digital speedometer ::::;, page 20
Open door- and luggage compartment warning ::::;, page 21
Service interval display
Au to Check syst em
Driver information
Speed warning
Trip computer Gearshift selector positions
(Automatic transmission*)
[ i ] Tips
::::;, page 21
::::;, page27
::::;, page28
::::;, page26
::::;, page23
::::;, page 149
In the event of a malfunction either a red or yellow icon appears in
the display. Red symbols indicate
D anger ~ page 28. Yellow
symbols ind icate a
Warning ::::;, page 32. •
Page 22 of 360
Driver information display
Applies to vehicles: with m anu al tr ansmi ssion and g earsh if t indica tor
Gearshift Indicator
This indicator can help conserve fuel.
mi 16.0
+6 5°F Fig . 11 Display : Gear
shift indicator
Fig . 12 MMI Display:
Showing and hiding
gearshift recommen
dation
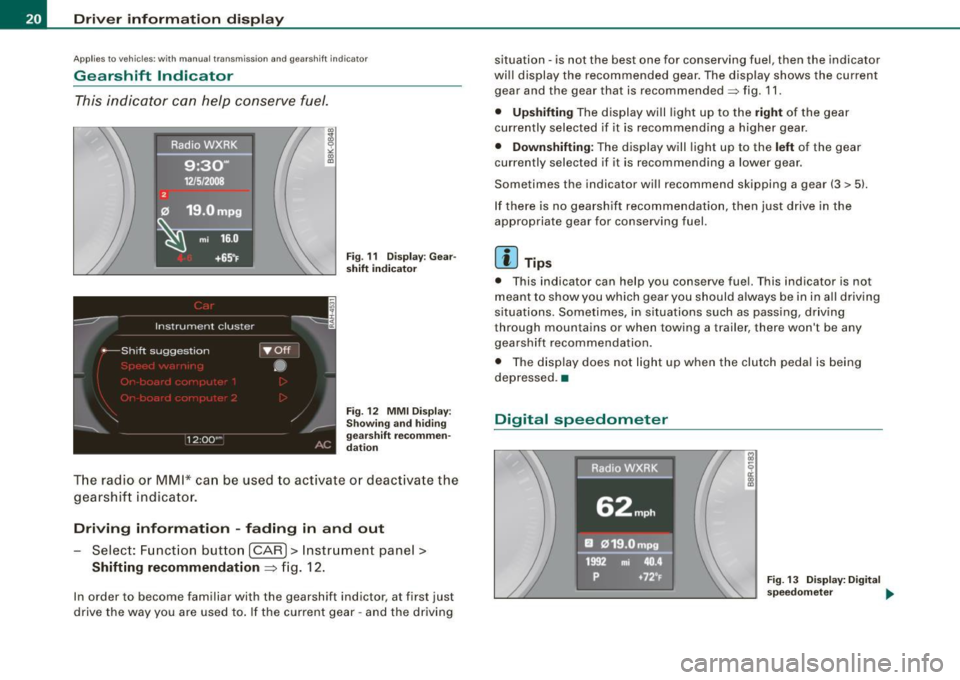
T he radio or MMI* can be used to activate or deactivate the
gearshift indicator.
Driving information -fading in and out
Select: Function button [CAR]> Instrument panel>
Shifting recommendation => fig. 12.
In order to become familiar with the gearshift indictor, at first just
drive the way you are used to . If the current gear -and the driving situation
-is not the best one for conserving fuel, then the indicator
will display the recommended gear . The display shows the current
gear and the gear that is recommended~ fig. 11.
• Upshifting The display will light up to the right of the gear
currently selected if it is recommending a higher gear.
• Downshifting: The display will light up to the left of the gear
currently selected if it is recommending a lower gear .
Sometimes the indicator will recommend skipping a gear (3
> 51.
If there is no gearshift recommendation, then just drive in the
appropriate gear for conserving fuel.
[ i ] Tips
• This indicator can help you conserve fuel. This indicator is not
meant to show you which gear you should always be in in all driving
situations. Sometimes , in situations such as passing , driving
through mountains or when towing a trailer, there won't be any
gearshift recommendation.
• The disp lay does not light up when the clutch peda l is being
depressed .•
Digital speedometer
Fig. 13 Display: D igital
speedometer ...
Page 36 of 360
Driver information display
more difficult or sensitive than usual. The steering wheel can also
be at an angle when driving straight.
Dynamic steering: initialization
If this driver message appears and the indicator light is flashing
on the instrument panel, dynamic steering is being reinitialized.
Once you start the engine after this is finished, the steering wheel
wi ll be easy to move. Re-initialization might be necessary if the
steering whee l was moved hard to the left and right while the
vehicle was not moving. The display goes out as soon as initializa
tion is complete .
& WARNING
Have the dynamic steering system malfunction repaired as soon
as possible by an authorized Audi dealer or any qualified work
shop -risk of accident!
[ i ] Tips
The dynamic steering stability systems are not available in the event
of a system malfunction. •
Applies to vehi cles: wit h conven ienc e key
Key not in vehicle
Key not in vehicle
This reminder appears along with the symbol if the master key is
removed from the vehicle with the engine running. It is intended to
remind you (e .g. when changing drivers) not to continue the journey
without the master key.
If the master key is no longer in the vehicle, you cannot switch off
the ignition after stopping the engine and you also cannot start the
engine again . You also cannot lock the vehicle from the outside .•
Ap plies to vehi cles : w it h li ght/ ra in sensor
Light /rain sensor defective C../1
...i-Automatic headlights /automatic wipers defective
If the symbo l il luminates, the light sensor has failed . For safety
reasons the low beams are turned on permanently with the switch
in
AUTO . However, you can continue to turn the lights on and off
using the light switch. In the case of a defect in the rain sensor, the
windshie ld wiper lever functions are still available. Have the
light/rain sensor checked as soon as possible by an authorized Audi
dea ler. •
Worn brake pads
Brake pads!
If the warning light illuminates, immediately contact your autho
rized Audi dealer or qualified workshop to have all brake pads
inspected . On USA models the warning light 't comes on together
with the warning light
BRAKE . Both sets of brake pads on an axle must
a lways be replaced at the same time .
& WARNING
Driving with bad brakes can cause a collision and serious personal
injury.
• If the warning light and the warning lig ht
BRAKE1
l with the
message Brake pads! comes on in the instrument cluster display ,
immediately contact your authorized Audi dealer or qualified
workshop to have all brake pads checked or replaced if
necessary .•
1 1 BRAK£ : USA models only
Page 58 of 360

Clear vision
0 Note
Always be aware of changes in outside light conditions while you
are driving. Respond in time to fading daylight by turning the light
switch to position
gO (or "AUTO") to turn on your headlights. •
Instrument lighting
The basic brightness of the illumination for the instru
ments, the center console and the display can be
adjusted.
Press the knob to release it.
Fig. 54 Instrument
lighting
- Rotating the knob to the right"+" will increase the basic
brightness when it is dark.
Rotating the knob to the left" -" will decrease the basic
brightness when it is dark.
- Pressing the knob will prevent unintentiona l changes.
0 Note
The instrument cluster and center console illumination (gauges and
needles) comes on when you switch on the ignition and the
vehicle headlights are off
.
Be aware of the following difference between
models built to US or Canadian specifications:
• USA models: illumination of the instrument cluster (gauges and
needles), dash and center console around the gearshift lever is
controlled by a light sensor located in the instrument panel. The
instrument panel illumination will automatically become dimmer
as the daylight fades away and eventually will go out completely
when outside light is very low. This is to remind you, the driver, to
switch on the headlights before it gets too dark.
• Canada models: instrument panel illumination will stay bright
regardless of the intensity of ambient light . Always be aware of
changes in outside light conditions while you are driving. Respond
in time to fading daylight by turning the light switch to position
gD
(or "AUTO" if your car is equipped with this feature) to turn on your
headlights. •
Applies to vehicles : w ith xenon head ligh ts
Xenon headlights
After starting the engine, the xenon headlights are automatically
adjusted to the load and angle of the vehicle (for example, during
acceleration and braking!. This prevents oncoming traffic from
experiencing unnecessary headlight glare from your xenon head
lights.
If the system is not operating properly, a warning symbol in the
Auto-Check Control is displayed
:::::> page 36. •
Page 71 of 360
Seats and storage
General recommendations
Why is your seat adjustment so important? The safety belts and the airbag system can only provide
maximum protection if the front seats are correctly
adjusted.
The re are various ways of adjusting the front seats to provide safe
and comfortable support for the driver and the front passenger.
Adjust your seat properly so that:
• you can easily and quickly reach all the switches and controls in
the instrument panel
• your body is properly supported thus reducing physical stress
and fatigue
• the safety belts and airbag system can offer maximum protec
tion
~ page 188.
In the follow ing sections, you will see exactly how you can best
adjust your seats.
There are special regulations and instructions for installing a child safety seat on the front passenger's seat. Always follow the informa
tion regarding child safety provided in~
page 213, "C hild Safety".
& WARNING
Incorrect seating position of the driver and all other passengers
can result in serious personal injury.
• Always keep your feet on the floor when the vehicle is in motion
- never put your feet on top of the instrument panel, out of the
window or on top of the seat cushion. This applies especially to
the passengers. If your seating position is incorrect, you increase
the risk of injury in the case of sudden braking or an accident. If
Controls and equip
ment
Seats and storage
& WARNING (continued)
the airbag inflates and the seating position is incorrect, this could
result in personal injury or even death.
• It is important for both the driver and front passenger to keep
a distance of at least 10 inches (25 cml between themselves and
the steering wheel and/or instrument panel. If you're sitting any closer than this, the airbag system cannot protect you properly. In
addition, the front seats and head restraints must be adjusted to
your body height so that they can give you maximum protection.
• Always try to keep as much distance as possible between your
self and the steering wheel or instrument panel.
• Do not adjust the driver's or front passenger's seat while the
vehicle is moving. Your seat may move unexpectedly, causing
sudden loss of vehicle control and personal injury . If you adjust
your seat while the vehicle is moving, you are out of position. •
Driver's seat
The correct seat position is important for safe and relaxed
driving.
We recommend that you adjust the driver's seat in the
following manner:
Adjust the seat in fore and aft direction so that you can
easily push the pedals to the floor while keeping your
knees slightly bent=>
& in "Why is your seat adjustment
so important?".
- Adjust the seatback so that when you sit with your back
against the seatback, you can still grasp the top of the
steering wheel. ..,
I • •
Page 72 of 360
Seats and storage
- Position the head restraint according to the occupant's height =>
page 76. For maximum protection, the top of
the head restraint should be at least at eye level, prefer
ably higher and ideally level with the top of the head
=>
page 173 , fig. 182.
& WARNING
Never place any objects in the driver's footwell. An object could
get into the pedal area and interfere with pedal function . In case
of sudden braking or an accident, you would not be able to brake
or accelerate. •
Front passenger's seat
Always move the front passenger seat into the rearmost position.
To avoid contact with the airbag while it is deploying, do not
sit any closer to the instrument panel than necessary and
always wear the three-point safety belt provided adjusted
correctly. We recommend that you adjust the passenger's
seat in the following manner :
- Bring the backrest up to an (almost) upright position.
Do
not ride with the seat reclined.
- The ideal pos ition for the head restraint is with the upper
edge of the restraint level with the top of your head
=> page 76. You should not lower the top of the restraint
below the level of your eyes.
- Place your feet on the floor in front of the passenger's
seat .•
Adjusting front seats manually
Ap plies to vehicles : w ith manu ally adju sta ble seats
Seat adjustment controls
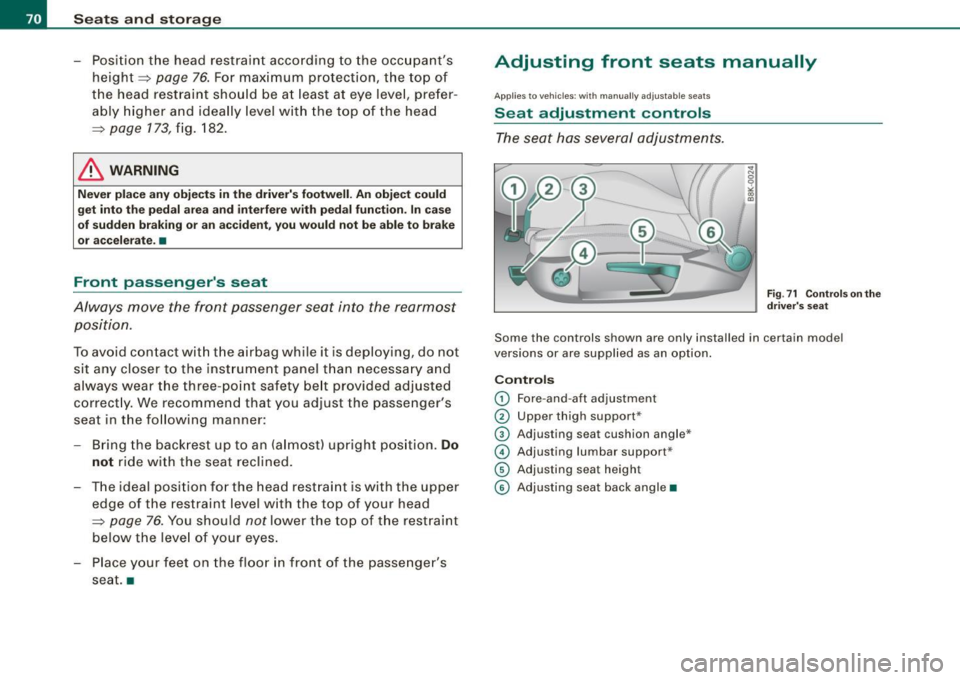
The seat has several adjustments.
Fig . 71 Controls on the
driver's seat
Some the controls shown are only installed in certain mod el
versions or are supplied as an option.
Controls
0 Fore-and-aft adjustment
0 Upper thigh support*
© Adjusting seat cushion angle*
© Adjusting lumbar suppor t*
© Adjusting seat height
© Adjusting seat back angle •
Page 90 of 360
Seats and storage
Before you purchase any accessories, always read and follow the
information in=> page 341, "Additional accessories and parts
replacement".
& WARNING
• Use care when using the cigarette lighter. Inattentive or unsu
pervised use of the cigarette lighter can cause burns -risk of
injury!
• The cigarette lighter works when the ignition is switched off or
with the ignition key removed . Children should never be left unsu
pervised in the vehicle, or there could be risk of fire!
• The power outlets and therefore the electrical accessories
connected to them operate only with the ignition on. Improper use
of the outlets or of electrical accessories can lead to serious inju
ries or cause a fire. For this reason, children should never be left
unattended in the vehicle -they could be injured!
0 Note
• To avoid damaging the socket, only use plugs that fit properly .
• Only use the cigarette lighter socket as a power source for elec
trical accessories for short durations . Use the sockets* in the
vehicle when a power source is needed for longer durations.
[ i] Tips
When the engine is off and accessories are still plugged in and are
on, the vehicle battery can still be drained .•
Storage
General overview
There are numerous places to store items in your vehicle.
Glove compartment => page 89
Storage compartment in the roof =>
page 89
Coat hooks => page 89
- -Storage in the trim panels in the luggage
compartment
& WARNING
• Always remove objects from the instrument panel. Any items
not put away could slide around inside the vehicle while driving or
when accelerating or when applying the brakes or when driving around a corner .
• When you are driving make sure that anything you may have
placed in the center console or other storage locations cannot fall
out into the footwells. In case of sudden braking you would not be
able to brake, depress the clutch or accelerate.
• Any pieces of clothing that you have hung up must not interfere
with the driver's view. The coat hooks are designed only for light
weight clothing. Never hang any clothing with hard, pointed or
heavy objects in the pockets on the coat hooks . During sudden
braking or in an accident - especially if the airbag is deployed -
these objects could injure any passengers inside the vehicle . •
Page 105 of 360
___________________________________________________ W_ a_ r_m _ a_ n_d_ c_ o_ ld _ __.11111
component. Please consult a authorized dealership if there is an
operating problem. •
Applies to v ehicl es: with De lux e autom atic c lim ate contro l plus
Air vents
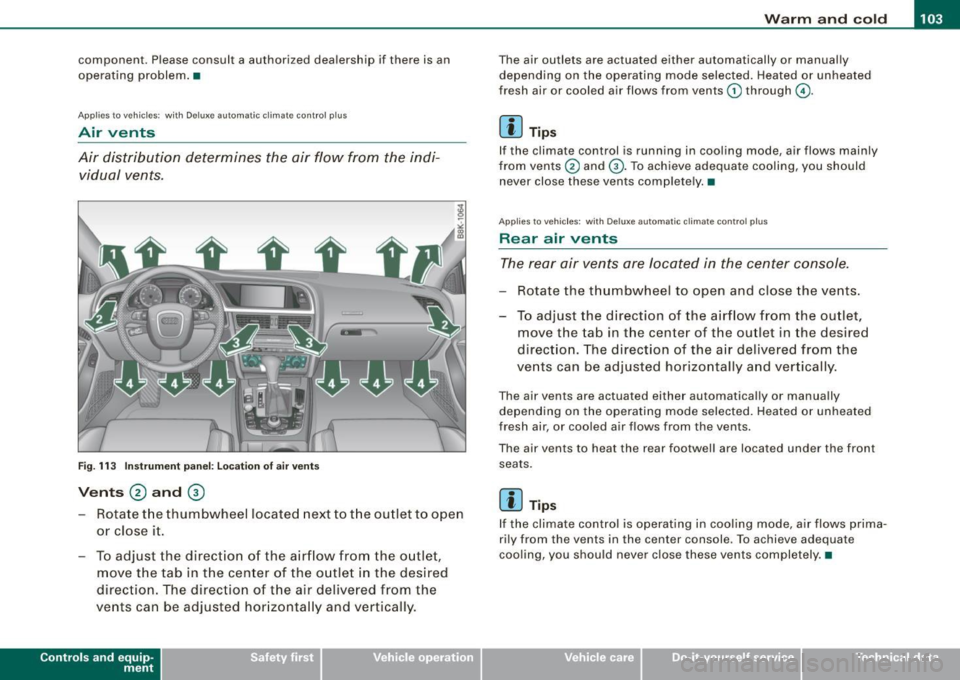
Air distribution determines the air flow from the indi
vidual vents.
Fig. 113 Instrument panel: Locat ion of air vents
Vents @ and ®
- Rotate the thumbwheel located next to the outlet to open
or close it.
- To adjust the direction of the airflow from the outlet,
move the tab in the center of the outlet in the desired
direction . The direction of the air delivered from the
vents can be adjusted hor izontally and vertically .
Contro ls and eq uip
ment
The air outlets are actuated either automatically or manual ly
depending on the operating mode selected. Heated or unheated
fresh air or cooled air flows from vents
G) through G).
[ i ] Tips
If the climate control is running in cooling mode, air flows mainly
from vents
0 and G). To achieve adequate cooling, you should
never close these vents comp lete ly. •
Applies to ve hic les : with Deluxe automa tic clima te cont ro l p lus
Rear air vents
The rear air vents are located in the center console.
Rotate the thumbwheel to open and close the vents.
To adjust the direction of the airflow from the outlet,
move the tab in the center of the outlet in the desired
direction. The direction of the air delivered from the
vents can be adjusted horizontally and vertically.
The air vents are actuated either automatically or manually
depending on the operating mode selected. Heated or unheated
fresh air, or cooled air f lows from the vents.
The air vents to heat the rear footwell are located under the front
seats .
[ i ] Tips
If the climate control is operating in cooling mode, air flows prima
rily from the vents in the center console . To achieve adequate
cooling, you should never close these vents completely. •
Vehicle care I I irechnical data
Page 173 of 360

Driving Safely -
----------------
& WARNING (continued)
to help reduce the risk of personal injury if the driver's airbag
inflates.
• Never hold the steering wheel at the 12 o'clock position or with
your hands at other positions inside the steering wheel rim or on
the steering wheel hub . Holding the steering wheel the wrong way
can cause serious injuries to the hands, arms and head if the
driver's airbag deploys .
• Pointing the steering wheel toward your face decreases the
ability of the supplemental driver's airbag to protect you in a colli
sion.
• Always sit in an upright position and never lean against or
place any part of your body too close to the area where the airbags
are located .
• Before driving, always adjust the front seats and head
restraints properly and make sure that all passengers are properly
restrained.
• Never adjust the seats while the vehicle is moving. Your seat
may move unexpectedly and you could lose control of the vehicle.
• Never drive with the backrest reclined or tilted far back! The
farther the backrests are tilted back, the greater the risk of injury
due to incorrect positioning of the safety belt and improper
seating position.
• Children must always ride in child safety seats
=> page 213.
Special precautions apply when installing a child safety seat on
the front passenger seat
=> page 188 . •
Controls and equip
ment Safety first Vehicle operation
Proper seating position for the front
passenger
The proper front passenger seating position is important
for safe, relaxed driving.
For your own safety and to reduce the risk of injury in the
event of an accident, we recommend that you adjust the
seat for the front passenger to the following pos ition:
- Move the front passenger seat back as far as possible.
There must be a minimum of 10 inches (25 cm) between
the breastbone and the instrument panel
=> &.
- Adjust the angle of the seatback so that it is in an upright
position and your back comes in full contact with it
whenever the vehicle is moving.
- Adjust the head restraint so that the upper edge is as
even with the top of your head as possible but not lower
than eye level and so that it is as close to the back of your
head as possible .
- Keep both feet flat on the floor in front of the front
passenger seat.
- Fasten and wear safety belts correctly =>
page 183.
For detailed information on how to adjust the front passenger's
seat, see
=> page 69.
& WARNING
Front seat passengers who are unbelted, out of position or too
close to the airbag can be seriously injured or killed by the airbag
as it unfolds. To help reduce the risk of serious personal injury : .,
Vehicle care Do-it-yourself service Technical data
Page 174 of 360
-Driving
Safely ------=-------=----------------
& WARNING
(continued)
• Passengers must always sit in an upright position and never
lean against or place any part of their body too close to the area
where the airbags are located.
• Passengers who are unbelted, out of position or too close to the
airbag can be seriously injured by an airbag as it unfolds with
great force in the blink of an eye .
• Always make sure that there are at least 10 inches (25 cm)
between the front passenger's breastbone and the instrument
panel.
• Each passenger must always sit on a seat of their own and
properly fasten and wear the safety belt belonging to that seat.
• Before driving, always adjust the front passenger seat and
head restraint properly.
• Always keep your feet on the floor in front of the seat . Never
rest them on the seat, instrument panel, out of the window, etc.
The airbag system and safety belt will not be able to protect you properly and can even increase the risk of injury in a crash.
• Never drive with the backrest reclined or tilted far back! The
farther the backrests are tilted back, the greater the risk of injury due to incorrect positioning of the safety belt and improper
seating position.
• Children must always ride in child safety seats~
page 213.
Special precautions apply when installing a child safety seat on
the front passenger seat
~ page 188 . •
Proper seating positions for passengers in
rear seats
Rear seat passengers must sit upright with both feet on
the floor consistent with their physical size and be prop
erly restrained whenever the vehicle is in use.
To reduce the risk of injury caused by an incorrect seating
position in the event of a sudden braking maneuver or an
accident, your passengers on the rear bench seat must
always observe the following:
- Make sure that the seatback is securely latched in the
upright position~
page 80.
Keep both feet flat in the footwell in front of the rear seat.
Fasten and wear safety belts properly ~
page 183.
-Make sure that children are always properly restrained in
a child restraint that is appropriate for their size and age
~ page 213.
& WARNING
Passengers who are improperly seated on the rear seat can be
seriously injured in a crash.
• Each passenger must always sit on a seat of their own and
properly fasten and wear the safety belt belonging to that seat.
• Safety belts only offer maximum protection when the seatback
is securely latched in the upright position and the safety belts are
properly positioned on the body . By not sitting upright, a rear seat
passenger increases the risk of personal injury from improperly
positioned safety belts!
• Always adjust the head restraint properly so that it can give
maximum protection . •