AUDI A6 2017 Manual Online
Manufacturer: AUDI, Model Year: 2017, Model line: A6, Model: AUDI A6 2017Pages: 280, PDF Size: 70.24 MB
Page 81 of 280
co
co
.... N
" N .... 0 0 <..:l -
pressed.
Interlock button
The in terlo ck button i n the selector lever handle
p revents yo u from moving the selector lever i n
advertently while in some se lector lever posi
tions. The positions that require the interlock button to be pressed are marked in co lor i n the il
lustration
c:> fig . 84.
Driving tips
Starting the engine
.. The selector lever must be in the P or the N po
s it ion.
Starting from a stop
.. Press and hold the brake pedal.
.. Press and hold the lock button in the selector
lever hand le, select the desired se lector lever
pos ition such as 0/5 and release the lock but
ton .
.. Wait a moment unt il the transm ission shifts .
You w ill no tice a slight movement when t he
gear e ngages .
.. Release t he b rake pedal and press the acce le ra
tor pedal
c:> &_ .
Stopping temporarily
.. Keep the veh icle stat ionary using the braking
peda l, for example at traffic lights .
.. Do no t press t he accelerator pedal when doing
t hi s.
.. To p revent the vehicle from rolling when yo u
sta rt driving, se t the park ing brake when stop
ping on steep i nclines
c:> _&. .
.. The parking bra ke wi ll re lease automatically
and the vehicle will start moving once you press
the accelerator pedal.
Stopping /parking
If the se lec to r l ever is not in the P posi tion when
you open the driver's door, the vehicle could rol l.
The message
Transmission: selector lever in
drive position!
appears . A warn ing tone wi ll also
sound.
.. Press and hold the brake pedal
c:> _&. .
Driving
.. Se t the par king brake.
.. Select the P selector lever posit ion .
U nder certain circumst ances, su ch as driving in
t h e mo unta ins, i t may be useful to swi tch tempo
ra rily to the manual s hift program in order to
man ua lly adjust the gea rs to the driving condi
tions
c:> poge 80.
On inclines, activate the parking brake fi rs t a nd
t h en move the selector lever to t he P position
c:> page 75. This prevents the locking mechanism
from be ing loaded too heavily and will make it
easier to move the selector lever out of the P po
s ition .
A WARNING
- The vehicle ca n roll even if the ignit ion is
sw itched off .
- Never leave your ve hicle w ith the engine
r u nning while in gear .
- Do not press the acce le rator peda l when
changing the se lector lever posi tion while
the vehicle is s ta tionary and the engi ne is
r u nning .
-
-Please no te that a small amo unt of power is
transmi tted if the veh icle is stopped tern po
r a rily w hile in t he D/S or R select or leve r po
si tion. To reduce t he risk of an a cc iden t, y ou
m ust cont in ue pressing firmly on the brake
pedal whi le t he veh icle is stoppe d so that i t
does not ro ll.
- Never engage the R or P sele ctor leve l pos i
tions while dr iv ing. It could ca use a crash .
- Before driving down a steep slope, reduce
your speed and sh ift into a lowe r gear w ith
"t i pt ronic" .
- Do not r ide the brakes or p ress the brake
pedal too often or too lon g when dr iving
downhill . Constant bra king causes the
brakes to overheat and s ubstant ially re
duces brak ing performance, increases b rak
ing d istance or causes comp lete fai lure of
the bra ke system.
- If you must stop on an incline, a lways hold
the vehicle in place wit h the foot brake or
pa rking bra ke to p reve nt i t from rolling
back.
79
Page 82 of 280
Driving
-Never hold the vehicle on an incline with a
slipping clutch. The clutch opens automati
cally when it becomes too hot from the
overload . The
[i1 indicator Light turns on
and a message appears~
page 81 when
the clutch is overloaded.
(D Note
-When stopping on an incline, do not try to
hold the vehicle in place by pressing the ac
celerator pedal while a driving gear is se
lected. This can cause the transmission to
overheat and can damage it. Set the parking brake or press the brake pedal to prevent
the vehicle from rolling.
- Allowing the vehicle to roll when the engine
is stopped will damage the transmission be
cause it is not lubricated .
@ Tips
For safety reasons, the parking brake is re
leased automatically only when the driver's
safety belt is fastened.
Hill descent control
The hill descent control system assists the driver
when driving down hills .
Hill descent control is activated when the selec
tor lever is in the Dor S position and you press
the brake pedal. The transmission automatically
selects a gear that is suitable for the hill . Hill de
scent control tries to maintain the speed ach
ieved at the time of braking, within physical and
technical limitations. If may still be necessary to
adjust the speed with the brake pedal.
Hill descent control switches off once the hill lev
els out or you press the accelerator pedal.
On vehicles with a cruise control system*
~ page 86, hill descent control is also activated
when the speed is set.
A WARNING
Hill descent control cannot overcome physical
limitations , so it may not be able to maintain
80
a constant speed under all conditions. Always
be ready to apply the brakes .
Shifting manually (tiptronic mode)
The tiptronic mode allows the driver to shift the
gears manually.
'
}
Fig . 85 Center console: sh ift ing manually with the selector
l ever
Fig. 86 Steering wheel : manual s hift ing with the s hift pad
dles*
Shifting with the selector lever
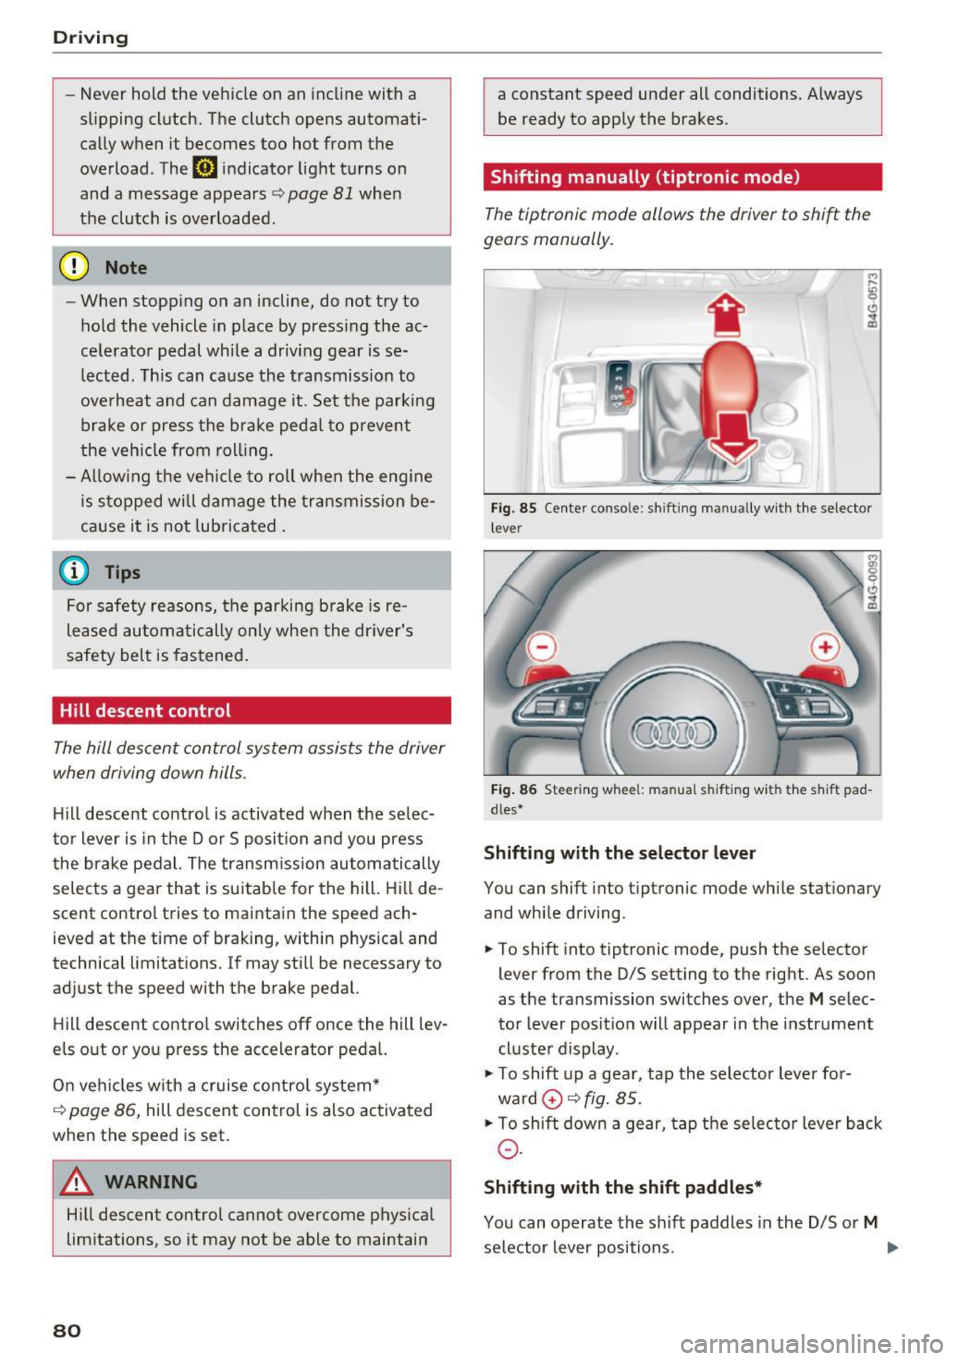
You can shift into tip tron ic mode while stationary
and while driving.
.,. To shift into tiptronic mode, push the selector
lever from the D/S setting to the right. As soon
as the transmission switches over, the
M selec
tor lever position will appear in the instrument
cluster display .
.,. To shift up a gear, tap the selector lever for
ward
0 ~ fig. 85.
.,. To shift down a gear, tap the selector lever back
0-
Shifting with the shift paddles*
You can operate the shift paddles in the D/S or M
selector lever positions. ..,.
Page 83 of 280
co
co
.... N
" N .... 0 0 <..:l '
¢fig. 86.
~ To shift down one gear, tap the 0 shift paddle.
The transmission automatically shifts up or down before critical engine speed is reached.
The transmission only allows manual shifting
when the engine speed is within the permitted
range.
Kick-down
Kick-down enables maximum acceleration.
When you press the accelerator pedal down be
yond the resistance point, the automatic trans
mission downshifts into a lower gear, depending
on vehicle speed and engine RPM.
It shifts up in
to the next higher gear once the maximum speci
fied engine RPM is reached.
A WARNING
Please note that the wheels could spin on
slick or slippery roads when kick-down is ac
tive.
Launch control program
A ppl ies to: ve hicles wit h S tro nic
-
The launch control program provides the best
possible acceleration when starting from a stop.
Requirement: the engine must be at operating
temperature and the steering wheel must not be
turned .
~ Deactivate the Start/Stop system*¢ page 74.
The LED in the l0 u•I button turns on.
~ Switch the Electronic Stabilization Control
(ESC) sport mode on ¢
page 121. The II i ndi
cator light turns on.
~ Pull the selector lever back out of the D/S posi
tion briefly to select the S position or select the
DYNAMIC driving mode in drive select
¢page 106.
~ Press the brake pedal firmly with your left foot
and hold it all the way down for at least one
second .
Driving
~ At the same time, press the gas pedal all the
way down with your right foot until the engine reaches and stays at a high RPM level.
~ Remove your foot from the brake pedal within
five seconds ¢_& .
A WARNING
-Always adapt your driving to the traffic flow.
- Only use the Launch control program when
road and traffic conditions allow it and oth
er drivers will not be endangered or both
ered by your driving and the vehicle's accel
eration.
- Please note that the drive wheels can spin
and the vehicle can break away when sport
mode is switched on, especially when the
road is slippery.
- Once the vehicle has started moving, press
the
I.P-O FFI button briefly to turn the sport
mode off.
@ Tips
- The transmission temperature may increase
significantly after using the launch control
program. If that happens, the program may
not be available for a few minutes.
It will be
available again after a cool-down period.
- When accelerating using the launch control
program, all vehicle parts are subject to
heavy loads. This can lead to increased
wear.
Transmission malfunction
DD Transmission: please press brake pedal and
select gear again
Press the brake pedal and select the desired se
lector lever position again. You can then continue
driving.
DD Transmission overheating: Please drive con
servatively.
The transmission temperature has increased sig
nificantly due to the sporty driving manner. Drive
in a less sporty manner until the temperature re
turns to the normal range and the indicator light switches of. .,..
81
Page 84 of 280
Driving
rm Tran smissio n m alfun ction: Yo u can continu e
d riv ing
There is a system malfunc tion in the t ransm is
sion. Yo u may continue dr iving. Drive to your au
thorized Audi dealer or authorized Audi Service
F acility soon to have the malfunction corrected.
rm Tran smission m alfun ction: You can continue
driving with limi ted fun ct iona lity
There is a system malfunct ion in the transm is
sion. The transmission is switching to emergency
mode. This mode only shifts into certain gears o r
will no longer shift at all. The engine may stall.
Drive to an autho rized Audi dea ler or authorized
Audi Service Facility immediately to have the
malfunct ion corrected .
Appl ies to: ve hicles w ith 5 tro nic t ra n smi ssio n
rm Ii] Tran sm iss ion malfunction: No re verse
gear. You can cont inu e dri ving
There is a system malfunct io n in the transmis
sion. The transmission is switching to emergency
mode . This mode only shifts into certain gears o r
will no longer shift at all. The engine may stall .
You cannot engage the reverse gear. Drive to an
authorized Audi dealer or author ized Audi Service
Facility immediately to have the malfunction cor
rected.
[O] Tran smission m alfunction : Stop vehicle and
s hi ft t o park .
Do not cont inue driving. Select the P se lector lev
er position and see an a uthorized Audi dea le r or
author ized Audi Se rvice Facility for assis tance.
d) Note
If the transmission has switched to emergen
cy mode, drive to your author ized Audi dealer
or au thori zed A udi Service Fa cility immediate
ly to have the malfunc tion cor rected.
82
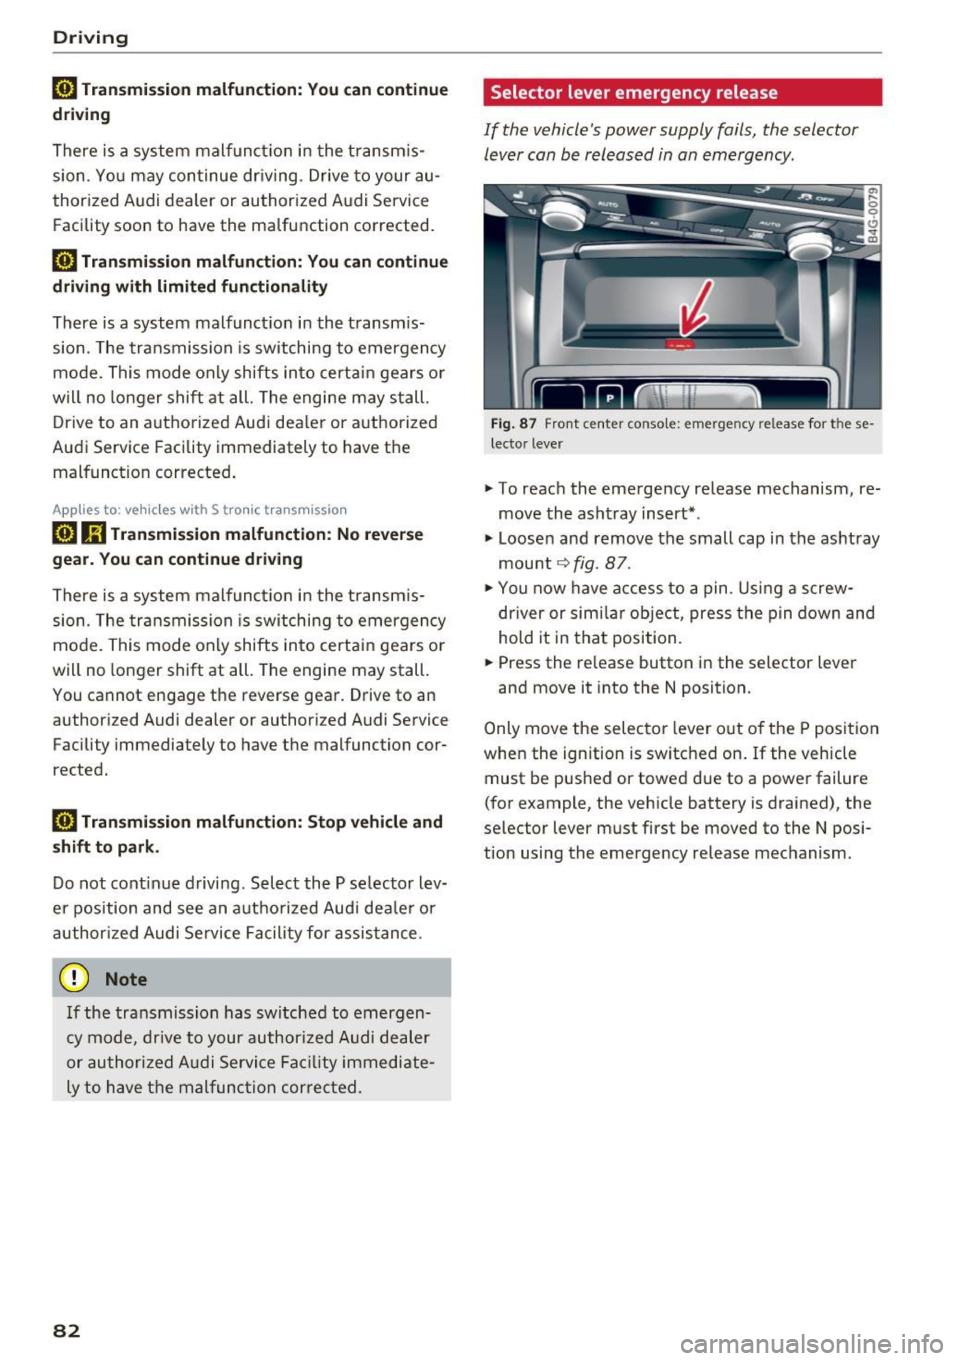
Selector lever emergency release
If the vehicle's power supply fails, the selector
lever can be released in an emergency .
Fig. 87 Front center console: emerge ncy re le ase for these·
lecto r lever
.,. To reach the emergency release mechanism, re
move the asht ray insert *.
.,. Loosen and remove the small cap in the ashtray
mount
¢ fig. 87 .
.,. You now have access to a pin . Using a screw
driver or sim ila r object, press the pin down and
hold it in that position.
.,. Press the re lease button in the selector lever
and move it into the N position.
Only move the selector lever out o f the P position
when the ignition is switched on .
If the vehicle
must be pushed or towed due to a power failure
(for example, the vehicle battery is drained), the
selector lever must first be moved to the N posi
tion using the emergency release mechanism.
Page 85 of 280
co
co
.... N
" N .... 0 0 <..:l '
General information
Your Audi was designed primarily for passenger
transportation .
If you plan to tow a trailer, please remember that
the additional load will affect durability, econo
my and performance.
Trailer towing not only places more stress on the
vehicle, it also calls for more concentration from
the driver.
For this reason, always follow the operating and
driving instructions provided and use common
sense.
(D Note
If you are going to tow a trailer, you must ac
tivate the trai ler operation mode
c::> page 83, Operating instructions.
Technical requirements
Trailer hitch
Use a weight-carrying hitch conforming to the
gross trailer weight. The hitch must be suitable
for your vehicle and trailer and must be mounted
securely on the vehicle's chassis at a
technically
sound
location . Use only a trailer hitch with a re
movable ball mount. Always check with the trail
er hitch manufacturer to make sure that you are
using the correct hitch.
Do not use a bumper hitch.
The hitch must be installed in such a way that it
does not interfere with the impact -absorbing
bumper system . No modifications should be
made to the vehicle exhaust and brake systems .
From time to time, check that all hitch mounting
bolts remain securely fastened.
When you are not towing a trailer,
remove the
trailer hitch ball mount . This prevents the hitch
from causing damage shou ld your vehicle be
struck from behind
c::> .&, .
Tra iler towing
Trailer brakes
If your trailer is equipped with a braking system,
check to be sure that it conforms to all regu la
tions.
T he trailer hydraulic brake system must not be
directly connected to the vehicle's hydraulic
brake system.
Safety chains
Always use safety chains between your vehicle
and the tra iler .
Trailer lights
Trailer lights must meet all regulations. Be sure
to check with your Audi dealer for correct wiring,
switches and relays.
Mirrors
If you are unable to see the traffic behind you us
ing the regular outside mirrors, then you
must in
stall extended mirrors . It is important that you
always have clear vision to the rear .
A WARNING
--
After removing the trailer hitch, do not store
it in your vehicle. In case of sudden braking,
the hitch could fly forward and injure you or
your passengers.
Operating instructions
Maximum trailer weight
A trailer for your vehicle is lim ited to a typical
class 1 or class 2 trailer.
Trailer load distribution
Be sure the load in the trailer is held securely in
place to prevent it from shifting forward, back
ward or s ideways.
Never allow a passenger to ride in a trailer c::> .&.
in Driving instructions on page 85 .
Engine cooling system
Towing a trailer makes the engine work harder. It
is important that the cooling system's perform
ance is up to the additional load. Make sure that
the cooling system has enough fluid . ..,.
83
Page 86 of 280
Trailer towing
Tire pr essure
When tow ing a tra iler, inflate the tires of yo ur
veh icle to the tire pressure listed under " Fu ll
load" on the label¢
page 220. Inflate trai ler
tires to trai ler and tire manufacturers' specifica
tions.
Lights
Check to ma ke sure both vehicle and t railer lights
are working proper ly.
Safety chains
Be sure trailer safety chains are proper ly connect
ed from the traile r to the hitch on the vehicle.
L eave enough slac k in the c ha ins to permi t turn
ing corners. When you install safety chains, make
sure they wi ll not drag on the road when you are
driving.
The chains shou ld cross under the trailer tongue
to prevent it from dropping in case of separation
from the hitch .
Adjusting the Audi drive select
Make sure the veh icle is on a level surface before
h itchi ng up the t railer a nd before adjus ting the
tongue we igh t. The vehicle must be in
auto or
c omfort driving mode and not ra ised
¢page 104, ¢(!) .
Make sure that the vehicle is lowered. In Info
tainmen t, se lect:
ICARI f u nct ion butto n> Lower
con trol b utton.
I f you must dr ive under poo r road conditions, you
can ra ise the vehicle
aft er coup ling the t rai ler or
after adj usting the tongue weight¢ page 106.
@ Note
-Changes in tempe rature or load ca n affect
the he ight of the vehicle.
- Always se lect
auto or comfort mode . Other
wise, the tongue load spec ified for your ve
hi cle w ill no longe r be applicable.
84
· Driving instructions
Driving with a trailer always requires extra care
and consideration.
Weight distribution
Towing a loaded trailer with an empty car results
i n a h ighly unstab le distribut ion of weight. If this
cannot be avoided, drive at very low speeds only
to avoid the risk of losing steering control.
A "balanced" rig is easier to operate and control.
This means that the tow vehicle shou ld be loaded
to the extent possible and permissible, wh ile
keeping the trailer as light as possible under the
c ir cumstances . Wheneve r possible, transfer
some cargo to the luggage compartment of the
tow ve hicle while observing tongue load require
ments and vehicle load ing conside ra tions.
Speed
The higher the speed, the more difficult it be
comes for the dr iver to control the r ig. Do not
drive at the maximum permissible speed. Reduce
yo ur speed even more if load, weather or wind
cond it ions are unfavo rab le -pa rtic ularly whe n
going downh ill.
Reduce vehicle speed
immed iately if the t railer
shows the slightest sign of sway ing.
Do not try
t o stop th e s waying by accelerating.
Observe speed limits. In some areas, speeds fo r
vehicles tow ing traile rs are lower than for regular
vehicles.
Always apply brakes early. When driving down
hill, shift into a lower gear to use the eng ine
braki ng effect to slow the vehicle. Use of the
bra kes alone ca n cause them to overheat a nd fail.
Air suspension*
When dr iving with a trailer, act ivate the trailer
mode of the air suspens io n. Switch the a ir sus
pension trailer mode on w hen you are towing a
trailer. This wi ll limit the regulation by the air
s u spension while dr iv ing. Se lect in the M MI:
I CAR ! funct ion but ton > (Car )* s ystem s contro l
button >
Vehicle setting s > Air su sp .: towing >
On . .,_
Page 87 of 280
co
co
.... N
" N .... 0 0 <..:l '
The coolant temperature gauge c::> page 9 must
be observed carefu lly . The coolant temperature
can increase if you drive on long inclines in a low
gear at high engine speeds. Reduce your speed immediately if the LEDs in the top part of the dis
play turn on.
F or more information about ind icator lights, re
fer to.
c::> page 14.
A WARNING
Anyone not proper ly restrained in a moving
vehicle is at a much greater risk in an acci
dent. Never let anyone ride in your car who is
not properly wearing the restraints provided
by Audi.
Trailer towing information
Important to know
Your vehicle handles differently when towing a
tra iler because of the additional weight and dif
ferent weight distribut ion . Safety, performance
and economy will greatly depend on how careful
ly you load your trailer and operate your rig.
Before you actually tow your trailer, practice
turning, stopp ing and back ing up in an area away
from traff ic. Keep practicing until you have be
come completely fam iliar with the way your vehi
cle-trailer combination behaves and responds.
Backing up is difficult and requires pract ice.
Backing up with a trailer generally requires steer
ing action opposite to that when backing up your
vehicle without a trailer.
Maintain a greater d istance between your vehicle
and the one in front of you. You w ill need more
r oom to stop. To compensate for the trailer, you
will need a larger than normal turning radius.
When passing, remember that you cannot accel
erate as fast as you normally wou ld because of
the added load. Make s ure you have enough room
to pass. After passing, a llow plenty of room for
your tra iler before changing lanes again.
Trailer towing
Avoid jerky starts, sharp turns or rapid lane
changes.
(D Tips
- Do not tow a trailer during the break-in peri
od of your vehicle.
- If you tow a trailer, your Audi may require
more frequent maintenance due to the ex
tra load
c::> page 259 .
Parking on a slope
Do not pork on a slope with a trailer. If it cannot
be avoided, do so only after doing the following:
When parking:
• Apply the foot brake.
• Have someone place chocks under both the ve
hicle and the trailer wheels.
• With chocks in place, slowly release the brakes
until the wheel chocks absorb the load.
• Turn the whee ls towards the curb.
• App ly the parking brake.
• Select the P selector lever position.
When restarting after parking:
• App ly the foot brake.
• Start the engine.
• Select the D/S se lector lever position.
• Release the parking brake and slowly pull out
and away from the wheel chocks.
• Stop and have someone retrieve the wheel
chocks.
(D Tips
If you move the selector lever of the automat
i c transmission to P before applying the park
i ng brake and before blocking the wheels, you
may have to use more force later to move the
l ever out of the P position.
85
Page 88 of 280
Assist
Assist Speed warning system
Applies to: vehicles with speed warning system
The speed warning system helps you to stay un
der a specified maximum speed.
The speed warning system warns you if you are
exceeding the maximum speed that you have set.
A warning tone will sound as soon as your speed
exceeds the stored value slightly.
The . (USA models)/ . (Canada models) indi
cator light and a message appear in the instru
ment cluster display at the same time. The •
• indicator light and the message turn off if the
speed falls back below the stored maximum
speed .
Setting a threshold is recommended if you would
like to be reminded when you reach a certain
maximum speed. Situations where you may want
to do so include driving in a country with a gener
al speed limit or if there is a specified maximum
speed for winter tires.
Setting the warning threshold
The warning threshold is set in the Infotainment
system.
.. Select: the
ICARI function button > (Car)* Sys
tems
control button > Driver assistance >
Speed warning.
(D Tips
Regardless of the speed warning system, you
should always monitor your speed using the
speedometer and make sure you are following
the legal speed limit.
86
Cruise control system
Switching on
Applies to: vehicles with cruise control system
The cruise control system makes it possible to
drive at a constant speed starting at 20 mph (30
km/h) .
0
f
~
0
Fig. 88 Operat ing lever: cruise co ntro l syste m
.,. To switch the cruise control on, pull the lever
into posit ion
(D ~ fig . 88.
.,. Drive at the speed to be maintained .
.,. To store the speed, press the button @.
~ M 0 :i:
;;i;
The stored speed and the (ij;\1)~14 (USA models) /
l'I (Canada models) indicator light are disp layed
in the instrument cluster.
This information is also shown briefly in the
Head-up disp lay* .
The speed is maintained by modifying engine
power or through an active brake intervention.
~ WARNING
-Always pay attention to the traffic around
you when the cruise control system is in op
eration . You are always responsible for your
speed and the distance between your vehi
cle and other vehicles.
- For safety reasons, cruise control should not be used in the city, in stop-and-go traffic, on
winding roads and when road conditions are poor (such as ice, fog, gravel, heavy rain and
hydroplaning), because this increases the
r isk of an accident.
- Switch the cruise control off temporarily
when dr iv in g in turning lanes, highway exits
or in construction zones.
-
Page 89 of 280
co
co
.... N
" N .... 0 0 <..:l '
your foot on the accelerator pedal prevents
the cruise control from braking. This is be
cause pressing the accelerator pedal over
rides the cruise control system .
- If a brake system malfunction such as over
heating occurs when the cruise control sys
tem is switched on, the braking function in
the system may be switched off. The rest of
the cruise control system functions remain
active as long as the
(tj;(IM@ (USA models) /
ii (Canada models) indicator light is on.
@ Tips
The brake lights turn on when the brakes are
applied automat ically .
Changing speed
Applies to: vehicles with cruise control system
.. To increase or decrease the speed in incre
ments, tap the lever toward
010 ¢ page 86,
fig. 88 .
.. To increase or decrease the speed quickly, hold
the lever in the
G)/0 direction until the de
sired speed is displayed.
You can also press the accelerator pedal down to
increase your speed, for example if you want to
pass someone. The speed you set earlier will re
sume as soon as you release the accelerator ped
al.
However, if you exceed your saved speed by 5
mph (10 km/h) for longer than 6 minutes, the
cruise control system turns off temporarily .
The green
ltj;(i )~i@ (USA models) 1 '11 (Canada mod
els) indicator light in the speedometer turns off
and the stored speed is maintained.
Preselecting the speed
App lies to: ve hicles with cru ise control system
You can pre-select your desired speed when the
vehicle is stationary.
.. Switch the ignition on.
.. Pull the lever into position
(D ¢ page 86,
fig. 88 .
Assist
.. To increase or decrease the speed, tap the lever
toward
0 10 .
.. To store the speed displayed, release the lever.
T his function makes it possible, for example, to
save the speed you want before driving on the
highway. Once on the highway, activate the
cruise control by pulling the lever toward @.
Switching off
Appl ies to : vehicles with cruise co ntrol system
Temporary deactivation
.. Press the brake pedal, or
.. Press the lever into position @ (not clicked into
place)
¢ page 86, fig. 88, or
.. Drive for longer than 5 minutes faster than 5
mph (10 km/h) above the stored speed .
Switching off completely
.. Press the lever into position @(clicked into
place), or
.. Switch the ignition off.
The speed you stored will be maintained if the cruise control has been switched off temporarily .
To resume the stored speed, release the brake pedal and pull the lever to position@.
Switching the ignition off will erase the stored
speed .
A WARNING
--You should only resume the stored speed if it
i s not too high for existing traff ic conditions.
Otherw ise you can inc rease the risk of an acci
dent.
87
Page 90 of 280
Assist
Audi adaptive cruise
control
Description
Applies to: vehicles with Audi adapt ive cruise control
F ig. 89 Detection range
The adaptive cruise control system is a combina
tion of speed and distance regulation.
It assists
the driver by both regulating the speed and
maintaining a distance to the vehicle driving
ahead, within the limits of the system .
If the sys
tem detects and object ahead, adaptive cruise
control can brake and acce lerate your vehicle.
This makes driving more comfortable both on long stretches of highway and in stop-and-go
traffic.
What can adaptive cruise control do?
The adaptive cruise contro l system uses video, ra
dar and ultrasound . Objects driving ahead can be
recognized up to 650 feet (200 m) away.
On open roads with no traffic, it functions
like a
cruise control system . The stored speed is main
tained. When approaching an object ahead, the
adaptive cruise control system automatically
brakes to match that object's speed and then
maintains t he stored distance . As soon as the
system does not detect an object ahead, adaptive
cru ise control acce lerates up to the stored speed .
In stop-and-go traffic, adaptive cru ise control can
brake until the vehicle is stat ionary and then be
g in driving aga in under certain conditions
¢page 91.
Audi braking guard can warn you about an im
pending collision and initiate braking maneuvers
¢page 93.
88
Which functions can be controlled?
When you switch adaptive cruise control on, you
can set the current speed as the "control speed"
¢ page 90, Switching on/off.
When driving, you can stop cruise control
¢page 92 or cha nge the speed ¢ page 91 at
any time.
You can also set the distance to the object mov
ing ahead and set the driving mode of the adap
tive cruis e con trol
¢p age 92.
General information
Applies to: vehicles with Audi adaptive cruise control
Fig. 90 Front of the vehicle: sensors and video camera
The areas that contain the radar and ultrasonic
senso rs and the video camera ¢
fig. 90 must not
be covered by stickers, deposits or other objects
because they can interfere with the function of
the adapt ive cruise control system and braking
guard. For information on clea ning, refer to
¢ page 231. The same applies for any modif ica
tions made in the front area.
The function of the adaptive cruise control sys
tem and braking guard is limited under some
conditions.
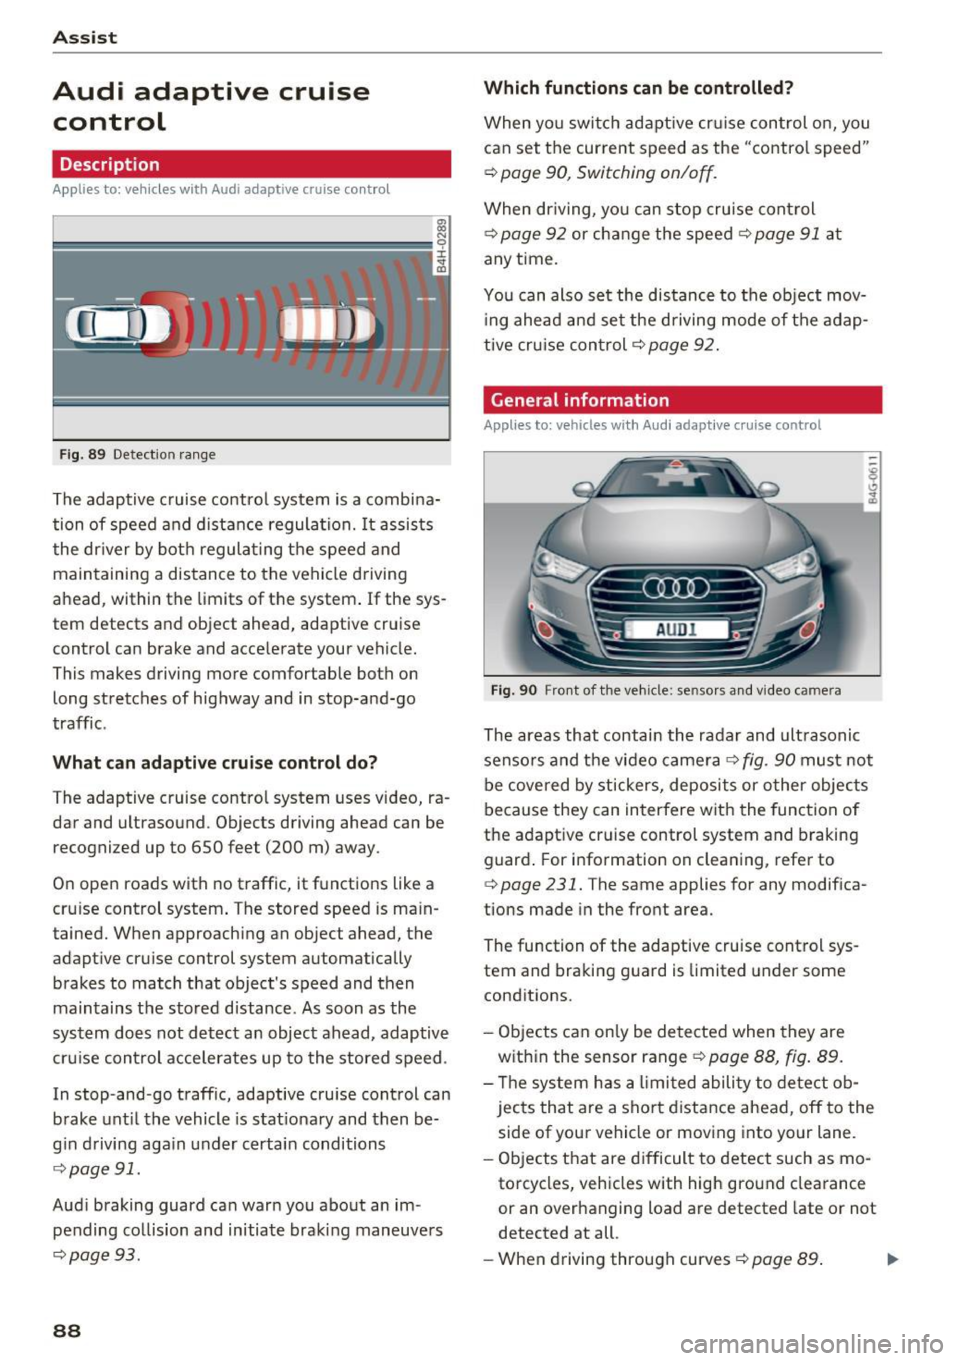
- Objects can only be detected when they are
with in the sensor range
¢p age 88, fig. 89.
- Th e system has a limit ed ability to detect ob
jects that are a sho rt distance ahead, off to the
side of your vehicle or moving into your lane.
- Objects that are difficult to detect such as mo
torcycles, vehicles with high ground clearance
or an overhanging load are detected late or not
detected at all.
- When driving through curves¢
page 89. ll>