cooling AUDI A7 2013 Owners Manual
[x] Cancel search | Manufacturer: AUDI, Model Year: 2013, Model line: A7, Model: AUDI A7 2013Pages: 310, PDF Size: 77.45 MB
Page 5 of 310
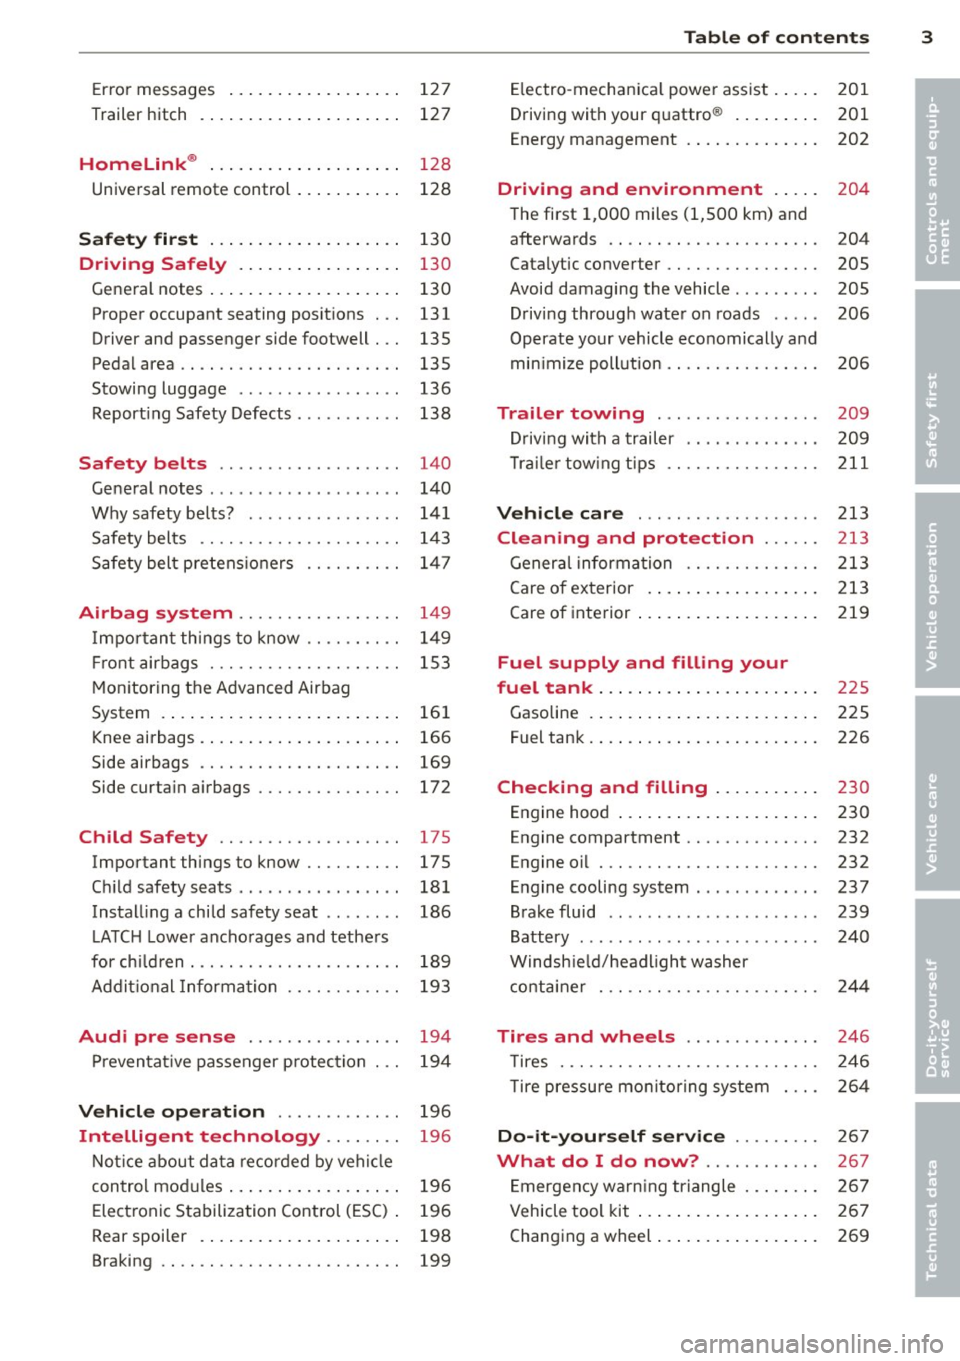
Error messages . . . . . . . . . . . . . . . . . . 127
Trailer hitch . . . . . . . . . . . . . . . . . . . . . 127
Homelink ® . . . . . . . . . . . . . . . . . . . . 12 8
Universal remote control . . . . . . . . . . . 128
Safety fir st . . . . . . . . . . . . . . . . . . . . 130
Driving Safely . . . . . . . . . . . . . . . . . 130
Gene ral notes . . . . . . . . . . . . . . . . . . . . 130
Proper occupant seating posit ions . . . 131
Driver and passenger side footwell . . . 135
Pedal area . . . . . . . . . . . . . . . . . . . . . . . 135
Stowing luggage . . . . . . . . . . . . . . . . . 136
Report ing Safety Defects . . . . . . . . . . . 138
Safety belts . . . . . . . . . . . . . . . . . . . 140
Ge neral notes . . . . . . . . . . . . . . . . . . . . 1 40
Why safety be lts? . . . . . . . . . . . . . . . . 141
Safety belts . . . . . . . . . . . . . . . . . . . . . 1 43
Safety bel t pre tens io ners . . . . . . . . . . 147
Airbag system . . . . . . . . . . . . . . . . . 14 9
I mpo rtan t th ings to know . . . . . . . . . . 1 49
Fr ont airbags . . . . . . . . . . . . . . . . . . . . 1 53
M on itoring the Advanced Airbag
System . . . . . . . . . . . . . . . . . . . . . . . . . 161
K nee airbags . . . . . . . . . . . . . . . . . . . . . 166
Side airbags . . . . . . . . . . . . . . . . . . . . . 169
Side curta in a irbags . . . . . . . . . . . . . . . 172
Child Safety . . . . . . . . . . . . . . . . . . . 175
Important things to know . . . . . . . . . . 17 5
C hi ld safety seats . . . . . . . . . . . . . . . . . 181
Install ing a child safety seat . . . . . . . . 186
L ATC H Lower ancho rages and tethe rs
for ch ild ren . . . . . . . . . . . . . . . . . . . . . . 189
Addit ional Information 193
Audi pre sense . . . . . . . . . . . . . . . . 194
P reven tat ive passenger p rotection 194
Vehicle operat ion . . . . . . . . . . . . . 196
Intelligent technology . . . . . . . . 196
N ot ice about da ta re cor ded by veh icle
control mod ules . . . . . . . . . . . . . . . . . . 196
Elec tronic Stabilization Control (ESC) . 196
Rear spoiler . . . . . . . . . . . . . . . . . . . . . 198
Braking . . . . . . . . . . . . . . . . . . . . . . . . . 199
Table of contents 3
El ectro -mechan ica l powe r ass ist . . . . . 201
Driving with your q uattro ® . . . . . . . . . 201
Energy management . . . . . . . . . . . . . . 202
Driving and environment . . . . . 20 4
The first 1,000 miles (1,500 km) and
afterwards . . . . . . . . . . . . . . . . . . . . . . 204
Catalytic converter . . . . . . . . . . . . . . . . 205
Avoid damaging the vehicle . . . . . . . . . 205
Drivi ng throug h wate r on roads . . . . . 206
Operate your vehicle economically and
min imize poll ution . . . . . . . . . . . . . . . . 206
Trailer towing . . . . . . . . . . . . . . . . . 209
D rivi ng wit h a trailer . . . . . . . . . . . . . . 209
T rai le r tow ing tips .. .. .. .. .. .. .. .. 211
Vehicle care . . . . . . . . . . . . . . . . . . . 213
Cleaning and protection . . . . . . 213
General information . . . . . . . . . . . . . . 213
Care of ex terior . . . . . . . . . . . . . . . . . . 213
Care of inte rior . . . . . . . . . . . . . . . . . . . 219
Fuel supply and filling your
fuel tank . . . . . . . . . . . . . . . . . . . . . . .
225
Gasoline . . . . . . . . . . . . . . . . . . . . . . . . 225
Fuel tan k. . . . . . . . . . . . . . . . . . . . . . . . 226
Checking and filling . . . . . . . . . . . 230
Engine hood . . . . . . . . . . . . . . . . . . . . . 230
Engine compartment . . . . . . . . . . . . . . 232
Engine o il . . . . . . . . . . . . . . . . . . . . . . . 232
E n gine cooling system . . . . . . . . . . . . . 237
Brake fluid . . . . . . . . . . . . . . . . . . . . . . 239
Battery . . . . . . . . . . . . . . . . . . . . . . . . . 240
Windsh ie ld/headlight washer
co nta iner . .. .. .. .. .. ........... . 244
Tires and wheels . . . . . . . . . . . . . . 246
T ires . . . . . . . . . . . . . . . . . . . . . . . . . . . 246
T ire pressu re mo nitor ing system 264
Do -it-yourself service . . . . . . . . . 26 7
What do I do now? . . . . . . . . . . . . 267
E mergency warn ing triangle . . . . . . . . 267
Vehicle tool kit . . . . . . . . . . . . . . . . . . . 267
Changing a wheel . . . . . . . . . . . . . . . . . 269
•
•
Page 14 of 310
12 Instrum ent s and w arn ing /indic ato r light s
-Never open the engine hood if you see or
hear steam, or if you see engine coolant
dripping from the engine compartment.
You could burn yourself . Let the engine
cool off first until you can no longer see
o r hear steam or coo lant escaping.
@ Note
- Mounting additional lights or accessories
i n front of the a ir inlets reduces the cool
i ng effect of the rad iator . At h igh outside
temperatures or high eng ine load, the
engine could overheat.
- The front spo iler has been designed to
proper ly distribute the cooling air when
t h e ve hicle is moving.
If the spoiler is
dam aged, th is co uld red uce the cooling
effect and the engine co uld then over
heat . Ask your authorized Audi dea ler for
assistance .
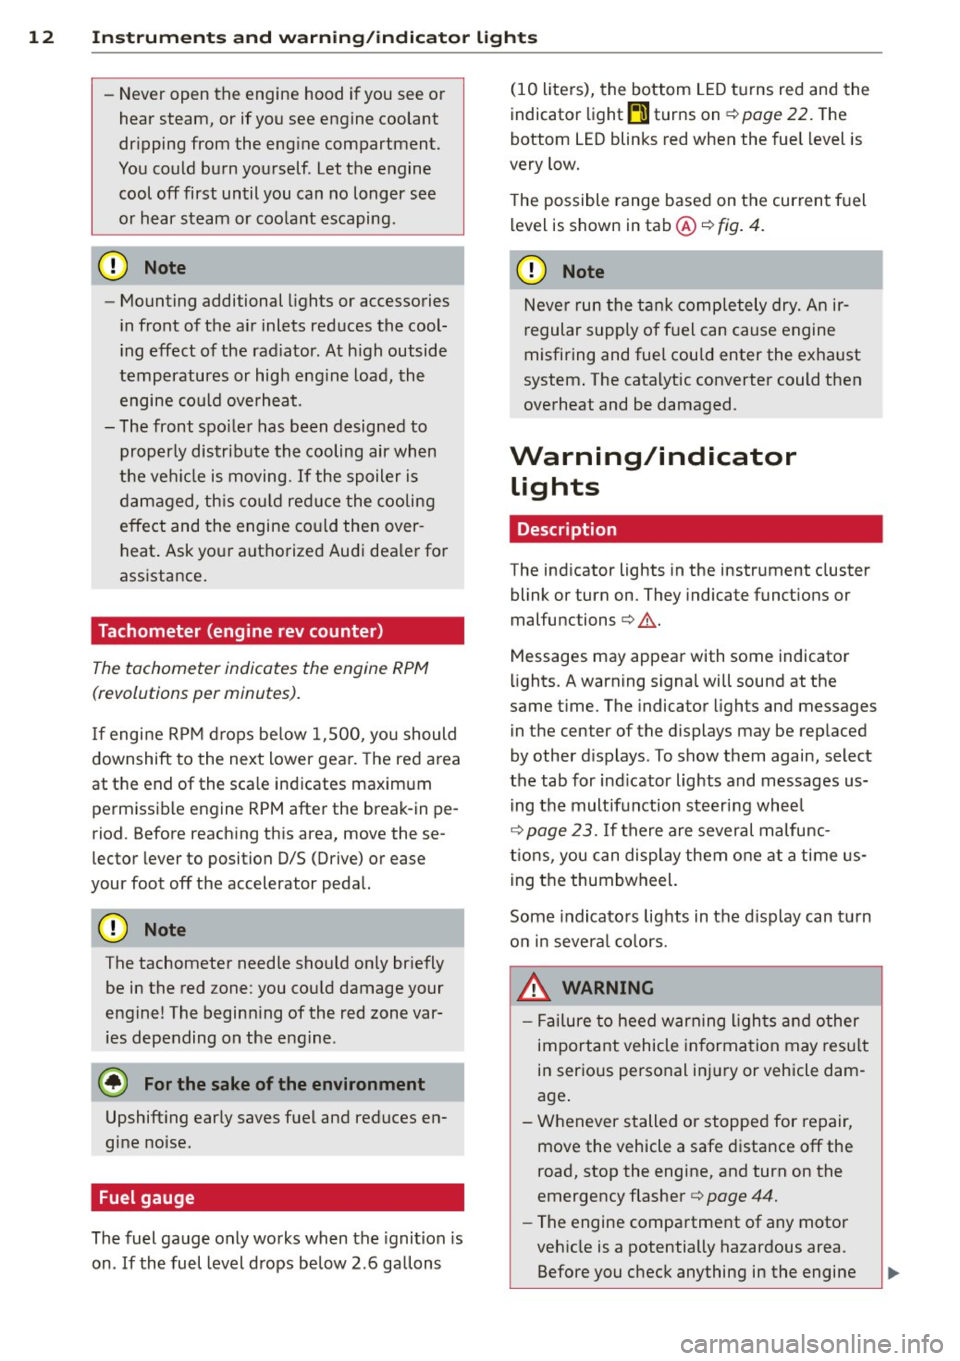
Tachometer (engine rev counter)
The tachometer indicates the engine RPM
(revolutions per minutes).
If engine RP M drops be low 1,500, yo u should
downshift to the next lower gear. The red a rea
at the end of the sca le indicates maximum
perm iss ib le engine RPM after the break-in pe
riod. Before reaching this area, move these
lector lever to position D/S (Drive) or ease
your foot off the accelerator pedal.
(D Note
The tachometer needle should on ly br iefly
be in the red zone: you could damage your
engine! The beginn ing of the red zone var
ies depending on the engine .
@ For the sake of the environment
Upshifting early saves fuel and reduces en
gine noise.
Fuel gauge
The fuel gauge only works when the ignition is
on .
If the fuel level d rops below 2 . 6 ga llons (10 liters), the bottom LED turns red and the
indicator light
Em turns on
¢ page 22. The
bottom LED blinks red when the fuel level is
very low.
T he possible range based on the current fuel
level is shown in tab@<=>
fig. 4.
(D Note
Never run the tank completely dry. An ir
r egular supply of f uel can cause engine
misfiring and fuel could enter the ex haust
system . The catalytic converter could then
overheat and be damaged.
Warning/indicator lights
Description
The ind icator lights in the instrument cluster
blink or turn on. They indicate funct ions or
malfunc tions <=>,& .
Messages may appear with some indicato r
lights. A warning signal will sound at the
same t ime. The indicator lights and messages
in the center of the displays may be rep laced
by other d isplays . To show them again, select
the tab for ind icator lights and messages us
i ng the multifunction steering wheel
Q page 23. If t here are several malfunc
t ions, you can display them one at a time us
ing the thumbwheel.
Some indicato rs lights in the d isplay can tu rn
o n in severa l co lors.
A WARNING
- F ailure to heed w arning l igh ts and other
important vehicle in forma tion may res ult
in ser io us personal inj ury or vehicle dam
age .
- Whenever stalled or stopped for repair, move the vehicle a safe d istance off the
road, stop the engine, and turn on the
emergency flasher<=>
page 44.
-The engine compartment of any motor
veh icle is a potentially hazardous area.
Before you chec k anything in the engine
Page 15 of 310
Instrument s and warnin g/indic ator ligh ts 13
compartment, stop the engine and let it
cool down. Always exercise extreme cau
t ion when working under the hood
<=> page 224, Engine compartment
@ Tips
Ma lf u nctions or faults wi ll be identified ei
ther with a red symbo l (pr iority 1 -Dan
ger!) or with a yellow symbol (pr iority
2 -
Warn ing).
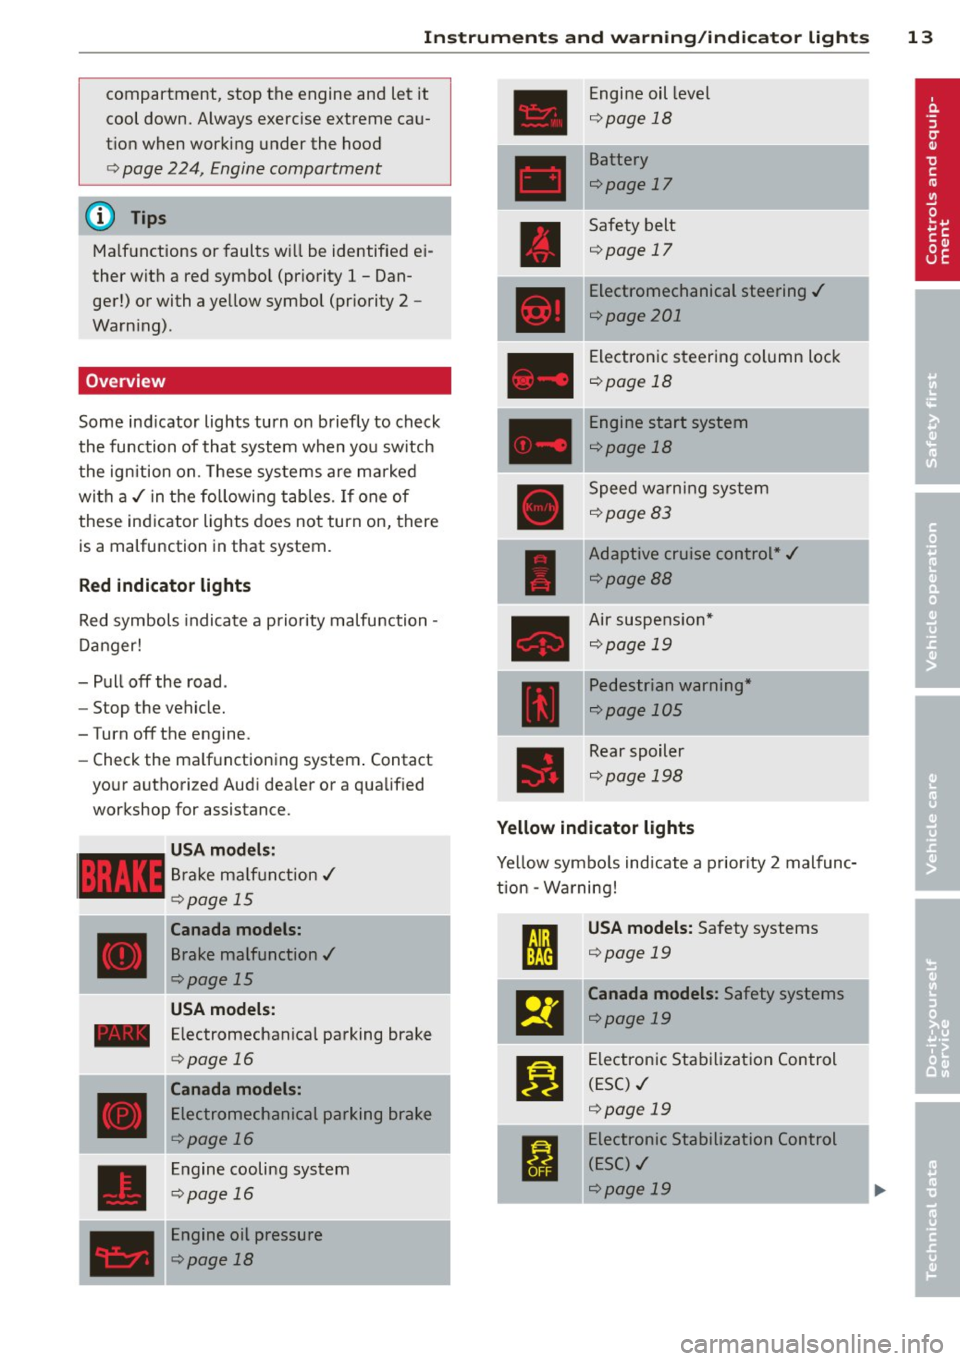
Overview
Some ind icator lights turn on briefly to check
the function of that system when you switch
the ignition on. These systems are ma rked
with a ,/ in the following tables. If one of
these indicator lights does not turn on, there
is a malfunction in that system.
Red indicator lights
Red symbols indicate a prio rity malfunction -
D anger!
- Pull off the road.
- Stop the vehicle.
-Turn off the engine.
- Check the ma lf u nctioning system . Contact
your authorized Audi dea ler or a qualified
workshop for assistance.
USA mode ls:
Brake ma lf u nction,/
c::>page 15
Canada models:
Brake malfunction,/
c::>page 15
USA models:
- Electromechanical parking brake
____ ,
D
<=> page 16
Canada models:
Electromechanical parking brake
<=>page 16
Engine cooling system
c::> page 16
Engine oil pressure
c::> page 18
Engine oil level
Q page 18
Battery
<=>page 17
Safety belt
<=>page 17
Electromechanical steering ,/
<=> page 201
Electronic steering column lock
<=>page 18
Engine start system
<=>page 18
Speed warning system
<=>page 83
Adaptive cruise control*,/
<=>page88
Air suspe nsion*
Qpage 19
Pedestrian warning*
Qpage 105
Rear spoiler
c::>page 198
Yellow indicator lights
Yellow symbo ls indicate a prior ity 2 malfunc
tion - Wa rning!
m
l:ml
El
fl
USA models: Safety systems
<=> page 19
Canada models: Safety systems
c::> page 19
Electronic Stabilization Control
(ESC) ,/
<=>page 19
Electronic Stabilization Control
( E SC) ,/
c::> page 19
Page 18 of 310
16 Instrum ent s and w arn ing /indic ato r light s
&_ WARNING
-Always observe the warnings in
i=> page 224, Engine compartment, be
fore opening the hood and checking the brake flu id.
- Driv ing with low brake fluid is a safety
hazard. Stop the car and get professional
assistance.
- USA models: If the 1111 warn ing light,
the
G1 warning light and the m:11 warn
ing light come on together, the rea r
wheels co uld lock up first unde r hard
braking . Rear wheel lock-up can cause
loss of vehicle control and an accident.
Have your vehicle repaired immediately
by your authorized Aud i dea ler or a quali
fied workshop. Drive slowly and avoid
sudden, hard brake applications.
- Canada models: If the brake warn ing
light ., the
DJ warn ing light and the
ABS warning light
ii] come on together,
the rear wheels could lock up first unde r
hard bra king. Rear wheel lock-up can
cause loss of vehicle co ntrol and an acci
dent. Have yo ur vehicle repaired immed i
a tely by your authori zed A udi dealer or a
qualified workshop . Dr ive slowly and
avoid sudden, hard brake applicat ions.
- If the brake warning/indicator ligh t does
not go out afte r a few secon ds an d the
parking brake is released, or lights up
whi le you are driving, the fluid level in
the brake fluid reservoir is too low. If you believe that it is safe to do so, proceed
immediately at low speed to the nearest
authorized Audi dealer o r qualified repair
facility and have the brake system in
s pected.
- Always kee p in m ind that afte r several
brake applicat ions, yo u will need g reater
pressure on the b rake peda l to s top your
vehicle. Do no t re ly on stra ined brakes to
respond with maxim um stopping power
in critical situations . You must allow for
increased brak ing distances. The extra
distance used up by fad ing brakes could
lead to an acc ident.
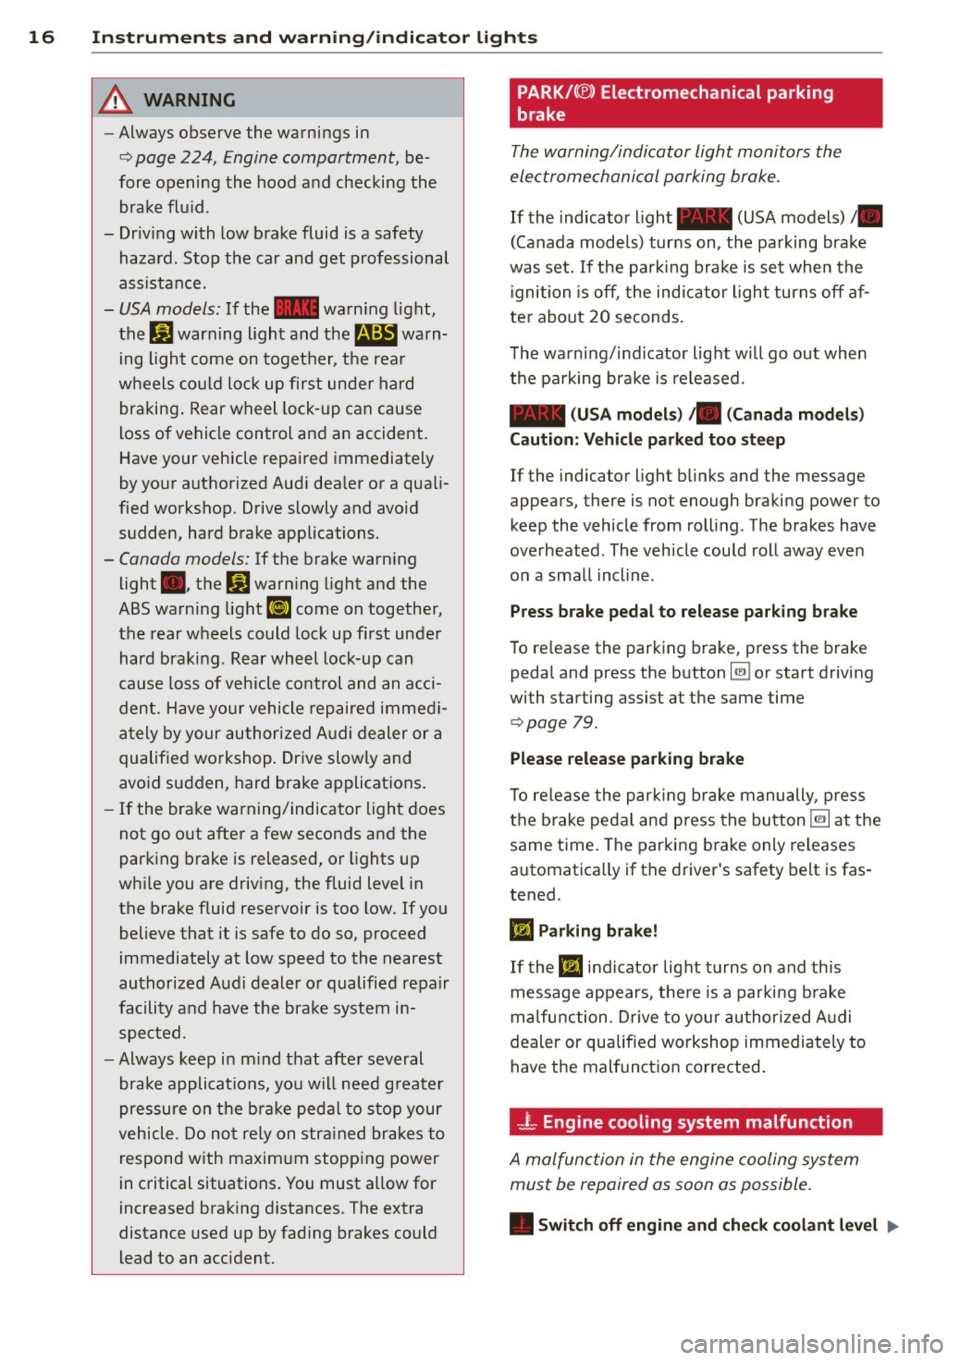
PARK/( ®) Electromechanical parking
brake
The warning/indicator light monitors the
electromechanical parking brake .
If the indicato r light - (USA models)/ .
(Canada mode ls) turns on, the pa rking brake
was set. If the pa rking brake is set when the
igni tion is off, the indicator light turns off a f
te r abo ut 20 seconds .
The wa rning/i nd icator lig ht wi ll go out when
the pa rking bra ke is re leased.
- (USA models ) /. (Canada mod els)
Caution: Vehicle park ed too steep
If the indicator light b links and the message
appea rs, there is not enough braki ng power to
keep the vehicle from roll ing . The brakes have
overheated . The veh icle cou ld roll away eve n
on a sma ll incline .
Press brake pedal to release parking brake
To release the parking b rake, press the brake
peda l and press the button~ or start driving
with starting assist at the same time
i=> page 79.
Plea se relea se parking brake
T o re lease the p arki ng brake manually, p re ss
t h e brake peda l and press the button ~ at the
same time. The parki ng b rake only releases
automatica lly if the driver's safety belt is fas
tened .
Iii Parking brake!
If the Iii indicator lig ht tur ns on and th is
message appears, the re is a parki ng b rake
m alfunction . D rive to your au thori zed A udi
dealer or qualified workshop immediately to
have t he malfunction corrected .
-L Engine cooling system malfunction
A malfunction in the engine cooling system
must be repaired as soon as possible.
• Switch off engin e and check coolant level ..,.
Page 19 of 310
Instruments and warning/indicator lights 17
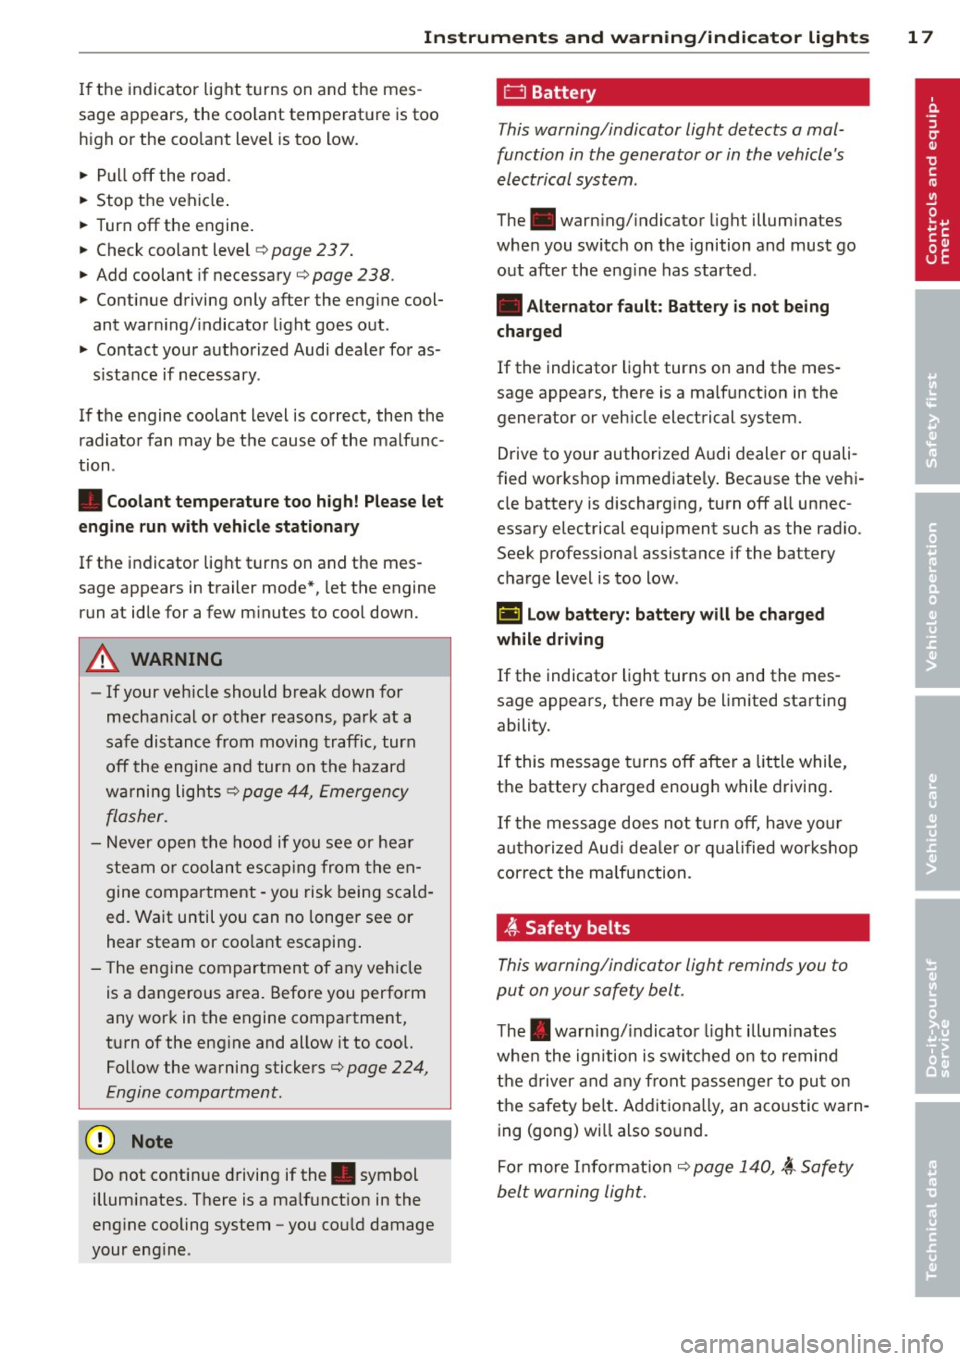
If the indicator light turns on and the mes
sage appears , the coo lant temperature is too
high or the coo lant level is too low.
.,. Pull
off the road.
.,. Stop the vehicle .
.,. Turn
off the engine.
.,. Check coo lant level
¢ page 23 7.
.,. Add coolant if necessary¢
page 238 .
.,. Continue driving only after the engine cool
ant warning/indicator light goes out .
.,. Contact your authorized Aud i dealer for as-
s istance if necessary .
If the engine coolant level is correct, then the radiator fan may be the cause of the malfunc
tion .
• Coolant temperature too high! Please let
engine run with vehicle stationary
If the indicator light turns on and the mes
sage appears in trailer mode*, let the engine
run at idle for a few m inutes to cool down.
A WARNING
- If your veh icle should break down for
mechanical or other reasons, park at a
safe distance from moving traffic, turn
off the engine and turn on the hazard
warning lights ¢
page 44, Emergency
flasher.
-
- Never open the hood if you see or hear
steam or coolant escaping from the en
gine compartment - you risk being scald
ed. Wait until you can no longe r see or
hear steam or coo lant escaping .
- The engine compartment of any vehicle
is a dangerous area. Before you perform
any work in the engine compartment,
turn of the engine and allow it to cool.
Follow the warning stickers¢
page 224,
Engine compartment.
Do not continue driving if the . symbol
illuminates. There is a ma lfunct ion in the
eng ine cooling system -you cou ld damage
your eng ine .
0 Battery
This warning/indicator light detects a mal
function in the generator or in the vehicle's
electrical system .
The .warning/ indicator light illuminates
when you switch on the ignition and must go
out after the engine has started .
• Alternator fault: Battery is not being
charged
If the indicator light turns on and the mes
sage appears, there is a malfunction in the generator or veh icle electrical system.
Drive to your authorized A udi dealer or quali
fied workshop immediate ly . Because the vehi
cle battery is discharg ing, turn
off all unnec
essary electrical equipment such as the rad io.
Seek professional assistance if the battery
charge level is too low.
t•i low battery: battery will be charged
while driving
If the indicator light turns on and the mes
sage appears, there may be limited starting
ability.
If this message turns
off after a little while,
the battery charged enough while driving.
If the message does not turn off, have your
a uthor ized Aud i dealer or qualified workshop
correct the malfunction.
~-Safety belts
This warning/indicator light reminds you to
put on your safety belt.
The . warn ing/ indicato r light illum inates
when the ignition is switched on to remind
the driver and any front passenger to put on
the safety be lt. Additiona lly, an acoustic warn
ing (gong) wi ll also sound.
For more Info rmation ¢
page 140, ~ Safety
belt warning light.
Page 62 of 310
60 Seats and st o rage
vehicle movement, hot liqu id could spill,
causing scalding burns. Spilled hot liqu id
can also cause an accident and personal
injury .
- Use only soft cups in the cupholder. Hard
cups and glasses can cause inju ry in an
acc ident .
- Never use the cupholder or adapter as an
ashtray- risk of fire.
([) Note
Only drink containers with lids should be
carried in the cupho lder. Liqu id could spill
out and damage your veh icle's e lectronic
equ ipment or stain the upholste ry, etc.
Cooled glove compartment
Ap plies to vehicles: with coole d glove compa rtm ent
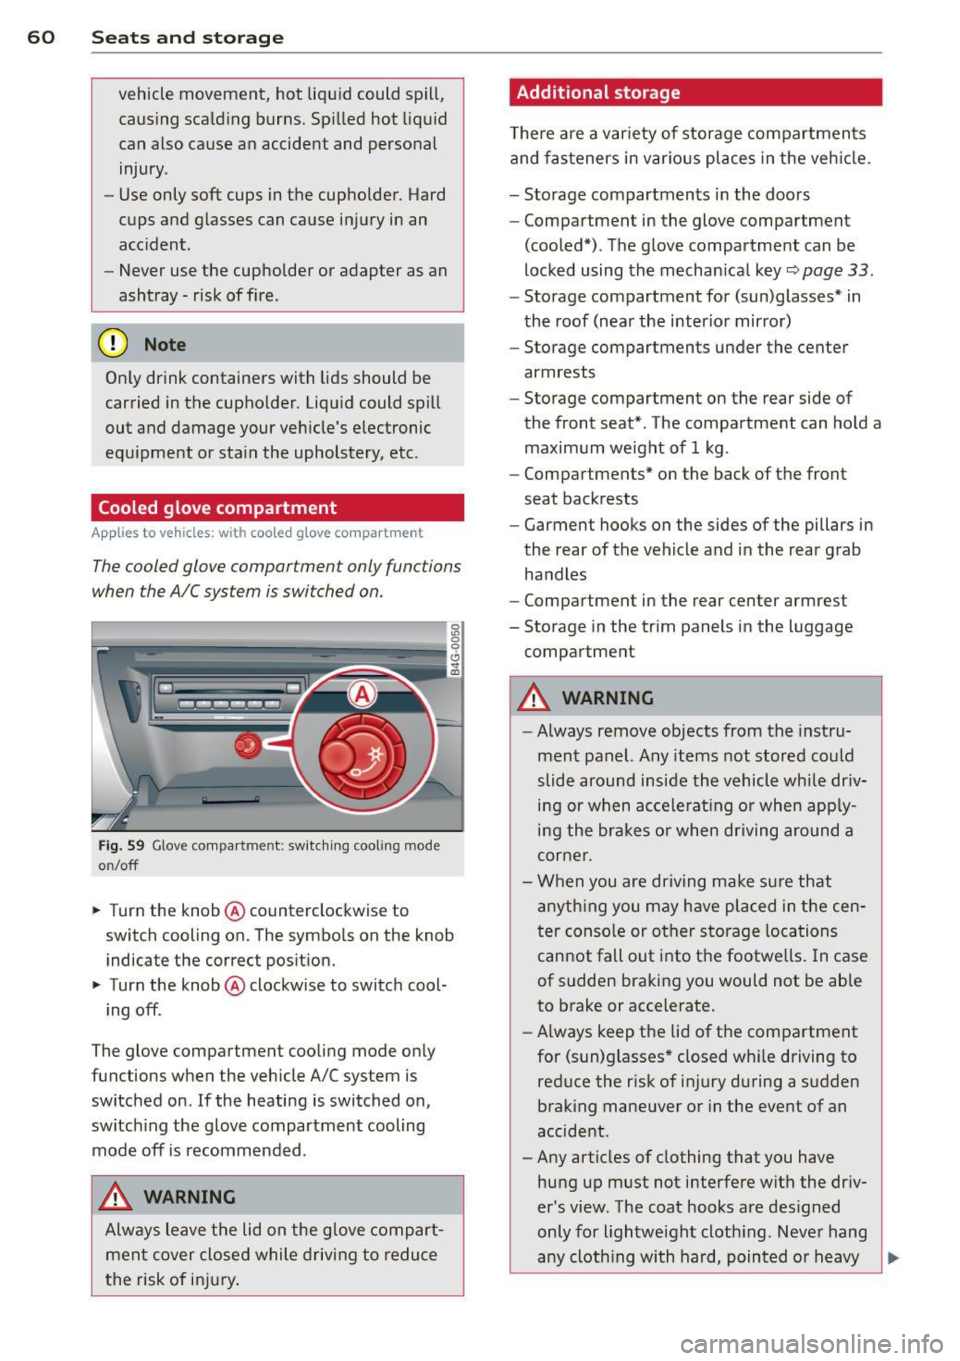
The cooled glove compartment only functions
when the AIC system is switched on.
Fig. 59 Glove compa rtment: switc hin g cooling mode
o n/off
~ Turn the knob@ counterclockwise to
switch cooling on. The symbols on the knob
indicate the correct pos ition.
~ Turn the knob @ clockwise to switch cool-
ing off .
The glove compartment cooli ng mode only
functions when the vehicle A/C system is
switched on .
If the heating is switched on,
switch ing the glove compartment cooling
mode off is recommended .
_& WARNING
Always leave the lid on the glove compart
men t cover close d while driving to reduce
t he risk of in jury.
Additional storage
The re are a var iety of storage compartmen ts
and fas teners in various pl aces in the veh icle.
- Storage compartments in the doors
- Compartment in the glove compartment
(coo led*) . The glove compartment can be
locked using the mechan ical key
r::;, page 33.
- Storage compartment for (sun)glasses* in
the roof (near the interior mirro r)
- Storage compartments under the center
armrests
- Storage compartment on the rear side of
the front seat* . The compartment can hold a
maximum weight of 1 kg .
- Compartments* on the back of the front
seat backrests
- Garment hooks on the sides of the pillars in
the rear of the vehicle and in the rear grab
handles
- Compartment in the rear center armrest
- Storage in the trim panels in the luggage
compartment
_& WARNING
-
- Always remove objects from the instru
ment panel. Any items not stored could
slide around inside the vehicle while dr iv
ing or when acce le rat ing or whe n app ly
ing the brakes o r when driving around a
corne r.
- When you are driving make su re that
anyth ing you may have placed in the cen
t er conso le or other storage locations
cannot fall out into the footwe lls . I n case
of sudden braki ng you would not be able
to brake or accelerate.
- Always keep the lid of the compartment
for (sun)glasses" closed wh ile driving to
reduce the risk of i njury during a su dden
braking maneuver or in the event of an
accident .
- Any articles of clothing that you have
hung up must not interfere with the driv
er's view. The coat hooks are des igned
only for lightwe ight cloth ing. Neve r hang
-
any cloth ing with hard, pointed or heavy ..,_
Page 70 of 310
68 Warm and cold
Warm and cold Climate controls
Description
A pplies to vehicles: with three-zone cl imate cont ro l or
four-zone a uto mat ic climate contro l
The climate control system warms, cools and
adds humidity to the a ir in the ve hicle interior.
It is the most effect ive when the windows and
sun roof * are closed .
If the tempe rature i nside
the par ked veh icle becomes very warm, open
i ng the w indow br ie fly will speed up the cool
ing process.
I n all heating mode f unctio ns except
defrost,
the blower on ly sw itches to a h ighe r speed
once the engine coo lan t has reached a ce rtain
temperature.
Condensat ion from the cooling system can
d rip and form a puddle of wate r under the ve
h icle. This is normal and does no t mean there
is a lea k.
Pollutant filter
The pollutant filte r removes pollutants such
as dust and po llen from the air.
The air pollutants filter must be changed at
the intervals spec ified in you r Warranty
&
Maintenance boo klet, so that the air condi
tioner can prope rly work .
If you drive your vehicle in an area with h igh
a ir po llution, the fi lter may need to be
changed more freq uently than specified in
your Aud i Wa rranty & Ma intenance booklet. If
i n doubt, as k your author ized A udi Se rvice Ad
visor for adv ice.
K ey coded settings
Three-zone climate control: T he b lower set
ting and air distribution are stored automati
cally and ass igned to the remote control key
that is i n use.
Four-zone automatic climate control: The cli
mate control settings are automat ica lly stor
ed and assigned to the remote control key
that is i n use.
A WARNING
Reduced visibility is dangerous and can
cause accidents.
-
- For safe driving it is very important that
all windows be free of ice, snow and con
densat ion .
- Comp lete ly fam iliarize yourse lf with the
proper use and funct ion of the heat ing
and ve nti lation system and especially
how to defog and defrost the w indows.
- Never use the windshield wiper/washer system in freez ing weathe r unt il you
have wa rmed the windshie ld first, using
the heating and ventilation system. The
washer sol ution may freeze o n the w ind
shie ld and re duce visib ility.
(D Note
- If you suspect that the air conditioner
has been damaged, sw itch the sys tem
off to avoid further d amage and have i t
inspected by a q uali fied dealership .
- Repairs to the Audi air conditioner re
quire speci al technical know ledge and
special tools. Contact an autho rized Audi
dea ler fo r ass istance.
@ For the sake of the environment
B y reducing the amou nt of f uel you use,
you also red uce the amount of pollutants
emitted into the air.
(D Tips
- Keep the air intake s lo ts (in front o f the
windshield) free from ice, snow and de
br is in order to maintain the proper func
tion of the climate control system.
- The energy management system may
switch the seat heating* or rear window
defroster off temporar ily. These systems
are available again as soon as the energy
balance has been restored .
-Air escapes through vents under the rear window. When plac ing items of cloth ing
on the luggage compartment cover, en
sure that the openings are no t covered.
Page 71 of 310
Warm and cold 69
Three-zone climate control
Operation
Applies to vehicles: with three-zone climate control
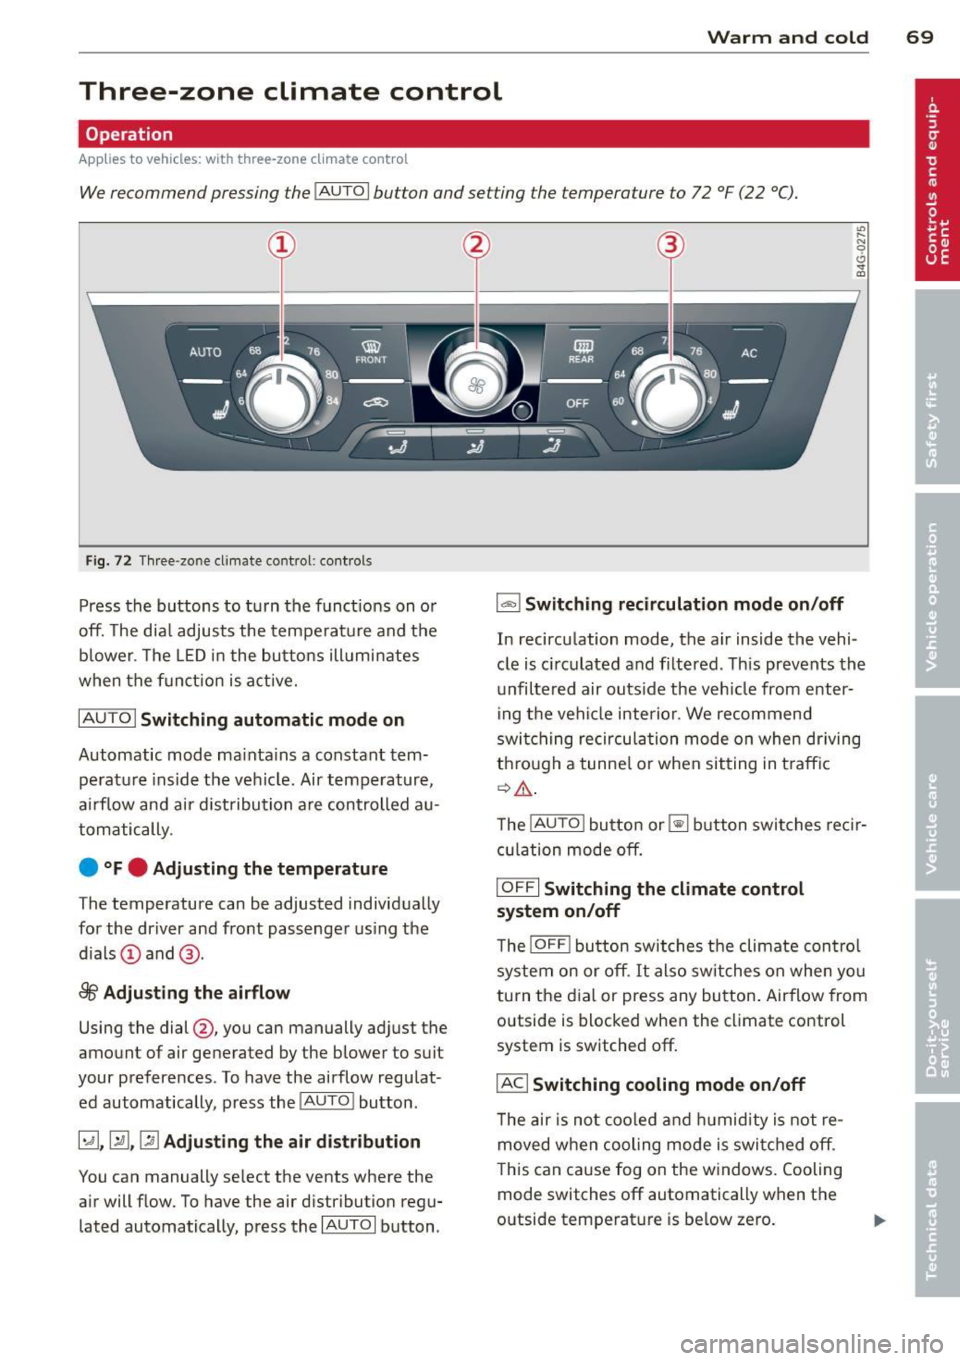
We recommend pressing the !AUTOI button and setting the temperature to 72 °F (22 °C).
F ig. 72 Three -zone cl imate control : controls
Press the buttons to turn the funct ions on or
off. The dial adjusts the temperature and the
blower . The LED in the buttons illuminates
when the funct ion is active.
IAUTO I Switching automatic mode on
Automatic mode maintains a constant tem
perature inside the vehicle. Air temperature,
airflow and air d istribution are controlled au
tomatically.
e °F e Adjusting the temperature
The temperature can be adjusted individually
for the driver and front passenger using the
d ials (!) and @.
~ Adjusting the airflow
Using the dial@, you can manually adjust the
amount of air generated by the blower to suit
your preferences . To have the airflow regulat
ed automatically, press the
! AUTO ! button.
~. rill, [2] Adjusting the air distribution
You can manually se lect the vents where the
air will flow. To have the air distribution regu lated automatically, press the
!AUTOI button .
l""" I Switching recirculation mode on/off
In recirculation mode, the air inside the vehi
cle is circulated and filtered. This prevents the
unfiltered air outside the veh icle from enter
ing the vehicle interior . We recommend
switching recirculation mode on when dr iving
through a tunnel or when sitting in traffic
~.& -
The !AUTO ! button or~ button switches recir
cu lation mode off.
I OFFI Switching the climate control
system on/off
The ! O FF! button switches the climate con trol
system on or off.
It also switches on when yo u
turn the dial or press any button. Airflow from
outside is blocked when the climate control
system is switched off.
IACI Switching cooling mode on/off
The air is not coo led and humidity is not re
moved when cooling mode is switched off .
This can cause fog on the w indows. Cooling
mode switches off automatically when the
outside temperature is be low zero.
Page 73 of 310
Warm and cold 71
Four-zone automatic climate control
Operation
Applies to vehicles: with four -zone a utomat ic climate control
We recommend pressing the IAUTOI button and setting the temperature to 72 °F (22 °C).
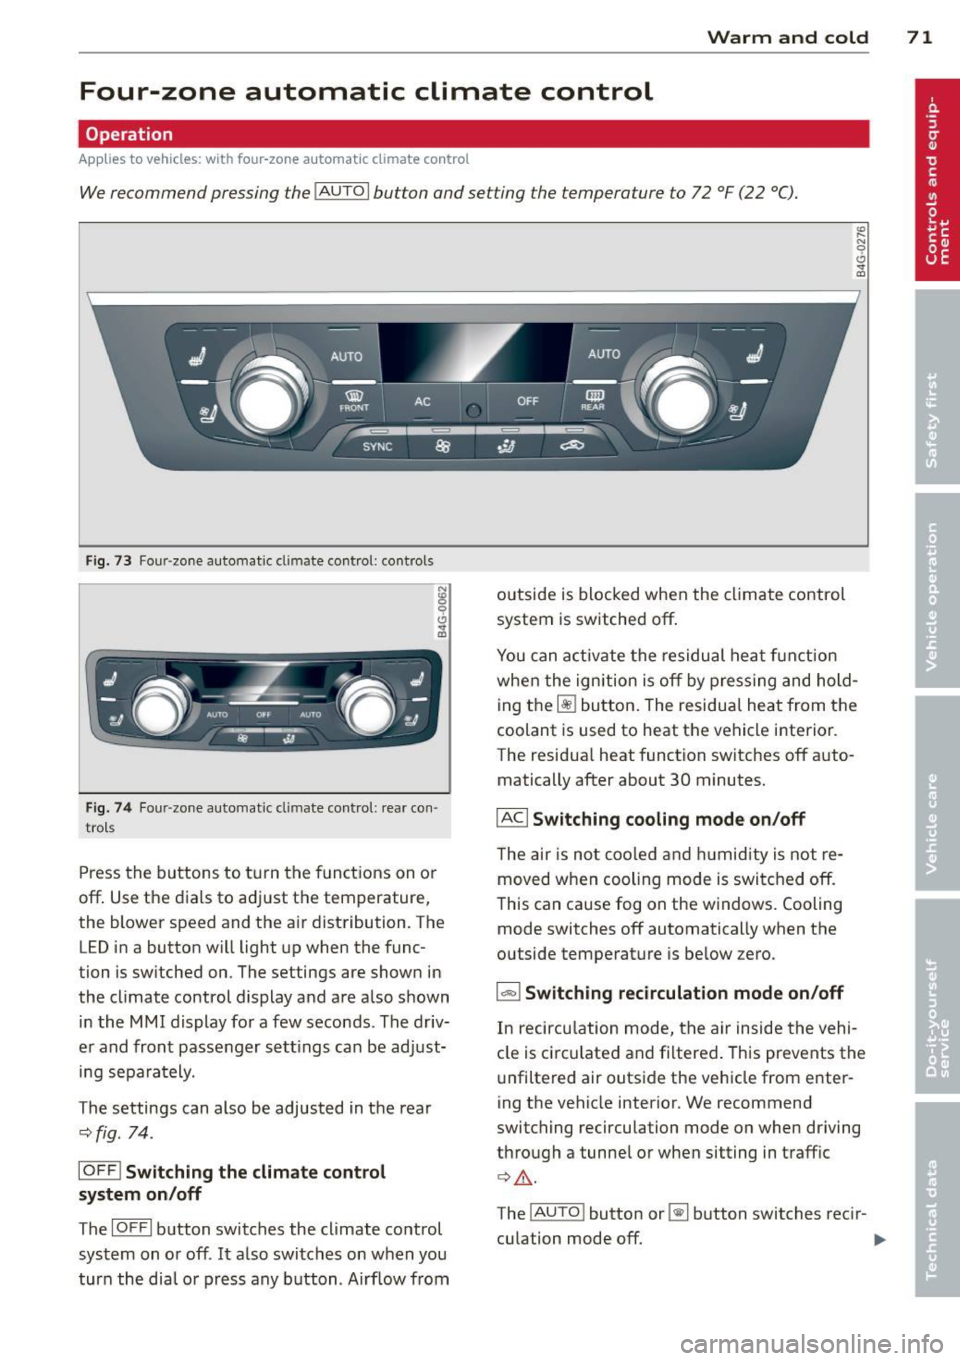
F ig. 73 Four -zone automat ic climate control: controls
Fig. 74 F our -zone automat ic climate control: rear con·
trols
Press the buttons to turn the functions on or
off. Use the dials to adjust the temperature,
the blower speed and the air distribution. The
LED in a button will light up when the func
tion is switched on. The settings are shown in
the climate control display and are also shown in the MMI display for a few seconds . The driv
er and front passenger settings can be adjust·
ing separately.
The settings can also be adjusted in the rea r
r::;,fig. 74.
IOFFl Switching the climate control
system on/off
The IOFFI button switches the climate control
system on or off .
It also switches on when you
turn the dial or press any button . Airf low from outside is blocked when the
climate control
system is switched off.
You can activate the residual heat funct ion
when the ignition is off by pressing and hold
ing the ~ button. The residual heat from the
coolant is used to heat the vehicle interior.
The residua l heat function switches off auto
matically after about 30 minutes.
IACI Switching cooling mode on /off
T he air is not coo led and humidity is not re
moved when cooling mode is switched off.
This can cause fog on the windows. Cooling
mode switches off automatically when the
outside temperature is below zero.
1- 1 Switching recirculation mode on/off
In recircu lation mode, the air inside the vehi
cle is circ ulated and filtered. This prevents the
unfiltered air outside the vehicle from enter
ing the vehicle interior. We recommend
switching recirculation mode on when driving
through a tunnel or when sitting in traffic
¢ Li). .
The !AUTO ! button or~ button switches recir-
culation mode off. .,..
Page 74 of 310
72 Warm and cold
IAUTO I Switching automatic mode on
Automatic mode m ainta ins a constant tem
perat ure inside the vehi cle. Air tempera ture,
airflow and air d istribution a re controlled a u
tomatically.
Adjusting the temperature
T empe ratu res between 60 °F (+16 °C) and
84 °F ( +28 ° C) c an be se t. O uts ide of this
range,
lo or hi w ill appear in the climate con
trol system disp lay. At both of these settings,
the cl imate control system r uns continuously
at max imum cooling or heat ing power. There
is no temperature regu lation.
~ Adjusting the airflow
You can a djust the airf low manually to s uit
your needs . To have the airf low reg ulated a u
tomatically, press the
! AUTO ! button.
~ Adjusting the air distribution
You can manu ally se lect the ve nts w here the
a ir will flow. To have the air d istribu tion reg u
l ated automatically, press the
IAUTOI bu tton.
~ I~ * Adjusting seat heating/
ventilat ion*
Pr ess ing the button swi tches the sea t heat
ing/ventilation on at the highest sett ing ( leve l
3). The LEDs indicate the heating/venti lat ion
leve l. To reduce the heating/vent ilation, press
the butto n aga in. To switch the seat heat ing/
ve nti lation off, press the button repeatedly
u ntil the LED turns off.
After 10 minutes, the seat heating automati
cally switches from leve l 3 to level 2.
l <;j) FRON T I Switch the defroster on/off
The win dsh ield and s ide windows are defrost
e d or cleared of con densation as quickly as
possib le. The max imum amo unt of air flows
mainly from the vents be low the windshield.
Recirculation mode switches off.
The
IAUTOI bu tton switches the defroster off.
lliiil REAR ! Switching rear window heater
on /off
T he rea r window heate r only operates w hen
the engine is running. It sw itches off auto
matically after 10 to 20 minutes, depending
o n the outside temperature.
T o p revent the rea r window heate r from
switching off automatically, p ress and ho ld
t h e ~ button for more than 2 seconds. Th is
rema ins stored until the ignition is switched
off .
ISYNC I Synchronization*
When synchronization is switched on, the
same settings are applied to bot h the dr iver
and fr ont passenger, except for the seat heat
i ng/venti lation *. The rear zo ne is also
synchronized. Synchronization switches off
whe n the se ttings for the front passenge r side
o r r ear are ad justed.
You can also switch synchronizati on o n by
pressing and holding a dial. For example, if
you press and hold t he di al on the front pas
senger si de, the setti ngs for that s ide a re
t ran sfer red to t he d rive r si de. The same ap
plies to the re ar.
Air vents
You can open o r close the center and ou ter
vents i n the cockpit and the vents in the rear
c ente r console and doo r pillars us ing t he
ridged t humbwheels. The levers adjust the d i
r ect ion o f the airfl ow from the vents.
A WARNING
-Do not use t he recirc ulation for ex tended
pe riods of time . The windows could fo g
up since no f resh a ir can enter the vehi
cle. If the windows fog up, p ress the air
recirc ulation butto n again immediately
to switch off the air reci rcu latio n fu nc
tion o r se lect defros t.
- Individ uals w it h reduced se nsitivity to
pa in or te mperature cou ld deve lop burns
when us ing the s eat heating fu nction . To
re duc e the risk of i nju ry, these i nd iv idu-
als should n ot us e sea t heating.
~