AUDI A8 2017 Workshop Manual
Manufacturer: AUDI, Model Year: 2017, Model line: A8, Model: AUDI A8 2017Pages: 354, PDF Size: 88.68 MB
Page 51 of 354
C) C0 ....
"' " "' .... 0 0 :r
seek medical attention.
- If electrolyte flu .id comes into contact with
the skin, flush the affected area with clean
water for at least 15 minutes and then clean
with soap and water and seek medical at
tent ion. Clean affected clothing and shoes
thoroughly before wear ing again.
- If the fluid was swallowed and the person is
conscious, flush the mouth with water for at
least 15 minutes. Do not induce vomiting
unless this is recommended by med ical pro
fessionals. Seek med ica l attent ion immed i
ately.
(D Note
The e lectrolyte fluid that leaks out of broken
m irror glass co rrodes plastic surfaces and the
pa int. Clean this liq uid as quickly as possible,
for examp le w ith a wet sponge .
(l) Tips
-If the light reaching the interior rearv iew
mir ror is obstr ucted (for examp le by the
sunshade*), the automatic d imm ing rear
v iew mirror w ill not f unction correctly.
- The au toma tic d imm ing mirrors do not dim
when the interior lighting is turned on or
the reverse gear is selected.
Sun visors
I 1
0
,
•
J "
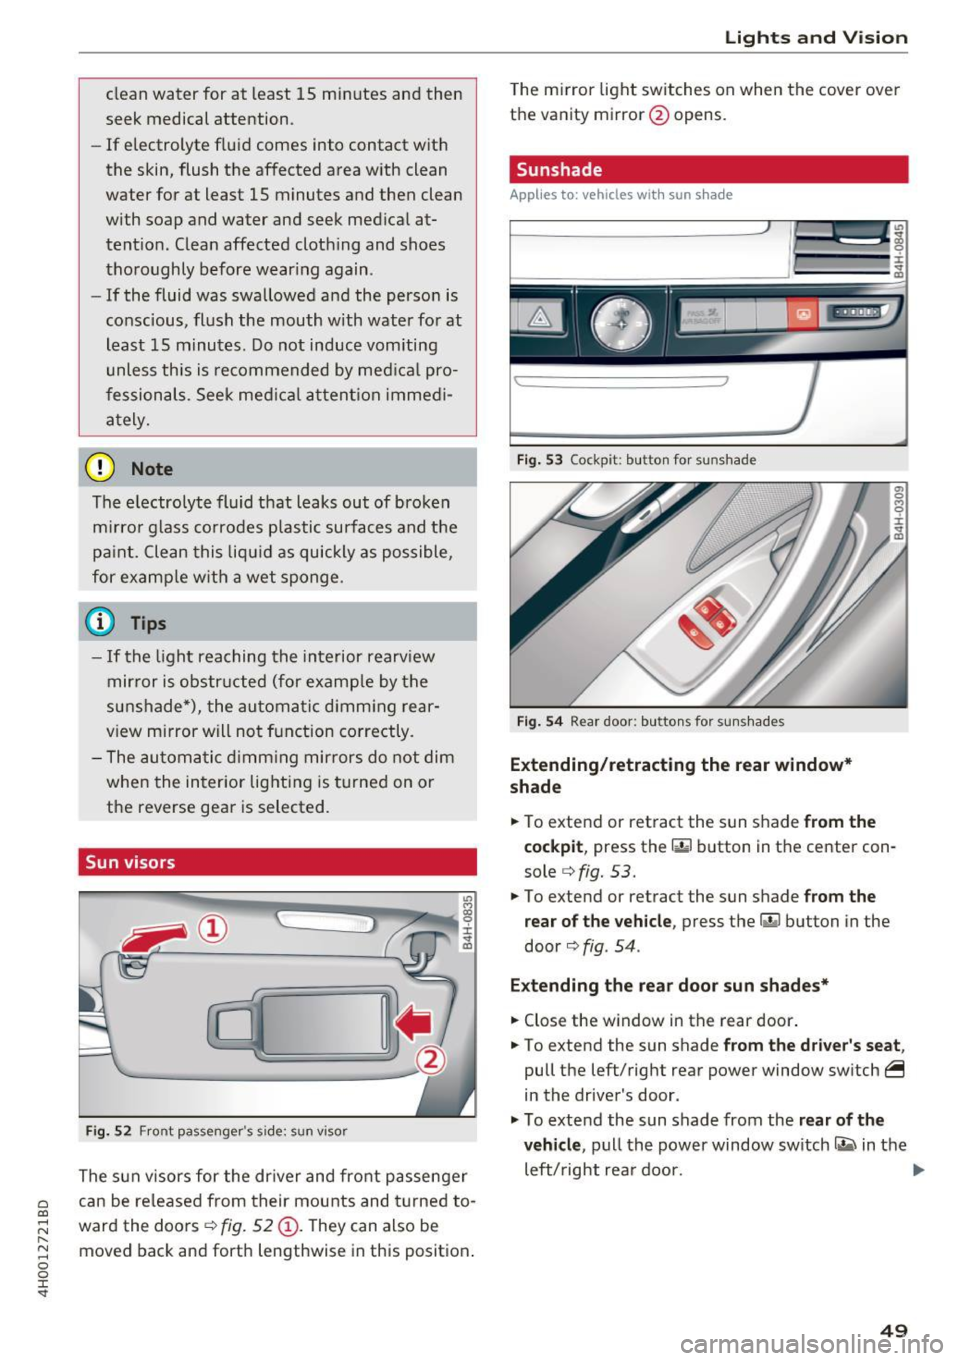
Fi g. 52 Front passenger 's side: sun v iso r
The sun visors for the dr iver and front passenger
can be re leased from their mounts and t urned to
ward the doors ¢
fig. 52 (D. They can also be
moved back and forth lengthwise in this posit ion .
Lights and V ision
The mirror light switches on when the cover over
the vanity mirror@opens.
Sunshade
Applies to : vehicles with sun s hade
Fig . 53 Cockpit: button for sunshade
Fig . 54 Rear door: bu ttons for sunshades
Extending /retract ing the rear window *
shad e
.,. To extend or retract the sun shade from the
c ockpi t,
press the ru button in the center con
sole ¢
fig. 53 .
.,. To extend or retract the sun shade
from the
r e ar o f the ve hicl e,
press the r.iil button in the
door ¢
fig. 54 .
Extending the rea r doo r sun sh ad es *
.,. Close the window in the rear door .
.,. To extend the sun shade
from the dr iver 's sea t,
pull the left/right rear power window switch~
in the driver's door .
.,. To extend the sun shade from the
rear of th e
ve hicle ,
pull the power window switch~ in the
left/right rear door.
Iii>-
49
Page 52 of 354

Lights and Vision
Retracting the rear door sun sh ades*
.. To re trac t the sun shade from the drive r's s eat ,
press the left/right rear powe r window switc h
~ in the driver's door .
.. To retract the sun shade from the
rear of the
vehicle ,
press the power window switch Q;;; in
the left/right rear door .
You can adjust the settings for the rear sun shade so the shade retracts automatically when you se
lect the reverse gear. Select:
CAR function button
> Car sy stem s control button > Vehicle settings
> Automatic rear blind > On. The settings are au
tomatically sto red and assigned to the remote
con trol key. The sun shade is extended again as
soon as the vehicle is trave ling fo rwa rd a t a speed
g rea ter than 9 mph (15 km/h) if the ignition has
not been swi tched o ff in the mean time .
.&_ WARNING
Always pay caref ul attention when closing the
sunshades . Pinching could ca use serio us inju
r ies.
@ Tips
- Pressing the l~•~ l b utton several t imes in a
r ow can trigger the overload protection. The
su n shade can only be extended/retracted
again after a br ief waiting period.
- The rear win dow sun shade on ly functions
when the vehicle interior is warmer than
14°F (-10°().
Vanity mirror in the rear
App lies to: veh icles with vanity mirrors in the rear
Fig. 55 Rea r head liner: va nity m irro r
50
.. Press the button to fold the mirror o pen . The
mirror lighting turns on automatically .
.. To change the mir ror's angle, move it forward/
back with your hand.
Windshield wipers
Switching the windshield wipers on
Fig. 56 W indsh ield w iper lever
Move the w indshie ld w iper lever to the co rre
sponding posi tion:
@ -wipers off
@-Rain sensor mode. The windshield wi pe rs
switch on once the vehicle speed exceeds appro x
i mately 2 mph (4 km/h) and it is raining. The
higher the rain sensor sensit iv ity is set (switch @
to t he right), the earlier the windshield wipers re
act to moisture on the windsh ie ld . You can deac
tivate the rain sensor mode in the I nfota inment
system, which swi tches the intermitten t mo de
o n. Sele ct:
!CARI function button> Car sy stem s
contro l bu tto n > Driver as sist > Rain sensor >
Off . In inte rmitten t mode, you can adjus t the in
te rval time using the switch @.
@-slow w iping
@ -fast w iping
@ -single wipe If you hold the lever in this pos i
t ion longer, the wipers switch from slow wiping
to fast wiping.
® -clean the wi ndshield The w ipers w ipe one
time a fter several seconds of driving to remove
water droplets. You can sw itch this function off
by moving the leve r to posit ion ® within
10 sec
o nds of the a fterwipe . The afterwipe function is ..,_
Page 53 of 354

0 co .... N ,..... N .... 0 0 :c '
on.
C leaning the headlights. The headlight washer
system operates only when the low beam head lights are switched on.
If you move the lever to
position @, the headlights and the night vision
assist camera* are cleaned at intervals.
A WARNING
- The rain sensor is only intended to assist the
driver. The driver may still be responsible
for manually sw itching the wipers on based
on v is ibility conditions .
- The w indshield may not be treated with wa
ter-repelling windsh ield coating agents . Un
favorable conditions, such as wetness, dark ness, and when the sun is low, can cause in
creased g lare, which increases the risk of an
acc ident. W iper blade chatter is a lso poss i
ble.
- Prope rly f unction ing windsh ield wiper
blades are required fo r a clear view and safe
driving
c:> page 51, Replacing the wiper
blades.
(D Note
- If there is frost, make su re t he windshie ld
wiper blades are not fro zen to the wind
shield. Sw itching on the windshield wipers
when the blades are frozen to the wind
shield can damage the wiper blades.
- Prior to using a car wash, the windshield
wiper system must be switched
off (lever in
pos ition
@ ). This prevents the wipers from
switching on un intent ionally and causing
damage to the w indshield w iper system .
- The windshield wipers switch
off when the
i gnition is sw itched off. You can activate the
windsh ield wipers after the ign it ion is
switched back on by moving the winds hield
wiper lever to any posit ion.
- Worn o r dirty windshield wiper blades result
i n streak ing . This can affect the ra in sensor
funct ion. Check you r windshield wiper
blades regu larly.
Light s and Vision
-The washer fluid nozz les for the windshield
washer system are heated at low tempera
t u res when the ign ition is on .
- When stopping tempo rari ly, such as at a
traffic light, the speed of the windshield
w ipers automatically reduces by one level.
Cleaning the wiper blades
Clean the wiper b lades when you see w iper
streaks . Clean the wiper blades with a soft towel
and glass cleane r.
.. Place the windshie ld w iper arms in the service
position
c:> page 51.
.. Fold the windshield w iper arms away from the
w indshield .
A WARNING
Dirty windshie ld wiper b lades can impa ir vi
sion, wh ich increases the ris k of an acciden t.
Replacing the wiper blades
The service position is set in the Infotainment
system .
Fig. 57 Removing winds hield wiper b lades
Wind shi eld wiper se rvice po sition /b lade
r epl ace ment po sit ion
~
~
M 0 :i: ... m
.. Switch the ignition off and move the windshield
w iper lever to position @briefly
c::> page 50,
fig. 56. The windshield wipers move into the
serv ice position .
.. To br ing the wiper b lades back into the original
position, switch the ignition on and ope rate the
w indshield w iper lever.
You can also turn the service posit io n on or off in
the Infotainment system: ..,_
51
Page 54 of 354
Lights and Vision
• Switch the windshield wipers off (position @
¢page 50, fig. 56).
• Select: the ICARI function button > Car systems
control button
> Servicing & checks > Wiper
service position.
> On .
Removing the wiper blade
• Fold the windshield wiper arm away from the
windshield.
• Press the locking knob@c:>
fig. 57 on the wiper
blade . Hold the wiper blade firmly.
• Remove the wiper blade in the direction of the
arrow .
Installing the wiper blade
• Insert the new wiper blade into the mount on
the wiper arm @until it clicks into place.
• Place the wiper arm back on the windshield.
• Turn the service position off.
A WARNING
For safety reasons, the windshield wiper
blades should be replaced once or twice each
year.
(D Note
- The windshield wiper blades must only be
folded away when in the service position!
Otherwise, you risk damaging the paint on
the hood or the windshield wiper motor.
- You should not move your vehicle or press
the windshield wiper lever when the wiper
arms are folded away from the windshield.
The windshield wipers would
move back in
to their original position and could damage
the hood and windshield.
- You can also use the service position, for ex
ample, if you want to protect the windshield
from icing by using a
cover.
- You cannot activate the service position
when the hood is open.
52
Digital compass
Switching the compass on and off
Applies to: vehicles wit h digital com pass
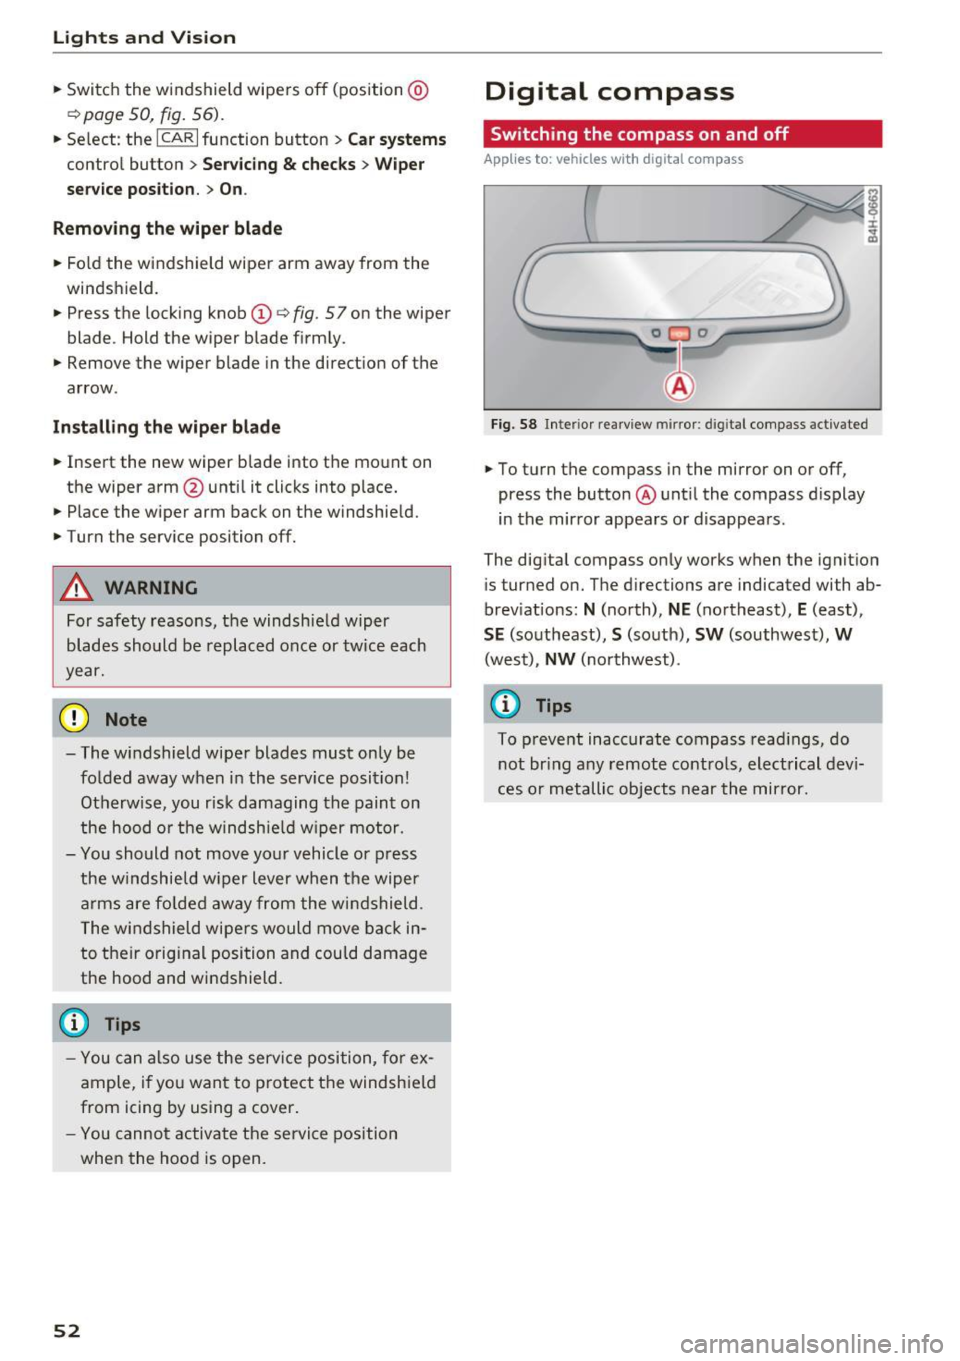
Fig. 58 Inter ior rearview mirror : d ig ital compass activated
• To turn the compass in the mirror on or off,
press the button @ until the compass display
in the mirror appears or disappears.
The digital compass only works when the ignition
is tur ned on. The directions are indicated with ab
breviations:
N (north), NE (northeast), E (east),
SE (southeast), S (south), SW (southwest), W
(west), NW (northwest).
(D Tips
To prevent inaccurate compass readings, do
not bring any remote controls, electrical devi
ces or metallic objects near the mirror.
Page 55 of 354
C) C0 ....
"' ,....
"' .... 0 0 :r
Applies to: vehicles with digital compass
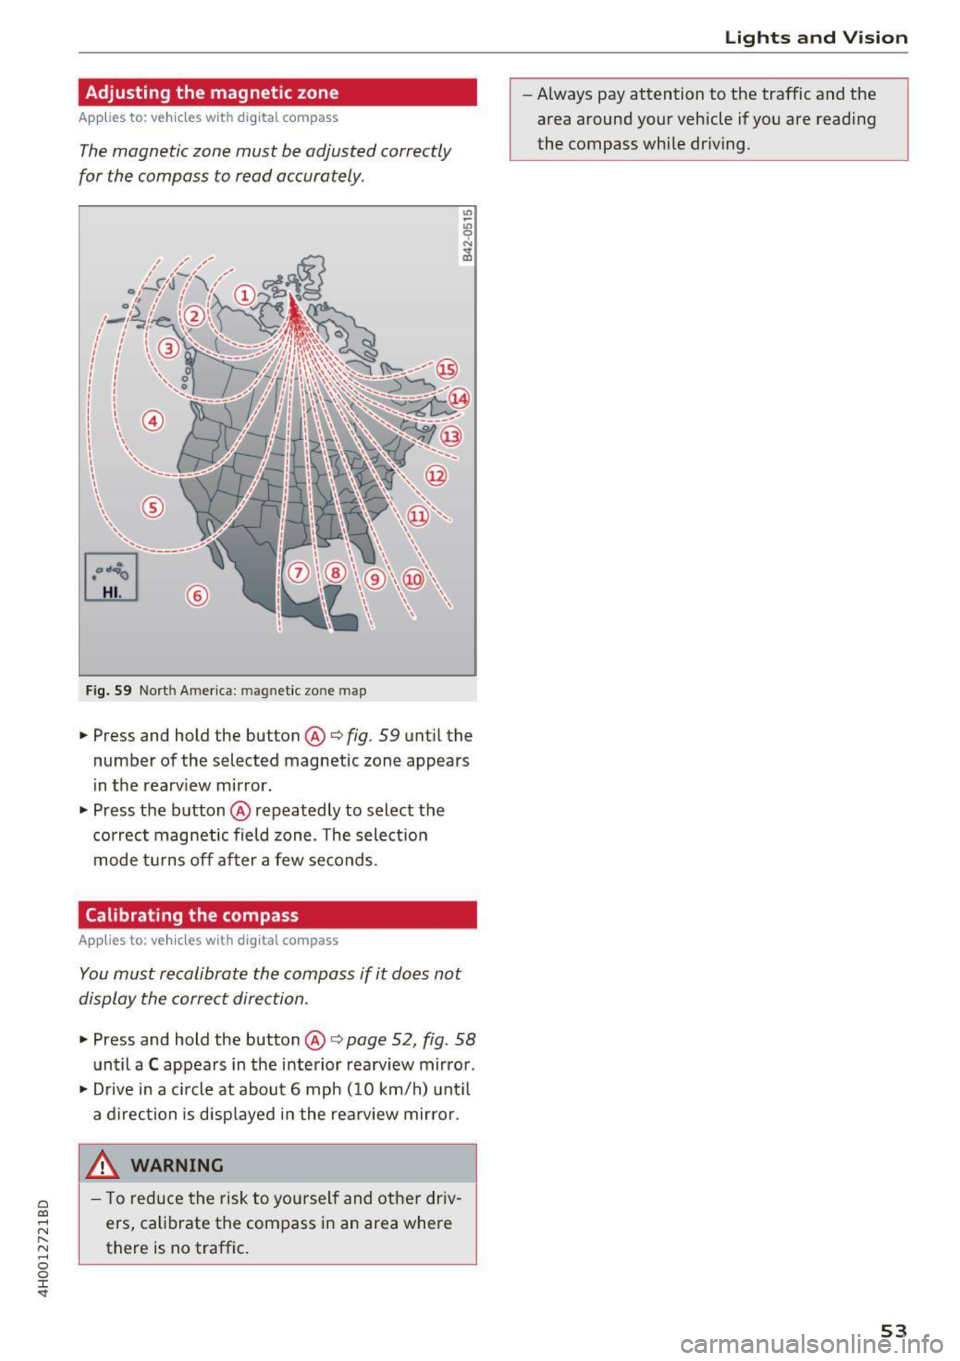
The magnetic zone must be adjusted correctly
for the compass to read accurately .
®
Fig. S9 Nort h Americ a: magn etic zone map
• Press and hold the button @i=> fig. 59 unt il the
number of the selected magnetic zone appears
in the rearv iew mirror.
• Press the button @repeatedly to select the
correct magnetic field zone . T he select io n
mode t urns off after a few seconds.
Calibrating the compass
Applies to: vehicles with digital compass
You must recalibrate the compass if it does not
display the correct direction .
• Press and hold the button @i=> page 52, fig . 58
unt il a C appears in the interior rearview mirror .
• Drive in a c ircle at about 6 mph ( 10 km/h) unt il
a d irection is disp layed in the rea rview mirror.
_& WARNING ,___
- T o reduce the risk to you rself and other driv
ers, calibrate the compass in an area where
there is no traffic.
Lights and V ision
-Always pay attention to the traffic and the
area around your vehicle if you are reading
the compass while dr iv ing .
53
Page 56 of 354
Sea ts and stor age
Seats and storage
General information
A WARNING
Refer to ¢ page 207, Driving safety for im
portant information, tips, suggestions and
warnings that you should read and follow for
your own safety and the safety of you r pas
sengers.
Front seats
Controls
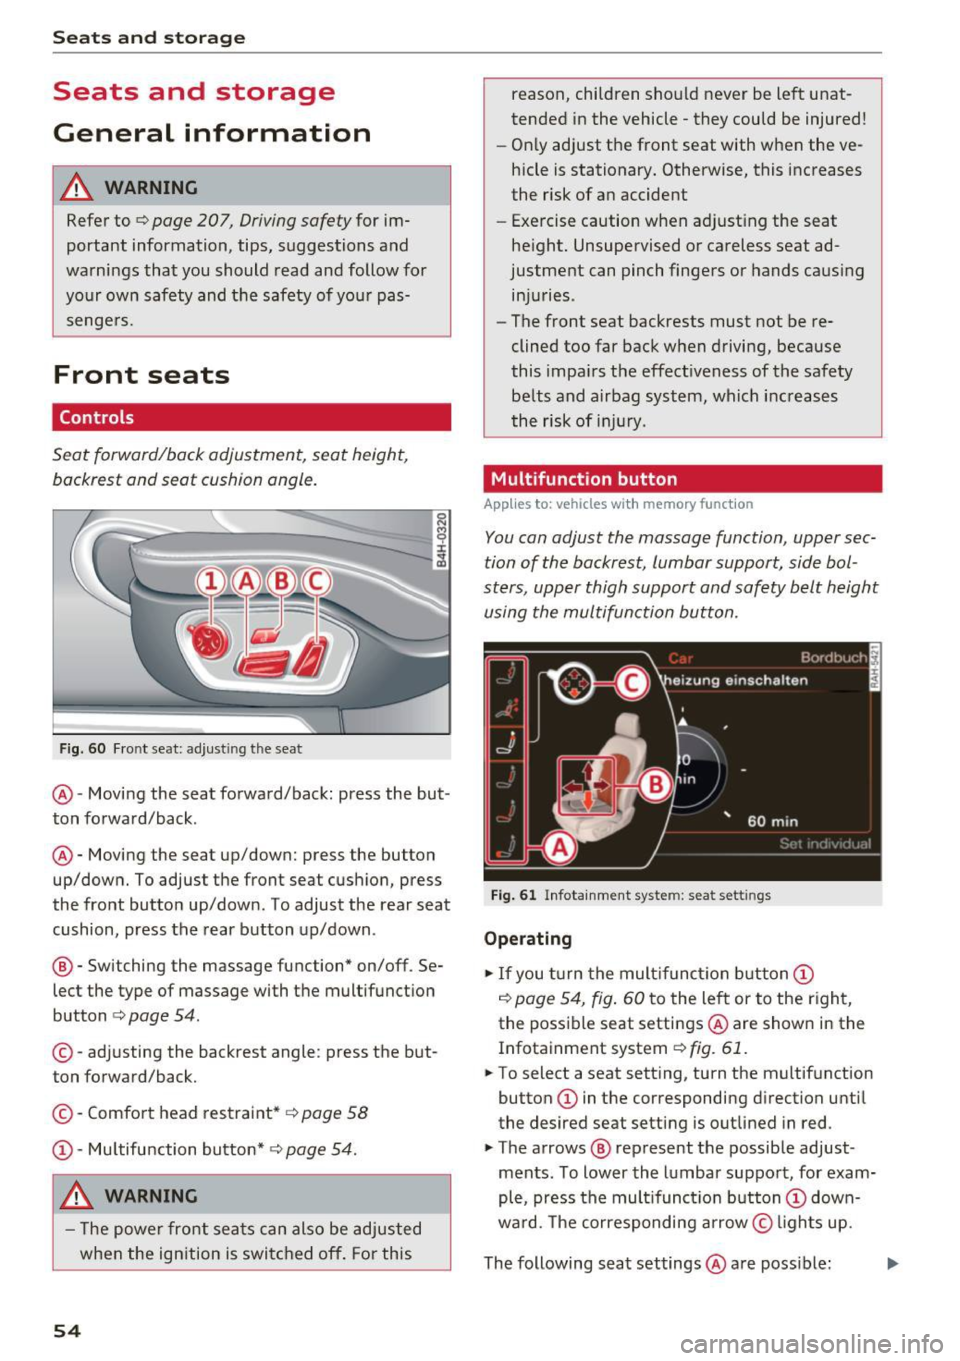
Seat forward/back adjustment, seat height, backrest and seat cushion angle.
F ig. 60 Fr ont seat: adjust ing the seat
@ -Moving the seat forward/back: press the but
ton forward/back .
@ -Moving the seat up/down: press the button
up/down. To adjust the front seat cushion, press
the front button up/down. To adjust the rear seat
cushion, press the rear button up/down .
® - Switching the massage function* on/off . Se
lect the type of massage with the multifunction
button
c:> page 54.
© - adjusting the backrest angle : press the but
ton forward/back.
© -Comfo rt head restraint*
c:> page 58
@ -Mu ltifunction button* c:> page 54.
A WARNING
- The power front sea ts can also be adjusted
when the ign ition is switc hed off . For this
54
reason, children sho uld never be left unat
tended in the vehicle - they could be injured!
- On ly adjust the front seat with when the ve
hicle is stationary. Otherwise, this increases
the risk of an accident
- Exercise caution when adjust ing the seat
height. Unsupervised or careless seat ad
justment can pinch fingers or hands causing in juries .
- The front seat backrests must not be re
clined too far back when driving, because
this impa irs the effectiveness of the safety
belts and airbag system, which increases
the risk of inj ury.
Multifunction button
App lies to: vehicles wit h memory funct ion
You can adjust the massage function, upper sec
tion of the backrest, lumbar support, side bol
sters, upper thigh support and safety belt height using the multifun ction button.
Fig . 61 Infota inment system : seat sett ings
Ope rating
.. If you turn the mult ifunct ion button @
c:> page 54, fig . 60 to the left or to the right,
the poss ible seat settings @are shown in the
Infotainment system
c:> fig. 61.
.. To select a seat setting, turn the multifunction
button @ in the corresponding direction until
the desired seat setting is outlined in red .
.. The arrows ® represent the possible adjust
ments . To lower the lumbar support, for exam
ple, press the mult ifunct ion button @ down
ward. The corresponding arrow © lights up.
The following seat settings @are poss ible: ..,_
Page 57 of 354
C) C0 ....
"' ,....
"' .... 0 0 :r
St retch , Lumbar or Shou lder
massage type or
off. You can adjust the intensity of each massage
from 1 through 5. You can switch the selected
massage on/off using the button@
c> page 54,
fig. 60 .
Safety belt height adju stment * -adjust the safe
ty belt up or down
c> page 223 .
Upper ba ckre st * -angle the upper area of the
backrest forward or back.
Lumbar support -you can adjust the lumbar sup
port up/down and to be stronge r/weaker.
S eat bo lsters * -you can increase/decrease the
l ateral support in the seat using the s ide bo lsters
at the seat surface and the backrest.
Upper thigh support * -you can increase/de
crease the upper th igh support.
(0 Tips
- The massage function* switches off auto
matically after approx imately 10 minutes.
- In vehicles with the recl ining rear seat, only
the seat belt he ight and thigh support can
be adjusted on the front passenger seat us
i ng the multif unction button.
- The air i n the s ide bo lsters* is released as
soon as the driver's door opens. Th is makes
i s possible to enter and exit the vehicle
more comfortab ly. As soon as you sta rt driv
i ng the ve hicle, the s ide bo lsters fill.
Center armrest
Appl ies to vehicles w ith a front center armrest
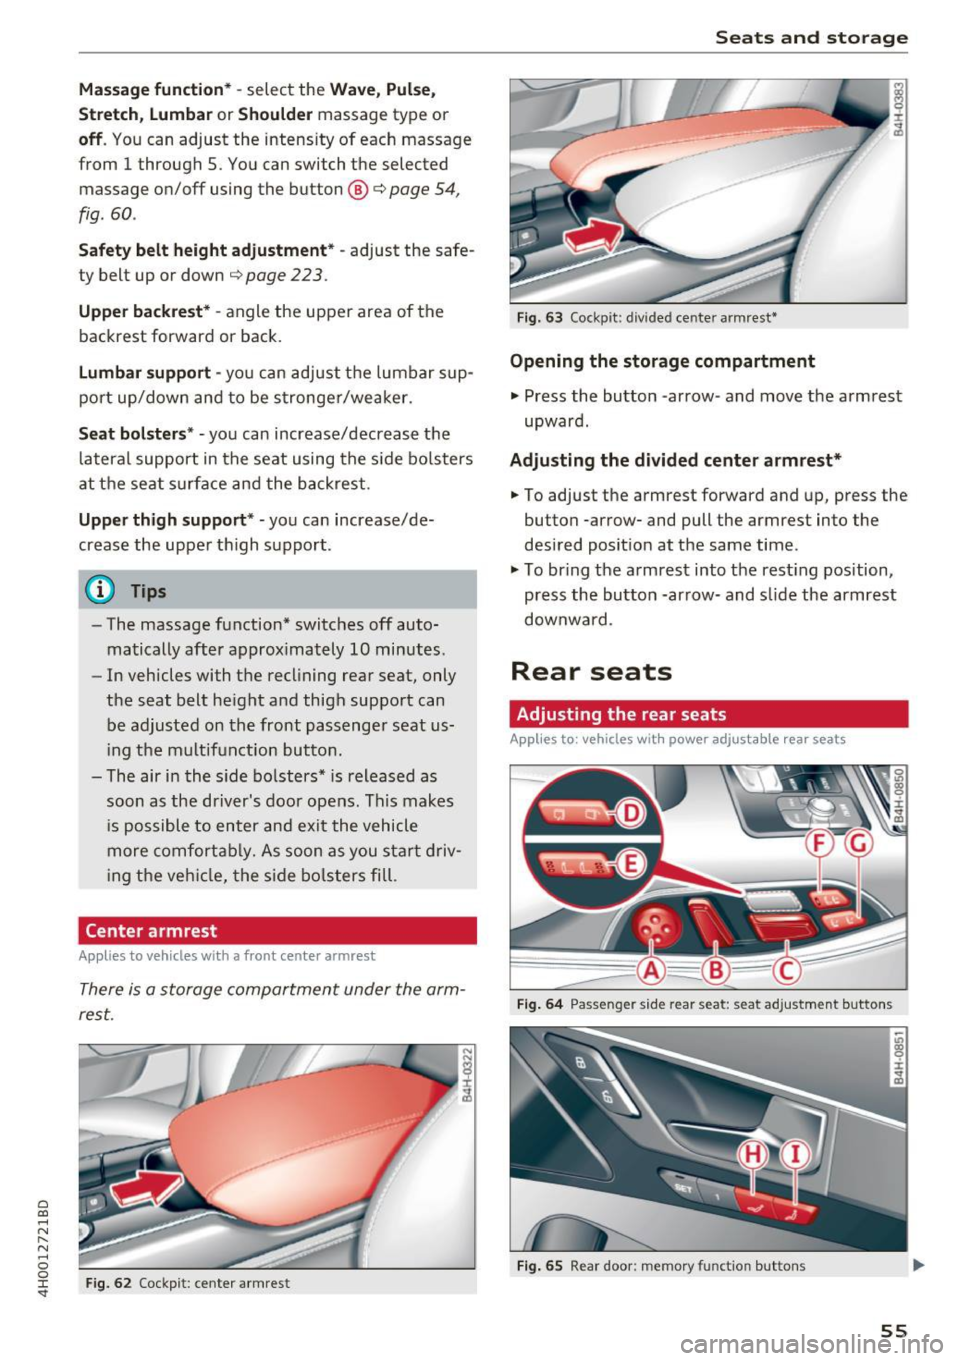
There is a storage compartment under the arm
rest.
N
I
Fig. 62 Cockpit: center armrest
Seats and storag e
---
Fig. 63 Cockpit: divided center armrest •
Opening the storage compartment
.,. Press the button -arrow-and move the armrest
upward.
Ad ju sting the divided center arm rest *
.,. To adjust the armrest forward and up, press the
button -arrow- and pull the armrest into the
desired posit ion at the same time .
.,. To br ing the armrest into the resting position,
press the button -arrow- and s lide the armrest
downwa rd .
Rear seats
Adjusting the rear seats
Applies to : vehicles w ith power adjustable rear seats
F ig . 64 Passenger side rear seat: seat adjustment buttons
F ig . 65 Rear doo r: memory function buttons
55
Page 58 of 354
Seat s and sto rage
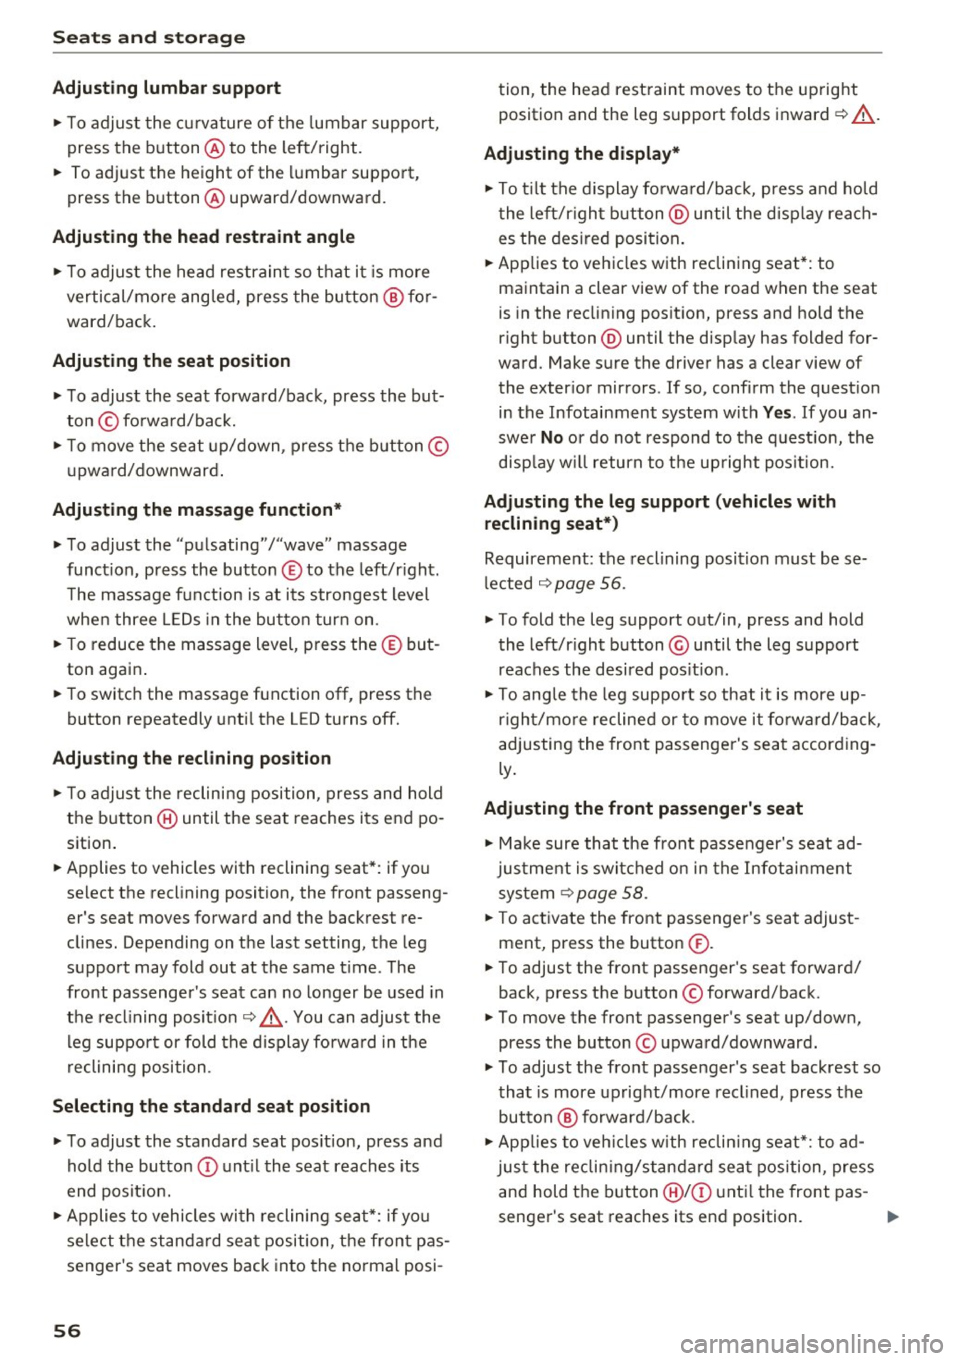
Adju st ing lumbar support
.,. To a djust the cu rvature of the lumbar support,
press the b utton @to the left/right.
.,. To adj ust the he ight of the lumbar support,
press the button @upward/downward.
Adjusting th e head rest raint angle
.,. To adjust the head restraint so t hat it is more
vertical/more ang led, press the bu tton @ for
ward/back.
Adjusting th e seat position
.,. To adjust the seat forward/back, press the but
ton © forwa rd/back.
.,. To move the seat up/down, press t he button ©
upward/downward .
Adjusting the massage function *
.,. To adjust the "pulsating"/"wave" massage
funct ion, press the button © to the left/r ight.
T he massage f unction is at i ts strongest level
when three LEDs in the butto n turn on.
.,. To reduce the massage level, press the © but
ton again .
.,. To switc h the massage function off, press the
button repeatedly until the L ED turns off.
Adju st ing th e re clining position
.,. To adjust the reclining position, press and hold
the button @ until the seat reaches its end po
sition .
.,. Applies to vehicles with reclining seat*: if you
select the reclining position, the front passeng
er's seat moves forward and the backrest re
clines. Depending on the last setting, the leg
support may fold out at the same t ime . The
front passenger 's seat can no longer be used in
the re clining posit ion ¢..&, . You can adjust the
l eg suppo rt or fold the display fo rwa rd in the
reclining position.
Selecting the standard seat position
.,. To adjust the sta ndard seat pos it ion, press and
hold the button © unt il the seat reaches its
end posit ion .
.,. Applies to vehicles with reclining seat*: if you
select the standa rd sea t position, the fron t pas
senger's seat moves back into the norma l posi-
56
tion, the head restraint moves to the upright
position and the leg support folds inward¢..&, .
Adjusting the d isplay*
.,. To t ilt the display fo rwa rd/bac k, press and hold
the left/r ight button @) until the d isp lay reach
es the des ired position .
.,. Applies to vehicles with reclining seat*: to
maintain a clear view of the road when the seat
is in the reclining pos ition, press and hold the
r ight button @) until the disp lay has folded for
ward. Make sure the driver has a clear view of
the exter ior mirrors . If so, confirm the quest io n
in the Infotainment system w ith
Ye s. If you an
swe r
No or do not respond to the q uest ion, the
disp lay w ill return to the up right pos ition.
Adju sting the leg support (vehicles with
reclining seat*)
Requirement: the reclining position must be se
l ected
¢ page 56.
.,. To fold the leg support out/in, press and hold
the left/r ight button @ until the leg support
reaches the desired pos it ion.
.,. To angle the leg suppo rt so that it is more up
r igh t/mo re reclined or to move it fo rward/back,
adj usting the front passenge r's sea t accord ing
ly .
Adjusting the front passenger 's seat
.,. Make sure that the front passenger's seat ad
jus tment is switc hed on in the Infotainment
system
¢ page 58 .
.,. To activate the front passenger's seat adjust
ment, press the button ®·
.,. To adjust the front passenger's seat forward/
back, press the button © forward/back.
.,. To move the front passenger's seat up/down,
press the button © upward/downward.
.,. To adjust the front passenger's seat backrest so
that is more upright/more recl ined, press the
button @ forward/back .
.,. App lies to ve hicles with reclin ing seat*: to ad
just the reclin ing/standard sea t position, press
and hold the b utton @!© unt il the front pas -
senger's seat reaches its end position. .,.
Page 59 of 354
C) C0 ....
"' " "' .... 0 0 :r
-The power seats can also be adjusted when
the ignition is switched off. For this reason,
children should never be left unattended in
the vehicle - they could be injured!
- Be careful when ad justing the seat. Unsu
pervised or careless seat adjustment can
pinch fingers o r hands ca using injur ies.
- Applies to vehicles with reclining seat*:
- Do not use the fron t passenger's seat for
seating when it is in the reclining position .
This increases the risk of serious injury or
death.
- Never adjust the reclining position when
the front passenger 's seat is occupied.
This increases the risk of injury.
- Do not tilt the display if the driver's view
of the right exterior mirror w ill be ob
structed .
- Make sure the area between the leg sup
port and the front passenger 's seat back
rest is clear before folding the leg support
in so that you are not pinched.
(D Tips
- The massage function switches off auto
matically after approx imately 10 minutes.
- If you
cannot ad just the reclining seat * or
the front passenger's seat from the rear, it is possible that:
- t he front passenger's seat memory fu nc
t ion is swi tched off~ page
59, or
- the c hild safety lock is switched on (the~
button ~ page 37 or the right
T button
~ page 37 is turned on in the dr iver's
door), o r
- the front passenger seat adjustment is
switched off in the Infotainment system
~ page
SB.
Seats and storag e
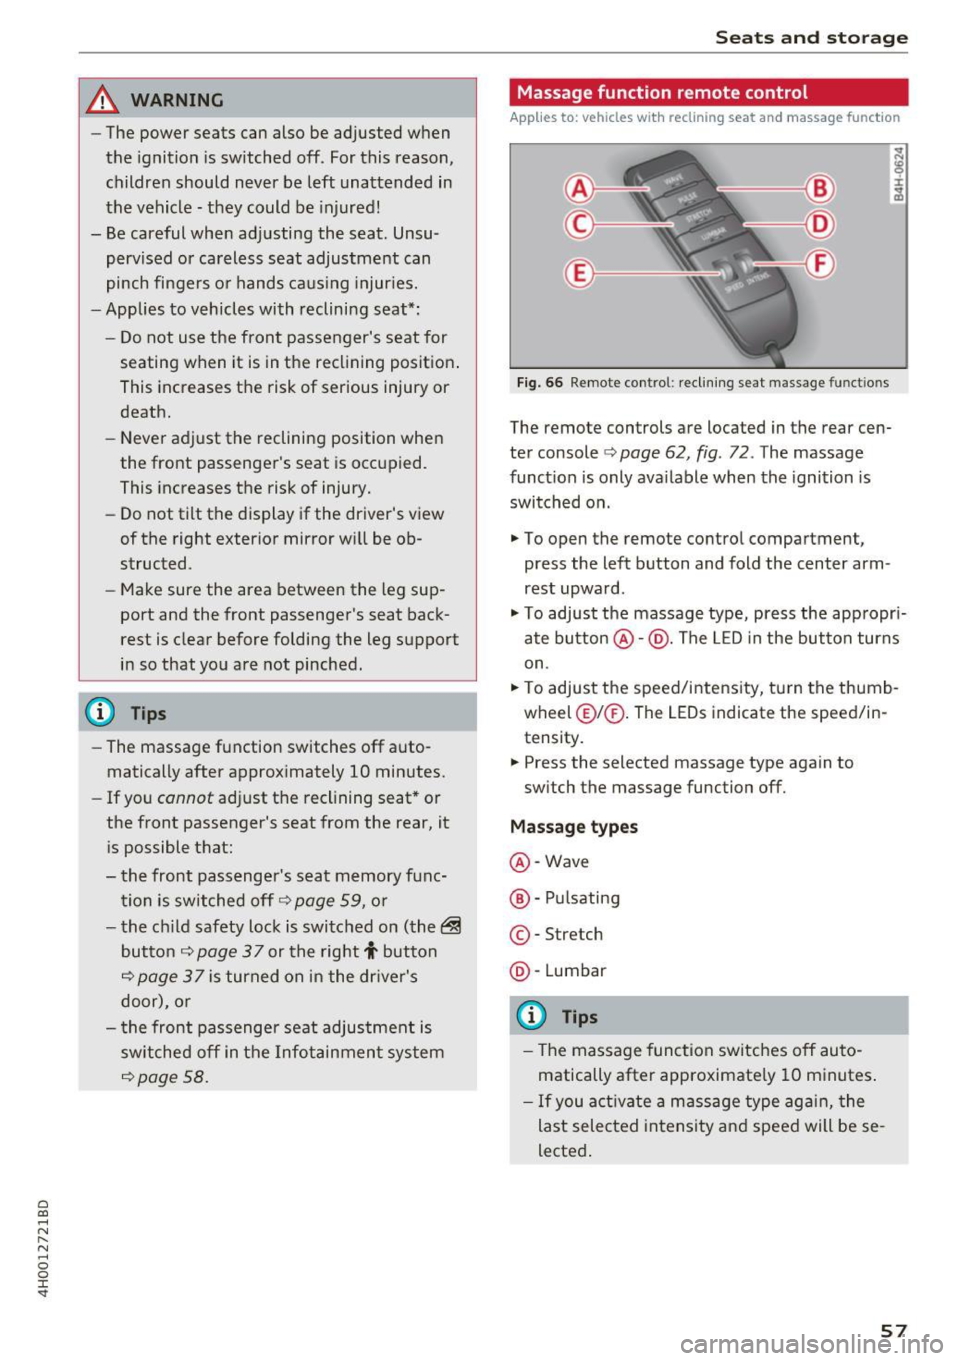
Massage function remote control
Applies to: vehicles with reclining seat and massage function
Fig. 66 Remote cont rol: rec lin ing seat massage functions
The remote controls are located in the rear cen
ter console ¢ page 62, fig. 72 . The massage
funct ion is only ava ilable when the ignition is
switched on.
.,. To open the remote control compartment,
press the left button and fold the center arm
rest upward .
.,. To adjust the massage type, press the appropr i
ate button @·@ . The LED in the button turns
on .
.,. To adjust the speed/inte nsity, turn the thumb
wheel @I® . The LEDs indicate the speed/in
tensity.
.. Press the selected massage type again to
sw itch the massage function off.
Massage types
@ -Wave
@ -Pul sating
© -Stretch
@ -Lumbar
(D Tips
- The massage function switches off auto
matically after approximate ly 10 minutes .
- If you activate a massage type aga in, the
last selected intensity and speed will be se
lected .
57
Page 60 of 354
Seats and storage
Comfort settings
Applies to: vehicles with comfort seats in the rear
You con also apply several settings for the rear
using the Infotainment system in the cockpit.
• Se lect in the MMI: !CAR ! function button> Car
systems
control button > Vehicle settings >
Seats > Rear seats .
Adjust to normal position -
with this function,
the outer rear seats and the front passenger's
seat are moved to the factory setting.
Easy seat entry -the Easy seat entry makes it
possible to enter and exit the rear seats comfort
ably. If the function is sw itched on, the rear seat
automatically moves all the way back when t he
corresponding door is opened .
Passenger's seat adjustment* -if the function is
switched on in the Infotainment system, the
front passenger's seat can also be adjusted from
the rear seat using the ¢
page 55, fig. 64 but
tons .
The front passenger's seat cannot be adjusted, if
- the front passenger's seat memory function is
switched off¢
page 59.
-the ~ button tur ns on in the driver's door
¢page 37.
-The right[!] button turns on in vehicles with
power child safety locks *
¢page 37.
Head restraints
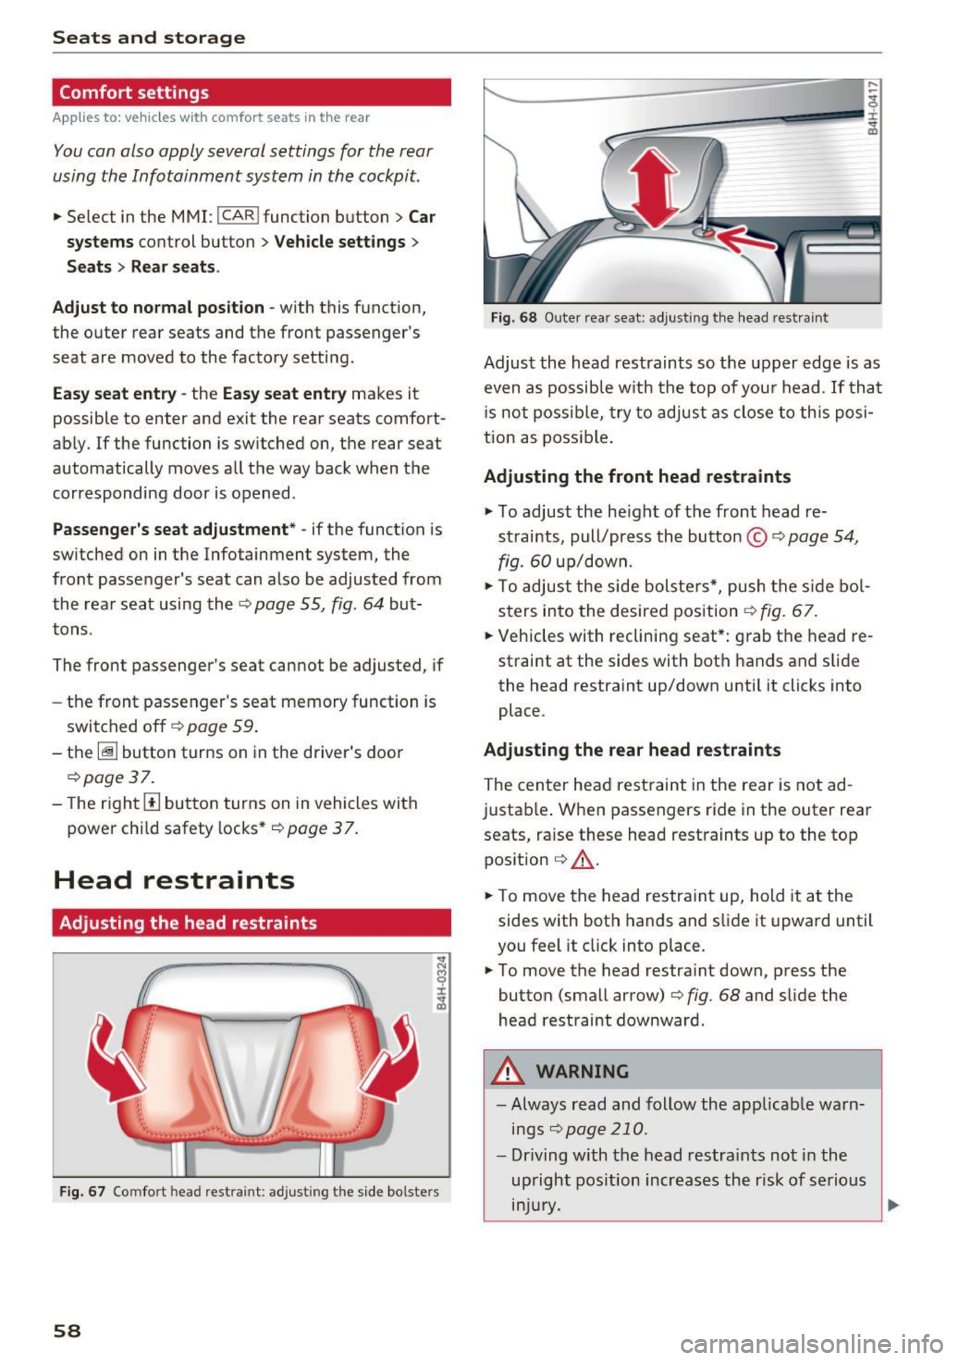
Adjusting the head restraints
Fig. 67 Comfo rt hea d rest raint: ad just ing t he side bo lste rs
58
Fig. 68 Outer rea r seat: adjus ting the head restra int
Adjust the head restraints so the upper edge is as
even as possible with the top of you r head . If tha t
i s not possible, try to adjust as close to this posi
tion as possible.
Adjusting the front head restraints
.,. To adjust the he igh t of the front head re
straints, pull/press the button ©
9 page 54,
fig.
60 up/down.
.,. To adjust the side bolsters*, push the side bol
sters in to the desired position ¢
fig. 67.
• Vehicles with reclining seat*: grab the head re
straint at the sides with both hands and slide
the head restraint up/down until it clicks into
place .
Adjusting the rear head restraints
The center head restraint in the rear is not ad
justable. When passengers ride in the outer rear
seats, raise these head restraints up to the top position ¢
,&.
• To move the head restra int up, hold it at the
sides with both hands and slide it upward until
you feel it click into place .
.,. To move the head restraint down, press the
button (small arrow) ¢
fig. 68 and slide the
head restraint downward.
8,_ WARNING
- Always read and follow the applicab le warn
ings
¢page 210.
-Driving with the head restraints not in the
upright position increases the r isk of se rious
lnJUry .
~