ESP AUDI A8 2018 Workshop Manual
[x] Cancel search | Manufacturer: AUDI, Model Year: 2018, Model line: A8, Model: AUDI A8 2018Pages: 356, PDF Size: 54.71 MB
Page 176 of 356
Navigation
Route criteria
Auto rerouting (traffic):
when auto rerouting is
On, the route is automatically adjusted based on
TMC traffic information . If the MMI does not cal
culate a detour even though you have se lected
dynamic route
On and a traffic jam was reported
on the calculated route, then the detour the sys
tem calculated would take more time than the
time spent wa iting in the traffic jam.
Alternative routes : when the function is On, up
to three suggested routes and their criteria ap
pear in the Infotainment d isplay in the s ide
menu . After chang ing to map view, the new route
that was calculated according to your criteria is
h ighlighted. You can select the poss ible routing
in the alternative routes by turning and press ing
t he control knob.
Route type: you can select a Short , Fast or Mixed
route.
Highway /Toll roads/Ferry: select the Avoid op
tion you do not want the navigation system to in
clude highways, toll roads or ferr ies when ca lcu
lating
a route.
Time restricted roads : using the Avoid function
w ill exclude time restricted roads, such as pedes
trian zones, from the route calcu lation. Whe n
Auto is selected, the MMI decides if the time re
stricted roads should be included when calculat
ing the route guidance based on the e ntries stor
ed in the navigation data.
Seasonal closing: using the Avoid function w ill
ex clud e seasona l closings, such as mountain
passes, from the route calculation . When
Auto is
selected, t he
MMI decides if the seasona l re
stricted roads should be included when calcu lat
ing the route guidance based on the entries stor
ed in the navigation data.
Map colors
Day /Night :
the map is displayed with a light/
dark background.
Auto : when t he lig hts switch on, the map colors
sw itch from day to night.
1> Only possible in the 2D map v iew
174
Orientation
North 1
l: the map orientation is facing nort h.
Dir. of travel : the map orientation is in the direc
t ion of travel. At a sca le of 62 miles (100 km),
t h e map is or iented to the north for easie r orien
tation.
Auto: at a scale up to 3 m iles (5 km), the map
o rientation is in the direction of travel. At a scale
greate r than 3 miles (5 km), the map is or iented
to the north.
Map type
Destination :
the destination is marked with a
checke red flag. The map indicates the destina
t ion and is oriented to the north.
2D: the current veh icle posit ion is displayed. The
map or ientation corresponds to the sett ing in the
Map orientation menu ~ page 174 .
3D: when th is function is switched on, the cur
rent vehicle position is displayed in a three-di
mens ional terrain map and the map or ientat ion
i s set automatically to the
Dir. of travel. At a
sca le of 100 km and larger, the map is oriented
to th e north . At a scale between 30
-100 meters,
the display will show three-dimensional city
models and landmarks will be shown at a scale of
30
-200 meters.
Overview : the entire route from the vehicle loca
tion to the destination is d isp layed on the map.
The map scale depends on the length of the
route. The map is oriented to the north.
Map display
Online map view ~ page 172
Map content
Map contents such as traffic information, favor
i tes or restaurants can be displayed
(~) or hid
den .
The functions in the
Map POis menu depend on
the map display that is selected.
IJIJ,
Page 183 of 356
u. co .... N
" N .... 0 0 :c '
connections
Introduction
There are various media drives and connections
ava ilable i n the MMI. For example, you can play
aud io/video* f iles through the Jukebox, or you
can connect a portable device to the Audi music in te rface* a nd ope rate it throug h the MM I.
Notes
General information
Media and format restr ictions :
the MMI (includ
ing the SD card reader and the USB storage de
vice connect ion*) was tested w ith a var iety of
products and media on the market. However,
there may be cases where ind iv idual devices or
media and aud io/video files* may not be recog
niz ed, may play o nly w it h rest rictio ns, o r may no t
p lay at a ll.
The MM I media dr ives do not suppo rt W indows
M edia Audio 9 Vo ice, W indows Media Aud io 9
L oss less and Windows Media
9 Pr ofessional for
mats .
Digital Rights Management : please note that
the audio/v ideo* fi les are subject to copy right
p rotection.
The med ia drives do not play f iles that are pro
tected by DRM and that are ident ified w ith the
symbo l
i'.D.
Data se curity : Never store important data on the
memory cards, the Jukebox, CDs/DVDs or porta
b le aud io devices . Audi is not responsib le for
damaged or lost fi les and med ia.
Loading times : the more files/fo lders/playlists
that are on a storage medium, the longer it will
take to load the aud io/v ideo* fi les . Audi recom
mends us ing storage med ia that o nly conta in a u
d io/video files*. To de cre ase the time it takes to
l oad audio/v ideo f iles*, c reate subfo lders ( for ex
ample, for the a rtist o r album). The loading time
will also increase when importing fi les .
Additional information : when playing, aud io
fi les are a utomatica lly displayed with any addi -
Media drives and conn ection s
tiona l information t hat is stored (such as t he ar
tist, track and a lbum cover) . If this information is
not avai lab le on t he storage medium, the MMI
will check Gracenote . However, in some cases,
the addit ional information may not be d isplayed .
Restricted functionality : if functionality is re
stricted, reset the
Media setting s to the factory
defau lt settings
¢ page 207.
Reset the Jukebox to the factory defa ult settings
if functiona lity is
restricted ¢ page 207.
Fo r i nforma tion abo ut the p roper ties of support
ed med ia an d file forma ts , see
¢ page 187 .
(UJ) Note
Always fo llow the information fo und in ¢ (i} in
Wi -Fi
hot spo t on page 161.
CD/DVD operation
CD /DVD and format re striction s:
the functiona li
ty of individ ua l storage media may be limited due
to the va riety of b lank CDs/DVDs avai lab le and
the various capacities. Audio CDs or video DVDs
with copy protection, CDs/DVDs that do not con
form to the standard and mult i sess ion CDs may
have l imited playback or may not play at all. Audi
r ecommends finaliz ing the reco rding process
whe n creat ing mult isess ion C Ds. Mult isess ion is
not supported for DV Ds.
Handling CD s/DVDs and the DVD drive : to en
su re good, high-quality sound reproduction and
to prevent damage to the dr ive or d isc read ing er
r ors, always s to re CDs/DVDs in a protective
s leeve and do no t expose t hem to direct s unligh t.
Do
not u se :
- Damaged, dirty o r sc ratched CDs/ DVDs
- Single CDs/DVDs (3 inch/8 cm d iame ter)
- CD/DVDs tha t are not round
- CDs/DVDs w ith labe ls
- Protective rings
- Clean ing CDs
Thermal protection switch : CD/DV D playback
may be tempora rily unavai lab le if o uts ide tem
peratu res are extremely hot or co ld . A t hermal
181
Page 185 of 356
DVD changer
Applies to: vehicles wit h DVD changer
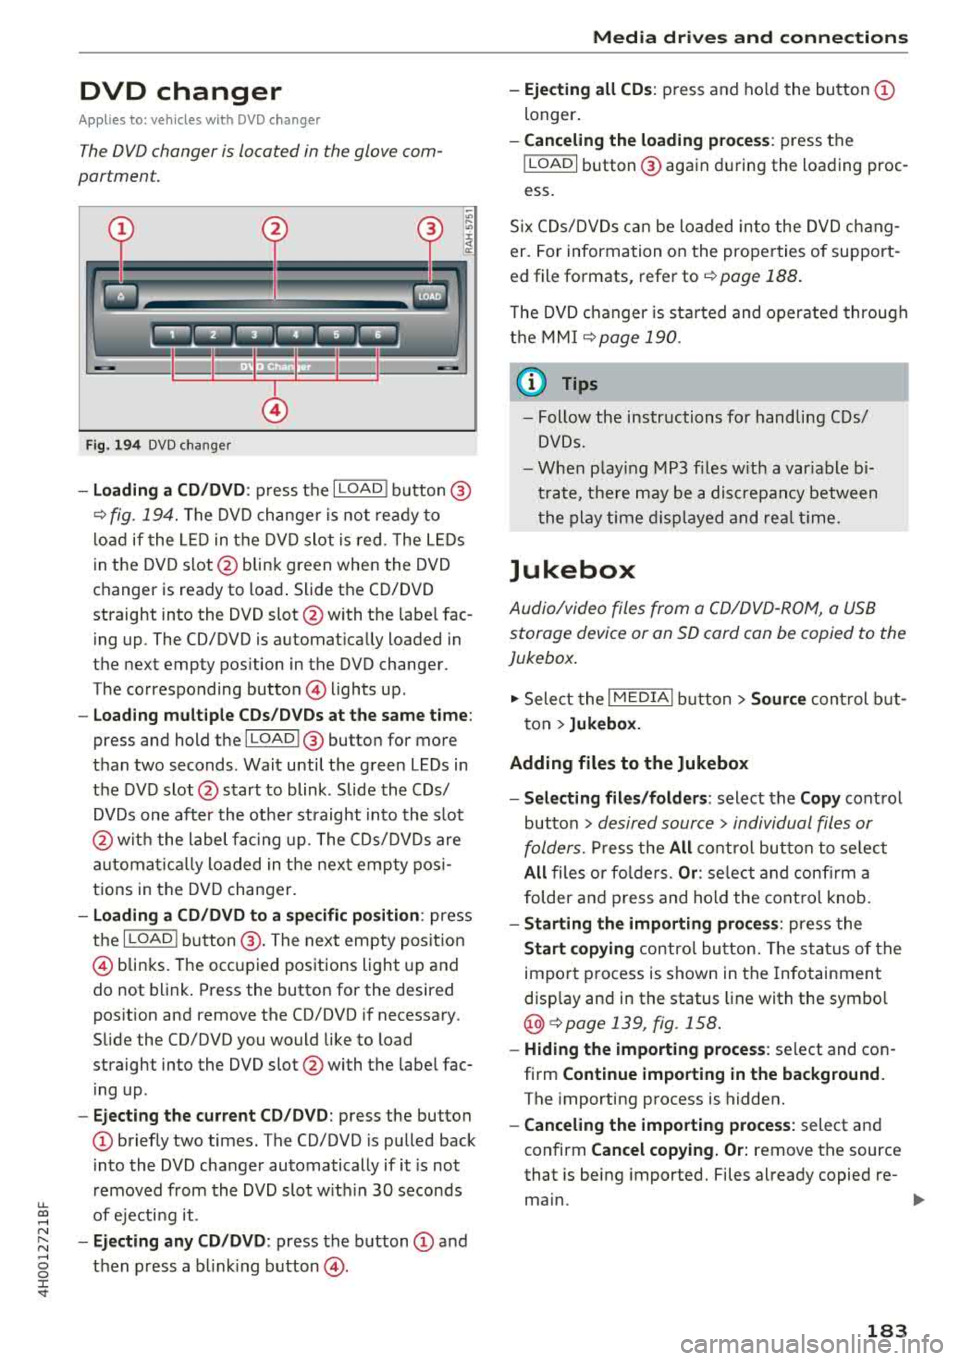
The DVD changer is located in the glove com
partment.
0
F ig. 194 DVD changer
-Loading a CD/DVD : press the I LOADI button @
¢ fig. 194. The DVD changer is not ready to
load if the LED in the DVD slot is red . T he LEDs
in the DVD slot @ blink green when the DVD
changer is ready to load . Slide the CD/DVD
straight into the DVD slot @with the labe l fac
ing up. The CD/DVD is automat ically loaded in
the next empty pos ition in the DVD changer .
The corresponding button © lights up .
-Load ing mult iple CDs/DVDs at the same time:
press and hold the I LOADl @button for more
than two seconds . Wait until the green LEDs in
the DVD slot@start to blink . Slide the CDs/
DVDs one after the othe r straight into the s lot
@ wit h the label facing up. The CDs/DVDs are
a ut omatica lly loaded in t he next empty posi
tions in the DVD changer.
-Loading a CD/DVD to a specific position: press
the I
L OAD ! button @. The next empty posit ion
© blinks. The occupied positions light up and
do not blink. Press the button for the desired
position and remove the CD/DVD if necessary.
Slide the CD/DVD you would like to load
straight into the DVD slot @with the label fac
ing up .
-Ejecting the current CD/DVD: press the button
CD briefly two times. The CD/DVD is pulled back
i nto the DVD changer automatically if it is not
removed from the DVD slot with in 30 seconds
u.
~ of ejecti ng it .
~ -Ejecting any CD/DVD : press the button CD and
~ then press a blinking button @. 0 :c '
-Ejecting all CDs : press and ho ld the button CD
longer .
-Canceling the loading process : press the
!LOAD! button @ again during the loading proc
ess.
Six CDs/DVDs can be loaded into the DVD chang
er. For information on the properties of support
ed file formats, refer to
¢ page 188.
T he DVD changer is sta rted and operated through
the MMI
¢ page 190.
@ Tips
-Follow the instructions for handling C Ds/
DVDs.
- When playing MP3 files with a variable bi
trate, there may be a disc repancy between
th e play time displayed and rea l time.
Jukebox
Audio/video files from a CD/DVD-ROM, a USB
storage device or an SD card can be copied to the
Jukebox.
.,. Select the I MEDIAi button> Source control but
ton >
Jukebox.
Adding files to the Jukebox
- Selecting files/folders :
select the Copy control
button
> desired source > individual files or
folders.
Press the All control button to select
All files or folders. Or : select and confirm a
folder and press and hold the control knob.
-Starting the importing process : press the
Start copying control button. The status of the
import process is shown in the Infotainment
disp lay and in the status line with the symbo l
@¢page 139, fig . 158.
-Hiding the importing process : select and con
firm
Continue importing in the background.
The importing process is hidden.
-Canceling the importing process: select and
confirm
Cancel copying. Or: remove the source
that is being imported. Files already copied re-
main.
IJI>-
183
Page 196 of 356
Rear Seat Entertainment
Rear Seat Entertainment
RSE components
overview
A pp lies to: ve hicles w ith Rea r Seat En te rtainment
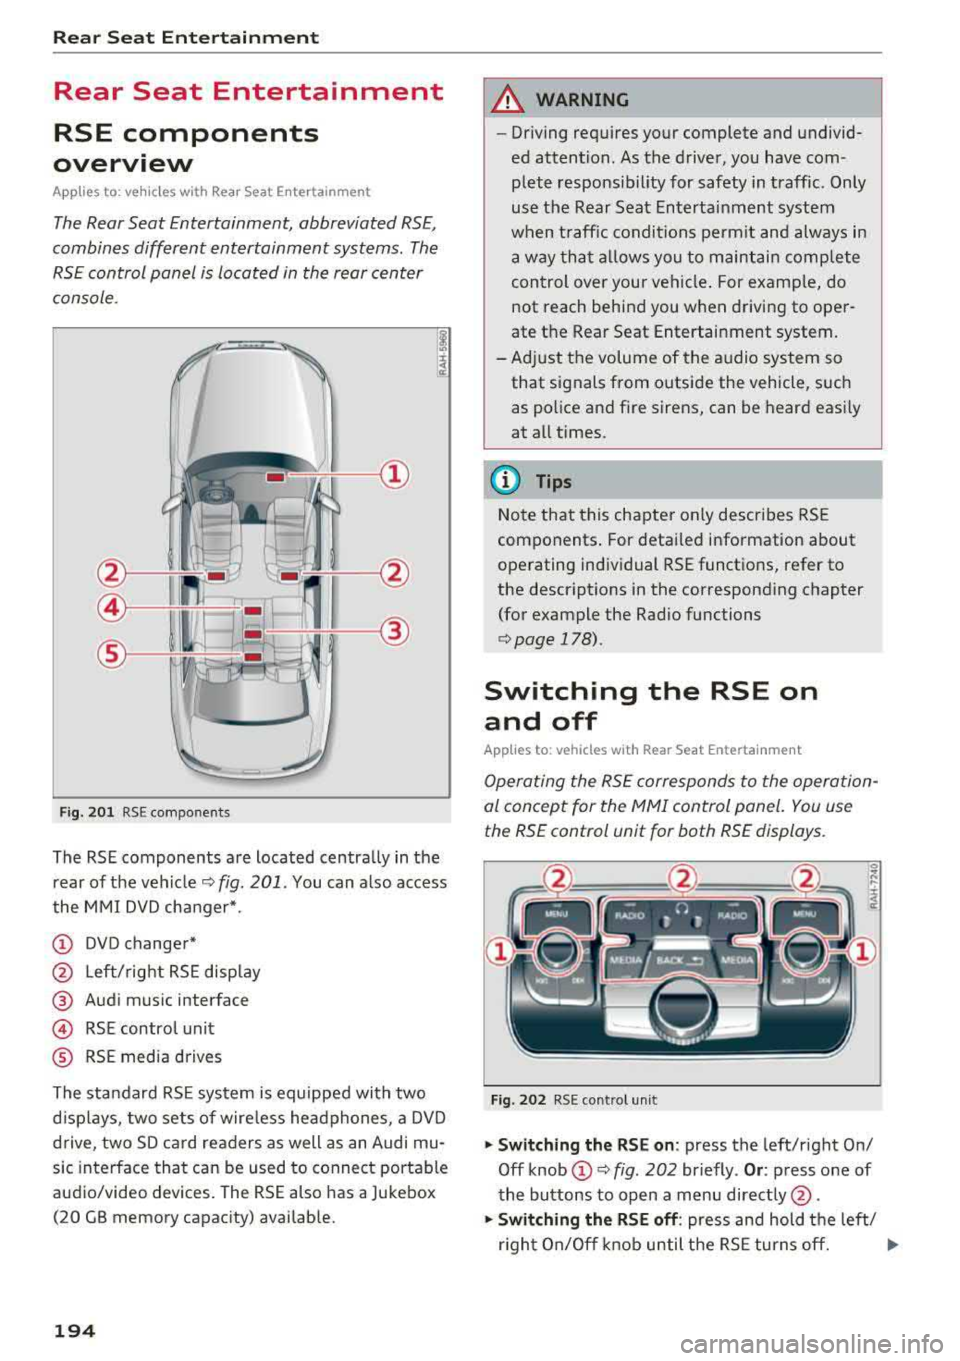
The Rear Seat Entertainment, abbreviated RSE,
combines different entertainment systems . The
RSE control panel is located in the rear center
console .
Fig. 201 RSE components
The RSE components are located centrally in the
rear of the vehicle
c:.> fig. 201 . You can also access
the MMI DVD changer*.
(D DVD changer*
@ Left/right RSE display
@ Audi music interface
@ RSE contro l unit
® RSE media drives
The standard RSE system is equipped with two
d isplays, two sets of wire less headphones, a DVD
drive, two SD card readers as well as an Audi mu
sic interface that can be used to connect portable
audio/video devices. The RSE also has a Jukebox
(20 GB memory capacity) availab le.
194
A WARNING
,-
- Driving requires your complete and undivid-
ed attention. As the driver, you have com
plete responsib ility for safety in traffic. Only
use the Rear Seat Entertainment system
when traffic conditions permit and always in
a way that allows you to maintain comp lete
control over your vehicle . For examp le, do
not reach behind you when driving to oper
ate the Rear Seat Entertainment system.
-Adjust the volume of the audio system so
that signals from outside the vehicle, such
as police and fire sirens, can be heard easily
at all times.
(D Tips
Note that this chapter on ly describes RSE
components . For detailed information about
operating individual RSE functions, refer to
the descriptions in the corresponding chapter
(for example the Rad io functions
r::.> page 178).
Switching the RSE on
and off
App lies to: vehicles with Rear Seat Entertainment
Operating the RSE corresponds to the operation
al concept for the
MMI control panel. You use
the RSE control unit for both RSE displays.
Fig. 202 RSE cont rol unit
.,. Switching the RSE on : press the left/right On/
Off knob
(D c:.> fig . 202 br iefly . Or: press one of
the buttons to open a menu directly @.
.,. Switching the RSE off: press and hold the left/
r ight On/Off knob until the RSE turns off.
.,..
Page 198 of 356
Rear Seat Entertainment
Audio output
Applies to: vehicles with Rear Seat Entertainment
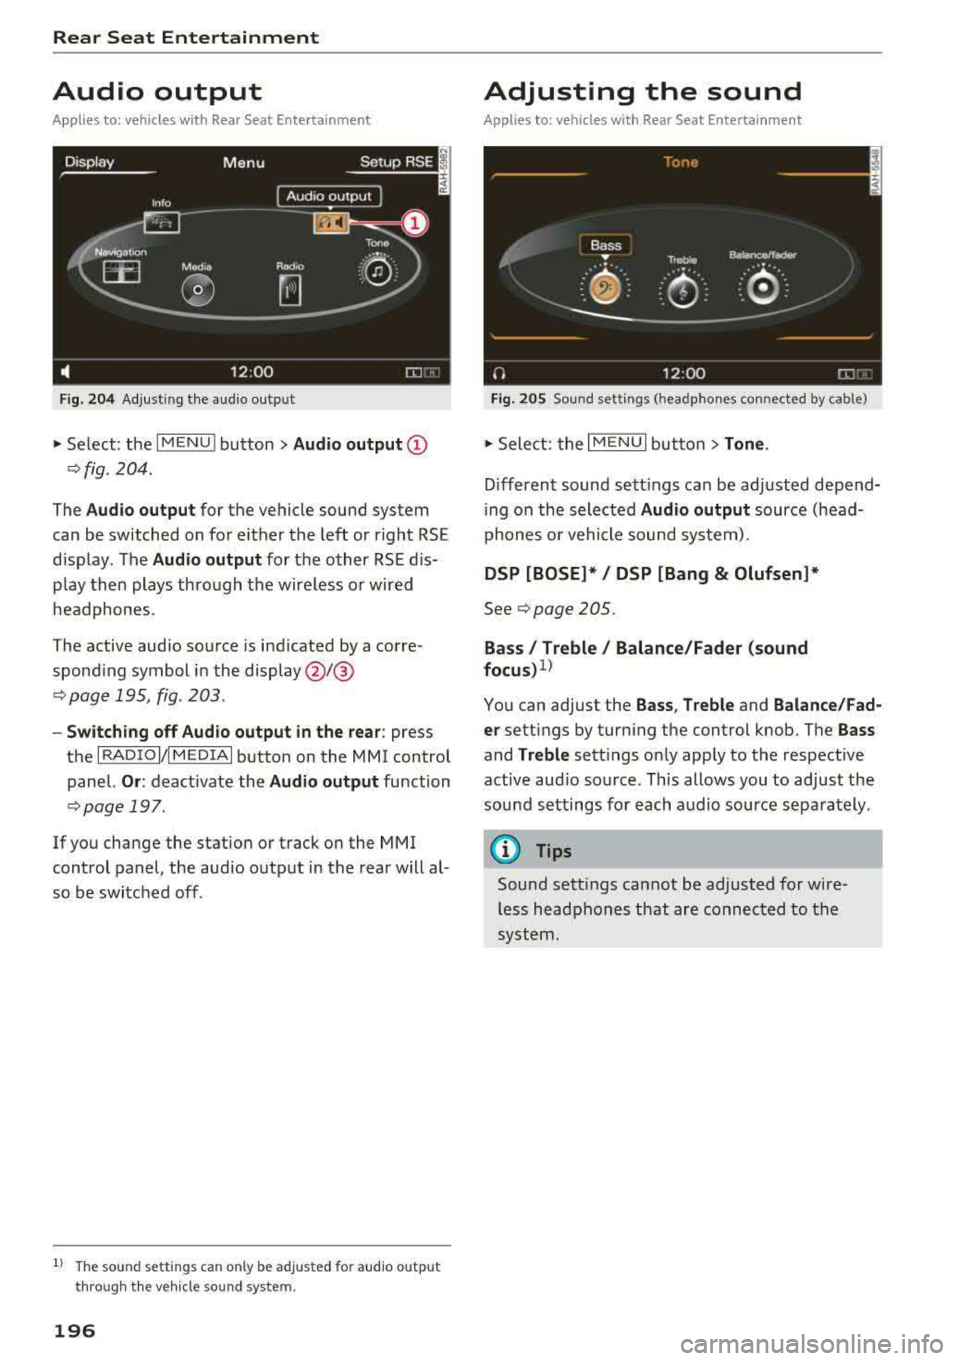
F ig . 204 A dj ust ing t he audio outp ut
" Se lect : the IMENU ! button> Audio output (D
¢fig. 204 .
The Audio output for the vehicle sound system
can be switched on fo r either the left or r ight RS E
d isp lay. The
Audio output for the other RSE dis·
p lay then plays thro ugh t he wire less or wired
headphones.
The active aud io so urce is ind icated by a co rre
spond ing sy mbol in the
display @/@
.:;, page 195, fig. 203 .
-Switching off Audio output in the rear : press
t h e
I R ADIO I/ I MEDIAi button on the MMI control
panel.
Or : deact ivate the Audio output function
¢ pag e 197.
If you change the station or track on the MMI
control panel, the aud io o utp ut in t he rear w ill
al ·
so be switc hed off.
1) T he so und sett ings ca n only be ad juste d fo r au d io o utp ut
t hr ough t he vehi cle s oun d sy stem.
196
Adjusting the sound
Applies to: vehicles with Rear Seat Entertainment
Fig. 205 So un d settings ( headpho nes con nected by cable)
" Sele ct: the I M ENU I but ton> Tone .
Differen t sound se tt ings ca n be ad justed depend·
i ng on the selected
Audio output source (head·
p hone s or vehi cle sou nd sys tem).
DSP [BOSE]*/ DSP [Bang
& Olufsen]*
See.:;, page 205.
Bass/ Treble/ Balance/Fader (sound
focus)1 )
You can adjust the Bass , T reble and Balance/Fad·
er
setti ngs by turn ing the control knob. The Bass
and Treble sett ings on ly app ly to the respective
active aud io so urce . This allows you to adjust the
sou nd set tings fo r each a udio source sep arately .
@ Tips
Sound sett ings cannot be adjusted for wire·
l ess head phones that are connec ted to t he
sy ste m.
Page 207 of 356
System settings
Setting the time and
date
You can set the clock time manually or using the
CPS .
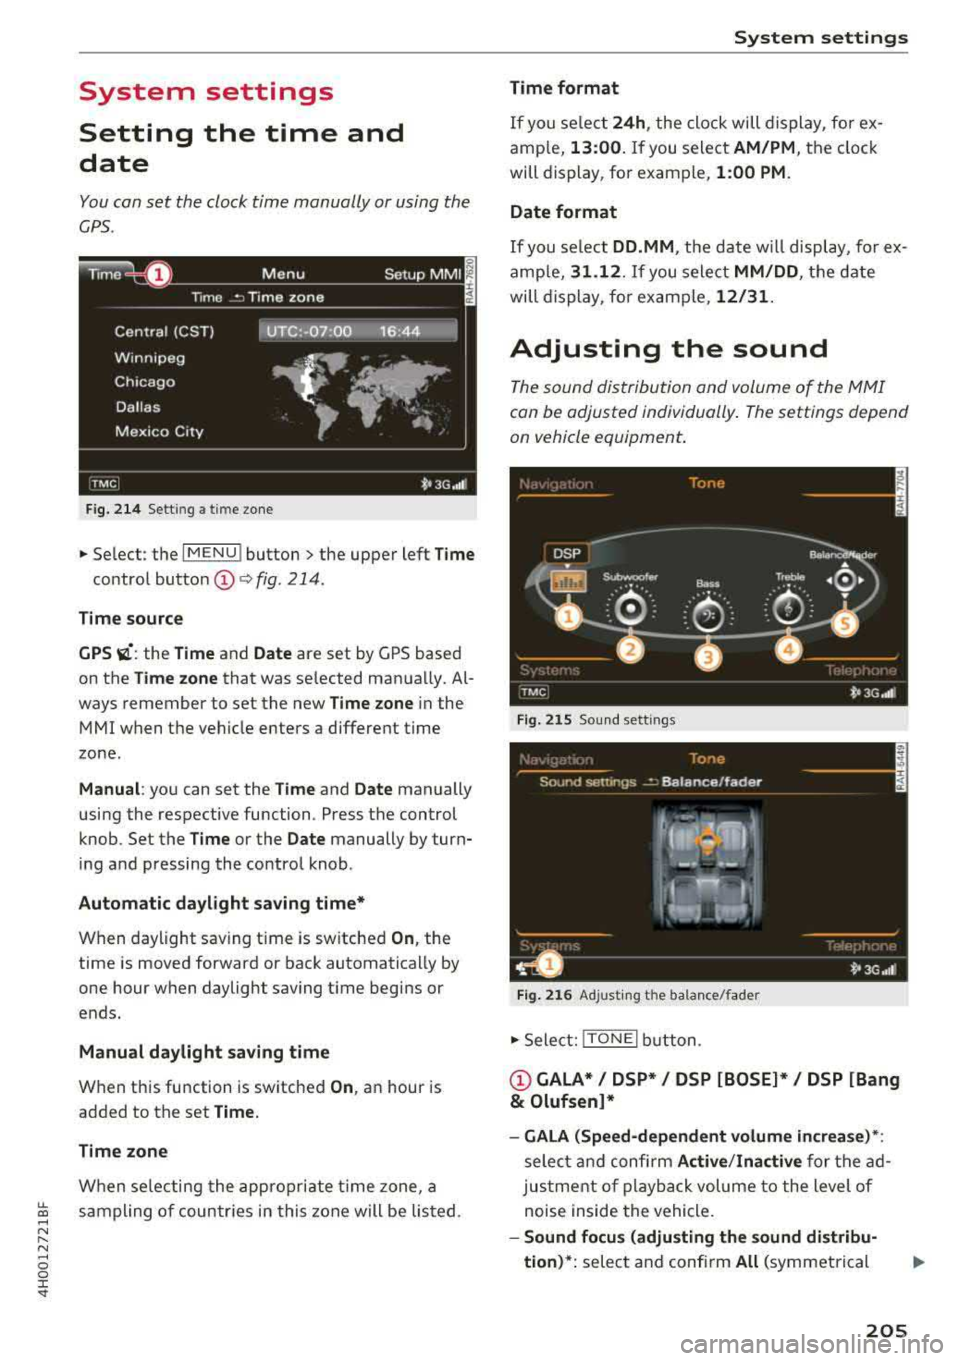
Fig. 214 Setting a time zone
.,. Select : the I MENU ! button > the upper left Time
control button (D c> fig. 214 .
Time source
GPS
vi: the Time and Date are set by GPS based
on the
Time zone that was se lected manually. Al
ways remember to set the new
Time zone in the
MMI when the vehicle enters a different time
zone.
Manual : you can set the Time and Date manually
using the respective function . Press the control
knob. Set the
Time or the Date manually by turn
ing and pressing the control knob .
Automatic daylight saving time*
When daylight sav ing time is sw itched On, the
time is moved forward or back automatically by
one hour when daylight saving time begins or
ends.
Manual daylight saving time
When this function is switched On, an hour is
added to the set
Time.
Time zone
When selecting the appropriate time zone, a
~ sampling of countries in this zone will be listed. ....
"" ......
"" .... 0 0 :c '
Time format
If you select 24h , the clock will display, for ex
amp le,
13:00. If you select AM/PM , the clock
will display, for example,
1:00 PM.
Date format
If you se lect DD.MM , the date will display, for ex
amp le,
31 .12 . If you select MM/DD , the date
will display, for example,
12/31.
Adjusting the sound
The sound distribution and volume of the MMI
can be adjusted individually . The settings depend
on vehicle equipment.
Fig. 215 Sound settings
Fig. 216 Adjusting the balance/fader
.,. Select: !TONEI button .
(!)GALA*/ DSP* / DSP [BOSE]*/ DSP [Bang
& Olufsen]*
- GALA (Speed-dependent volume increase)*:
select and confirm Active/Inactive for the ad
justment of playback volume to the level of
noise inside the vehicle .
-Sound focus (adjusting the sound distribu
tion) *:
select and confirm All (symmetrical
205
Page 210 of 356
Drivin g saf ety
Driving safety
Basics
Safe driving habits
Please remember -safety first!
The individua l safety features of your vehicle can
work together as a system to help protect you
and your passengers in a wide range of accidents.
These features cannot work as a system if they
are not always correctly adjusted and correctly
used .
This chapter contains important informat ion,
tips, instruct ions and warn ings that you need to
read and observe for your own safety, the safety
of you r passengers and others . We have summar
ized here w hat you need to know about safety
be lts, a irbags, child restra ints as well as child
safety. Yo ur safety is for us
priority number 1. Al
ways observe the information and warnings in
this section -for your own safety as we ll as that
of your passengers.
The information in this section applies to all
model versions of your vehicle . Some of the fea
tures described in this sections may be standard
equipment on some models, or may be optional
equ ipment on others. If you are not sure, ask
your author ized Audi dealer.
A WARNING
- Always make sure that you follow the in
structions and heed the WARNINGS in th is
Manua l.
It is in your interest and in the in
te rest of your passengers .
-
-Always keep the complete Owner's Litera
tu re in you r A udi when you lend or se ll you r
vehicle so that this import ant information
will always be available to the d river and
passengers.
- Always keep the Owner 's lite rature h andy so
that you can find it easily if you have ques
tions .
208
Important things to do before driving
Safety is everybody's job! Vehicle and occupant
safety always depends on the informed and care
ful driver .
For your safety and the safety of your passen
gers,
bef ore dri ving alw ays:
.. Make sure that a ll lights and signals are operat
ing correctly .
.. Make sure that the tire pressure is correct.
.. Make sure that all windows are clean and afford
good vis ibility to the outs ide .
.. Sec ure all luggage and othe r items ca refully
¢ page 65, ¢page 63 .
.. Make sure tha t noth ing ca n interfere wi th the
peda ls .
.. Adjust front seat, head restraint and mirrors
correctly for your height.
.. Instruct passengers to adjust the head re
straints according to their he ight.
.. Make sure to use the right child restraint cor
rectly to protect
children ¢ page 249, Child
safety .
• Sit proper ly in yo ur seat a nd make sure t hat
your passenge rs do the same
¢ page 54, Seats
and storage.
.. Fasten your sa fety belt and wear it p roperly . Al
so instruct your passengers to fasten their safe
ty be lts properly
¢ page 219 .
What impairs driving safety?
Safe driving is directly related to the condition of
the vehicle, the driver as well as the driver's abili
ty to concentrate on the road without being dis
tracted.
The driver is responsib le for the safety of the ve
hicle and a ll of its occupants. If your ability to
drive is impa ired, safety risks for everybody in the
vehicle increase and you a lso become a hazard to
everyone else on the road
¢ _&. . Therefore:
.. Do not let yourse lf be distracted by passenge rs
or by using a cellular telephone .
.. NEVER drive when your driving ability is im
paired (by med ications, alcohol, drugs, etc .) .
.. Observe all traffic laws, rules of the road and
speed lim its and plain common sense .
.,.
Page 214 of 356

Drivin g saf ety
- Every person in the vehicle must have a
properly adjusted head restra int.
- Always make sure each person in the vehicle
properly adjusts their head restraint. Adjust
the head restra int so the upper edge is as
even as possib le w ith the top of your head.
If that is not possible, try to adjust the head
restra int so that it is as close to th is position
as possib le.
- Never attempt to adjust head restraint wh ile driving.
If you have dr iven off and
must adjust the driver headrest for any rea
son, fi rst s top the vehicle safely before at
tempting to ad just the head restra int.
- Children must always be p roperly restrained
in a chi ld restrain t that is appropria te fo r
their age and size
q page 249.
Examples of improper seating positions
The occupant restraint system con only reduce
the risk of injury if vehicle occupants ore properly
sea ted.
I mp roper seating posit ions can cause se rious in
ju ry or deat h. Safety belts can only wo rk when
t hey are p roper ly posit ioned o n the body . Im
p roper seating posi tions reduce t he effect iveness
of safety belts and wi ll even increase the risk of
inj ury and death by moving the safety be lt to crit
ical areas of the body. Improper seating posit ions
also increase the risk of ser ious injury and death
when an airbag deploys and str ikes an occupant
who is not in the proper seat ing position . A driver
is responsible for the safety of a ll vehicle occu
pants and especially fo r ch ildre n. Therefo re :
"' Never allow anyone to assume an incorrect
seat ing pos ition w hen the ve hicle is being used
q& .
The fo llow ing bulletins list only some sample po
sitions that wi ll increase the risk of ser ious injury
a nd death . Our hope is that these examples will
make you more aware of seat ing pos it ions that
are dangero us.
Therefore, whenever the vehicle is moving:
- never stand up in the ve hicle
- never stand on the seats
212 -
neve r kneel on the seats
- neve r ride w it h the sea tback re clined
- neve r lie down on the seats
- never lean up aga inst the instrument panel
- never s it on the edge of the seat
- never s it sideways
- never lean out the window
- never put your feet out the window
- neve r put your feet on the instr ument panel
- neve r rest you r feet on the seat c ushion or bac k
of t he se at
- neve r ride in the footwell
- never ride in the cargo area
A WARNING
Imp roper seating posi tions inc rease the risk
of ser ious personal inju ry and death whenever
a veh icle is being used.
- Always make sure that all veh icle occupants
s tay in a proper sea ting posit ion and a re
properly restrained whenever the vehicle is
be ing used .
Driver's and front
passenger's footwell
Important safety instructions
A WARNING
A lways make su re that the knee airbag can in
flate w ithout interference. Objects between
yourself and the airbag can inc rease the risk
of injury in an accident by interfering with the
way the airbag dep loys o r by being pushed in
to you as the airbag dep loys .
- No persons (ch ild ren) or animals should ride
in the footwell in front of the passenger
seat . If the airbag deploys, this can res ult in
serious or fatal injuries.
- No objects of any kind should be carried in
the footwell area in front of the dr iver's or
passenger's se at. Bu lky objects (shopping
bags, for examp le) can ham per or prevent
proper dep loymen t of the airbag . Sma ll ob
jects can be thrown thro ugh the vehicle if
the air bag deploys and in jure you or your
passengers.
Page 216 of 356
Drivin g saf ety
A WARNING
Improperly stored luggage or other items can
fly through the vehicle causing serious per sonal injury in the event of hard braking or an
accident. To help reduce the risk of serious
personal injury:
- Always put objects, for example, luggage or other heavy items in the luggage compart
ment.
- Always secure objects in the luggage com
partment using the tie-down hooks and
suitable straps .
A WARNING
Heavy loads will influence the way your vehi
cle handles. To help reduce the r isk of a loss
of control leading to serious pe rsonal injury:
- Always keep in mind when transporting heavy objects, that a change in the center of
grav ity can also cause changes in vehicle
hand ling:
- Always distribute the load as even ly as
possible.
- Place heavy objects as far forward in the
luggage compartment as poss ible.
- Never exceed the Gross Axle Weight Rating
o r the Gross Vehicle Weight Rating specified
on the safety compliance sticker on the left
doo r jamb. Exceed ing permissible weight
standards can cause the vehicle to slide and
hand le differently .
- Please observe information on safe driving
c> page 208.
A WARNING
To help prevent poisonous exhaust gas from
being d rawn into the vehicle, always keep the
rear lid closed whi le driving.
- Never transport objec ts larger than those
fi tt ing complete ly into the luggage a rea be
ca use the rear l id cannot be fully closed.
- If you absolutely mus t drive w ith the rea r lid
open, obse rve the follow ing notes to reduce
t h e risk of poisoning:
- Close all windows,
- Close the power roof,
214
-
- Open all a ir outlets in the instrument pan
el,
- Switch off the air reci rculat ion
'
- Set the fresh air fan to the highest speed .
A WARNING -
Always make su re that the doo rs, all win
dows, the powe r roof and the rear lid are se
curely closed and locked to re duce the risk of
in jury when the veh icle is not being used.
- After closing the rear lid, always ma ke sure
that it is properly closed and locked.
- Never leave your veh icle unattended espe
cially with the rear lid left open . A child
could crawl into the vehicle through the lug
gage compartment and close the rea r lid be
coming trapped and unab le to get o ut. Be
ing trapped in a vehicle can lead to ser ious
pe rsonal injury.
- Never let ch ildren play in o r around the vehi
cle.
- Never let passengers ride in the luggage
compa rtment . Vehicle occupants mus t al
ways be properly restrained in one of the ve hicle's seat ing pos itions.
(D Tips
- Air circulation helps to reduce w indow fog
ging . Stale ai r esca pes to the outs ide
through vents in the trim panel, on the left
side of the luggage compartment. Be sure
to keep t hese s lo ts free and open.
- T he tire p ressure must correspond to the
load. The t ire pressure is shown on t he tire
press ure label. The ti re pre ssure label is lo
c ated on the drive r's side B- pilla r. The tire
pressu re label lists the recommen ded cold
t ire inflation pressures fo r the veh icle at its
maximum capac ity we ight and the tires that
we re on your veh icle at the time it was man
ufactured . For recommended t ire pressures
for normal load conditions, p lease see chap
ter
c> page 294.
Page 221 of 356
u. co .... N
" N .... 0 0 :c '
General information
Always wear safety belts!
Wearing safety belts correctly saves lives!
This chapter explains why safety be lts are neces
sary, how they work and how to adjust and wear
them correctly.
~ Read all the information that follows and heed
all of the instructions and WARNINGS.
A WARNING
Not wearing safety belts or wearing them im
properly increases the risk of serious personal
injury and death.
- Safety belts are the s ingle most effective
means ava ilable to reduce the risk of serious
injury and death in automobi le accidents.
For your protection and that of your passen
gers, always co rrect ly wea r safety be lts
w hen the veh icle is mov ing.
- Pregnant wome n, in ju red, o r physically im
paired persons mus t also use safety be lts.
Lik e al l vehicle oc cupan ts, they are mo re
li kely to be serio usly injured i f th ey do no t
wear safety be lts . The best way to protect a
fetus is to protect the mothe r -throug hout
the ent ire pregnancy.
Number of seats
Your Aud i has a total of five seating positions:
two in the front and three in t he rear. In some
veh icles, there are four seat ing positions: two in
the fro nt and two in the rear . Each seati ng posi
tion has a safety belt.
A WARNING
N ot we aring safety bel ts or wear ing them im
pro perly in cre ases the risk of ser io us pe rsonal
inju ry and dea th.
- Never st rap more th an one pe rso n, includ
ing sm all c hildr en, in to any be lt.
It is espe
c ially dangerous to place a safety belt over a
child sitting on your lap .
Safet y be lts
- Never let more peop le r ide in the vehicle
than there are safety be lts available.
- Be s ure everyone riding in the vehicle is
proper ly restrained w ith a separate safety
be lt or ch ild restraint.
,ff. Safety belt warning light
Your vehicle has a warning system for the driver
and front seat passenger to remind you about
the importance of buckling-up.
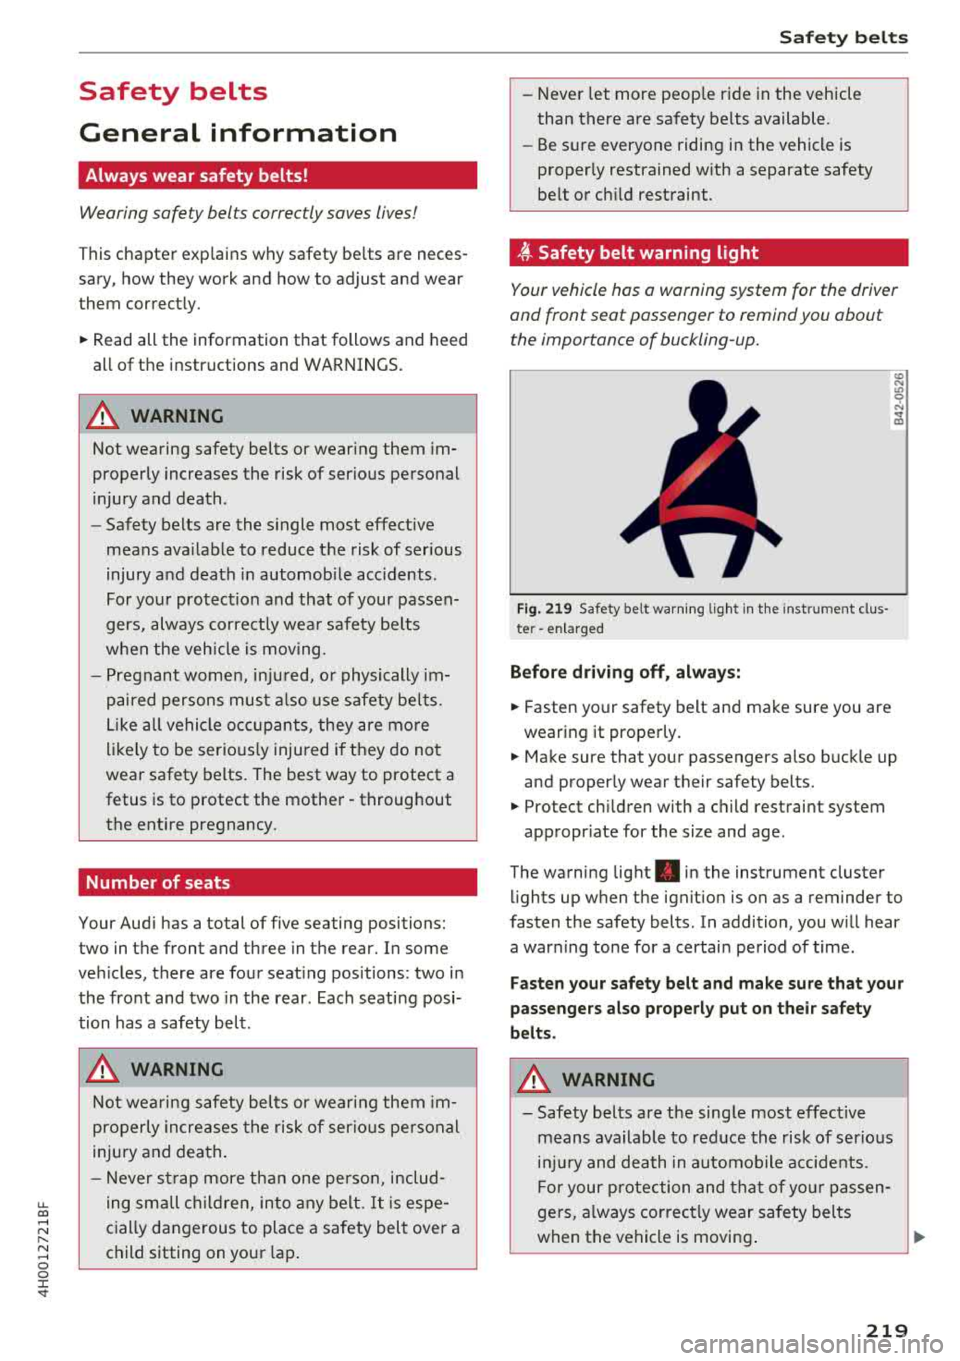
F ig. 21 9 Safety belt warnin g lig ht in t he inst rument clus·
te r -en larged
Befor e dr ivi ng off , always :
~ Fasten your safety belt and make sure you are
wearing it properly.
~
~ Make sure that your passengers a lso buckle up
and properly wear their safety belts.
~ Protect ch ildren with a c hild restraint system
appropr iate for the size and age .
The warning lig ht . in the instrument cluster
lights up when the ignit ion is on as a reminder to
fasten the safety belts . In addition, you will hear
a war ning tone for a certai n period of time .
Fasten your safet y belt and make su re that your
passengers also properly put on their safety
b e lts .
A WARNING
-
-Safety bel ts are the sing le m ost effec tive
means available to red uce the risk of ser io u s
i njur y and death in a utomob ile accidents.
F or your p rotection and that of yo ur passen
ge rs, always correc tly wear safety bel ts
when the vehicle is moving .
~
219