tow AUDI A8 2020 Owners Manual
[x] Cancel search | Manufacturer: AUDI, Model Year: 2020, Model line: A8, Model: AUDI A8 2020Pages: 360, PDF Size: 95.38 MB
Page 4 of 360
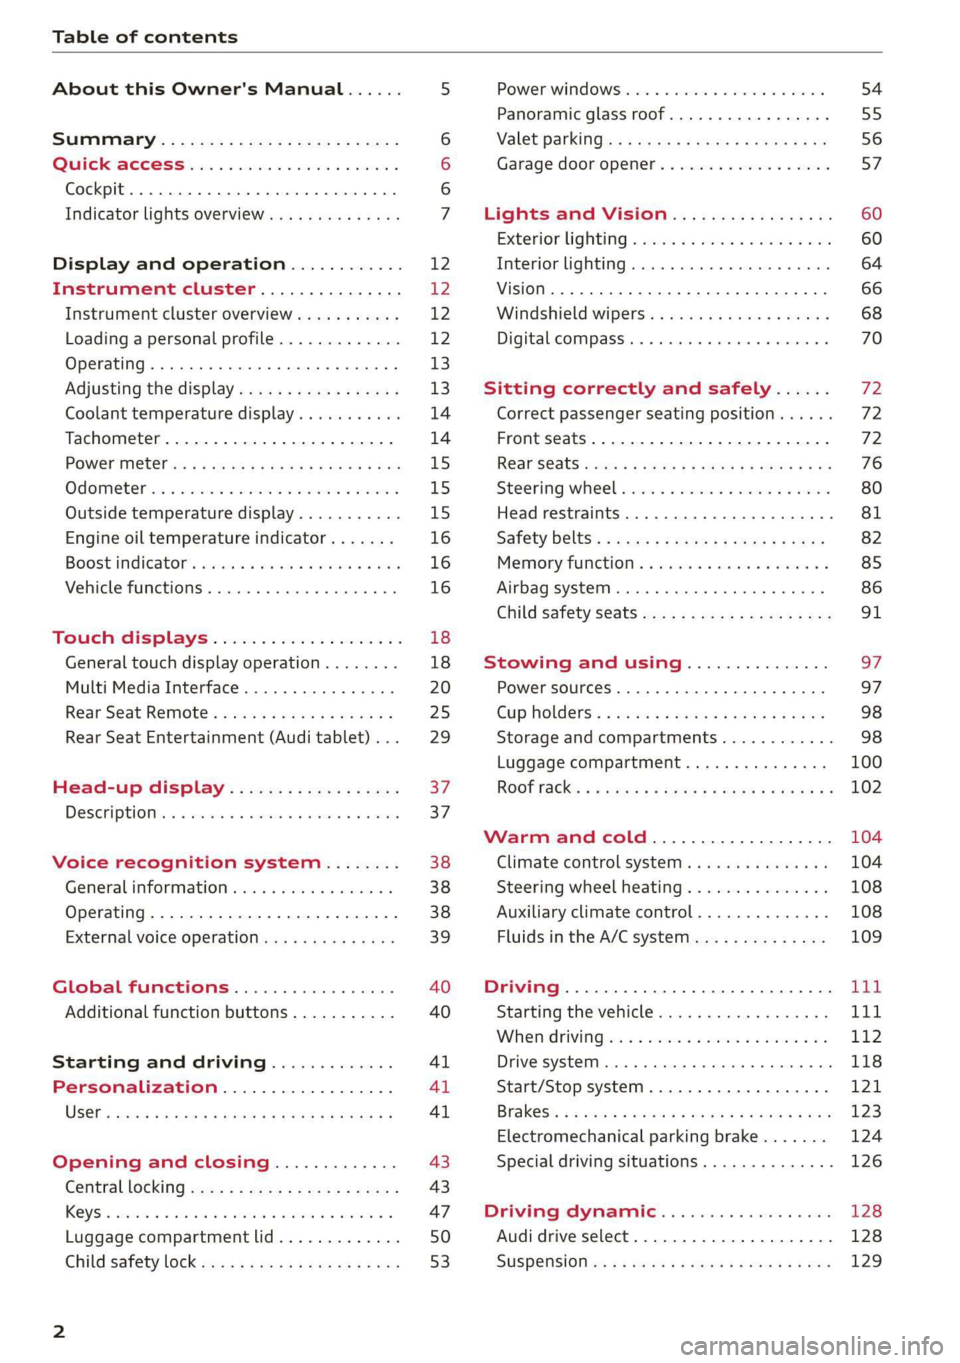
Table of contents
About this Owner's Manual......
SUMIMALY: ; « ss6% : osen ss sean cs poe s
QC CCeS Skis: si esis a 6 ores os ewe
Cockpit... 2... ee eee eee eee
Indicator lights overview...........0.
Display and operation............
Instrument cluster...............
Instrument cluster overview...........
Loading a personal profile.............
Operating. ........ 20.00. cece eee eee
Adjusting the display.................
Coolant temperature display...........
Tachometer............. eee eee eee
POWErIMEEEr ss 5 2 sags & e eaters # eee < ae
Odometer wack «sce o sesvens we oon wo ereeees
Outside temperature display...........
Engine oil temperature indicator.......
Boost indicator’. wis as caren se owen oo ocers
Vehicle functions ..............000 00
TOUCHHAISPLAYS). w:suis 6 6 sere sx eee oo
General touch display operation........
Multi Media Interface................
Rear Seat Remote « wiws s essa ss nena ss
Rear Seat Entertainment (Audi tablet) . . .
Head-up display..................
DESCRIPTION. 6 & wisn ox saosin + & asexiue 6 v sirosius
Voice recognition system........
General information.................
Operating...............0..0..0000-
External voice operation..............
Global functions.................
Additional function buttons...........
Starting and driving.............
Personalization..................
Opening and closing.............
Cenittal locking #acx <= zene es ese s eran:
NOD
OO
13
18
18
20
25
29 37 37 38 38 38 39
40 40
4l 41 Al
Power windOwS sevice vs seca ¥ & aenios 6 v aware 54
Panoramic glass roof.............0005 55
Valet parking’: s ¢ sewn s 2 seus « eee gc oe 56
Garage door opener...........--.00-- 5H
Lights and Vision................. 60
Exterior lighting « ssscs< <2 coos 2 eeeme + aes 60
Tmterior UQhting)ecoo 6. secre» «scones 6 + euniece 64
VISION... ke eee eee 66
Windshield wipers................... 68
Digital compass............... 000 eee 70
Sitting correctly and safely...... 72
Correct passenger seating position...... 72
Front seatS 1.2... . 0. e eee eee ee eee 72
REAP SEAUS sass = = seeps © ¢ syns F = sees 7 oe 76
Steering wheel wie. <6 ese oy eee ee eee 80
Head restraints ..........0.-..0000005 81
Safety belts’: « sees + ¢ weve ss wae oe eee 82
Memory function's 5 sce << seas sv evan sx 85
Airbag system... 22... ee eee eee eee 86
Child safety seats.............2..000. 91
Stowing and using............... 97.
Power SOUrCeS ... 2... ee eee eee eee 97
Cup holders’: « ssa s ¢ sews s 5 eeies & 2 wees 98
Storage and compartments............ 98
Luggage compartment............... 100
ROOTTSCK:
« = cwwea « ¢ mee 4 2 awa ts ewe ea 102
Warm and cold................... 104
Climate control system.........-.0005 104
Steering wheel heating............... 108
Auxiliary climate control.............. 108
Fluids in the A/C system.............. 109
Driving................. 0.00.00. 00. Ltt
Starting the vehicle................0- 11
When drivingjen <2 neve se eree ve sen eos 112
Drive system... 0... eee ee eee ee 118
Start/Stop system...........--00000- 121
Brakes, « s wees + pase ss pose ss meee ss TET 123
Electromechanical parking brake....... 124
Special driving situations.............. 126
Driving dynamic.................. 128
Audi drive select...............00000. 128
SUSPENSION e « « sues g « omen 3 e eee a ¥ es 129
Page 6 of 360
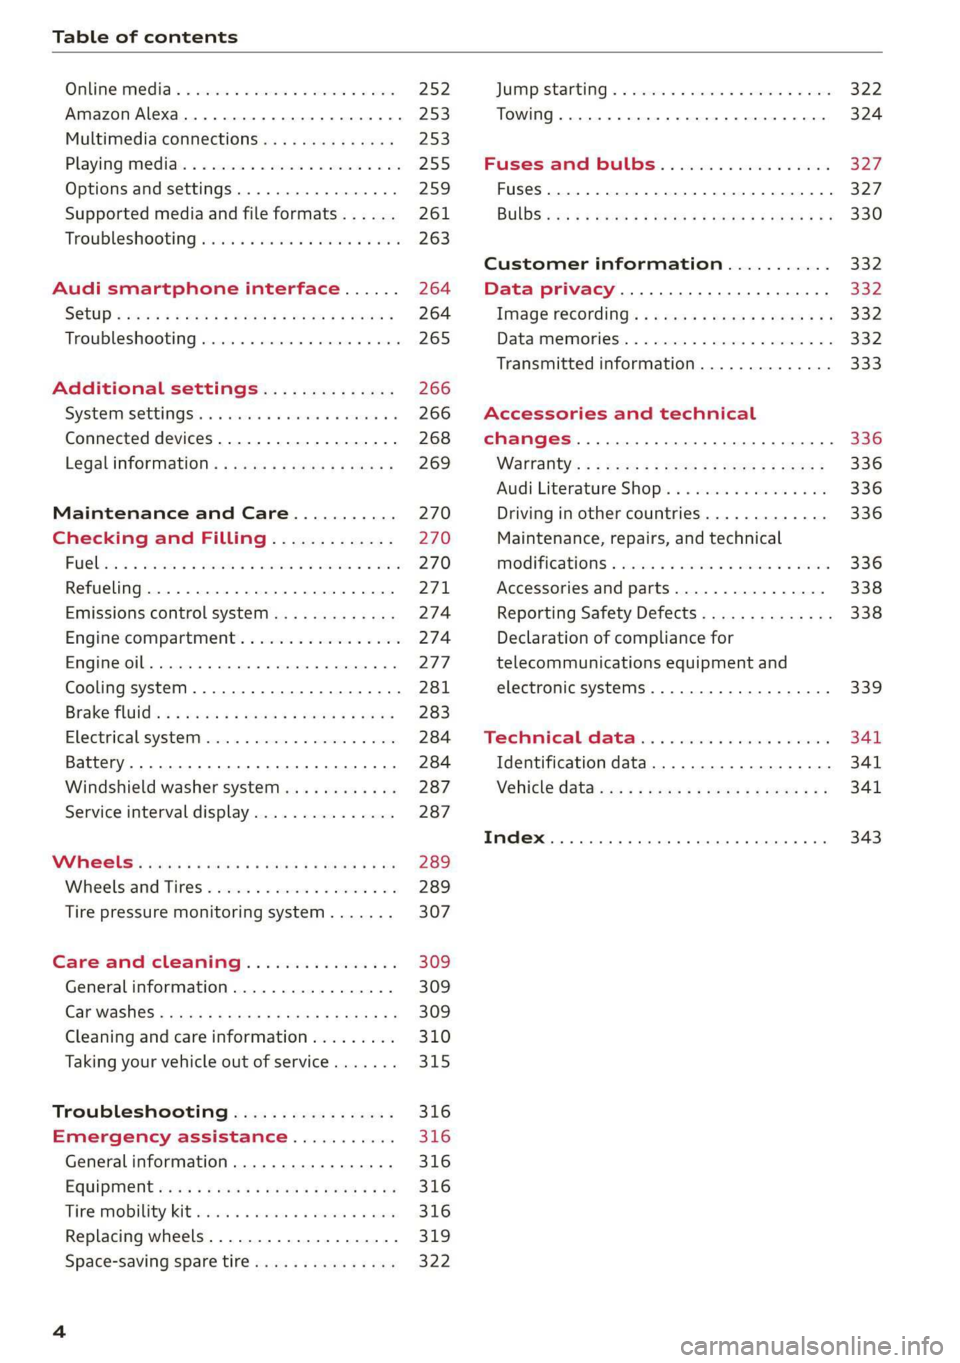
Table of contents
Online media « « cscs x « asco sw eves vw aves 252
Amazon Alexa...... cece eee ee 253
Multimedia connections.............. 253
Playing media’. « 2 ssw x 2 wei 2 o oem 2 8 oe 255
Options and settings...............6. 259
Supported media and file formats...... 261
Troubleshooting sic s 6 caine x « eve «owe 263
Audi smartphone interface...... 264
SQlUD © nsws 2 o eee ys eee os Hew ee Heresy 264
Troubleshooting..............0e0 eee 265
Additional settings.............. 266
System SettingS'. » 6 secie ss sews vc owe ee 266
Connected devices.................-. 268
Legal inforttiation’s < ses + < emus s ¢ sano 3 269
Maintenance and Care........... 270
Checking and Filling............. 270
FuUCliic oe aren a 2 sani & ¥ mimi @ wane Wo ame8e 270
Refueling..............0 cece eee eee 271
Emissions control system............. 274
Engine compartment................. 274
EMGIMeLOI Le. sussnce « » svaxace we ws snntate © & oxetinse # 4.6 277
Cooling systeM...........00 2-0 ee eee 281
Brake: fluids « ¢ sas ¢ ¢ eae = ¢ wens 5 ¢ cares 283
Electrical system. ............02-000. 284
Battery... 0.2... cece cee eee ee 284
Windshield washer system...........- 287
Service interval display............... 287
Whe ets ares ys ams i 2 ewe ¢ x masa 2 eae 289
Wheelsiand Tittes « sscis +o soins «0 senses 0 0 289
Tire pressure monitoring system....... 307
Care and cleaning................ 309
General information................. 309
Carwashes « sans 3 < aan a5 Ween 2b eee eS 309
Cleaning and care information......... 310
Taking your vehicle out of service....... 315
Troubleshooting................. 316
Emergency assistance........... 316
Generalinformation................. 316
EQuIPMENt eens « x cows o ween 3 e cies & 316
Tire MOBILEY-KIE wsscoe oo sressie ae emcosie wo sees 316
Replacing wheels................-00. 319
Space-saving spare tire............... 322
JUIMIPESTANEING 5 x exces ow canes @ a someees vo eee 322
TOWING... cece eee 324
Fuses and bulbs.................. 327
Fuses... 00... ccc eee eee eee 327
BUILDS sss s ¢ ware 5% Soom 5 2 cores Bee gee 330
Customer information........... 332
Data privacy...............00.0 eee 332
Image recording.............eee eee 332
Dataamemoniess. « o swscs s 2 wean a arene « 2 6 332
Transmitted information.............. 333
Accessories and technical
CHANGe|S.... 1... eee eee 336
Warranty’: « = sce « = seme us cemes § g eee e 336
Audi Literature Shop...............4. 336
Driving in other countries 336
Maintenance, repairs, and technical
MOGITICATIONS « sesso: os soni & 4 menace 4 & omer 336
Accessories and parts..............-. 338
Reporting Safety Defects.............. 338
Declaration of compliance for
telecommunications equipment and
electronic systems............---00005 339
Fechnnicalidata... . 6 ccsen ss ess oe meee 341
Identification data................... 341
Nehicle data ac»: » s seus «2 sews gy aes ge 341
INdeX. 16. ees 343
Page 21 of 360
4N0012721BD
Touch displays
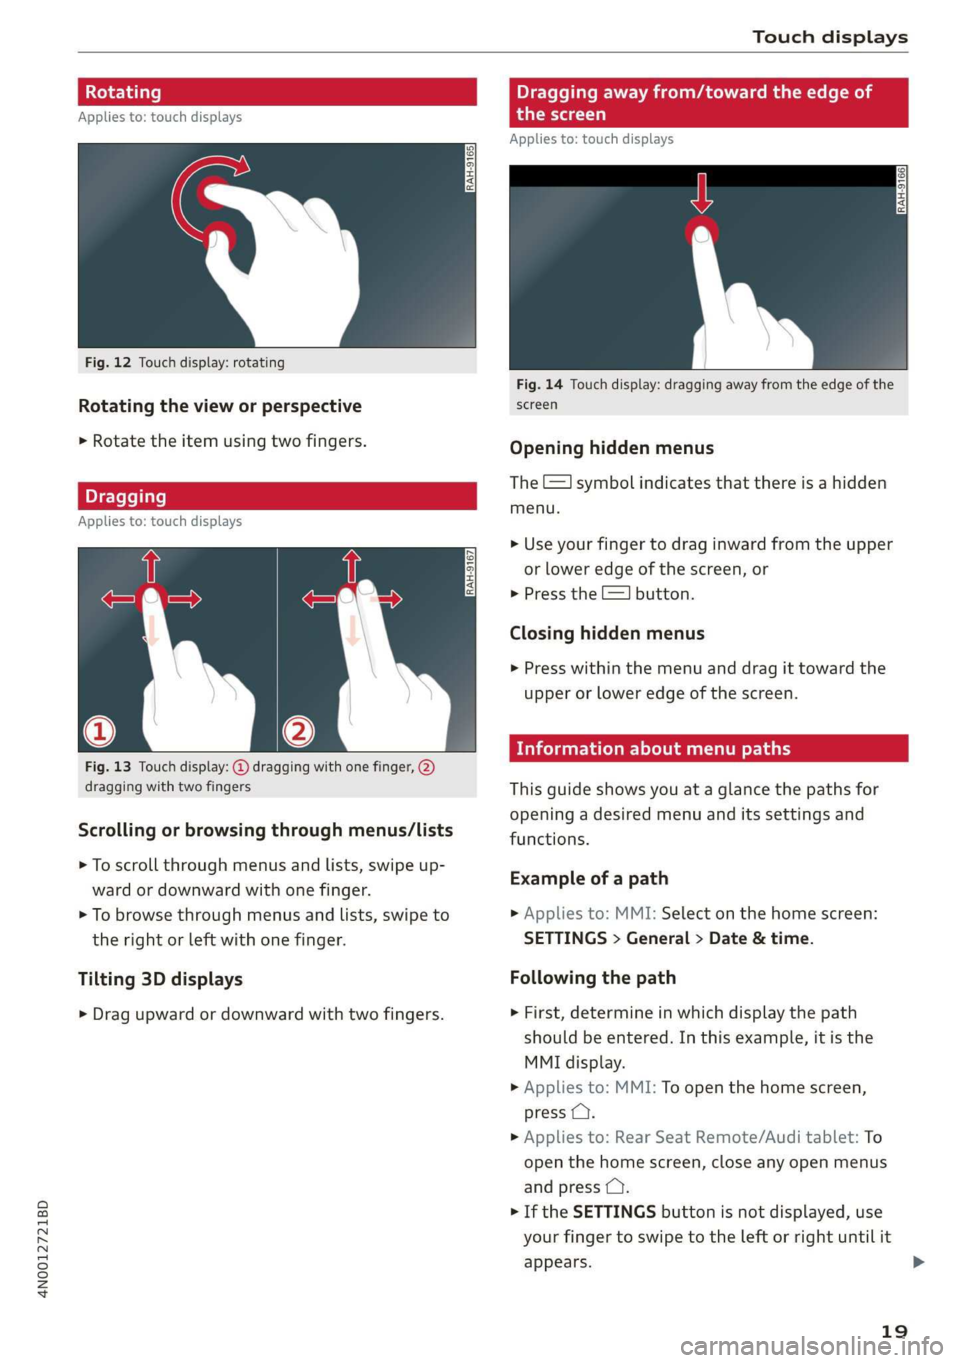
Rotating
Applies to: touch displays
Fig. 12 Touch display: rotating
Rotating the view or perspective
> Rotate the item using two fingers.
Dragging
Applies to: touch displays
Fig. 13 Touch display: @ dragging with one finger, @
dragging with two fingers
Scrolling or browsing through menus/lists
> To scroll through menus and lists, swipe up-
ward or downward with one finger.
> To browse through menus and lists, swipe to
the right or left with one finger.
Tilting 3D displays
> Drag upward or downward with two fingers.
Dragging away from/toward the edge of
the screen
Applies to: touch displays
Fig. 14 Touch display: dragging away from the edge of the
screen
Opening hidden menus
The E=] symbol indicates that there is a hidden
menu.
>» Use your finger to drag inward from the upper
or lower edge of the screen, or
> Press the =] button.
Closing hidden menus
> Press within the menu and drag it toward the
upper or lower edge of the screen.
icleueleClae cola Ue rary
This guide shows you at a glance the paths for
opening a desired menu and its settings and
functions.
Example of a path
> Applies to: MMI: Select on the home screen:
SETTINGS > General > Date & time.
Following the path
> First, determine in which display the path
should be entered. In this example, it is the
MMI display.
>» Applies to: MMI: To open the home screen,
press ().
> Applies to: Rear Seat Remote/Audi tablet: To
open the home screen, close any open menus
and press (.
> If the SETTINGS button is not displayed, use
your finger to swipe to the left or right until it
appears.
19
>
Page 22 of 360
Touch displays
> Press the SETTINGS button.
> If the General button is not displayed, swipe
toward the left or right with one finger until it
appears.
> Press the General button.
> If the Date & time button is not displayed,
swipe upward or downward with one finger un-
tilit appears.
> Press the Date & time button.
@) Tips
If a menu or symbol is in parentheses in the
path, for example, (General) or ({23), then it is
an optional menu item that does not need to
be used in every system.
You can adjust or turn off the MMI touch display
feedback.
> Applies to: MMI: Select on the home screen:
SETTINGS > Display & brightness > MMI.
Possible settings:
— Brightness
— Touchscreen Feedback
Multi Media Interface
MeCN ACen
Audi recommends performing certain Infotain-
ment system functions, such as entering a desti-
nation, only when the vehicle is stationary. Al-
ways be prepared to stop operating the Infotain-
ment system in the interest of your safety and
the safety of other road users.
ZA WARNING
Only use the Infotainment system when road,
traffic, weather, and visibility conditions per-
mit and always in a way that allows you to
maintain complete control over your vehicle.
@ Tips
Certain functions are not available while driv-
ing.
20
Wine mela mel mela
Switching the MMI on or off
> To switch the MMI off, press and hold the
On/Off knob > page 40, fig. 31 until the up-
per
display and all Infotainment system func-
tions are switched off.
> To switch the MMI on, press the On/Off knob.
Restarting the MMI
>» Press and hold the On/Off knob for at least 10
seconds.
Switching displays on or off
> To switch the upper display off, press [Jon the
lower display.
> To switch the upper display on, touch the upper
display or press [Jon the lower display.
> To switch both displays on or off, press and hold
Co] on the lower display.
Introduction
You can display and operate Infotainment system
and vehicle functions using both of the Multi Me-
dia Interface (MMI) touch displays.
Configuration wizard
After starting for the first time, the configuration
wizard helps you to set up the vehicle, for exam-
ple to set the desired system language and con-
nect a telephone.
> Follow the instructions in the display.
> Applies to: MMI: To access the configuration
wizard at a later time, select on the home
screen: HELP > Configuration wizard.
Tool tips
Tool tips are displayed on the upper display after
starting for the first time. They introduce various
MMI functions to you.
> Follow the instructions in the display.
» Applies to: MMI: To access the tool tips at a lat-
er time, select on the home screen: SETTINGS
> Help > Show tool tips.
> Applies to: MMI: To receive other tool tips, se-
lect on the home screen: HELP > Tool tips > Ba-
sic information or Expert information.
Page 25 of 360
![AUDI A8 2020 Owners Manual 4N0012721BD
Touch displays
Using the notification center
> To open the notification center, pull the status
bar downward, or
> Press the E=] button on the status bar.
> To apply quick setting AUDI A8 2020 Owners Manual 4N0012721BD
Touch displays
Using the notification center
> To open the notification center, pull the status
bar downward, or
> Press the E=] button on the status bar.
> To apply quick setting](/img/6/57606/w960_57606-24.png)
4N0012721BD
Touch displays
Using the notification center
> To open the notification center, pull the status
bar downward, or
> Press the E=] button on the status bar.
> To apply quick settings, press the respective
symbol (@).
> To obtain additional information about a notifi-
cation, press it.
> To delete a notification, pull it toward the right
edge of the screen.
> If there are more than four notifications in the
notification center, the older notifications will
be hidden. To display the older notifications,
drag
your finger upward on the screen.
Setting displayed content
You can set whether some notifications should be
displayed.
> To set the displayed content, press &@, or
> Applies to MMI: Select on the home screen:
SETTINGS > Notifications.
> Select and confirm which notifications should
be displayed.
Possible quick settings
Symbol Description
Apply sound settings
Open menu settings
Manage connected devices
Manage personal profiles
Set date and time
= Set displayed content in the noti-
fication center
Depending on the vehicle equipment, you can op-
erate various functions in the function bar.
Description
Switch Start/Stop system on or
off
Applies to: Plug-in hybrid drive:
Selecting the driving mode
Symbol Description
Opens the garage door opener
function
Press: adjust sunshade
Press and hold: convenience
opening and closing
Press: shows settings for the
head-up display
Press and hold: switches the
head-up display on or off
Press: switches the upper display
on or off
Press and hold: switches both dis-
plays on or off
Shortcuts
By creating shortcuts, you have quick access to
various items, such as radio stations, frequently
used contacts, or vehicle settings.
Adding shortcuts
The «++ buttons in the upper display indicate, for
example, if a selected radio station can be added
to the shortcuts. Depending on the context, you
may also be able to add items from a list to the
shortcuts.
> Press «+» or press and hold an item ina list.
> Press Save as a shortcut. The selected item will
be added to the shortcuts on the lower display
and
displayed as a tile.
Using shortcuts
> Press the ac! @) > page 21, fig. 15 button in the
function bar on the lower screen. The saved
shortcuts will be displayed or hidden.
> To access the stored function, press the respec-
tive tile.
Moving or deleting shortcuts
> Press and hold a shortcut on the lower display.
> To adjust the order of the shortcuts, drag a
shortcut to the desired location.
> To delete a shortcut, press ®.
23
Page 27 of 360
4N0012721BD
Touch displays
Accepting suggested words or selecting
entries from the results list
> To accept a suggested word (2) or select an en-
try from the results list @), press on it.
> To display more content in the results list, drag
your finger upward or downward on the screen.
Setting the input language or keyboard
layout
> Applies to MMI: Select on the home screen:
SETTINGS > Language & keyboard > Keyboard.
> To define additional input languages, press the
© button.
> To change the keyboard layout for an input lan-
guage, press >. For example, you can select be-
tween QWERTZ and QWERTY.
Rear Seat Remote
Applies to: vehicles with Rear Seat Remote
With Rear Seat Remote, you can control conven-
ience and Infotainment system functions in the
rear of the vehicle, such as the climate control
system or the media playback in the vehicle.
ZA WARNING
— As the driver, do not allow usage of the Rear
Seat Remote to distract you from driving, as
this could increase the risk of an accident.
For example, do not reach behind you while
driving to operate the Rear Seat Remote.
— The Rear Seat Remote can only be operated
when the vehicle is stationary or when the
remote is securely positioned in the desig-
nated holder in the vehicle. Like all loose ob-
jects, it could be thrown through the vehicle
and
cause serious injuries in a collision. If
the Rear Seat Remote is not in the designat-
ed holder, it must always be securely stowed
while driving.
— Do not use any wireless devices on the front
seats within range of the airbags while driv-
ing. Also read the warnings in the chapter
> page 86.
— The Rear Seat Remote can become hot while
charging. Pay attention to the housing and
display temperature, and be careful when
removing the Rear Seat Remote from the
holder.
— There are magnets located on the back of
the Rear Seat Remote and in the designated
holder. For people with pacemakers, the
electromagnetic radiation may impair pace-
maker function. Always maintain a mini-
mum distance of approximately 6 in (15 cm)
from the magnets.
CG) Note
— Always follow the information found in 9®
in General information on page 216.
— Protect the Rear Seat Remote against pro-
longed exposure to direct sunlight.
— Extremely high or low temperatures that
can occur inside vehicles can damage the
Rear Seat Remote and/or impair the device
performance. Never leave your Rear Seat
Remote in the vehicle in extremely high or
low temperatures.
— Protect the Rear Seat Remote from coming
into contact with any fluids.
G) Tips
— Please note that the Rear Seat Remote can
be used only when the ignition is switched
on and within range of your vehicle's active
Wi-Fi hotspot.
— Please note that a Wi-Fi connection does
not automatically make it possible to use
the
Internet. For additional information,
see the chapter > page 216.
— When playing online media sources, there
may be longer loading times or restrictions
on media playback, depending on the Inter-
net connection or the Wi-Fi usage (for ex-
ample, if there is intensive usage by multi-
ple devices on the hotspot).
— Signals from Bluetooth devices and Wi-Fi
hotspots within range of the vehicle may
impair the vehicle Wi-Fi services. If multiple
Bluetooth devices and Wi-Fi hotspots are
within range of the vehicle, it may cause re-
duced data transfer rates, connection inter-
ruptions, or limitations when streaming me-
dia.
25
Page 28 of 360
![AUDI A8 2020 Owners Manual Touch displays
Lea TN]
Applies to: vehicles with Rear Seat Remote
Lt
=.
S
Fig. 19 Rear Seat Remote: overview
[RAH-9143]
@ Microphone
@ Volume button (decrease/mute)
@® Volu AUDI A8 2020 Owners Manual Touch displays
Lea TN]
Applies to: vehicles with Rear Seat Remote
Lt
=.
S
Fig. 19 Rear Seat Remote: overview
[RAH-9143]
@ Microphone
@ Volume button (decrease/mute)
@® Volu](/img/6/57606/w960_57606-27.png)
Touch displays
Lea TN]
Applies to: vehicles with Rear Seat Remote
Lt
=.
S
Fig. 19 Rear Seat Remote: overview
[RAH-9143]
@ Microphone
@ Volume button (decrease/mute)
@® Volume button (increase)
@ Speaker
©) Display
Using the holder
Applies to: vehicles with Rear Seat Remote
[RAH-9144)
Fig. 20 Rear center armrest/full-length center console:
Rear Seat Remote holder
Depending on the equipment, the Rear Seat Re-
mote may be located in the rear center armrest
or on the full-length center console.
Removing the Rear Seat Remote
> To release the Rear Seat Remote, press the A
button @.
26
>» Remove the Rear Seat Remote from the holder
using both hands > A\ in Introduction on
page 25.
Securing the Rear Seat Remote
> Hold the Rear Seat Remote in both hands so
that the volume buttons @) and @) > page 26,
fig. 19 face upward.
> Carefully press the Rear Seat Remote toward
the holder until the Rear Seat Remote locks in-
to place.
Charging the battery
Applies to: vehicles with Rear Seat Remote
Requirement: the ignition must be switched on.
> To charge the battery, secure the Rear Seat Re-
mote in the holder > page 26. The battery will
charge automatically.
@) Note
The Rear Seat Remote battery is permanently
installed and may only be replaced by an au-
thorized Audi dealer or authorized Audi Serv-
ice Facility. If the battery replacement is not
done correctly, it may cause malfunctions and
increase the risk of damaging the Rear Seat
Remote.
@ Tips
— Batteries have a limited service life. If the
operating time decreases significantly, the
battery should be replaced. Contact an au-
thorized Audi dealer or authorized Audi
Service Facility if you need a new battery.
— The Rear Seat Remote is equipped with an
intelligent battery management system to
provide a long battery service life. There-
fore, the battery may not be charged to its
full capacity, especially when temperatures
are high or low.
Page 31 of 360
4N0012721BD
Touch displays
Rear Seat Remote
Dimensions (height x width x depth) 3.39 in x 6.38 in x 0.43 in (86 mm x 162 mmx
11 mm)
Weight
0.58 lbs (261 g)
Rear Seat Entertainment
(Audi tablet)
Introduction
Applies to: vehicles with Audi tablet
You can control available sources in the vehicle
(such as the radio) using the Audi tablet and lis-
ten to them through the vehicle speakers or
headphones. You can also display vehicle infor-
mation (such as the next oil change service). The
Audi tablet also has applications and functions
that are not related to the vehicle.
ZA WARNING
— As the driver, do not allow usage of the Audi
tablet to distract you from driving, as this
could increase the risk of an accident. For
example, do not reach behind you while
driving to operate the Audi tablet.
— Children in rear-facing child safety seats in
the rear: remove the Audi tablet from the
backrest on the front seat to reduce the risk
of
injury. Read the instructions in the chap-
ter > page 91.
— The Audi tablet can only be operated when
the vehicle is stationary or when it is secure-
ly positioned in the designated holder in the
vehicle. Like all loose objects, it could be
thrown through the vehicle and cause seri-
ous injuries in a collision. If the Audi tablet
is not in the designated holder, it must al-
ways be securely stowed while driving.
— Do not use any wireless devices on the front
seats within range of the airbags while driv-
ing. Also read the warnings in the chapter
=> page 86.
— The back of the Audi tablet can become hot
while charging. Pay attention to the housing
temperature, and be careful when removing
the Audi tablet from the holder.
@) Note
— Always follow the information found in >®
in General information on page 216.
— Protect the Audi tablet against prolonged
exposure to direct sunlight.
— Extremely high or low temperatures that
can occur inside vehicles may damage the
Audi tablet or impair its performance. Never
leave your Audi tablet in the vehicle in ex-
tremely high or low temperatures.
— Protect the Audi tablet from coming into
contact with any fluids.
G) Tips
— If the Audi tablet is used when the ignition
is switched off or outside of the range of the
MMI, then only the non-vehicle applications
and functions will be available.
— Vehicle settings are only possible through
the MMI.
— Please note that a Wi-Fi connection does
not automatically make it possible to use
the
Internet. For additional information,
see the chapter > page 216.
— The Audi tablet makes it possible to access
services from external providers. Permanent
availability cannot be guaranteed, because
that depends on the service provider.
— When playing online media sources, there
may be longer loading times or restrictions
on media playback, depending on the Inter-
net connection or the Wi-Fi usage (for ex-
ample, if there is intensive usage by multi-
ple devices on the hotspot, such as tablets
or laptops).
— The Audi tablet has an anti-theft protection
feature: it can only connect to the MMI of
the associated vehicle. Also, the Audi tablet
will be disabled if it has not been connected
to the MMI for longer than 30 days. To ena-
ble it again, connect the Audi tablet to the
29
>
Page 33 of 360
4N0012721BD
Touch displays
Securing the Audi tablet
Requirement: the two buttons @) ° fig. 24 must
be in the retracted position.
> Hold the Audi tablet in both hands during the
entire process.
» Engage the Audi tablet at the contact strip @
> fig. 25.
> Carefully press the Audi tablet toward the Audi
tablet holder @) > fig. 25 until the Audi tablet
locks into place audibly.
@ Tips
If the Audi tablet is not in its holder and is ex-
posed to extremely high or low temperatures,
it may turn off automatically for safety rea-
sons.
Tilting the holder
Applies to: vehicles with Audi tablet
wy
RAH-8642|
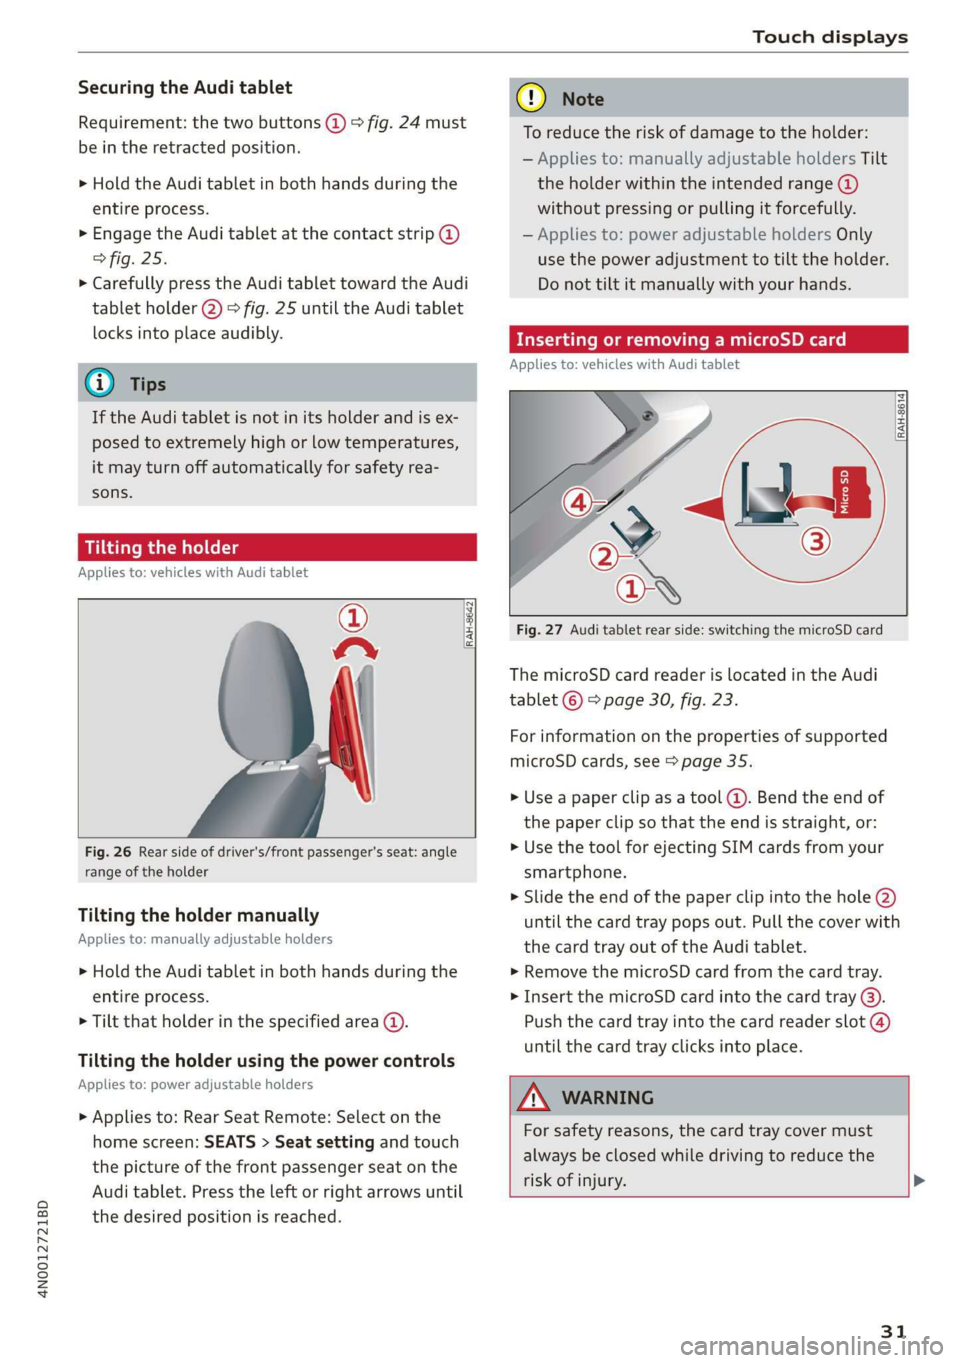
Fig. 26 Rear side of driver's/front passenger's seat: angle
range of the holder
Tilting the holder manually
Applies to: manually adjustable holders
> Hold the Audi tablet in both hands during the
entire process.
> Tilt that holder in the specified area @).
Tilting the holder using the power controls
Applies to: power adjustable holders
> Applies to: Rear Seat Remote: Select on the
home screen: SEATS > Seat setting and touch
the picture of the front passenger seat on the
Audi tablet. Press the left or right arrows until
the desired position is reached.
® Note
To reduce the risk of damage to the holder:
— Applies to: manually adjustable holders Tilt
the holder within the intended range @)
without pressing or pulling it forcefully.
— Applies to: power adjustable holders Only
use the power adjustment to tilt the holder.
Do not tilt it manually with your hands.
Inserting or removing a microSD card
Applies to: vehicles with Audi tablet
RAH-8614 fi
Fig. 27 Audi tablet rear side: switching the microSD card
The microSD card reader is located in the Audi
tablet © > page 30, fig. 23.
For information on the properties of supported
microSD cards, see > page 35.
» Use a paper clip as a tool (@). Bend the end of
the paper clip so that the end is straight, or:
> Use the tool for ejecting SIM cards from your
smartphone.
> Slide the end of the paper clip into the hole @)
until the card tray pops out. Pull the cover with
the card tray out of the Audi tablet.
» Remove the microSD card from the card tray.
> Insert the microSD card into the card tray @).
Push the card tray into the card reader slot @)
until the card tray clicks into place.
AN WARNING
For safety reasons, the card tray cover must
always be closed while driving to reduce the
risk of injury. >
31
Page 35 of 360
4N0012721BD
Touch displays
Menus and symbols
Applies to: vehicles with Audi tablet
emsa || | cea
Rats ® SETTINGS
Cy
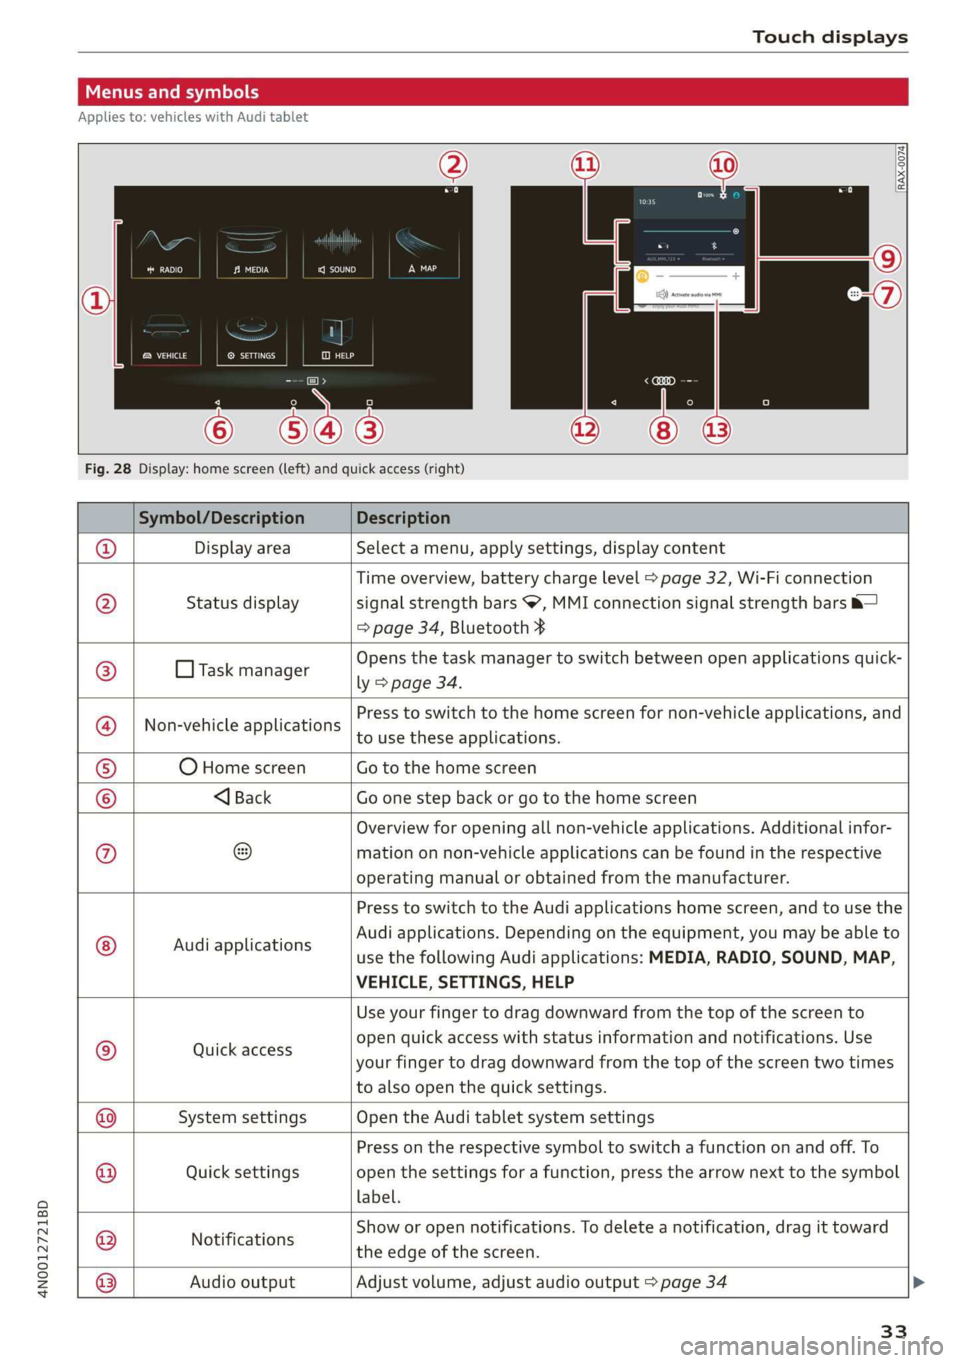
Fig. 28 Display: home screen (left) and quick access (right)
Symbol/Description Description
Display area Select a menu, apply settings, display content
Status display
Time overview, battery charge level > page 32, Wi-Fi connection
signal strength bars , MMI connection signal strength bars &—
=> page 34, Bluetooth ¥
O Task manager
Opens the task manager to switch between open applications quick-
ly > page 34.
Non-vehicle applications
Press to switch to the home screen for non-vehicle applications, and
to use these applications.
O Home screen Go to the home screen
®@
Ef
©|e|
©
|}
<1 Back Go one step back or go to the home screen
Overview for opening all non-vehicle applications. Additional infor-
mation on non-vehicle applications can be found in the respective
operating manual or obtained from the manufacturer.
© Audi applications
Press to switch to the Audi applications home screen, and to use the
Audi applications. Depending on the equipment, you may be able to
use the following Audi applications: MEDIA, RADIO, SOUND, MAP,
VEHICLE, SETTINGS, HELP
Quick access
Use your finger to drag downward from the top of the screen to
open quick access with status information and notifications. Use
your finger to drag downward from the top of the screen two times
to also open the quick settings.
@|
©
System settings Open the Audi tablet system settings
Quick settings
Press on the respective symbol to switch a function on and off. To
open the settings for a function, press the arrow next to the symbol
label.
Notifications
Show or open notifications. To delete a notification, drag it toward
the edge of the screen.
@|O|]
©
Audio output
Adjust volume, adjust audio output > page 34
33