car stand AUDI Q2 2021 Owner´s Manual
[x] Cancel search | Manufacturer: AUDI, Model Year: 2021, Model line: Q2, Model: AUDI Q2 2021Pages: 364, PDF Size: 87.77 MB
Page 4 of 364
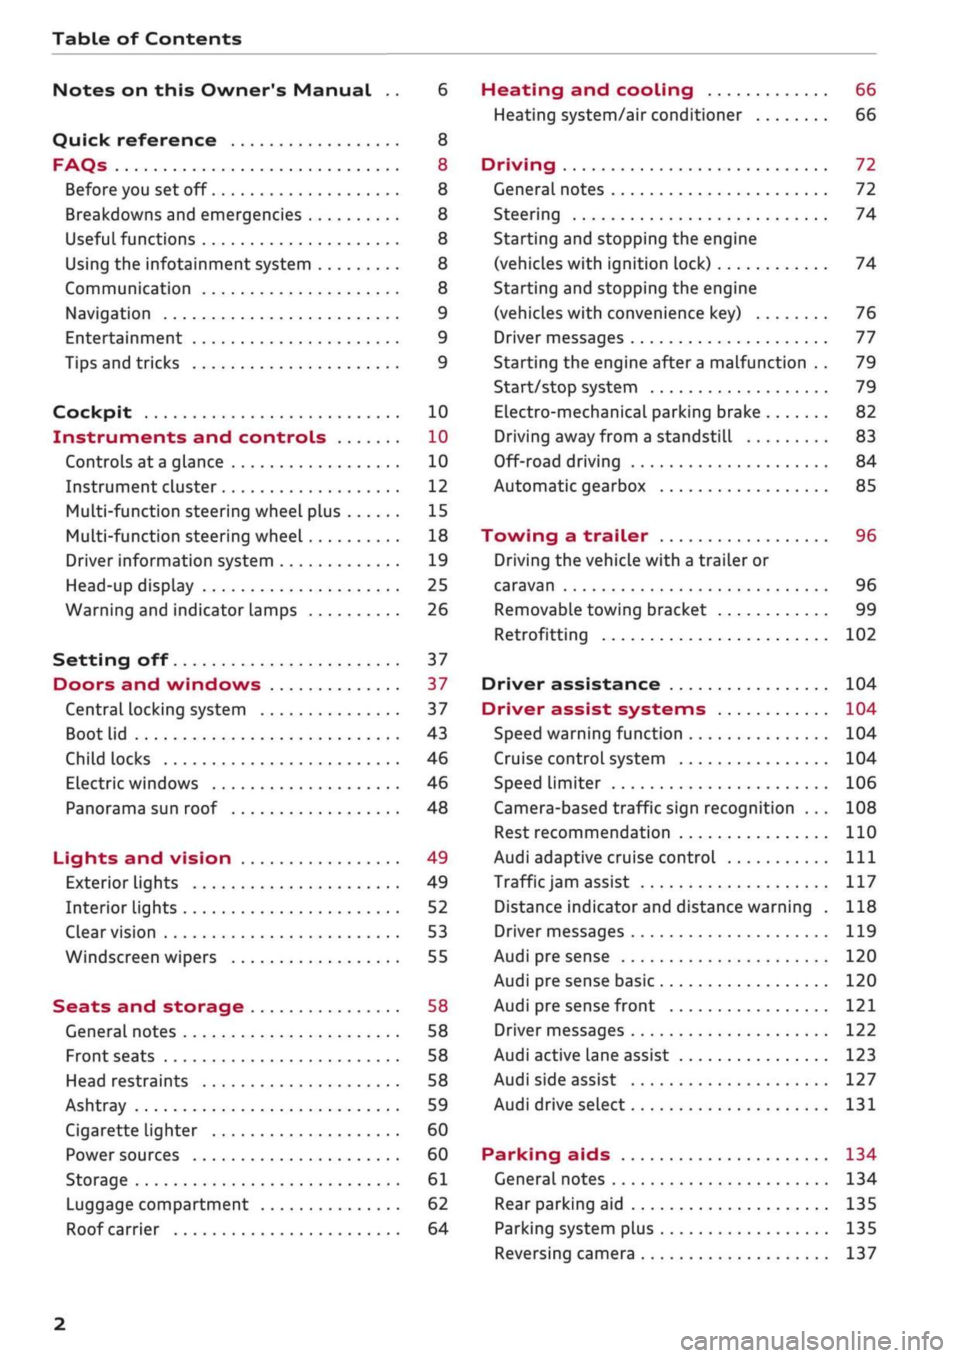
Table of Contents
Notes on this Owner's Manual .. 6
Quick reference 8
FAQs 8
Before you set off 8
Breakdowns and emergencies 8
Useful functions 8
Using the infotainment system 8
Communication 8
Navigation 9
Entertainment 9
Tips and tricks 9
Cockpit 10
Instruments and controls 10
Controls at a glance 10
Instrument cluster 12
Multi-function steering wheel plus 15
Multi-function steering wheel 18
Driver information system 19
Head-up display 25
Warning and indicator lamps 26
Setting off 37
Doors and windows 37
Central locking system 37
Boot lid 43
Child locks 46
Electric windows 46
Panorama sun roof 48
Lights and vision 49
Exterior lights 49
Interior lights 52
Clear vision 53
Windscreen wipers 55
Seats and storage 58
General notes 58
Front seats 58
Head restraints 58
Ashtray 59
Cigarette lighter 60
Power sources 60
Storage 61
Luggage compartment 62
Roof carrier 64
Heating and cooling 66
Heating system/air conditioner 66
Driving 72
General notes 72
Steering 74
Starting and stopping the engine
(vehicles with ignition lock) 74
Starting and stopping the engine
(vehicles with convenience key) 76
Driver messages 77
Starting the engine after a malfunction . . 79
Start/stop system 79
Electro-mechanical parking brake 82
Driving away from a standstill 83
Off-road driving 84
Automatic gearbox 85
Towing a trailer 96
Driving the vehicle with a trailer or
caravan 96
Removable towing bracket 99
Retrofitting 102
Driver assistance 104
Driver assist systems 104
Speed warning function 104
Cruise control system 104
Speed limiter 106
Camera-based traffic sign recognition ... 108
Rest recommendation 110
Audi adaptive cruise control
Ill
Traffic
jam assist 117
Distance indicator and distance warning . 118
Driver messages
119
Audi pre sense 120
Audi pre sense basic 120
Audi pre sense front 121
Driver messages 122
Audi active lane assist 123
Audi side assist 127
Audi drive select 131
Parking aids 134
General notes 134
Rear parking aid
135
Parking system plus 135
Reversing camera 137
2
Page 34 of 364
Instruments and controls
When the vehicle has gathered speed you will al
so hear
a
warning chime.
Applies to: vehicles with manual gearbox
© Note
For further information on the seat belts
•=>
page 275.
©-•
Steering lock
| Do not drive vehicle: steering defective
There is a malfunction in the electronic steering
lock. The ignition can no longer be switched on.
Do not have the vehicle towed away, because you
won't be able to steer it. Obtain professional as
sistance.
^3
Steering lock: system fault! Please contact
workshop
There is a malfunction in the electronic steering
lock.
Drive to a qualified workshop soon and have the
fault rectified.
A WARNING
Your vehicle must not be towed if there is a
fault in the electronic steering Lock - risk of
accident!
-=*>
Engine start system
H
Engine start
system:
system fault! Please
contact workshop
Do not switch off the ignition; otherwise you may
not be able to switch it on again.
Drive to a qualified workshop without delay and
have the fault rectified.
3
Engine start
system:
system fault! Please
contact workshop
There is a malfunction in the engine start system.
Drive to a qualified workshop soon and have the
fault rectified.
jBy
Clutch:
fault. Please contact workshop
There is a permanent malfunction in the clutch.
The transmissible torque is reduced. You can
con
tinue driving, but avoid placing an excessive load
on the clutch. Do not slip the clutch for too
long,
for example when driving away on a slope, tow
ing a trailer or when parking. Drive to a qualified
workshop soon and have the fault rectified.
Q}
Clutch: overheating. Please adapt driving
style
There is a malfunction in the clutch. The trans
missible torque is reduced. You can continue
driving,
but avoid placing an excessive load on
the clutch. Do not slip the clutch for too
long,
for
example when driving away on a slope, towing a
trailer or when parking. The indicator lamp will
go out when the transmission capability of the
clutch has been restored completely.
^
Engine stopped while vehicle is moving
| Engine stopped: brake servo and power
steering not possible
There is a malfunction in the engine or fuel sup
ply system.
Greater strength is required to steer and brake
the vehicle if the engine stops while the vehicle is
coasting.
Carefully try to bring the coasting
vehi
cle safely to a standstill out of the way of moving
traffic. Obtain professional assistance.
A WARNING
Greater strength is required to brake the
vehi
cle if the engine stops while the vehicle is
moving - risk of accident! Greater strength
will be required to steer the vehicle unless the
power steering is still providing assistance.
The power steering may still be available if
the vehicle is still coasting with the ignition
switched on (and the vehicle battery charge is
sufficient).
32
Page 46 of 364
Doors and windows
Power-operated boot lid
Applies to: vehicles with power-operated boot lid
The
boot lid can be opened and closed automati
cally.
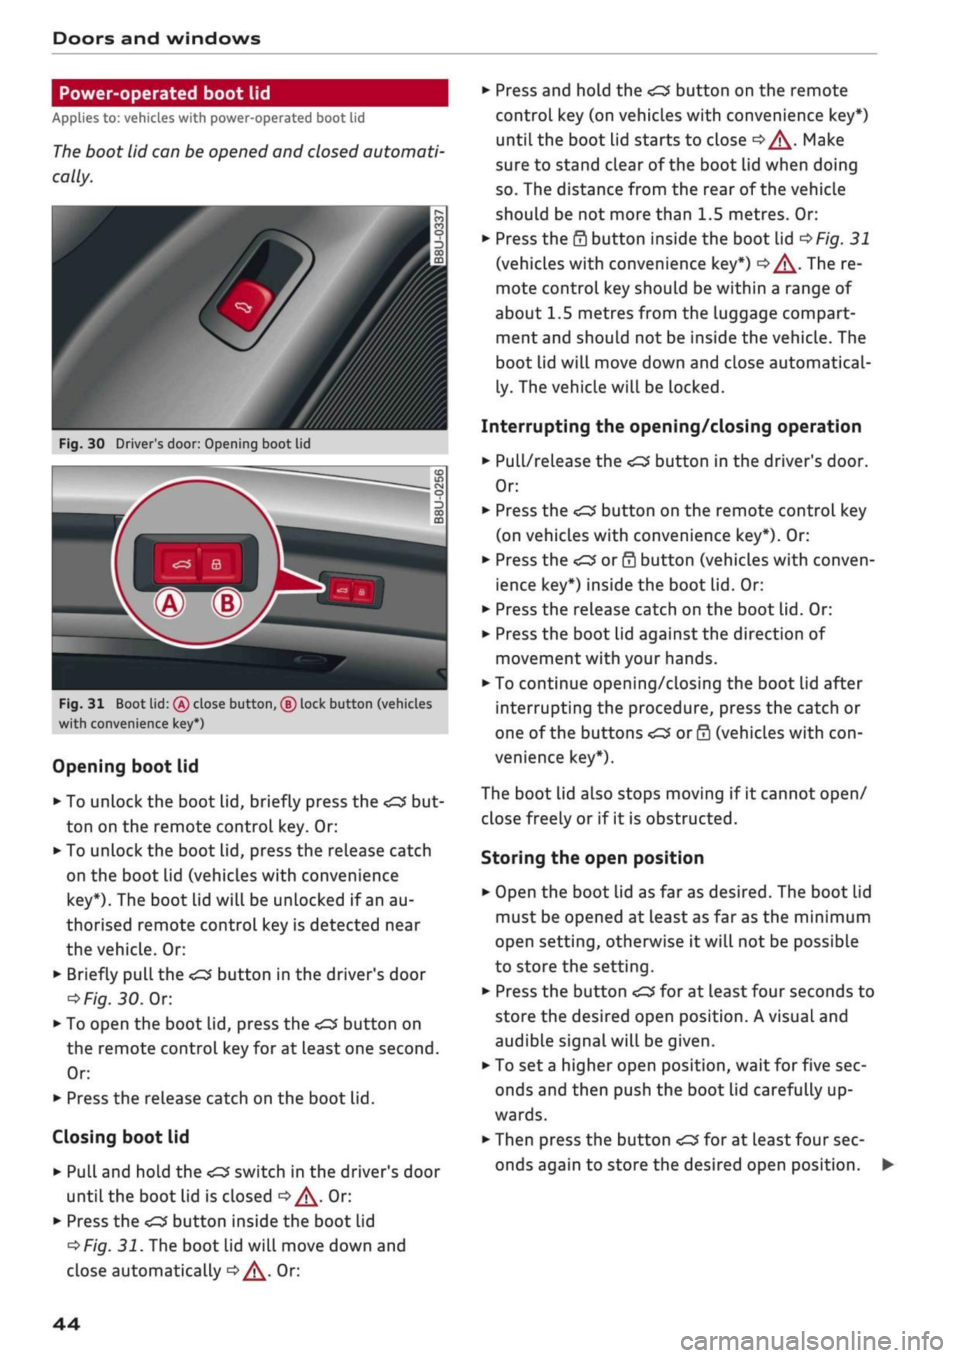
Fig.
30 Driver's door: Opening boot lid
Fig.
31 Boot lid:
(Â)
close button, ® lock button (vehicles
with convenience key*)
Opening boot lid
•
To unlock the boot lid, briefly press the
ton on the remote control key. Or:
•
To unlock the boot lid, press the release catch
on the boot Lid (vehicles with convenience
key*).
The boot lid will be unlocked if an au
thorised remote control key is detected near
the vehicle. Or:
•
Briefly
pulL
the
<£3
button in the driver's door
oFig.
30.
Or.
*•
To open the boot lid, press the
<^>'
button on
the remote control key for at least one second.
Or:
•
Press the release catch on the boot lid.
Closing boot lid
• Pull and hold the
<£3
switch in the driver's door
until the boot lid is closed
o/^.
Or:
•
Press the
«
button inside the boot lid
^>Fig.
31. The boot lid will move down and
close automatically
^^.
Or:
•
Press and hold the
<£3
button on the remote
control key (on vehicles with convenience key*)
until the boot lid starts to close
c>^.
Make
sure to stand clear of the boot lid when doing
so.
The distance from the rear of the vehicle
should be not more than 1.5 metres. Or:
•
Press the
0
button inside the boot lid
^>Fig.
31
(vehicles with convenience key*)
|=>^.
The re
mote control key should be within a range of
about 1.5 metres from the luggage compart
ment and should not be inside the vehicle. The
boot lid will move down and close automatical
ly. The vehicle will be locked.
Interrupting the opening/closing operation
•
Pull/release the
<£3
button in the driver's door.
Or:
•
Press the
^
button on the remote control key
(on vehicles with convenience key*). Or:
•
Press the
<£3
or
0
button (vehicles with conven
ience key*) inside the boot lid. Or:
•
Press the release catch on the boot lid. Or:
•
Press the boot lid against the direction of
movement with your hands.
•
To continue opening/closing the boot lid after
interrupting the procedure, press the catch or
one of the buttons
<£2
or 0 (vehicles with
con
venience key*).
The boot lid also stops moving if it cannot open/
close freely or if it is obstructed.
Storing the open position
•
Open the boot lid as far as desired. The boot Lid
must be opened at least as far as the minimum
open setting, otherwise it will not be possible
to store the setting.
•
Press the button
<£3
for at least four seconds to
store the desired open position. A visual and
audible signaLwill be given.
• To set
a
higher open position, wait for five sec
onds and then push the boot lid carefully up
wards.
•
Then press the button
«£3
for at least four sec
onds again to store the desired open position.
44
Page 68 of 364
Heating and cooling
Heating and cooling
Heating system/air
conditioner
Description
One of the following systems may be fitted, de
pending on the equipment in your vehicle:
- Heating and ventilation system or
- Manual air conditioner* or
- Automatic air conditioner* (deluxe version)
The heating and ventilation system* heats and
ventilates the vehicle interior. The air condition
er* additionally cools and dehumidifies the air in
side the vehicle. It operates most effectively with
the windows and the panorama sun roof* closed.
If the vehicle has been standing in the sun, it may
cool down faster if
you
open the windows briefly
to let the hot air escape.
Pollution filter
The pollution filter removes impurities, such as
dust and pollen, from the air.
Key-coded settings
Various settings are stored and assigned to the
remote control key in use.
Default settings
Default settings for certain functions can be se
lected on the infotainment system.
SeLect the following on the infotainment system:
|MENU|
button
>
Car
>
left control button
>
A/C.
Supplementary heater*
Applies to: vehicles with diesel engine
The vehicle interior warms up more quickly with
the supplementary heater. The system automati
cally switches the supplementary heater on
tem
porarily as required, depending on the setting on
the vehicle heating system.
The supplementary heater function can be
switched on or off as required. SeLect the follow
ing on the infotainment system:
|MENU|
button >
Car
>
left control button
>
A/C
>
Auto supple
mentary heater.
® For the sake of the environment
I
- Switch off the cooling mode on the air
con
ditioner* by pressing the A/C button if you
wish to save
fuel.
This will also reduce emis
sions.
The LED in the button will go out
when the air conditioner is switched off.
- On vehicles with efficiency program*, you
can see how your fuel consumption is being
affected by auxiliary equipment and have
tips for improved fuel economy displayed
•=>
page 21.
- Applies to vehicles with diesel engine: The
automatic supplementary heater function
can be switched off on the infotainment sys
tem
cépage
66, Supplementary
heater*.
©
- Keep the air intake slots in front of the
windscreen clear of snow, ice and Leaves to
ensure unimpaired heating and cooling, and
to prevent the windows misting over.
- Condensation can drip off the air cooling
system*
and form a pool underneath the ve
hicle.
This is normal and does not indicate a
leak.
- If
you
notice, for instance, that the seat* or
rear window heating is not working, it may
have been temporarily switched off by the
power management function. These sys
tems will be available again as soon as
suffi
cient electrical power is available.
l
) Note
The air conditioner contains fluorinated
greenhouse gases. Further information is pro
vided on a sticker in the engine compart
ment1^.
1'
May vary in different countries
66
Page 84 of 364
Driving
Electro-mechanical
parking brake
•_ -_-
:c
2C
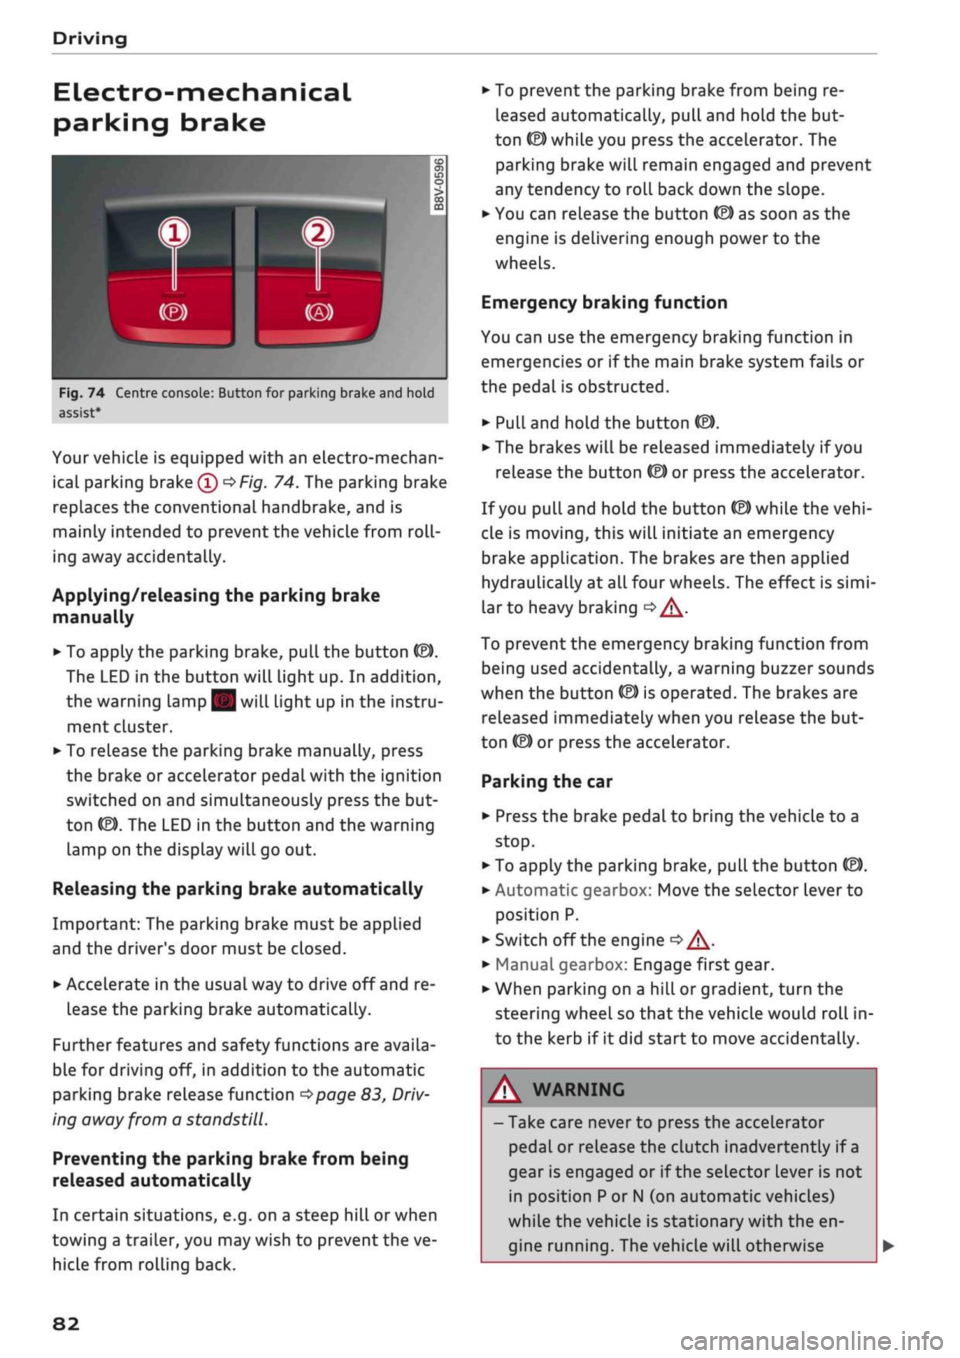
Fig.
74 Centre console: Button for parking brake and hold
assist
Your vehicle is equipped with an electro-mechan
ical parking brake
(l)
^>Fig.
74. The parking brake
replaces the conventional handbrake, and is
mainly intended to prevent the vehicle from
roll
ing away accidentally.
Applying/releasing the parking brake
manually
• To apply the parking brake, pull the button (®).
The LED in the button will light up. In addition,
the warning lamp || will light up in the instru
ment cluster.
•
To release the parking brake manually, press
the brake or accelerator pedal with the ignition
switched on and simultaneously press the but
ton
©).
The LED in the button and the warning
lamp on the display will go out.
Releasing the parking brake automatically
Important: The parking brake must be applied
and the driver's door must be closed.
•
Accelerate in the usual way to drive off and re
lease the parking brake automatically.
Further features and safety functions are availa
ble for driving off, in addition to the automatic
parking brake release function
^>page
83,
Driv
ing away from a standstill.
Preventing the parking brake from being
released automatically
In certain situations, e.g. on a steep hill or when
towing a trailer, you may wish to prevent the ve
hicle from rolling back.
•
To prevent the parking brake from being re
leased automatically, pull and hold the but
ton ©) while you press the accelerator. The
parking brake will remain engaged and prevent
any tendency to roll back down the slope.
•
You can release the button
(®)
as soon as the
engine is delivering enough power to the
wheels.
Emergency braking function
You can use the emergency braking function in
emergencies or if the main brake system fails or
the pedal is obstructed.
•
PuLl
and hold the button
«EJ.
• The brakes will be released immediately if you
release the button
®
or press the accelerator.
If
you
pull and hold the button
(®)
while the
vehi
cle is moving, this will initiate an emergency
brake application. The brakes are then applied
hydraulically at all four wheels. The effect is
simi
lar to heavy braking
<=> /\.
To prevent the emergency braking function from
being used accidentally, a warning buzzer sounds
when the button
(®)
is operated. The brakes are
released immediately when you release the but
ton (®) or press the accelerator.
Parking the car
•
Press the brake pedal to bring the vehicle to a
stop.
•
To apply the parking brake, pull the button
©).
• Automatic gearbox: Move the selector lever to
position P.
• Switch off the engine
•» A-
•
Manual gearbox: Engage first gear.
•
When parking on a hill or gradient, turn the
steering wheel so that the vehicle would roll in
to the kerb if it did start to move accidentally.
A
WARNING
- Take care never to press the accelerator
pedal or release the clutch inadvertently if
a
gear is engaged or if the selector Lever is not
in position
P
or
N
(on automatic vehicles)
while the vehicle is stationary with the en
gine running. The vehicle will otherwise
82
Page 85 of 364

Driving
start moving immediately and could cause
an accident.
- You should only use the emergency braking
function in a real emergency, for example if
the brake system were to fail or if the brake
pedal were to be obstructed. If
you
use the
emergency braking function by activating
the parking brake switch, this has the same
effect as heavy braking. Please remember
that the ESC (and the integrated ABS, EDL
and traction control functions) is still sub
ject to certain physical limits. In a corner or
in bad road or weather conditions an emer
gency stop can cause the vehicle to skid or
lose steering control.
- It is not possible to apply the parking brake
if the electrical power supply fails. In this
case,
park the vehicle on a
level
surface and
select 1st gear (manual gearbox) or move
the selector lever to position
P
(automatic
gearbox) to prevent
it
from rolling. Obtain
professional assistance.
- Always take the key with you when leaving
your
vehide
- even if
you
only intend to be
gone for
a
short time. This is especially im
portant if children are left in the car. They
might otherwise be able to start the engine,
release the parking brake or use power-op
erated equipment such as the electric
win
dows - this could lead to injuries.
- Do not leave anyone (especially children) in
the vehicle when it is locked. Locked doors
could delay assistance in an emergency, po
tentially putting lives at risk.
© Note
Applies to: vehicles with automatic gearbox
You can apply the parking brake manually or
switch on the hold assist* when stopping at
traffic lights, etc. You do not then have to
hold the car with the brake pedal, as the
brakes will stop it creeping forward while a
gear is engaged in the automatic transmis
sion.
When you drive off in the normal way,
co
the parking brake will be released automati-
<
° cally
and your vehicle will start moving
2 •=>
page 83. o < 00
O
Note
- Any slight noise which may be heard when
the parking brake is applied or released is
quite normal and no cause for concern.
- The parking brake runs an automatic test
cycle at regular intervals when the vehicle is
parked.
This may cause a slight noise, which
is normal.
- If the electrical power supply fails, it is not
possible to release the parking brake (if it
was applied) or to apply the parking brake
(if it was released)
•=> A-
Obtain professional
assistance.
Driving away from a
standstill
Various features and safety functions are availa
ble for driving off, depending on the equipment
in your vehicle.
Hill starting with the parking brake applied
Important: The driver's door must be closed.
•
To drive off more easily on a slope, apply the
parking brake and drive off just as you usually
would.
The parking brake will be released auto
matically, but not until there is enough power
at the wheels to make the vehicle move in the
desired direction.
Hill starting with the hill hold assist
The hill hold assist function makes it easier to
drive away on a slope.
Important: The driver's door must be closed and
the engine must be running.
•
To activate the hill hold assist, press and hold
the brake pedal for several seconds. The vehicle
must be on a slope and facing uphill.
When you release the brake pedal the braking
force will be maintained for
a
moment
^^
in
order to hold the vehicle and make it easier for
you to drive away. •
83
Page 89 of 364
Driving
R - Reverse gear
Reverse gear should only be engaged when the
vehicle is stationary and the engine is idling
^A-
To move the selector lever to position R, release
the selector Lever lock and at the same time
press the brake pedal.
N - Neutral
In this position, the gearbox is in neutral.
D/S - Drive/Sport (standard position for
driving forwards)
In selector Lever position D/S, the gearbox can be
operated in either the standard drive mode (D) or
in sport mode (S). To select sport mode (S), brief
ly pull the selector lever back. The gearbox will
switch back to drive mode (D) if
you
pull the se
lector lever again. The selected driving mode is
shown in the instrument cluster display.
In the standard drive mode (D), the gearbox au
tomatically selects the best gear ratio. This de
pends on the engine
load,
the road speed and the
driving style.
In Sport mode S, the gearbox makes full use of
the engine power. When accelerating the gear
shifts may be noticeable.
Press the brake pedal when moving the selector
lever from N to D/S if the vehicle is stationary or
at speeds below 2 km/h
o A-
E - Efficiency*
In efficiency mode
^>page
131, Audi drive se
lect,
the gearbox selects the next gear at lower
engine speeds. Earlier upshifts give improved
fuel economy because the full power reserves of
the engine are not used.
In this mode, an
E
is shown on the instrument
cluster display instead of
a D
^>Fig.
75.
CO
< o rN
iv
rN
t-H
o < 00
A,
WARNING
- The car can roll away even if the ignition is
switched off.
- Never move the selector lever to
R
or P
when driving, as this could cause an
acci
dent.
- In all selector lever positions (except P) the
vehicle must always be held with the foot
brake when the engine is running. This is be
cause an automatic gearbox still transmits
power even at idling speed, and the vehicle
tends to "creep" - risk of accident!
- The accelerator pedal must on no account
be pressed inadvertently when a gear is en
gaged with the vehicle stationary. The
vehi
cle could otherwise start moving immedi
ately (in some cases even if the parking
brake is engaged) and possibly cause an ac
cident.
- Do not press the accelerator while selecting
a gear with the vehicle stationary and the
engine running, as this could cause an
acci
dent.
- The driver should never get out of the
vehi
cle when the engine is running and a gear is
engaged.
If
you
have to Leave your vehicle
while the engine is running, you must apply
the parking brake and engage the parking
lock P.
- To avoid accidents, apply the parking brake
and
put
the selector lever in position
P
be
fore opening the bonnet and working on the
vehicLe with the engine running. Please ob
serve the important safety warnings
^>page
295, Working on components in
the engine compartment.
© Note
- Audi drive select: You can select the sport
program for gear changes by activating the
dynamic mode
^>page
131. The instru
ment cluster display will show
S
instead of
D.
- If the lever is moved accidentally to
N
when
driving,
take
your
foot off the accelerator
and
let
the engine speed drop to idling be
fore selecting
D
or
S
again.
- It is not possible to move the selector lever
out of position
P
if the electrical power sup
ply fails. In this case, the selector lever can
be released manually. Left-hand drive
vehicles
^page
93, right-hand drive
vehicles
<^>page
94.
87
Page 90 of 364

Driving
©
y Note
If the selector lever does not lock automati
cally, a malfunction has occurred. In this case,
the power transmission is interrupted to pre
vent the vehicle from moving unintentionally.
Proceed as follows to engage the selector lev
er lock again:
- Applies to vehicles with 6-speed gearbox:
Briefly press the brake pedal.
- Applies to vehicles with 7-speed gearbox:
Press the brake pedal. Move the selector
lever to position
P
or
N
and then select a
gear.
- If the vehicle does not move forwards or
backwards even though a gear is selected,
proceed as follows:
- If the vehicle does not move in the desired
direction,
the system may have failed to en
gage the gear correctly. In this case, press
the brake pedal and select the gear again.
- If the vehicle still does not move in the de
sired direction, a system malfunction has
occurred.
Seek professional assistance and
have the system checked.
General notes on driving an automatic
Applies to: vehicles with automatic gearbox
Fig.
77 Detail of the centre console: Selector lever with in
terlock button
Starting the engine
•
Move the selector Lever to
P
or N. In the case of
Low outside temperatures (below -10 °C), the
engine can only be started when the selector
lever is in position P.
Driving away from a standstill
•
Press and hold the brake pedal.
•
Press and hold the interlock button (the button
in the selector lever handle), set the selector
lever to the desired position (e.g. D)
^>page
86
and release the interlock button.
•
Wait for the gearbox to engage the gear (a
slight movement can be felt).
•
Release the brake and press the accelerator
There are several convenient functions to help
you drive away on gradients
^page
83.
Stopping briefly
•
Press the brake pedal to hold the vehicLe when
stationary (for instance at traffic lights).
•
Do not press the accelerator.
•
To prevent the vehicLe from rolling away, apply
the parking brake before moving off on steep
gradients
•=>^
and
•=>(]).
• As soon as you acceLerate as normal, the park
ing brake will automatically be released and
the vehicLe will start moving. Important: The
driver's door must be closed.
Stopping/parking the car
If
you
open the driver's door while the selector
lever is not in position P, the vehicle can roll
away. The message Shift to P, otherwise vehicle
can roll away. Doors do not lock if lever is not in
P. appears on vehicles with convenience key*. A
buzzer will also sound.
•
Press and hold the brake pedal
<=>
A..
•
Apply the parking brake.
•
Move the selector Lever to P.
In some situations (such as on mountain roads or
when towing a trailer or caravan) it can be advan
tageous to switch temporarily to the manual
shift programme so that the gear ratios can be
selected manually to suit the driving conditions
^>page
90.
On level ground it is sufficient to move the selec
tor lever to P. On a gradient the parking brake
should be applied first and the selector Lever
should be moved to
P ^>page
82. This reduces
the load on the locking mechanism and makes it
easier to move the selector lever out of position
P. •
88
Page 99 of 364
Towing a trailer
Tyre pressure
Check the tyre pressures on your car, and adjust
for "full
load"
conditions (refer to the sticker list
ing the tyre pressures)
^>page
307. It may also
be necessary to adjust the tyre pressures on the
trailer according to the recommendations of the
trailer manufacturer.
Exterior mirrors
Check whether you can see enough of the road
behind the trailer with the standard mirrors. If
this is not the case you should have additional
mirrors fitted. Both exterior mirrors should be
mounted on hinged extension brackets. Adjust
the mirrors to give sufficient vision to the rear.
Headlights
Before starting
a
journey, check the headlight
beam settings with the trailer hitched up. Adjust
the headlight settings if necessary.
On vehicles with halogen headlights, the
head
light range control must be adjusted, see
tapage
49.
The headlight range control will be adjusted au
tomatically if your vehicle is equipped with LED
headlights*.
Power supply
To ensure that the engine can be started again
after the ignition is switched off, the power
man
agement system
^>page
149 controls the distri
bution of electrical power and gradually switches
off unnecessary electrical equipment. The trailer
is supplied with power during this period. The
power supply to the trailer is interrupted while
the engine is being started.
Removable ball joint coupling
Vehicles with a factory-fitted towing bracket are
equipped with a removable
ball
joint coupling.
This is stored in the spare wheel well or in a sepa
rate bag on the floor of the luggage compart
ment, together with the necessary fitting instruc
tions.
We recommend having the car serviced be
tween the normal inspection intervals if it
used frequently for towing a trailer.
Trailer stabilisation system
Applies to: vehicles with towing bracket
Trailer stabilisation helps to reduce the risk of
the vehicle skidding when towing a
trailer.
When is the trailer stabilisation
system1'
activated?
Trailer stabilisation is active when the following
requirements are met:
- The ESC must be switched on
^>page
146 and
fully functional (no ESC malfunction).
- The trailer connector must be properly secured
in the vehicle socket.
- The vehicle speed must be higher than approx.
60 km/h.
How trailer stabilisation works
In many cases, the driver can stabilise a swaying
trailer by manually braking the vehicle.
However, if the ESC detects that the trailer is
swaying and this is affecting the towing vehicle,
it will automatically brake the vehicle in order to
stabilise the trailer. The indicator
Lamp Hi
will
flash in the instrument cluster. If possible, do
not turn the steering wheel at this stage.
In order to warn traffic behind you, the brake
lights will come on during this automatic braking
operation.
A trailer may sway quite considerably without the
trailer stabilisation system intervening.
If the system for activating the trailer brake
lights is defective, this will be indicated in the in
strument cluster display
opage
35,
:&
Bulb
monitor.
•
CO
rN
rN
t-H
o <
x)
Not available on vehicles for some markets.
97
Page 110 of 364
Driver assist systems
Camera-based traffic
sign recognition
Description
Applies to: vehicles with camera-based traffic sign recogni
tion
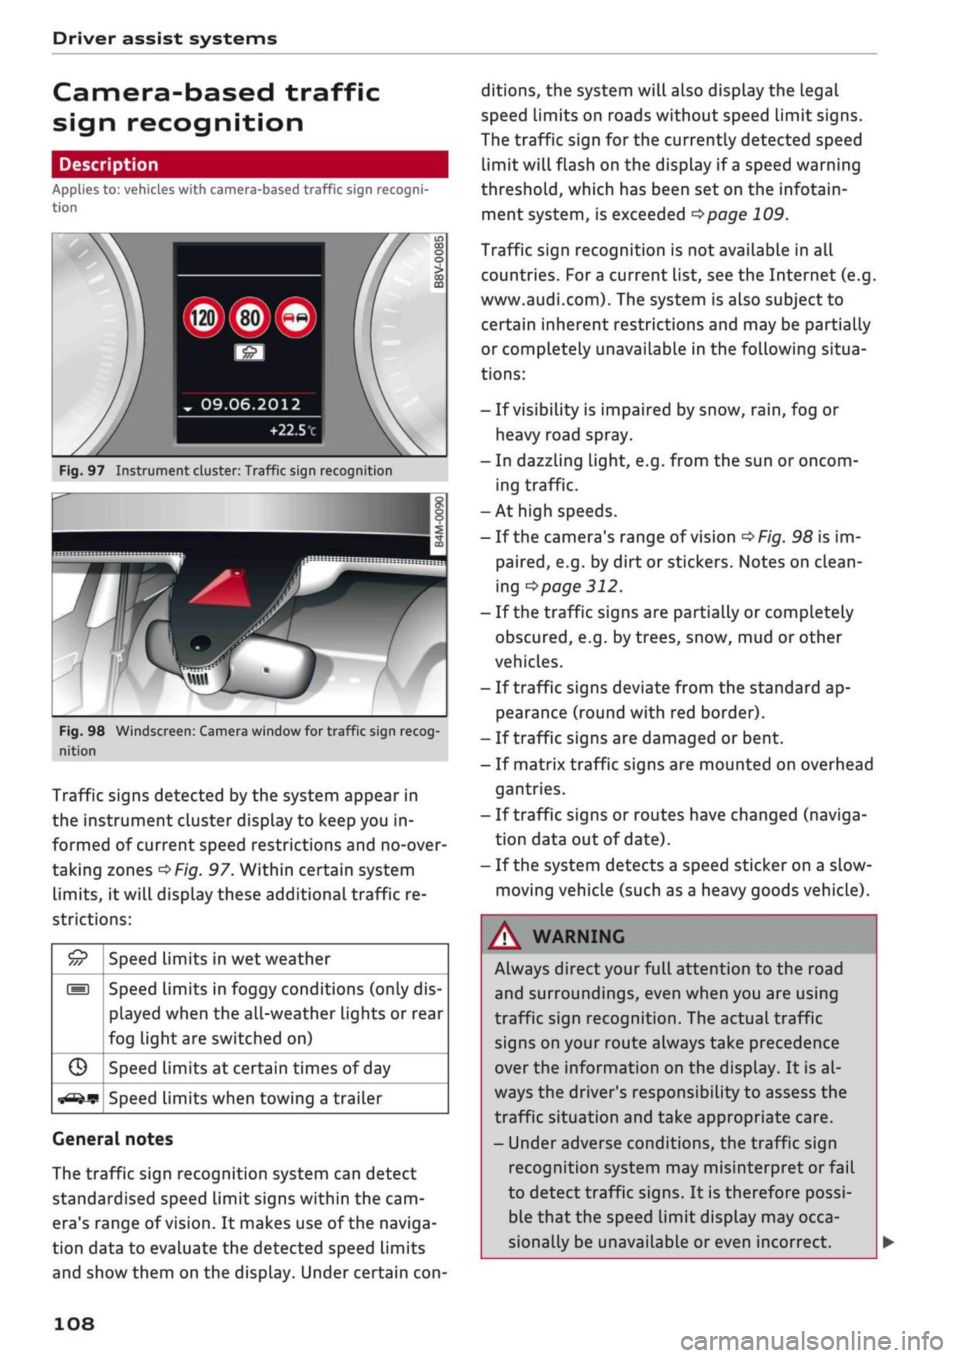
Fig.
97 Instrument cluster: Traffic sign recognition
Fig.
98 Windscreen: Camera window for traffic sign recog
nition
Traffic signs detected by the system appear in
the instrument cluster display to keep you in
formed of current speed restrictions and no-over
taking zones
^>Fig.
97. Within certain system
limits,
it will display these additional traffic re
strictions:
£5
///
s
G
^-if?
Speed limits in wet weather
Speed limits in foggy conditions (only dis
played when the all-weather lights or rear
fog light are switched on)
Speed limits at certain times of day
Speed limits when towing a trailer
General notes
The traffic sign recognition system can detect
standardised speed Limit signs within the cam
era's range of
vision.
It makes use of the naviga
tion data to evaluate the detected speed limits
and show them on the display. Under certain
con
ditions, the system will also display the legal
speed limits on roads without speed Limit signs.
The traffic sign for the currently detected speed
limit will flash on the display if
a
speed warning
threshold,
which has been set on the infotain
ment system, is exceeded
^page
109.
Traffic sign recognition is not available in all
countries. For
a
current list, see the Internet (e.g.
www.audi.com). The system is also subject to
certain inherent restrictions and may be partially
or completely unavailable in the following situa
tions:
- If visibility is impaired by snow,
rain,
fog or
heavy road spray.
- In dazzling light, e.g. from the sun or oncom
ing traffic.
-At high speeds.
- If the camera's range of vision
^>Fig.
98 is im
paired,
e.g. by dirt or stickers. Notes on clean
ing
•=>
page 312.
- If the traffic signs are partially or completely
obscured,
e.g. by trees, snow, mud or other
vehicles.
- If traffic signs deviate from the standard ap
pearance (round with red border).
- If traffic signs are damaged or bent.
- If matrix traffic signs are mounted on overhead
gantries.
- If traffic signs or routes have changed (naviga
tion data out of date).
- If the system detects a speed sticker on a slow-
moving vehicle (such as a heavy goods vehicle).
WARNING
Always direct your full attention to the road
and surroundings, even when you are using
traffic sign recognition. The actual traffic
signs on your route always take precedence
over
the information on the display. It is al
ways the driver's responsibility to assess the
traffic situation and take appropriate care.
- Under adverse conditions, the traffic sign
recognition system may misinterpret or fail
to detect traffic signs. It is therefore possi
ble that the speed limit display may occa
sionally be unavailable or even incorrect.
108