roof AUDI Q2 2021 Owner´s Manual
[x] Cancel search | Manufacturer: AUDI, Model Year: 2021, Model line: Q2, Model: AUDI Q2 2021Pages: 364, PDF Size: 87.77 MB
Page 4 of 364
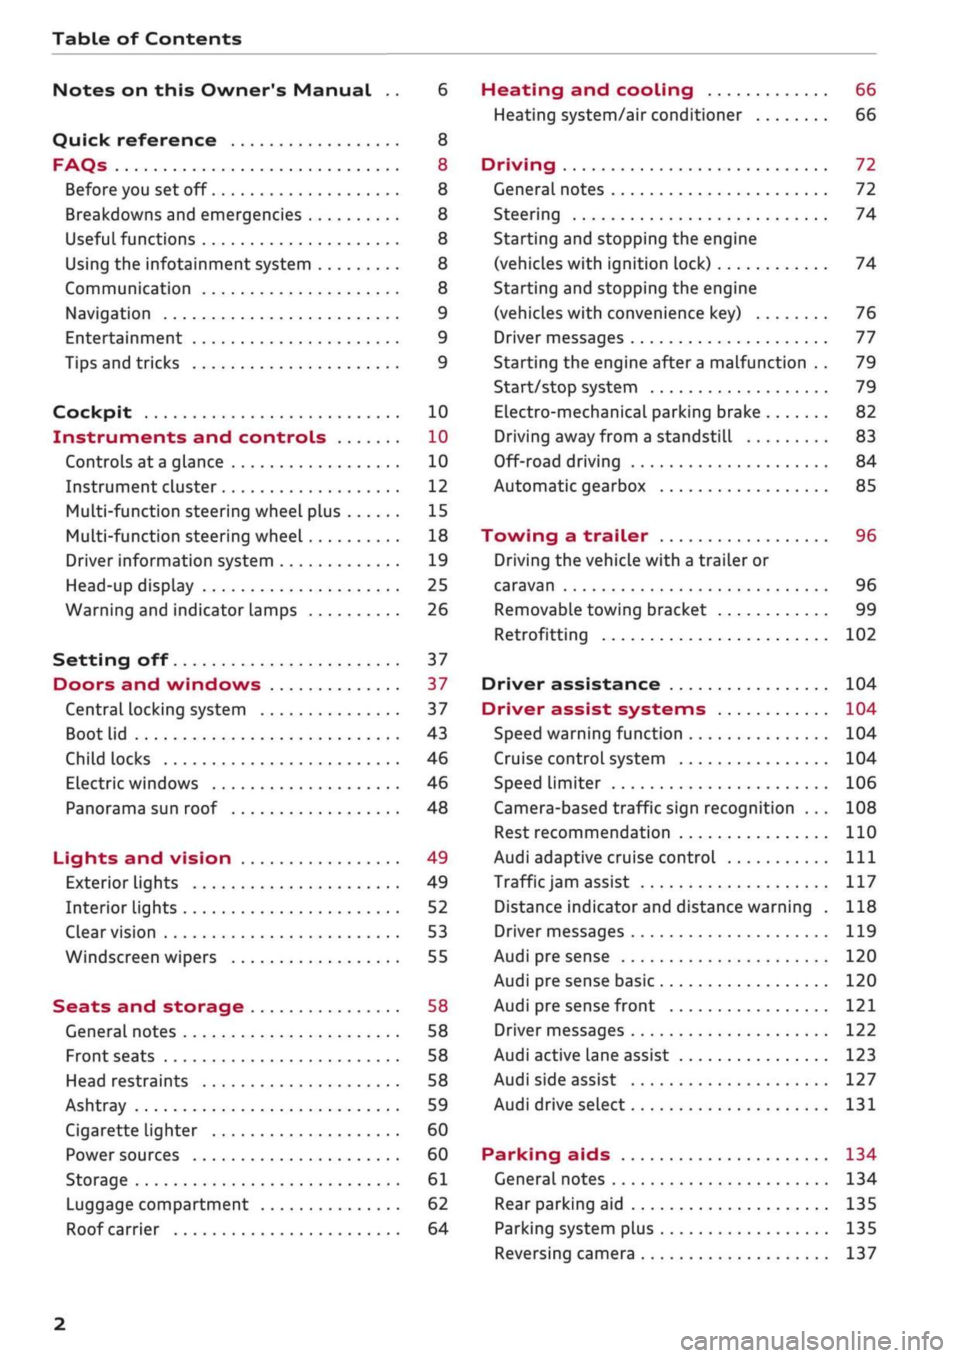
Table of Contents
Notes on this Owner's Manual .. 6
Quick reference 8
FAQs 8
Before you set off 8
Breakdowns and emergencies 8
Useful functions 8
Using the infotainment system 8
Communication 8
Navigation 9
Entertainment 9
Tips and tricks 9
Cockpit 10
Instruments and controls 10
Controls at a glance 10
Instrument cluster 12
Multi-function steering wheel plus 15
Multi-function steering wheel 18
Driver information system 19
Head-up display 25
Warning and indicator lamps 26
Setting off 37
Doors and windows 37
Central locking system 37
Boot lid 43
Child locks 46
Electric windows 46
Panorama sun roof 48
Lights and vision 49
Exterior lights 49
Interior lights 52
Clear vision 53
Windscreen wipers 55
Seats and storage 58
General notes 58
Front seats 58
Head restraints 58
Ashtray 59
Cigarette lighter 60
Power sources 60
Storage 61
Luggage compartment 62
Roof carrier 64
Heating and cooling 66
Heating system/air conditioner 66
Driving 72
General notes 72
Steering 74
Starting and stopping the engine
(vehicles with ignition lock) 74
Starting and stopping the engine
(vehicles with convenience key) 76
Driver messages 77
Starting the engine after a malfunction . . 79
Start/stop system 79
Electro-mechanical parking brake 82
Driving away from a standstill 83
Off-road driving 84
Automatic gearbox 85
Towing a trailer 96
Driving the vehicle with a trailer or
caravan 96
Removable towing bracket 99
Retrofitting 102
Driver assistance 104
Driver assist systems 104
Speed warning function 104
Cruise control system 104
Speed limiter 106
Camera-based traffic sign recognition ... 108
Rest recommendation 110
Audi adaptive cruise control
Ill
Traffic
jam assist 117
Distance indicator and distance warning . 118
Driver messages
119
Audi pre sense 120
Audi pre sense basic 120
Audi pre sense front 121
Driver messages 122
Audi active lane assist 123
Audi side assist 127
Audi drive select 131
Parking aids 134
General notes 134
Rear parking aid
135
Parking system plus 135
Reversing camera 137
2
Page 45 of 364
![AUDI Q2 2021 Owner´s Manual
Doors and windows
CO
s
rN rN
•-i
00
safelock mechanism* by using one of the follow
ing options:
•
Press the
[a]
button on the remote control key a
second time within 2 seconds. AUDI Q2 2021 Owner´s Manual
Doors and windows
CO
s
rN rN
•-i
00
safelock mechanism* by using one of the follow
ing options:
•
Press the
[a]
button on the remote control key a
second time within 2 seconds.](/img/6/40262/w960_40262-44.png)
Doors and windows
CO
s
rN rN
•-i
00
safelock mechanism* by using one of the follow
ing options:
•
Press the
[a]
button on the remote control key a
second time within 2 seconds. Or:
•
AppLies to vehicles with convenience key: Touch
the sensor on the door handle a second time
within 2 seconds. Or:
•
Turn the key in the door lock to the lock
posi
tion a second time within 2 seconds.
The alarm is triggered if
you
switch off the safe-
lock mechanism* and a door handle is then oper
ated.
To deactivate the alarm, switch on the
igni
tion or press the
[M
button on the remote control
key.
A WARNING
Do not leave anyone (especially children) in
the car if it is locked from the outside and the
safelock mechanism* is activated: the doors
and windows cannot then be opened from the
inside.
Locked doors could delay assistance in
an emergency, potentially putting lives at
risk.
© CAUTION
If
you
switch off the safelock mechanism*,
the interior monitor and tow-away protection
are automatically disabLed, and vice versa.
This means that your vehicle is no longer
completely protected against theft.
© Note
The interior monitor and tow-away protection
will only function as intended if the windows
and the panorama sun roof* are closed.
Boot Lid
Opening/closing boot lid
H AUD
Fig.
29 Boot lid: Opening (release catch)
Opening boot lid
•
Press the
ED
button on the remote control key
for at least one second, or
•
Press the release catch on the boot lid
•=>
Fig.
29.
Closing boot lid
•
Pull down the boot lid by the handle on the in
side and let it drop into the latch
oA.
A,
WARNING
- After closing the boot lid, always check that
the catch has engaged properly. The boot lid
could otherwise open suddenLy when the ve
hicle is moving - this could result in an
acci
dent.
- The boot lid must always be completely
closed when the vehicle is moving; other
wise toxic exhaust fumes can be drawn into
the interior.
- Always make sure that no-one is in the boot
lid's area of movement (especially near the
hinges) when it is moving. Risk of severe in
juries to fingers or hands!
© Note
I
When the vehicle is locked, you can unlock
the boot lid separately by pressing the
S
button on the remote control key. The boot
lid will Lock automatically when you close it
again.
43
Page 49 of 364
Doors and windows
CO
s
rN rN
•-i
00
• To set an intermediate position,
press/pulL
the
switch to the first position until the window has
reached the desired position.
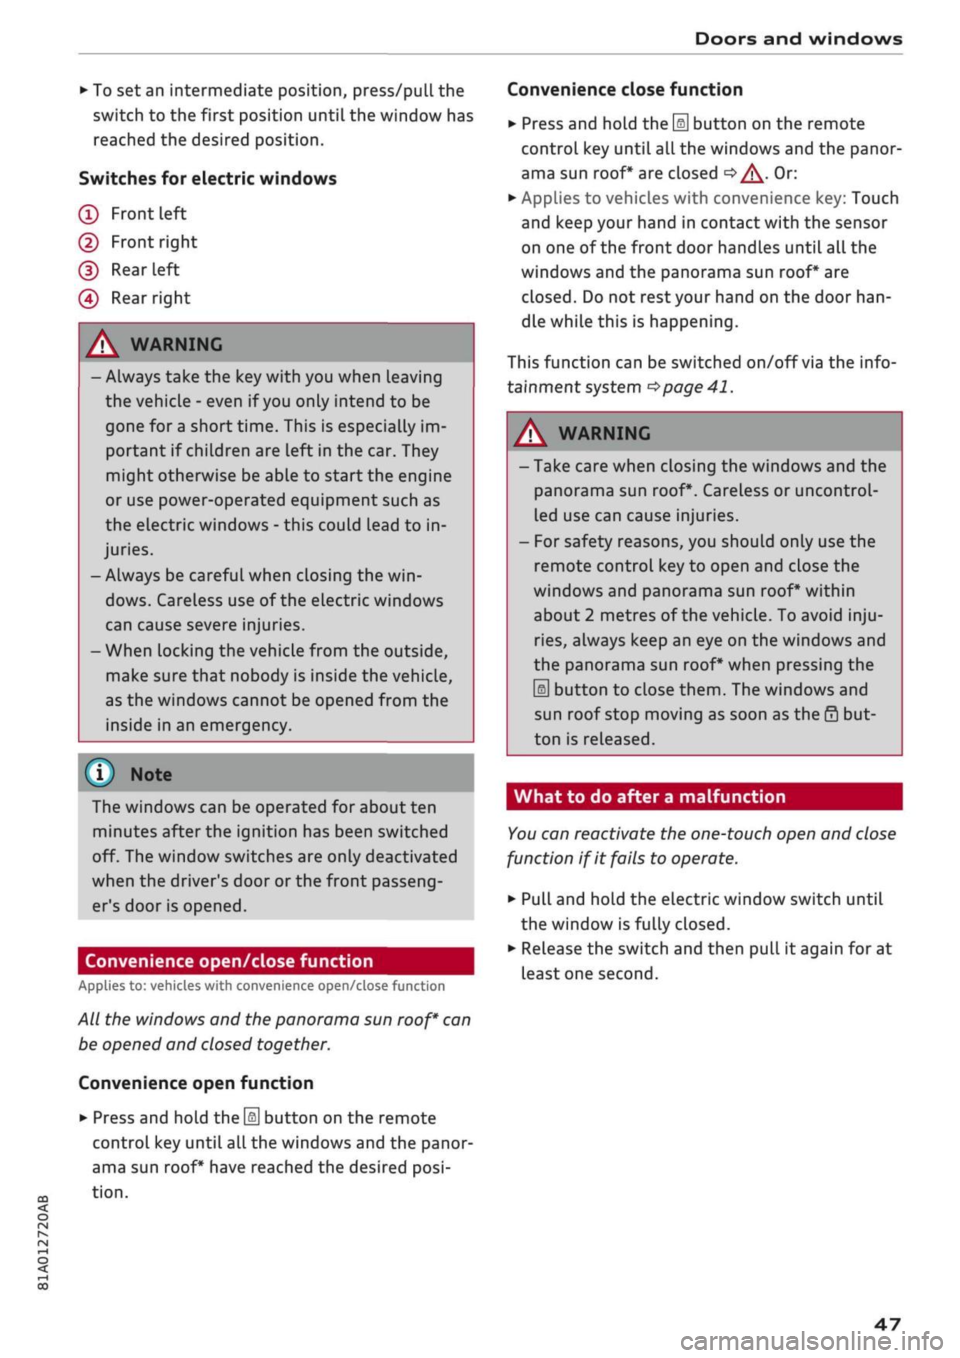
Switches for electric windows
(T)
Front left
(2) Front right
(D
Rear
left
(4) Rear right
/\
WARNING
- Always take the key with you when Leaving
the vehicle - even if
you
only intend to be
gone for a short time. This is especially im
portant if chiLdren are left in the car. They
might otherwise be able to start the engine
or use power-operated equipment such as
the electric windows - this could lead to in
juries.
- Always be careful when closing the
win
dows.
Careless use of the electric windows
can cause severe injuries.
- When locking the vehicle from the outside,
make sure that nobody is inside the vehicle,
as the windows cannot be opened from the
inside in an emergency.
© Note
The windows can be operated for about ten
minutes after the ignition has been switched
off. The window switches are only deactivated
when the driver's door or the front passeng
er's door is opened.
Convenience open/close function
Applies to: vehicles with convenience open/close function
All the windows and the panorama sun
roof*
can
be opened and closed together.
Convenience open function
•
Press and hold the
\§\
button on the remote
control key until all the windows and the panor
ama sun roof* have reached the desired
posi
tion.
Convenience close function
•
Press and hold the
\M
button on the remote
control key until all the windows and the panor
ama sun roof* are closed
c>^.
Or:
• Applies to vehicles with convenience key: Touch
and keep your hand in contact with the sensor
on one of the front door handles until
all
the
windows and the panorama sun roof* are
closed.
Do not
rest
your hand on the door
han
dle while this is happening.
This function can be switched
on/off
via the info
tainment system
•=>
page 41.
A WARNING
-Take care when closing the windows and the
panorama sun roof*. Careless or uncontrol
led use can cause injuries.
- For safety reasons, you should only use the
remote control key to open and close the
windows and panorama sun roof* within
about 2 metres of the vehicle. To avoid
inju
ries,
always keep an eye on the windows and
the panorama sun roof* when pressing the
m
button to close them. The windows and
sun roof stop moving as soon as the 0 but
ton is released.
What to do after a malfunction
You
can reactivate the one-touch open and close
function if it fails to operate.
•
Pull and hold the electric window switch until
the window is fully closed.
•
Release the switch and then pull it again for at
least one second.
47
Page 50 of 364
Doors and windows
Panorama sun roof
Description
Applies to: vehicles with panorama sun roof
1
Fig.
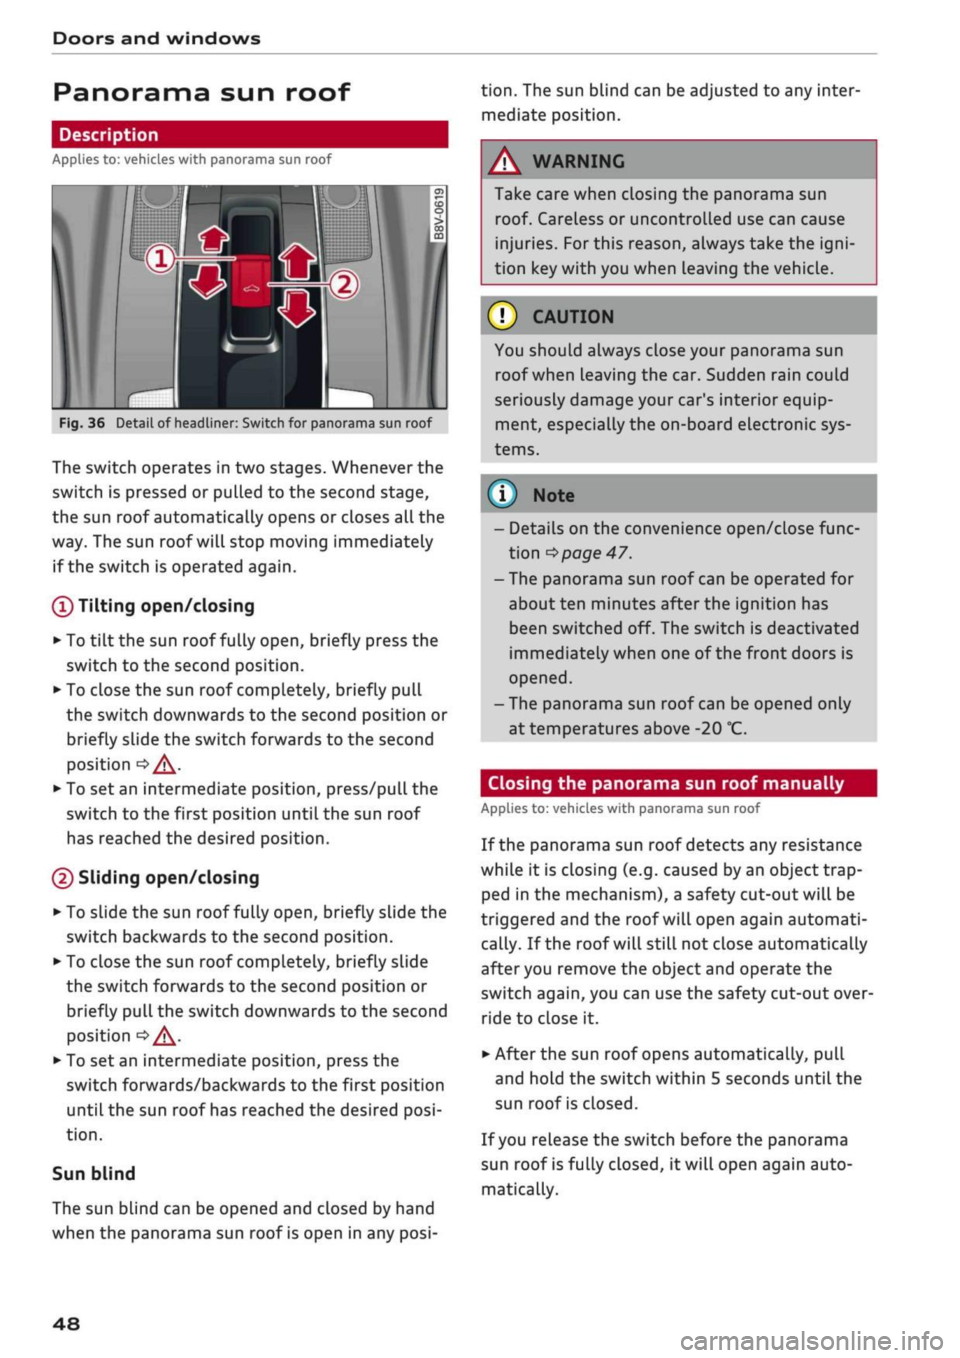
36 Detail of headliner: Switch for panorama sun roof
The switch operates in two stages. Whenever the
switch is pressed or pulled to the second stage,
the sun roof automatically opens or closes all the
way. The sun roof will stop moving immediately
if the switch is operated again.
(T)
Tilting open/closing
• To
tilt
the sun roof fully open, briefly press the
switch to the second position.
•
To close the sun roof completely, briefly pull
the switch downwards to the second position or
briefly slide the switch forwards to the second
position
•=> /\.
• To set an intermediate position, press/pull the
switch to the first position until the sun roof
has reached the desired position.
(D Sliding open/closing
•
To slide the sun roof fully open, briefly slide the
switch backwards to the second position.
•
To close the sun roof completely, briefly slide
the switch forwards to the second position or
briefly pull the switch downwards to the second
position
oA-
•
To set an intermediate position, press the
switch forwards/backwards to the first position
until the sun roof has reached the desired
posi
tion.
Sun blind
The sun blind can be opened and closed by hand
when the panorama sun roof is open in any
posi
tion.
The sun blind can be adjusted to any inter
mediate position.
Take care when closing the panorama sun
roof. Careless or uncontrolled use can cause
injuries. For this reason, always take the
igni
tion key with you when Leaving the vehicle.
© CAUTION
You should always close your panorama sun
roof when leaving the car. Sudden rain could
seriously damage your car's interior equip
ment, especially the on-board electronic sys
tems.
© Note
- Details on the convenience open/close func
tion
^>
page 47.
-The panorama sun roof can be operated for
about ten minutes after the ignition has
been switched off. The switch is deactivated
immediately when one of the front doors is
opened.
-The panorama sun roof can be opened only
at temperatures above -20
°C.
Closing the panorama sun roof manually
Applies to: vehicles with panorama sun roof
If the panorama sun roof detects any resistance
while it is closing (e.g. caused by an object trap
ped in the mechanism), a safety cut-out will be
triggered and the roof will open again automati
cally. If the roof will still not close automatically
after you remove the object and operate the
switch again, you can use the safety cut-out over
ride to close it.
• After the sun roof opens automatically, pull
and hold the switch within 5 seconds until the
sun roof is closed.
If
you
release the switch before the panorama
sun roof is fully closed, it will open again auto
matically.
48
Page 66 of 364
Seats and storage
© CAUTIOI
- If
you
need to adjust the front seats when
either of the rear backrests is folded for
wards, please take care to avoid damaging
the rear head restraints. If necessary, re
move the appropriate head restraints be
fore you slide back the front seats.
- Lower the rear head restraints before you
fold down the backrest
•=>
A in Rear head
restraints on page 59 - risk of damage!
- When returning the backrest to an upright
position,
make sure that the seat belts for
the outer rear seats are not caught up and
damaged in the catches for the backrest.
Load-through hatch
Applies to: vehicles with load-through hatch
ft
•
/ Bsa-1
j^^V^il
n^B
iV^yM
•
in
H o
• CD •
O
• >
CO
CD
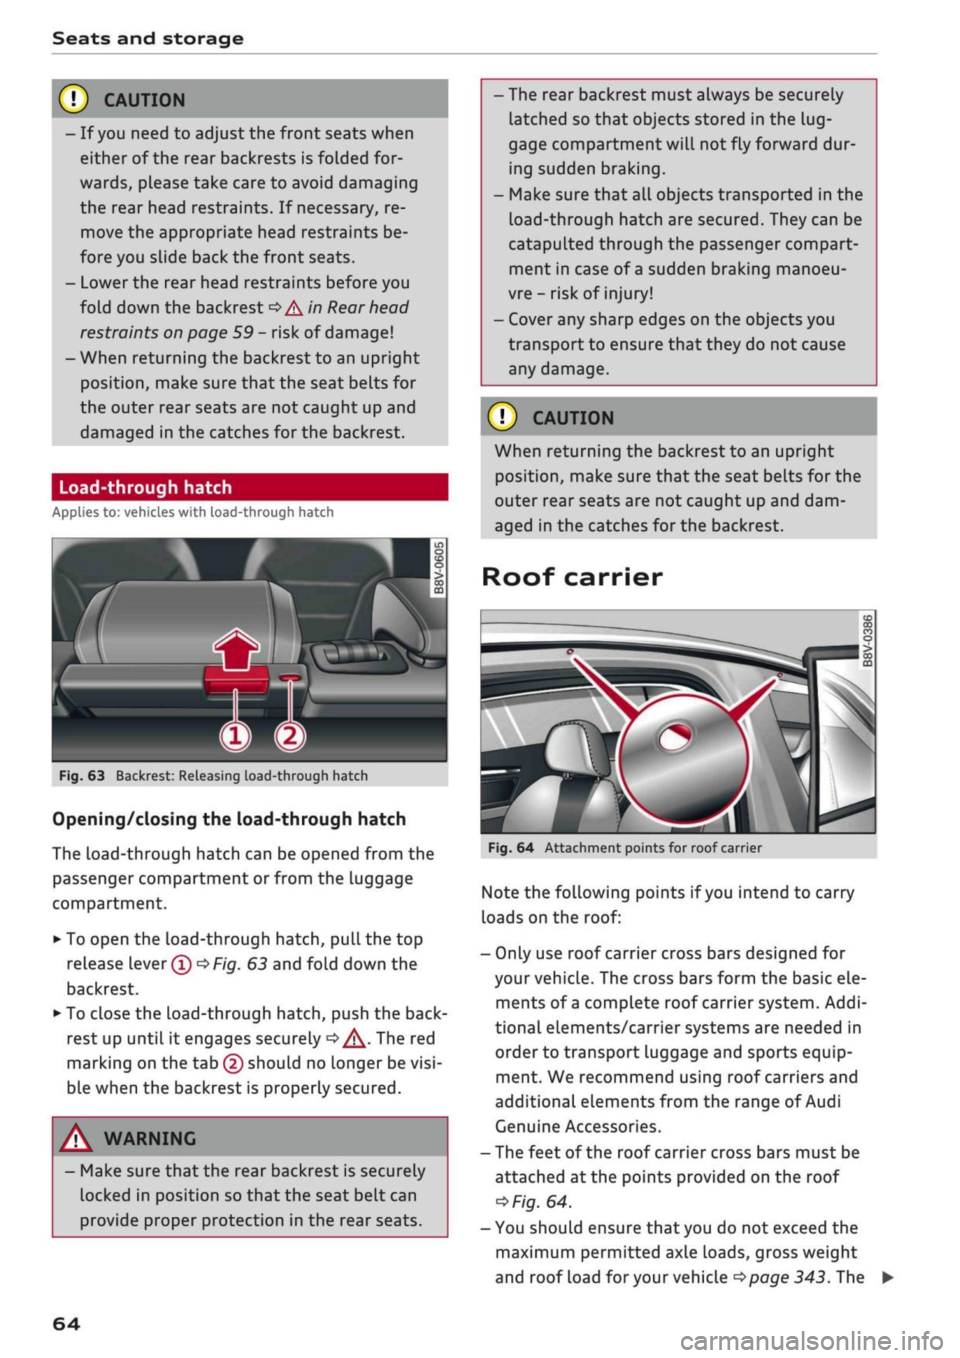
Fig.
63 Backrest: Releasing load-through hatch
Opening/closing the load-through hatch
The
Load-through
hatch can be opened from the
passenger compartment or from the luggage
compartment.
• To open the load-through hatch, pull the top
release lever®
OF/g.
63 and fold down the
backrest.
• To close the load-through hatch, push the
back
rest up until it engages securely
d>^.
The red
marking on the tab (2) should no longer be
visi
ble when the backrest is properly secured.
A WARNING
- Make sure that the rear backrest is securely
locked in position so that the seat belt can
provide proper protection in the rear seats.
- The rear backrest must always be securely
latched so that objects stored in the
lug
gage compartment
wilL
not fly forward dur
ing sudden braking.
- Make sure that all objects transported in the
Load-through
hatch are secured. They can be
catapulted through the passenger compart
ment in case of
a
sudden braking manoeu
vre - risk of injury!
- Cover any sharp edges on the objects you
transport to ensure that they do not cause
any damage.
© CAUTION
When returning the backrest to an upright
position,
make sure that the seat belts for the
outer rear seats are not caught up and dam
aged in the catches for the backrest.
Roof carrier
Fig.
64 Attachment points for roof carrier
Note the folLowing points if
you
intend to carry
loads on the roof:
- Only use roof carrier cross bars designed for
your vehicle. The cross bars form the basic ele
ments of
a
complete roof carrier system. Addi
tional elements/carrier systems are needed in
order to transport luggage and sports equip
ment. We recommend using roof carriers and
additional elements from the range of Audi
Genuine Accessories.
- The feet of the roof carrier cross bars must be
attached at the points provided on the roof
*>Fig.
64.
- You should ensure that you do not exceed the
maximum permitted axle loads, gross weight
and roof load
for
your vehicle
•=>page
343. The
64
Page 67 of 364
Seats and storage
CO
rN
rN
•-i
00
roof load limit applies to the combined weight
of the roof carrier, the additional elements and
the Load itself. Please do not exceed the maxi
mum carrying load of the carrier system you are
using.
A WARNIN
- Note the fitting instructions provided by the
manufacturer of the roof carrier system. If
you do not secure the roof carrier system
and roof load correctly, they can become
separated from the vehicle and cause an ac
cident.
- The use of
a
roof carrier system affects the
vehicle's handling by shifting the centre of
gravity and increasing susceptibility to cross
winds - risk of accident! Take extra care
when driving and adjust your speed accord
ingly.
CAUTION
- Any damage to the vehicle caused by the
use of other types of roof rack or incorrect
installation will not be covered by the facto
ry warranty. The roof carrier system must
therefore be installed exactly according to
the instructions provided.
- Please take care that the boot lid and panor
ama sun roof* do not come into contact
with the roof load when opened.
(•)
For
the sake of the environment
The increased air resistance means that the
vehicle uses more
fuel.
For this reason you
should always take off the roof carrier when it
is not in use.
65
Page 68 of 364
Heating and cooling
Heating and cooling
Heating system/air
conditioner
Description
One of the following systems may be fitted, de
pending on the equipment in your vehicle:
- Heating and ventilation system or
- Manual air conditioner* or
- Automatic air conditioner* (deluxe version)
The heating and ventilation system* heats and
ventilates the vehicle interior. The air condition
er* additionally cools and dehumidifies the air in
side the vehicle. It operates most effectively with
the windows and the panorama sun roof* closed.
If the vehicle has been standing in the sun, it may
cool down faster if
you
open the windows briefly
to let the hot air escape.
Pollution filter
The pollution filter removes impurities, such as
dust and pollen, from the air.
Key-coded settings
Various settings are stored and assigned to the
remote control key in use.
Default settings
Default settings for certain functions can be se
lected on the infotainment system.
SeLect the following on the infotainment system:
|MENU|
button
>
Car
>
left control button
>
A/C.
Supplementary heater*
Applies to: vehicles with diesel engine
The vehicle interior warms up more quickly with
the supplementary heater. The system automati
cally switches the supplementary heater on
tem
porarily as required, depending on the setting on
the vehicle heating system.
The supplementary heater function can be
switched on or off as required. SeLect the follow
ing on the infotainment system:
|MENU|
button >
Car
>
left control button
>
A/C
>
Auto supple
mentary heater.
® For the sake of the environment
I
- Switch off the cooling mode on the air
con
ditioner* by pressing the A/C button if you
wish to save
fuel.
This will also reduce emis
sions.
The LED in the button will go out
when the air conditioner is switched off.
- On vehicles with efficiency program*, you
can see how your fuel consumption is being
affected by auxiliary equipment and have
tips for improved fuel economy displayed
•=>
page 21.
- Applies to vehicles with diesel engine: The
automatic supplementary heater function
can be switched off on the infotainment sys
tem
cépage
66, Supplementary
heater*.
©
- Keep the air intake slots in front of the
windscreen clear of snow, ice and Leaves to
ensure unimpaired heating and cooling, and
to prevent the windows misting over.
- Condensation can drip off the air cooling
system*
and form a pool underneath the ve
hicle.
This is normal and does not indicate a
leak.
- If
you
notice, for instance, that the seat* or
rear window heating is not working, it may
have been temporarily switched off by the
power management function. These sys
tems will be available again as soon as
suffi
cient electrical power is available.
l
) Note
The air conditioner contains fluorinated
greenhouse gases. Further information is pro
vided on a sticker in the engine compart
ment1^.
1'
May vary in different countries
66
Page 75 of 364

Driving
instance when you can see that the next traffic
lights are red. This takes advantage of the engine
braking effect, reducing wear on the brakes and
tyres.
Emissions and fuel consumption will drop
to zero due to the overrun fuel cut-off.
Change gear early to save fuel
An effective way of saving fuel is to change up
quickly through the gears. Running the engine at
high rpm in the lower gears uses an unnecessary
amount of
fuel.
Applies to: vehicles with manual gearbox
Shift up to second gear as soon as possible. If
possible, we recommend shifting up to the next
gear at approx. 2,000 rpm.
Applies to: vehicles with automatic gearbox
Press the accelerator slowly and avoid using the
"kick-down"
feature.
Avoid driving at high speed
Avoid travelling at top speed. Fuel consumption,
exhaust emissions and noise Levels all increase
very rapidly at higher speeds. Driving at moder
ate speeds will help to save
fuel.
Do not let the engine idle for longer than
necessary
Engine idling periods are automatically reduced
on vehicles with start/stop system*. On vehicles
without a start/stop system, it is worthwhile
switching off the engine at level crossings, for in
stance, or at traffic lights with a long red phase.
The fuel saved after about 5 seconds can be
greater than the amount of fuel needed to re
start a warm engine (the exact fuel saving de
pends on the engine version).
The engine takes a very long time to warm up
when it is running at idling speed. Mechanical
wear and pollutant emissions are also especially
high during this initial warm-up phase. It is
therefore best to drive off immediately after
starting the engine. Avoid running the engine at
high speed.
o
Regular servicing
Regular servicing can establish a basis for good
iS
fuel economy before you start driving. A
well-
serviced engine gives you the benefit of im
proved fuel efficiency as well as maximum relia
bility and an enhanced resale value. A poorly
maintained engine can consume up to ten per
cent more fuel than necessary.
Avoid short trips
The engine and emission control system need to
reach their proper working temperature in order
to minimise fuel consumption and emissions.
A cold engine uses disproportionately more
fuel.
The engine only reaches its working temperature
after about four kilometres, when fuel consump
tion will return to a normal level.
Check tyre pressures
Always make sure the tyres are inflated to the
correct pressures
•=>page
306 to save
fuel.
If the
tyre pressures
are
just 0.5
bar
too Low, this can
increase the fuel consumption by as much as 5
%. Due to the greater rolling resistance, under-
inflation also increases tyre wear and impairs
handling.
Do not use winter tyres all through the year; they
will increase fuel consumption by up to 10 %.
Avoid carrying unnecessary loads
Every kilo of extra weight will increase the fuel
consumption, so it is worth checking the Luggage
compartment occasionally to make sure that no
unnecessary loads are being transported.
The roof carrier increases the air resistance of the
vehicle and should be removed when not in use.
This will save about 12 % of fuel at speeds of be
tween 60 and 75
mph.
Save electrical energy
The engine drives the alternator to generate elec
tricity. This means that fuel consumption rises
when more power is required for electrical equip
ment. Switch off electrical equipment when it is
not needed. Electrical equipment which uses a
lot of electricity includes the blower (at a high
setting), the rear window heating and the seat
heating*.
73
Page 122 of 364
Driver assist systems
This message appears if the radar sensor vision is
impaired,
e.g. by leaves, snow, heavy road spray
or dirt. Clean the sensor
<^>page
112, Fig. 101.
Distance warning: currently unavailable. See
owner's manual
This driver message will appear if the system
fails temporarily. If the fault occurs repeatedly,
drive to a qualified workshop and have the fauLt
rectified.
Fasten seat belt
The system is not fully available when the driver's
seat belt is unfastened.
Stationary object ahead
This message appears if
you
try to switch on the
system when a stationary object is located imme
diately in front of your car.
Door open
The system is not available when the vehicle is
stationary and the driver's door is open.
Audi pre sense
Introduction
Applies to: vehicles with Audi pre sense
The pre sense functions can take action to pro
tect the vehicle occupants and other road users in
certain hazardous conditions within the system
limits.
- Because the different on-board systems are
networked,
pre sense basic can detect critical
situations and take preventive action to protect
the occupants.
- The pre sense front uses the data of the radar
sensor to calculate the probability of an
acci
dent
opage
112. It can detect an impending
collision with vehicles or
pedestrians1^
(subject
to general system limitations). In this case, the
system warns the driver visually, acoustically
and,
if necessary, with a short, sharp brake ap
plication.
If necessary, it can initiate a partial or
fuLl
brake application in order to reduce the im
pact speed or, in certain circumstances, to
avoid a collision. In conjunction with pre sense
basic, the reversible tensioners on the front
seat belts are also applied if necessary. Pre
sense front is active even when the adaptive
cruise control* is switched off.
Please observe the general safety warnings
•=>
A in General notes on page 112.
© Note
- Certain pre sense functions are deactivated
when reversing.
- The functions of the pre sense system may
also be unavailable if
a
fault develops in the
ESC
system or airbag control unit.
- Please note that, if the front passenger's
airbag has been deactivated, the reversible
belt tensioner on the passenger's side will
be deactivated as
well.
- Switch off pre sense on private roads and
while the vehicle is being loaded onto a car
transporter, train or ferry, etc. This prevents
the pre sense system from taking action in
an inappropriate situation.
Audi pre sense basic
Description
Applies to: vehicles with Audi pre sense basic
The pre sense basic functions are activated at
speeds above approximately 30 km/h.
The system can activate the following functions
in certain situations:
- Seat belt tensioning (e.g. during hard braking):
The seat belts on the front seats have reversi
ble tensioners. Provided an accident does not
occur, the belts are loosened again slightly and
kept ready for activation.
- Initiation of the closure process for the
win
dows and panorama sun roof* (e.g. if the
vehi
cLe understeers or oversteers).
Audi drive select*: the activation threshold
dif
fers according to the mode selected.
x)
Not available on vehicles for some markets.
120
Page 123 of 364
Driver assist systems
Audi pre sense front
Description
Applies to: vehicles with Audi pre sense front
In certain situations and at certain speeds, pre
sense front can warn you if there is a danger of
collision with crossing
pedestrians1^
or station
ary, parked and moving vehicles, and can apply
the brakes if necessary.
Pre sense front will not react if it is not in a
posi
tion to detect the danger.
In conjunction with pre sense basic, the following
functions may be initiated, depending on how
fast the vehicle is travelling:
- Activation of reversible front seat belt tension
ers.
-Automatic closing of windows and panorama
sun
roof*.
Warnings and braking
Applies to: vehicles with Audi pre sense front
Audi
pre sense
CO
rN
rN
t-H
o <
Fig.
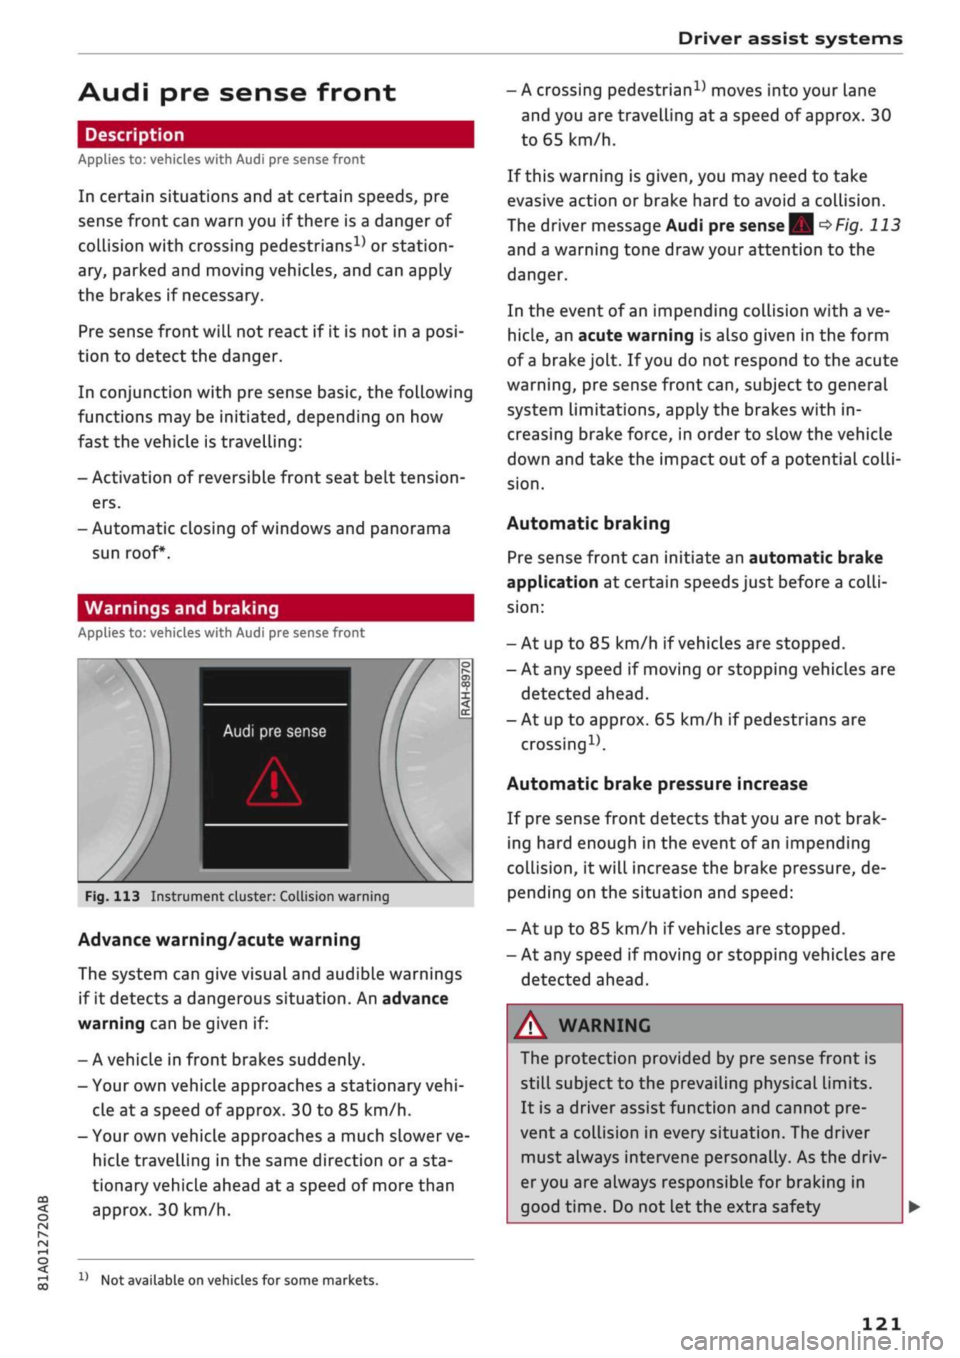
113 Instrument cluster: Collision warning
Advance warning/acute warning
The system can give visual and audible warnings
if it detects a dangerous situation. An advance
warning can be given if:
- A vehicle in front brakes suddenly.
- Your own vehicle approaches a stationary
vehi
cle at
a
speed of approx. 30 to 85 km/h.
- Your own vehicLe approaches a much slower ve
hicle travelling in the same direction or
a
sta
tionary vehicle ahead at
a
speed of more than
approx. 30 km/h.
x)
Not available on vehicles for some markets.
- A crossing
pedestrian15
moves into your lane
and you are travelling at a speed of approx. 30
to 65 km/h.
If this warning is given, you may need to take
evasive action or brake hard to avoid a collision.
The driver message Audi pre sense
| Sj
^>Fig.
113
and a warning tone draw your attention to the
danger.
In the event of an impending collision with a ve
hicle,
an acute warning is also given in the form
of
a
brake jolt. If
you
do not respond to the acute
warning,
pre sense front
can,
subject to general
system limitations, apply the brakes with in
creasing brake force, in order to slow the vehicle
down and take the impact out of
a
potential
colli
sion.
Automatic braking
Pre sense front can initiate an automatic brake
application at certain speeds just before a
colli
sion:
- At up to 85 km/h if vehicles are stopped.
- At any speed if moving or stopping vehicles are
detected ahead.
- At up to approx. 65 km/h if pedestrians are
crossing15.
Automatic brake pressure increase
If pre sense front detects
that
you are not brak
ing hard enough in the event of an impending
collision,
it will increase the brake pressure, de
pending on the situation and speed:
- At up to 85 km/h if vehicles are stopped.
- At any speed if moving or stopping vehicles are
detected ahead.
WARNING
The protection provided by pre sense front is
still subject to the prevailing physical limits.
It is a driver assist function and cannot pre
vent
a
collision in every situation. The driver
must always intervene personally. As the driv
er you are always responsible for braking in
good time. Do not let the extra safety
121