check engine AUDI Q5 2015 User Guide
[x] Cancel search | Manufacturer: AUDI, Model Year: 2015, Model line: Q5, Model: AUDI Q5 2015Pages: 302, PDF Size: 75.01 MB
Page 36 of 302
Driver inform ation system
the dr iver information system . Keep in mind that
the engine speed will not exceed the va lue dis
p layed in the driver information system, for ex
ample when downshifting.
P lease go to an autho rized Audi dea le r or other
qualified workshop to have the malfunction re paired.
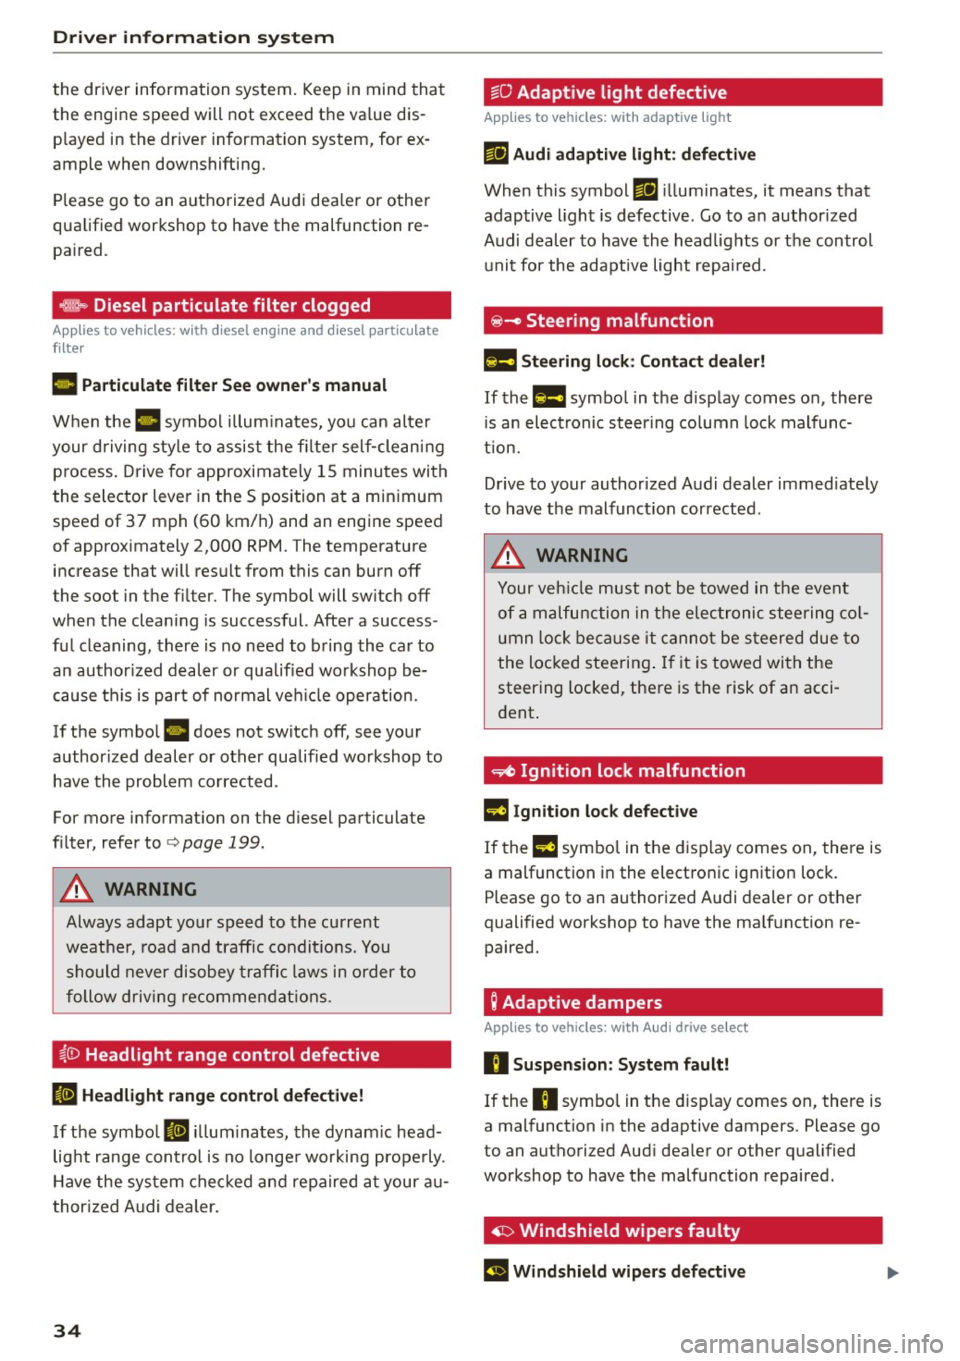
,m.. Diesel particulate filter clogged
Ap plies to veh icles: w ith diesel e ngi ne and d iesel pa rticu late
f ilt e r
II Particul ate filter Se e owne r's manu al
When the II symbol illum inates, you can alte r
your driving style to assist the fi lter self-clean ing
process . Drive for approximately 15 minu tes wi th
the selector lever in the S position at a minimum
speed of 37 mph (60 km/h) and an engine speed
of approximately 2,000 RPM. The temperature
increase that will result from this can burn off
the soot in the fi lter. The symbol will sw itch off
when the clean ing is successful. After a success
ful cleaning, there is no need to b ring the car to
an author ized deal er or qualified wo rkshop be
cause this is part of normal ve hicle operation.
If the symbo l
II does not switch off, see your
author ized dealer or other qualif ied wo rkshop to
have the problem corrected.
For more information on the d iesel particulate
fi lter, refer to
<=> page 199 .
A WARNING
Always adapt yo ur speed to the current
weather, road and traffic condit ions. You
should never disobey traffic laws in order to
follow driving recommendat ions.
~()) Headlight range control defective
II Headlight range contr ol d efec tiv e!
If the symbol II ill um inates, the dynam ic head
light range con trol is no longe r working prope rly .
H ave the system checked and repaired a t your au
thor ized Audi dealer.
34
~O Adaptive light defective
App lies to vehicles: wit h adaptive light
mil Audi adaptiv e light : defe ctiv e
When this symbol mil illuminates, it means that
adaptive light is defective. Go to an author ized
Audi dealer to have the headlig hts o r the control
unit for the adaptive light repa ired.
@ -Steering malfunction
El! Steering lock: Contact deal er!
If the El! symbol in the d isplay comes on, there
i s a n elect ronic steering co lumn lock malfunc
tion.
Drive to your authorized Audi dealer immed iately
to have the malfunct ion corrected.
A WARNING
Your veh icle must not be towed in the event
of a malfunction in the elec tronic steering co l
umn lock be ca u se it canno t be s teered due to
the locked steering . If it is towed with the
steering locked, there is the risk of an acci
dent .
~ Ignition lock malfunction
m Ignition lock defective
If the l3 symbo l in the d isplay comes on, there is
a malfunction i n the electronic ignition lock.
Please go to an authorized A udi dealer or other
qualified workshop to have the ma lf u nction re
paired.
; Adaptive dampers
App lies to vehicles: with Aud i drive se lect
R Suspension : Sy stem fault!
If the R symbo l in the disp lay comes on, there is
a mal function in the adaptive dampers. Please go
to an authorized Aud i dea ler or other qualified
workshop to have the malfunction repaired .
· ~ Windshield wipers faulty
El Windshield wipers d efective
Page 86 of 302
Driving
Driving
Steering
Manually adjustable steering wheel
The height and reach of the steering wheel can
be adjusted .
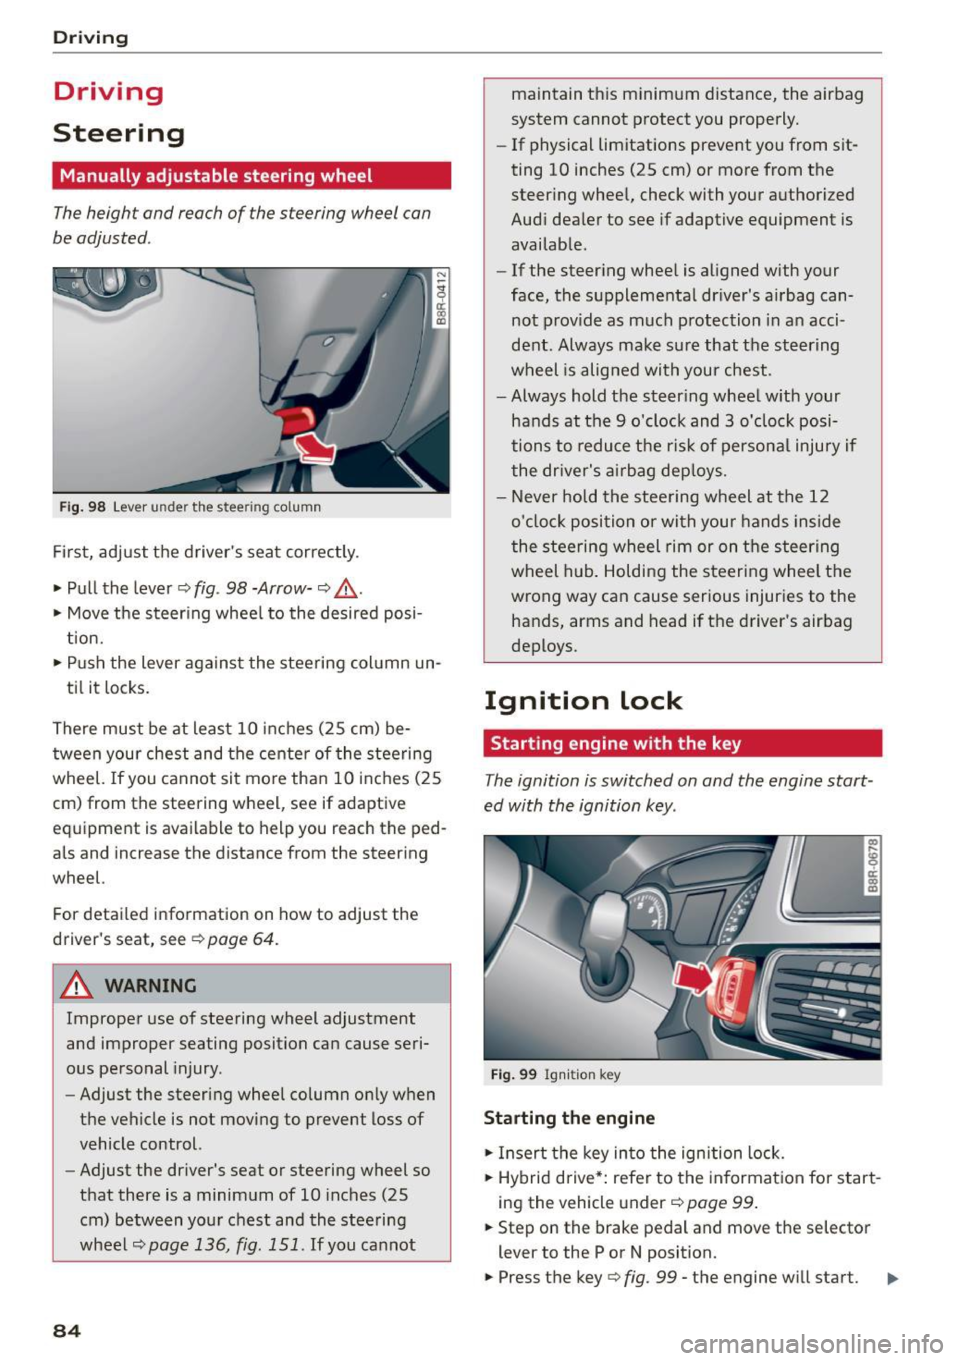
Fig. 98 Lever under the steering column
Firs t, adjust the driver 's seat cor rectly .
• Pull the lever ¢
fig. 98 -Arrow-¢ &_.
• Move the steer ing whee l to the desired posi
t ion.
• Push the lever agains t the steering col umn un-
ti l it locks.
There must be at least 10 inches (25 cm) be tween your chest and the cente r of the steering
wheel.
If you cannot sit mo re than 10 i nch es (25
cm) from the steering wheel, see if adaptive
equipment is available to help you reach the ped
als and increase the distance from the steering
wheel.
For detailed information on how to adjust the
driver 's seat, see ¢
page 64.
A WARNING
Improper use of steering wheel adjustment
and improper seating position can cause seri
ous pe rsonal injury .
- Adjust the steering wheel column on ly when
the vehicle is not moving to prevent loss of
vehicle control.
- Adjust the driver's seat or steering wheel so
that there is a minimum of 10 inches (25
cm) between your chest and the steering
wheel
¢page 136, fig. 151 . If you cannot
84
maintain this minimum distance, the airbag
system cannot p rotect you properly.
- If physical limitations prevent you from sit
ting 10 inches (25 cm) or more from the
steer ing whee l, check with your authorized
Audi dea ler to see if adaptive equipment is
availab le.
- If the steer ing whee l is aligned with your
face, the supplementa l driver 's airbag can
not prov ide as much p rotection in a n acci
dent. Always make su re that the steering
wheel is alig ned with your chest.
- Always hold the steer ing wheel w ith your
hands at the 9 o'clock and 3 o'clock posi
tions to reduce the ris k of persona l injury if
the dr iver's air bag dep loys.
- Never hold the stee ring wheel at the 12
o'cloc k position o r with your hands inside
the steering wheel rim or on t he steering
wheel hub . Holding the steeri ng whee l the
wrong way can cause serious injuries to the
hands, arms and head if the driver's airbag
deploys.
Ignition lock
Starting engine with the key
The ignition is switched on and the engine start
ed with the ignition key.
Fig . 99 Ign iti on key
Starting the engine
• Insert the key in to the ign ition lock.
• Hybrid drive *: refe r to the informat ion fo r start
i ng the veh icle under ¢
page 99 .
• Step on the brake pedal and move the selector
lever to the P or N position.
• Press the key¢
fig. 99 -the engine will start. IIJ,
Page 95 of 302
M N
co ~ co
rl I.O
"' N
"' rl
General information
Applies to vehicles: with Start-Stop-System
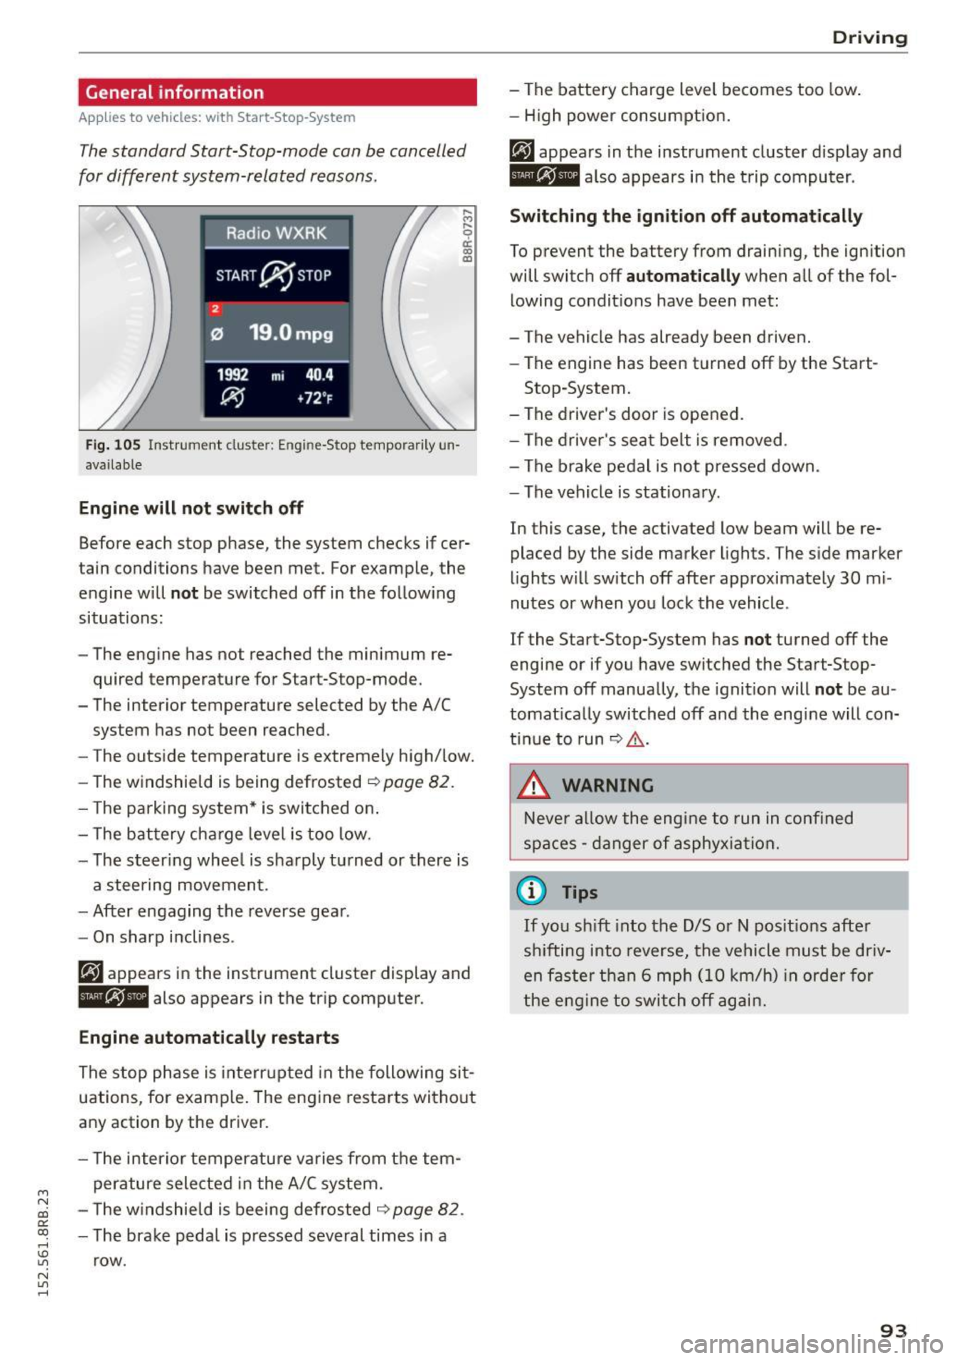
The standard Start-Stop-mode can be cancelled
for different system-related reasons.
Fig . 105 Instrument cluster: E ngin e-Stop tempo rarily un
available
Engine will not switch off
.... M
9 cc IX) ID
Before each stop phase, the system checks if cer
tain conditions have been met. For example, the
engine will
not be switched off in the following
situations:
- The engine has not reached the minimum re
quired temperature for Start-Stop-mode.
- The interior temperature selected by the A/C system has not been reached.
- The outside temperature is extremely high/low.
- The windshield is being defrosted ~
page 82.
-The park ing system* is switched on .
- The battery cha rge level is too low.
- The steer ing whee l is sharply turned or there is
a steering movement.
- After engaging the reverse gear.
Engine automatically restarts
The stop phase is interrupted in the following sit
uations, for example. The engine restarts without
any action by the driver.
- The interior temperature varies from the tem
perature selected in the A/C system.
- The windshield is beeing defrosted
~ page 82.
-The brake pedal is pressed several times in a
row.
Driving
- The battery charge level becomes too low.
Switching the ignition off automatically
To prevent the battery from draining, the ignition
will switch off
automatically when all of the fol
lowing condit ions have been met:
- The vehicle has already been driven.
- The engine has been turned off by the Start-
Stop-System.
- The driver's door is opened.
- The driver's seat belt is removed .
- The brake pedal is not pressed down.
- The vehicle is stationary .
In this case, the activated low beam will be re
placed by the side marker lights. The side marker
lights will switch off after approximately 30 mi
nutes or when you lock the vehicle .
If the Start-Stop-System has
not turned off the
engine or if you have switched the Start-Stop
System off manually, the ignition will
not be au
tomatically switched off and the engine will con
tinue to run~,&. .
A WARNING
Never allow the engine to run in confined
spaces - danger of asphyxiation.
(D Tips
-
If you shift into the D/S or N positions after
sh ifting into reverse, the vehicle must be driv
en faster than 6 mph (10 km/h) in orde r for
the engine to switch off again.
93
Page 128 of 302
Automatic transmission
-Never leave your vehicle with the engine
running while in gear. If you must leave your
vehicle when the engine is running, activate
the parking brake and move the selector lev er to P.
- Power is still transmitted to the wheels
when the engine is running at idle. To pre
vent the vehicle from "creeping", you must keep your foot on the brake when the engine
is running and the selector lever is in D/S or
R or "tiptronic" mode is selected.
- Do not press the accelerator pedal when
changing the selector lever position while
the vehicle is stationary and the engine is
running.
- Never shift into R or P while driving.
- Before driving down a steep slope, reduce
your speed and shift into a lower gear with
"tiptronic".
- Do not ride the brakes or press the brake
pedal too often or too long when driving
down a hill. Constant braking causes the
brakes to overheat and substantially re
duces braking performance, increases brak
ing distance or causes complete failure of
the brake system.
- To prevent the vehicle from rolling back
when stopping on inclines, always hold it in
place with the brake pedal or parking brake.
- Never hold the vehicle on an incline with a
slipping clutch. The clutch opens automati
cally when it becomes too hot from the
overload. An indicator lamp[!] illuminates
and a driver message appears
<=> page 127
when the clutch is overloaded .
-If the engine must remain running, never
have any driving position engaged when
checking under the hood. Make sure these
lector lever has securely engaged and is
locked in P with the parking brake set
<=>page 221. Otherwise, any increase in en
gine speed may set the vehicle in motion,
even with the parking brake applied.
0 Note
- When stopping on an incline, do not try to
hold the vehicle in place by pressing the ac
celerator pedal while a driving gear is se-
126
lected. This can cause the transmission to
overheat and can damage it. Activate the
parking brake or press the brake pedal to
prevent the vehicle from rolling.
- Allowing the vehicle to roll when the engine
is stopped and the selector lever is in N will
damage the transmission because it is not
lubricated under those circumstances.
{!) Tips
For safety reasons, the parking brake is re
leased automatically only when the driver's
safety belt is engaged in the buckle.
Hill descent control
The hill descent control system assists the driver
when driving down declines.
Hill descent control is activated when the selec
tor lever is in D/S and you press the brake pedal.
The transmission automatically selects a gear
that is suitable for the incline. Hill descent con
trol tries to maintain the speed achieved at the
time of braking, within physical and technical limitations.
It may still be necessary to adjust the
speed with the brakes.
Hill descent control switches off once the decline
levels out or you press the accelerator pedal.
When the speed is set in the cruise control sys
tem <=>
page 95, hill descent control is also acti
vated .
A WARNING
Hill descent control cannot overcome physical
limitations, so it may not be able to maintain
a constant speed under all conditions. Always
be ready to apply the brakes.
Page 196 of 302
Smart Technolog y
Operating c ondit ion s and drivin g hab it s
The brakes on today 's automobi les are st ill sub
ject to wear, depending largely on operating con ditions and driving habits¢.&. . On vehicles that
are either driven mostly in stop-and-go city traf
f ic or are driven hard, the brake pads should be
checked by your authori zed Audi dealer more of
ten than specified in the
Wa rra nty & Mainte
n an ce boo kle t .
Fa ilure to have your brake pads
inspected can result in reduced brake perform
ance.
On steep slopes, you should use the brak ing ef
fect of the eng ine . Th is way, you prevent unnec
essary wear on the brake system. If you must use
your brakes, do not ho ld the brakes down contin
uously. Pump the brakes at inte rva ls.
Operat ing no ise
Noises may occur when braking depending on the
speed, brak ing force and outside conditions such
as temperature and humid ity .
Effect of w ate r an d r oad sal t
In certain situations, for example after driving
through water, in heavy rain, after overn ight con
densat ion or after washing your car, the braking
effect can be reduced by mo isture or ice on the
brake rotors and brake pads . The brakes must be
d ried first with a few carefu l brake applications.
At h igher speeds and with the w indshield wipers
turned on, the brake pads press against the brake rotors for a short amount of t ime . This occurs at
regular intervals without the d river noticing and
p rov ides for better brake response t ime unde r
wet conditions .
The effectiveness of the brakes can be reduced
when the vehicle is dr iven on a salt-covered road
a nd the brakes are not used . L ikew ise, you clean
off accumulated sa lt coating from brake discs
and pads with a few cautious applications of the brake ¢.&. .
Corros ion
There may be a tendency for dirt to bui ld up on
the brake pads and corros ion to fo rm on the discs
if the car is not driven regularly or on ly for short
trips with litt le use of the brakes.
194
If the brakes are not used frequently, or if corro
sion has formed on the discs, it is advisable to clean off the pads and d iscs by braking firmly a
few times from a moderate ly high speed¢.&. .
Fault s in the brak e system
If you shou ld notice a sudden increase in bra ke
pedal travel, then one of the two brake circuits
may have failed
¢ .&. .
Lo w b rake fluid l evel
Malfunctions can occur in the brake system if the
brake flu id leve l is too low. The brake fl uid level is
monitored electronica lly.
Brake boos ter
The brake booster increases the pressure that you
generate w ith the brake pedal. It on ly operates
whi le the engine is runn ing o r with the ig nit ion
switched on (hybrid drive*)
¢ ,& .
Brake lining we ar status
Brake lining wear may be checked by visual in
spection of the condition of the brake pads
through the open ings in the wheel. If necessary ,
the wheel may be removed for this inspec tion
¢ page 260, Replacing wheels .
& WARNING -
- New brake pads don't have the best stop
ping power and m ust be "broken-in" during
the initial 250 miles (400 km) . You can com
pensate for this by pressing the brake pedal
more f irm ly. This also applies later when
new pads are installed.
- You should perform braking maneuvers for
the purpose of cleaning the brake system
only if road conditions permit. Other road
users must not be put at r isk -you may
cause an accident!
- Before descend ing a steep grade, reduce
speed and sh ift transmission into a lower
gea r or lower dr iving range. Do not ride the
bra kes or ho ld the peda l down too long or
too often . This could cause the bra kes to get
hot and diminish braking efficiency.
- Do not "ride the brakes" by rest ing your foot
on the pedal when you do not intend to
~
Page 205 of 302
M N
co
a:
co
,...., \!) ..,.,
N ..,., ,....,
-Ideal conditions do not prevail offroad . Nev
er utilize the maximum read ings to their
fullest, always leave a safety reserve.
Driving tips
On poor road and offroad, there is always only
one motto: Plan ahead and drive slowly!
P lease observe the followin g when driving away
from paved roads :
~ Drive only on roads and off road sections which
match the des ign of your veh icle and yo ur abili
t ies as a driver . Never take risks!
~ Drive slowly and plan ahead!
~ Take into consideration the gr ou nd cle aran ce of
your vehicle.
~ Activate the offroad mode c> page 191 as need
ed .
~ Use the hill des cent a ssi st <=:> page 193 when
dr iv ing down steep sections on hi lls.
Unp aved roads and offroad
Drive s low ly on unfami liar roads and unknown
offroad sections, and look out for unexpected ob
stacles (e.g . potho les, rocks, tree stumps, etc .) .
T o prevent the vehicle from bottoming and avoid
damage to the underbody, you should drive
straight across severe bumps in the ground with
only one side of the vehicle so that only two of
your wheels cross t he bumps.
Drive briskly through sandy or marshy offroad
sections and do not stop, if at all poss ible.
Driving through water
Note the following to avoid vehicle damage when
driving through water, for example on flooded roads:
- The water must not be any higher than the bot-
tom of the vehicle body .
- Do no t d rive fas ter than wa lking speed.
Driving on a slope
If you ever find yourself not ab le to climb a s lope,
do not try to turn around, drive back down in
re
ver se.
Othe rwise, you ru n the r isk of tipp ing ove r.
O ffro ad dri vin g
If the vehicle th reaten s to tip over when driving
acro ss a slope, you must immediately stee r
downhill in the direction of the slope.
Do not park you r vehi cle on steep s lopes or
grades.
T o reduce the risk of tipp ing ove r, d rive on s lopes
i n the d irection of t he downwa rd s lope (fall li ne) -
not cro sswi se .
& WARNING ~ -
After driving th rough water, mud, s lush, etc.,
the bra kes may be s low to take effect because
of wet bra ke rotors and pads. Dry the brakes
f irst by brak ing carefully to restore the full
braking effect.
(D Note
- Veh icle components s uch as the engine,
transm ission, suspension or electrical sys
tem can be severely damaged by driving
through water.
- Always switch off the Start-Stop-System *
when drivi ng throug h water
r=> page 94.
(D Tips
- Check t he depth of the water before driving
through it.
- Do not stop the vehicle, drive in reverse or
switch the engine off when driv ing through
water.
- Keep i n mind that oncoming veh icles may
create waves that raise the water level and
make it too deep for your vehicle to drive
through safely .
-Avo id driving through salt wate r because it
can cause corrosion .
203
Page 207 of 302
M N
co
a:
co
,...., \!) Ll"I
N Ll"I ,....,
Operating instructions
6"
~
a
2
. 1/2"
'
-{ I} 1-1/2"
-
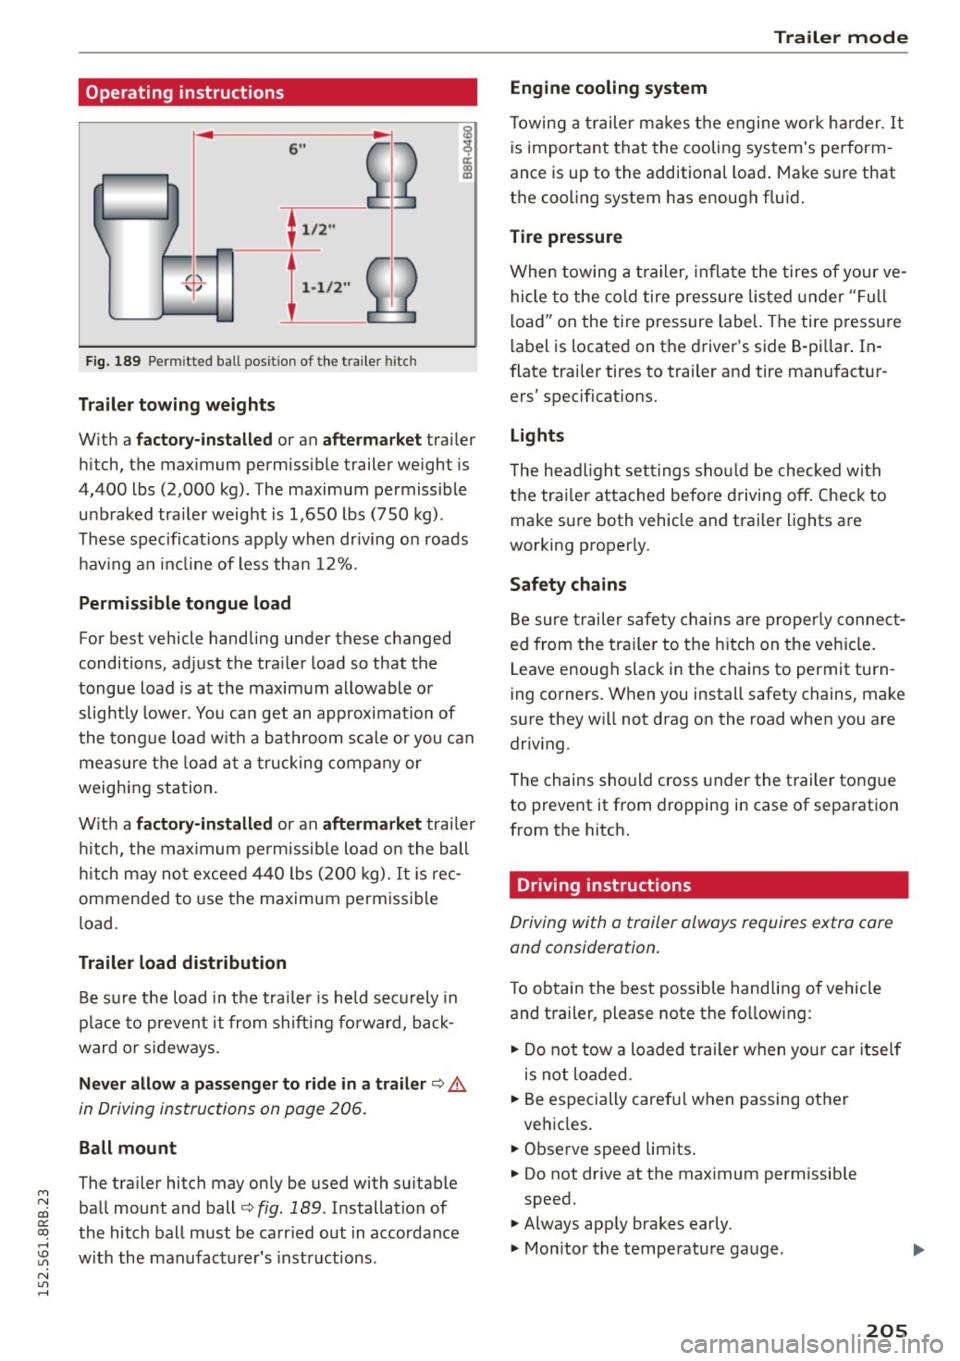
Fig. 189 Pe rmi tted ba ll pos it ion of the trailer hitc h
Trailer towing weights
With a factory-installed or an aftermarket trailer
hitch, the maximum permissible trailer weight is
4,400 lbs (2,000 kg) . T he maximum permissible
unbraked trailer weight is 1,650 lbs (750 kg) .
These specifications apply when dr iv ing on roads
having an inclin e of less than 12%.
Permissible tongue load
For best vehicle handling under these changed
conditions, adjust the traile r load so that the
tongue load is at the maximum allowable or
slightly lower. You can get an approximat ion of
the tongue load w ith a bathroom scale or you can
measure the load at a trucking company or
weighing station.
With a
factory-installed or an aftermarket trailer
hitch, the maximum permissible load on the ball
hitch may not exceed 440 lbs (200 kg). It is rec
ommended to use the maximum permissible
l oad.
Trailer load distribution
Be sure the load in the tra iler is held securely in
place to prevent it from shifting forward, back
ward or sideways .
Never allow a passenger to ride in a trailer c::> .&.
in Driving instructions on page 206.
Ball mount
The trailer hitch may only be used with suitable
ball mount and ball
c::> fig. 189 . Installation of
the hitch ball must be carr ied out in accordance
with the manufacturer's instructions .
Trailer mode
Engine cooling system
Towing a trailer makes the engine work harder . It
is important that the cooling system's perform
ance is up to the additional load . Make s ure that
the cooling system has enough fluid .
Tire pressure
When towing a trailer, inflate the tires of your ve
hicle to the cold tire pressure listed under "Full
load" on the tire pressure label. The tire pressure
label is located on the driver's side B·pillar. In·
flate trailer tires to trailer and tire manufactur
ers' specifications.
Lights
T he headlight settings sho uld be checked with
the trai ler attached before driving off. Check to
make sure both vehicle and trailer lights are
working properly.
Safety chains
Be sure trailer safety chains are properly connect
ed from the trailer to the hitch on the vehicle.
Leave enough slack in the chains to permit turn
ing corners. When you install safety chains, make
sure they w ill not drag on the road when you are
driving.
The chains should cross under the trailer tongue
to prevent it from dropping in case of separation
from the hitch.
Driving instructions
Driving with o trailer always requires extra core
and consideration .
To obtain the best possible handling of vehicle
and trailer, please note the fo llowing :
.. Do not tow a loaded trailer when your car itse lf
is not loaded.
.. Be especially careful when passing other
vehicles .
.. Observe speed lim its .
.. Do not drive at the maximum permissible
speed.
.. Always apply brakes early .
.. Mon itor the temperature gauge .
205
Page 217 of 302
M N
co
a:
co
,...., \!) 1.1'1
N 1.1'1 ,....,
Gasoline additives
Appl ies to vehicles: with gaso line engine
A major concern among many auto manufactur
ers is carbon deposit build-up caused by the type
of gasoline yo u use.
Although gasoline grades differ from one manu
facture r to another, they have certa in things in
common. A ll gasoline grades contain substances
that can cause deposits to collect on v ita l engine
parts, such as fue l injectors and intake va lves. A l
though most gasoline brands include additives to
keep engine and fuel systems clean, they are not
equally effective.
Audi recommends using TOP TIER Detergent Gas
oline. For more information on TOP TIER Deter
gent Gasoline, please go to the official website
(www.toptiergas.com).
After an extended period of using inadequate
fuels, built-up carbon deposits can rob your en
gine of peak performance .
CD Note
-Damage or malf u nction due to poor fuel
quality is not covered by the Audi New Vehi
cle Limited Warranty.
- Do not add aftermarket fuel additive prod
ucts to your fuel tank.
Diesel fuel
Applies to veh icles: with d iesel e ng in e
Always use ULSD (Ultra Low Sulfur Diesel) No. 2.
The ULSD No. 2 meets the ASTM O97S.
Diesel fuel with concentrat ions of biodiesel high
er than S
% such as B11, B2O or B1OO are strictly
prohibited.
Service station fuel pumps are labeled w ith the
correct fuel information for easy recognition by
the user .
If the diesel fuel pump is not labeled
ask the station operator what fuel is being d is
pensed before filling up your vehicle.
ULSD No. 2 may not be ava ilab le outside the USA
and Canada. Be sure to check before traveling to
other countries .
Fuel and Refueling
ULSD No. 2 can become thicker in very cold tem
peratures, and this can impair the engine's start
ing and running. Depend ing on the season, gas
stations provide ULSD No. 2 that flows better in cold temperatures so that you can cont inue oper
ating your vehicle as usual.
CD Note
- Your vehicle's diesel engine was designed
soley for use w ith ULSD No. 2. Therefore,
never use gasoline, heating oil, other fuels
or flow improvers. These contain substances
that will severe ly damage the fuel system
and the engine. Such damage will not be
covered by your New Vehicle Limited War
ranty.
- If you put any amount of incorrect fuel in
the fuel tank, do not start the engine under
any circumstances. Immediately contact the
nearest authorized Audi dealer or author
ized Aud i Service Facility for assistance .
These fuels contain substances that can se
vere ly damage the fuel system and the en
gine if the engine is started.
Refueling
Fuel filler neck
The fue l filler neck is located on the right rear
side panel behind the fuel filler flap .
If the power lock ing system should fail, you can
still open the flap manually -for detailed instruc
tions see
¢ page 217.
You can find the fuel tank capacity of your vehicle
in
¢ page 278.
The label on the inside of the fuel f iller flap tells
you the correct fuel for your veh icle. For more in
formation about fuel specifications, see
¢page 213.
Your vehicle fuel tank has an on-board refuelling
vapor recovery system. This feature helps to pre
ven t fu el vapors from escap ing from the tank and
polluting the environment while yo u refuel your
vehicle. In order to fill the tank properly while
protecting the environment, please follow this
refueling procedure carefully .
215
Page 218 of 302
Fuel and R efue lin g
_& WARNING
Under normal operating conditions, never car
ry additional fuel containers in your car. Gas
canisters and other containers used to trans
port fuel can be dangerous. Such containers,
full or empty, may leak and could cause a fire
in a collision. If you must transport fuel to
use for your lawn mower, snow blower, etc.,
be very careful and a lways observe loca l and
state laws rega rding the use, transportation
and sto rage of such fuel containers. Make cer
tain the container meets industry standards
(ANSI/ASTM F852 -86) .
(D Note
Never d rive you r vehicle unt il the fuel tank is
comp letely empty. The irreg ular supply of
fue l can cause m isfiring. Gasoline cou ld enter
the exhaust system and damage the catalytic
converter.
Refuelling
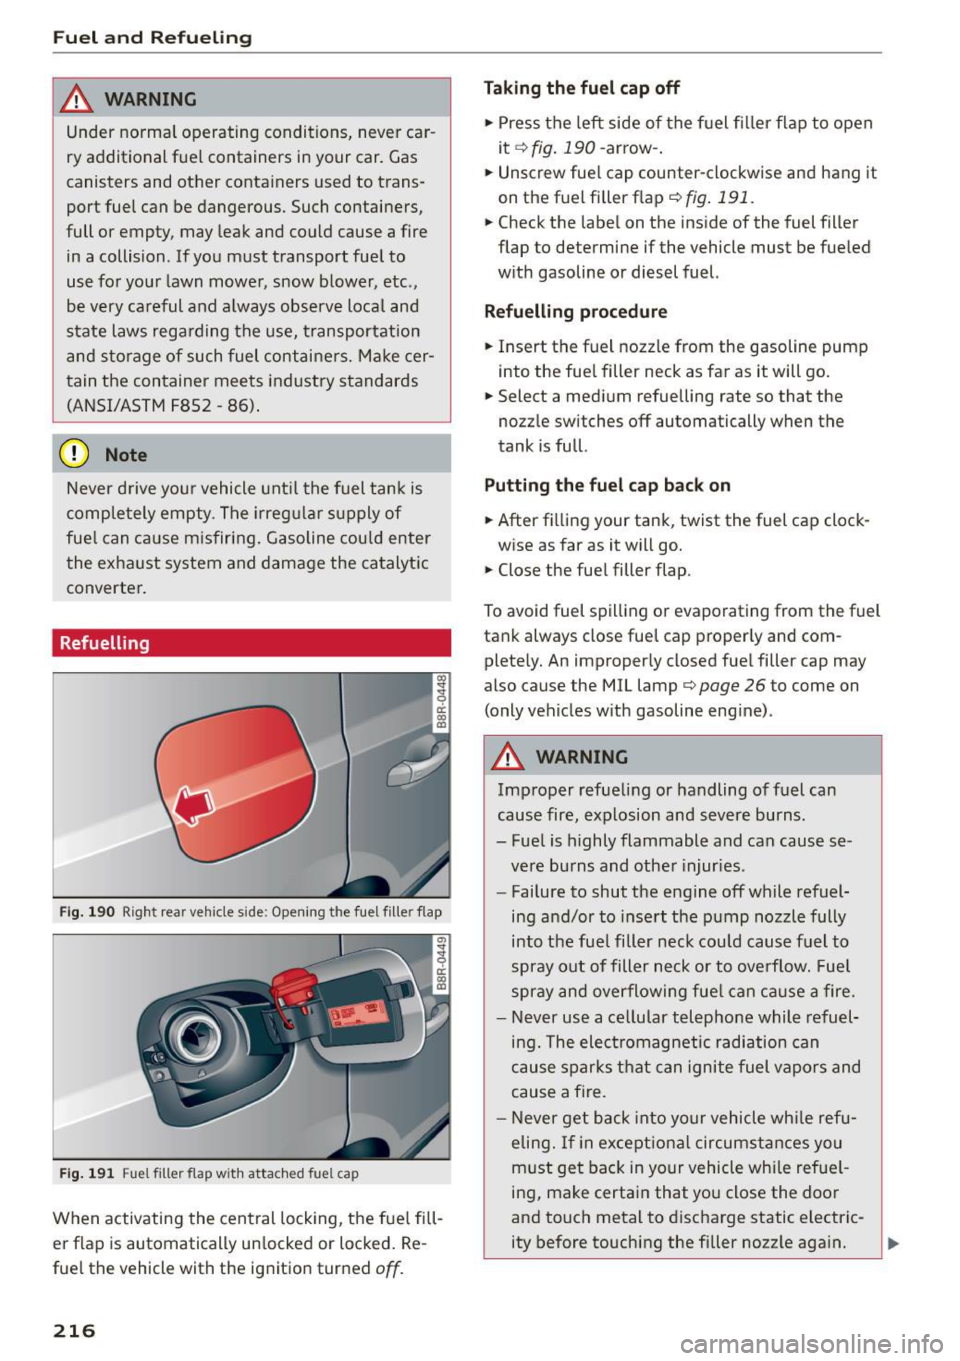
Fig . 190 Right rear vehicle s ide: Opening the fuel fill er flap
Fi g. 191 Fuel filler flap with attached fuel cap
When activating the central lock ing, the fue l fill
er flap is automatically un locked or locked. Re
fue l the vehicle with the ignition turned
off.
216
Tak ing the fu el cap off
.. Press the left side of the fuel fi ller flap to open
it
¢ fig . 190 -arrow-.
.. Unscrew fue l cap counter-clockwise and hang it
on the fuel filler f lap
c;, fig. 191.
.. Check the label on the inside of the fuel filler
flap to determine if the vehicle must be fueled
w ith gasoline or diesel fuel.
Re fuelling proce dure
.. Insert the fuel nozzle from the gasoline pump
into the fue l filler neck as far as it will go.
.. Select a medium refuelling rate so that the
nozzle switches off automatically when the
tank is full.
Putting t he fu el cap b ack on
.. After f illing your tank, twist the fuel cap clock-
wise as far as it will go.
.. Close the fuel filler flap.
To avoid fuel spilling or evaporating from the fuel
tank always close fue l cap proper ly and com
plete ly. An improper ly closed fue l filler cap may
also cause the MIL lamp
c;, page 26 to come on
(only vehicles w ith gasoline eng ine) .
_& WARNING
Imp roper refueling or handling of fuel can
cause fire, explosion and severe burns.
- Fue l is highly flammable and can cause se
vere burns and other injur ies.
-
- Failure to shut the engine off while refuel
ing and/or to insert the pump nozzle fully
into the fue l filler neck could cause fuel to
spray out of filler neck or to overflow. Fue l
spray and overflowing fue l can cause a fire.
- Never use a ce llular telephone while refuel
ing. The electromagnetic radiation can
cause sparks that can ignite fuel vapors and
cause a fire.
- Never get back into your vehicle wh ile refu
eling. If in except iona l circumstances you
m ust get back in your vehicle whi le refue l
ing, make certain that yo u close the door
and touch metal to discharge static electric-
ity before touching the filler nozz le aga in.
IJJ,,,
Page 223 of 302
M N
Checking and Filling Hood
Releasing the engine hood
The engine hood is released from inside the vehi
cle .
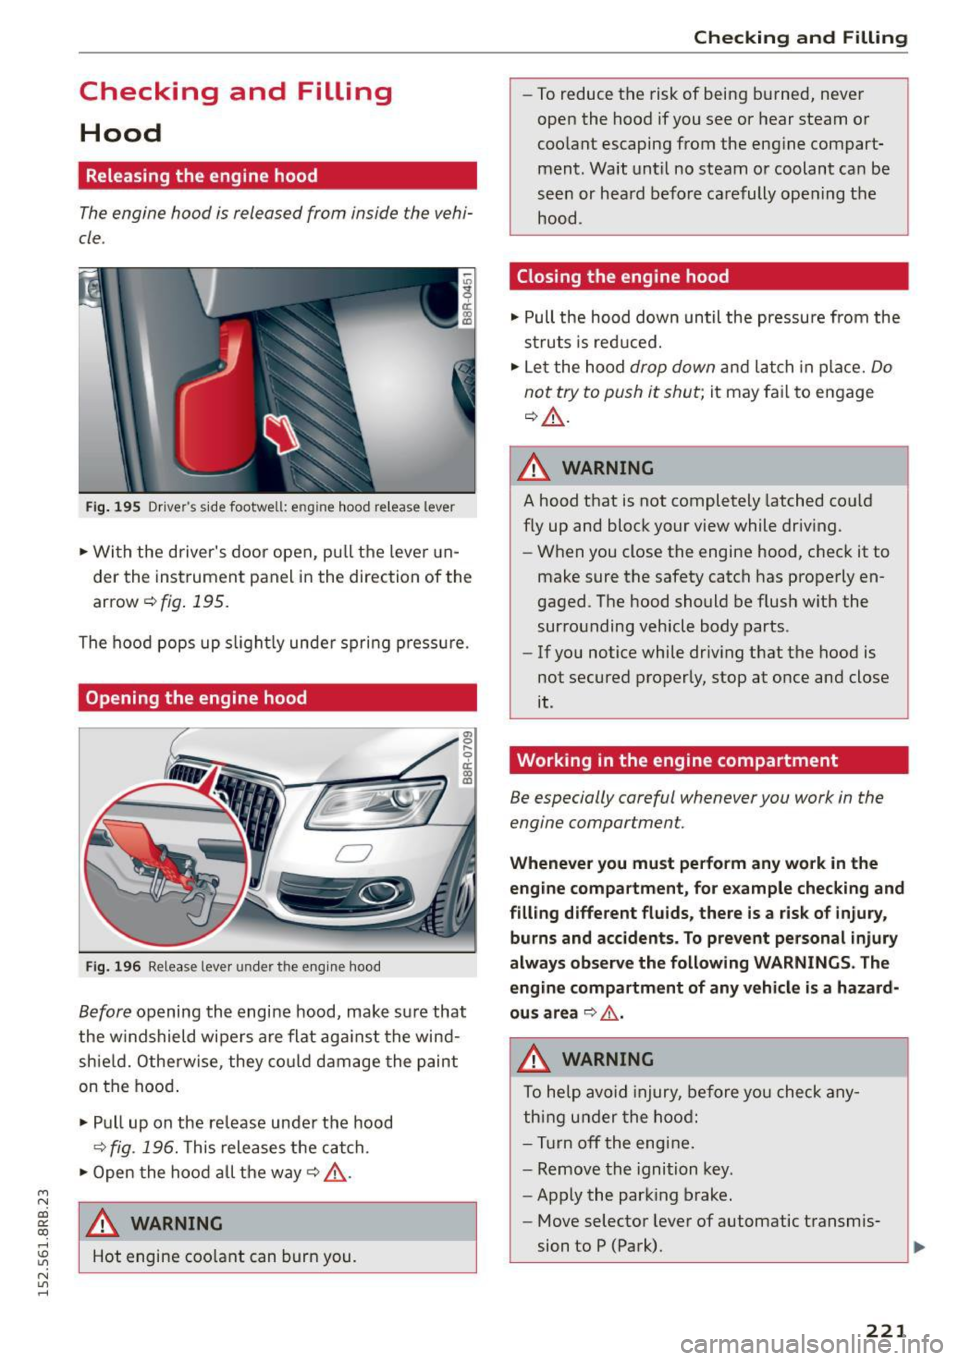
Fig . 195 Drive r's side footwe ll: e ng ine hood re lease lever
"' Wi th the driver's door open, pu ll the leve r un
der the instrument panel in the direction of the
arrow
c::> fig . 195.
The hood pops up s light ly under spri ng press ure.
Opening the engine hood
Fig. 196 Relea se leve r un der the eng ine hood
Before opening the engine hood, make su re that
the w indshield wipers are flat aga inst the wind
shield. Otherwise, they could damage the paint
on the hood .
"' Pull up on the release under the hood
c:> fig . 196. This releases the catch.
"' Open the hood all the way
c::> A.
~ _&. WARNING
rl
:5: Hot engine coo lant can burn you.
N l/1 rl
Ch eck in g and Fillin g
-To reduce the risk of being burned, never
open the hood if you see or hear steam or
coolant escaping from the eng ine compart
ment. Wait until no steam or coolant can be
seen or heard before carefully opening the hood.
Closing the engine hood
"' Pull the hood down until the pressu re from the
struts is reduced.
"' Le t the hood
drop down and latch in p lace. Do
not try to push it shut;
it may fa il to engage
c::> A .
A WARNING
-
A hood that is not completely latched cou ld
fly up and block your view while driv ing.
-
- When you close the engine hood, check it to
make sure the safety catch has properly en
gaged . The hood should be flush with the
surrounding vehicle body parts .
- If you notice while driv ing that the hood is
not secured properly, stop at once and close
it .
Working in the engine compartment
Be especially careful whenever you work in the
engine compartment.
Wheneve r you must pe rfo rm an y wo rk in the
eng ine comp artment , for e xample chec king and
fi lling differen t fluids , ther e is a ri sk of i nju ry,
bu rn s and acci den ts. To p re ve nt pe rsonal injur y
al way s ob serve the follo wing WARN INGS . The
e ngi ne compartm ent of an y ve hicle is a haza rd
ou s area
~ ,&..
A WARNING
To help avoid injury, before you check any
thing under the hood:
- Turn off the eng ine.
- Remove the ignition key.
- Apply the parking brake.
-
- Move selector lever of automatic transmis-
sion to P (Park).
221