wheel AUDI Q5 2016 Owners Manual
[x] Cancel search | Manufacturer: AUDI, Model Year: 2016, Model line: Q5, Model: AUDI Q5 2016Pages: 300, PDF Size: 75.02 MB
Page 5 of 300
.... N
co
er::
co
....
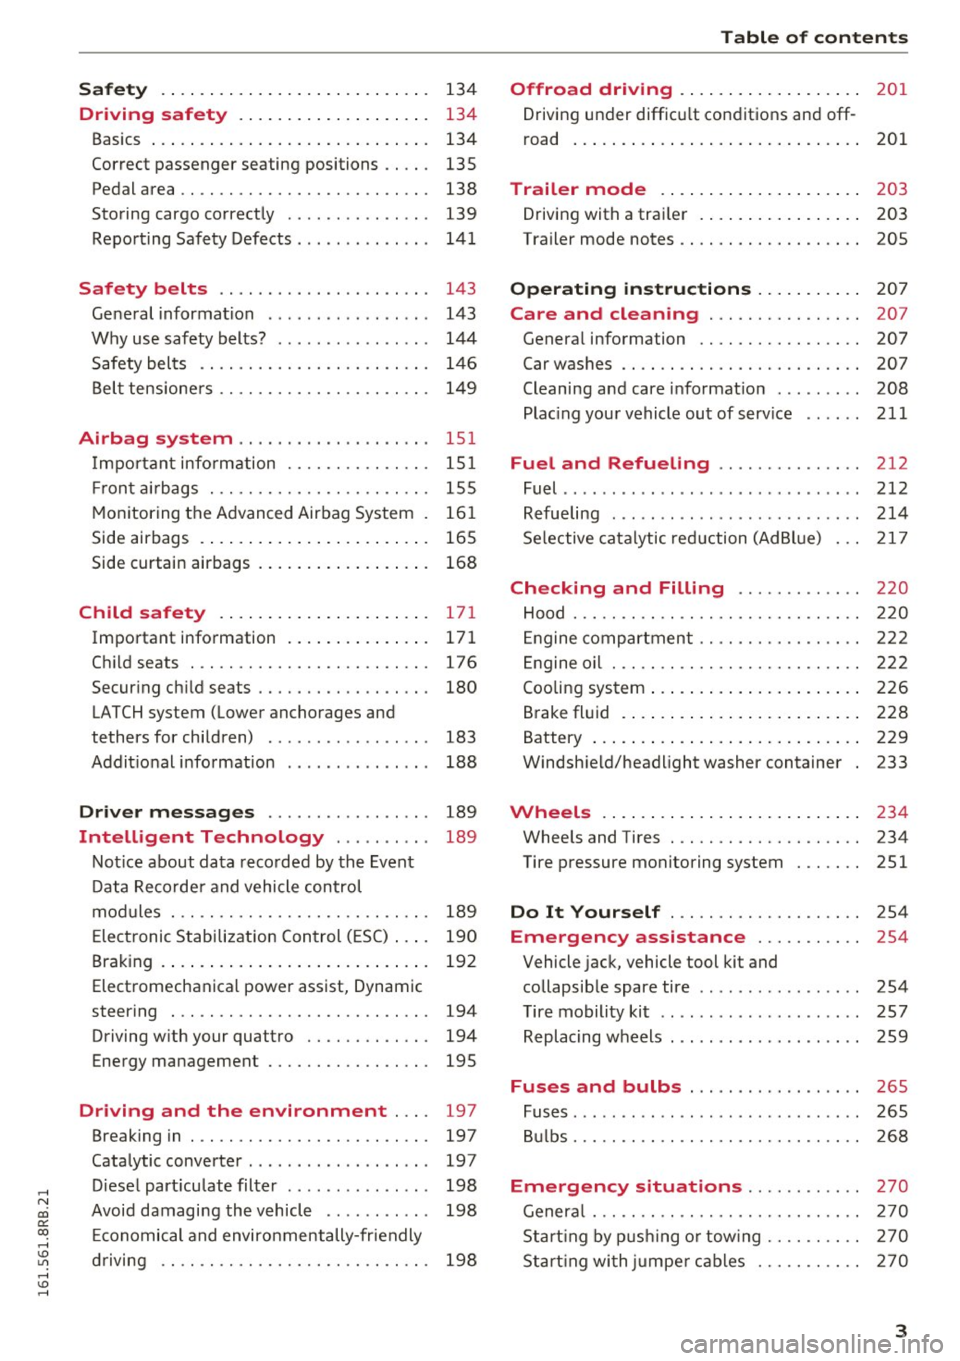
Driving safety . . . . . . . . . . . . . . . . . . . . 134
Basics . . . . . . . . . . . . . . . . . . . . . . . . . . . . . 134
Correct passenger seating positions . . . . . 135
Pedal area . . . . . . . . . . . . . . . . . . . . . . . . . . 138
Storing cargo correct ly . . . . . . . . . . . . . . . 139
Repo rt ing Safety Defects . . . . . . . . . . . . . . 14 1
Safety belts . . . . . . . . . . . . . . . . . . . . . . 143
Ge ne ral information . . . . . . . . . . . . . . . . . 143
Why use safety belts? . . . . . . . . . . . . . . . . 144
S afety belts . . . . . . . . . . . . . . . . . . . . . . . . 14 6
Bel t tensione rs . . . . . . . . . . . . . . . . . . . . . . 14 9
Airbag system .......... .... ... .. . 15 1
I mportant info rm ation . . . . . . . . . . . . . . . 151
Fr on t air bags . . . . . . . . . . . . . . . . . . . . . . . 155
M oni toring the A dvanced Airbag Sys tem . 16 1
Side airbags . . . . . . . . . . . . . . . . . . . . . . . . 165
Side curtain airbags . . . . . . . . . . . . . . . . . . 168
Child safety . . . . . . . . . . . . . . . . . . . . . . 171
Important information . . . . . . . . . . . . . . . 17 1
Ch ild seats . .. ............... .. .... . 17 6
Secur ing child seats . . . . . . . . . . . . . . . . . . 180
LATCH system (Lower anchorages and
tethers for children) . . . . . . . . . . . . . . . . . 183
Addit ional information 188
Driver messages . . . . . . . . . . . . . . . . . 189
Intelligent Technology . . . . . . . . . . 189
Not ice about data reco rded by the Event
D ata Recorde r and vehicle control
mod ules . . . . . . . . . . . . . . . . . . . . . . . . . . . 189
E lectronic Stabilization Con trol ( ESC) . . . . 190
Braking . . . . . . . . . . . . . . . . . . . . . . . . . . . . 192
Elect romechanica l power assist, Dynam ic
steering . . . . . . . . . . . . . . . . . . . . . . . . . . . 194
Driving w ith your quattro . . . . . . . . . . . . . 194
Energy management . . . . . . . . . . . . . . . . . 195
Driving and the environment . . . . 197
Breaking in . . . . . . . . . . . . . . . . . . . . . . . . . 197
Cata lytic converte r . . . . . . . . . . . . . . . . . . . 197
D iese l part icu late filter . . . . . . . . . . . . . . . 198
Avoid damagi ng the vehicle . . . . . . . . . . . 198
E conomical and environmentally-fr iendly
driving . . . . . . . . . . . . . . . . . . . . . . . . . . . . 198
Table of contents
Offroad driving . . . . . . . . . . . . . . . . . . .
201
Driving under diffic ult con ditions and off -
road . . . . . . . . . . . . . . . . . . . . . . . . . . . . . . 201
Trailer mode . . . . . . . . . . . . . . . . . . . . . 203
Driving with a trai ler . . . . . . . . . . . . . . . . . 203
Trailer mode notes . . . . . . . . . . . . . . . . . . . 205
Operating instructions . . . . . . . . . . . 207
Care and cleaning . . . . . . . . . . . . . . . . 207
Genera l information . . . . . . . . . . . . . . . . . 207
Car washes . . . . . . . . . . . . . . . . . . . . . . . . . 207
Cleaning and care informat ion . . . . . . . . . 208
Plac ing your vehicle out of serv ice . . . . . . 211
Fuel and Refueling ............... 212
Fuel ......... ...................... 212
Refue ling . . . . . . . . . . . . . . . . . . . . . . . . . . 214
Se lective cata lytic red uction (AdBlue) 217
Checking and Filling . . . . . . . . . . . . . 220
Hood . . . . . . . . . . . . . . . . . . . . . . . . . . . . . . 220
En gine compartment . . . . . . . . . . . . . . . . . 22 2
En gine oi l . . . . . . . . . . . . . . . . . . . . . . . . . . 2 22
Cooling sys tem . . . . . . . . . . . . . . . . . . . . . . 2 26
Brake fl uid . . . . . . . . . . . . . . . . . . . . . . . . . 228
Battery . . . . . . . . . . . . . . . . . . . . . . . . . . . . 229
Windsh ield/headlight washer container 233
Wheels .. .. .. .. .. ... .. ..... ... .. .. 234
Wheels and Tires . . . . . . . . . . . . . . . . . . . . 234
Tire p ressure mon itoring system
251
Do It Yourself . . . . . . . . . . . . . . . . . . . . 254
Emergency assistance . . . . . . . . . . . 254
Vehicle jack, vehicle tool kit and
collapsib le spare tire . . . . . . . . . . . . . . . . . 254
T ire mobility kit . . . . . . . . . . . . . . . . . . . . . 257
Replacing w heels . . . . . . . . . . . . . . . . . . . . 259
Fuses and bulbs . . . . . . . . . . . . . . . . . . 265
Fuses . . . . . . . . . . . . . . . . . . . . . . . . . . . . . . 265
B ulbs. . . . . . . . . . . . . . . . . . . . . . . . . . . . . . 268
Emergency situations . . . . . . . . . . . . 270
Genera l . . . . . . . . . . . . . . . . . . . . . . . . . . . . 270
Start ing by p ushi ng o r tow ing . . . . . . . . . . 270
Sta rt ing wi th ju mpe r cab les . . . . . . . . . . . 270
3
Page 11 of 300
.... N
co
er::
co
....
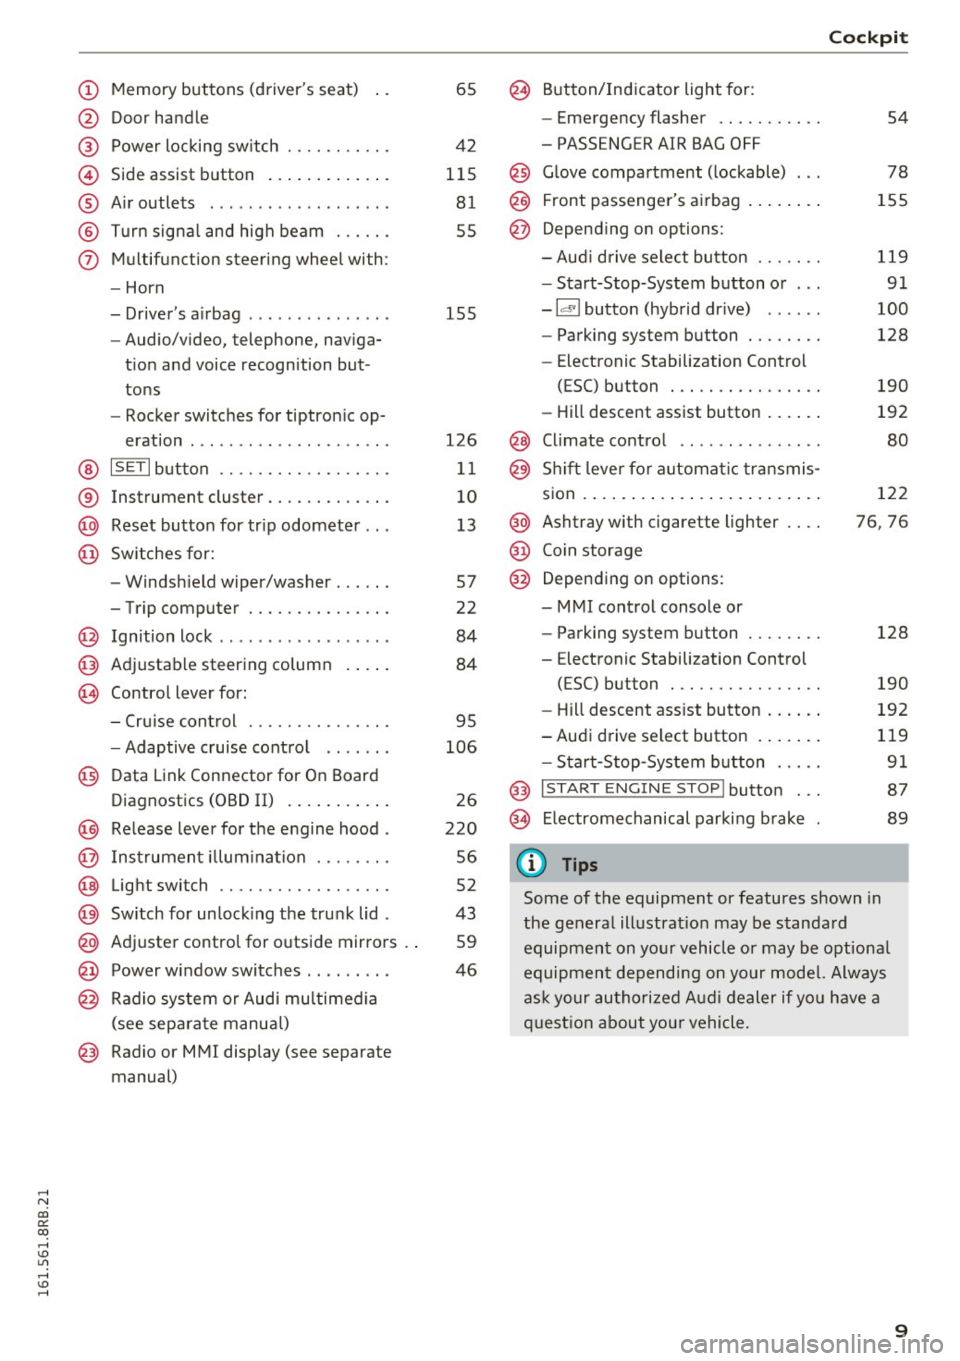
@ Door handle
@ Power locking sw itch .......... .
© Side assist button ............ .
® Air outlets ..... ........ .... . .
@ Turn signal and high beam ... .. .
(j) Multifunction steering wheel with:
- Horn
- Driver's airbag ..... ..... ... . .
- Audio/video, telephone, naviga-
tion and voice recognition but
tons
- Rocker switches for tiptronic op-
eration ............... ..... .
@ ISETI button ............... .. .
® Instrument cluster .......... .. .
@ Reset button for trip odometer .. .
@ Switches for:
- Windshield wiper/washer . .... .
- Trip computer ............ .. .
@ Ignition lock ................. .
@ Adjustable steering column
@ Control lever for:
65
42
115 81
55
155
126
11
10
13
57
22
84
84
- Cruise control . . . . . . . . . . . . . . . 95
- Adaptive cruise control . . . . . . .
106
@ Data Link Connector for On Board
Diagnostics (OBD II) . . . . . . . . . . .
26
@) Release lever for the engine hood . 220
@ Instrument illumination . . . . . . . . 56
@ Light switch . . . . . . . . . . . . . . . . . . 52
@) Switch for unlocking the trunk lid . 43
@ Adjuster control for outside mirrors . . 59
@ Power window switches . . . . . . . . . 46
@ Radio system or Audi multimedia
(see separate manual)
@ Radio or MMI display (see separate
manual)
@ Button/Indicator light for:
- Emergency flasher .......... .
- PASSENGER AIR BAG OFF
@ Glove compartment (lockable) .. .
@ Front passenger's airbag ....... .
@ Depending on options:
- Aud i drive select button ...... .
- Start-Stop-System button or .. .
- Id'! button (hybrid drive) ..... .
- Parking system button ....... .
- Elect ronic Stabilization Control
(ESC) button . .............. .
- Hill descent assist button ..... .
@ Climate control .. ............ .
@ Shift lever for automat ic transmis-
sion ..... ..... .. ............ .
@ Ashtray with cigarette lighter ... .
@ Coin storage
@ Depending on options:
- MMI control console or
- Parking system button ....... .
- E lectronic Stabilization Control
(ESC) button . .. ............ .
Cockpit
54
78
155
119
91
100
128
190
192
80
122
76, 76
128
190
- Hill descent assist button . . . . . . 192
-Audi drive select button . . . . . . . 119
- Start-Stop -System button . . . . . 91
@ I START ENGINE STOP! button . . . 87
@> Electromechanical parking brake 89
(D Tips
Some of the equipment or features shown in
the general illustration may be standard
equipment on your vehicle or may be optional
equipment depending on your model. Always
ask your authorized Audi dealer if you have a
question about you r vehicle.
9
Page 57 of 300
..... N
co ~ CX)
..... I.Cl U"I
..... I.Cl .....
-your vehicle is being towed by a tow truck or
if you are towing another vehicle behind
you .
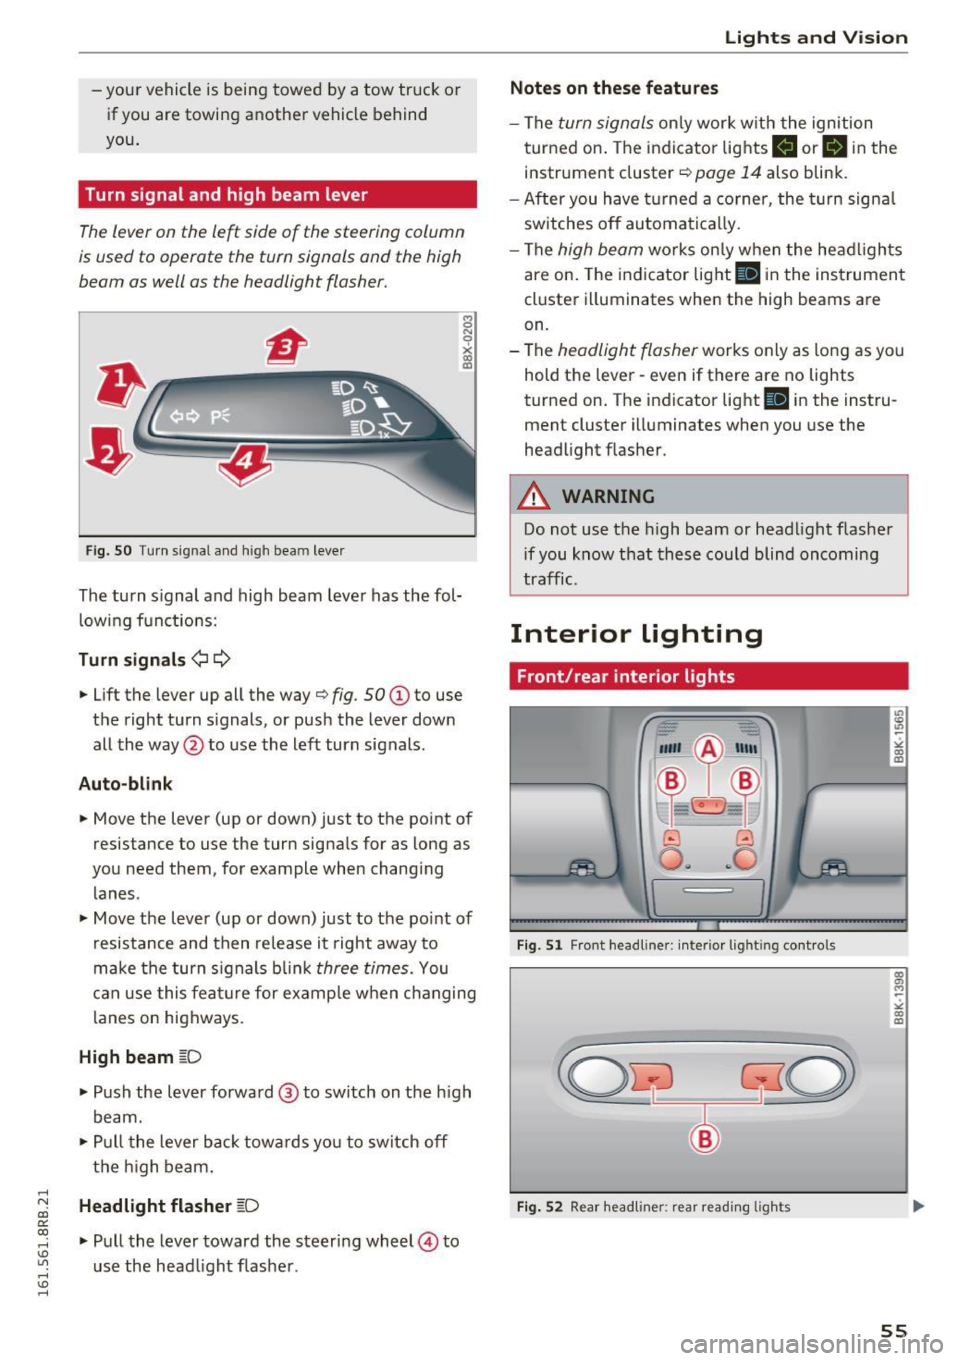
Turn signal and high beam lever
The lever on the le~ side of the steering column
is used to operate the turn signals and the high
beam as well as the headlight flasher.
Fig. SO Tu rn signal and high bea m lever
The turn s ignal and high beam lever has the fol·
lowing functions:
Turn signals ¢¢
8 N
0
~ IXI
• Lift the lever up all the way¢ fig. 50 (D to use
t h e right turn s ignals, or push the lever down
all the way @to use the left turn signals .
Auto-blink
• Move the lever (up or down) just to the point of
resistance to use the turn signa ls for as long as
you need them, for example when changing lanes .
• Move the lever (up or down) just to the point of
resistance and then release it right away to
make the turn s ignals blink
three times. You
can use this feature for example when changing
l anes on highways.
High beam ~D
• Push the lever forward@ to switch on the high
beam.
• Pull the lever back towa rds yo u to switch off
the high beam .
Headlight flasher ~D
• Pull the lever toward the steering wheel© to
u se the head light flasher .
Lights and V ision
Notes on these features
-The turn signals only work w ith the ignition
turned on. The indicato r lights
II or II in the
instr ument cluster ¢
page 14 also blink.
- After you have turned a corner, the turn signa l
switches off automatically.
- The
high beam wo rks on ly when the headlights
are on. The indicator light
II in the instrument
cluster illuminates when the high beams are
on.
- The
headlight flasher works only as long as yo u
hold the lever· even if there are no lights
turned on . The indicator light
II in the instru
ment cluster illuminates when you use the
headlight flasher .
A WARNING
-Do not use the high beam or head light flasher
i f you know that these could blind oncoming
traffic.
Interior lighting
Front /rear interior lights
_. --=:.
I-~~
._ -- v
8 G
o .. .. c
l
Fig. 51 Front head line r: in ter io r light ing cont rols
Fig. 52 Rear headliner: rear read ing lights
55
Page 65 of 300
..... N
co
er::
co
.....
General information
Why is your seat adjustment so important?
The safety belts and the airbag system can only
provide maximum protection if the front seats are corr ectly adjusted .
There are various ways of adjusting the front
seats to provide safe and comfortable support
for the driver and the front passenger . Adjust
your seat properly so that:
- you can easily and quickly reach all the switches
and controls in the instrument panel
- your body is properly supported thus reducing
physical stress and fatigue
- the safety belts and a irbag system can offer
maximum protection
<=:> page 151.
In the following sections, you will see exact ly
how you can best adjust your seats.
There are spec ial regulations and instr uctions for
installing a child safety seat on the front pas
senger's seat . Always fo llow the information re
garding child safety provided in
¢ page 171,
Child safety.
A WARNING
Incorrect seating position of the driver and all
other passengers can result in serious person
al injury .
- Always keep your feet on the floor when the
vehicle is in motion - never put your feet on
top of the instrument pane l, o ut of the win
dow or on top of the seat cushion. This ap
plies especially to the passengers.
If your
seating pos it ion is inco rrect, yo u increase
the risk of injury in the case of sudden brak
ing or an accident. If the ai rbag inf lates and
the seating position is incorrect, this cou ld
result in personal injury or even death.
- It is important for both the driver and front
passenger to keep a d istance o f at least
10 inches (25 cm) between themselves and
the steering wheel and/or instrument pan el. If you're s itting any closer than this, the
airbag system can not protect you properly .
Seat s and sto rage
In addition, the front seats and head re
stra ints must be adjusted to your body
he ight so that they can g ive you maximum
protection .
- Always try to keep as much distance as pos
sible between yourself and the steer ing
wheel or instrument panel.
- Do not adjust the driver's or front passeng
er's seat while the veh icle is moving . Your
seat may move unexpectedly, causing sud
den loss of vehicle contro l and personal in
jury.
If yo u ad just yo ur seat while the veh icle
is moving, you a re o ut of pos ition.
Driver's seat
The correct seat position is important for safe
and relaxed driving.
We recommend that you adjust the dr iver 's seat
i n the following manner:
.. Adjust the seat in fore and aft direction so that
you can eas ily push the pedals to the floor
while keeping yo ur knees slightly bent<=:>.&,
in
Why is your seat adjustment so important? on
page 63 .
.,. Adjust the seatback so that when yo u sit with
your back agains t the se atback , you can still
grasp the to p of the steering wheel.
.,. Adjust the head res traint so the uppe r edge is
as even as possib le with the top of you r head. If
that is not possible, try to adjust the head re
straint so that it is as close to this posit ion as
possible
<=:> page 67.
A WARNING
--
Neve r place any objects in the dr iver's foot
well. An object could ge t into the pedal a rea
and inte rfe re with pedal function. In case of
su dd en braking or an accident, you would no t
be ab le to br ake or accelera te.
63
Page 84 of 300
Warm and cold
[ii Adjusting seat heating*
P ressing the button switches the seat heating on
at the highest setting (level 3). The LEDs indicate
the temperature level. To reduce the tempera
ture, press the button again. To switch the seat heating
off, press the button repeatedly until the
LED turns
off.
After 10 minutes, the seat heating automatically
switches from level 3 to level 2.
lil Adjusting seat ventilation*
Pressing the button switches the seat vent ilation
on at the highest sett ing (level 3). The LEDs indi
cate the venti lation level. To reduce the ventila
tion level, press the button again. To sw itch the
seat ventilation
off, press the button repeatedly
until the LED turns
off.
l qo, FRONT I Switch the defroster on/off
The windshield and side windows are defrosted
or cleared of condensation as quickly as possible.
The maximum amount of air flows main ly from
the vents below the windshield. Recirculation
mode switches off. The temperature should be
set to 72 °F (22 °() or higher. The temperature is
controlled automat ically .
The
IAUTOI button switches the defroster off.
IQiil REARI Switching rear window heater on/
off
The rear window heater on ly operates when the
engine is running. It switches off automatica lly
after a few minutes, depending on the outside
temperature.
To prevent the rear window heater from switch ing
off automatically, press and ho ld the l(jji) REARI
button for more than 2 seconds. This remains
stored until the ign it ion is switched off.
Air vents
You can open and close the center and rear air
vents using the thumbw heels . The levers adjust
the direction of the airflow from the vents.
You can adjust the air temperature in the rear by
turning the thumbwheel toward the red side to
82
make it warmer or toward the blue side to make
it coo ler.
A WARNING
- Do not use the recirculation for extended
periods of time. The windows could fog up
since no fresh air can enter the vehicle. If
the windows fog up, press the air rec ircula
tion button again immed iately to switch
off
the air rec irculat ion function or select de
frost.
- Individuals with reduced sensit iv it y to pain
or temperature could develop burns when
using the seat heating* function . To reduce
the risk of injury, these individuals should
not use seat heating.
(D Note
To avoid damage to the heating elements* in
the seats, do not kneel on the seats or place heavy loads on a small area of the seat.
Setup
-
The basic climate control settings can be adjust
ed in the radio or MM!".
"'Select : !CAR I function button> A/C control but
ton. Or
"' Select:
I CAR I function button > Car systems*
control button >
A/C.
Automatic recirculation
When switched on, automat ic rec irculation con
tro ls the recirculation mode automatically. If the
windows fog up, press the
I® FRO NT ! button.
Synchronization
When synchron izat ion is switched on, the same
settings are applied to both the dr iver and front
passenger , except for the seat heating/ventila
tion* . Synchronization switches
off when you ad
just the settings on the front passenger's side.
You can also switch synchronizat ion on by press -
i ng and holding the knob on the driver's side .
Ill>-
Page 86 of 300
Driving
Driving
Steering
Manually adjustable steering wheel
The height and reach of the steering wheel can
be adjusted .
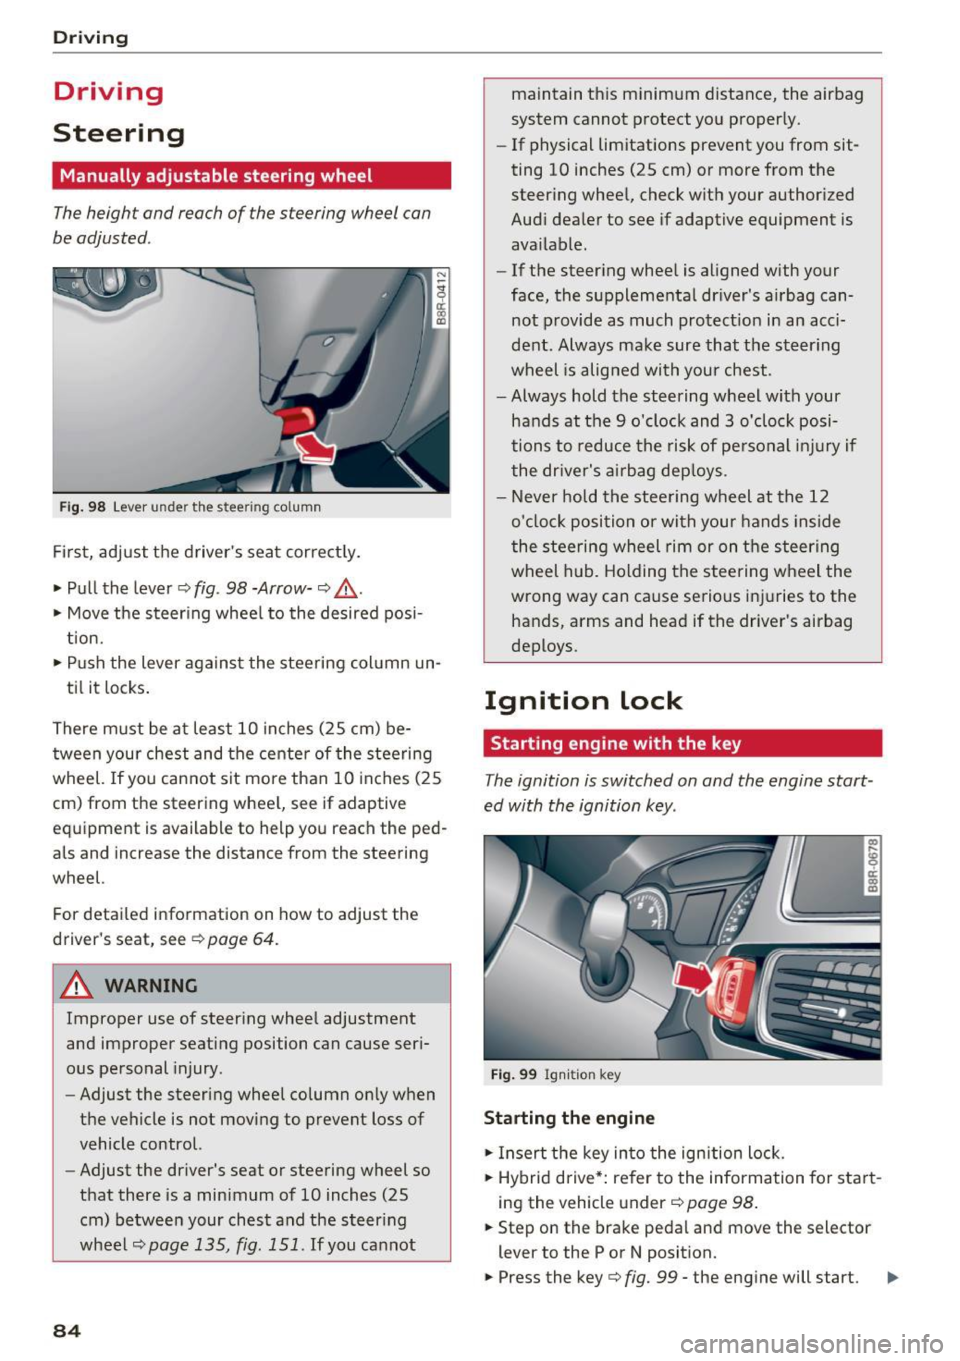
Fig . 98 Lever under the s tee ring column
Fi rs t, adjust t he driver 's sea t cor rect ly.
• Pull the lever¢
fig. 98 -Arrow-¢ &_.
• Move the steer ing whee l to the desired posi
t ion.
• Push the lever agains t the steering col umn un-
ti l it locks .
There m ust be at least 10 inches (25 cm) be
tween your chest and the cente r of the steering
wheel. If you cannot sit more than 10 inches (25
cm) from the steering whee l, see if adaptive
eq uipment is available to help you reach the ped
als and increase the distance from the steering
wheel.
For detailed information on how to adjust the
driver's seat, see ¢
page 64.
A WARNING
Improper use of steering whee l adjustment
and improper seati ng position can cause ser i
ous pe rsonal injury.
- Adjust the steering wheel column on ly when
the vehicle is not moving to prevent loss of
vehicle control.
- Adjust the dr iver's seat o r steering wheel so
that there is a min imum o f 10 inches (25
cm) be twee n your chest and the s teer ing
wheel
¢page 135, fig. 151 . If you ca nnot
84
maintain t his minim um distance, the airbag
system cannot p rotect yo u properly.
- If physical limitations prevent you from sit
ting 10 inches (25 cm) or more from the
steer ing whee l, check with your author ized
Aud i dea ler to see if adaptive equipment is
ava ilable.
- If the steer ing whee l is aligned with your
face, the s upplementa l dr iver's a irbag can
not provide as much protect ion in an acci
dent . Always make sure that the steer ing
wheel is alig ned wi th your chest.
- Always hold the steering w heel with your
hands at the 9 o'clock and 3 o'clock posi
tions to reduce the ris k of pe rsonal injur y if
the dr ive r's ai rb ag de ploys .
- Never ho ld the stee ring w heel at t he 12
o' cl oc k position or with your hands inside
the stee ring wheel rim or on t he steering
wheel hub. Holding the steering w heel the
wrong way can cause se rious i njuries to the
hands, arms and head if the driver's airbag
deploys .
Ignition lock
Starting engine with the key
The ignition is switched on and the engine start
ed with the ignition key.
F ig . 9 9 Ign iti on key
Starting the engine
• In sert the key in to the ignition lock.
• Hybrid d rive *: refer to the information fo r sta rt
i ng the veh icle under ¢
page 98 .
• Step on the brake pedal and move the selector
lever to the P or N posit ion.
• Press the key¢
fig. 99 -the eng ine will start. .,.
Page 91 of 300

..... N
co ~ CX)
..... I.Cl U"I
..... I.Cl .....
!I Is the ke y in the vehicle ?
This message appears in a veh icle w ith Conven
ience key* if the master key is removed from the
ve hicle w ith the engine r unning.
If the master
key is no longer in the vehicle, you cannot switch
on the ignition after stopping the engine and you
also cannot start the eng ine again. Moreover, you
cannot lock the veh icle from the outside with the
key.
Shift to P othe rwis e vehicle c an roll away . Doors
do not l ock if lever i s not in
P.
This message appears for safe ty reasons a long
with a warning s ignal.
It appears i f the selector
lever for the automatic transmission is not in the
P posit ion when switching
off the ignition. Move
the selector lever to the P posit ion, otherwise the
vehicle is not secured aga inst rolling away . You
also cannot lock the vehicle using the locking button* on the door handle or using the remote
key .
Turn off ignit io n befo re lea ving car
Th is message appears if the driver's door is
opened while the ignition is switched on . Always
switch
off the ignition if you are leaving the vehi
cle . See also
c:;, page 93.
Turn off ignit ion befo re lea ving car. Batte ry is
dis charging
This message appears if the d river's door is
ope ned while the ignition is switched on. Always
switch
off the ignition if you are leaving the vehi
cle . See a lso
c:;, page 93.
Shift to P and turn off ignition, otherwi se vehi
cle can roll awa y
This message appears if the driver 's door is
opened while the igni tion is sw itched on and t he
selec to r lever is not in t he P posit ion. Shift the
se lector lever into the P pos ition and switch of f
the ignition when you exit the vehicle . Otherwise
the vehicle cou ld roll . See also
c:;, page 93.
Con venien ce k ey defe cti ve ! Use igniti on lo ck
This message appears if the engine must be
started or stopped using the ignit ion key and not
the
! S TAR T ENGINE ST OPI* button .
Electromechanical
parking brake
Operation D
rivi ng
The electromechanical parking brake replaces
the hand brake.
F ig. 103 Center co nsole : P ark ing brake
.,. Pull on the switch Wl c:;, fig. 103 to apply the
parking brake. The indicator lights in the switch
and . (USA models)/ . (Canada models) in
the inst rument cluster illuminate .
.,. With the ignition switched on, step o n the
brake pedal or the accelerator pedal and press
t he swit ch(® at the same time to re lease the
parking brake . The indicator lights in the switch
and . (USA mode ls)/ . (Canada models) in
the instrument cluster go out.
You r vehicle is equ ipped wi th an electromechan i
ca l parking brake . The parking brake is designed
to prevent the vehicle from ro lling unintentional
ly and replaces the hand brake.
In add ition to the normal functions of a trad i
t iona l han d brake, the electromechanical parking
brake provides va rious convenience and safety
funct ions .
When starting from rest
-The integra l sta rting assist he lps yo u when
driving by automati cally releas ing the pa rking
brake
c:;, page 90, Starting from res t.
-When start ing on incline s, t he s tart ing assist
prevents the vehicle from uninten tionally ro ll
ing back . The braking force of the parking brake
is not re leased unti l sufficient driving force has
been built up at the wheels. .,.
89
Page 92 of 300
Driving
E m erg ency b ra ke function
An emergency b rake ensures that the veh icle can
be slowed down even if the normal brakes fai l
¢ page 91, Emergency broking.
A WARNING
If a drive range is engaged with the vehicle
stationary and the engine running, you must
in no instance accelerate care lessly. Other
w ise the vehicle will start to move immediate
ly -risk of an accident.
(D Tips
- If the parking brake is app lied with the igni
tion switched off, the indicator lights in the
switch and. (USA models)/ . (Cana-
da models) in the instrument cluster will go
out after a ce rtain per iod of t ime.
- Occasiona l noises whe n the parking b rake is
applied and released are normal and are not
a cause for conce rn.
- When the vehicle is par ked, the park ing
brake goes thro ugh a self-test cycle at regu
l a r i nte rvals. Any associa ted noises a re nor
mal.
Parking
" Press the brake ped al to stop the vehicle.
" Pull the switch
¢ page 89, fig. 103 to set the
parking brake.
" Move the selector lever to P.
" Turn the eng ine off¢ &_.
-
"When on incl ines or declines, turn the steering
wheel so that the vehicle w ill roll into the curb
if it beg ins to move .
A WARNING
-When you leave your vehi cle - even if on ly
br iefly- always remove the ign ition key. This
applies particular ly when c hildren remain in
the vehicle . Otherwise the children could
sta rt the engine, release the pa rking brake
or operate electrical eq uipment (e .g. power
windows). There is the risk of an acc ident.
- When the vehicle is loc ked, no one - particu
larly not children shou ld remain in the vehi-
90
-
cle. Locked doors make it more d ifficult for
emergency wo rkers to get into the vehicle -
putting lives at risk.
Starting from rest
The starting assist function ensures that the
parking broke is released automatically upon
starting.
Stopping and applying park ing brake
" Pull the switch to app ly the parking b rake.
Starting and automat ically releasing the
park ing brake
" When you start to d rive as usua l, the par king
brake is automatically released and yo ur vehicle
beg ins to move.
When stopp ing at a t raffic sig na l or s topping in
c ity traff ic on vehicles with an automat ic t rans
mission, the pa rking brake can be applied . The
vehicle does not have to be held with the foot brake. The parking brake eliminates the tendency
to c reep w ith a dr ive range engaged . As soon as
you drive off as usual, the parking brake is re
leased automat ica lly and the vehicle starts to
move.
Starting on slope s
When starting on incl ines, the starting assist pre
vents the vehicle from un intent iona lly rolling
back. The braking force of the parking brake is
not re leased u nti l sufficient dr iv ing fo rce has
been built up at the wheels.
@ Tips
For safety reasons, the park ing brake is re
l eased automatically on ly when the d river's
safety be lt is engaged in the b uckle.
Starting off with a trailer
To prevent rolling bock unintentionally on on in
cline, do the following:
" Keep the switch pu lled and depress the acceler
ator. The park ing brake stays applied and pre-
vents the ve hicle from roll ing backward.
IJ,,
Page 93 of 300
,....,
N
co
er::
co
,....,
that you are developing enough driving force at
the wheels by depressing the accelerator .
Depending on the weight of the r ig (vehi cle and
tra iler) and the severity of the incline, you may
ro ll backwards as you start . You can prevent roll
ing backwards by holding the parking brake
switch pulled out and accelerating -just as you
wou ld when starting on a hill with a conventiona l
h and brake .
Emergency braking
In the event that the conven tional brake system
fails or locks .
~ In an emergency, pull the sw itch and cont inue
to pull it to slow your veh icle down with the
parking b rake.
~ As soon as you release the switch or accelerate,
the b raking process stops .
If you pull the sw itch and hold it above a speed of
about 5 mph (8 km/h) , the eme rgency braking
function is in it iated . The vehicle is braked at all
four wheels by activating the hydraulic brake sys
te m. T he b rake perfo rman ce is sim ila r t o making
an em ergen cy sto p ~ ,& .
In o rder not to activate the emergency brak ing by
mista ke, an audib le wa rn ing tone (buzze r)
sounds w hen the sw itch is p ulled. As soon as t he
sw itch is rele ased, or the acce le ra to r p edal is de
p ressed, eme rgency bra king stops.
A WARNING
Emergency bra king should only be use d in an
emergency, w hen the normal foot brake has
fai led or the bra ke pedal is obstructed . Using
the par king b rake to perfo rm emergency
brak ing will slow your vehicle down as if you
had made a full bra ke ap plication . The laws of
physics cannot be suspended even wi th ESC
a n d its associated components (A BS, ASR,
E DS). In c orn ers and when road or weath er
c ondi tions are bad, a full brake ap plication
c an ca use the vehicle to sk id or the rear end to
break away· r isking an accident .
Driving
Driver messages in the instrument cluster
Caution: Vehicle parked too steep
T h is message appears when the pa rking bra ke is
applie d on an in cl in e that exceeds about 30%.
In this case the braki ng power o f the pa rking
brake may not be adequate to prevent the ve hi
cle from roll ing uninten tionally.
Press b rake pedal to release park ing brake
This dr iver message appears when the sw itch to
re lease the par king brake was pressed. The park
ing brake can only be released if you step o n the
brake pedal and at the same time press the
switch or you automatica lly re lease the park ing
bra ke w ith the sta rting ass ist ~
page 90 .
r.lJ Parking brake malfunction!
This dr iver message appears together w ith the
yellow
rlJ symbol whe n there is a parki ng brake
malfu nction .
Start/Stop system
Description
Applies to vehicles: wit h Start-Stop-Syste m
The Start -Stop -System can he lp increase f uel
economy and reduce CO2 emissions.
In the Start -S top -mode, the engine sh uts off au
tomat ica lly when the vehicle is stoppe d, such as
at a t raff ic light. The ignition remains switched
on d uring this stop phase. The eng ine will be a u
tomat ically restarted when needed.
T he last Start-Stop -System setting (on/off usin g
the b utton
10~ 1) will be restored when the ign i
t ion is turned on. The LED in the
10'" 1 button turns
on when the Start-Stop-System is switched off
manua lly .
Ba sic requirements for the Start-Stop mode
- The d river 's door is closed.
- The driver 's sea t belt is latc hed.
- The hood is closed.
- The vehicle must have bee n driven fast er than
2.5 mph (4 km/h) s in ce the last s top.
- A t railer is not hitched to the vehicle . .,.
91
Page 118 of 300
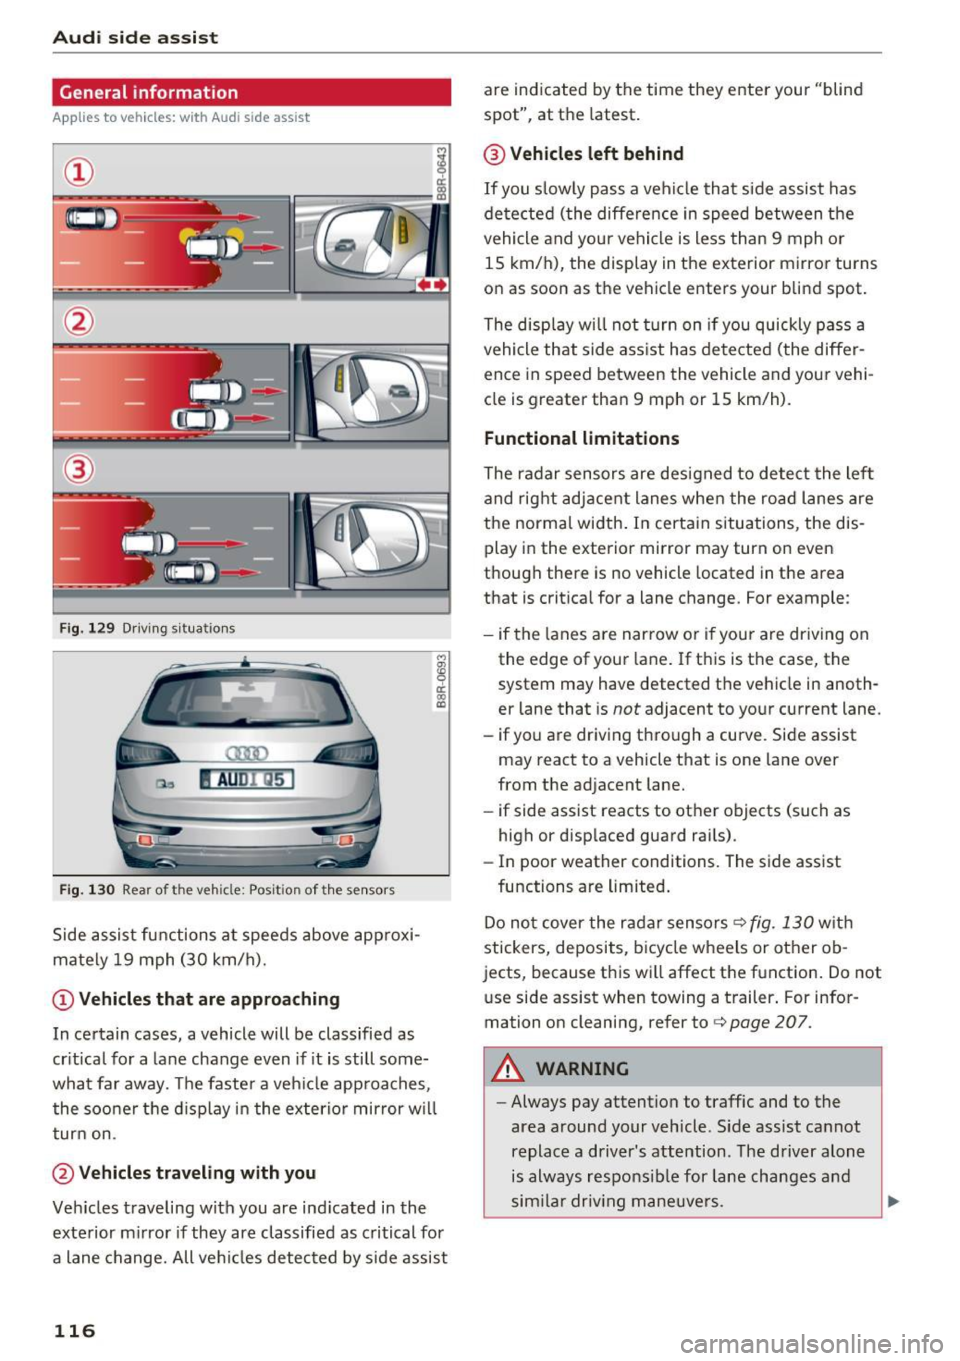
Audi side assist
General information
Applies to vehicles: with Audi side assist
F ig . 129 Driving s it ua tion s
Fig. 130 Rear of the veh icle: Posit ion of the se nsor s
Side assist functions at speeds above approxi
mately 19 mph (30 km/h).
(D Vehicles that are appro aching
M
! OJ CD
In certain cases, a vehicle will be classified as
cr itical for a la ne change even if it is still some
what far away. The faster a veh icle approaches ,
the soo ner the d isplay in the exterior mirror w il l
turn on.
@ Vehicles tra veling with you
Veh icles traveling with you are ind icated in the
exterior m irror if they are classified as critical for
a lane change. All ve hicl es detected by side assist
116
are indicated by the time they enter your "blind
spot", at th e latest .
@ Vehicle s left behind
If you slow ly pass a vehicle that s ide assist has
de tected (the diffe rence in speed between the
vehicle and your vehicle is less than 9 mph or
15 km/h), the display in the exterior mirror turns
on as soon as the vehicle enters your blind spot.
The display w ill not turn on if you quickly pass a
vehicle that side ass ist has detected (the differ
ence in speed between the vehicle and your vehi
cle is greater than 9 mph or 15 km/h).
Functional limitation s
The radar sensors are designed to detect the lef t
and rig ht adjacent lanes whe n the road lanes are
the normal width . In certa in situations, the dis
play in the exterior mirror may turn on even
t hough there is no vehicle located in the area
that is crit ica l for a lane change. For example :
- if the lanes a re narrow o r if your are driving on
the edge of your lane . If this is the case, the
system may have detect ed the vehicle in anoth
e r lane that is
not adjacent to your current lane.
- if yo u are driving through a curve. Side assist
may r eact to a vehicle that is on e lane over
from the ad jacent lane.
- if side assist reacts to other objects (such as
high or disp laced guard rai ls) .
- In poor weather condit ions. The side assist
functions are limited .
Do no t cover the radar sensors ¢
fig. 130 wit h
stickers, deposits, bicycl e wheels or other ob
jects, because this wi ll affect the function. Do not
u se side assist when towing a trailer . For infor
mation on cleaning, refer to ¢
page 207.
A WARNING
-Always pay attention to traffic and to the
area around your veh icle . S ide assist cannot
replace a driver's attention . The driver alone
is always responsib le for lane changes and
sim ila r driv ing mane uve rs .