tire pressure AUDI Q5 2017 Owners Manual
[x] Cancel search | Manufacturer: AUDI, Model Year: 2017, Model line: Q5, Model: AUDI Q5 2017Pages: 296, PDF Size: 74.43 MB
Page 5 of 296
CD
CD
.... N ,-... N ..... 0 0 C<'. 00
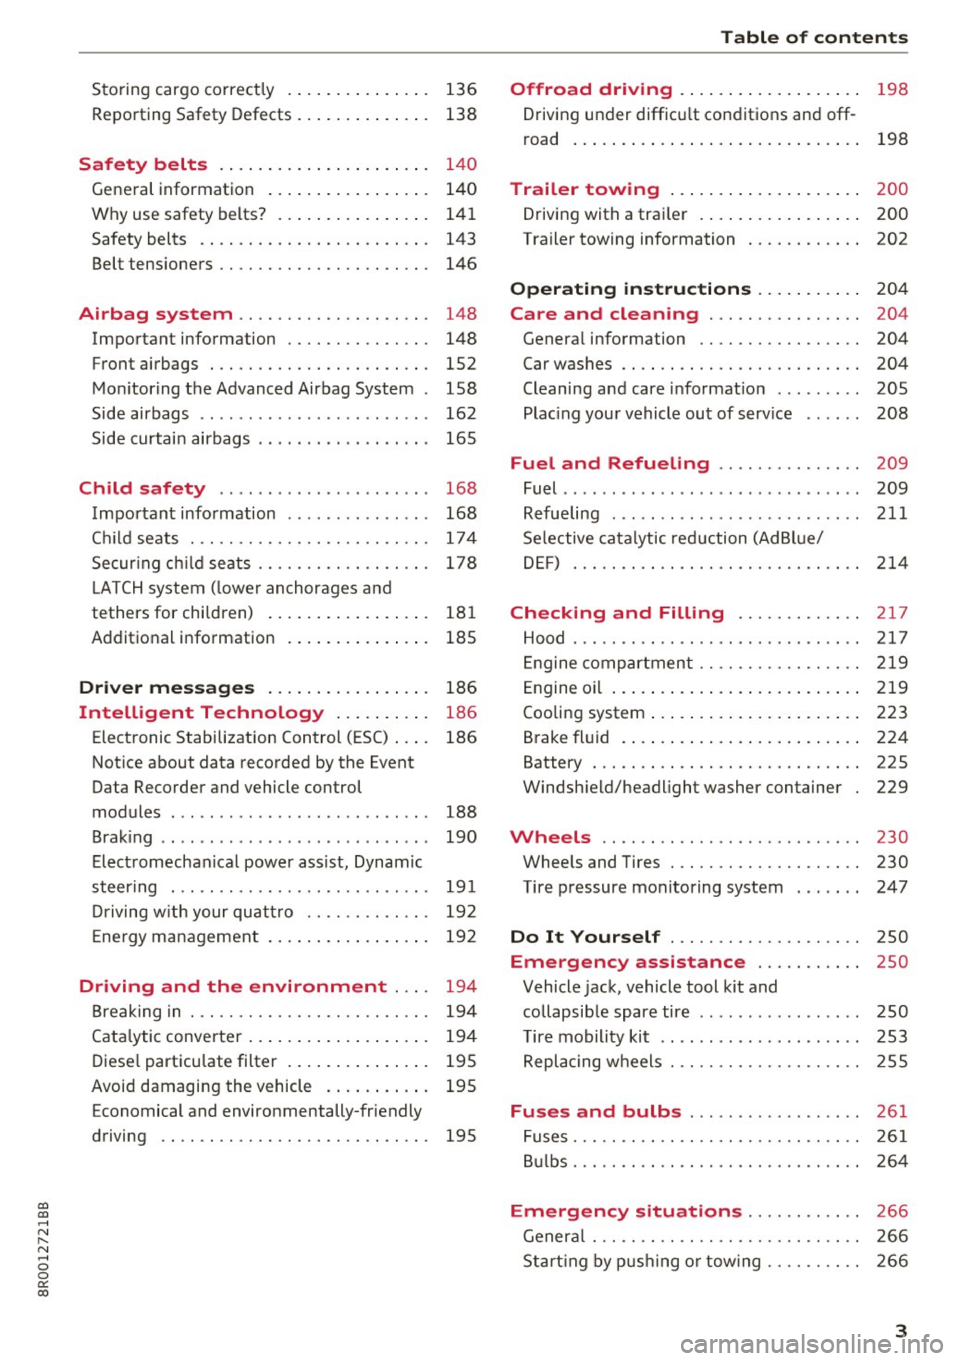
Storing cargo correctly . . . . . . . . . . . . . . . 136
R epo rting Safety Defects . . . . . . . . . . . . . . 138
Safety belts . . . . . . . . . . . . . . . . . . . . . . 14 0
General information . . . . . . . . . . . . . . . . . 140
Why use safety belts? . . . . . . . . . . . . . . . . 141
Safety belts . . . . . . . . . . . . . . . . . . . . . . . . 143
Belt tensioners . . . . . . . . . . . . . . . . . . . . . . 146
Airbag system . . . . . . . . . . . . . . . . . . . . 148
Important information . . . . . . . . . . . . . . . 148
Front airbags . . . . . . . . . . . . . . . . . . . . . . . 1S2
Monitoring the Advanced Airbag System . 158
Side airbags . . . . . . . . . . . . . . . . . . . . . . . . 162
Side curtain airbags . . . . . . . . . . . . . . . . . . 165
Child safety . . . . . . . . . . . . . . . . . . . . . . 168
Important information . . . . . . . . . . . . . . . 168
Ch ild seats . . . . . . . . . . . . . . . . . . . . . . . . . 174
S ecur ing ch ild seats . . . . . . . . . . . . . . . . . . 178
L ATCH system (lower anchorages and
tethers for chi ldren) . . . . . . . . . . . . . . . . . 181
Additional in fo rma tion
185
Driver messages . . . . . . . . . . . . . . . . . 186
Intelligent Technology . . . . . . . . . . 186
Elect ronic Stabilization Control (ESC) . . . . 186
Notice about data recorded by the Event
Data Recorder and vehicle control
modules . . . . . . . . . . . . . . . . . . . . . . . . . . . 188
B rak ing . . . . . . . . . . . . . . . . . . . . . . . . . . . . 190
E lect romechanical power assist, Dynamic
steering . . . . . . . . . . . . . . . . . . . . . . . . . . . 191
Dri ving with your quattro . . . . . . . . . . . . . 192
En erg y management . . . . . . . . . . . . . . . . . 192
Driving and the environment . . . . 194
Br eak ing in . . . . . . . . . . . . . . . . . . . . . . . . . 194
Catalytic converter . . . . . . . . . . . . . . . . . . . 194
Di ese l particulate filter . . . . . . . . . . . . . . . 195
Avoid damaging the vehicle . . . . . . . . . . . 195
Economical and environmentally-friendly
driving . . . . . . . . . . . . . . . . . . . . . . . . . . . . 195
Table of contents
Offroad driving . . . . . . . . . . . . . . . . . . .
198
Driving under difficult conditions and off-
ro ad . . . . . . . . . . . . . . . . . . . . . . . . . . . . . . 198
Trailer towing . . . . . . . . . . . . . . . . . . . . 200
Driving with a traile r . . . . . . . . . . . . . . . . . 200
Trailer towing information . . . . . . . . . . . . 202
Operating instructions . . . . . . . . . . . 204
Care and cleaning . . . . . . . . . . . . . . . . 204
Genera l information . . . . . . . . . . . . . . . . . 204
Car washes . . . . . . . . . . . . . . . . . . . . . . . . . 204
Cleaning and care information . . . . . . . . . 205
Plac ing your vehicle out of service . . . . . . 208
Fuel and Refueling . . . . . . . . . . . . . . . 209
Fuel .. .. .. .. .. .. .. ... .. ..... ... .. .. 209
Refueling ... .. .. .. .... .. ... .... .. .. 211
Selective catalytic reduct ion (Ad Blu e/
DEF) . . . . . . . . . . . . . . . . . . . . . . . . . . . . . . 214
Checking and Filling ........... .. 2 17
Hood ..... .. .. .. ................. .. 217
Eng ine compartm ent . . . . . . . . . . . . . . . . . 219
Eng ine oil . . . . . . . . . . . . . . . . . . . . . . . . . . 219
Cooling system . . . . . . . . . . . . . . . . . . . . . . 223
Brake fluid . . . . . . . . . . . . . . . . . . . . . . . . . 224
Battery . . . . . . . . . . . . . . . . . . . . . . . . . . . . 225
Windshield/headlight washer container
229
Wheels ........................... 230
Wheels and Tires . . . . . . . . . . . . . . . . . . . . 230
Tire pressure monitoring system 247
Do It Yourself . . . . . . . . . . . . . . . . . . . . 250
Emergency assistance . . . . . . . . . . . 250
Vehicle jack, vehicle tool kit and
collapsible spare tire . . . . . . . . . . . . . . . . . 250
T ire mobility kit . . . . . . . . . . . . . . . . . . . . . 253
Replacing wheels . . . . . . . . . . . . . . . . . . . . 255
Fuses and bulbs . . . . . . . . . . . . . . . . . . 261
Fuses . . . . . . . . . . . . . . . . . . . . . . . . . . . . . . 261
Bulbs . . . . . . . . . . . . . . . . . . . . . . . . . . . . . . 264
Emergency situations . . . . . . . . . . . . 266
General . . . . . . . . . . . . . . . . . . . . . . . . . . . . 266
Starting by pushing or tow ing . . . . . . . . . . 266
3
Page 14 of 296
Instruments and indicator lights
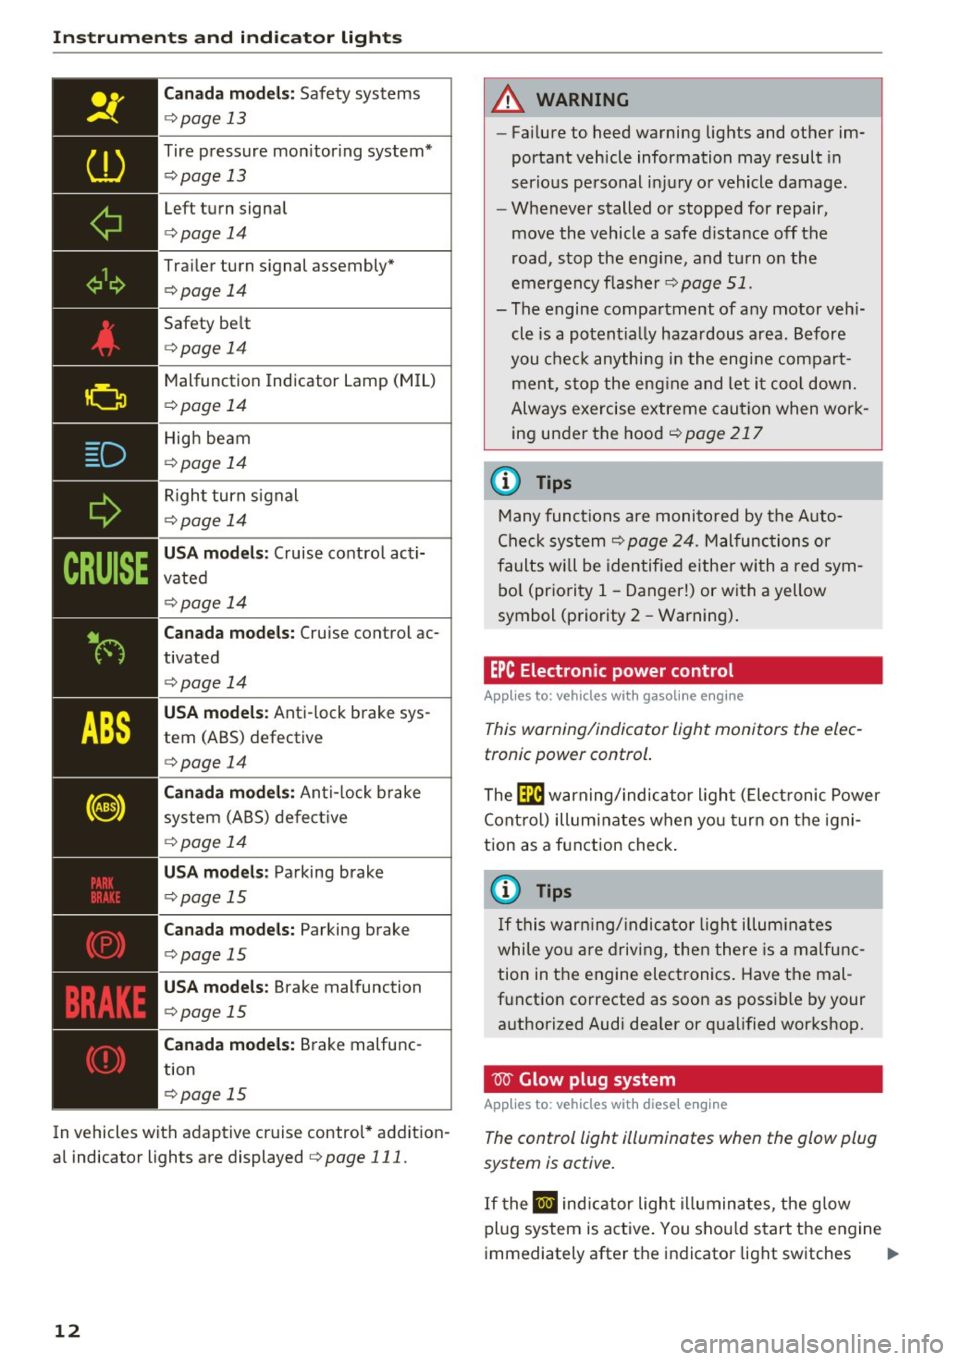
Canada models: Safety systems
c:> page 13
Tire pressure mon itor ing system*
c:> page 13
Left turn signal
c:>page 14
Trailer turn s ignal assembly*
c:> page 14
Safety be lt
c:> page 14
Malfunction Indicator Lamp (M IL)
c:> page 14
High beam
c:>page 14
Right turn signal
c:> page 14
USA models: Cruise control acti
vated
c:> page 14
Can ada mode ls: Cruise control ac
tivated
c:> page 14
USA model s: Anti-lock brake sys
tem (ABS) defective
c:> page 14
Canada mode ls: Anti- lock b rake
system (ABS) defect ive
c:> page 14
USA mod els : Parking brake
c:> page 15
Can ad a mode ls: Parking brake
c:> page 15
USA models: Brake malfunction
c:> page 15
Canada mode ls: Brake malfunc
tion
c:> page 15
In vehicles with adaptive cruise control* addition
al indicator lights are displayed
c:> page 111.
12
A WARNING
-
-Fa ilure to heed warning lights and other im-
portant vehicle information may result in
serious personal inj ury or vehicle damage .
- Whenever stalled or stopped for repair,
move the vehicle a safe d istance off the
road, s top the eng ine, and turn on the
emergency flasher
c:> page 51.
- The engine compartment of any motor veh i
cle is a potent ially hazardous area. Before
you chec k anything in the engi ne compart
men t, s top the eng ine and let i t coo l down.
Always exercise extreme caut ion when wor k
ing under the hood
c:>page217
(D Tips
Many func tions are monito red by the Auto
Check sys tem
c:> page 24. Malfunc tions or
faults wi ll be identified either wi th a red sym
bo l (pr io rity 1 -Danger!) or with a yellow
symbol (priority 2 -Warning).
EPC Electronic power control
App lies to: vehicles wi th gaso line e ngi ne
This warning/indicator light monitors the elec
tronic power control .
The Ila warning/indicator ligh t (E lect ronic Power
Cont rol) illuminates when yo u turn on the igni
tion as a function check .
@ Tips
If this warn ing/ indica to r li gh t illum inates
while yo u are driving, then there is a ma lfu nc
tion in the engine electronics . Have the mal
f u nction corrected as soon as possible by your
a uthorized Audi dea ler or q ualified workshop.
W Glow plug system
App lies to : vehicles wi th diese l engin e
The control light illuminates when the glow plug
system is active.
If the II ind icator light i lluminates, the g low
pl ug system is active . You shou ld start the engine
immediately after the indicator light switches .,.
Page 15 of 296
CD
CD
.... N ,-... N ..... 0 0 C<'. 00
off. Th e indicator light only illuminates for ap
proximately 1 second if the engine is warm or if
the outside temperature is above 46 QF (8 QC).
(D Tips
- If the glow plug indicator light illuminates
while driving, there is an engine control
malfunction. The engine should be checked
immediately.
- If the indicator light does not illuminate at
all when switching the ignition on, there
may be a malfunction in the glow plug sys
tem. The engine should be checked.
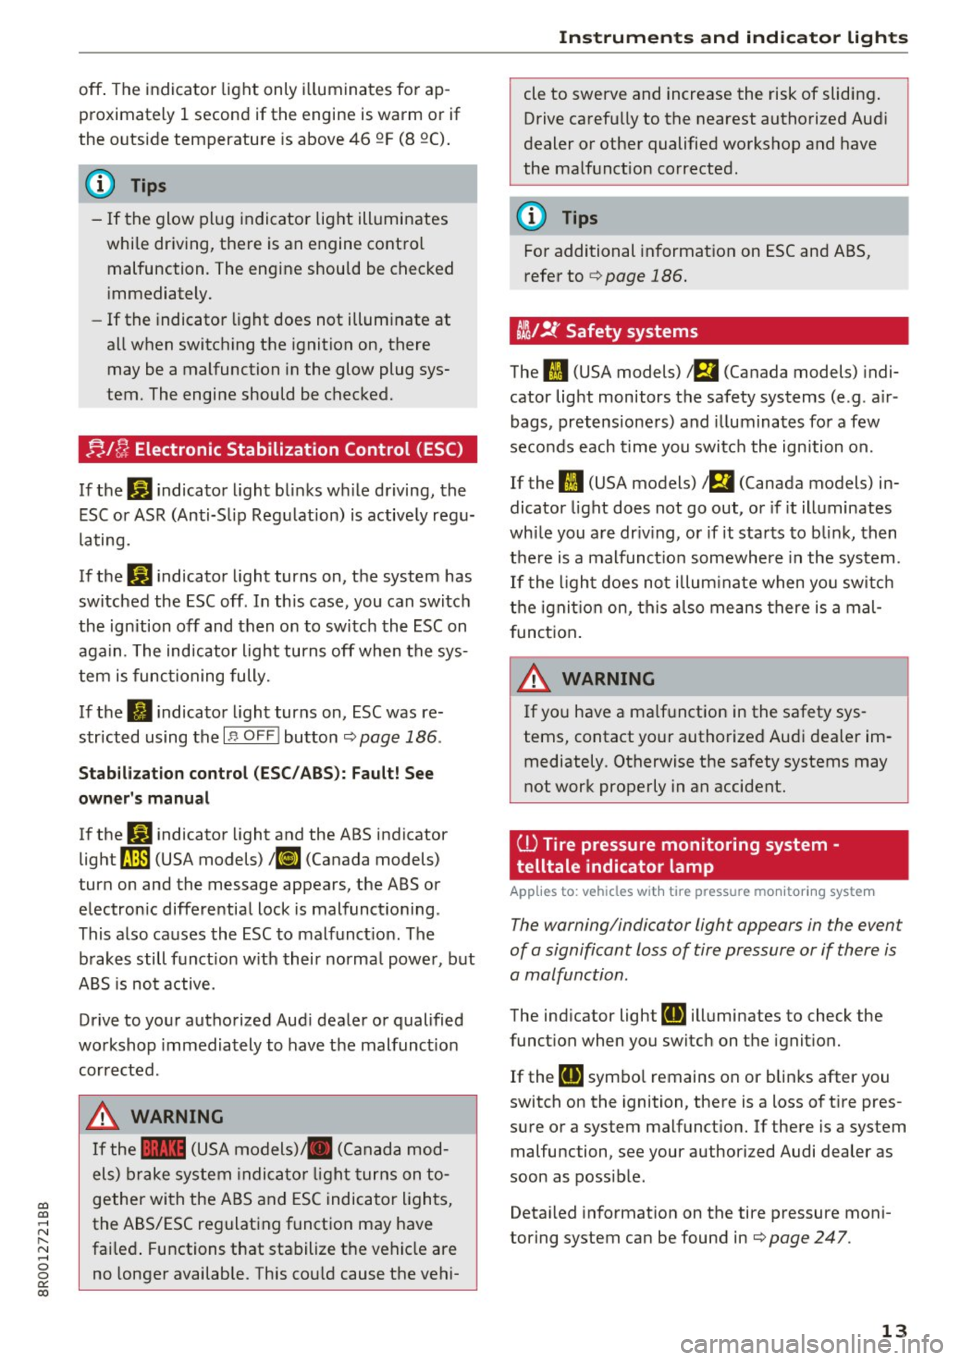
;J,./ fj Electronic Stabilization Control (ESC )
If the Gl indicator light blinks wh ile driving, the
ESC or ASR (Anti-Slip Regu lation) is active ly regu
lating.
If the
DJ indicator light turns on, the system has
switched the ESC off. In this case , you can switch
the ignition off and then on to switch the ESC on
again. The indicator light turns off when the sys
tem is functioning fully.
If the
II i ndicator light turns on, ESC was re
stricted using the
I " OFF ! button ¢ page 186 .
Stabilization control (ESC /ABS): Fault! See
owner 's manual
If the GI indicator light and the ABS indicator
light ~ (USA models)
1iJ (Canada models)
turn on and the message appears, the ABS or
electronic differential lock is malfunctioning .
This also causes the ESC to malfunct io n. The
brakes still funct ion w ith their normal power, but
ABS is not active.
Drive to your authorized Audi dealer or qualified
workshop immediately to have the malfunct io n
corrected.
A WARNING
If the 1111 (USA models) JII (Canada mod
els) brake system indicato r light turns on to
gether with the ABS and ESC indicator lights,
the ABS/ESC regulating function may have
fai led . Functions that stabilize the vehicle are
no longer available. This cou ld cause the vehi-
Instruments and indicator lights
cle to swerve and increase the risk of sliding.
Drive carefully to the nearest authorized Aud i
dealer or other qualified workshop and have
the malfunction corrected.
(D Tips
For additional information on ESC and ABS,
refer to ¢
page 186.
t!i/!{' Safety systems
The II (USA models) a (Canada models) indi
cator light monitors the safety systems (e.g . a ir
bags, pretensioners) and illuminates for a few
seconds each time you switc h the ignition on.
If the
II (USA models) 1 m (Canada models) in
dicator light does not go out, or if it illuminates
whi le you are dr iv ing, or if it starts to blink, then
there is a malfunct ion somewhere in the system .
If the light does not illum inate when you switch
the ignition on, this also means there is a mal
function.
A WARNING
-
If you have a ma lfunction in the safety sys
tems, contact your authorized Audi dealer im mediately . Otherwise the safety systems may
not work properly in an accident.
(l) Tire pressure monitoring system ·
telltale indicator lamp
App lies to: veh icles w it h tire pressure mo nitor ing syste m
The warning/indicator ligh t appears in the event
of a significant loss of tire pressure or if there is
a malfunction.
The indicator light [DJ illuminates to check the
function when you switch on the ignition.
If the
[DJ symbol remains on or blinks after you
switch on the ignition, there is a loss of t ire pres
sure or a system malfunction.
If there is a system
malfunction, see your authorized Audi dealer as
soon as possible.
Detai led information on the tire pressure moni
toring system can be found in ¢
page 247.
13
Page 19 of 296
a,
a,
..... N r-N ..... 0 0
0:
co
Driver information
system
Introduction
General notes
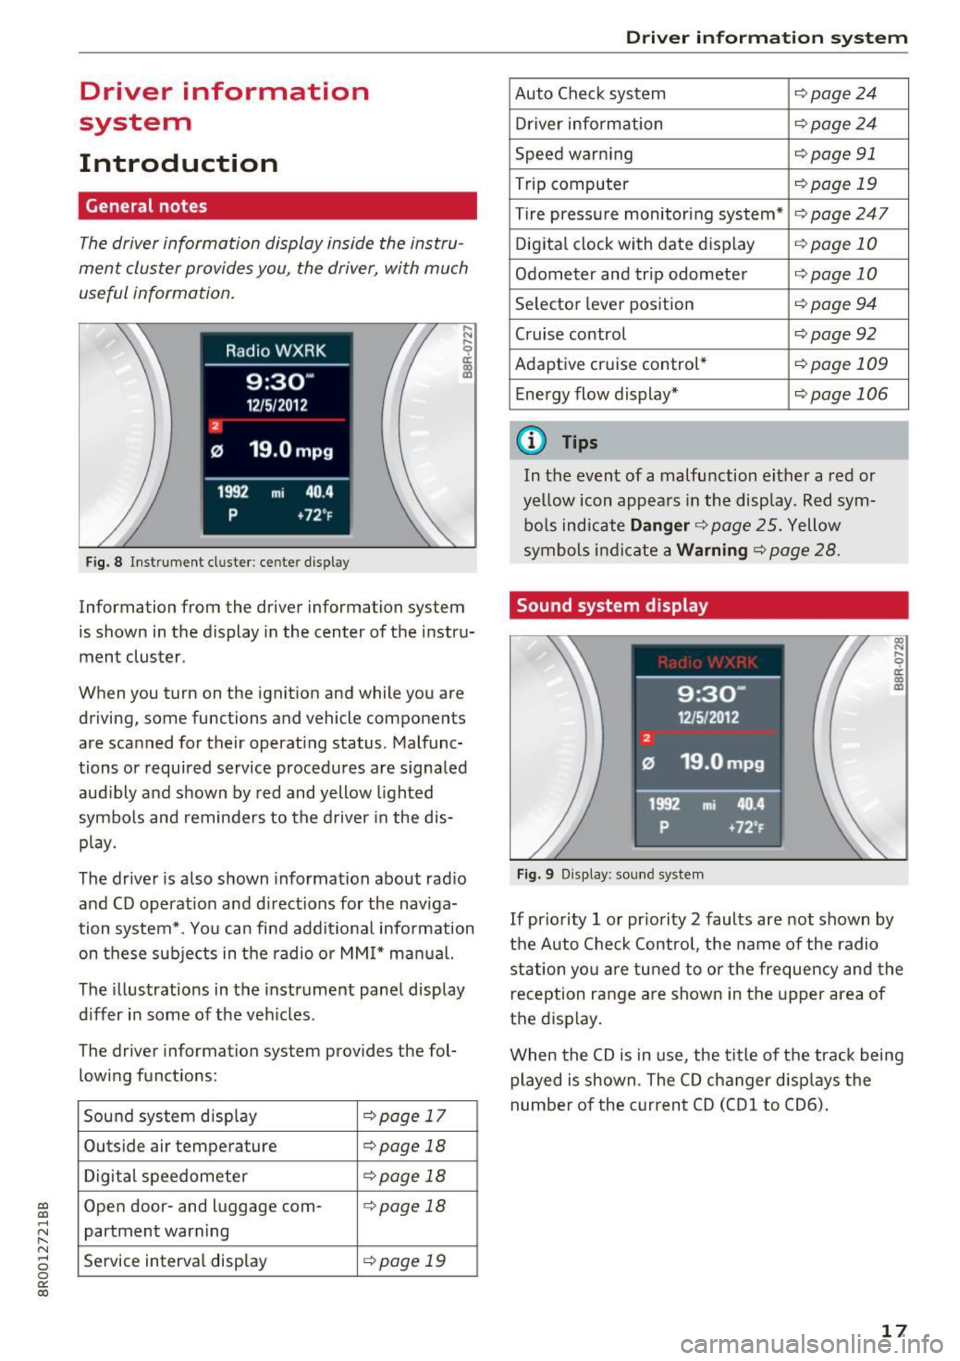
The driver information display inside the instru
ment cluster provides you , the driver, with much
useful information.
Fig. 8 Instrument cl uster : ce nt er display
Information from the driver information system
is shown in the display in the center of the instr u
ment cluster.
When you turn on the ignition and while you are
driving, some functions and vehicle components
are sca nned for their operat ing status. Malfunc
tions or required service procedures are signaled
audibly and shown by red and yellow lighted
symbols and reminders to the driver in the dis
play.
The driver is also shown information about rad io
and CD operat ion and directions for the naviga
tion system*. You can find addit ional information
on these subjects in the radio or MMI* manual.
The illustrations in the instrument panel display
differ in some of the vehicles .
The driver information system provides the fol
lowing functions:
Sound system disp lay
c:> page 17
Outside air temperature c:>page 18
Digital speedometer c:>page 18
Open door- and luggage com-c:> page 18
partment warning
Service interval display
c:> page 19
Driver in forma tion system
Auto Check system c:>page24
Driver information c:>page 24
Speed warning c:>page 91
Trip computer c:>page 19
Tire pressure monitoring system* c:>page247
Digital clock with date display c:>page 10
Odometer and trip odometer c:>page 10
Selector lever position c:> page 94
Cruise control c:>page92
Adaptive cruise control* c:>page 109
Energy flow display* c:>page 106
(D Tips
In the event of a malfunction either a red or
yellow icon appears in the display. Red sym
bols indicate
Danger c:>page 25. Yellow
symbols indicate a
Warning c:> page 28.
Sound system display
Fig. 9 Display: sou nd system
l!3 .... 0 er. m m
If priority 1 or pr iority 2 faults are not shown by
the Auto Check Control, the name of the radio
station you are tuned to or the frequency and the
reception range are shown in the upper area of
the display .
When the CD is in use , the tit le of the track being
played is shown. The CD changer disp lays the
number of the current CD (CDl to CD6).
17
Page 26 of 296
Driver information system
Lamp (MIL) II will illuminate. If this occurs,
contact the nearest authorized Audi dealer for
assistance.
A WARNING
Always observe the posted speed limits and
adjust your speed to suit prevailing road, traf
fic and weather conditions. Never drive your
vehicle faster than the maximum speed rating
of the tires installed.
Auto Check Control
Introduction
The Auto-Check control monitors the function of
certa in vehicle features and components. It sim
ply makes sure these features and components
are working properly. The Auto-Check control
works as long as the ignition is on, as well as
whenever the veh icle is driven.
-
If a component is malfunctioning or if the need
for an urgent repair has been detected, this will
appear in the instrument cluster display. You will
also hear an audib le warning tone . The displays
are color coded in eit he r red or yellow depending
on their level of priority.
A red symbol means
Danger, a yellow symbol in
d icates
Warning . In certain s ituations, informa
tion message for the driver appea r in addition to
the red and yellow symbols .
Note about automatic transmission
The Auto -Check Control will automatically per
form a test each time you switch on the ignition. W ith the selector lever in P or N, the fo llowing
message appears in the display:
When stationary apply brake pedal while select
ing gear
When you select a different gear (for example: R, D, etc.), the message will disappear and the Au
to-Check function is displayed.
If there is a malfunct ion, then the malfunction
message will appear about 15 seconds after you
start the vehicle. At the same time you will hear a
warn ing tone.
24
Driver information messages
Driver information messages are shown in the in
strument cluster display in addition to symbols.
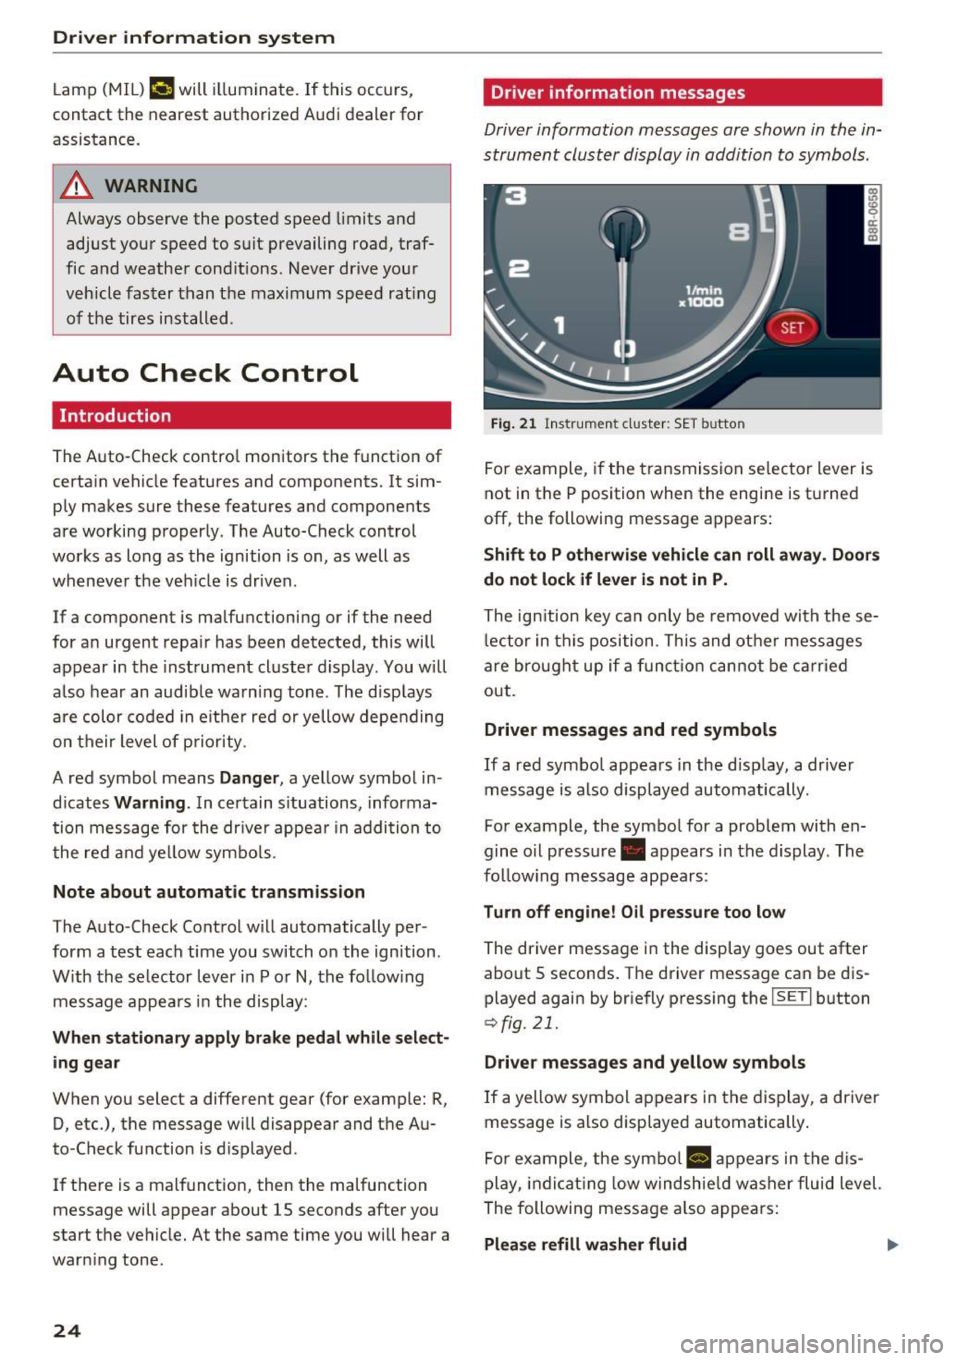
Fig. 21 Instrument cluste r: SET button
For example, if the transmission selector lever is
not in the P position when the engine is tu rned
off, the following message appears:
Shift to P otherwise vehicle can roll away. Doors
do not lock if lever is not in P.
The ign ition key can only be removed with these
lector in this position. This and other messages
are brought up if a function cannot be carried
out.
Driver messages and red symbols
If a red symbol appears in the disp lay, a driver
message is also displayed automatically.
For example, the symbol for a problem with en
gine o il pressure . appears in the display. The
follow ing message appears:
Turn off engine! Oil pressure too low
The driver message in the display goes out after
about 5 seconds. The driver message can be dis played again by briefly pressing the
I SETI button
r::> fig. 21.
Driver messages and yellow symbols
If a yellow symbol appears in the display, a driver
message is also displayed automatically.
For example, the symbol
a, appears in the dis
play, indicating low windshie ld washer fluid level.
The following message also appears:
Please refill washer fluid II>-
Page 31 of 296
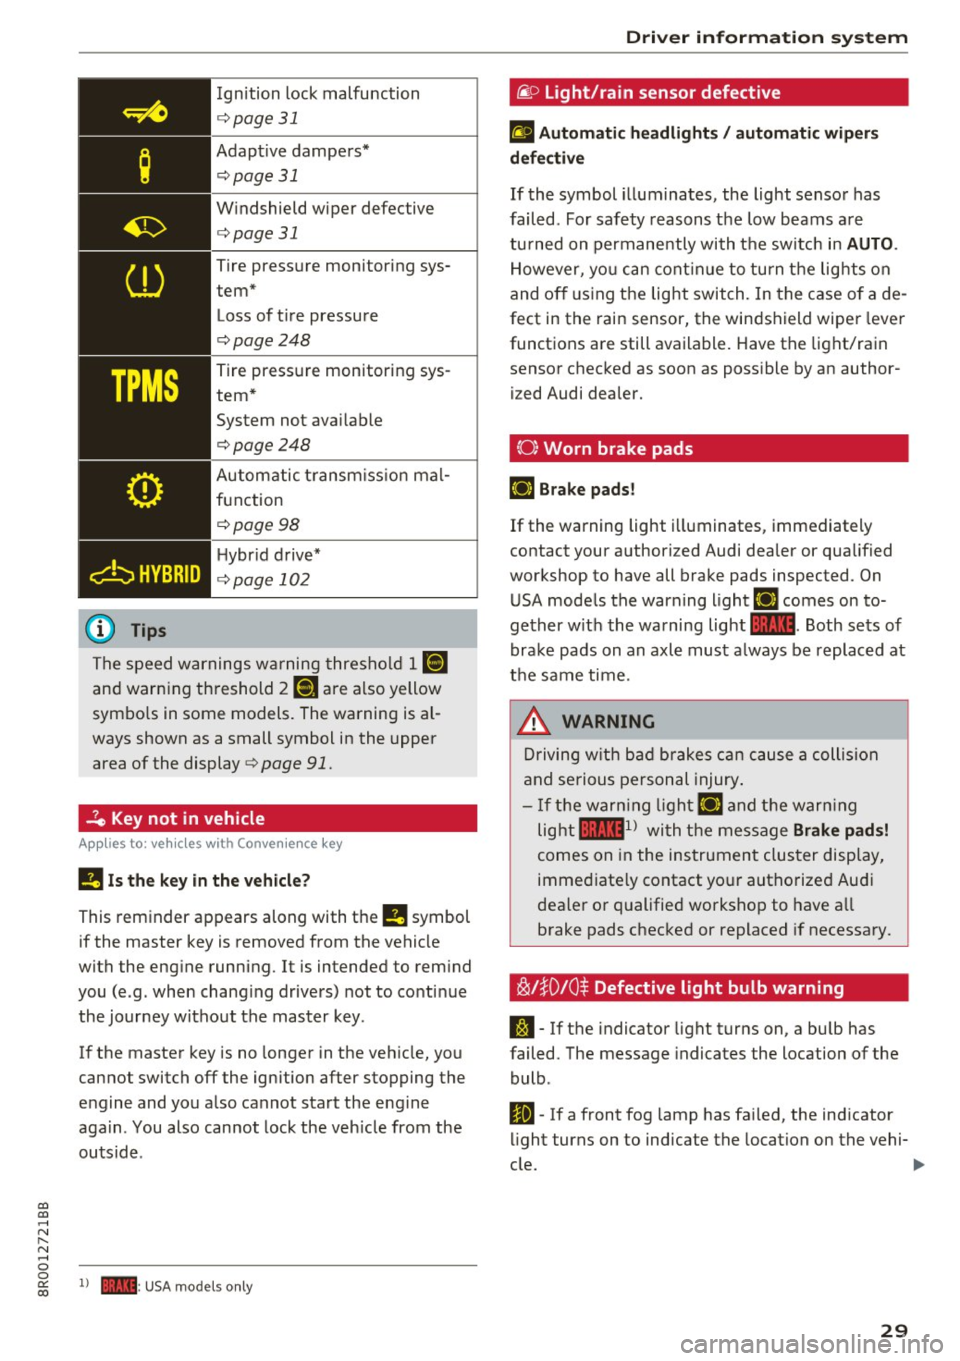
Ignition lock malfunction
¢ page 31
Adaptive dampers*
¢ page 31
Windshield wiper defective
¢ page 31
Tire pressure monitoring sys
tem*
Loss of ti re pressure
¢ page248
Tire pressure monitoring sys
tem *
System not ava ilable
¢page248
Automatic t ransm iss ion mal
function
¢ page98
Hybr id d rive*
¢ page 102
The speed warnings wa rning thresho ld 1 1aj
and warning th reshold 7 ISi are also yellow
symbo ls in some models. The warning is al
ways shown as a small symbol in the upper area of the display
¢ page 91.
-le Key not in vehicle
Appl ies to : ve hicl es with Conve nien ce key
!I Is the ke y in the v ehicle ?
This reminder appears along with the !I symbol
if the master key is removed from the vehicle
with the eng ine running . It is intended to rem ind
you (e .g . when chang ing drivers) not to conti nue
the journey without the master key.
If the master key is no longer in the veh icle, you
cannot switch off the ignition after stopping the
engine and you a lso cannot start the engine
aga in . You also cannot lock the veh icle from the
ou ts ide .
CD
CD
.... N ,-... N .... 0 0
~ 1) - : USA mod els onl y
Dri ver informa tion system
@f> Light/rain sensor defective
fl Automati c headlight s/ automati c wip ers
d efective
If the symbol illum inates , the light sensor has
failed . For safety reasons the low beams are
tu rned on permanently with the switch in
AUTO .
However, yo u can cont inue to turn t he lig hts on
and off us ing the light switch. In the case of a de
fect in the rain sensor, the windshield wipe r lever
functions are still available. Have the light/rain sensor checked as soon as poss ible by an author
i z ed Audi dealer.
{0) Worn brake pads
liJ Brake pads!
If the warning light illuminates , immediat ely
contact your authori zed Audi dealer or qualified
workshop to have all brake pads inspected . On
USA mode ls the warning light
liJ comes on to
gether w ith the warning light
1111 . Both sets of
brake pads on an axle must a lways be replaced at
the same time.
&_ WARNING
Driving w ith b ad b rakes can cause a collision
and serious personal injury .
- If the warn ing light liJ and the warn ing
light
llll1 l with the message Brake pad s!
comes on in the instrument clus ter display,
immed iate ly contact yo ur authorized Aud i
dealer o r qualified workshop to have a ll
brake pads checked or replaced if necessary .
~!}0 10$ Defective light bulb warning
J:1 -If the indicator light turns on, a bu lb has
failed. The message indicates the location of the
bulb .
II-If a front fog lamp has fa iled, the ind icator
li ght turns on to indicate the location on the vehi-
c le.
~
29
Page 133 of 296
CD
CD
.... N ,-... N ,....,
0 0 C<'. 00
Driving safety
Basics
Safe driving habits
Please remember -safety first!
This chapter contains important information,
tips, instructions and warnings that you need to
read and observe for your own safety, the safety
of your passengers and others . We have summar
ized here what you need to know about safety
belts, airbags, child restraints as well as child
safety. Your safety is for us
priority number 1. Al
ways observe the information and warnings in
this section - for your own safety as well as that
of your passengers.
The information in this section applies to all
model versions of your vehicle. Some of the fea
tures descr ibed in this sections may be standard
equipment on some models, or may be optional
equipment on others. If you are not sure, ask
your authorized Audi dealer.
A WARNING
- Always make sure that you follow the in
structions and heed the WARNINGS in this
Manual. It is in your interest and in the in
terest of your passengers .
-
-Always keep the complete Owner's Litera
ture in your Audi when you lend or sell your
vehicle so that this important information
will always be available to the driver and
passengers.
- Always keep the Owner's literature handy so
that you can find it easily if you have ques
tions.
Safety equipment
The safety features are part of the occupant re
straint system and work together to help reduce
the risk of injury in a wide variety of accident sit
uations.
Your safety and the safety of your passengers
should not be left to chance. Advances in tech
nology have made a var iety of features available
to help reduce the risk of injury in an accident.
Driving safety
The following is a list of just a few of the safety
features in your Audi:
- sophisticated safety belts for driver and all pas-
senger seat ing pos itions,
- be lt force limiters for the front seats,
- belt pretensioners for the seats,
- belt height adjustment for the front seats,
- head restraints for each seating position,
- front airbags,
- side airbags in the front seats and outer rear
seats *,
- side curtain airbags,
- special LATCH anchorages for child restraints,
- adjustab le steering column.
These individual safety features, can work to gether as a system to help protect you and your
passengers in a wide range of accidents . These
features cannot work as a system if they are not
always correctly adjusted and correctly used.
Safety is everybody's responsibility!
Important things to do before driving
Safety is everybody 's job! Vehicle and occupant
safety always depends on the informed and care
ful driver .
For your safety and the safety of your passen
gers,
before driving always:
.,. Make sure that all lights and signals are operat
ing correctly.
.,. Make sure that the tire pressure is correct .
.,. Make sure that all windows are clean and afford
good visibility to the outside .
.,. Secure all luggage and other items carefully
~page 74 .
.,. Make sure that nothing can interfere with the
pedals.
.,. Adjust front seat, head restraint and mirrors
correctly for your height.
.,. Instruct passengers to adjust the head re
straints according to their height.
.,. Make sure to use the right child restraint cor
rectly to protect children
¢ page 168, Child
safety. ..,.
131
Page 139 of 296
CD
CD
.... N ,-... N .... 0 0 C<'. 00
-Always put objects, for example, luggage or
other heavy items in the luggage compart
ment.
- Always secure objects in the luggage com
partment using the tie-down eyelets and
suitable straps.
A WARNING
Heavy loads will influence the way your vehi
cle handles . To help reduce the risk of a loss
of control leading to serious personal injury:
- Always keep in mind when transporting
heavy objects, that a change in the center of
gravity can also cause changes in vehicle
hand ling:
- Always distribute the load as evenly as
possible.
- Place heavy objects as far forward in the
luggage compartment as possible.
- Never exceed the Gross Axle Weight Rating
or the Gross Vehicle Weight Rating specified
on the safety compliance sticker on the left
door jamb. Exceeding permissible weight
standards can cause the vehicle to slide and
handle differently .
- Please observe information on safe driving
<=>page 131.
A WARNING
To help prevent poisonous exhaust gas from
being drawn into the vehicle, always keep the
rear lid closed while driving .
- Never transport objects larger than those
fitting completely into the luggage area be
cause the rear lid cannot be fully closed .
- If you absolutely must drive with the rear lid
open, observe the following notes to reduce
the risk of poisoning:
- Close all windows,
- Close the Pano ramic sliding sunroof*,
- Open all air outlets in the instrument pan-
el,
- Switch off the air recirculation,
- Set the fresh air fan to the highest speed .
Driving safety
A WARNING
-
Always make sure that the doors, all win
dows, the Panoramic sliding sunroof* and the
rear lid are securely closed and locked to re
duce the risk of injury when the vehicle is not
being used .
-After closing the rear lid, always make sure
that it is properly closed and locked.
- Never leave your vehicle unattended espe
cially with the rear lid left open. A child
could crawl into the vehicle through the lug
gage compartment and close the rear lid be
coming trapped and unable to get out. Be
ing trapped in a vehicle can lead to serious
personal injury.
- Never let children play in or around the vehi
cle.
- Never let passengers ride in the luggage
compartment. Vehicle occupants must al
ways be properly restrained in one of the ve
hicle's seating positions.
(D Tips
-Air circulation helps to reduce w indow fog
ging . Stale air escapes to the outside
through vents in the trim panel. Be sure to
keep these slots free and open.
- The tire pressure must correspond to the
load. The tire pressure is shown on the tire
pressure label. The tire pressure label is lo
cated on the driver's side B-pillar . The tire
pressure label lists the recommended cold
tire inflation pressures for the vehicle at its
maximum capac ity weight and the tires that
were on your vehicle at the time it was man
ufactured. For recommended t ire pressures
for normal load conditions, please see chap
ter
r=> page 241.
Tie-downs
The luggage compartment is equipped with four
tie-downs to secure luggage and other items.
Use the tie-downs to secure your cargo properly
Q page 136, Loading the luggage compartment . ..,_
137
Page 200 of 296
Offroad dri ving
Offroad driving
Driving under difficult
conditions and off-road
General information
The operation of the Electronic Stabilization Con
trol (ESC) is expanded for operation away from
paved roads. In situations where slip or a differ
ential locking function is required, the offroad mode can be activated
<=> page 186. Your Audi al
so has permanent all-wheel drive in addition .
However, your Audi is not a pure offroad vehicle.
It was not built for driving under extreme condi
tions, e.g. for trips that are in the nature of an
expedition .
Drive only on roads and offroad sections which
match the design of your vehicle and your abili
ties as a driver. Never take risks!
Befo re driving offroad
-Check the eng ine oil level, tire pressure, coo l
ant level, and the fluid leve l in the windshield
washer reservoir.
- Stow luggage items and other objects in the
lu ggage compartment, and secure them
against sliding around.
After driving offroad
-After trips offroad, remove any twigs and other
foreign objects from the grill, the underbody
and the wheels. Pay specia l attention to foreign
objects (stones) which have become lodged in
the tire tread.
- Clean the body and the vehicle underside, and
inspect the vehicle for possible damage.
- Clean dirty windows, headlamp lenses, rear
lights, and license plates.
- Perform a brake check (particularly after travel
ling through water) .
A WARNING
- Drive especially attentive ly and plan ahead
in difficult road conditions and when off
road. Excessive speed or incorrect maneu
vers can cause in juries and damage to the
vehicle.
198
- Always adapt your speed and driving style to
road, offroad, traffic, and weather condi
tions. Drive especially slowly offroad when
your view is restricted.
- Please be aware that in offroad mode, par
ticularly on a smooth and slippery road, the
wheels may have an increased tendency to
spin and the vehicle may break away - dan
ger of skidding!
- Stability is limited in the offroad mode.
® For the sake of the environment
Avoid damage to the environment and re
spect nature.
(D Tips
Only drive where it is permitted and stay on
marked roads and paths.
Explanation of some technical terms
The following data refer to ideal conditions. De pending on vehicle load and ground conditions
and the env ironment, the numbers may vary. It is
the driver's responsibility to decide whether ave
hicle can overcome a specific s ituation
<=> .&. .
Gradient angle
The number of meters in alt itude gained over a
distance of 109.4 yards or 100 meters (grade)
are given as a percentage or degrees . Informa
tion about the gradient the vehicle can cl imb un
der its own power (depends in part on the road
surface and eng ine power). Maximum permitted
grade: 31
°
Ground clearance
The distance between the road surface and the lowest point of the vehicle underbody. Ground
clearance 7.9 in (200 mm)
.&, WARNING
Exceeding the stated maximum figures can
result in severe injuries or vehicle damage.
- All the information was gathered on level,
firm and non-slippery road surfaces, and un-
-
der dry weather conditions. ..,
Page 203 of 296
CD
CD
.... N ,-... N ..... 0 0 C<'. 00
Operating instructions
6" r-2
~·~
1/2"
1·1/2"
ill
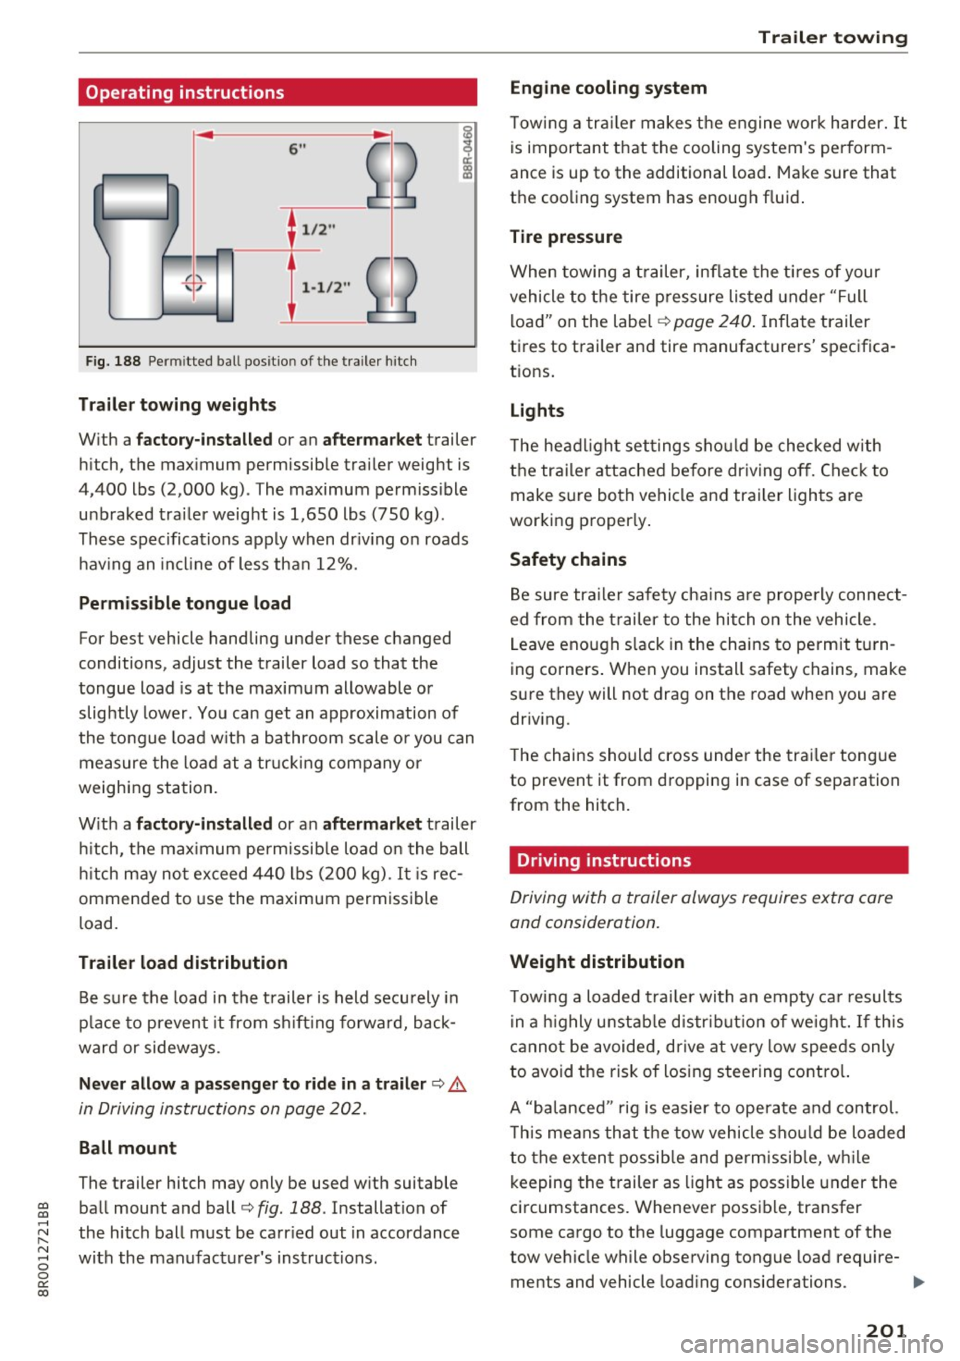
Fig. 188 Permi tted ba ll pos it io n of the trailer h itch
Trailer towing weights
With a
factory-installed or an aftermarket trailer
hitch, the maximum permissible trailer weight is
4,400 lbs (2,000 kg) . The maximum permissible
unbraked trailer weight is 1,650 lbs (750 kg).
These specifications apply when driving on roads having an incline of less than 12%.
Permissible tongue load
For best vehicle handling under these changed
conditions, adjust the trailer load so that the
tongue load is at the maximum allowable or
slightly lower. You can get an approximation of
the tongue load with a bathroom scale or you can
measure the load at a trucking company or
weighing station.
With a
factory-installed or an aftermarket trailer
hitch, the maximum permissible load on the ball
hitch may not exceed 440 lbs (200 kg) .
It is rec
ommended to use the maximum permissible
load.
Trailer load distribution Be sure the load in the trailer is held securely in
place to prevent it from shifting forward, back
ward or sideways.
Never allow a passenger to ride in a trailer ¢.&.
in Driving instructions on page 202.
Ball mount
The trailer hitch may only be used with suitable ball mount and ball¢
fig. 188 . Installation of
the hitch ball must be carried out in accordance
with the manufacturer's instructions .
Trailer towing
Engine cooling system
Towing a trailer makes the engine work harder. It
is important that the cooling system's perform
ance is up to the additional load. Make sure that
the cooling system has enough fluid.
Tire pressure
When towing a trailer, inflate the tires of your
vehicle to the tire pressure listed under "Full
load" on the label¢
page 240. Inflate trailer
tires to trailer and tire manufacturers' specifica
tions.
Lights
The headlight settings should be checked with
the trailer attached before driving off. Check to
make sure both vehicle and trailer lights are
working properly.
Safety chains
Be sure trailer safety chains are properly connect
ed from the trailer to the hitch on the vehicle .
Leave enough slack in the chains to permit turn
ing corners. When you install safety chains, make
sure they will not drag on the road when you are
driving.
The chains should cross under the trailer tongue
to prevent it from dropping in case of separation
from the hitch.
· Driving instructions
Driving with a trailer always requires extra care
and consideration.
Weight distribution
Towing a loaded trailer with an empty car results
in a highly unstable distribution of weight. If this
cannot be avoided, drive at very low speeds only
to avoid the risk of losing steering control.
A "balanced " rig is easier to operate and control.
This means that the tow vehicle should be loaded
to the extent possible and permissible, while
keeping the trailer as light as possible under the
circumstances. Whenever possible, transfer
some cargo to the luggage compartment of the
tow vehicle while observing tongue load require-
ments and vehicle loading considerations. .,.
201