key AUDI Q5 2018 User Guide
[x] Cancel search | Manufacturer: AUDI, Model Year: 2018, Model line: Q5, Model: AUDI Q5 2018Pages: 392, PDF Size: 60.56 MB
Page 39 of 392
u co ..... N r-N .....
~ 0 co
- Never leave your vehicle unattended when
the luggage compartment lid is open. A
child could climb into the vehicle through
the luggage compartment. If the luggage
compartment lid was then closed, the child
would be trapped in the vehicle and unable
to escape. To reduce the risk of injury, do
not allow children to play in or around the
vehicle. Always keep the luggage compart
ment lid and the doors closed when the ve
hicle is not in use.
- Always make sure no one is in the luggage
compartment lid's range of motion when it
is closing, especially near the hinges. Fin
gers or hands could be pinched.
(D Tips
- When the vehicle is locked, the luggage
compartment lid can be unlocked separately
by pressing the
c:s button on the remote
control key. The luggage compartment lid
locks automatically when it is closed again.
- The settings in the Infota inment system de
termine if the luggage compartment lid can
be opened us ing the
handle¢ page 35.
Automatic luggage compartment lid
Applies to: veh icles with automatic luggage compartme nt lid
The luggage compartment lid can be opened and
closed electrically.
F ig. 27 Driver's door: opening the luggage compartment
l id
Opening and closing
Fig. 28 Luggage compa rtment lid: @clos ing button, @
l ock button (vehicles with convenience key•)
Opening the luggage compartment lid
... Press and hold the c:s button on the remote
control key for at least one second . Or
... Press the hand le in the luggage compartment
lid. Or
... Move the selector lever to the "P" posit ion and
pull the
c:s button* in the dr iver's door.
Closing the luggage compartment lid
... When the ignition is switched on, pull the c:s
switch in the driver's door until the luggage
compartment lid is closed
¢ &_ . Or
... Press the c:s button in the luggage compart
ment
lid ¢ fig. 28 . The luggage compartment
lid will automat ica lly lower and
close ¢&_ . Or
.,. Applies to: vehicles with convenience key: Press
the
c:s button on the remote control key until
the lu ggage compartment lid
closes¢&.
Make sure there is enough distance between
you and the luggage compartment lid. There
should be a maximum 9 feet (3 m) of distance.
Or
... Applies to: vehicles with convenience key: press
the~ button in the luggage compartment lid
¢ fig. 28 . The remote control key must not be
more than approx imately 4 feet (1.5 m) away
from the luggage compartment a nd it must not
be inside the vehicle . The l uggage compart
men t lid wi ll automatically lower and close. The
vehicle
locks ¢&_ . Or
... Lightly pull the luggage compartment lid at the
inner gr ip . The luggage compartment lid will
automatically lower and close
¢ &.-Or
... Press the handle in the luggage compartment
lid . The luggage compartment lid will automat-
ically lower and close
¢ &_. .,.
37
Page 40 of 392
Opening and clo sing
Storin g th e luggag e comp artm ent lid
o pening posit ion
~ Bring the luggage compartment lid into the de
sired open position. The position must be at a
certain height or higher to store.
~ Press and hold the C> button in the luggage
compartment lid for at least four seconds to
store the new open position . A visual and audio
s ignal will follow .
~ To set a h igher open position, wait at least five
seconds and then caref ully press the luggage
compartment lid upward .
~ Press and hold the C> button again for at least
four seconds to store the desired opening posi
tion.
The opening/closing process wi ll stop immedi
ately if :
- Yo u pull/release the
C> switch in the driver's
door, or
- Applies to: vehicles with convenience key:
press/release the
C> button on the remote
contro l key, or
- Applies to:
vehicles with conveniern;e key: press
the C> button or the {n but ton in the luggage
compartment lid, or
- Yo u push the hand le in the luggage compart
ment lid, or
- When something b locks the luggage compa rt
ment lid or makes it difficu lt fo r the lid to
move .
I f you press the hand le or one of the
C> or {n but
tons (veh icles w it h conven ience key*) now, the
luggage compartment lid w ill either open or
close, depending on its angle .
A WARNING
-After closing the luggage compartment lid,
make s ure that it is latched. Otherwise, the
l uggage compartment lid could open sud
denly when driving, which increases the risk
of an accident .
- Pay careful attention when closing the lug
gage compartment lid. Otherw ise, you could
cause serious injury to yourself or others de
spite the pinch protection .
38
-To reduce the risk of pinching injuries, a l
ways make sure that no one is in the operat ing area of the luggage compartment lid, in
cluding the hinge areas and the upper and
lower edge of the luggage compartment lid .
- Never drive with the luggage compartment
lid ajar or open, because poisonous gases
can enter the vehicle inte rior and create the
risk of asphyx iat ion.
- If there is a luggage rack (such as a bicycle rack) on the luggage compartment lid, the
luggage compartment lid may not ope n
comp letely under cert ain ci rcumstan ces or it
co uld close by itself if open due to t he extra
weight. There fore, the open luggage com
partment lid must be given additional sup
port or the cargo must fi rst be removed
from the luggage rack.
@ Note
The l uggage compa rtment lid can bump into
objects s uch as the garage ceiling when open
i ng and become damaged .
(D Tips
- The settings in the Infotainment system de
termine if t he luggage compartment lid can
be opened using the
hand le ~ page 35.
- Th ere are audible signals when closing the
luggage compartment lid with the remote
contro l key (vehicles with conven ience key*)
or with the
C> button in the driver's door.
- When the vehicle is locked, the luggage
compartment lid can be unlocked sepa rately
by pressing the
C> button on the remote
control key . The luggage compartme nt lid
locks automat ically when it is closed again.
- Applies to: vehicles with convenience key:
The luggage compartment lid can be closed
w ith the conven ience from a distance up to
approximate ly 9 ft (3 m).
- T he luggage compartment lid can be oper
ated manua lly if the veh icle battery is low .
It is necessa ry to use mo re force when do ing
this. Move the lid s low ly to redu ce the
amou nt o f fo rce needed.
..,.
Page 41 of 392
u co ..... N r-N .....
~ 0 co
-When the trailer socket is being used (for
example, for a bicycle rack), the luggage
compartment lid can be opened and closed using the handle or the foot motion activa
tion (vehicles with convenience key*).
Opening/closing the luggage compartment
lid with foot motion activation (kicking
movement)
Applies to: veh icles with conven ience key and sensor-control
led luggage compartment lid
Fig. 29 Rea r of t he ve hicle : foot movement
You can open and close the luggage compart
ment lid w ith foot motion activat ion .
Requirements: you must be carrying your conven
ience key* with you . You must be standing at the
center behind the luggage compartment lid. The
ignition must be switched off . Make sure you
have f irm foot ing.
- Move your foot back and forth under the bump er one time
q fig. 29. Do not touch the bumper.
The luggage compartment lid will open/close
once the system detects the movement.
The luggage compartment lid will only open/
close if you perform the movement as described.
This prevents the luggage compartment lid from open ing or closing due to sim ilar movements,
such as when you walk between the rear of the
vehicle and your garage door.
The closing of the luggage compartment lid is in
d icated by a warning signa l and can be cance led
by making the described movement again .
The foot movement does not lock the vehicle.
Op eni ng and clos ing
General informat ion
In some sit uations, the funct ion may be limited
or temporarily unavailable. This may happen if:
- the l uggage compartment lid was closed imme
d iately before
- you park close to a hedge and the branches
move back and forth under the veh icle for a
long per iod of t i me
- you clean your veh icle, for example w ith a pres
sure washer or in a car wash
- there is heavy rain
- the bumper is very dirty, for example after driv- ing on salt-covered roads
- there is interference to the radio signal from
the vehicle key, such as from cell phones or re
mote controls
8,. WARNING
-Pay careful attention when closing the lug
gage compartment lid . O therwise, you co uld
cause serious injury to yourself or others de
spite the pinch protection .
-To reduce the risk of pinching inju ries, al
ways make sure that no o ne is in the ope rat
ing area of the luggage compartment lid, in
cluding the hinge areas and the upper and
lower edge of the luggage compartment lid.
-Never drive with the luggage compartment
lid ajar or open, because poisonous gases
can enter the vehicle interior and create the risk of asphyxiat ion.
-If there is a luggage rack (such as a bicycle
rack) on the luggage compartment lid, the
luggage compartment lid may not open
comp letely under certa in circumstances or it
could close by itself if open due to the ext ra
weight. Therefore, the open luggage com
partment lid must be given additional sup
port or the ca rgo must fi rst be removed
from the luggage rack.
3 9
Page 42 of 392
Opening and closing
Luggage compartment lid emergency
release
Fig. 30 Inne r luggage compartment lid : access to the
emergency release
.. Remove the screwdriver from the vehicle tool
kit.
.. Use the screwdriver to pry the cover off
<=>fig. 30.
.. Press the lever in the direct ion of the arrow to
release the luggage compartment lid .
Child safety lock
The child safety lock prevents the rear doors
from being opened from the inside and the rear
power windows from be operated.
F ig. 31 Sect ion of drive r's door: contro ls
Fig . 32 Re ar doo r: child safety lock
40
.. To deactivate/activate the power window
switch in the rear doors, press
the@ button in
the driver's
door ¢ fig. 31. The indicator light in
the button turns on/blinks .
.. To also deactivate/activate the inner door han
dle, open the respect ive rear door and turn the
key switch with the mechanical key in the direc
tion of the arrow or oppos ite the direction of
the arrow
¢fig. 32.
Message in the instrument cluster display
(81 Childproof catch: malfunction! Please con
tact Service
There is a ma lfunction in the chi ld safety lock .
Press
the @ button again .
If the message stays on, drive immediate ly to an
authorized Audi dealer or authorized Audi Service
Facility to have the malfunction repaired .
A WARNING
-- If you leave the vehicle, sw itch the ignition
off and take the veh icle key with you. This
applies particularly when children remain in
the vehicle. Otherwise ch ildren could start
the engine or operate electrical equipment
(such as power windows), which increases
the ris k of an accident.
- A malfunction in the child safety lock could
allow the rear doors to be opened from the
inside, which increases the risk of an acci
dent.
Power windows
Controls
The driver can control all power windows .
Fig. 33 Driver's doo r: power window cont rols
Cl) ~
"" 0
='> Cl) m
Page 43 of 392
u co ..... N ,..._
N ..... 0 <( 0 00
All power window switches are equipped with a
two-stage function *:
Opening and clo sing the windows
.,. T o open or close the w indow completely, p ress
the sw itc h down or p ull the sw itc h up br iefly to
the second level. The operation wi ll stop if the
switch is pressed/pu lled again.
.. To se lect a position in between opened and
closed, press/pull the switch to the first leve l
until the desired window position is reached.
Po wer window switch es
(D Left front door
@ R ight front door
@ L eft rea r door*
© Right rear door*
A WARNING
- If you leave the veh icle, switch the ignition
off and take the vehicle key with you. This
applies particularly when children remain in
the vehicle . Otherw ise children could start
the engine or operate elect rical equipment
(such as powe r windows), which inc reases
the risk of an acc ident. The power windows
c ontin ue to f unct ion until the driver's door
or front passenge r's door has been opened .
- Pay ca reful attent ion when closing the win
dows. Pin ching co uld cause serious injur ies.
- When loc king the veh icle from outside, the
vehicle mus t be unoccupied since the win
dows can no longer be opened in an emer
gency.
(D Tips
You can still open and close the w indows for
app roxima tely 10 minutes after tu rning the
ign it ion off. The power windows do no t switch
off until the driver's door or front passenger's
door has been opene d.
Opening and cl osing
Convenience opening/closing
Applies to: vehicles with convenience key
All of the windows and the roof* con be opened/
closed at the some time .
Convenience opening f eature
.. Press and hold the @ button on the remote con
trol key until a ll of the windows reach the de
sired position and the roof* is ti lted open .
Convenience closing feature
.. Press the t'fl button on the remote control key
until the roof* is closed
~ ,&. , or
.. Touch the sensor * on the door handle unti l all
of the windows and the roof* are closed. Do not place your hand in the door handle when doing
this .
Sett ing con ven ience opening in the
Infotainment system
.. Select in the Infotainment system: I MENU ! but
ton
> V ehicle > left control button > V ehicle
s etting s
> Central locking > Long press to
open windows .
A WARNING
-Never close the w indows o r the roof* ca re
lessly or in an uncon trolled manner, be
cause this increases the risk o f injury .
- For secur ity reasons, the win dows and the
roof* c an only be opened and closed with
the remote control key at a maxim um dis
tance of approximately 6.S feet (2 m) away
from the vehicle. Always pay attention when using the
t'fl button to close the windows
and the roof * so that no one is pinched. The
clos ing process will stop immediately when
the
t'fl button is released.
(D Tips
Applies to: vehicles with panorama glass roof:
the power sunshade also opens/closes when
opening/closing the roof .
-
41
Page 51 of 392
u co ..... N r-N .....
~ 0 co
Version 1
To adjust the brightness of individual zones, se
lect
Front brightness* , Door brightness or Foot
well brightness.
Turn the control knob to th e left
or to th e right. Pr ess the control knob to confirm
the b rightness.
Version 2
Select and confirm one of the displayed profiles
by pressing the control knob.
Individual: you can customize the brightness and
color of individual zones. Press the right control
button. Press the control knob again to confirm
the settings.
Audi drive select: the interior and contour light
ing color changes depending on the driving mode
selected in drive select*
r::?vpage 125.
(0) Tips
The setting is automatically stored and as
signed to the remote control key that is being
used.
Instrument illumination
The brightness of the illumination for the instru
ments, display and head-up display* can be ad
justed.
--------... ~
i
Fig. 43 Instrument i llumination
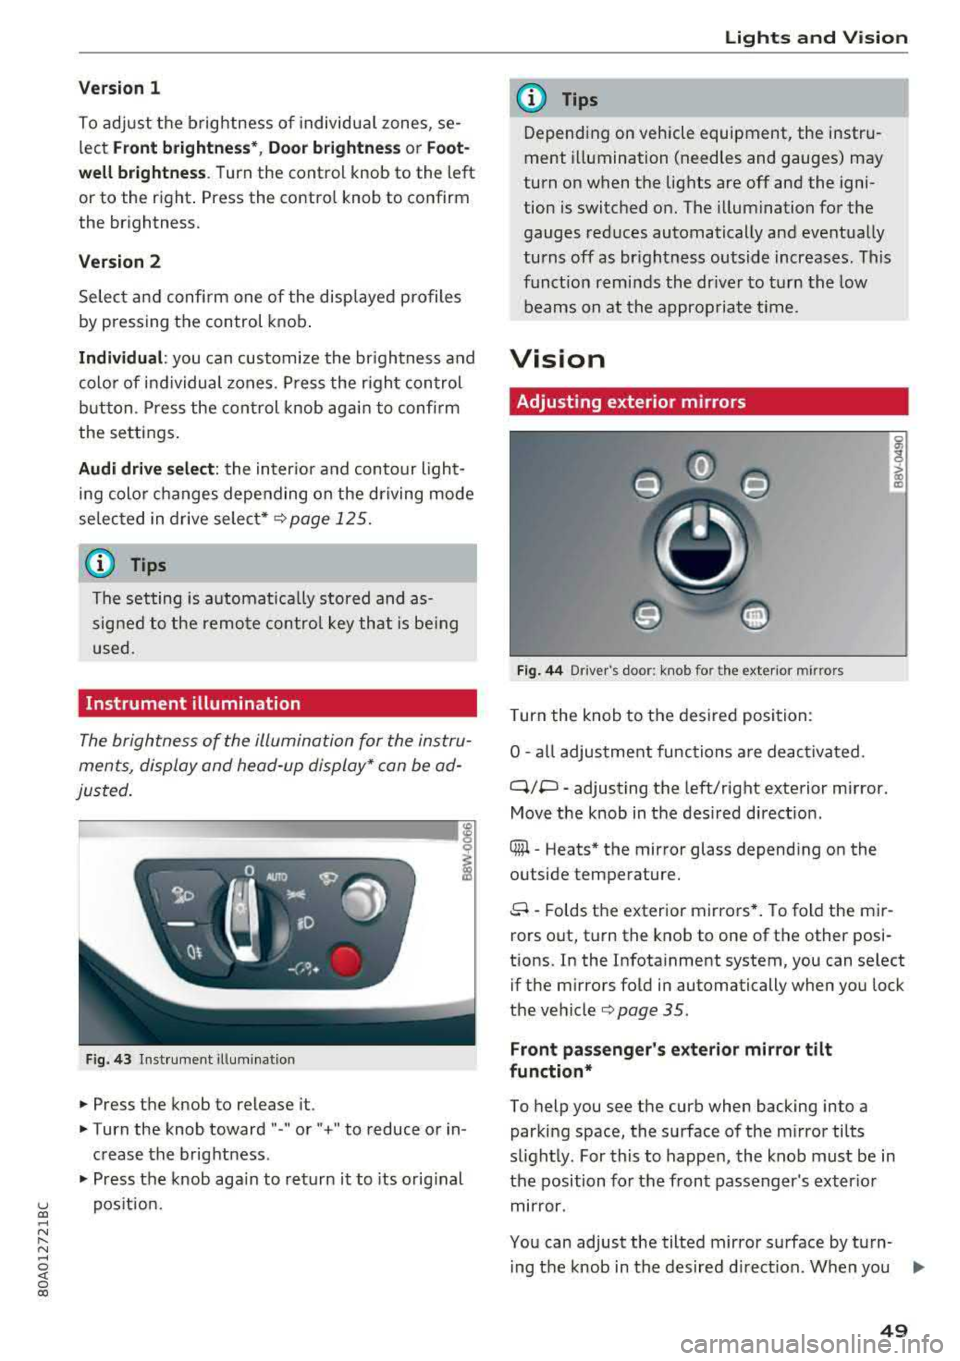
.. Press the knob to release it.
.. Turn the knob toward "-" or" +" to reduce or in
crease the brightness .
.. Press the knob again to return it to its original
position.
Lights and Vision
(D Tips
Depending on vehicle equipment, the instru
ment illumination (needles and gauges) may
turn on when the lights are off and the igni
tion is switched on. The illumination for the
gauges reduces automatically and eventually
turns off as brightness outside increases . This
function reminds the driver to turn the low
beams on at the appropriate time.
Vision
Adjusting exterior mirrors
Fig. 44 D river 's doo r: knob fo r the ext erior mirr ors
Turn the knob to the desired position:
0
-all adjustment functions are deactivated .
q;p -adjusting the left/right exterior mirror.
Move the knob in the desired direction .
® -Heats* the mirror glass depending on the
outside temperature.
8 -Folds the exterior mirrors*. To fold the mir
rors out, turn the knob to one of the other posi
tions. In the Infotainment system, you can select if the mirrors fold in automatically when you lock
the
vehicle¢ page 35 .
Front passenger's exterior mirror tilt
function*
To help you see the curb when backing into a
parking space, the surface of the mirror tilts
slightly. For this to happen, the knob must be in
the position for the front passenger's exterior
mirror.
You can adjust the tilted mirror surface by turn- ing the knob in the desired direction. When you
.,.
49
Page 52 of 392
Lights and Vision
move out of reverse and into another gear, the
new mirror position is stored and assigned to the
key you are using.
The mirror goes back into its original position
once you drive forward faster than 9 mph
(15 km/h) or turn t he ignition
off.
A WARNING
Curved mirror surfaces (for example convex)
enlarge the field of vision. However, they
make objects in the mirror appear smaller
and farther away. You may estimate incor
rectly when you use these mirrors to gauge
your distance from the vehicles behind you
when changing lanes, which increases the risk of an accident.
«1j) Note
-Applies to vehicles with power folding exte
rior mirrors: if the mirror housing was
moved by outside forces (such as an impact
when maneuvering), you must use the pow
er folding function to fold the mirror all the
way out. The mirrors will make a loud noise
when they latch into place. The mirror hous
ing must not be moved back into place by
hand because this would impair the func
tion of the mirror mechanism.
- Applies to vehicles without power folding
exterior mirrors : if the mirror housing was
moved by outside forces (such as an impact
when maneuvering), you must move it back in place by hand.
- If you wash the vehicle in an automatic car
wash, you must fold the exterior mirrors in
to reduce the risk of damage to the mirrors.
Never fold power folding exterior mirrors*
by hand . Only fold them in and out using
the power controls.
(D Tips
-If the power adjusting function malfunc
tions, the glass in both mirrors can be ad
justed by pressing on the edge of it by hand.
- The exterior mirror settings are stored with
the memory
function*~ page 59.
so
Dimming the mirrors
Your vehicle is equipped with a manual or auto
matic* dimming rearview mirror .
Manual dimming rearview mirror
.,. Pull the lever on the bottom of the mirror back.
Automatic dimming rearview mirror*
.,. The interior and exterior mirrors dim automati
cally when light shines on them, for example
from headlights on a vehicle behind you.
A WARNING
If the glass on an automatic dimming mirror
breaks, electrolyte can leak out. This liquid
can irritate the skin, eyes and respiratory sys
tem. If there is contact with the fluid, flush immediately with plenty of water. Consult a
physician if necessary .
- Repeated or long-term exposure to electro
lyte fluid can lead to irritation of the air
ways, especially in people with asthma or other respiratory conditions. Take deep
breaths immediately after leaving the vehi
cle or, if this is not possible, open all of the
doors and windows as wide as possible.
- If electrolyte fluid enters the eyes, flush
them thoroughly with a large amount of
clean water for at least 15 minutes and then
seek medical attention.
- If electrolyte fluid comes into contact with
the skin, flush the affected area with clean
water for at least 15 minutes and then clean
with soap and water and seek medical at tention. Clean affected clothing and shoes
thoroughly before wearing again.
- If the fluid was swallowed and the person is
conscious, flush the mouth with water for at
least 15 minutes . Do not induce vomiting
unless this is recommended by medical pro
fessionals. Seek medical attention immedi
ately .
@ Note
If the glass on an automatic dimming mirror
breaks, electrolyte can leak out. This liquid
damages plastic surfaces and paint. Clean
Page 60 of 392
Seats and stor age
Head restraints
Front head restraints
Applies to: vehicles with adjustable head restraints
Fig . 59 Front seat: adjusting the head rest raint•
Adj ust the head restra ints so the uppe r edge is as
even as possible with the top of your head.
If that
is not possible, try to adjust as close to this posi
tion as possible.
Adjusting th e head restraints
"'To move the head rest raint upwa rd/forward,
hold it at the sides wi th both hands and slide it
u pward/forward un til you fee l it click into
place.
"' To move the head restraint downward/back
ward, press the side button and slide the head
restraint downward/backward. Re lease the but
ton and slide the head restraint farther until it
locks into place .
.,&. WARNING
Always read and fo llow the applicable warn
ings¢
page 255, Proper adjustment of head
restraints.
58
Rear head restraints
Applies to: vehicles with adjustable head restraints
Fig. 60 Rear seat: adjusting the head restraint
Fig. 61 Rear seat: removing the head restraint
.... m
I
If passengers are sitting in the outer rear seats,
adjust the head restraints so that the upper edge
of the head restraint is as level as possible with
the upper part of their head. If that is not possi
ble, try to adjust as close to this position as pos
s ible. If your vehicle has a middle seat, adjust
that head restraint all the way up ¢
.&,
Moving the head restraint s
"'To move the head restraint upward, hold it at
the s ides with both hands and slide it upward
until it cl icks into place ¢
fig. 60 .
"'To move the head restra int down, press the
button -arrow-
¢ fig . 60 and s lide the head re
s traint downward.
Remo ving the head r estraint s
"'Move the head restra int upward as far as it can
go .
"' Press the release point ¢ fig. 61 using the me
chanical key ¢
page 31, Key set and press the
button
-arrow- ¢ fig. 60. Pu ll the head restra int
out of the bac krest at the same
time ¢.&, . Ill>
Page 61 of 392
u co ..... N r-N .....
~ 0 co
Installing the head restraints
.,. Slide the posts on the head restraint dow n into
the gu ides unt il the posts click into place .
... Press the button -arrow-c::> fig. 60 and slide the
head restraint all th e way down. You should not
be able to remove the head restraint from the
backrest without pressing the button.
A WARNING
-Always read and follow the applicable warn
ings
c::> page 255 , Proper adjustment of
head restraints .
-Only remove the head restraints from the
rear seats when it is necessary for install ing
a ch ild safety sea t
c::> page 291, Child safe
ty. Install the head restra int aga in immedi
ately once the chi ld safety seat is removed .
Driv ing with the head restraints removed or
not in the upright position inc reases the risk
of serious inj ury.
Memory function
Description
Applies to: vehicles with memory function
Using the memo ry funct ion, you can qu ickly and
eas ily store a pe rsonal seat profile for the dr iver
and recall the setti ngs later. The memory f unc
tion is controlled by the remo te control key and
the memory buttons in the drive r's door.
The drive r's seat p rofile is stored again and as
signed to t he remote contro l key each time the
ve hicle is locked. When you open the door, the
seat prof ile is automatica lly reca lled . If two peo
p le use the vehicle, it is recommended that each
person always uses their
"own" remote control
key .
Two seat profiles can be stored each using the memory buttons . Once they are stored, these
seat profi les can be se lected at any time.
The fo llow ing settings are stored :
Seats and storag e
Remote con- Memory but-
trol key ton
Driver Driver
Seat X X
Both exterior
mirrors*
X X
Remote control key
Applies to: vehicles with memory function
The driver's seat profile can be assigned to the
remote control key when the vehicle is locked .
... Select in the Infotainment system: I MENU! but
ton
> Vehicle > left control button > Vehicle
setting s > Seat s > Driver's seat > Store set
ting s on remote control ke y.
(D Tips
If you do not wish to have the seat prof ile for
anothe r dr iver assigned to the remote control
k ey, sw itch the memory f unction off in the In
fotainment system.
Memory buttons
Applies to: vehicles with memory function
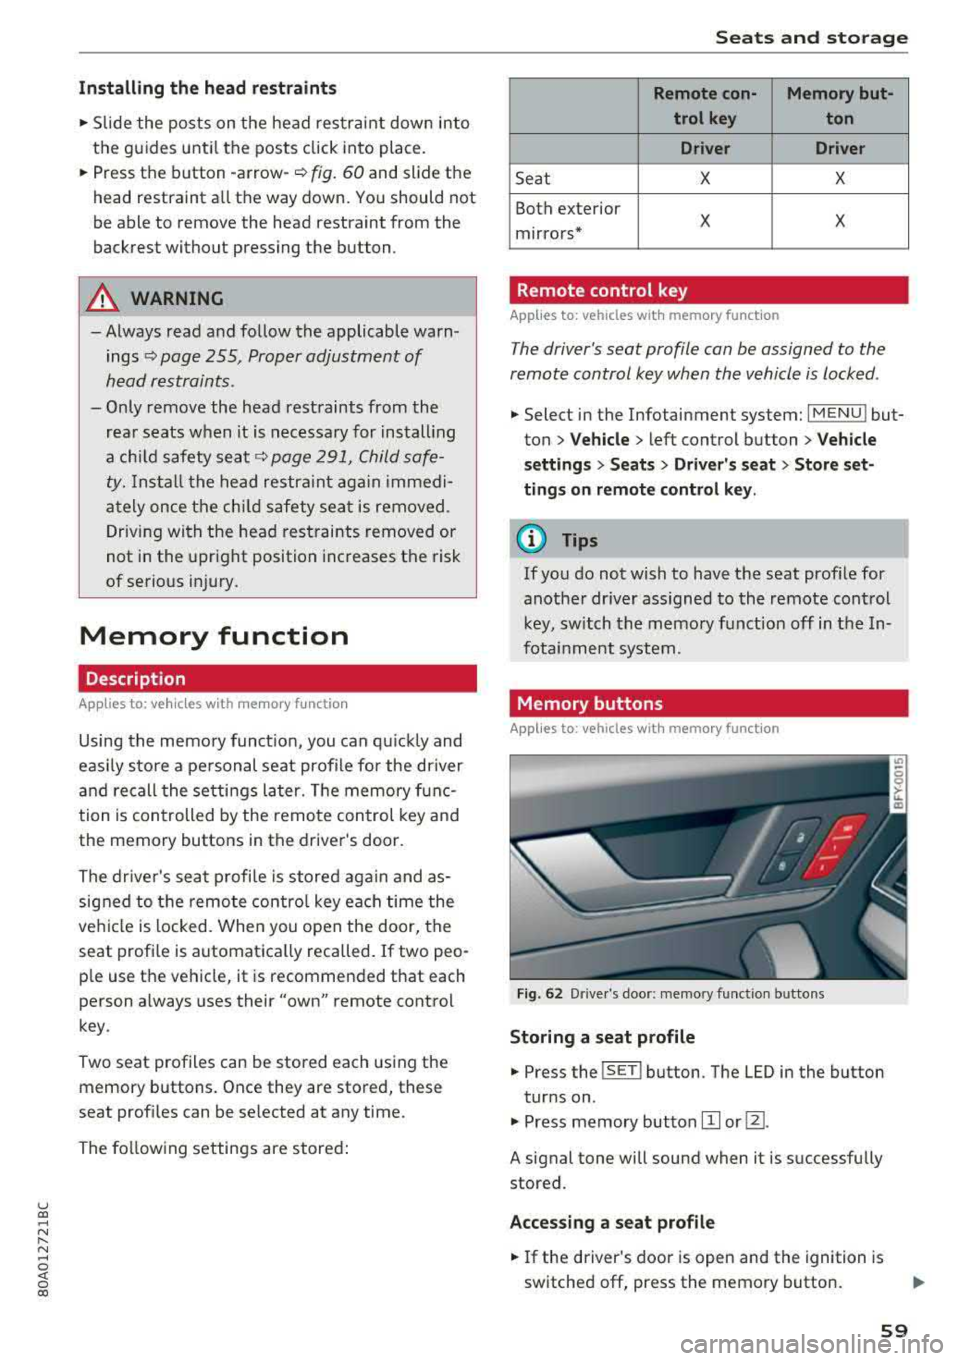
Fig. 62 Drive r's doo r: memory funct io n bu ttons
Storing a seat p rofile
... Press the ISET I button. The LED in the button
tur ns on .
.,. Press memory button IT] or@.
A signal tone will sound when it is successfully
stored.
Acces sing a seat profile
... If the driver's door is open and the ignition is
switched off, press the memory button .
59
Page 62 of 392
Seats and stor age
,.. If the driver's door is closed or the ignition is
switched on, press and ho ld the memory but
ton until the seat adjustment is comp lete.
A WARNING
- For safety reasons, the seat setting can only
be recalled when the vehicle is stationary to
reduce the risk of an accident.
- In an emergency, seat adjustment operation
can be stopped by press ing the
ISETI button
or the buttons @or@
¢ page 56, fig . 54.
Power sources
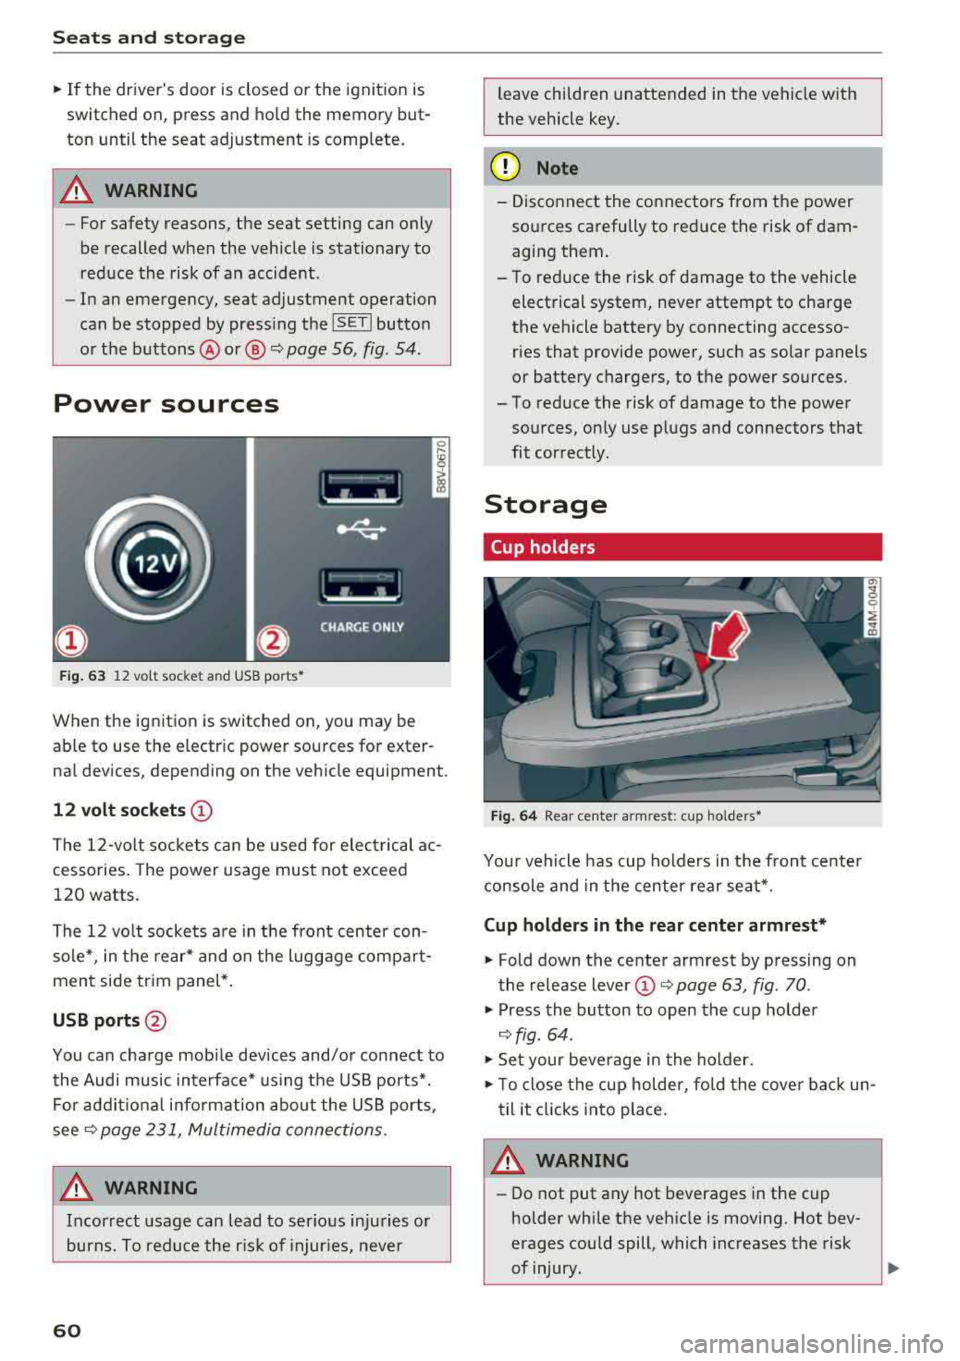
F ig . 63 12 vo lt socket and USB ports *
When the ignition is switched on, you may be
ab le to use the e lectr ic power sources for exter
nal devices, depending on the vehicle equipment.
12 volt so ckets CD
The 12-volt sockets can be used for elec trical ac
cessories. The power usage must not exceed
120 watts.
The 12 vo lt socke ts a re in the front center con
sole *, in the rear * and on the luggage compar t
ment side trim panel* .
USB ports@
You can cha rge mobi le devices and/or connect to
the Audi music interface* us ing the USB ports*.
For addit ional i nfo rmation abou t the USB ports,
see
¢ page 231, Multimedia connections.
A WARNING
Incorrect usage ca n lead to serious injuries or
burns. To reduce the r is k of injur ies, neve r
60
leave children unattended in the vehicle wit h
the vehicle key.
(D Note
- Dis co nnect the connectors from t he power
sources carefu lly to reduce the risk of dam
aging them .
- To reduce the risk of damage to the vehicle
electrical system, neve r attempt to charge
the vehicle battery by connecting accesso r ies that provide power, such as solar panels
or battery chargers, to the power sources.
- To reduce the risk of damage to the power sou rces, on ly use plugs and connectors that
fit correctly.
Storage
Cup holders
Fi g. 6 4 Rear ce nte r armrest: cup holders•
Yo ur vehicle has cup holders in the fron t center
console and in the center rear seat*.
Cup holders in the rear center armrest*
.,. Fold down the ce nte r armrest by pressing on
t he release lever
(D ¢ page 63, fig . 70 .
.,. Press the button to open the cup holde r
~fig. 64 .
.,. Set your beverage i n the holder.
.,. To close the cup holder, fold the cover bac k un
til it clicks into place.
A WARNING
-
- Do not put any hot beverages in the cup
holder while the vehicle is moving. Hot bev
erages could spill, which increases the risk
of injury.
1iJ,,