radio AUDI Q7 2009 Owner´s Manual
[x] Cancel search | Manufacturer: AUDI, Model Year: 2009, Model line: Q7, Model: AUDI Q7 2009Pages: 426, PDF Size: 97.13 MB
Page 27 of 426

Driver information display
Introduction
General notes
The driver information display inside the instrument
cluster provides you, the driver, with much useful infor
mation.
F ig. 8 Inst rume nt
c luster: ce nte r display
Information from the Driver Information System is shown in the
display in the center of the instrument cluster.
When you turn on the ignition and whi le you are driving, some func
tions and vehicle components are scanned for their operating status . Malfunctions or required service procedures are signa lled
audibly and shown by red and yellow lighted symbols and
reminders to the driver in the display .
The driver is also shown information about radio and CD operation and directions for the navigation system . You can find additional
information on these subjects in the MMI manual.
The Driver Information System provides the following functions:
Con tro ls and eq uip
ment
Dri ver inf orm atio n di spl ay
Sound system display ~ page26
Outside air temperature ~ page26
Digital speedometer ~ page27
Door open indicator ~ page27
Defective light bulb ~ page27
Service interval display ~ page28
Auto Check system ~ page30
Driver informat ion ~ page30
Speed limiter ~ page29
Trip computer ~ page40
Adaptive Air Suspension* ~ page209
Tire pressure monitoring ~ page42
Selector lever position
~ page 185
[ i ] Tip s
In the event of a malfunction either a red or yellow icon appears in
the display. Red symbols indicate
D ange r~ page 31. Ye llow
symbols indicate a
Warning~ page 35. •
Vehicle care I I irechnical data
Page 48 of 426

Driver inf ormati on displ ay
• The tire pressure monitoring system helps the driver to keep an
eye on tire pressures. But the driver stil l has the responsibility for
maintaining the correct tire pressure .•
Wheel change
If a wheel is changed, the wheels that were exchanged
have to be re-programmed.
Turn on the ignit ion.
- Pressthe!CARlfunction button.
- Select
Systems in the CAR menu.
- Selec t
Tire pre ssure monitoring .
Select Initialize wheel s.
Programming is necessary:
• after the tires have been rotated on the vehicle,
• if tires with new wheel sensors are used .
A ll pressure warning and system malfunction indicators in the
display will be canceled .
If a wheel change has been made, it is necessary to complete the
I niti alize w hee ls function. Afte r you have selected the function, the
new wheels are programmed and the actual pressures are stored .
This learning phase can take up to 20 minutes driving time.
During the learning process the tire pressure monitoring system is
not avai lable. •
Malfunctions =-r,,11~
A malfunction can have various causes.
Fig. 28 Displ ay :
Syste m malfu nc tion
If the warning light in the instrument cluster flashes for approxi
mately one minute and then remains continuously illuminated and
additionally the
JIS => fig . 28 symbol appears in the display , the
tire pressure monitoring system is not available. This can have
various causes.
• If the message appears at the end of the learning process, the
system cannot recognize the wheels installed on the vehicle. This
can be because one or more wheels without a whee l sensor were
insta lled .
• A wheel sensor or other component may have failed .
• During initialization the system has detected more than 4 whee ls
on the vehicle, for examp le while driving next to another car with a
tire pressure monitoring system .
• A wheel change was made but the
Initi alize wheel s function
=> page 46was not activated.
• Audi replacement parts were not used .
• If snow chains are being used , system function can be compro
m ised due to the shielding properties of the cha ins .
• T he tire pressure monitoring system may not be available
because of a radio ma lfunction. _,.,
Page 49 of 426
• Transmitters with the same frequency, such as radio head
phones in the veh ic le or radio equipment, can cause a temporary
disruption of the system through excessive electromagnetic fields.
• Eliminate the interference if possib le/if you can and then re-start
the
Init ialize wh eels function . If the warning light comes on again,
you shou ld contact your authorized Audi dealer immediate ly to have
the problem corrected.
• Do not use commercially available tire sealants. Otherwise, the
e lectrical components of the tire pressure monitoring system will
no longer work properly and the sensor for the tire pressure moni
toring system wi ll have to be replaced by a qua lified workshop .•
Controls and equip
ment
Dr ive r informat ion di spl ay
I • •
Page 148 of 426

• .___O_ n_ t_h _e _ r_o _a_ d __________________________________________________ _
& WARNING
• Never turn off the engine until the vehicle has come to a
complete stop.
• The brake booster and servotronic only work when the engine
is running. With the ignition turned off, you have to apply more
force when steering or braking. Since you cannot steer and stop
normally, this can lead to accidents and serious injuries.
• For safety reasons, you should always park your vehicle with
the selector lever in P. Otherwise, the vehicle could inadvertently roll away.
• After the engine has been switched off, the radiator fan can
continue to run for up to 10 minutes -even with the ignition
switched off. It can also switch on again after some time if the
coolant temperature rises as the result of a heat buildup or if the
engine is hot and the engine compartment is additionally heated
by the sun's rays.
0 Note
If the engine has been under heavy load for an extended period,
heat builds up in the engine compartment after the engine is
switched off -there is a risk of damaging the engine. Allow the
engine to run at idle for about 2 minutes before switching it off. •
Applies to vehicles: w ith Conven ience key
Driver messages in the instrument cluster
display
If a function is not present, a driver message appears.
No key identified
This message appears when the [STAR T) button is pressed if there
is no master key inside the vehicle or if the system does not recog
nize it . For example, the master key cannot be recognized if it is
covered by an object (e.g. aluminum brief case) which
screens the radio signal. Electronic devices such as cell phones can also inter
fere with the radio signal.
Press brake pedal to start engine
This message appears if you press the [ START) button to start the
engine and do not depress the brake pedal. The engine can only be
started if the brake pedal is depressed.
Engage N or P to start engine
This message appears when the engine is started if the selector
lever for the automatic transmission is not in the P or N position.
The engine can only be started with the selector in these positions.
? Key not in vehicle
This message appears along with the symbol if the master key is
removed from the vehicle with the engine running. It is intended to
remind you (e.g. when changing drivers) not to continue the journey
without the master key.
If the master key is no longer in the vehicle, you cannot switch off
the ignition after stopping the engine and you also cannot start the engine again. Moreover, you cannot lock the vehicle from the
outside with the key.
Shift to P, otherwise vehicle can roll away. Doors do not lock if lever
is not in
P.
This message appears for safety reasons along with a warning
buzzer if the selector lever for the automatic transmission is not in
the P position when the ignition is switched off with the
[STOP)
button and the driver's door is opened. Move the selector lever to
the P position, otherwise the vehicle is not secured against rolling
away. You also cannot lock the vehicle using the locking button on
the door handle or using the remote key.
To engage steering lock, press and hold STOP button
This message appears for safety reasons if the engine and the igni
tion have been switched off by pressing the [
STOP) button once, .,,_
Page 195 of 426

____________________________________________ A_d_ v_ a_n_ c_ e_d _ P_a_ r_ k_ i_ n ..::g==-- S_ y=- s_t _e _m __ lllll
T he image in the visua l display can be switched off on the MMI
display ::::> page
203. The acoustic distance warning remains active.
If you press a function button on the MMI termina l, the visual
display disappears . Manually switching the parking assist on again
via the
p ,y 1 switch shows the visual image on the MM I display aga in.
Further information regarding the MMI terminal is included in the
MMI user's manual.
R ear-view camera (rear view )
The rear-view camera picture::::> page 196, fig. 2 12 appears on the
MM I display as a mirror image. The rear -view camera picture has
orientation lines and marked s urfaces projected into it as an aid to
the parking process ::::> page
194. The red line in the picture
::::> pag e
194, fig. 208 or ::::, page 194, fig. 209 indicates th e collis ion
area . You shou ld stop backing up, preferably before you reach this
point ::::>
&.
If your vehicle is close to an obstacle, the visual distance display
a lso appears in the picture from the rear -view camera . This superim
posed display is intended to help d isplay the relevan t critica l vehicle
area.
I f the visual d isplay is shown on the MMI display and you press the
control button with the Rear view function::::> page
191, fig. 207, the
pictu re from the rear -v iew came ra is displayed.
If the picture from the rear -view camera is s hown a nd you press the
control button w ith the Graphic function ::::, page
196, fig. 212, the
visual display is shown.
T he picture from the rear -view camera can be switched off on the
M MI display ::::, page
203 . The acoustic distance warn ing re mains
active.
I f you press a function button on the MMI te rmina l, the rear-view
camera p icture disappears. The rear -v iew came ra picture reappears
the next time you park. But the picture from the rear -view camera
can also be shown aga in on the MM I display by manually switching
off and on with the
P •1A switch . Further information regarding the
MMI terminal is included in the MM I user's ma nual.
Controls and equip
ment
& WARNING
• Sensor s have dead space s in which obje cts cannot be
detected. Be e spe cially careful to check for small children and
an imals before ba cking up . Small children and animals will not
always be detected by the sensors.
• The Audi parking system is not a substitute for being careful
and alert when backing up. Be e spe cially careful during parking
and similar maneuver s. A lways watch where you are dri ving and
make sure that nothing is in the way.
• Remember that low ob sta cles which have already been
s ignaled may pass below the system' s sen sing zone when the
v ehi cle is ba cking up . The fa ct that the signal stop s doe s not mean
that you have cleared the obstacle . When the signal stops , impact
is imminent . Obje cts su ch as trailer hit che s, chain s, narrow posts
or fences covered by a thin l ayer of paint may not always be
detected by the sy stem. They can still damage your vehicle
without warning .
• Alway s make sure that the volume and frequency of the chime s
is adjusted so that you can eas ily hear the acoustic distance signal
even if the radio is playing , the air -conditioner blower is on High or
there is a high level of out side noise .
- Check the setting s whenever someone else has dri ven the
vehicle before you.
• Improper relian ce on the Aud i parking sy stem can cau se colli
sions and serious per sonal injury .
- Never rely only on parking assi st when ba cking up .
- Always check rear view mirrors to make sure it is safe to back
up .
[ i ] Tips
• The rear -view camera picture is available as soon as the MMI
Disp lay or the MMI is swi tch ed o n, or the start -up phase is
completed.
I • •
Page 197 of 426

__________________________________________ A___;_ d_v _a_ n___;_ c __ e _d _ P_a_ r_ k_ i_n -=g ~ S_,y:... s_ t_ e_ m ___ llll
T he rear -v iew cam era can be turned on and off in the MMI
~ page 203 . The acous tic dista nce wa rning rem ains ac tive .
& WARNING
• The rear -view camera has blind spots, in which objects cannot
be detected . Be especially careful to check for small children and
animals before backing up. Small children and animals will not
always be detected by the sensors .
• The Audi parking system is not a substitute for being careful
and alert when backing up. Be especially careful during parking
and similar maneuvers . Always watch where you are driving and
make sure that nothing is in the way .
• Remember that low obstacles which have already been
signaled may pass below the system's sensing zone when the
vehicle is backing up . The fact that the signal stops does not mean
that you have cleared the obstacle. When the signal stops , impact
is imminent . Objects such as trailer hitches, chains , narrow posts
or fences covered by a thin layer of paint may not always be
detected by the system. They can still damage your vehicle
without warning .
• Always make sure that the volume and frequency of the chimes
is adjusted so that you can easily hear the acoustic distan ce signal
even if the radio is playing , the air-conditioner blower is on High or
there is a high level of outs ide noise .
- Check the settings whenever someone else has driven the
vehicle before you.
• Improper reliance on the Audi parking system can cause colli
sions and serious personal injury .
- Never rely only on parking assist when changing backing up.
- Always check rear view mirrors to make sure it is safe to back
up.
Controls and equip
ment
[ i ] Tips
• B efore par king w it h the rea r-view camera, the Adapti ve Ai r
S uspen sion * co mfort or automatic mode m ust be switched on
~ page 2 1.
• The rea r-vie w camera p ict ure i s avai la ble as soon as the M MI
Di sp lay or t he MMI is sw itched o n, o r the sta rt- up p hase is
completed.
• I n order for th e rear -view camera to function properly, the
came ra lens ~
page 191, fig. 205 mus t be ke pt clean, and free of
s n ow and ice . P lease fo llo w th e ad ditional notes on
~ p age 204.
• The camera c ove rage a ngle c hange s w hen the trun k lid is ope n.
Therefore, the rear -view camera picture is disp layed without orien
tati on lines an d without b lue s urfaces .
• Observe and fol low th e not es on towing mode * on~
page 201 . •
A pplies to vehic les : w it h Ad va nced Par kin g Sys te m with re ar view camer a
Rear-view camera coverage area
I • •
Fig. 210 Top view:
Rear-view camera
coverage area
Page 204 of 426
IIIII..__A_ d_v _ a_ n_c _e _ d_ P_ a_r _k _in ---== g'-- S...:y _ s_ t_ e_ m ___________________________________________ _
The volume and frequency settings are automatically stored and
assigned to the remote master key.
& WARNING
Always make sure that the volume and frequency of the chimes is
adjusted so that you can easily hear the acoustic distance signal
even if the radio is playing, the air-conditioner blower is on High or
there is a high level of outside noise. Check the settings whenever
someone else has driven the vehicle before you. •
Applies to veh icles: with Advanced Parking System with rear view ca me ra
Adjusting the chimes -option 2
The menu for adjusting signal sounds can also be called
up via the control button with the "settings" function.
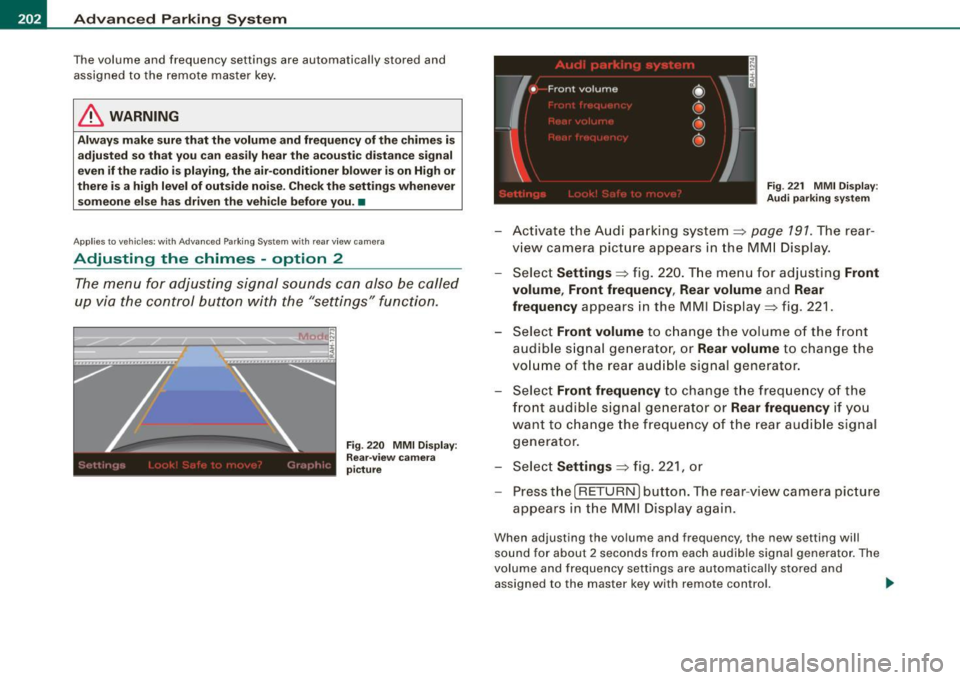
Fig . 220 MMI Display:
Rear-view camera
picture Fig
. 221 MMI Display:
Audi parking system
-Activate the Audi parking system:::::, page 791 . The rear
view camera picture appears in the MMI Display.
- Select
Settings :::::, fig. 220. The menu for adjusting Front
volume, Front frequency , Rear volume
and Rear
frequency
appears in the MMI Display:::::, fig. 221.
Select
Front volume to change the volume of the front
audible signal generator, or
Rear volume to change the
volume of the rear audible signal generator.
- Select
Front frequency to change the frequency of the
front audible signal generator or
Rear frequency if you
want to change the frequency of the rear audible signal
generator.
- Select
Settings :::::, fig. 221, or
- Pressthe[RETURN]button. The rear -view camera picture
appears in the MMI Display again.
When adjusting the volume and frequency, the new setting will
sound for about 2 seconds from each audible signal generator. The
volume and frequency settings are automatically stored and
assigned to the master key with remote control. _..
Page 218 of 426
ll9..__H_ o_m_ e_ L_ i_ n _k_ @_R __________________________________________________ _
9. The emergency flashers will flash three times (after
about 15-60 seconds) when the programming is
successful. Release the button on the remote control.
- To program more devices, repeat steps 4 to 9.
10. Press and hold the trained Homelink® button and
observe the indicator light@=> page 215, fig. 232.
- If the indicator light is solid/continuous, programming is
complete and your device should activate when you press and release the trained Homelink® button.
- If the indicator light blinks rapidly for 2 seconds and is
then a solid/continuous light, proceed with phase 3 to program a rolling code device.
Phase 3: rolling code programming
- A second person on a ladder who can safely reach the
garage door opener motor is recommended.
11. Locate the "learn" button on the garage door opener
motor (refer to the operating instructions for the opener,
as the location of this button may vary by manufacturer).
12. Press and release the learn button on the garage door
opener motor.
- Note: once the button is pressed, there are 30 seconds in
which to initiate the next step.
13. On the Homelink® keypad inside the vehicle, firmly
press and hold the Homelink® button previously
programmed in phases 1 and 2 for two seconds and
release. Repeat this sequence
twice .
- Some vehicles may require the press/hold/release
sequence up to three times to complete the training
process.
- Homelink® should now activate your rolling code
equipped device.
If the 5 minute time limit is exceeded, the emergency flashers will
flash one time
to indicate that the process has been terminated. In
this case, repeat steps 4 through 9.
If the emergency flashers do not flash
three times (after about 15-
60 seconds), programming was not successful. In this case, repeat
steps 4 through 9 .
Remote control units for garage door openers in Canada are set to
stop transmitting radio frequency signals after two seconds. This
time may not b e sufficient for the Homelink® system to learn the
radio frequency signal. Perform all other steps as described
above. •
Applies to v ehi cles: with Horn e link ® uni versa l re mo te contro l
Operating the HomeLink ® transmitter
The Homelink® transmitter works in the same manner as
the original handheld remote control that came with the
system.
-----------------:c
i
Gl0 0
l
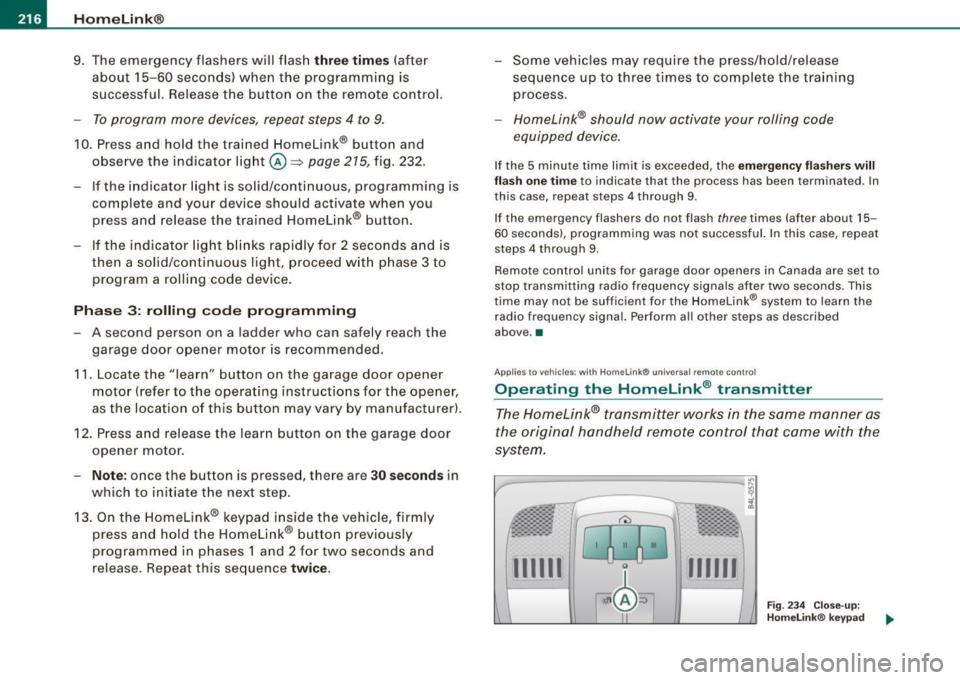
·~ ± b ~ / Fig. 234 Close-up:
Homelink® keypad
...._...._ __ __,..._......__......__...._ ........ ___ ___.__..
111111 111111
Page 258 of 426
-L~A:::..:,: ir:....: b:!..::: a~g L.:: s:1y :...:s::..: t~ e:.: m:...:...:.. ________________________________________________ _
& WARN ING (continued )
cellular telephones and CB radios , et c.) must be performed by a
qualified technician who has the training and spec ial equipment
ne cessary .
• For any work on the airbag system , we strongly recommend
that you see your author ized Audi dealer or qual ified workshop .
• Never modify the front bumper or parts of the vehicle body.
• Always make sure that the side airbag can inflate without inter
ference :
- Never install seat covers or replacement upholstery over the
front seatba cks that have not been spe cific ally approved by
Audi.
- Never use additional seat cushions that cover the areas
where the side airbags inflate.
- Damage to the original seat covers or to the seam in the area
of the side airbag module must always be repaired immedi
ately by an authorized Audi dealer .
• The airbag system can be activated only once. Afte r an airbag
has inflated , it must be replaced by an authorized Audi dealer or
qualified technician who has the te chnical information , training
and spe cial equipment necessary.
• The airbag sy stem can be deployed only once. After an airbag
has been deployed , it must be repla ced with new repla cement
parts designed and approved especially for your Audi model
version . Replacement of complete airbag systems or airbag
components must be performed by qualified workshops only .
Make sure that any airbag service action is entered in your Audi
Warranty
& Maintenan ce booklet under AIRBAG REPLACEMENT
RECORD .
• For safety reasons in severe accidents , the alternator and
starter are separated from the vehicle battery with a pyrotechni c
c ircuit interrupter.
- Work on the pyrotechni c circuit interrupter must only be
performed by a qualified dealer -risk of an accident!
& WAR NING (continued )
-If the vehicle or the circuit interrupter is s crapped , all appli
cable safety precautions must be followed.
ffi For the sake of the environment
Undeployed airbag modules and pretensioners might be c lassified
as Pe rchlorate Material -special handling may apply, see
www .dtsc.ca .gov/hazardouswaste/perc hlo ra te . When t he veh icle or
parts of the restraint system inc luding airbag mod ules and safety
be lts wi th pre tensio ners are sc rapp ed, all ap plicab le laws a nd regu
l ations must be observed . Your authorized Audi dealer is fam iliar
wit h these requir ements an d we re co mmen d t hat yo u have your
dea ler perform this service for you. •
Other things that can affect Advanced Airbag
performance
Changing the veh ic le 's su spension system can change the way that
th e Advanced Air bag Syste m performs in a c rash. Fo r example,
using tire-rim combinations not approved by Audi, lowering the
v eh ic le, c hang ing the stif fness of th e suspe nsio n, in cl ud in g the
springs, suspension struts, shoc k absorbers etc . can change the
fo rces that a re m eas ure d b y the air bag senso rs and se nt to the elec
tronic control unit. Some suspension changes can, for example,
increa se the fo rce level s measured by the sen so rs and ma ke the
a irbag syste m dep loy in crash es in which it wou ld not dep loy if the
changes ha d not been made . Othe r kinds of change s may red uce
t he fo rce lev els measu red by the se nso rs a nd preve nt the airba g
from deploying when it should.
T he sens ors i n th e safe ty bel t buc kle for th e driver a nd fr ont
passenger seat tell the electronic control modu le if the safety belt is
l a tc h ed or not. I f th e safe ty belt is being used, the fron t airbag wi ll
deploy at a slight ly h igher rate of vehic le dece leration than if the
sa fe ty be lt is n ot b ein g use d. Therefore, i n a partic ular c ollisi on, it i s -.,
Page 298 of 426
llffl __ ln_ t _e_ ll-'"ig ...,_ e_ n_t _t_ e_ c_ h _ n_o _ l_o _,.g= y,_ __________________________________________ _
Vehicle stands for an extended period
If you do not drive your vehicle over a period of several days or
weeks, electrical components are gradually cut back or switched off.
This reduces energy consumption and maintains starting capability
over a longer period.
Take into consideration that when you unlock your vehicle, some
convenience functions, such as the remote key or power seat
adjustment, may not be available. The convenience functions will be
available again when you turn on the ignition and start the engine.
With the engine turned off
If you listen to the radio, for example, with the engine turned off or
use other MMI functions, the battery is being discharged.
If starting capability is jeopardized due to energy consumption, the
following warning appears in the MMI display:
Please start engine, otherwise system will switch off in
3 minutes.
The warning indicates that the system will be turned off automati
cally after 3 minutes. If you wish to continue using the functions,
you have to start the engine.
With the engine running
Although electrical energy is generated when the vehicle is being
driven, the battery can become discharged. This happens mostly
when little energy is being generated and a great deal consumed and the battery's state of charge is not optimal.
To bring the energy balance back into equilibrium, consumers
which require especially large amounts of energy are temporarily
cut back or switched off. Heating systems in particular require a
great deal of energy. If you notice, for example, that the heated
seats* or the heated rear window are not heating, they have been
temporarily cut back or switched off. These systems will be available
again as soon as the energy balance has been restored.
You will also notice that engine idle speed has been increased
slightly. This is normal and not a cause for concern. By increasing engine idle speed the additional energy required is generated and
the battery is charged. •
Driver notification in the instrument cluster
display
If battery power drops into the range where it can limit the ability of
the engine to start, this is shown in the instrument cluster display
with the following driver message:
C Low battery charge: battery will be charged while driving
This notification reminds you that the starting capability of the
engine may be limited. As soon as you start driving again, the
battery will be recharged and the notification will go out.
Driver notification appears and goes out again
If this driver notification appears after the ignition is turned on or
while driving and it goes out again after a while, the battery has
been adequately recharged.
Driver notification appears and does not go out again
If this driver notification appears after the ignition is turned on or
while driving and does not go out again, the battery's state of
charge is not in the optimal range. Starting ability is restricted. Have
the battery checked as soon as possible by an authorized Audi dealer or qualified workshop. •