ESP AUDI R8 2007 Owner's Manual
[x] Cancel search | Manufacturer: AUDI, Model Year: 2007, Model line: R8, Model: AUDI R8 2007Pages: 210, PDF Size: 8.1 MB
Page 88 of 210
Driving 86Parking
If the parking manoeuvre involves shunting backwards and
forwards, the warning sound will be switched off temporarily while
you change gear. The warning beeps will start again as soon as the
vehicle comes closer to an obstacle.
Possible faults
If you hear a long beep when you engage reverse gear (or when you
activate the system using the switch) and the diode in the switch
starts flashing, there is a fault in the system. The long warning beep
is given just once to indicate the fault. If you try activating the
parking aid again, the warning beep will not sound and fault is only
indicated by the flashing diode. This also applies if you switch the
ignition off and then on again: the long warning beep will only
sound the first time you try activating the parking aid. Have the fault
rectified.
If there is a fault in the system there will be no confirming beep
when you activate the parking aid.
To ensure that the acoustic parking aid works properly, the sensors
must be kept clean and free of ice.
WARNING
•
The sensors have blind spots in which obstacles are not regis-
tered. It is particularly important to ensure that there are no small
children or animals near the vehicle when reversing, as the
sensors may not always be able to detect them.
•
The parking aid cannot replace the full concentration of the
driver. The driver is always responsible for safety during parking
and other manoeuvres.Caution
Please note that low obstacles detected by the system may no
longer be registered by the sensors as the car moves closer, so the
system will not give any further warning. Certain kinds of obstacles (such as wire fences, chains, thin painted posts or trailer draw bars,
etc) may not always be detected by the system, so take care not to
damage the vehicle in such cases.
Note
Your vehicle has low ground clearance. To help you prevent damage
to the vehicle, warning beeps will sound when you approach a steep
slope (e.g. in a car park or garage).Cruise control systemApplies to vehicles: with cruise control systemIntroduction
The cruise control system allows you to maintain a
constant speed.The cruise control system allows you to maintain any desired
constant cruising speed at speeds above about 30 km/h. Of course,
this is subject to power output and braking ability of the engine.
This helps to reduce fatigue, especially on long journeys.
The indicator lamp
in the instrument cluster lights up when the
cruise control system is operating.
The cruise control system is automatically deactivated immediately
by
•
pressing the brake pedal.
•
pressing the clutch pedal.
WARNING
For safety reasons the cruise control system should not be used in
dense traffic or poor road conditions (such as slippery surfaces,
heavy rain, loose grit or gravel) – this could cause an accident.
document_0900452a816e6cc9.book Seite 86 Mittwoch, 21. Februar 2007 1:32 13
Page 92 of 210
Automatic gearbox 90Automatic gearboxApplies to vehicles: with R tronicDescriptionR tronic is an automatic sequential-shift gearbox using shift-by-wire
technology to operate the clutch and change the gears.
The gears are engaged manually (the principle is similar to a manual
gearbox) but they can also be shifted automatically. The engine can
be started and stopped in any gear ⇒page 82.
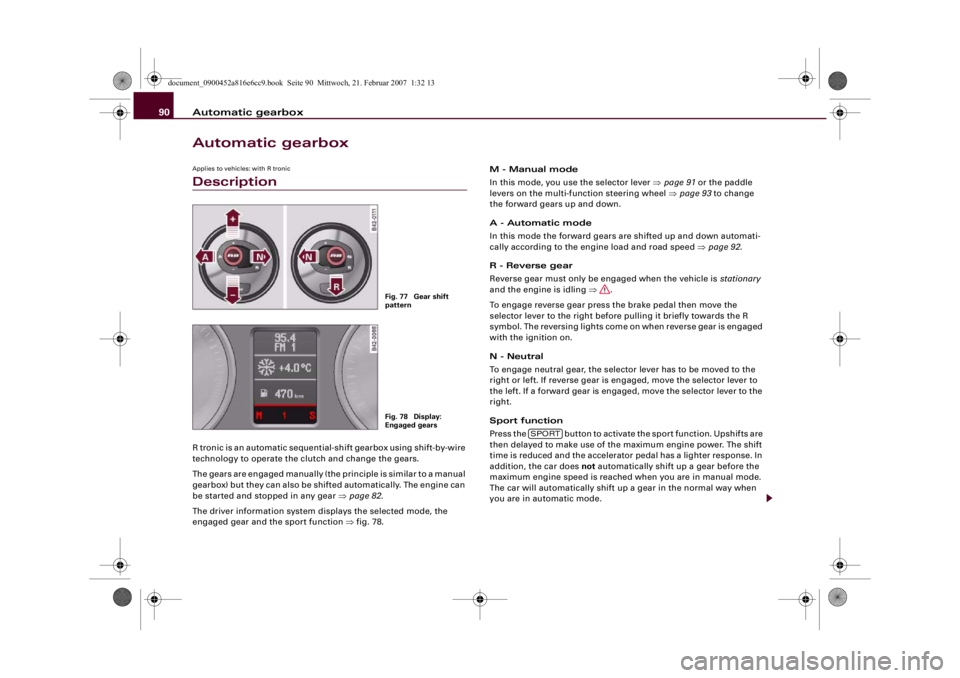
The driver information system displays the selected mode, the
engaged gear and the sport function ⇒fig. 78.M - Manual mode
In this mode, you use the selector lever ⇒page 91 or the paddle
levers on the multi-function steering wheel ⇒page 93 to change
the forward gears up and down.
A - Automatic mode
In this mode the forward gears are shifted up and down automati-
cally according to the engine load and road speed ⇒page 92.
R - Reverse gear
Reverse gear must only be engaged when the vehicle is stationary
and the engine is idling ⇒.
To engage reverse gear press the brake pedal then move the
selector lever to the right before pulling it briefly towards the R
symbol. The reversing lights come on when reverse gear is engaged
with the ignition on.
N - Neutral
To engage neutral gear, the selector lever has to be moved to the
right or left. If reverse gear is engaged, move the selector lever to
the left. If a forward gear is engaged, move the selector lever to the
right.
Sport function
Press the button to activate the sport function. Upshifts are
then delayed to make use of the maximum engine power. The shift
time is reduced and the accelerator pedal has a lighter response. In
addition, the car does not automatically shift up a gear before the
maximum engine speed is reached when you are in manual mode.
The car will automatically shift up a gear in the normal way when
you are in automatic mode.
Fig. 77 Gear shift
patternFig. 78 Display:
Engaged gears
SPORT
document_0900452a816e6cc9.book Seite 90 Mittwoch, 21. Februar 2007 1:32 13
Page 95 of 210
Automatic gearbox93
Controls
Safety
Driving tips
General maintenance
Self-help
Technical data
Applies to vehicles: with R tronicLaunch control programmeThe launch control programme enables maximum accel-
eration.– Press the ESP switch once while the engine is running.
The ESP warning lamp
will light up in the driver infor-
mation system display.
– Press and hold the brake pedal with your left foot.
– Engage a gear.
– Press the button.
– Press the accelerator all the way down with your right
foot until the engine reaches a constant rpm speed.
– Take your left foot off the brake ⇒.
WARNING
•
Always adapt your driving style to the traffic conditions.
•
Only use the launch control programme when road and traffic
conditions permit, and make sure your manner of driving and
accelerating the vehicle does not inconvenience or endanger other
road users.
•
Please note that, when the ESP is switched off, the driven
wheels may start to spin, causing the vehicle to lose grip, in partic-
ular on slippery or wet roads - danger of skidding!
•
When acceleration has been completed, the ESP should be
reactivated by pressing the ESP switch.
Note
Accelerating with the launch control programme places a heavy
load on all parts of the vehicle. This can result in increased wear and
tear.Applies to vehicles: with R tronicSteering wheel with paddle leversThe paddle levers behind the steering wheel allow you to
change gear manually without taking your hands off the
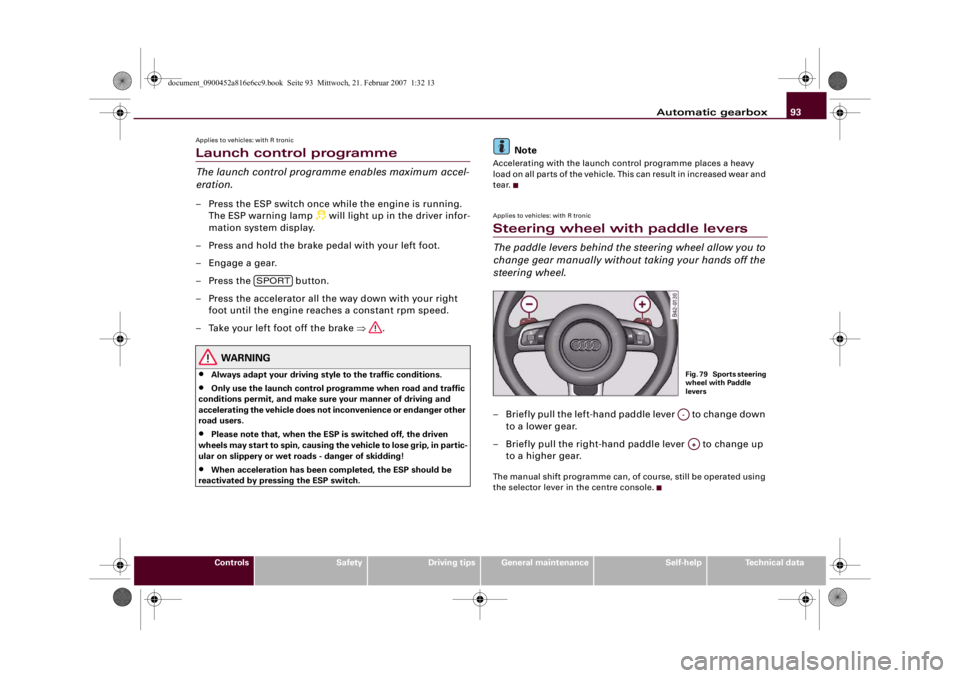
steering wheel.– Briefly pull the left-hand paddle lever to change down
to a lower gear.
– Briefly pull the right-hand paddle lever to change up
to a higher gear.The manual shift programme can, of course, still be operated using
the selector lever in the centre console.
SPORT
Fig. 79 Sports steering
wheel with Paddle
leversA-A+
document_0900452a816e6cc9.book Seite 93 Mittwoch, 21. Februar 2007 1:32 13
Page 97 of 210
HomeLink95
Controls
Safety
Driving tips
General maintenance
Self-help
Technical data
HomeLinkUniversal transmitterApplies to vehicles: with HomeLinkDescription
The HomeLink universal transmitter can be programmed
to replace the hand-held controls of devices already in
use.The HomeLink universal transmitter allows you to conveniently acti-
vate garage doors, estate gates, security systems, home or office
lighting and other electric devices by means of control buttons
inside your car.
The single remote control unit that HomeLink provides will replace
up to three hand-held transmitters operating existing devices on
your property. This will be possible for most transmitters which
control the drive units for a garage door or external gates, etc.
Programming of the individual hand-held transmitters for your
remote control is done at the centre of the front bumper. This is
where the control unit is located.
To be able to control systems with HomeLink, you need to perform
initial programming on the HomeLink transmitter first. If systems
fail to respond after the initial programming, check whether these
systems work with a "rolling code" (variable security code)
⇒page 97.
WARNING
When you are programming the HomeLink universal transmitter,
make sure that no persons or objects are close to the devices
receiving the transmitter signals. If a gate or door is inadvertently
set into motion during programming, persons might be injured or
other damage caused by moving parts.
Note
•
For additional information on HomeLink® and/or products
compatible with HomeLink®, please call the toll-free HomeLink®
hotline (0) 08000466 35465 (in Germany) or alternatively +49 (0) 6838
907 277, or visit the HomeLink® website at: www.homelink.com
•
HomeLink
® is a registered trademark of Johnson Controls.
Applies to vehicles: with HomeLinkProgramming the universal transmitter
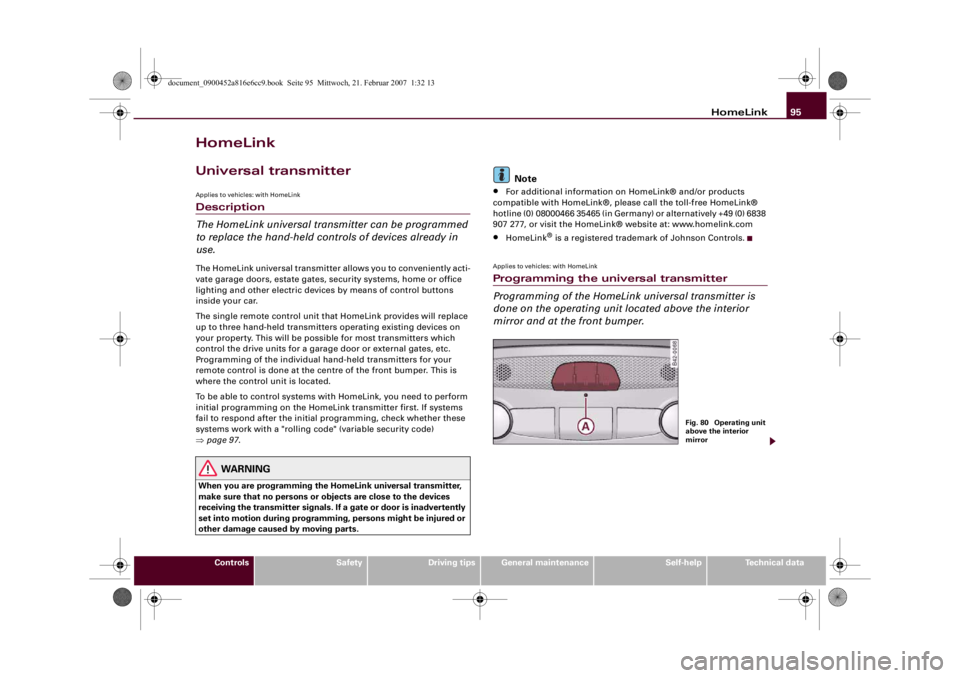
Programming of the HomeLink universal transmitter is
done on the operating unit located above the interior
mirror and at the front bumper.
Fig. 80 Operating unit
above the interior
mirror
document_0900452a816e6cc9.book Seite 95 Mittwoch, 21. Februar 2007 1:32 13
Page 99 of 210
HomeLink97
Controls
Safety
Driving tips
General maintenance
Self-help
Technical data
Applies to vehicles: with HomeLinkRolling code programming
Some devices require rolling code programming of the
HomeLink universal transmitter.Identifying a rolling code
– Press the already programmed HomeLink button again
and hold it down.
–Watch HomeLink diode ⇒page 95, fig. 80. If the diode
starts flashing rapidly and turns into a constant light
after about 2 seconds, this indicates that the device you
wish to operate (e.g. a garage door opener) is equipped
with a rolling code.
– Program the rolling code as follows:
Activating the garage door opener drive unit
– Locate the programming button on the garage door
drive. The exact location and colour of the button may
vary depending on the type of garage door opener.
– Press the programming button on the door drive unit
(this will normally cause a “programming mode indicator
lamp” on the unit to light up). You now have about 30
seconds to start and complete programming of the
HomeLink control button on the operating unit.
Programming of the operating unit above the
interior mirror
– Press and release the already programmed HomeLink
button.
– Press the HomeLink button again to complete rolling
code programming.
After programming at the operating unit, the garage door opener
should recognise the HomeLink signal and respond when the
HomeLink button is pressed. Now the other control buttons can be
programmed as required.
Note
•
Having a second person assist you makes programming of the
rolling code easier and faster. For some makes of garage door
openers the HomeLink button may have to be pressed a third time
to complete the training sequence.
•
If you encounter problems programming the rolling code you
may find helpful information in the operating instructions of the
garage door opener or other device you wish to operate.
Applies to vehicles: with HomeLinkOperating HomeLink
The programmed devices are activated by means of the
HomeLink control buttons above the interior mirror.– Switch on the ignition (do not start the engine).
– Press the programmed HomeLink button ⇒page 95,
fig. 80. The device assigned to that button (e.g. garage
door) will be activated.The HomeLink indicator diode ⇒page 95, fig. 80 will light up when
you press the button.Applies to vehicles: with HomeLinkErasing the HomeLink® button programming
You can erase the complete HomeLink programming by
pressing the two outer buttons.– Switch on the ignition (do not start the engine).
AA
document_0900452a816e6cc9.book Seite 97 Mittwoch, 21. Februar 2007 1:32 13
Page 104 of 210
Safe driving 102Safe drivingGeneral notesSafety is the first priority
Your safety is our first priority.This chapter contains important information, tips, sugges-
tions and warnings that you should read and observe for
your own safety and the safety of your passengers.
WARNING
•
The information in this chapter is important for the driver of
the vehicle and all passengers. The other chapters in this manual
(and, where applicable, in the other literature supplied with the
vehicle) contain further important notes which you should read
and observe for your own safety and that of your passengers.
•
Ensure that the complete vehicle wallet is always in the vehicle.
This is especially important when you lend or sell the vehicle to
others.
Safety features
The safety features listed here are part of the vehicle's
occupant restraint system. They work together to help
reduce the risk of injury in a wide variety of accident situ-
ations.Your safety and the safety of your passengers should not be left to
chance. In the event of an accident, the safety features incorporated
in your vehicle are capable of reducing the risk of injury. These are
just a few of the safety features in your Audi:•
Three-point seat belts for all seats,
•
Belt force limiters for the front seats,
•
Belt pre-tensioners for the front seats,
•
Front airbags,
•
Head/thorax airbags in the backrests,
•
“ISOFIX” mountings* for “ISOFIX” child safety seats on the front
passenger's seat,
•
Height-adjustable head restraints in the backrests,
•
Adjustable steering column.
These individual safety features are harmonised to provide you and
your passengers with the best possible protection in accident situ-
ations. However, they can only be effective if you and your passen-
gers sit in the correct position and adjust and use the safety equip-
ment properly.
For these reasons, this chapter explains why these safety features
are so important, how they can protect you, what you need to
remember when using them, and how you and your passengers can
gain the most benefit from them. There are also a number of impor-
tant safety warnings which you and your passengers should always
observe in order to minimise the risk of injury.
Safety is everyone's responsibility!
Before every trip
The driver is responsible for the safety of the passengers
and the safe operation of the vehicle at all times.For your own safety and the safety of your passengers,
always note the following points before every trip:
– Make sure that all lights and turn signals are working
properly.
document_0900452a816e6cc9.book Seite 102 Mittwoch, 21. Februar 2007 1:32 13
Page 105 of 210
Safe driving103
Controls
Safety
Driving tips
General maintenance
Self-help
Technical data
– Check the tyre pressures.
– Make sure that all windows are clean and give good visi-
bility to the outside.
– Secure all luggage and other items carefully.
– Make sure that no objects can interfere with the pedals.
– Adjust the front seat, head restraint and mirrors
correctly.
– Make sure that the head restraints for all passengers are
adjusted to the correct position.
– Make sure that children are protected with suitable
safety seats and properly worn seat belts ⇒page 122.
– Sit in the correct position in your seat and make sure that
your passengers do the same. ⇒page 67.
– Fasten your seat belt correctly. Make sure that your
passengers do the same ⇒page 109.What affects driving safety?
Safety on the road is directly related to how you drive, and
can also be affected by the passengers in the vehicle.The driver is responsible for the safety of the vehicle and all
its occupants. If your ability to drive is impaired in any way,
you endanger yourself and other road users ⇒. There-
fore:
– Do not let yourself be distracted by passengers or by
using a mobile phone, etc.
– Never drive when your driving ability is impaired (by
medication, alcohol, drugs, etc.).– Obey all traffic regulations and speed limits.
– Always adjust your speed to suit the road, traffic and
weather conditions.
– Take frequent breaks on long trips. Do not drive for more
than two hours without a stop.
– If possible, avoid driving when you are tired or stressed.
WARNING
•
Distractions while driving or any kind of impairment to your
driving ability increase the risk of accident and injury.
•
Do not store loose objects on the dashboard. These objects
could fly around the interior when the vehicle is moving (under
acceleration or whilst cornering) and distract the driver – this
could lead to an accident.
document_0900452a816e6cc9.book Seite 103 Mittwoch, 21. Februar 2007 1:32 13
Page 108 of 210
Safe driving 106Correct adjustment of head restraints
Properly adjusted head restraints are an important part of
the vehicle's occupant protection system. They can help
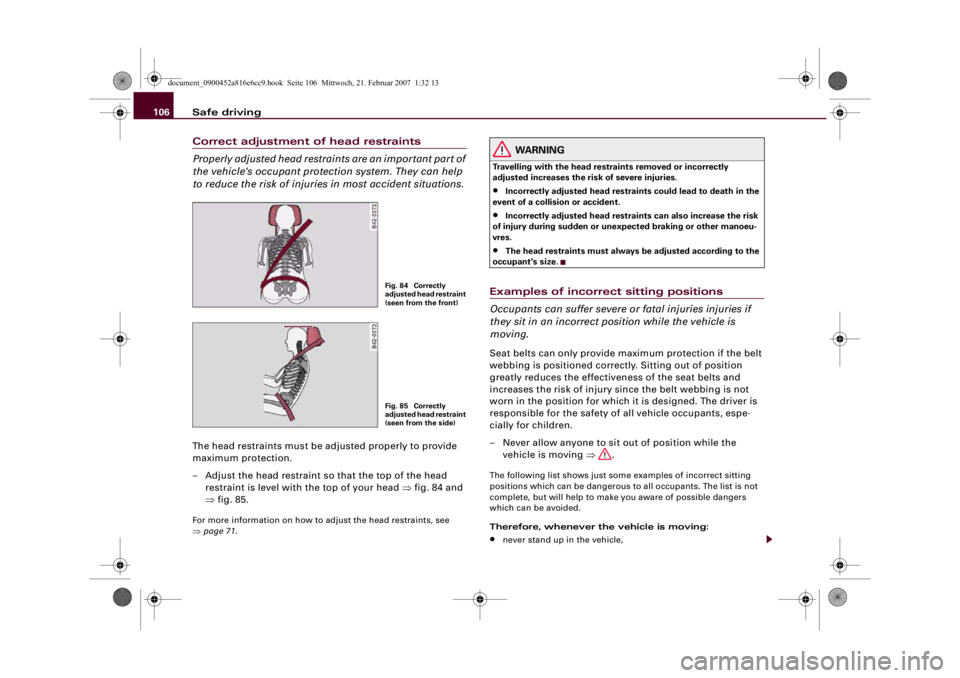
to reduce the risk of injuries in most accident situations.The head restraints must be adjusted properly to provide
maximum protection.
– Adjust the head restraint so that the top of the head
restraint is level with the top of your head ⇒fig. 84 and
⇒fig. 85.For more information on how to adjust the head restraints, see
⇒page 71.
WARNING
Travelling with the head restraints removed or incorrectly
adjusted increases the risk of severe injuries.•
Incorrectly adjusted head restraints could lead to death in the
event of a collision or accident.
•
Incorrectly adjusted head restraints can also increase the risk
of injury during sudden or unexpected braking or other manoeu-
vres.
•
The head restraints must always be adjusted according to the
occupant's size.
Examples of incorrect sitting positions
Occupants can suffer severe or fatal injuries injuries if
they sit in an incorrect position while the vehicle is
moving.Seat belts can only provide maximum protection if the belt
webbing is positioned correctly. Sitting out of position
greatly reduces the effectiveness of the seat belts and
increases the risk of injury since the belt webbing is not
worn in the position for which it is designed. The driver is
responsible for the safety of all vehicle occupants, espe-
cially for children.
– Never allow anyone to sit out of position while the
vehicle is moving ⇒.The following list shows just some examples of incorrect sitting
positions which can be dangerous to all occupants. The list is not
complete, but will help to make you aware of possible dangers
which can be avoided.
Therefore, whenever the vehicle is moving:•
never stand up in the vehicle,
Fig. 84 Correctly
adjusted head restraint
(seen from the front)Fig. 85 Correctly
adjusted head restraint
(seen from the side)
document_0900452a816e6cc9.book Seite 106 Mittwoch, 21. Februar 2007 1:32 13
Page 110 of 210
Safe driving 108Use only floor mats that leave the pedal area unobstructed and are
firmly secured to prevent them from slipping. You can obtain suit-
able floor mats from your dealer or a specialist retailer.
WARNING
Any obstructions that restrict pedal travel can cause loss of
vehicle control and increase the risk of serious personal injury. •
Always make sure that floor mats are properly secured.
•
Never lay or install additional floor mats or other floor cover-
ings over the existing floor mats; this would restrict the pedal area
and possibly obstruct the pedals, which could cause an
accident.
Stowing luggage safelyNotes
All luggage and objects must be securely stowed.Loose items can cause a safety hazard or impair the handling of the
vehicle by changing the weight distribution.
During a collision or an accident, even small and light objects can
possess so much energy that they can cause very severe injuries.
The amount of this “kinetic energy” depends on the speed of the
vehicle and the weight of the object. The most significant factor,
however, is the speed of the vehicle.
An example: An object weighing 4.5 kg is lying unsecured in the
vehicle. During a frontal collision at a speed of 50 km/h, this object
generates a force corresponding to 20 times its weight. That means
that the effective weight of the object increases to about 90 kg. You
can imagine the severity of the injuries which might be sustained if
this “projectile” strikes an occupant as it flies through the
passenger compartment.
WARNING
•
Always stow objects in the luggage compartment.
•
Transporting heavy objects may affect the vehicle's handling by
shifting the centre of gravity – this could cause an accident. Take
extra care when driving and adjust your speed accordingly.
•
Never exceed the maximum axle loads or the maximum gross
weight for the vehicle ⇒page 198, “Performance, weights and
dimensions”. Exceeding the permitted axle loads or gross weight
limit can affect the vehicle's handling characteristics, and increase
the risk of accidents, personal injuries or damage to the vehicle.
•
Never leave your vehicle unattended when the luggage lid is
open. Children could climb into the luggage compartment and
close the luggage lid from the inside. In this case the child would
be unable to get out of the vehicle without help. This could have
fatal consequences.
•
Never allow children to play in or around the vehicle. Always
close and lock the luggage lid and all the doors when you leave the
vehicle.
•
Never let passengers ride in the luggage compartment. All
occupants must be properly restrained by the seat belts at all
times ⇒page 109.
document_0900452a816e6cc9.book Seite 108 Mittwoch, 21. Februar 2007 1:32 13
Page 112 of 210
Seat belts 110Important safety instructions for using seat belts
There are a number of safety points concerning the seat
belts which you should remember. This will help to reduce
the risk of injury in an accident.
WARNING
•
The seat belts can only provide maximum protection if the
seats are adjusted properly ⇒page 67, “Seats and storage”.
•
To ensure proper protection, it is important to wear the seat
belts in the correct position ⇒page 112, “How to wear seat belts
properly”. Ensure that the seat belts are worn exactly as recom-
mended in this chapter. Belts which are not worn properly can
increase the risk of injury in accidents considerably.
•
Do not allow the seat belt to become twisted or jammed, or to
rub on any sharp edges.
•
Never allow two passengers (even children) to share the same
seat belt. It is especially dangerous to place a seat belt over a child
sitting on your lap.
•
Do not wear the belt over hard or fragile objects (such as
glasses or pens, etc.) because this can cause injuries.
•
Loose, bulky clothing (such as an overcoat over a jacket)
impairs the proper fit and function of the belts.
•
The belts must be kept clean, otherwise the retractors may not
work properly ⇒page 150, “Seat belts”.
•
The slot in the seat belt buckle must not be blocked with paper
or other objects, as this can prevent the latch plate from engaging
properly.
•
The latch plate of the belt must always be engaged in the
correct buckle for that seat, otherwise the belt will not be fully
effective.
•
Check the condition of the seat belts at regular intervals. If you
notice that the belt webbing, fittings, retractor mechanism or buckle of any of the belts is damaged, the belt must be replaced
by a qualified workshop.
•
The seat belts must not be removed or modified in any way. Do
not attempt to repair a damaged belt yourself.
•
Seat belts which have been worn in an accident and stretched
must be replaced by a qualified workshop. The belt anchorages
should also be checked.
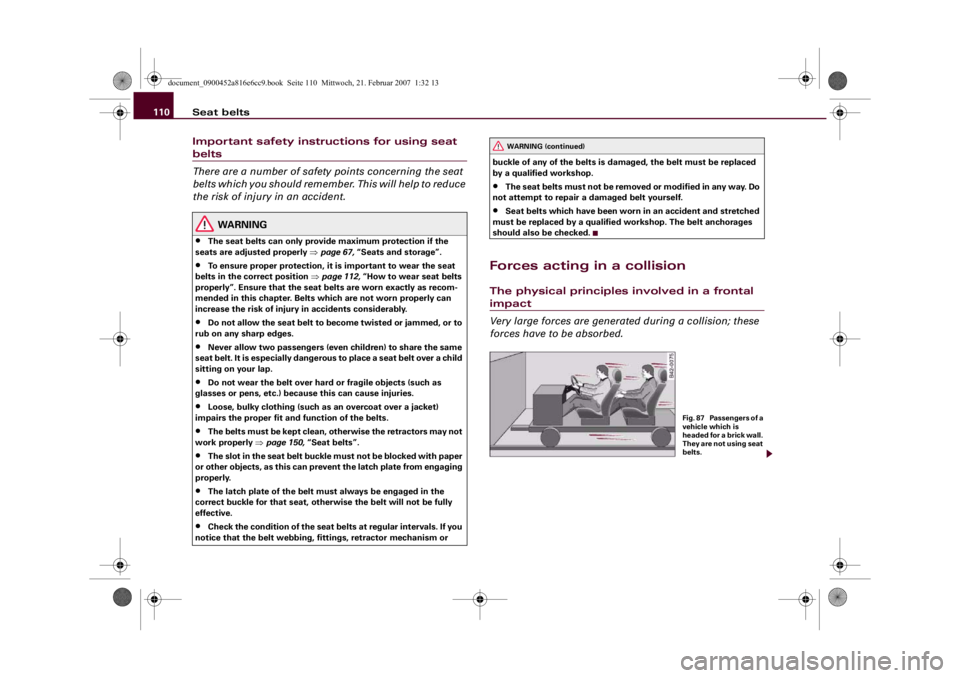
Forces acting in a collisionThe physical principles involved in a frontal impact
Very large forces are generated during a collision; these
forces have to be absorbed.
WARNING (continued)
F i g . 8 7 P a s s e n g e r s o f a
vehicle which is
headed for a brick wall.
They are not using seat
belts.
document_0900452a816e6cc9.book Seite 110 Mittwoch, 21. Februar 2007 1:32 13