airbag off AUDI R8 2007 Owners Manual
[x] Cancel search | Manufacturer: AUDI, Model Year: 2007, Model line: R8, Model: AUDI R8 2007Pages: 210, PDF Size: 8.1 MB
Page 4 of 210
Contents 2ContentsNotes on this Owner's
Manual
. . . . . . . . . . . . . . . . . . . . . .
Controls
. . . . . . . . . . . . . . . . . . . . .
Controls and displays
. . . . . . . . . .
Overview . . . . . . . . . . . . . . . . . . . . . .
Instruments and
warning/indicator lamps
. . . . . . .
Instruments . . . . . . . . . . . . . . . . . . . .
Warning and indicator lamps . . . . .
Driver information system
. . . . . .
Introduction . . . . . . . . . . . . . . . . . . . .
Service interval display . . . . . . . . . .
On-board computer . . . . . . . . . . . . .
Menus . . . . . . . . . . . . . . . . . . . . . . . . .
Lap timer . . . . . . . . . . . . . . . . . . . . . .
Speed warning function . . . . . . . . .
Notes and symbols . . . . . . . . . . . . .
Doors and windows
. . . . . . . . . . . .
Remote control keys . . . . . . . . . . . .
Central locking system . . . . . . . . . .
Luggage lid . . . . . . . . . . . . . . . . . . . .
Anti-theft alarm system . . . . . . . . . .
Electric windows . . . . . . . . . . . . . . .
Lights and vision
. . . . . . . . . . . . . .
Lights . . . . . . . . . . . . . . . . . . . . . . . . .
Interior lights . . . . . . . . . . . . . . . . . .
Clear vision . . . . . . . . . . . . . . . . . . . .
Windscreen wipers . . . . . . . . . . . . .
Rear-view mirrors . . . . . . . . . . . . . .
Digital compass . . . . . . . . . . . . . . . .
Seats and storage
. . . . . . . . . . . . .
Manually adjustable front seats . .
Electrically adjustable front seats
Bucket seats . . . . . . . . . . . . . . . . . . .
Head restraints . . . . . . . . . . . . . . . .
Cup holders . . . . . . . . . . . . . . . . . . .
Ashtray . . . . . . . . . . . . . . . . . . . . . . .
Cigarette lighter and electrical
socket . . . . . . . . . . . . . . . . . . . . . . . .
Storage compartments . . . . . . . . .
Heating and cooling
. . . . . . . . . . .
Air conditioner . . . . . . . . . . . . . . . . .
Rear window heating . . . . . . . . .
Seat heating . . . . . . . . . . . . . . . . . . .
Driving
. . . . . . . . . . . . . . . . . . . . . . . . .
Steering . . . . . . . . . . . . . . . . . . . . . . .
Ignition lock . . . . . . . . . . . . . . . . . . .
Starting the engine . . . . . . . . . . . . .
Switching off the engine . . . . . . . .
Handbrake . . . . . . . . . . . . . . . . . . . .
Parking aid . . . . . . . . . . . . . . . . . . . .
Cruise control system . . . . . . . . . .
Audi magnetic ride . . . . . . . . . . . . .
Automatic gearbox
. . . . . . . . . . . .
Description . . . . . . . . . . . . . . . . . . . .
Manual mode . . . . . . . . . . . . . . . . . .
Automatic mode . . . . . . . . . . . . . . .
Kick-down feature . . . . . . . . . . . . . . Launch control programme . . . . . .
Steering wheel with paddle levers
Backup programme . . . . . . . . . . . . .
HomeLink
. . . . . . . . . . . . . . . . . . . . . .
Universal transmitter . . . . . . . . . . . .
Safety
. . . . . . . . . . . . . . . . . . . . . . .
Safe driving
. . . . . . . . . . . . . . . . . . . .
General notes . . . . . . . . . . . . . . . . . .
Correct sitting positions . . . . . . . . .
Pedal area . . . . . . . . . . . . . . . . . . . . .
Stowing luggage safely . . . . . . . . .
Seat belts
. . . . . . . . . . . . . . . . . . . . . .
Why is it so important to use seat
belts? . . . . . . . . . . . . . . . . . . . . . . . . .
Forces acting in a collision . . . . . .
How to wear seat belts properly .
Belt tensioners . . . . . . . . . . . . . . . . .
Airbag system
. . . . . . . . . . . . . . . . . .
Description of airbag system . . . .
Front airbags . . . . . . . . . . . . . . . . . .
Side airbags . . . . . . . . . . . . . . . . . . .
Deactivating the airbags . . . . . . . . 5
7
9
9
10
10
15
20
20
21
22
24
27
31
33
40
40
42
47
48
5052
52
57
58
59
63
65
67
67
68
70
71
72
72
72
73
75
75
79
80
81
81
81
82
83
83
85
86
88
90
90
91
92
9293
93
94
95
95
101
102
102
104
107
108
109
109
110
112
114
115
115
116
118
120
document_0900452a816e6cc9.book Seite 2 Mittwoch, 21. Februar 2007 1:32 13
Page 19 of 210
Instruments and warning/indicator lamps17
Controls
Safety
Driving tips
General maintenance
Self-help
Technical data
•
It will also come on if a fault should occur in the ABS because the
ESP operates in conjunction with the ABS.
If the warning lamp lights up and stays on after the engine is
started, this may mean that the control system has temporarily
switched off the ESP. In this case the ESP can be reactivated by
switching the ignition off and then on again. If the warning lamp
goes out, this means the system is fully functional.
For further information on the ESP ⇒page 132.
If the battery is disconnected and then reconnected, this warning
lamp will light up when the engine is started and stay on until you
have driven a few metres.
Emission control system
If the warning lamp lights up continuously you should take your
vehicle to a qualified workshop as soon as possible in order to have
the fault rectified.
If the warning lamp flashes drive on at reduced speed and seek
professional help in order to avoid damage to the catalytic
converter.
For further information on the catalytic converter ⇒page 138.Main beam headlights
The indicator lamp
lights up when the main beams are on or
when the headlight flasher is operated.
For further information on the main beam headlights ⇒page 56.
Rear spoiler
This warning lamp monitors the automatic electrically
operated rear spoiler.The warning lamp
has the following functions:
•
It lights up when the ignition is switched on and should go out
again after about 3 seconds. This signals that the lamp is working
properly.
•
It lights up if a malfunction occurs on the automatic rear spoiler.
For further information on the automatic rear spoiler ⇒page 134.
Turn signals and hazard warning lights
Depending on which turn signal is operated, either the left
or
right
indicator lamp flashes. Both indicator lamps will flash when
the hazard warning lights are switched on.
If one turn signal should fail, the indicator lamp will start flashing
twice as fast.
For further information on the turn signals ⇒page 56.
Applies to vehicles: with cruise control systemCruise control
The indicator lamp
in the instrument cluster lights up when the
cruise control system is operating.
Airbag system
This warning lamp monitors the airbag and seat belt
tensioner system.The warning lamp
should light up for a few seconds when the
ignition is switched on.
document_0900452a816e6cc9.book Seite 17 Mittwoch, 21. Februar 2007 1:32 13
Page 20 of 210
Instruments and warning/indicator lamps 18If the warning lamp does not go out, or if it lights up, flashes or
flickers when the vehicle is moving, this indicates a malfunction in
the system. This is also the case if the warning lamp does not light
up when the ignition is switched on.
WARNING
If a malfunction should occur, have the system checked immedi-
ately by a qualified workshop. If this is neglected, there is a risk
that the airbag system and/or belt tensioners may not be acti-
vated in an accident.Alternator
The warning lamp signals a fault in the alternator or in
the vehicle's electrical system.The warning lamp
lights up when the ignition is switched on. It
should go out when the engine starts running.
If the warning lamp lights up when you are driving, you can
normally continue as far as the nearest qualified workshop.
However, you should avoid using electrical equipment that is not
absolutely necessary because this will drain the battery.
Caution
If the coolant warning lamp
in the instrument display lights up
as well while driving ⇒page 35, stop the vehicle immediately and
switch off the engine. In this case the coolant pump is no longer
being driven, and there is a risk of engine damage.
Seat belt warning lamp
The warning lamp acts as a reminder to fasten the seat
belts.After switching on the ignition, the warning lamp
will remain lit
until the driver has fastened his seat belt. When the vehicle has
gathered speed you will also hear a warning chime.
For further information on the seat belts ⇒page 109.
Brake system
The warning lamp flashes if the brake fluid level is too low
or if there is a fault in the ABS system.If the warning lamp
flashes (and the handbrake is not applied),
stop the vehicle and obtain professional assistance ⇒.
If a failure should occur in the ABS, the ABS warning lamp
will
light up together with the brake warning lamp
⇒.
Handbrake applied
The warning lamp
also lights up when the handbrake is applied.
If you drive by mistake with the handbrake still applied, you will hear
a warning buzzer.
WARNING
•
If the brake warning lamp does not go out, or if it lights up
when driving, the brake fluid level in the reservoir is too low – this
may cause an increased accident risk. Stop the vehicle and do not
drive on. You should obtain professional assistance.
•
If the brake warning lamp lights up together with the ABS
warning lamp, this can mean that the control function of the ABS
is out of action. As a result the rear wheels can lock relatively
easily when braking. This could cause the tail of the vehicle to skid
document_0900452a816e6cc9.book Seite 18 Mittwoch, 21. Februar 2007 1:32 13
Page 47 of 210
Doors and windows45
Controls
Safety
Driving tips
General maintenance
Self-help
Technical data
WARNING
Do not leave anyone (especially children) in the car if it is locked
from the outside and the deadlock mechanism is activated: the
doors and windows cannot then be opened from the inside.
Locked doors could delay assistance in an emergency, potentially
putting lives at risk.
Note
•
The deadlock mechanism and the anti-theft alarm cannot be acti-
vated if the central locking is not functioning.
•
However, please note that when you unlock the vehicle with the
key, this only unlocks the mechanical lock on the doors set in the
menu display ⇒page 24.
•
Both doors are automatically locked when you lock the vehicle.
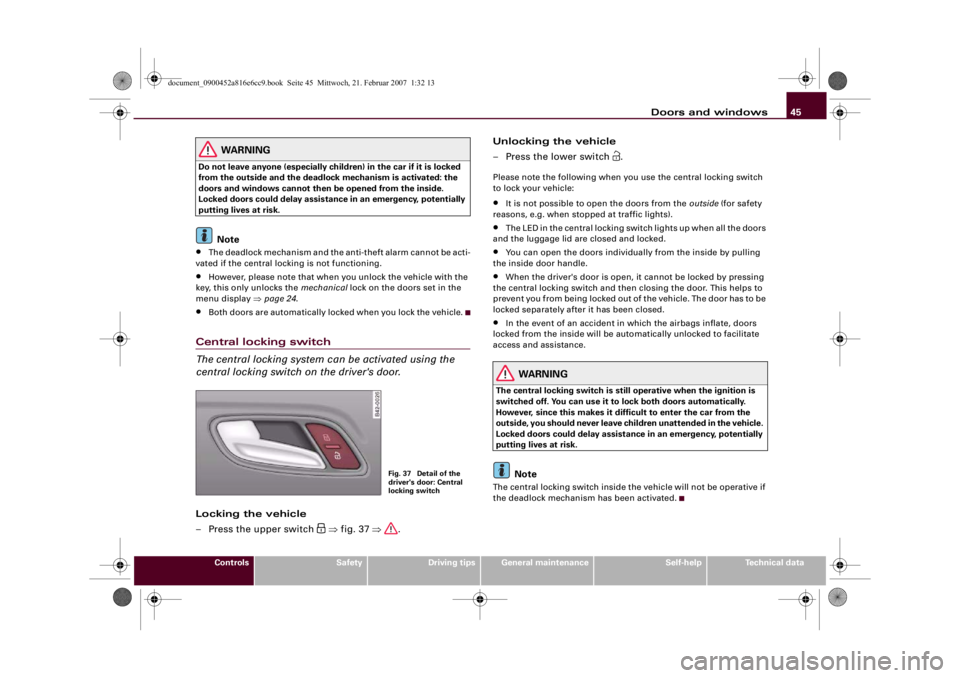
Central locking switch
The central locking system can be activated using the
central locking switch on the driver's door.Locking the vehicle
– Press the upper switch
⇒fig. 37 ⇒.Unlocking the vehicle
– Press the lower switch
.
Please note the following when you use the central locking switch
to lock your vehicle:•
It is not possible to open the doors from the outside (for safety
reasons, e.g. when stopped at traffic lights).
•
The LED in the central locking switch lights up when all the doors
and the luggage lid are closed and locked.
•
You can open the doors individually from the inside by pulling
the inside door handle.
•
When the driver's door is open, it cannot be locked by pressing
the central locking switch and then closing the door. This helps to
prevent you from being locked out of the vehicle. The door has to be
locked separately after it has been closed.
•
In the event of an accident in which the airbags inflate, doors
locked from the inside will be automatically unlocked to facilitate
access and assistance.
WARNING
The central locking switch is still operative when the ignition is
switched off. You can use it to lock both doors automatically.
However, since this makes it difficult to enter the car from the
outside, you should never leave children unattended in the vehicle.
Locked doors could delay assistance in an emergency, potentially
putting lives at risk.
Note
The central locking switch inside the vehicle will not be operative if
the deadlock mechanism has been activated.
Fig. 37 Detail of the
driver's door: Central
locking switch
document_0900452a816e6cc9.book Seite 45 Mittwoch, 21. Februar 2007 1:32 13
Page 58 of 210
Lights and vision 56Hazard warning lights
The hazard warning lights are used to make other road
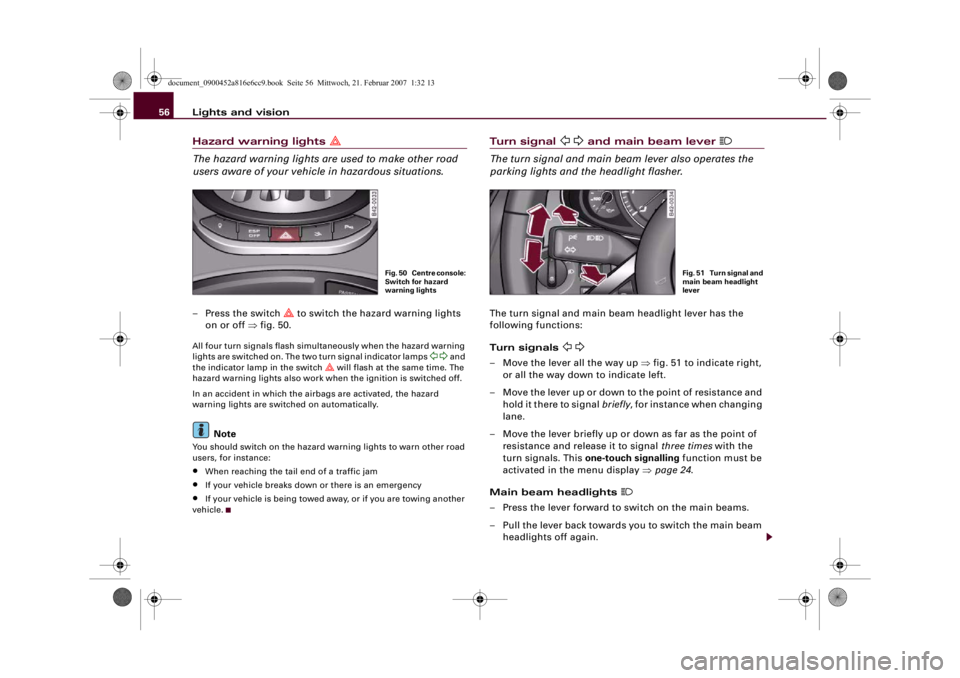
users aware of your vehicle in hazardous situations.– Press the switch
to switch the hazard warning lights
on or off ⇒fig. 50.
All four turn signals flash simultaneously when the hazard warning
lights are switched on. The two turn signal indicator lamps
and
the indicator lamp in the switch
will flash at the same time. The
hazard warning lights also work when the ignition is switched off.
In an accident in which the airbags are activated, the hazard
warning lights are switched on automatically.
Note
You should switch on the hazard warning lights to warn other road
users, for instance:•
When reaching the tail end of a traffic jam
•
If your vehicle breaks down or there is an emergency
•
If your vehicle is being towed away, or if you are towing another
vehicle.
Tu r n s i g n a l
and main beam lever
The turn signal and main beam lever also operates the
parking lights and the headlight flasher.The turn signal and main beam headlight lever has the
following functions:
Turn signals
– Move the lever all the way up ⇒fig. 51 to indicate right,
or all the way down to indicate left.
– Move the lever up or down to the point of resistance and
hold it there to signal briefly, for instance when changing
lane.
– Move the lever briefly up or down as far as the point of
resistance and release it to signal three times with the
turn signals. This one-touch signalling function must be
activated in the menu display ⇒page 24.
Main beam headlights
– Press the lever forward to switch on the main beams.
– Pull the lever back towards you to switch the main beam
headlights off again.
Fig. 50 Centre console:
Switch for hazard
warning lights
Fig. 51 Turn signal and
main beam headlight
lever
document_0900452a816e6cc9.book Seite 56 Mittwoch, 21. Februar 2007 1:32 13
Page 71 of 210
Seats and storage69
Controls
Safety
Driving tips
General maintenance
Self-help
Technical data
Applies to vehicles: with electric seat adjustmentSeat adjustment
You can use the electrical adjustment to set the position,
angle and shape of the seat so that you can travel in a
safe and comfortable sitting position.Before adjusting your seat, please read and observe the
warnings ⇒.
Adjusting contour of lumbar support*
– Press the front or rear part of the adjuster switch
⇒page 68, fig. 63 to increase or decrease the curvature
of the lumbar support as required.
Adjusting height of lumbar support*
– Press the top or bottom part of the adjuster switch to
move the lumbar support upwards or downwards as
required.
Moving seat backwards or forwards
– Press the switch forwards or backwards.
Adjusting seat height
– Press the switch up or down.
Raising/lowering seat at front
– Press the front of switch up or down.
Raising/lowering seat at rear
– Press the rear of switch up or down.
Adjusting the backrest angle
– Press the switch forwards or backwards.Unlocking backrest
– Push the handle upwards.
– Fold the backrest forwards
WARNING
•
Never adjust the driver's seat when the vehicle is moving - this
could lead to an accident.
•
The electrical seat adjustment also works when the ignition is
off and when the key is not in the ignition. To avoid accidental inju-
ries, never leave children unattended in the vehicle.
•
Be careful when adjusting the seat height. Careless or uncon-
trolled use of the height adjustment can cause injuries.
•
Do not drive with the backrests of the front seats reclined too
far as otherwise the seat belt and airbag could fail to restrain the
wearer properly in an accident, possibly leading to injury.
•
For safety reasons the front seat backrests must be locked
while driving.
A1A1
A2A2
A2A2
A3
A4
document_0900452a816e6cc9.book Seite 69 Mittwoch, 21. Februar 2007 1:32 13
Page 73 of 210
Seats and storage71
Controls
Safety
Driving tips
General maintenance
Self-help
Technical data
– Turn the adjuster wheel to set the angle of the back-
rest as required.
Unlocking backrest
– Press one of the two levers ⇒page 68, fig. 63
upwards and fold down the backrest.
WARNING
•
Never adjust the driver's seat when the vehicle is moving - this
could lead to an accident.
•
The electrical seat adjustment also works when the ignition is
off and when the key is not in the ignition. To avoid accidental inju-
ries, never leave children unattended in the vehicle.
•
Be careful when adjusting the seat height. Careless or uncon-
trolled use of the seat adjustment can cause injuries.
•
Do not drive with the backrests of the front seats reclined too
far as otherwise the seat belt and airbag could fail to restrain the
wearer properly in an accident, possibly leading to injury.
•
For safety reasons the front seat backrests must be locked
while driving.
Head restraintsFront head restraints
In combination with properly worn seat belts, the head
restraints offer effective protection. However, they must
always be properly adjusted to suit the height of the occu-
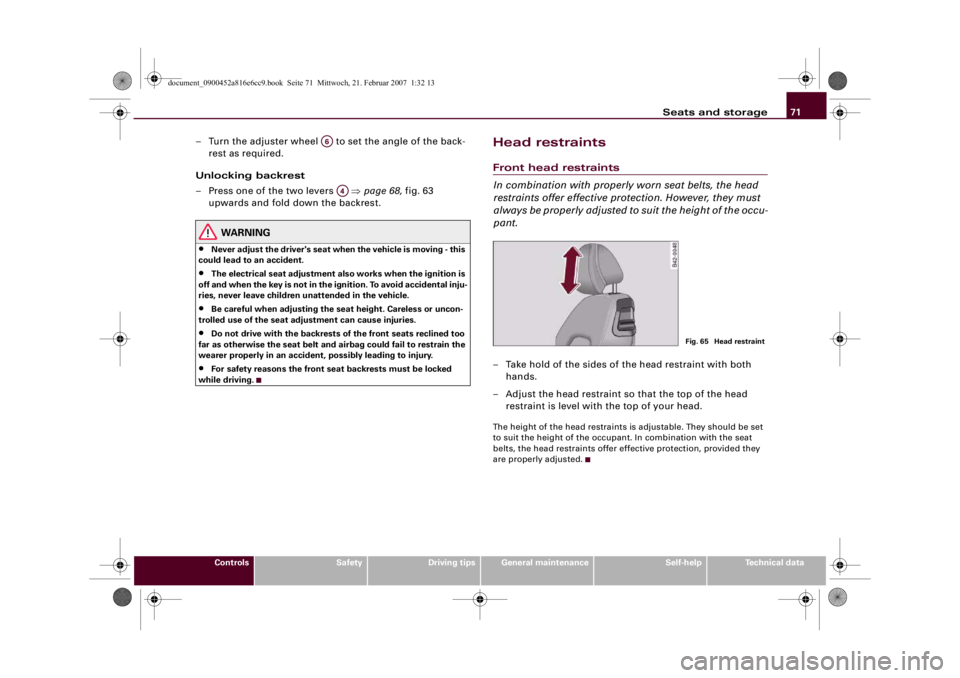
pant.– Take hold of the sides of the head restraint with both
hands.
– Adjust the head restraint so that the top of the head
restraint is level with the top of your head.The height of the head restraints is adjustable. They should be set
to suit the height of the occupant. In combination with the seat
belts, the head restraints offer effective protection, provided they
are properly adjusted.
A6
A4
Fig. 65 Head restraint
document_0900452a816e6cc9.book Seite 71 Mittwoch, 21. Februar 2007 1:32 13
Page 117 of 210
Airbag system115
Controls
Safety
Driving tips
General maintenance
Self-help
Technical data
Airbag systemDescription of airbag systemGeneral notes on airbag system
The airbag is an integral part of the car's passive safety
system.In conjunction with the three-point seat belts, the airbag system
gives the front occupants additional protection for the head and
chest in the event of a severe frontal collision.
In a side collision the side airbags reduce the risk of injury to the
areas of the body facing the impact ⇒.
In addition to their normal function of protecting the occupants in a
collision, the seat belts also hold them in a position where the
airbags can inflate properly and provide maximum protection.
The airbag system will only work with the ignition on. The airbag
system is monitored electronically; the airbag warning lamp indi-
cates whether the system is functioning properly.
The main parts of the airbag system are:•
the electronic monitoring system (control unit and sensors),
•
the two front airbags,
•
The two side airbags,
•
The airbag warning lamp in the instrument cluster.
There is a fault in the airbag system if the warning
lamp
•
does not come on when the ignition is switched on,
•
does not go out about 3 seconds after the ignition is switched
on,
•
goes out and then comes on again after the ignition is switched
on,
•
comes on or flickers while the car is moving.
WARNING
•
The airbags are not a substitute for the seat belts; they are an
integral part of the car's overall passive safety system. The airbags
can only offer effective protection if the occupants are wearing
their seat belts. For this reason it is very important to wear the
seat belts at all times ⇒page 109, “Why is it so important to use
seat belts?”.
•
The seat belts and airbags can only provide maximum protec-
tion if the occupants are seated correctly ⇒page 67, “Seats and
storage”.
•
If you do not wear a seat belt, if you lean forward, or are not
seated correctly while the vehicle is in motion, you are at greater
risk of injury should the airbag system be triggered in an accident.
•
Components of the airbag system are located in various parts
of the vehicle. If repairs to other vehicle components make it
necessary to perform work on the airbag system or to remove or
install parts of the airbag system, this may cause damage to the
airbag system. As a result, the airbags may not inflate correctly or
may not be triggered at all in an accident situation.
•
If a fault should occur in the airbag system, have the system
checked immediately by a qualified workshop. Otherwise the
system may fail to trigger in an accident.
•
Do not attempt to modify components of the airbag system in
any way.
•
Never make any alterations to the front bumper or the body.
•
The airbag system can only be activated once; if the airbag has
been triggered, the system must be replaced. Should the airbag
system or airbag modules have to be replaced, the qualified work-
shop carrying out the replacement will document all details in the
appropriate section of the Service Schedule.
document_0900452a816e6cc9.book Seite 115 Mittwoch, 21. Februar 2007 1:32 13
Page 121 of 210
Airbag system119
Controls
Safety
Driving tips
General maintenance
Self-help
Technical data collision ⇒ in “Important safety notes on the side airbag system”
on page 119.
In a side collision the side airbags reduce the risk of injury to the
areas of the body facing the impact.
How the side airbags work
When fully inflated, the side airbags reduce the risk of
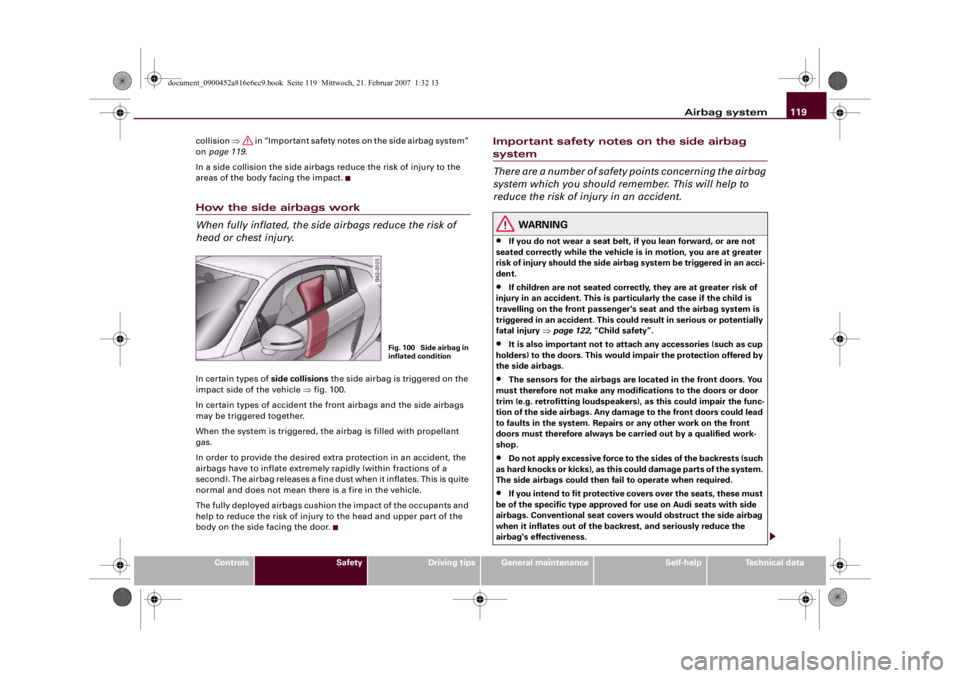
head or chest injury.In certain types of side collisions the side airbag is triggered on the
impact side of the vehicle ⇒fig. 100.
In certain types of accident the front airbags and the side airbags
may be triggered together.
When the system is triggered, the airbag is filled with propellant
gas.
In order to provide the desired extra protection in an accident, the
airbags have to inflate extremely rapidly (within fractions of a
second). The airbag releases a fine dust when it inflates. This is quite
normal and does not mean there is a fire in the vehicle.
The fully deployed airbags cushion the impact of the occupants and
help to reduce the risk of injury to the head and upper part of the
body on the side facing the door.
Important safety notes on the side airbag system
There are a number of safety points concerning the airbag
system which you should remember. This will help to
reduce the risk of injury in an accident.
WARNING
•
If you do not wear a seat belt, if you lean forward, or are not
seated correctly while the vehicle is in motion, you are at greater
risk of injury should the side airbag system be triggered in an acci-
dent.
•
If children are not seated correctly, they are at greater risk of
injury in an accident. This is particularly the case if the child is
travelling on the front passenger's seat and the airbag system is
triggered in an accident. This could result in serious or potentially
fatal injury ⇒page 122, “Child safety”.
•
It is also important not to attach any accessories (such as cup
holders) to the doors. This would impair the protection offered by
the side airbags.
•
The sensors for the airbags are located in the front doors. You
must therefore not make any modifications to the doors or door
trim (e.g. retrofitting loudspeakers), as this could impair the func-
tion of the side airbags. Any damage to the front doors could lead
to faults in the system. Repairs or any other work on the front
doors must therefore always be carried out by a qualified work-
shop.
•
Do not apply excessive force to the sides of the backrests (such
as hard knocks or kicks), as this could damage parts of the system.
The side airbags could then fail to operate when required.
•
If you intend to fit protective covers over the seats, these must
be of the specific type approved for use on Audi seats with side
airbags. Conventional seat covers would obstruct the side airbag
when it inflates out of the backrest, and seriously reduce the
airbag's effectiveness.
Fig. 100 Side airbag in
inflated condition
document_0900452a816e6cc9.book Seite 119 Mittwoch, 21. Februar 2007 1:32 13
Page 123 of 210
Airbag system121
Controls
Safety
Driving tips
General maintenance
Self-help
Technical data
The key-operated switch for deactivating the front
passenger's airbag is located in the glove box ⇒page 120,
fig. 101.
– To deactivate the front passenger's airbag, insert the
ignition key in the switch and turn it to position .
– The front passenger's airbag can be reactivated by
turning the key to position .If the front passenger's airbag has been deactivated via the key-
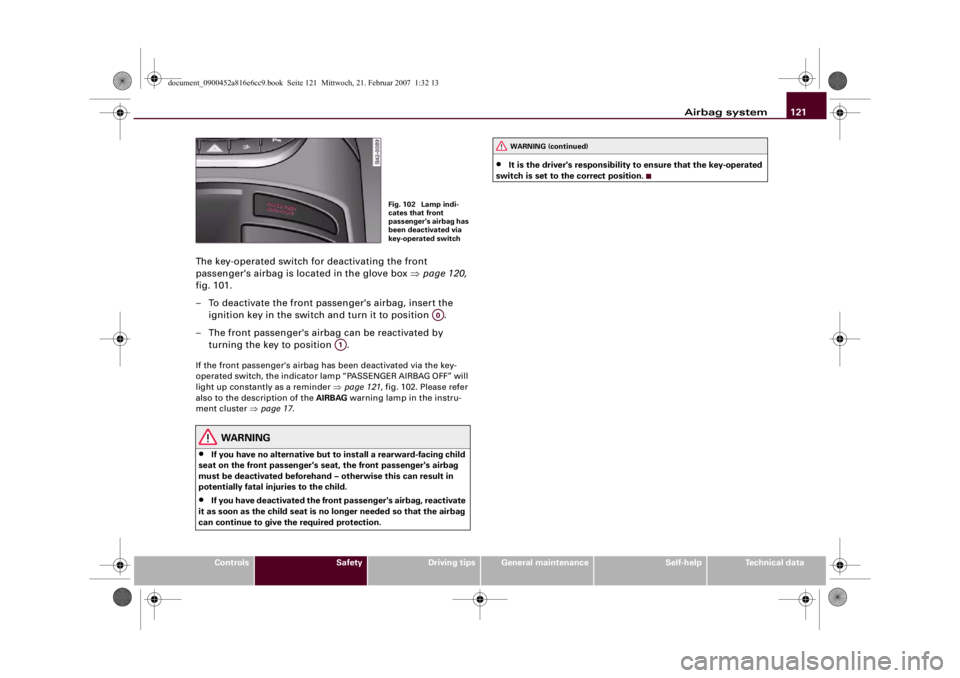
operated switch, the indicator lamp “PASSENGER AIRBAG OFF” will
light up constantly as a reminder ⇒page 121, fig. 102. Please refer
also to the description of the AIRBAG warning lamp in the instru-
ment cluster ⇒page 17.
WARNING
•
If you have no alternative but to install a rearward-facing child
seat on the front passenger's seat, the front passenger's airbag
must be deactivated beforehand – otherwise this can result in
potentially fatal injuries to the child.
•
If you have deactivated the front passenger's airbag, reactivate
it as soon as the child seat is no longer needed so that the airbag
can continue to give the required protection.
•
It is the driver's responsibility to ensure that the key-operated
switch is set to the correct position.
Fig. 102 Lamp indi-
cates that front
passenger's airbag has
been deactivated via
key-operated switch
A0
A1
WARNING (continued)
document_0900452a816e6cc9.book Seite 121 Mittwoch, 21. Februar 2007 1:32 13