oil dipstick AUDI R8 2007 Owners Manual
[x] Cancel search | Manufacturer: AUDI, Model Year: 2007, Model line: R8, Model: AUDI R8 2007Pages: 210, PDF Size: 8.1 MB
Page 158 of 210

Checking and topping up fluids 156drive belts and alternator, etc., and from the high-voltage ignition
system. •
Observe the following additional warnings if work on the fuel
system or the electrical system is necessary:
−Always disconnect the battery
−Do not smoke
−Never work near open flames
−Always keep an approved fire extinguisher immediately
available.Caution
When topping up fluids make sure the correct fluid is put into the
correct filler opening. This can otherwise cause serious malfunc-
tions or engine damage.
For the sake of the environment
Inspect the ground underneath your vehicle regularly so that any
leaks are detected at an early stage. If you find oil spots or other
fluids, have your vehicle inspected by a qualified workshop.
Note
On right-hand drive vehicles* some of the containers/ reservoirs
mentioned below are located on the other side of the engine
compartment.Closing the engine lid– Make sure that the rear spoiler is retracted ⇒page 134.
– To close the engine lid, pull it down to overcome the
spring pressure.– Then let it drop into the catches; do not press down ⇒.
WARNING
For safety reasons the engine lid must always be completely
closed when the vehicle is moving. After closing it always check
that it is properly secured. The engine lid must be flush with the
adjacent body panels.Engine compartment layout
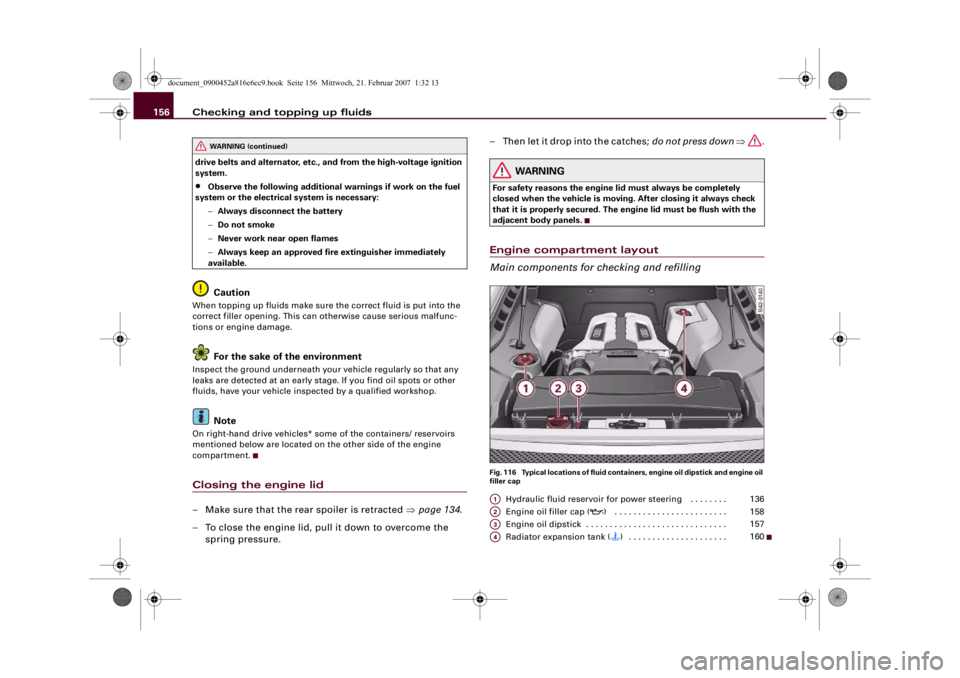
Main components for checking and refillingFig. 116 Typical locations of fluid containers, engine oil dipstick and engine oil
filler cap
Hydraulic fluid reservoir for power steering . . . . . . . .
Engine oil filler cap (
) . . . . . . . . . . . . . . . . . . . . . . . .
Engine oil dipstick . . . . . . . . . . . . . . . . . . . . . . . . . . . . . .
Radiator expansion tank () . . . . . . . . . . . . . . . . . . . . .
WARNING (continued)
A1
136
A2
158
A3
157
A4
160
document_0900452a816e6cc9.book Seite 156 Mittwoch, 21. Februar 2007 1:32 13
Page 159 of 210

Checking and topping up fluids157
Controls
Safety
Driving tips
General maintenance
Self-help
Technical data
Engine oilGeneral notesWe recommend that you have the oil change carried out by an
Audi R8 dealership or qualified workshop according to the intervals
stated in the Service Schedule or according to the service interval
display in the instrument cluster.
Whether your vehicle is serviced at flexible service intervals or fixed
service intervals is shown in the Service Schedule.
The correct oil specifications for your engine are listed in the Te c h -
nical data section ⇒page 198, “Performance, weights and dimen-
sions”.
Check that the specifications quoted (VW standards) appear on the
container either singly or in combination with other specifications.
Flexible service intervals (LongLife Service*)
Special engine oils ⇒page 198, “Performance, weights and dimen-
sions” have been developed as part of the Audi LongLife Service
(⇒“Service Schedule”).
This type of oil must be used if you intend to take advantage of the
extended maintenance intervals allowed by Audi's LongLife Service.•
Do not mix the LongLife oil with oil intended for fixed service
intervals, as the requirements for the extended service intervals are
then no longer guaranteed.
•
In exceptional circumstances, if the engine oil level is too low
⇒page 157 and you cannot obtain the specified LongLife oil, you
can put in a small quantity of oil for fixed service intervals -
⇒page 198, “Performance, weights and dimensions”. This should
not be done more than once and no more than 0.5 litres should be
used.Fixed service intervals (Inspection Service*)
If you do not take advantage of the LongLife service for your car, you
can use the oils for fixed service intervals - ⇒page 198, “Perform-
ance, weights and dimensions”. In this case, your car must be serv-
iced after a fixed interval of 1 year / 15,000 km (10,000 miles) – see
Service Schedule.
•
In exceptional circumstances, if the engine oil level is too low
⇒page 157 and you cannot obtain the oil specified for your vehicle,
you can put in a small quantity of oil conforming to the specification
ACEA A2 or ACEA A3. This should not be done more than once and
no more than 0.5 litres should be used.
Checking the oil level
Fig. 117 Instrument
cluster: Engine oil
temperature displayFig. 118 Markings on
oil dipstick
document_0900452a816e6cc9.book Seite 157 Mittwoch, 21. Februar 2007 1:32 13
Page 160 of 210

Checking and topping up fluids 158
Checking oil level
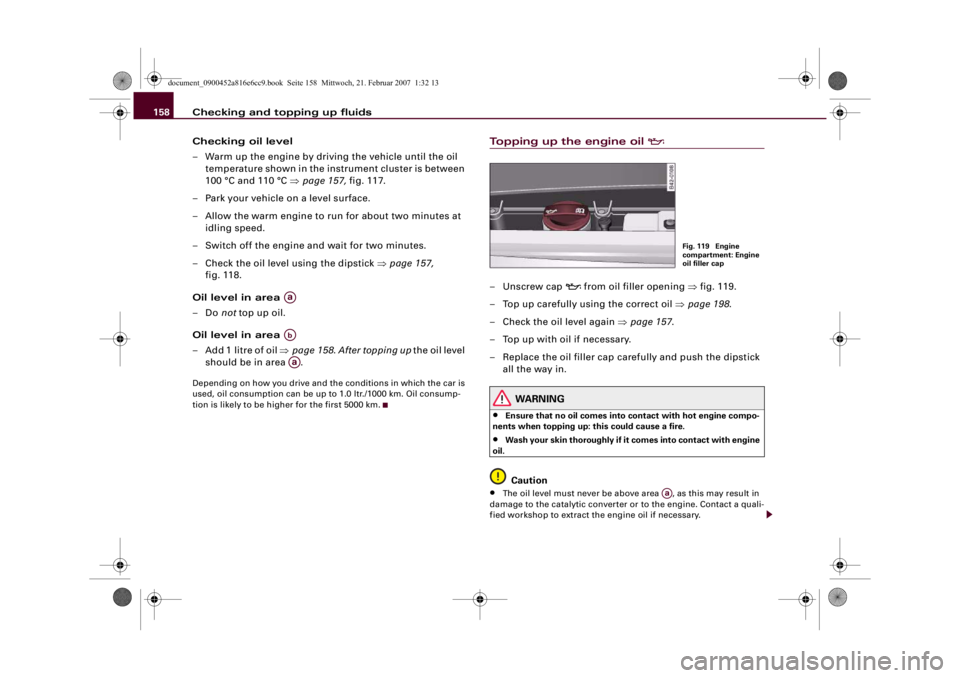
– Warm up the engine by driving the vehicle until the oil
temperature shown in the instrument cluster is between
100 °C and 110 °C ⇒page 157, fig. 117.
– Park your vehicle on a level surface.
– Allow the warm engine to run for about two minutes at
idling speed.
– Switch off the engine and wait for two minutes.
– Check the oil level using the dipstick ⇒page 157,
fig. 118.
Oil level in area
–Do not top up oil.
Oil level in area
– Add 1 litre of oil ⇒page 158. After topping up the oil level
should be in area .Depending on how you drive and the conditions in which the car is
used, oil consumption can be up to 1.0 ltr./1000 km. Oil consump-
tion is likely to be higher for the first 5000 km.
Topping up the engine oil
–Unscrew cap
from oil filler opening ⇒fig. 119.
– Top up carefully using the correct oil ⇒page 198.
– Check the oil level again ⇒page 157.
– Top up with oil if necessary.
– Replace the oil filler cap carefully and push the dipstick
all the way in.
WARNING
•
Ensure that no oil comes into contact with hot engine compo-
nents when topping up: this could cause a fire.
•
Wash your skin thoroughly if it comes into contact with engine
oil.Caution
•
The oil level must never be above area , as this may result in
damage to the catalytic converter or to the engine. Contact a quali-
fied workshop to extract the engine oil if necessary.
AaAbAa
Fig. 119 Engine
compartment: Engine
oil filler cap
Aa
document_0900452a816e6cc9.book Seite 158 Mittwoch, 21. Februar 2007 1:32 13
Page 208 of 210

Index 206Lights . . . . . . . . . . . . . . . . . . . . . . . . . . . . . . 52
Switching on and off . . . . . . . . . . . . . . 52
Locking . . . . . . . . . . . . . . . . . . . . . . . . . . . . 43
Central locking system . . . . . . . . . . . . . 44
Locking and unlocking the vehicle from in-
side
Central locking system . . . . . . . . . . . . . 45
Locking passenger's door manually . . . . . 46
Long periods of non-use
Battery . . . . . . . . . . . . . . . . . . . . . . . . . 162
LongLife Service . . . . . . . . . . . . . . . . . . . . 157
Luggage compartment . . . . . . . . . . . . . . . 58
Light . . . . . . . . . . . . . . . . . . . . . . . . . . . . 58
Luggage lid
Central locking system . . . . . . . . . . . . . 47
Manual release . . . . . . . . . . . . . . . . . . . 48MMain beam headlights . . . . . . . . . . . . . 52, 56
Make-up mirrors . . . . . . . . . . . . . . . . . . . . . 58
Manual operation
Fuel tank flap . . . . . . . . . . . . . . . . . . . . 154
Luggage lid . . . . . . . . . . . . . . . . . . . . . . 48
Maximum speed
SeePerformance, weights and
dimensions . . . . . . . . . . . . . . . . . . . . 198
Menu button . . . . . . . . . . . . . . . . . . . . . . . . 25
Menu display . . . . . . . . . . . . . . . . . . . . . . . 24
Menu, changing settings . . . . . . . . . . . . . . 26
Mileage recorder . . . . . . . . . . . . . . . . . . . . 13Mirrors
Anti-dazzle setting . . . . . . . . . . . . . . . . 63
Automatic anti-dazzle exterior mirrors 64
Automatic anti-dazzle interior mirror . 63
Exterior mirrors . . . . . . . . . . . . . . . . . . . 64
Interior mirror . . . . . . . . . . . . . . . . . . . . 63
Make-up mirrors . . . . . . . . . . . . . . . . . . 58
Mobile phones . . . . . . . . . . . . . . . . . . . . . 175
Modifications . . . . . . . . . . . . . . . . . . . . . . 174
NNatural leather . . . . . . . . . . . . . . . . . . . . . 148
No R gear . . . . . . . . . . . . . . . . . . . . . . . . . . . 38OOctane rating . . . . . . . . . . . . . . . . . . . . . . 152
Oil
SeeEngine oil . . . . . . . . . . . . . . . . . . . 157
Oil consumption . . . . . . . . . . . . . . . . . . . . 157
Oil dipstick . . . . . . . . . . . . . . . . . . . . . . . . . 157
Oil level . . . . . . . . . . . . . . . . . . . . . . . . . . . . 37
On-board computer . . . . . . . . . . . . . . . . . . 22
Opening
Engine lid . . . . . . . . . . . . . . . . . . . . . . . 155
Outside temperature display . . . . . . . . . . . 20
Overview . . . . . . . . . . . . . . . . . . . . . . . . . . . . 9PPaint damage . . . . . . . . . . . . . . . . . . . . . . 146
Paint No. . . . . . . . . . . . . . . . . . . . . . . . . . . 196Parking
R tronic . . . . . . . . . . . . . . . . . . . . . . . . . . 91
Parking aid . . . . . . . . . . . . . . . . . . . . . . . . . . 85
Parking lights . . . . . . . . . . . . . . . . . . . . . . . 57
Parking the car . . . . . . . . . . . . . . . . . . . . . . 84
Pedals . . . . . . . . . . . . . . . . . . . . . . . . . . . . . 107
Performance figures
SeePerformance, weights and
dimensions . . . . . . . . . . . . . . . . . . . . 198
Performance, weights and dimensions . 198
Personalised remote control key . . . . . . . 41
Petrol . . . . . . . . . . . . . . . . . . . . . . . . . . . . . 152
Polishing . . . . . . . . . . . . . . . . . . . . . . . . . . 144
Pollen filter . . . . . . . . . . . . . . . . . . . . . . . . . 76
Pollution filter . . . . . . . . . . . . . . . . . . . . . . . 76
Power steering . . . . . . . . . . . . . . . . . . . . . 136
Pressure (tyres) . . . . . . . . . . . . . . . . . . . . . 172
QQuartz clock . . . . . . . . . . . . . . . . . . . . . . . . . 12
quattro
SeeFour-wheel drive . . . . . . . . . . . . . . 136RR tronic . . . . . . . . . . . . . . . . . . . . . . . . . . . . . 90
Backup programme . . . . . . . . . . . . . . . . 94
Description . . . . . . . . . . . . . . . . . . . . . . . 90
Kick-down feature . . . . . . . . . . . . . . . . . 92
Launch control programme . . . . . . . . . 93
Manual mode . . . . . . . . . . . . . . . . . . . . . 91
Steering wheel with paddle levers . . . 93
document_0900452a816e6cc9.book Seite 206 Mittwoch, 21. Februar 2007 1:32 13