check oil AUDI R8 SPYDER 2011 Owners Manual
[x] Cancel search | Manufacturer: AUDI, Model Year: 2011, Model line: R8 SPYDER, Model: AUDI R8 SPYDER 2011Pages: 244, PDF Size: 59.74 MB
Page 5 of 244
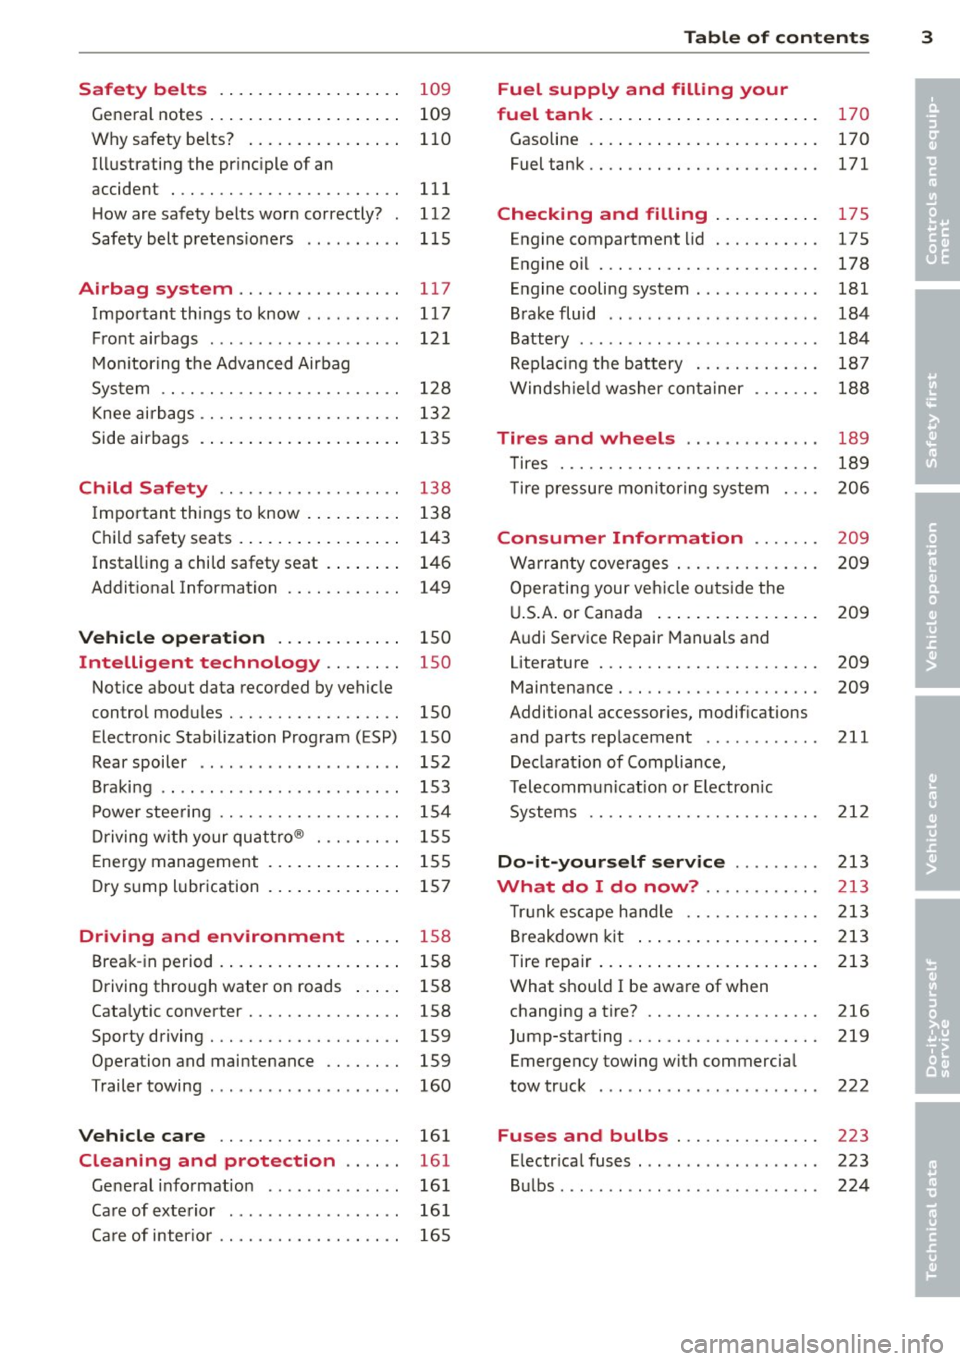
Safety belts . . . . . . . . . . . . . . . . . . . 109
General notes . . . . . . . . . . . . . . . . . . . . 109
Why safety be lts? . . . . . . . . . . . . . . . . 110
Ill ustrating the princ iple of an
accident . . . . . . . . . . . . . . . . . . . . . . . . 111
H ow are safety belts worn correctly? 112
Safety belt pretens ioners . . . . . . . . . . 115
Airbag system ........ .... ... .. 117
Important th ings to know . . . . . . . . . . 117
F ront airbags . . . . . . . . . . . . . . . . . . . . 121
M oni toring the Advanced Airbag
Sys tem . . . . . . . . . . . . . . . . . . . . . . . . . 128
Knee air bags . . . . . . . . . . . . . . . . . . . . . 132
Side airbags . . . . . . . . . . . . . . . . . . . . . 135
Child Safety ............. .. .. . .
Important things to know . ... .. .. . .
C hild safety seats . ..... ... .. .. .. . .
Instal ling a child safety seat . ... .. . .
Addit ional Information ........... .
Vehicle operat ion ..... .. .. .. . .
Intelligent technology .. .. .. . .
Not ice about data recorded by vehicle
control modules .......... .... .. . .
Electronic Stabilization Program ( ESP)
Rear spoiler .................... .
Braking .. .. .. ... ....... .... ... . .
P owe r stee ring .................. .
Driving w ith your qu attro ® ... .. .. . .
E ne rgy management ... ... .. .. .. . .
D ry s ump lubr ication ... ... .. .. .. . .
Driving and environment .... .
Break -in period . .. ..... ... .. .. .. . .
Driving through water on roads ... . .
Cata lytic converter ............ .. . .
Sporty driving . ........... .. .. .. . .
Operation and maintenance .. .. .. . .
Trailer towing ................... .
Vehicle care .................. .
Cleaning and protection ..... .
General information ...... .. .. .. . . 138
13
8
143
1 4 6
149
150
150
150
150
152
153
154
155
1 5 5
157
158 158
158
158
159
159 160
161
161
16 1
Ca re of exte rior . . . . . . . . . . . . . . . . . . 16 1
Ca re of inter io r . . . . . . . . . . . . . . . . . . . 165
Table of contents 3
Fuel supply and filling your
fuel tank ... .. .... . ... ...... ... .
170
Gasoline . . . . . . . . . . . . . . . . . . . . . . . . 170
Fuel tank. . . . . . . . . . . . . . . . . . . . . . . . 171
Checking and filling ..... ... .. .
Engine compartment lid .......... .
Engine oil ... .. .. .. . ............ .
E n gine cooling system ............ .
Brake fluid .. .. .. .. . .. .... ...... .
Battery ......... .. ............. .
Rep lacing the battery ............ .
Windsh ie ld washer container
Tires and wheels ... ..... ... .. .
175
175
178
181
184
184
18 7
188
189
T ires . . . . . . . . . . . . . . . . . . . . . . . . . . . 189
T ire pressure mo nitoring system
Consumer Information ...... .
Warranty coverages .............. .
Operating your veh icle outs ide the
U .S .A . or Canada ... . .. .. ..... ... .
A udi Se rvice Repair Manuals and
Literature . .. .. .. .... ........... .
Maintenance . .. .. .. ............. .
Additional accessories, modif ications
and parts rep lacement ........... .
Decla rat io n of Compliance,
T elecommunication or Electron ic
Systems .. .. .. .. .. ............. .
Do-it-yourself service ........ .
What do I do now? ........... .
Tru nk escape handle ........... .. .
B reakdown kit ... .. . .. ... .... ... .
Tire repa ir ... .... .. . .. .. ..... ... .
What shou ld I be awa re of when
h . t
' ? c anging a ,re. . . ............... .
Jump-starting .. ...... ........... .
Emergency towing with commercial
tow truck ....... .. ............. .
Fuses and bulbs .............. .
Electr ica l fuses .... .............. .
Bu lbs ... .. .. .. .. .. . .. .... ...... . 206
209
2
09
209
209
209
211
2 12
213
213
2 13
213
213
216
219
222
223
223
224
•
•
Page 12 of 244
10 Instruments and warning/indicator lights
Instruments and warning/indicator Lights
Instruments
Instrument cluster and controls
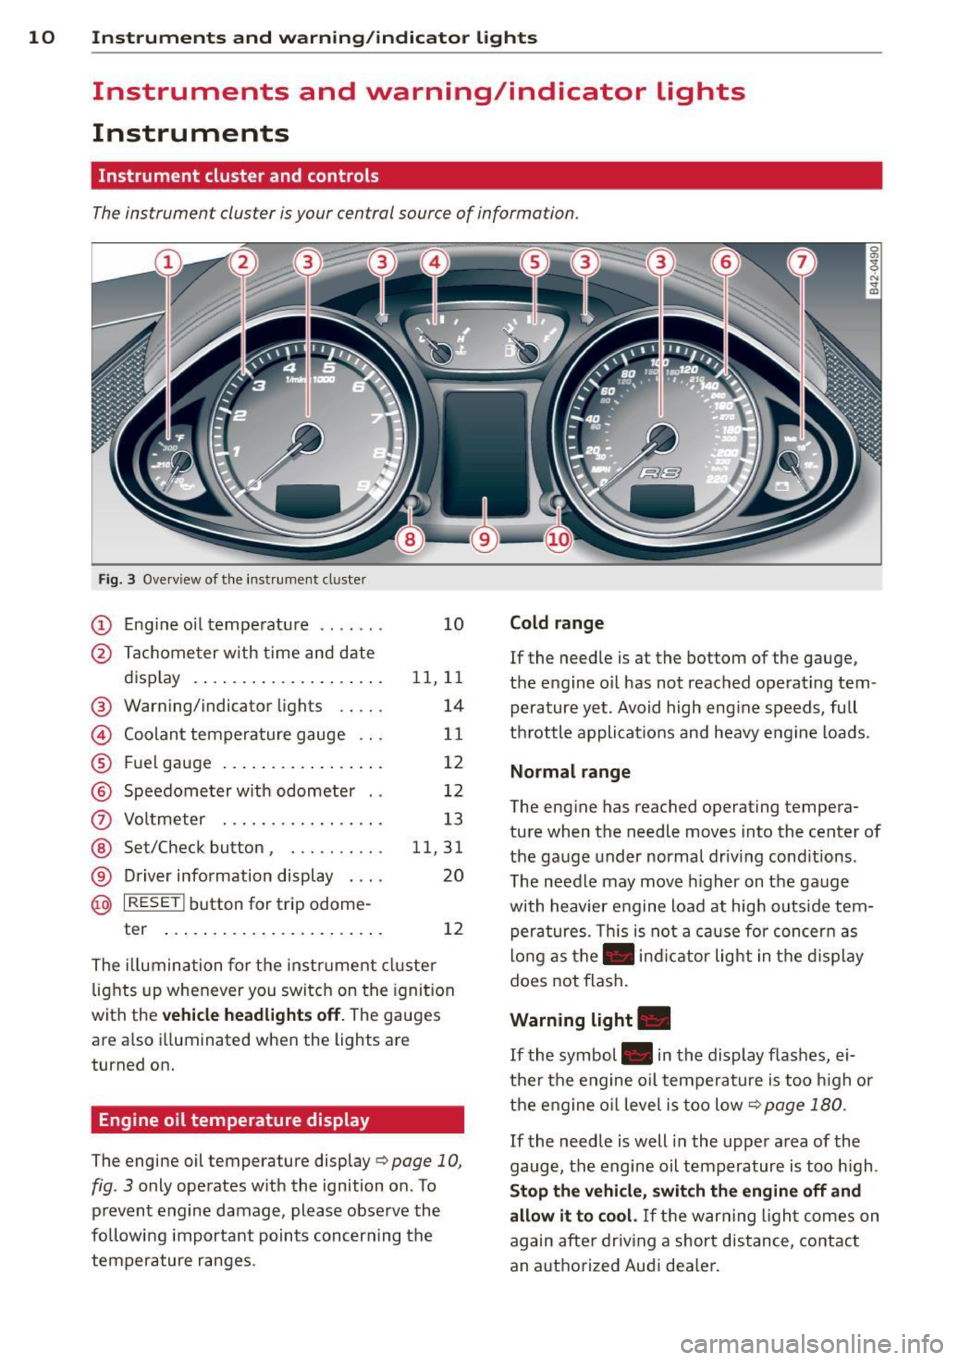
The instrument cluster is your central source of information.
Fig. 3 Overview of the inst rumen t cluster
(D Engine oil temperature ...... .
@ Tachometer with time and date
display ................... .
® Warning/indicator lights .. .. .
© Coolant temperature gauge .. .
® Fu el gauge .............. .. .
@ Speedometer with odometer ..
(i) Voltmeter .............. .. .
@ Set/Check button , ... .. .. .. .
® Driver information display . .. .
@ I RESET ! button for trip odome-
ter ....... ............. .. .
10
11, 11 14
11
12
12
13
11, 31 20
12
The illumination for the instrument cluster
lights up whenever you switch on the ignition
with the
vehicle headlights off. The gauges
are also illuminated when the lights are
turned on.
Engine oil temperature display
The engine oil temperature display Q page 10,
fig. 3
only operates with the ignition on. To
prevent engine damage, please observe the
following important points concerning the
temperature ranges.
Cold range
If the needle is at the bottom of the gauge,
the engine oil has not reached operating tem perature yet. Avoid high engine speeds, full
throttle applications and heavy engine loads .
Normal range
The engine has reached operating tempera
ture when the needle moves into the center of
the gauge under normal driving conditions .
The needle may move higher on the gauge
with heavier engine load at high outside tem peratures. This is not a cause for concern as
long as the . indicator light in the display
does not flash.
Warning light.
If the symbol . in the display flashes, ei
ther the engine oil temperature is too high or
the engine oil level is too low
Qpage 180.
If
the needle is well in the upper area of the
gauge, the engine oil temperature is too high .
Stop the vehicle, switch the engine off and
allow it to cool.
If the warning light comes on
again after driving a short distance, contact
an authorized Audi dealer.
Page 14 of 244
12 Instruments and warning /indicator lights
If the needle is well on the right side of the
gauge, the coolant temperature is too high .
Stop the vehicle, switch the engine off and
allow it to cool.
If the warning light comes on
again after driving a short distance, contact
an author ized Audi dealer .
A WARNING
-Always observe the warni ng in
¢ page 175, Working in the engine
compartment before opening the engine
compartment lid an d checking the en
gine coo lant level.
- Never open the engine compartment lid
if yo u see or hear steam, or if you see e n
gine coolant dripping from the engine
compartment . You could burn yourse lf.
Let the engine coo l off first so that you
cannot hear or see any steam or engine
coolant.
(D Note
- Mounting additional lights or accessories
in front of the air inlets red uces the cool
i ng effect of the radiator. At h igh outside
temperatures or high engine load, the
engine could overheat .
- The front spo iler has been designed to
properly distribute the cooling air when
the veh icle is moving. If the spoiler is
damaged, th is could reduce the cooling
effect and the engine could then over
heat. Ask you r autho rized Aud i dealer for
ass istan ce.
Fuel gauge
The fuel gauge works only when the ignition is
on. When the needle reaches the red area, the
warn ing light in the instrument cluster will il
lum inate
c> page 33 (il This means you
have approximately 2.6 gallons (10 liters) of
fuel left in the tank .
Time to refuel!
The total tank capacity of your vehicle is listed
in
Technical data ¢ page 228.
(D Note
Never run the tank completely dry! An ir
regular supply of fuel can cause engine
misfiring and fuel could enter into the ex
haust system . The catalytic converter
could then overheat and be damaged.
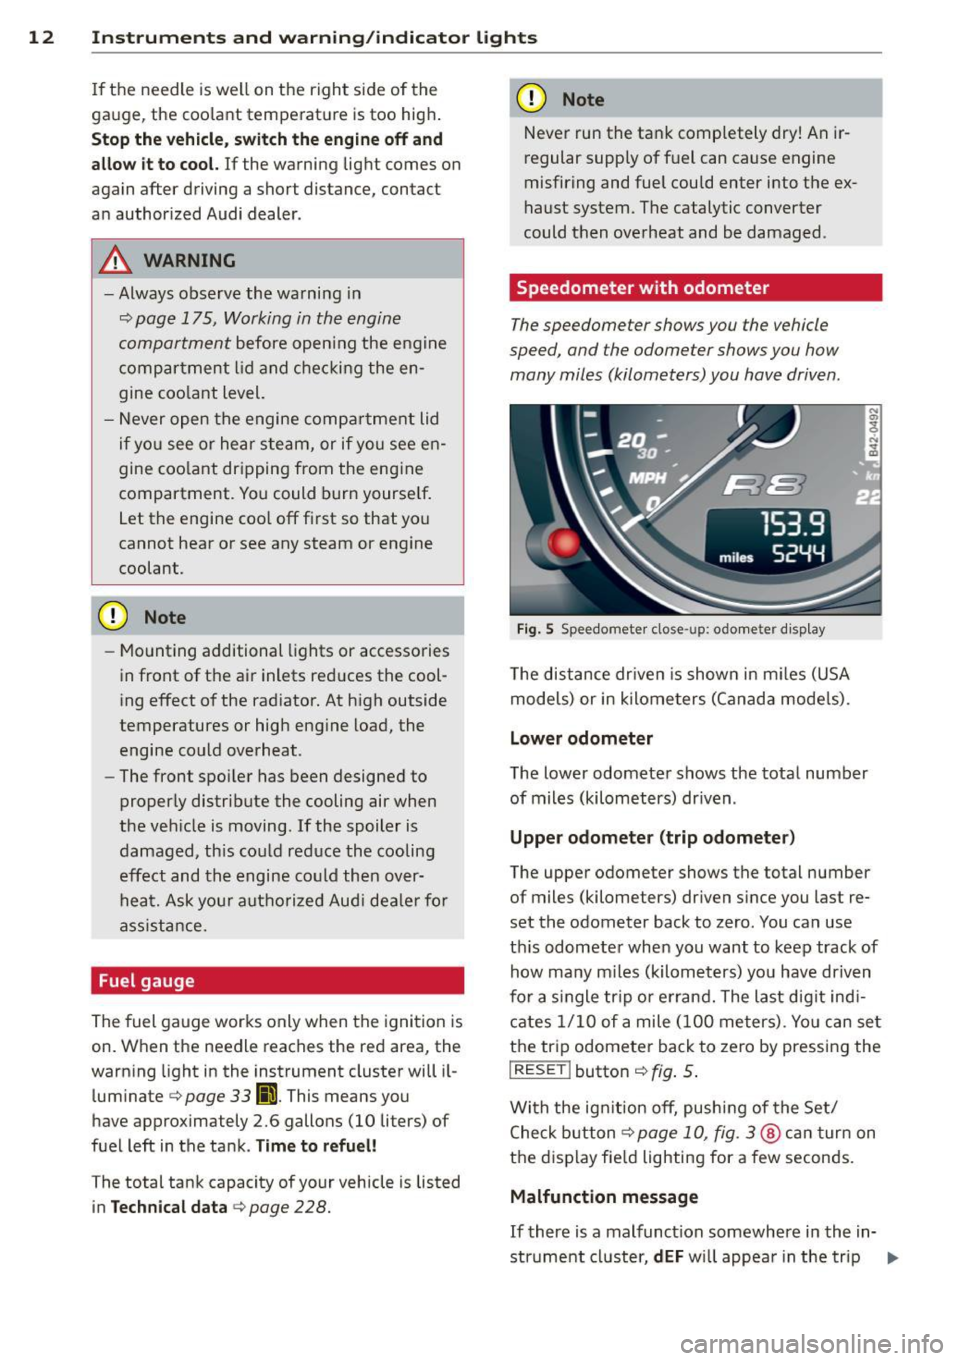
· Speedometer with odometer
The speedome ter shows you the vehicle
speed, and the odometer shows you how
many miles (kilometers) you have driven .
Fig. S Speedometer close -up: odome ter d isplay
The distance driven is shown in m iles (USA
models) or in kilometers (Canada mode ls).
Lower odometer
The lower odometer shows the total number
of miles (kilometers) dr iven .
Upper odometer (trip odometer)
The upper odometer shows the total number
of miles (kilometers) dr iven since you last re
set the odometer back to zero . You can use
th is odometer when you want to keep track of
how many m iles (kilometers) yo u have driven
for a single trip or errand. The last dig it ind i
cates 1/10 of a mile (100 meters) . Yo u can se t
the trip odometer back to zero by pressing the
I RESE T! button ¢ fig . 5 .
With the ign ition off, pushing of the Set/
Check button ¢ page 10, fig. 3 @ can turn on
the display field lighting for a few seconds.
Malfunction message
If there is a malfunct ion somewhere in the in-
strument cluster,
dEF will appea r in the trip .,.
Page 18 of 244
16 Instrum ent s and w arn ing /indic ato r light s
If this warning/indicator light illuminates
while you are driving, then there is a mal
function in the engine electron ics. Have
the malfunction corrected as soon as pos
sible by your authorized Aud i dealer or
qualified workshop .
"' Convertible top operation
The indicato r light turns on IJI
- When the convertible top opens or closes or
- If the convertible top d id not open or close
completely.
The indicator light blinks if the convertible top
cannot open or close¢
page 47.
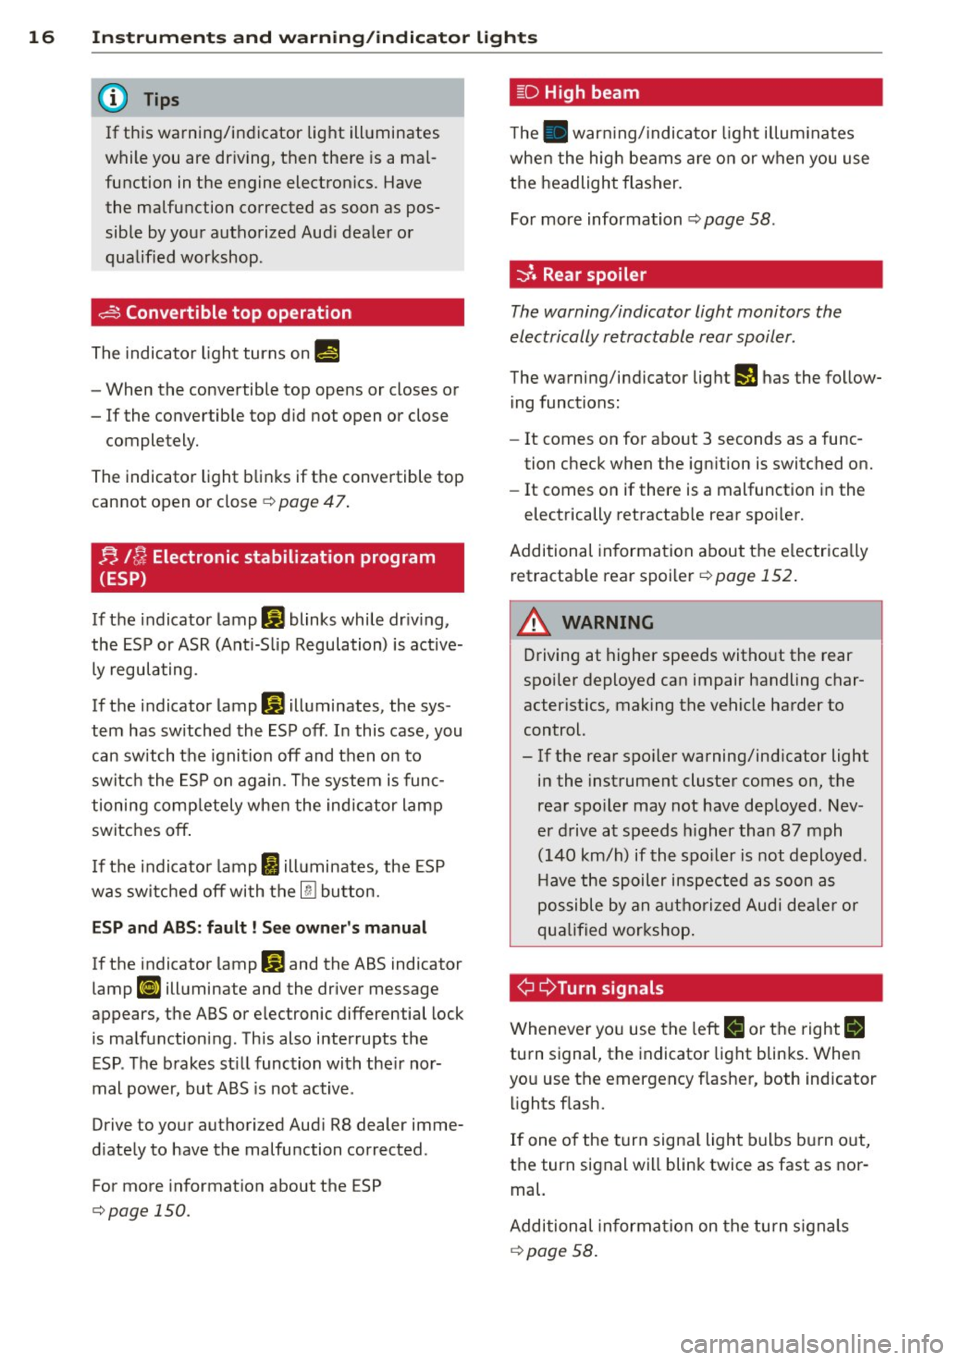
n If; Electronic stabilization program
(ESP)
If the indicator lamp Gl blinks while dr iv ing,
the ESP or ASR (Ant i-Slip Regulation) is active
l y regulating.
If the indicator lamp
Gl illuminates, the sys
tem has sw itched the ESP off . In this case , you
can switch the ignition off and then on to
switch the ESP on again . The system is func
tioning comp letely when the indicator lamp
switches off .
If the indicator lamp
I] illuminates , the ESP
was sw itc hed off with the
lliJ button.
E S P and A BS: fa u lt ! See owner's manu al
If the indicator lamp Gl and the ABS indicator
lamp
!I] illuminate and the driver message
appears, the ABS or electronic differential lock is malfunctioning . This also interrupts the
ESP . The brakes st ill function with the ir nor
mal power, but ABS is not active .
Drive to your authorized Aud i R8 dealer imme
d iately to have the malfunction corrected.
For more information about the ESP
¢page 150.
~D High beam
The . war ning/ indicato r light illum inates
whe n the high beams are on or when you use
the headlight flasher.
For more information ¢
page 58.
":::>'• Rear spoiler
The warning/indicator light monitors the
electrically retractable rear spoiler .
The warning/indicator lig ht (11 has the follow
ing functions :
- It comes on for about 3 seconds as a func
tion check when the ign ition is switched on.
- It comes on if there is a malfunction in the
electrically retractab le rear spoi ler.
Additional information about the e lectrica lly
retractable rear spoiler¢
page 152 .
& WARNING
=
Driving at higher speeds witho ut the rear
spoiler deployed can impair handling char
acteristics, making the vehicle harder to
control.
- If the rear spo iler warning/ind icator light
in the instrument cluster comes on, the
rear spo iler may not have dep loyed. Nev
e r drive at speeds h igher than 87 mph
(140 km/h) if the spo iler is not deployed .
H ave the spoiler inspected as soon as
possible by an a uthorized Aud i dea le r or
qualified wor kshop.
¢ ¢Turn signals
Whenever yo u use the left II or the right R
turn signal, the indicator light blinks. When
you use the emergency flasher, both indicator
li ghts f lash.
If one of the turn signa l light bulbs burn out,
the turn signal will blink twice as fast as nor
mal.
Addi tional in formation on the turn s ignals
¢ page 58.
Page 23 of 244
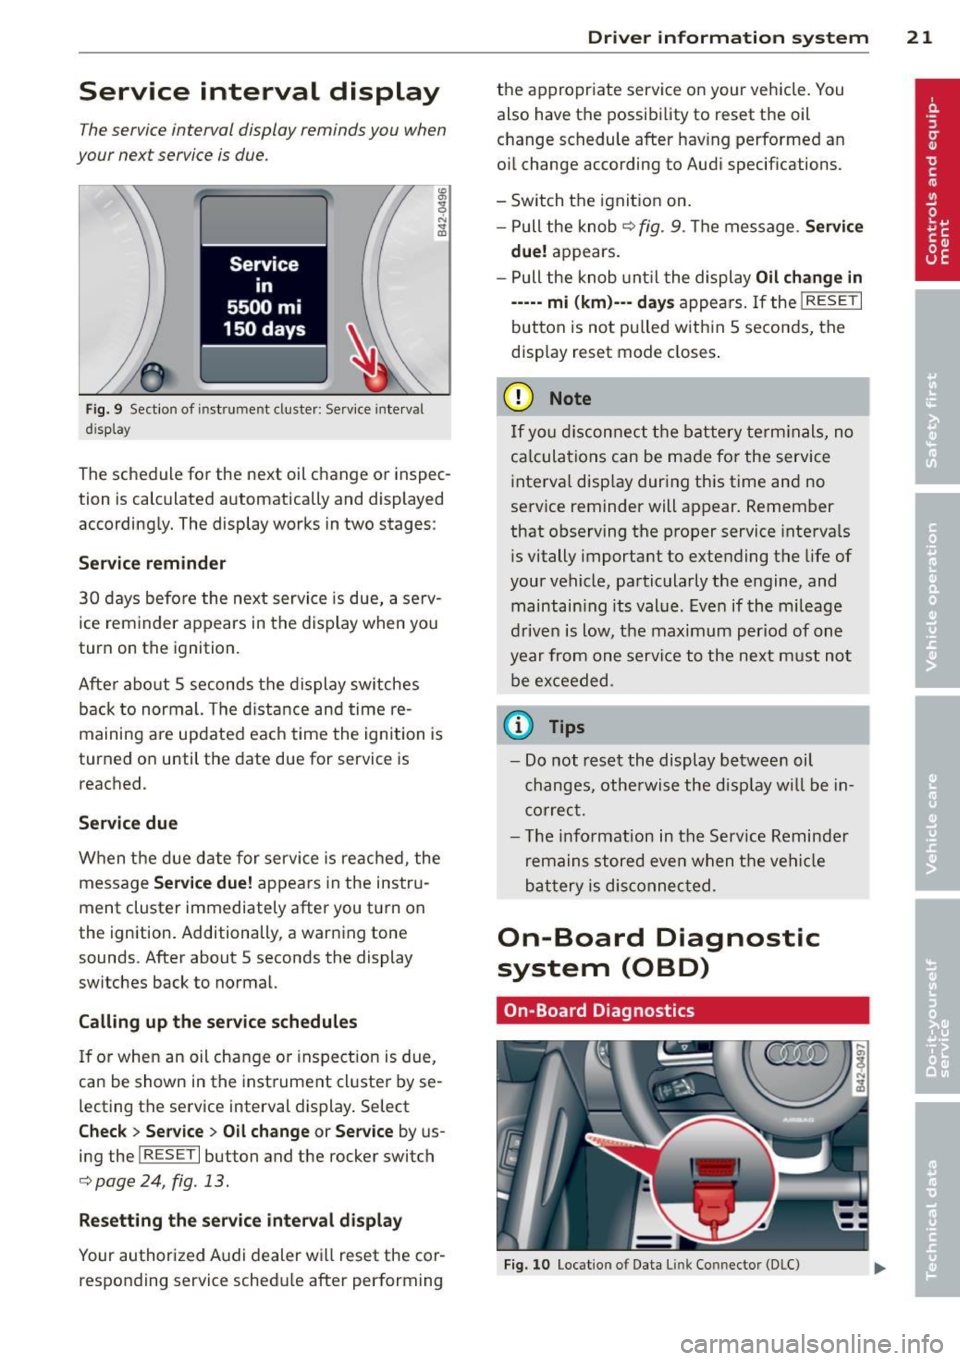
Service interval display
The service in terval display reminds you when
your next service
is due.
F ig . 9 Sectio n of i nst rum ent cluste r: Serv ice inte rva l
d is p lay
The schedule for the next oil change or inspec
tion is calc ulated automatically and displayed
according ly. The display works in two stages :
Service reminder
30 days before the next service is due, a se rv
ice reminder appears in the display when yo u
turn on the ignition.
Afte r abo ut
5 seconds the display sw itches
back to normal. The d ista nce and time re
maining are updated each time the ignition is
turned o n until the date due for service is
reached .
Service due
W hen the due d ate for service is reached , the
message
Ser vice due! appears in the instr u
ment cluster immediately after you tu rn on
the ignition. Additionally, a warning tone
sounds. After about
5 seconds the display
sw itches back to normal.
Calling up the serv ice schedules
I f o r when an oil change or inspect ion is due,
can be shown in the instrument cl uster by se
l ecting the service interval display . Select
Check > Se rvice > Oil change or Ser vice by us
ing the
I R ESET I button and the rocker switch
c:;, page 24, fig . 13.
Re setting the service interval di splay
Your authorized A udi dealer wi ll reset the cor
responding service sched ule after performing
Dr iver in formation system 21
the appropriate service on your vehicle. You
also have the possibility to reset the o il
change schedule after hav ing performed a n
o il change according to Audi specifications.
- Switch the ignit ion on.
- Pull the knob
c:;, fig . 9 . Th e message. Servic e
due!
appears .
- Pull the knob unt il t he display
Oil change in
----· mi (km)--· d ay s
appea rs. If the I RESE T I
button is not pu lled w ith in 5 secon ds, the
disp lay reset mode closes .
(D Note
If you discon nect the battery te rm inals, no
ca lcula tions can be ma de fo r the service
i nte rva l disp lay dur ing this time and no
se rvice reminder will appear. Remember
that observing the proper service interva ls
i s vitally important to extending the life of
your vehicle, particularly the engine, and maintain ing its value. Even if the mileage
d rive n is low, t he maximum per iod of one
year fro m one serv ice to the ne xt m ust not
be ex ceeded .
@ Tips
-Do not rese t the display between oil
c hanges, othe rwise the d isp lay w ill be in
co rrec t.
- Th e info rmat ion in the Se rv ice Reminder
remains stored eve n w hen t he ve hicl e
ba ttery is dis connec ted.
On-Board Diagnostic
system (OBD)
On -Boa rd Diagnostics
Fi g. 10 Locatio n of Data Li nk Conn ector (DLC)
Page 32 of 244
30 Driver in formation system
To sto re ma ximum sp ee d
.. Turn off the ignit ion.
.. Briefly press the button in the instrument
cluster¢ page 29, fig. 26. The odometer
and the digital clock are now illuminated .
.. Press the button for at least 2 seconds. The
currently stored maximum speed appears in
the d isplay
or the crossed out symbol for
warning threshold 2, if no max imum speed
was set previous ly.
.. Press the fu nction selector sw itch in the
wiper lever@~ fig. 2 7 up or down to
change the set value. Val ues run up or down
in steps o f 6 mph (10 km/h) .
To delete maximum speed
.. Turn off the ignit ion.
.. Briefly press the button in the instrument
cluster~ page 29, fig. 26. The odometer
and the digi tal clock are now illuminated .
.. Press the button for at least 2 seconds. The
currently stored maximum speed appears in
the disp lay.
.. Press the
l ~R_E_S-E T~I button in the w iper lever
@ ¢fig. 2 7 until the crossed out speed
warning symbol for warning threshold 2 ap
pears in the display.
A few seconds after the adjustment is com
pleted, the illumination for the odometer and
the dig ita l clock will go out.
{D) Tips
This war ning threshold can also be con
trolled through the trip computer
¢ page 25, Navigating the menu.
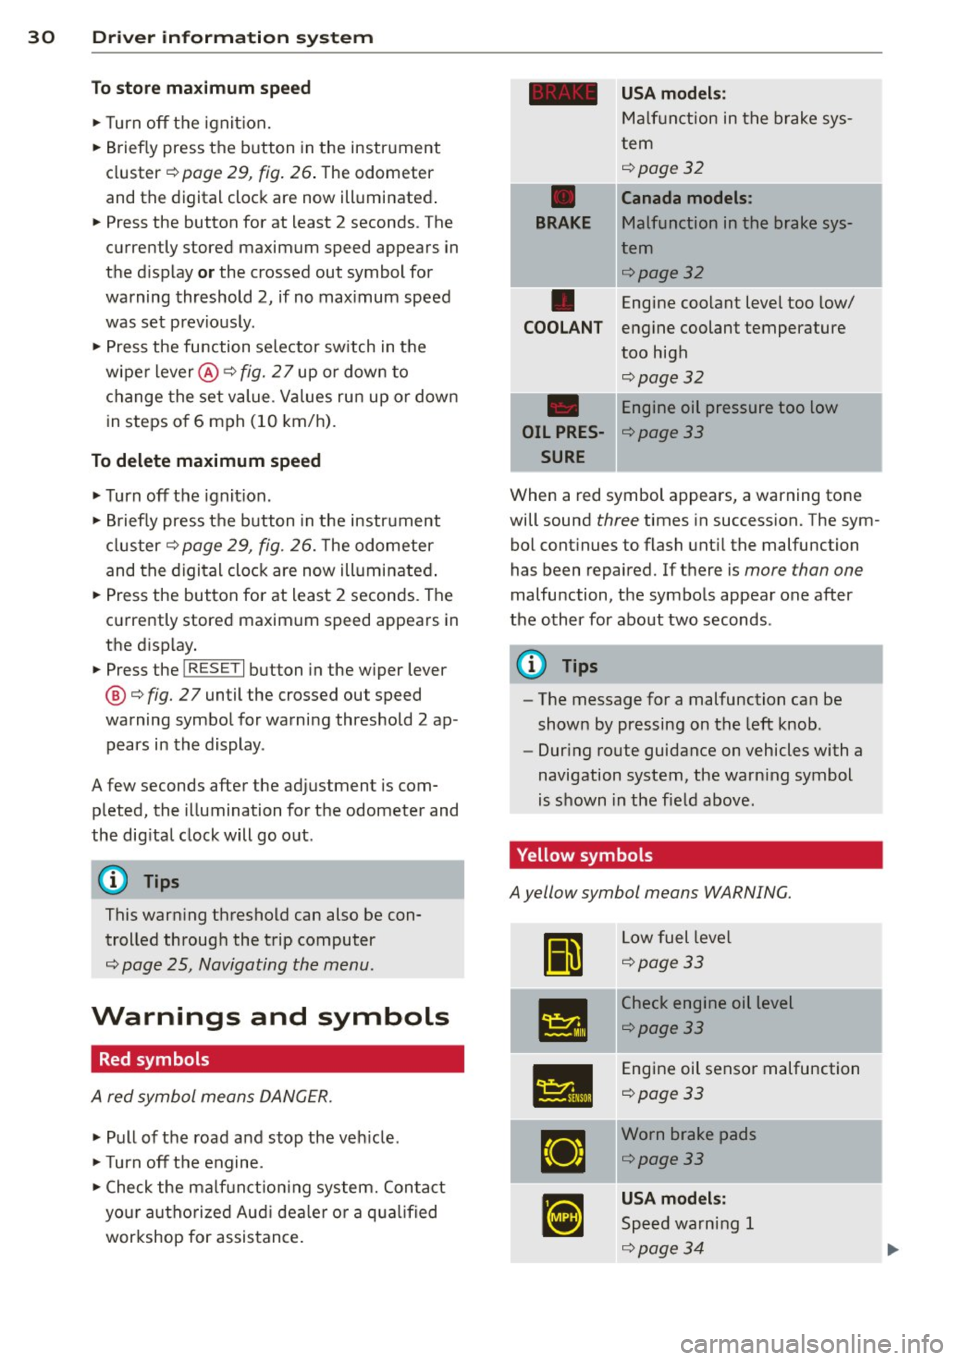
Warnings and symbols
Red symbols
A red symbol means DANGER.
.. Pull of the road and stop the veh icle.
.. Turn off the engine .
.. Check the ma lf u nct io ni ng system. Contact
your a uthorized Aud i dea ler o r a q ua lified
workshop for assistance.
-
USA mod els :
Ma lfunction in the brake sys-
tern
~page32
•
Canada mod els :
BRAKE
Malfunction in the brake sys-
tern
~page32
•
Engine coolant leve l too low/
COOL ANT engine coolant temperature
too high
~page32
Engine oil pressure too low
OIL PRES-¢page 33
SURE
When a red symbol appears, a warning tone
will sound three times in succession. The sym
bol cont inues to flash unt il the malfunction
has been repaired. If there is more than one
malfunction, the symbols appear one after
the other for about two seconds.
@ Tips
- The message for a malfunction can be
shown by pressing on the left knob.
- Dur ing route guidance on vehicles with a
navigation system, the warn ing symbol
is shown in the field above.
Yellow symbols
A yellow symbol means WARNING.
II
L ow fuel leve l
~page33
-
•
Check engine oil level
~page33
•
Engine oil sensor malfunction
¢page33
IJ
Worn brake pads
¢page33
•
USA models :
Speed warning 1
~page34
'
Page 33 of 244
•
Canada models:
Speed warning 1
¢page34
•
USA mode ls:
Speed warning 2
¢page 34
•
Canada model s:
Speed warning 2
¢page34
RI
S ignificant loss of a ir pressure
¢page34
lliliE Tire pressure monitoring sys-
tern malfunction
¢page34
a
Windshield washer f luid level
low
¢page34
-
II Battery voltage too high or too
low
,. ¢page 34
~:~
Defective light bulb
¢page 35
•
lrusA models:
Defective brake light
9page35
•
Canada model s:
Defective brake light
c!>page35
m
Light/rain sensor (automatic
headlights) defective
¢page35
ll 11il Selector lever defective*
No reverse gear *
¢page 35
min Clutch is overheating*
¢page36
D
Gearbox ma lf u nction*
¢page 36
(a
II Engine speed limitation
ll¢page36
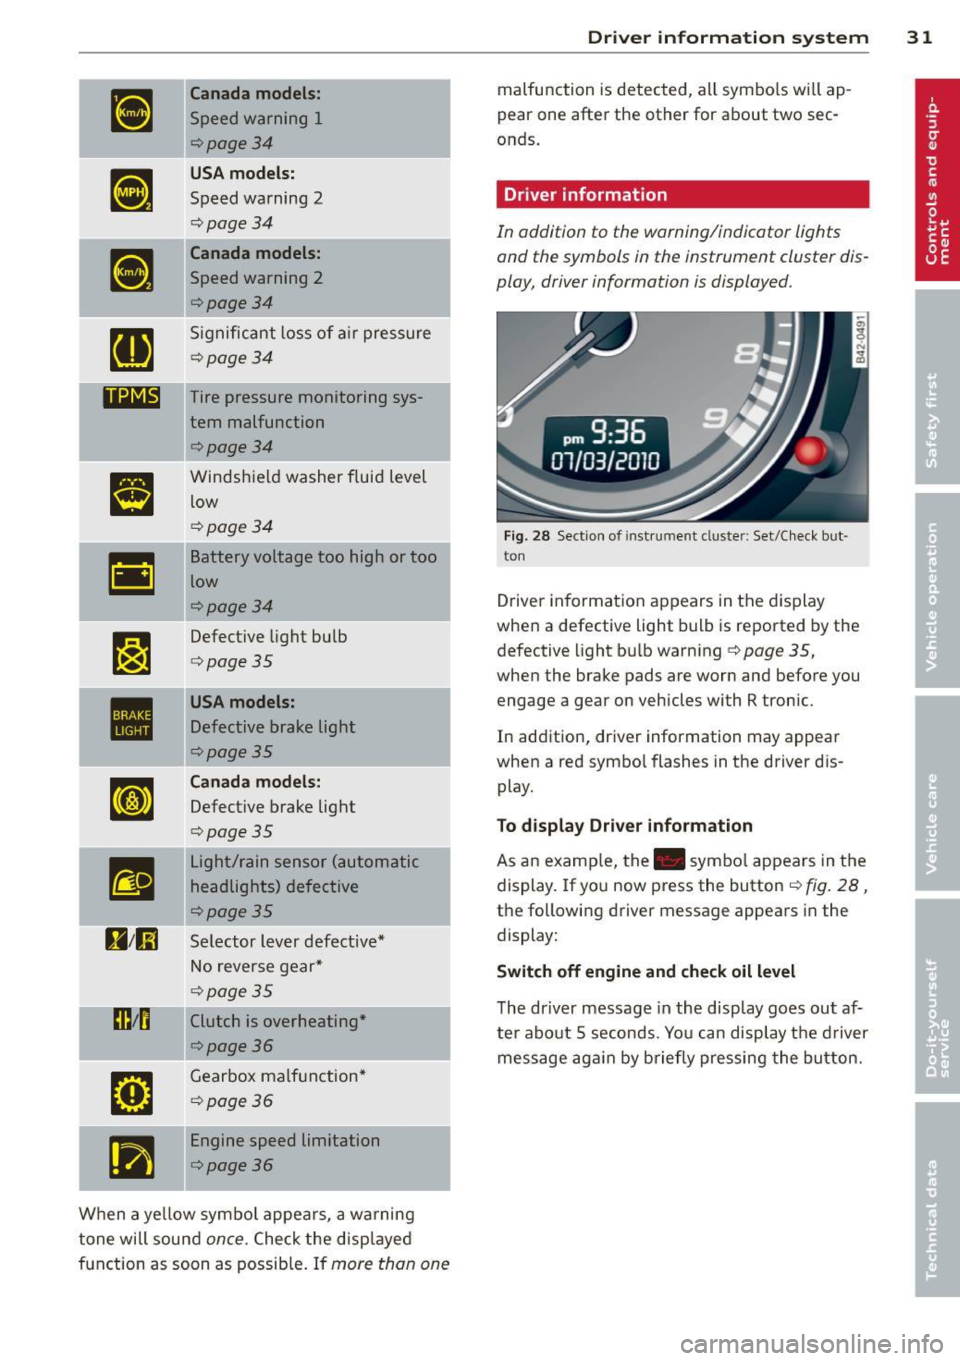
W hen a yellow symbo l appea rs, a wa rning
tone will sound
once. Check the disp layed
function as soon as possib le . If
more than one
Dr iver in formation system 31
malfunction is detected, all symbo ls wi ll ap
pear one after the other for about two sec
onds .
Driver information
In addition to the warning/indicator lights
and the symbols in the instrument cluster dis
play, driver information is displayed.
Fig. 2 8 Section of instrument cluster: Set/C heck but·
ton
Driver in format io n ap pears in the d is p lay
when a defective light bulb is reported by the
defective light bu lb warning ¢
page 35 ,
when the brake pads are worn and before you
engage a gear on vehicles with R tronic .
In addition, driver information may appear
when a red symbo l flashes in the driver dis
play.
To d isplay Driver information
As an examp le, the . symbo l appears in the
display. If you now press the button¢
fig. 28,
the following driver message appears in the
display:
Switch off engine and check oil le vel
T he dr iver message in the display goes out af
ter abo ut 5 seconds. Yo u can disp lay t he driver
message aga in by briefly pressing the button.
Page 35 of 244
no longer see or hear steam or coolant
escaping.
- The engine compartment of any vehicle
is a dangerous area. Before you perform
any work in the engine compartment,
turn off the engine and allow it to cool. Follow the warning stickers
c:> page 175,
Working in the engine compartment.
([) Note
Do not contin ue driving if the. symbol
illuminates. There is a malfunct ion in the
engine cooling system -you could damage
your eng ine .
9::::r: Engine oil pressure malfunction
The red engine oil pressure warning symbol
requires immediate service or repair .
If the . symbol appears in the display and
flashes, the oil pressure is too low. In addi tion
to the symbol, the following message also ap
pears in the d isp lay:
Sw itch off engine and check oil le vel
~ Pull off the road and stop the vehicle.
~ S hu t the engine down .
~ Check the engine oi l level c:> page 180.
~ Contact your a uthori zed Audi dea ler for as-
s istance if necessary .
Engine oil level too low
If the engine oil level is too low, top off oi l to
the proper leve l
i::>poge 180.
Engine oil level OK
If the . symbo l sta rts flas hing again even
though the engine oil leve l checks O K on the
d ipstick,
do not sta rt driv ing again and do
not let the engine run at idle .
Instead, con
tact your author ized A udi dealer for assis
tance.
l ) - : US A mod els on ly
Dr iver in formati on sys tem 33
Bu Fuel supply too low
When the fD1 symbol illum inates, t his means
there are abo ut 2.6 gallons (10 liters) o f fuel
left in the fue l tank . Time to re fuel!
c:> page 171 .
If the symbol lights up, even when there is
amp le fue l in the t ank, and the text
TANK
SYSTEM MALFUNCTION
! CONTACT WORK
SHOP
appears in the disp lay, there is a fa ult in
the system . Contact a qualified works hop to
have the fa ult rectif ied .
~,,., Checking the engine oil level
II Please add ma x. 1 qt of engine o il!
If the II symbol comes on , add 1 quart (1 li
ter) of oil at the n ext opportunity
i::> page 180.
~tt, Engine oil sensor defective
If the II symbol illuminates, contac t your
authorized Aud i dea le r and have t he oil sensor
inspected .
(0) Worn brake pads
EiJ Brake pad s!
If the warning light illuminates, immed iate ly
contact your authorized Audi dealer or quali
fied wor kshop to have all brake pads i nspect
ed. On USA models the war ning light
EiJ
comes on together w ith the w arning ligh t
1111. Both se ts of brake pads on an ax le
must a lways be rep laced at the same time.
A WARNING
-=
Driving with ba d brakes can cause a colli
sion and ser ious personal in jury.
- If the warn ing light
EiJ and the warning
light
11111> with the message Brake
-
pads! comes on in the instrument cluster ~
Page 156 of 244
154 Intelligent technology
Other road users must not be put at risk -
you may cause an accident!
- Before descending a steep grade, reduce
speed and shift transmission into a lower
gear or lower driving position . Do not
ride the brakes or hold the pedal down
too long or too often. This could cause
the brakes to get hot and diminish brak ing efficiency .
- Do not "ride the brakes" by resting your
foot on the pedal when you do not intend
to brake . This may cause the brakes to
overheat, premature wear and increased
stopping distance.
- Under certain climatic and operating
conditions such as passing through wa
ter, driving in heavy rain or after washing
the vehicle, the effectiveness of the
brakes can be reduced. In winter, ice can
accumulate on the brake pads, linings,
discs and drums. Cautiously apply brakes
for a test . Brakes will dry and ice coat
ings will be cleaned off after a few cau
tious brake applications .
- Driving for an extended period of time on
salt-covered roads without using your
brakes can also affect braking efficiency .
Clean off accumulated salt coating from
brake discs and pads with a few cautious
brake applications.
- If you damage the front spoiler, or if you
install a different spoiler, be sure the air
flow to the front brakes is not obstruct
ed. Otherwise the brake system could
overheat reducing the effectiveness of
the entire brake system.
- Failure of one brake circuit will impair
braking capability, resulting in increased
stopping distance. Avoid driving the vehi
cle and have it towed to the nearest au
thorized Audi dealer or qualified work
shop.
- Never let the vehicle roll to a stop with
the engine shut off .
- If the brake booster is not working, for
example when towing your vehicle, or because the brake booster has somehow
been damaged, the brake pedal must be pressed considerably harder to make up
for the lack of booster assistance.
Power steering
When the engine is running , power steering
makes i t easier for the driver to steer.
Power steering helps the driver steer the vehi
cle with little physical effort.
If the engine is not running, the power steer
ing system is also not working . In this case ,
you will find it extremely difficult to turn the
steering wheel.
If you turn the steering fully to the left or
right when the vehicle is stationary, you place
a very heavy load on the power steering sys
tem. Turning the steering wheel fully to the left or right will cause noise in the system. It
also reduces engine idle speed.
(D Note
Do not hold the steering turned fully to
the left or right for more than 10 seconds
when the engine is running . There is a risk
of damage to the power steering system .
(D Tips
-In the event of a power steering system
failure, or if the engine is not running
(while being towed), you will still be able
to steer the vehicle. However, you will re
quire more effort to do so .
- If the power steering system has a leak
or is defective, you should immediately
contact a qualified workshop .
- The power steering system requires a
special hydraulic fluid. The power steer
ing fluid reservoir is located in the en
gine compartment. The correct hydraulic
fluid level is important for proper opera
tion of the power steering system. The
power steering fluid level is checked ac
cording to the Audi maintenance service
schedule.
Page 159 of 244
will be recharged and the notification will go
out.
Driver notification appears and goes out
again
If this driver notification appears after the ig
nition is turned on or while driv ing and it goes
out again after a wh ile, the battery has been
adequately recharged.
Driver notification appears and does not
go out again
If this driver notification appears after the ig
nition is turned on or while driv ing and does
not go out again, the battery's state of charge
is not in the optimal range. Starting ability is
restricted. Have the battery checked as soon
as poss ible by an author ized Audi dealer or
qualified workshop.
Dry sump lubrication
H igh lateral and long itud inal forces affect the
engine and the vehicle during sporty driving.
Dr y sump l ubr ica tion ensures that your engine
i s supplied w ith oil and properly lub ricated
even under these conditions.
I n a "normal" veh icle the o il pump sends the
oil from the oil pan to the lubrication points in
the engine. The oil then returns to the oil pan .
I n extreme situations, the oil pump may draw
in air, which results in insufficient oil pressure.
With dry sump lubrication, the oil is not in the
oil pan (it is "d ry"), but in a separate oi l tank.
While one pump supplies the engine with oi l,
a second pump suctions the oi l out of the en
g ine and returns it to the oil tank . Because the
oil tank is ta ll and narrow, o il pressure is con
stant even under extreme conditions.
In addition, the oil pan in vehicles with dry
sump lubrication is noticeably sha llower. Th is
allows the engine to be installed lower in the
vehicle, bringing down the center of gravity .
This improves your vehicle's handling .
Intelligent technology 157
•
•