engine AUDI RS5 CABRIOLET 2013 Owners Manual
[x] Cancel search | Manufacturer: AUDI, Model Year: 2013, Model line: RS5 CABRIOLET, Model: AUDI RS5 CABRIOLET 2013Pages: 286, PDF Size: 71 MB
Page 5 of 286
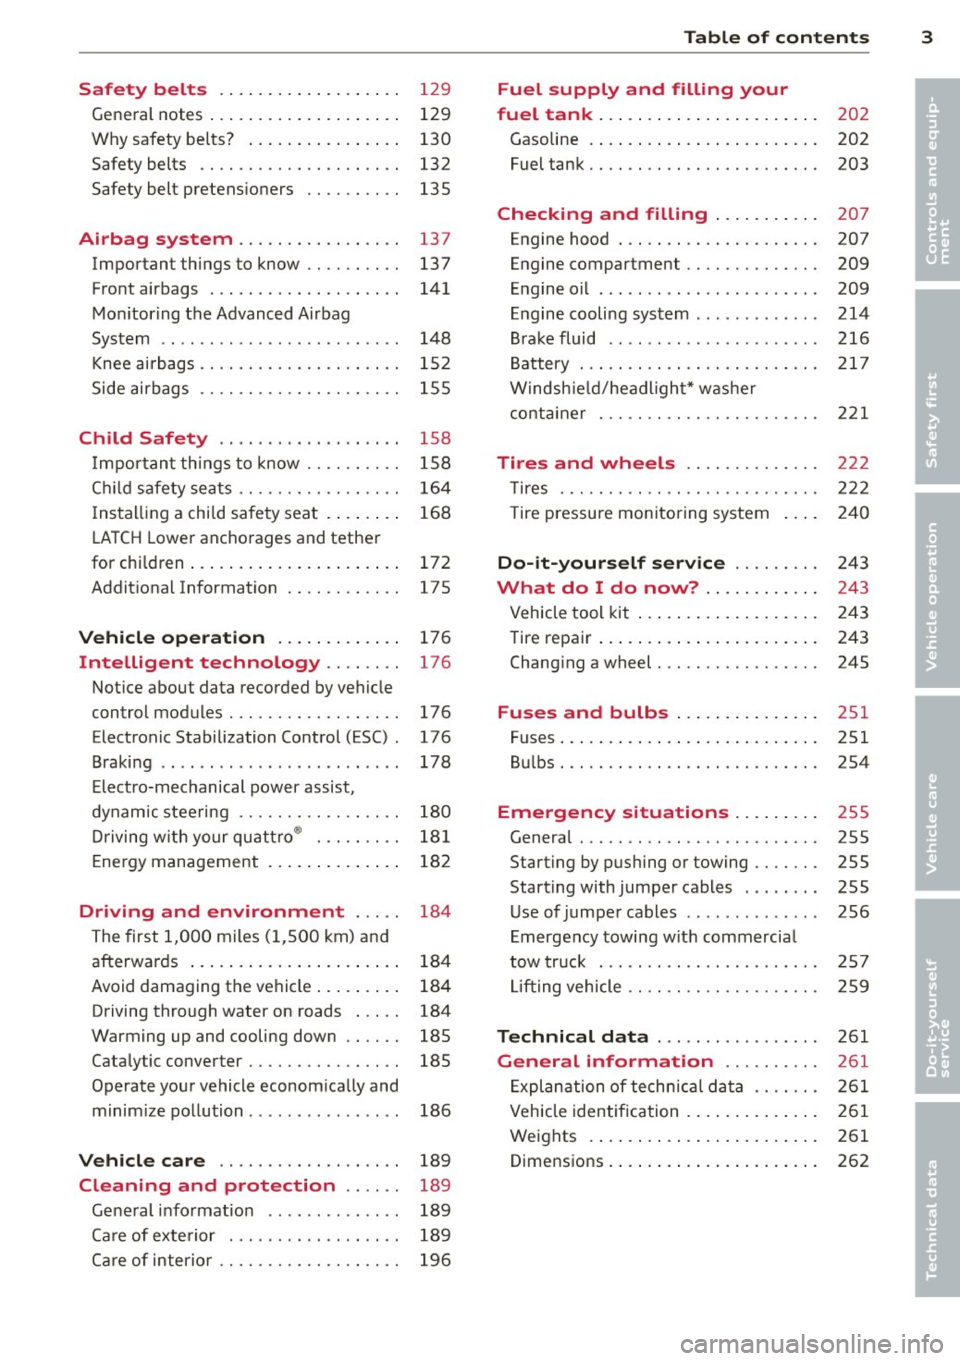
Safety belts . . . . . . . . . . . . . . . . . . . 129
General notes . . . . . . . . . . . . . . . . . . . . 129
Why safety be lts? . . . . . . . . . . . . . . . . 130
Safety belts . . . . . . . . . . . . . . . . . . . . . 132
Safety belt pretens ioners . . . . . . . . . . 13S
Airbag system ............. .. .. 137
Important things to know . . . . . . . . . . 137
Front airbags . . . . . . . . . . . . . . . . . . . . 141
Monitoring the Advanced Airbag
System . . . . . . . . . . . . . . . . . . . . . . . . . 148
Knee airba gs. . . . . . . . . . . . . . . . . . . . . 152
Side airbags . . . . . . . . . . . . . . . . . . . . . 155
Child Safety . . . . . . . . . . . . . . . . . . . 158
Import ant things to know .... .. .. . .
C hild safety sea ts ......... .. .. .. . .
I ns tall ing a chi ld safety seat . ... .. . .
L A T CH Lower anchorages and tether
for chi ldren ... ........... .. .. .. . .
Addit ional Information
Vehicle operation ............ .
Intelligent technology .. .. .. . .
Notice about data recorded by vehicle
control modules .......... .... .. . .
Electronic Stabilization Control (ESC) .
Braking .. ... ...... ......... .... .
E lect ro-mechanical power assist,
dynamic steering ............. .. . .
Driving with your qu attro ® ... .. .. . .
E nergy management ............. .
Driving and environment ... ..
The first 1,000 miles (1,500 km) and
afterwards ... ........... .. .. .. . .
Avoid damaging the vehicle ... .. .. . .
Driving through water on roads ... . .
Warming up and cooling down .. .. . .
Cataly tic converter ........ .... .. . .
Operate your vehicle econom ically and
minim ize pollution ......... ... ... .
Vehicle care .............. .. .. .
158
164
16 8
172
175
176
176
176
176
178
180
18 1
182
184
184
184
184
185
18S
186
189
Cleaning and protection . . . . . . 189
Gene ral i nfo rmation . . . . . . . . . . . . . . 189
Ca re of exte rior . . . . . . . . . . . . . . . . . . 189
Ca re of inter ior . . . . . . . . . . . . . . . . . . . 196
Table of contents 3
Fuel supply and filling your
fuel tank . . . . . . . . . . . . . . . . . . . . . . .
202
Gasoline . . . . . . . . . . . . . . . . . . . . . . . . 202
Fuel tank. . . . . . . . . . . . . . . . . . . . . . . . 203
Checking and filling . . . . . . . . . . . 207
Engine hood . . . . . . . . . . . . . . . . . . . . . 207
Engine compartment . . . . . . . . . . . . . . 209
Engine oil . . . . . . . . . . . . . . . . . . . . . . . 209
Engine cooling system . . . . . . . . . . . . . 214
Brake fluid ....... ............... 216
Battery . . . . . . . . . . . . . . . . . . . . . . . . . 217
Windshield/headlight* washer
container . . . . . . . . . . . . . . . . . . . . . . . 221
Tires and wheels ............. .
T ires ... .. .. .. .. .. . ............ .
T ire pressu re mon itoring system
Do-it-yourself service ........ .
What do I do now? ........... .
Vehicle tool kit ... .. . .. .......... .
Tire repair ... .. .... . ............ .
Chang ing a wheel ..... ........... .
Fuses and bulbs .. .. ... .... ... .
Fuses ..... .. .. .... .. ........... .
Bul bs ....... .. ...... ........... .
Emergency situations ........ .
General ... .. .. .. ............... .
Starting by pushing or towing ...... .
Starting with jumper cables ..... .. .
U se of jumper cables ... .. .. ... ... .
Emergency towing with commercia l
tow truck ... .. .. .. . ............ .
Lift ing vehicle .. .. .... ........... .
Technical data ... . .. .. ..... ... .
General information ......... .
Exp lanation of techn ic al data ...... .
Vehicle identification ........... .. .
Weights .. .. .... ... .. .......... .
Dimensions . ....... . .. .......... . 222
222
240
24
3
243
243
243
245
251
251
2S4
255
255
255
255
256
2 57
259
261
261
26 1
261
261
262
•
•
Page 6 of 286
4 Table of contents
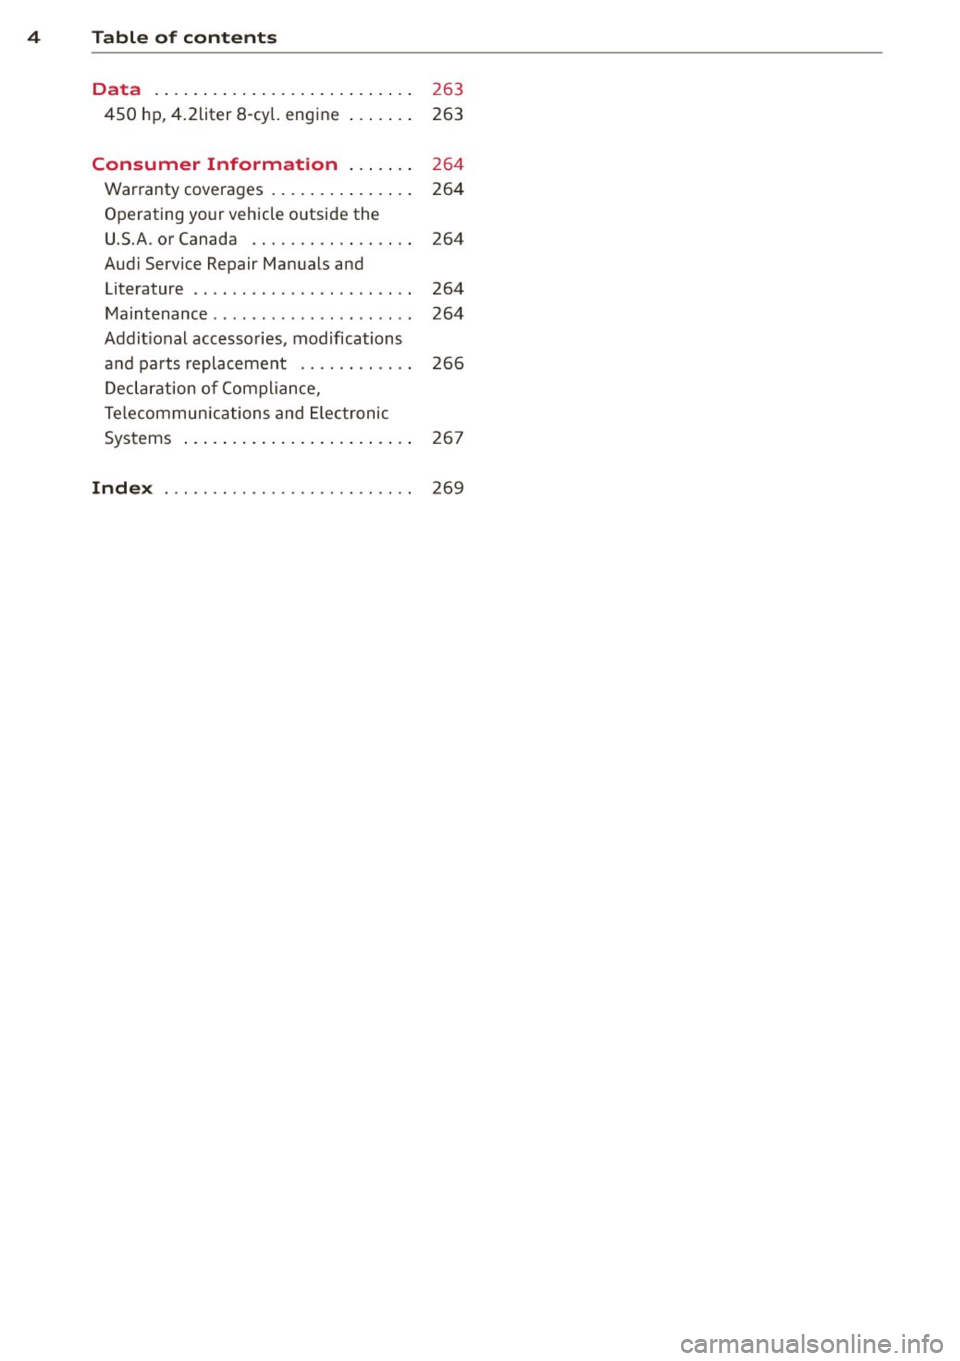
Data . . . . . . . . . . . . . . . . . . . . . . . . . . .
263
450 hp, 4 .2liter 8-cy l. engine . . . . . . . 263
Consumer Information . . . . . . . 264
Warranty coverages . . . . . . . . . . . . . . . 264
Operating your vehicle o utside the
U.S.A. or Canada . . . . . . . . . . . . . . . . . 264
Audi Service Repair Manuals and Literature . . . . . . . . . . . . . . . . . . . . . . . 264
Maintenance . . . . . . . . . . . . . . . . . . . . . 264
Addit ional accessories, modifications
a nd parts replacement . . . . . . . . . . . . 266
D eclaration of Compliance,
T e lecommun ications and Elec tronic
Systems . . . . . . . . . . . . . . . . . . . . . . . . 267
Index . . . . . . . . . . . . . . . . . . . . . . . . . . 269
Page 11 of 286

CD
@
®
©
®
®
Door handle
Power locking sw it ch
Memory buttons (dr iver's seat)
Button for side ass ist
A ir outlets
Control leve r for :
- Turn signal and high beam
0 Multi-function steering wheel
with:
- Horn
- Driver's airbag ...... ... .. .
- Audio/video , telephone and
navigation buttons
- Rocker switches for tiptron ic
operation .... .... ... .... .
@ ISETI button .... ....... .... .
® Instrument cluster ......... .
@ Reset button for trip odometer
@ Switches for:
- Windsh ield wiper/washer .. .
- Trip computer ............ .
- Lap -Timer ............ ... .
@ Ignition lock ... .... ... .... .
@ Adju stable steer ing column
@ Control lever for:
- Cruise contro l ....... ... .. .
- adaptive cruise cont ro l ... .. .
@ Instrument lighting .... .. .. .
@ Release lever for the engine
hood .. .. .... .. .. .. ....... .
@ Data Link Connector for On
Board Diagnost ics (OBD II) . .. .
35
64
101
53
14 1
89
11
10
12
57
25
28
74
74
82
92
55
207
29
@ Lig ht switch . . . . . . . . . . . . . . . . 52
@ Adjuster control fo r outside mi r-
rors . . . . . . . . . . . . . . . . . . . . . . 55
@ Power window switches . . . . . . 39
@ Radio-Disp lay or MM I-Disp lay
@ Depending on options:
- Radio system
- CD changer
@ Emergency flasher . . . . . . . . . . 54
@ Glove compartment ( lockable) 6 7
@ Front passenger's a irbag . . . . . 141
Instrument s and control s 9
@ Depending on options, switches
for :
- drive select .. .. . .. ... ... . . 104
- Electron ic Stabili zation Con-
trol ...... .. .. . ... ...... .
- parking sy stem ....... .... . 176
107
@ Deluxe automat
ic cl imate con-
t ro l .... .. .. .. ........... . .
69
@ Se lector lever for automatic
transmission .. .... ........ .
85
@) Ashtray with cigarette lighter 65
@ Depending on options:
- MMI control console or
- drive select . . . . . . . . . . . . . . . 104
- Electronic Stabili zation Con-
trol button . . . . . . . . . . . . . . . 176
- parking system . . . . . . . . . . . . 107
@ Central power w indow swi tch
@ Power top switc h . . . . . . . . . . . . 44
@ I S T AR T ENGINE S TOPI button 77
§) Electromechanical parking
brake . . . . . . . . . . . . . . . . . . . . . 79
(D Tips
- Some of the equipment or features
show n in the general illustration may be
standard equ ipment on your vehicle or
may be opt ional equ ipment depending
on your model. Always as k yo ur au thor
ized Audi dea ler if you have a quest ion
about your ve hicle .
- Ope rat ion of the Multi Med ia In terface
(MMI) is described in a separa te manua l.
Page 12 of 286
10 Instruments and warning/indicator lights
Instruments and warning/indicator Lights
Instruments
Instrument cluster and controls
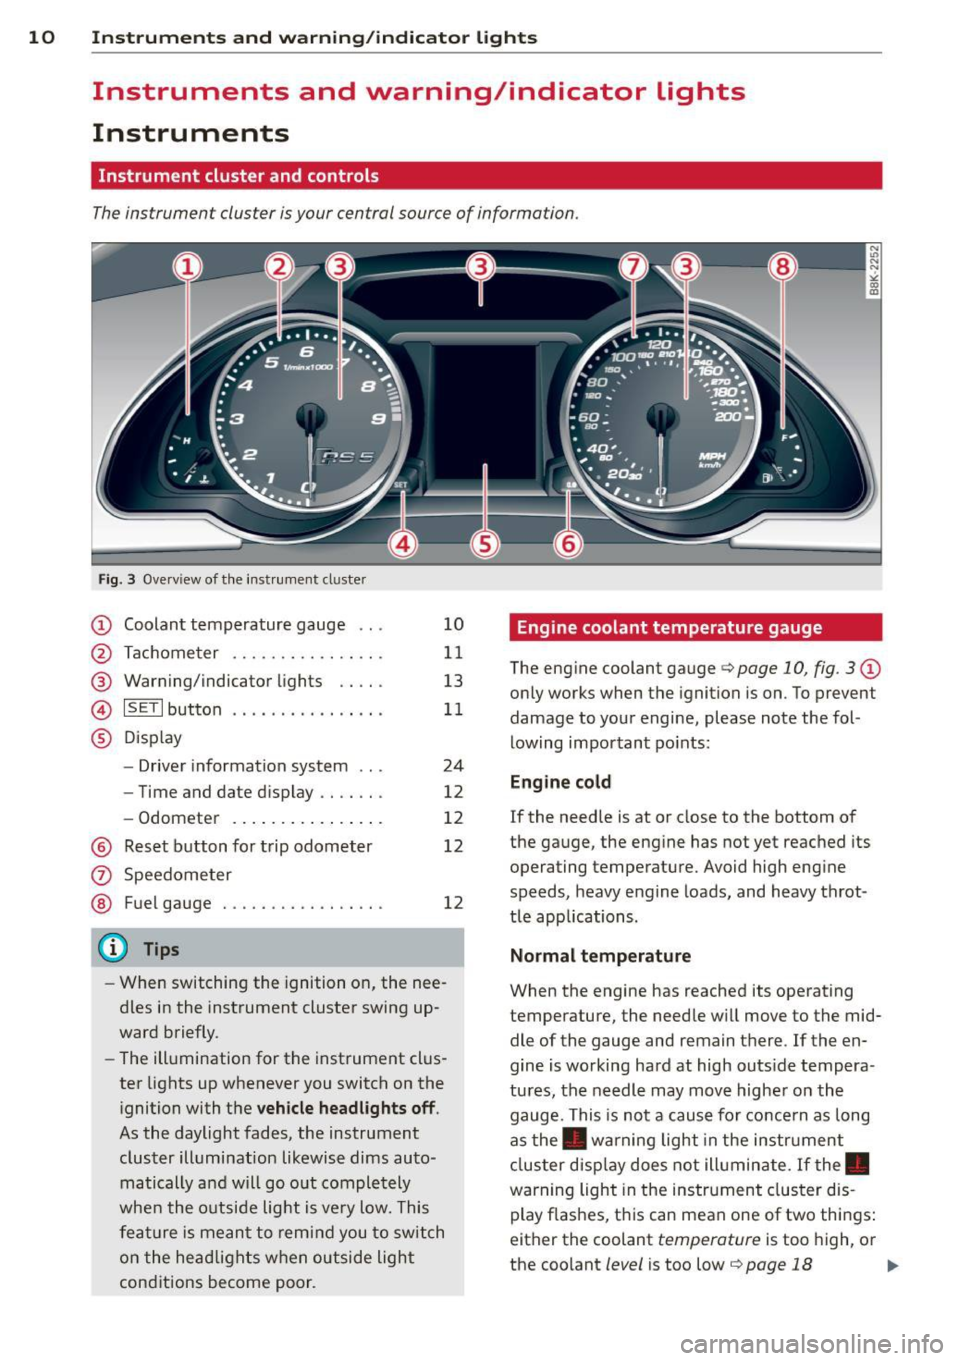
The instrument cluster is your central source of information.
Fig. 3 Ove rv iew of the instrument cluster
CD Coolant temperature gauge .. .
@ Tachometer ........... .. .. .
@ Warning/indicator lights .. .. .
© ISETlbutton .... .... .. .... . .
® Display
- Driver information system .. .
- Time and date d isplay .. .. .. .
- Odometer .......... ... .. .
@ Reset button for trip odometer
(z) Speedometer
@ Fuel gauge . .... ..... .. .. .. .
(D Tips
10
11
13
11
24
12
12
12
12
- When switching the ignition on, the nee
dles in the instrument cluster swing up
ward briefly.
- The illumination for the instrument clus
ter lights up whenever you switch on the
i gnition with the
vehicle headlights off .
As the daylight fades, the instrument
cluster illumination likewise dims auto
matically a nd will go out completely
when the outside light is
very low. This
feature is meant to remind you to switch
on the headlights when outside light
conditions become poor .
Engine coolant temperature gauge
The engine coolant gauge q page 10, fig. 3 CD
only works when the ignition is on. To prevent
damage to your engine, please note the fol
lowing important points:
Engine cold
If the needle is at or close to the bottom of
the gauge, the engine has not yet reached its
operating temperature. Avoid high engine
speeds, heavy engine loads, and heavy throt
tle app lications.
Normal temperature
When the engine has reached its operating
temperature, the needle will
move to the mid
dle of the gauge and remain there . If the en
gine is working hard at high outs ide tempera
tures, the needle may
move higher on the
gauge. This is not a cause for concern as long
as the . warning light in the instrument
cluster display does not illuminate. If the.
warning light in the instrument cluster dis
play flashes, this can mean one of two things:
either the coolant
temperature is too high, or
the coolant
level is too low q page 18 Ill-
Page 13 of 286
Instrument s and warning /indicator lights 11
,&_ WARNING
- Always observe the warning in
¢ page 200, Engine compartment, be
fore opening the hood and checking the
engine coolant level.
- Never open the engine hood if you see or
hear steam, or if you see engine coolant
dripping from the engine compartment.
You could burn yourself . Let the engine
cool off first so that you cannot hear or
see any steam or engine coolant .
(D Note
-Mounting additional lights or accessories
in front of the air inlets reduces the cool
i ng effect of the radiator . At h igh outside
temperatures or high engine load, the
engine could overheat.
- The front spo iler has been designed to
properly distribute the cooling air when
the veh icle is moving. If the spoiler is
damaged, this could reduce the cooling
effect and the engine could then over
heat. Ask your authorized Audi dealer for
assistance.
Tachometer (engine rev counter)
The tachometer indicates the engin e RPM
(r evolutions per minutes).
If engine RPM d rops be low 1,500 , you should
downshift to the next lower gear. The red area
at the end of the scale indicates maximum
permissible engine RPM after the break-in pe
riod . Before reaching this a rea, move these
lector lever to position D/S or ease your foot
off the accelerator pedal.
(D Note
The tachometer needle@¢ page 10,
fig . 3
shou ld only briefly be in the red
zone: you could damage your engine! The
beg inning of the red zone varies depend
ing on the engine.
@) For the sake of the environment
Upshifting early saves fuel and reduces en
gine noise.
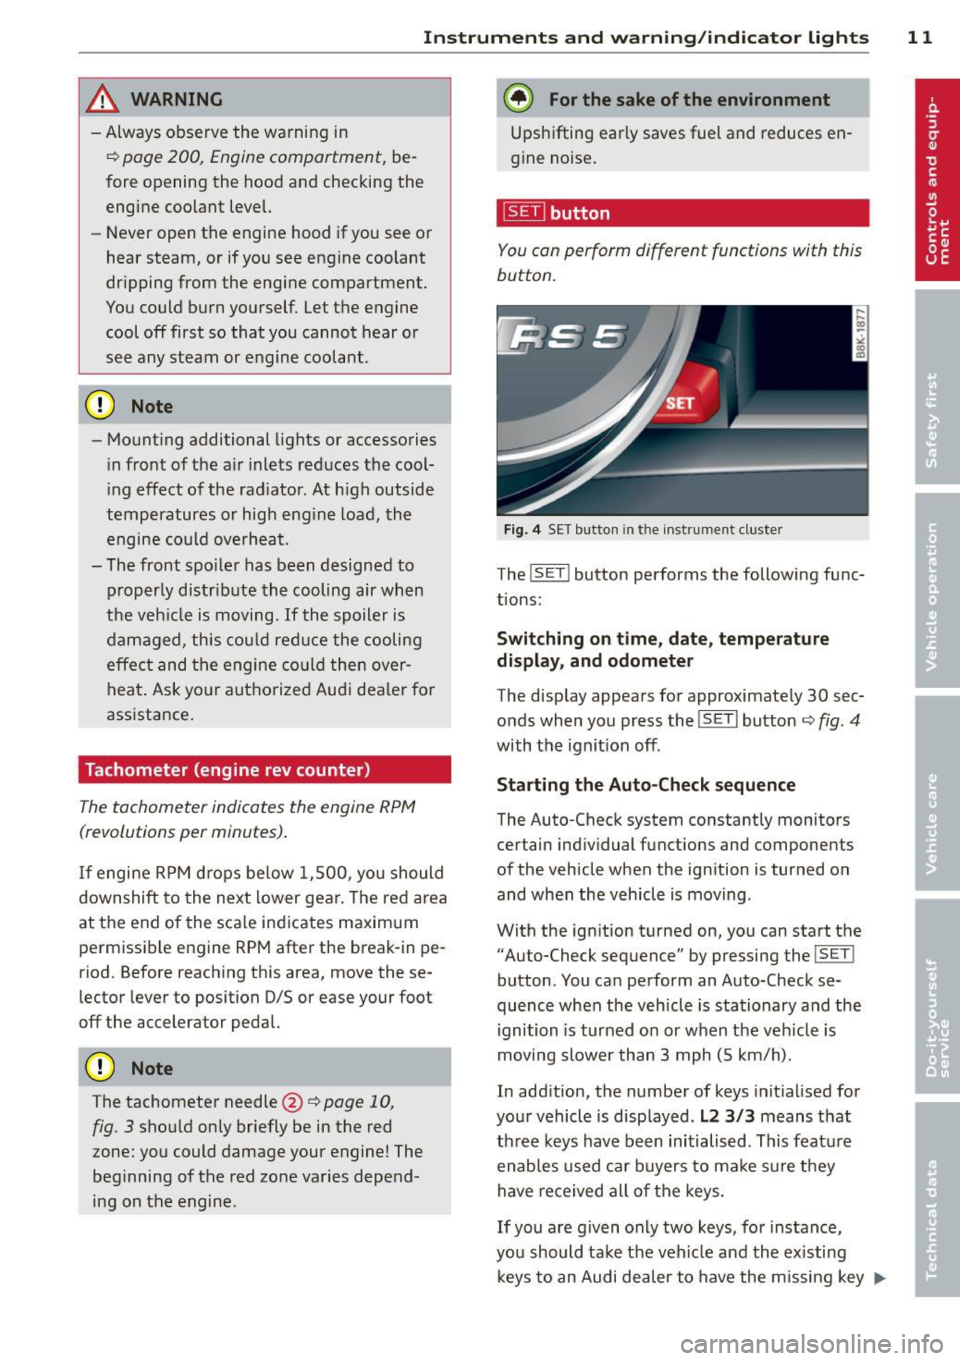
~ button
You can perform different functions with this
button.
Fig. 4 SET button in th e in strument cl uste r
The !SET ! button performs the following func
tions :
Switching on time, date, temperature
display , and odometer
The display appears for approximately 30 sec
onds when you press the
!S ET I button ¢ fig. 4
with the ignition off.
Starting the Auto-Check sequence
The Auto-Check system constantly monitors
certain individual functions and components
of the vehicle when the ignition is turned on
and when the vehicle is moving .
With the ignition turned on, you can start the "Auto-Check sequence" by pressing the
! S ET !
button . You can perform an Auto-Check se
quence when the vehicle is stationary and the
ignition is turned on or when the veh icle is
moving slower than 3 mph (5 km/h).
I n addition, the number of keys init ialised for
your vehicle is disp layed .
L2 3/3 means that
three keys have been initialised. This feature
enables used car buyers to ma ke sure they
have received all of the keys.
If you are given only two keys, for instance,
you should take the vehicle and the existing
keys to an Audi dea ler to have the missing key
II>-
Page 15 of 286
Instrument s and warnin g/indic ator ligh ts 13
(D Note
Never run the tank completely dry! An ir
reg ular supply of fuel can cause eng ine
m isfiring and fuel could enter into the ex
haust system. The catalyt ic converter
could the n overheat and be damaged .
Warning/indicator
Lights
Description
The indicator lights in the instrument cluster
blink or turn on . They indicate functions or
malfunct ions ¢,&. .
Messages may appear with some indicator
lights. A warning signal will sound at the
same time . The messages disappear again af
ter a short t ime . To display a message again ,
pressthelSE T!button
¢ page 11. If severa l
malfunc tions occu r, each of the indica to r/
warn ing lamps will be d isplayed in succession
for abo ut two seconds at a time .
Some ind icators lights in the disp lay can turn
on in several colors.
_& WARNING
- F ailure to heed warning lights and o ther
impor tant vehicle info rmation may result
in serious persona l injury o r vehicle dam
age.
- Whenever sta lled or stopped for repair,
move the vehicle a safe distance off the
road, stop the engine, and turn on the
eme rgency flasher¢
page 54.
-The e ngine compartment of any motor
vehicle is a potentially hazardous area.
Before you check anything in the engine
compartment, stop the engine and let it
cool down. Always exercise extreme cau
t ion when wor king under the hood
¢ page 200, Engine compartment
(D Tips
Ma lfunctions or faults w ill be identified ei
ther with a red symbo l (pr io rity 1 -Dan- ger!) or with a yellow symbol (prio
rit y 2 -
Warning).
' Overview
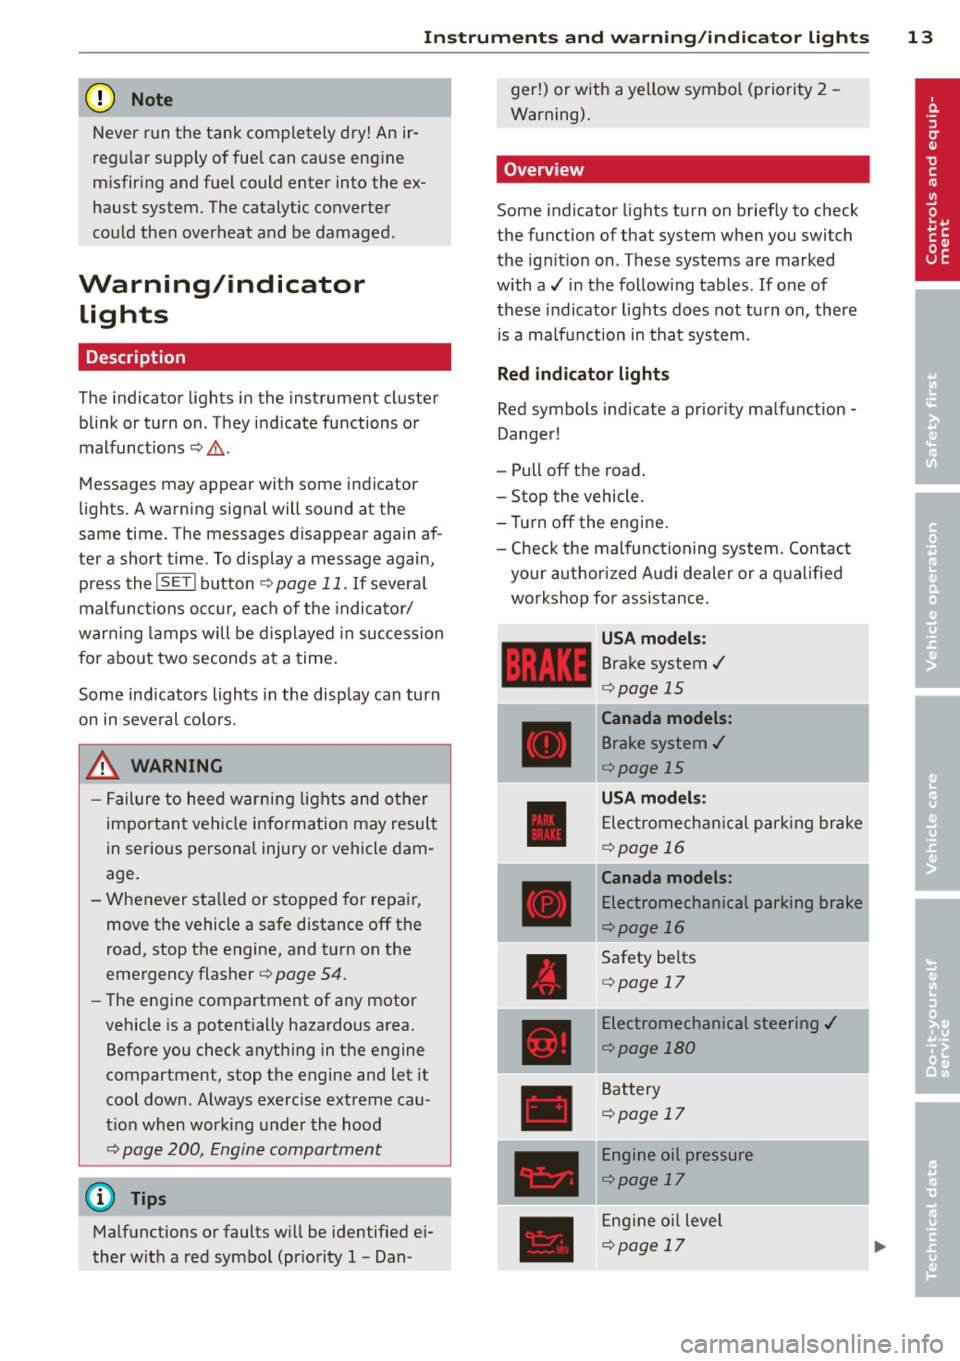
Some indicator lights t urn on briefly to check
the function of that system when you switch
the ignit ion on . These systems are marked
with a../ in the fo llow ing tables . If one of
these indicator lights does not tu rn on, there
i s a ma lf u nct ion in that system.
Red indicator lights
Red symbo ls indicate a prior ity ma lfunction -
Danger!
- Pull off the road .
- Stop the vehicle.
- Tur n off the engi ne.
- Check t he malfunc tioning system. Contac t
your author ized A udi dealer or a q ualified
workshop for assistance.
USA models :
Brake system../
¢page 15
----~r~
Canada models:
Brake system ../
¢page 15
USA mod els :
Elec tromech anical parki ng br ake
¢ page 16
Canada models:
Electromechanical parking brake
¢page 16
Safety be lts
¢ page 17
Electromechanical steering ../
¢page 180
Battery
¢page 17
Engine oil pressure
¢page 17
Eng ine oil level
¢page 17
Page 16 of 286

14 Instrum ent s and w arn ing /indic ato r light s
Engine cooling system
r:::;,page 18
Steering column lock
r:::;, page 18
Ignition lock
r:::;,page 18
USA mod els:
Speed warning system
r:::;, page 81
Canada models :
Speed warning system
r:::;,page81
Adapt ive cru ise control./
r:::;, page 94
Yellow ind ic a tor lights
Ye llow symbols indicate a priority 2 ma lfunc
tion -Warning!
•
I
ESC OFF
m
ll!fJ
Power top operation
r:::;, page43
Electronic Stabilization Control
(ESC) ,/
r:::;, page 19
Electronic Stabilization Control ( E SC) ./
r:::;,page 19
Electronic Stabilization Control
(ESC)
r:::;,page 176
USA mod els :
Anti-lock braking system (ABS)
defective ,/
r:::;, page 19
Canada model s:
Anti-lock braking system (ABS)
defective ,/
r:::;,page 19
USA models :
Safety systems ./
r:::;,page20
Canada models :
Safety systems ,/
r:::;,page20
•
•
[I]
.,,,~,
~
•
Im
-
•
•
-
ml
II
•
m
!I
-
!!
l:J
E
II
Worn brake pads
r:::;, page20
Electromechanical parking brake
r:::;, page
79
I
Tire pressure monitoring
system./
r:::;, page 241
Tire pressure monitor ing system
r:::;, page2 41
Electronic power control./
r:::;, page 20
Malfunction indicator Lamp
(MI L),/
r:::;, page 2 0
Engine speed limitation
r:::;, page21
Engine oi l level
r:::;,page 17
Eng ine oi l sensor
r:::;, page 21
Battery
r:::;, page 17
Tank system
r:::;, page 21
Windshield washer fluid level
r:::;,page 21
Windshie ld w ipers
r:::;, page 21
Remote control key
r:::;, page
7 7
"
Battery in remote control key
r:::;, page33
Defective light bulb warning
r:::;, page 21
Rear fog light(s)*
r:::;, page 21
Headlight range control
r:::;, page 22
Page 17 of 286

Instrument s and warnin g/indic ator ligh ts 15
ml
adaptive light *
¢page22
m
Light-/rain sensor*
¢page22
-
Ill
Sport differential*
¢page 22
m
Ignition lock
¢page22
Ill
Steering column lock
¢page 18
Et·D
Electromechanical steering,
dynamic steering *./
¢page 180
•
Transmission ¢ page 90
m
Transmission ¢ page 90
Other indicator light s
1111
Turn signals
ii ¢page22
CRUISE
•
Pl
-
I
•
USA models: Cruise control
¢page82
Canada model s: Cruise control
¢page82
Adaptive cruise control*
¢page94
-Adaptive cruise control*
¢page94
High beam
¢page 53
BRAKE /((f) ) Brake system
The light illum inates when the ignition is
switched on. It goes out after the engine has
been started. Th is indicates that the brake
warn ing light is functioning properly.
If the brake warning light doe s not light up
when the engine i s cranking , the re m ay be a malfunction in the elect
rical system . In thi s
ca se, contact your Audi deale r.
If the brake system wa rn ing/ indicator light
tu rns o n, there is a b ra ke sys tem ma lfunction .
1111 (USA model s)/. (Canada model s)
Stop ve hicle and check brake fluid lev el
If the indicator light turns on and the mes
sage appears, proceed as follows:
.,. Pull off the road.
.,. Stop the vehicle.
.,. Turn off the engine .
.,. Check the b rake fluid level¢
page 216 .
.,. Contact your nearest authorized repair fa-
cility if necessa ry.
W arning! Fault in brake system . Contact
d ealer
If the ABS indicator light E (USA models)/
Ii] (Canada mode ls), the ESC ind icator light
J.i) and the brake system indicator light
1111 ( U SA mode ls)/ . (Canada mode ls) tur n
o n and the message appears, the ABS, ESC
and braking distr ibut ion are not working¢,&..
Carefully drive to your author ized Audi dealer
immediately to have the malfunct ion correct
ed ¢& .
1111 (USA models )/. (Canada models)
Parking brake system fault! See owner 's
manual
- If the ind icator light and the message ap
pear
when stationary or after switch ing the
ignition on ,
check if you can release the
parking brake . Afte r releasing the parking
brake, carefully d rive to your author ized
Audi dea le r i mmediately to have the ma l
function corrected. If yo u cannot release the
parking brake, see k professiona l assistance .
- If the ind icator light and the message ap
pea r
while driving , the emergency b ra ki ng
function may not be avail able.
It may not be
possible to set the par king brake or release
it once it has been set. Seek professiona l as-
sistance. ..,.
Page 18 of 286

16 Instrum ent s and w arn ing /indic ato r light s
(US A models): If t he warning light 1111 and
the warning light
E+J appear toget her, imme
di ate ly contact your authorize d Aud i dea ler or
qua lified workshop to have all brake pa ds in
spected
¢ page 20.
When the li ght comes on, an audib le warning
signal is also given .
.&_ WARNING
-Always observe the warni ngs in
¢ page 200, Engine compartment, be
fore opening the hood and checking the
brake flu id.
- Driv ing with low brake fluid is a safety
hazard. Stop the car and get professional
assista nee.
- USA models: If the 1111 warn ing light,
the
G1 warning light and the (i1!B warn
ing light come on together, the rea r
wheels co uld lock up first unde r hard
braking. Rear wheel lock-up can cause
loss of vehicle con trol and an accident.
Have your vehicle repaired immediately
by you r authorized Aud i dea ler or a quali
fied workshop. Drive slowly and avoid
sudden, hard brake applications.
- Canada models: If the brake warning
light •• the
DJ warn ing light and the
ABS warning light
ti] come on together,
the rear wheels could lock up first under
hard braking. Rear wheel lock-up can
cause loss of vehicle control and an acc i
dent. Have yo ur vehicle repaired immed i
a tely by your authori zed A udi dealer or a
qualifie d workshop. Dr ive slowly and
avo id sudden, hard brake applicat ions.
- If the brake warning/indicator light does
not go out afte r a few seconds and the
par king brake is released, or lights up
whi le you are driving, the fluid level in
the brake fluid reservoir is too low. If you believe that it is safe to do so, proceed
immediately at low speed to the nearest
authorized Audi dealer or qualified repair
facility and have the brake system in spected. -
Always keep in mind that after severa l
brake applications, you will need greater
pressure on the brake pedal to stop your
veh icle. Do not rely on strained brakes to
respond with max imum s topping powe r
in critical s ituations . You must allow for
increased braking dis tan ces. The extra
d istance u sed up by fading br akes could
lead to an acciden t.
:l~ /(® ) Electromechanical parking brake
The warning/indicator light monitors the
electromechanical parking brake.
If the indicato r light . (USA models)/ .
(Canada mode ls) turns on, the pa rking brake
was set. If the pa rking brake is set when the
ignition is off, the indicator light turns off a f
te r abo ut 20 seconds .
The wa rning/indicator lig ht wi ll go out when
the pa rking brake is re leased.
• (USA models ) /. (Can ada models) Cau
tion: Vehicle parked too steep
If the indicator light b links and the message
appears, there is not enough braking power to
keep the vehicle from rolling . The brakes have
overheated . The vehicle cou ld roll away eve n
o n a sma ll incline .
Press brake pedal to release parking brake
To release the parking b rake, press the brake
peda l and press the button(®) or start dr iving
with starting assist at the same time
¢ page 80.
Please relea se p arking brake
To re lease the par king brake manually , p ress
the b rake peda l and press the button<®> at
the same time. The pa rking brake on ly re leas
es automatically if the driver's safety be lt is
fastened.
Iii Parkin g brake!
If the Iii indicator light t urns on and th is
message appears, the re is a parking b rake
malfunction. D rive to your au thori zed A udi
Page 19 of 286
Instrument s and warnin g/indic ator ligh ts 17
dealer or qualified workshop immediately to
have the ma lfunction corrected.
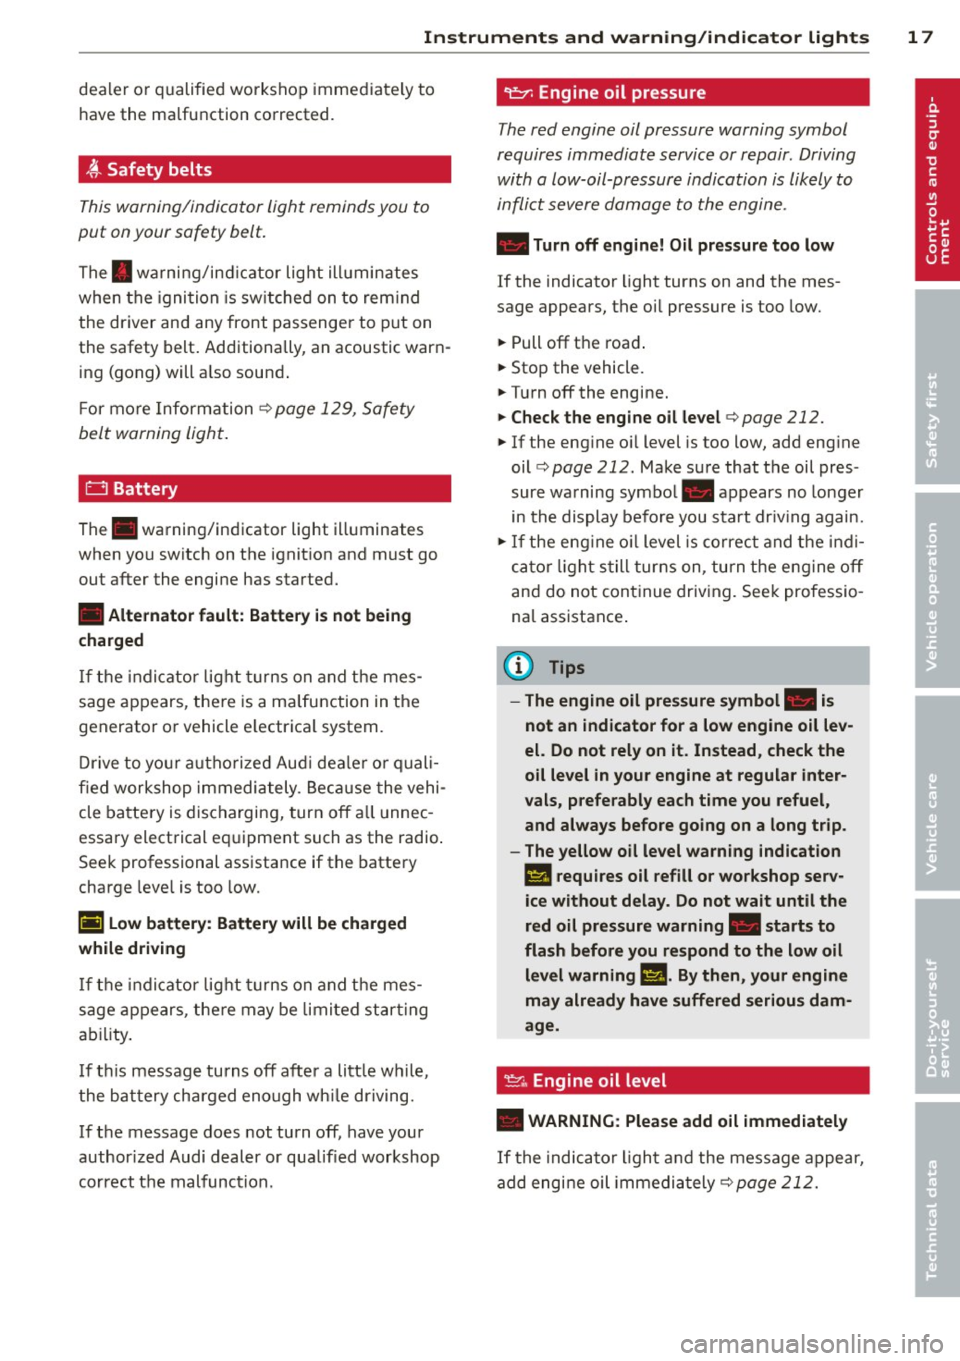
,(,_ Safety belts
This warning/indicator light reminds you to
put on your safety belt.
The . warning/ind icator light illuminates
when the ignition is sw itched on to rem ind
the driver and any front passenger to put on
the safety belt. Additionally, an acoustic warn
i ng (gong) will a lso sound .
F or more Information¢
page 129, Safety
belt warning light .
0 Battery
The. warning/indicator light illuminates
when you switch on the ignition and must go
out after the engine has started.
• Altern ator fault: Batte ry is not being
c ha rged
If the i ndicator light turns on and the mes
sage appears, there is a malfunction in the
generator or vehicle e lectrica l system .
D rive to you r autho rized Aud i dea ler or quali
fied workshop immediately . Bec ause the vehi
cle battery is discharging, turn
off a ll unnec
essary electrical eq uipment such as the radio .
Seek professional assistance if the battery
charge leve l is too low.
(•) Lo w b atter y: B att ery wi ll be charg ed
while dri ving
If the indicator lig ht turns on and the mes
sage appears, the re may be limited start ing
ab ility .
If t his message turns
off after a litt le while,
the battery charged enough wh ile driving.
If the message does not turn
off, have your
author ized Audi dealer or qualified workshop
correct the malfunction .
"l::;r: Engine oil pressure
The red engine oil pressure warning symbol
requires immediate service or repair . Driving
with a low-oil-pressure indication is likely to
inflict severe damage to the engine .
• Turn off eng ine! Oil pressure too l ow
If the indicator light turns on and the mes
sage appears, the oil pressure is too low.
.. Pull
off the road .
.. Stop the vehicle.
.. Turn
off the engine.
.. C heck the engine oil le vel ¢ page 212.
.. If the eng ine o il level is too low, add eng ine
oil
¢ page 212. Make sure that the oil pres
sure warning symbol. appears no longer
in the display befo re you sta rt dr iv ing again.
""I f the eng ine o il level is correct and t he i nd i
ca to r li ght still turns on, turn the eng ine
off
and do not continue driv ing. Seek professio
na l assistance .
(D Tips
- The engine oil pres sure sy mbol. is
not an indicat or for a low engine oil lev
el. Do not rel y on it . Instead, check the
o il level in yo ur engine at regula r inter
v als, p referably each time you refuel ,
and always before going on a long trip .
- The yellow oil level wa rn ing indication
Ill req uires oil refill or wo rkshop serv
ice without delay. Do not wait until th e
red oil p ressur e warning. st a rt s to
fla sh before you respond to the low oil
level warning
111 -By th en, your engin e
may already have suffered seriou s dam
age .
~ .. Engine oil level
• WARN ING: Ple ase add o il immed iatel y
If the indicator ligh t and the message appear,
add engine oil immedia tely
¢ page 212.