ECO mode AUDI RS7 SPORTBACK 2014 Owner's Manual
[x] Cancel search | Manufacturer: AUDI, Model Year: 2014, Model line: RS7 SPORTBACK, Model: AUDI RS7 SPORTBACK 2014Pages: 292, PDF Size: 73.56 MB
Page 122 of 292
120 Parking systems
Parking aid > Change to front/rear > Auto
or Manual.
Auto -
This view behind the vehicle (Rear
mode) is displayed automatically when you
shift into reverse . This view in front of the ve
hicle
( Front mode) is disp layed automatically
when you shift into the forward gears.
Manual -This view behind the vehicle (Rear
mode) is a lways disp layed when you turn on
the system.
Adjusting the display and the warning tones
Applies to vehicles: with parking system plus/rear view
camera/peripheral cameras
The display and warning tones can be adjust
ed in the Infotainment.
.. Se lect: I CAR ! function button > (Car)* sys
tems
control button > Driver assist > Park
ing aid.
Display
On* -
optical display is shown for the parking
system plus, rear view came ra image is shown
for parking system plus with rear view cam
era*.
Off -when the parking system is switched off,
on ly audib le signals are given.
Warning tones
Front volume -
Volume for the front area
Rear volume -Volume for the rear area
Front frequency -Frequency for the front area
Rear frequency -Frequency for the rear area
Music volume while parking -When the park
ing system is tu rned on, the volume of the au
dio/video source is lowered.
The newly adjusted value is briefly heard from
the signa l gene rator .
(D Tips
-The warning tones can a lso be adjusted
directly from the visual display or the rear v
iew camera* image. Simply press
the
Settings control button.
- Changed settings are activated when the
parking system is switched on again.
- The settings are automatically stored
and assigned to the remote cont rol key
that is in use .
Error messages
Applies to vehicles: with parking system plus/rear view
camera/peripheral cameras
T here is an error in the system if the LED in
the
p, q~ button is blinking and you hear a con
tinuous alarm for a few seconds after switch
ing on the parking system or when the park
ing system is already activated. If the error is
not corrected before you switc h
off the igni
tion, the LED in the
Pwi button will blink the
next t ime you sw itch on the parking system by
shifting into reverse.
Parking system plus
If a sensor is fa ulty, the~ symbol will appear
in front of/behind the vehicle in the Infotain
ment display. If a rear sensor is faulty, only
obstacles that are in areas @ and ® are
shown
Q page 111, fig. 121. If a front sensor
is faulty, only obstacles that are in areas ©
and @are shown.
Peripheral cameras*
There is also a system error if:
- the
i:80 ·• symbol appears in the display and
the corresponding display area is shown in
blue. The camera is not working in this area.
- all segments aro und the vehicles are red or
if no segments are displayed.
Drive to your authorized Audi dealer or au
thorized repa ir facility immed iately to have
the malfunction corrected.
Page 123 of 292
Homelink
Universal remote
control
General information
Applies to vehicles: with Home link unive rsal remote con
tro l
The Homelink universal remote control can
be programmed with hand-held transmitters
from existing equipment
With Home link, you can control devices such
as the garage door, security systems, house
lights, etc. comfortably from the inside of you
vehicle.
Homelink makes it possible for you to replace
three different remote controls from devices
in your home with one universal remote . This
feature works for most garage door and exte rior door motor signals. Programmi ng the in
d iv idual remote control for your remote con
trol takes place near the center of the radiator
grille. There is a control module attached at
this location .
A one-t ime programming of the sensor must
be performed before you are able to use sys
tems with Homelink.
A WARNING , .,.
- Never use the Homelink transmitter
with any garage door opener that does
have not the safety stop and reverse fea
ture as required by federal safety stand
ards . Th is includes any garage door open
er model manufactured before April 1, 1982.
- A garage door opener which cannot de
tect an object, signaling the door to stop
and reverse does not meet current feder
al safety standards . Us ing a garage door
opener without these features increases
risk of serious injury or death.
- For safety reasons
never release the
parking brake or start the engine while
anyone is standing in front of the vehicle .
- A garage door or an estate gate may sometimes be set in motion when the
H ome link 121
Homelink remote control is being pro
grammed. If the device is repeatedly ac
tivated, this can overstrain motor and
damage its electrical components -an
overheated motor is a fire hazard!
- To avoid possible injuries or property
damage, please always make absolutely
certa in that no persons or objects are lo
cated in the range of motion of any
equipment being ope rated.
(D Tips
- If you would like additional information
on the Home link Universal Transce iver
I
Homel ink compatib le products, or to
purchase other accessories such as the
Homelink Lighting Package, please con
tact Homelink at 1-800-355 -3515 or on
the Internet at www. homelink.com.
- For Declaration of Comp liance to United
States FCC and Ind ustry Canada reg ula
tions~
page 2 76.
- For security reasons, we recommend that
you clear the programmed buttons be
fore selling the vehicle .
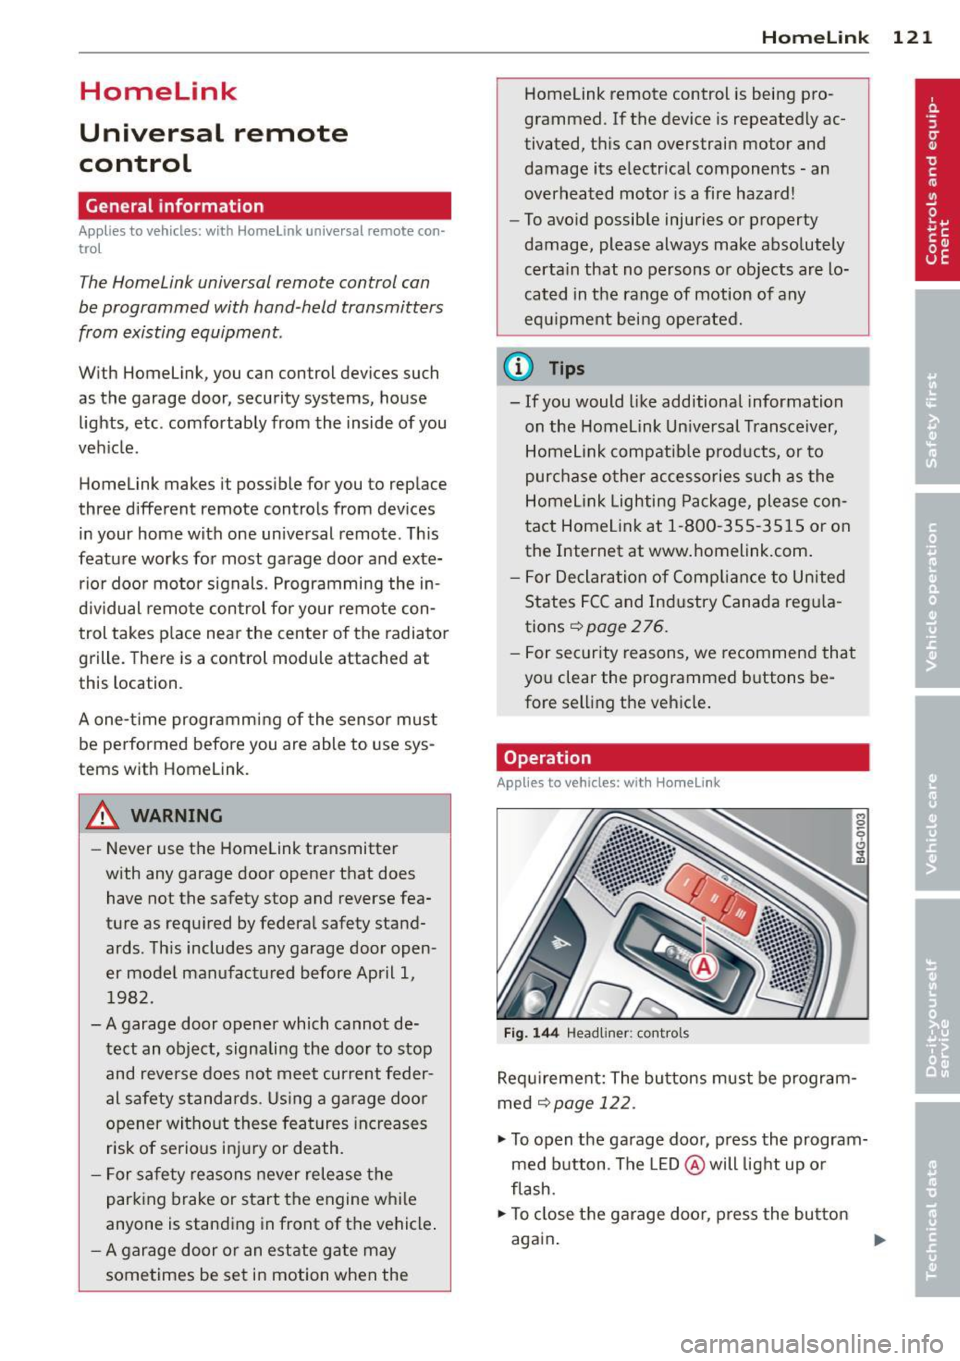
Operation
Applies to vehicles: with Homelink
Fig. 144 Headliner : cont rols
Req uirement: The bu ttons must be program
med
~ page 122.
.,. To open the garage door, press the program
med button . The LED @ will light up or
flash.
... To close the garage door , press the button
again .
II>
Page 124 of 292
122 Homelink
@ Tips
To open t he ga rage door, p ress the butto n,
but do not press it for longer ten seco nds
or the Homelink modu le w ill switch to
programming mode.
Programming the transmitter
App lies to vehicles: with Home link
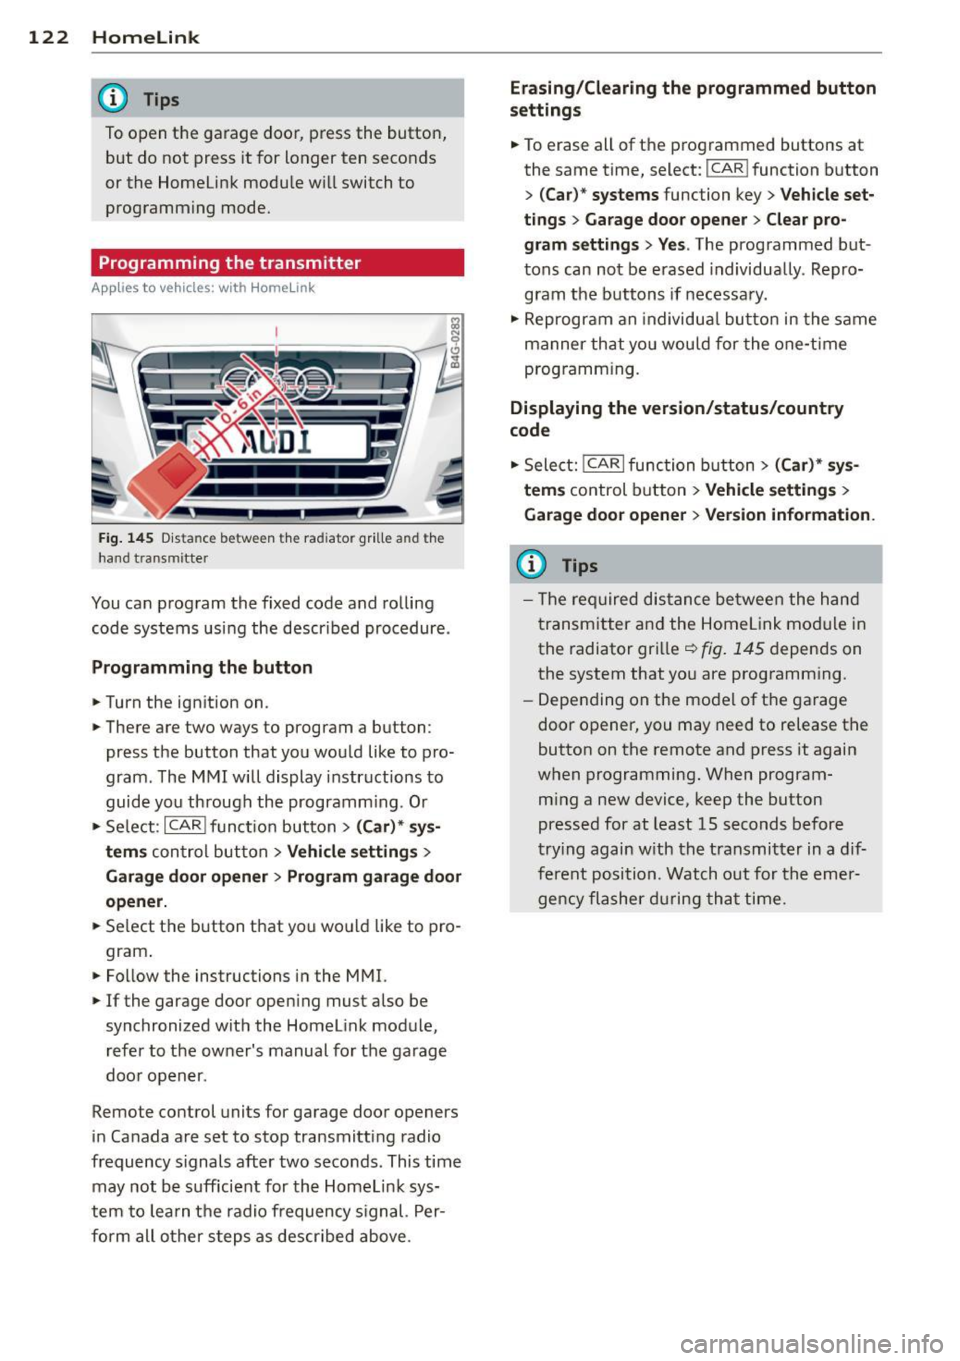
Fig. 145 Dis ta n ce between t he rad iator gr ille and the
hand t ransm itte r
You can prog ram the fixed code and ro lling
code systems us ing the descr ibed procedure .
Programming the button
.. Turn the ign ition on .
.. There are two ways to program a button:
press the button that you wou ld like to pro
gram . The M MI w ill display instructions to
guide yo u through the progr amm ing. Or
.. Se le ct: I CAR I f u ncti on but ton>
(Car) * sys ·
terns
con tro l bu tton > Vehicle settings >
Garage door opener > Program garage door
opener .
.. Se lect t he b utton t hat yo u wo uld like to pro
gram .
.. Fo llow the instructions i n the MMI.
.. If the garage door ope ning must also be
synchronized wit h the Homel ink module,
re fer to the ow ner's manual fo r the ga rage
doo r open er.
Remote control units for garage door openers
in Canada are set to s top transmitting radio
frequency signals after two seconds. This time may not b e sufficient for th e Homel ink sys
tem to lea rn t he radio frequency s ignal. Per
form all o ther step s as descr ibed above.
Erasing/Clearing the programmed button
settings
.. To erase all of t he p rogrammed buttons at
the same time , select: !C A R!function button
>
( Car )* systems function key > Vehicle set
tings
> Garage door opener > Clear pro·
gram settings > Yes .
The prog rammed but
tons can not be erased individua lly. Repro
g ram the b uttons if necessa ry .
.. Reprogr am an individu al bu tton in the same
manner th at you wou ld for the one-t ime
prog ramm in g .
Displaying the version/status/country
code
.. Sele ct: I CAR I func tion button > (Car )* sys
tems
control b utt on > Vehicle settings >
Garage door opener
> Version information.
(D Tips
- T he re qu ired dis tance betwee n the h and
tr ansm itter a nd the Homelink module in
the radiator grill e~
fig . 145 depen ds on
the system that yo u are prog ramm ing .
- Depe nding on the mode l of t he ga ra g e
door o pener, you may need to release t he
button on the rem ote and press it again
when programming . When program·
m ing a new device, keep the button
presse d for at least 15 seconds befor e
tr ying again w ith the t ransmit ter in a dif
fe re nt po sition. Watch out f or th e eme r
ge ncy fl ashe r dur in g tha t time.
Page 173 of 292
WARNINGS. Make certain that the child and
chi ld restraint are correct ly recognized by the
capacitive passenger detect ion system in the
front passenger seat, that the front passenger
airbag is turned
off, and that the airbag status
is always correct ly signaled by the
PASS EN
GER AIR BAG OFF
light .
Many types and models of child restra ints
have been available over the years, new mod
e ls are introduced regular ly incorporating new
and improved designs a nd older models are
taken out of production. Child restraints are not standardized. Ch ild restra ints of the same
type typically h ave different we ights and s izes
and d ifferen t "footprints", the size and shape
of the bottom of the child restraint that sits
on the seat, when they are installed on a vehi
cle seat. These differences make it virtually
imposs ible to certify compliance with the re
qu irements for advanced airbags w ith each
and every child restraint that has ever been
sold in the past or will be sold ove r the course
of the useful life of yo ur vehicle.
For this reason, the United States Nat ional
H ighway Traffic Safety Administration has
published a list of specific type, makes and
models of child restraints that must be used
to ce rtify compliance of t he Advanced A irbag
System in yo ur vehicle with the supp ress io n
requirements of Federa l Motor Vehicle Safety
Standard 208 . These child restraints are:
Subpart A -Car bed child restraints
Model Manufactured on or
after
Ange
l Guard Ange l September 25, 200 7
Ride AA2403 FOF
Subpart B -Rear -facing child restra ints
Model Manufactured on or
after
Century SmartFit December 1, 1999
4543
Cosco Arriva September 25, 200 7
2 2-0 13 PAW an d base
22-999WHO
Child Sa fet y 1 71
Model Manufactured on or
after
Evenflo Discovery Ad- December 1, 1999
just Right 212
E venflo First Choice December 1, 1999
204
Graco Infant 8457 December 1, 1999
Graco Snug ride September 25, 2007 Peg Perego Pr imo Vi- September 25, 2007
aggio SI P IMUNOOUS
Subpart C -Forw ard-facing and
convertible child restraints
Model Manufactured on or
after
Britax Roundabout September 25, 2007
E9L02xx
Cosco Touriva 025 19 December 1, 1999
Cosco Summit Deluxe September 25, 2007
High Back Booster
22-262
Cosco H igh Back September 2 5, 2007
Booster 22- 209
Evenflo Tribute V September 25, 2007
379xxxx
Evenf lo Meda llion December 1, 1999
254
E venflo Generations September 2 5, 200 7
35 2xxxx
Graco ComfortSport September 25, 2007
Gr aco Todd ler Safety September 25, 2007
Seat Step 2
Graco P lati num Cargo September 25, 2007
A WARNING
To reduce the risk of ser ious injury, ma ke
sure th at the
PASSENGER AIR BAG OFF
light comes on and st ays on wheneve r a
chi ld restraint is installed on the front pas
senger seat and the ignition is switched
on.
- Ta ke the chi ld restraint
off the front pas
senger seat and install it properly at one
of the rear seat positions if the
PASSEN-
GER AIR BAG OFF
light does not stay on. ~
•
•
Page 203 of 292
@ Tips
The consumption estimates as published by ENVIRONMENTAL PROTECTION AGENCY (EPA) and Transport Canada may not corre
spond to your actual consumption on the
road, wh ich will vary depend ing upon vehi
cle load and speed, road and weather con
ditions, tr ip length, etc.
Drive smoothly and keep a lookout
ahead
Vehicles use the most fuel when they are ac
celerating.
~ Avoid unnecessary accelerating and braking.
Vehicles use the most fuel when they are ac
celerating . If you anticipate what is go ing to
h appen next, you will need to b rake less and,
thus, accelerate less. Let the vehicle coast
wheneve r poss ible -fo r example when you see
that the nex t tr affic light is red.
Avoid full throttle
Driving at moderate speeds saves fuel and
improves your mileage.
~ T ry and keep well below your car's max imum
speed.
Accelerating gent ly reduces fuel consump
tion, engine wear, and does not disturb the
environment.
Fuel consumption, exhaust emissions and en
g ine no ise increase d ispropo rtionately at high
speeds. If you dr ive at approxima tely three
q uarters of top speed, fue l consumption will
be red uced by one ha lf. Never dr ive faste r
than the posted speed limit and wea ther con
d itions permit.
Reducing unnecessary idling
E ven when your car is just idling it burns up
fuel.
~ S hu t the engine off when you a re not dr iv ing
t h e vehi cle.
Dri vin g and en vironm ent 201
~ Do not warm up the vehicle by lett ing the
engine run at id le .
It makes sense to shut off the engine in traffi c
jams, when wa it ing fo r tra ins to pass at rail
road crossings, or at traffic lig hts that have
long waits on red. T urning the engine off for
just 30-40 seconds saves more fuel than is burned start ing the e ngine again.
It takes a long time for the engine to warm up
fully when it is runn ing at id le. However, wear
and noxious emissions are especia lly high
when the engine is warm ing up. So you should
drive away as soon as you start the engine and
avo id running at high rpms while the engine is
still warming up .
(D Note
Do not leave engi ne idling unattended a f
ter start ing . If warning lights sho uld come
on to i ndicate improper operat ion, they
would go unheeded. Extended idling a lso
p rodu ces hea t, w hich could re sul t in ove r
hea ting or othe r dam age to the veh icle or
other p roperty .
Regular maintenance
A badly tuned engine unnecessarily wastes a
lot of fuel .
~ Have your ve hicle serviced at reg ula r i nter-
vals.
By having your veh icle regula rly serviced by an
Audi deal er he lps to ensure that it runs prop
erly and economically. The condition of your
vehicle not only affec ts its sa fe ty and ability to
hold its value, it also affects
fuel con sump
tion .
Check your oil each time you fill your tank.
The amou nt of oi l used is re lated to eng ine
load and speed.
It is normal fo r th e oil consumption of a new
engine to reac h its lowest value after a certa in
mileage has bee n driven .
IIJ,,
•
•
Page 218 of 292
216 Check ing and filling
Modern engine lubrication has taken a quan
tum leap in the last few years. Many synthetic
oils ava ilable today provide better engine lu
brication that can outlast traditional petrole
um-based oils, making them a smart choice
for use throughout the life of your Audi .
Whether you use synthetic or petroleum
based engine oil, the oil that you use must
conform to Audi 's oil quality standard
VW 502 00 to he lp keep your vehicle's engine
running smoothly and help prevent the for
mat ion of harmfu l deposits, sometimes called
"s ludge ," that ove r time can lead to expensive
repairs .
At the time of pr int ing , engine o ils available in
the U .S . and Canada that meet the exacting
specifi cations of A udi oi l standard VW 502 00
a re synthetic engine oils. This does not mean,
however, that every syn thetic engine oi l wi ll
meet Audi oil standard VW 502 00. So always
be sure that you use an approved oil.
To help prevent the format ion of harmful de
posi ts use only oi l with the fo llow ing specifi
cations printed on the oil container :
Audi oil standard VW 502 00
O il container labe ls may carry the specif ica
tion s ingly or in comb inat ion with other des ig
nations and oil qua lity standards .
Viscosity
Engine oi ls are graded according to their vis
cosity. The proper viscosity grade oil for your
engine depends on cl imactic or seasonal con
d itions where you drive. You can use oil with a
viscosity grade of SA E SW40 across all tem
pe ratu re ranges for normal driving conditions .
However, if eng ine o il viscos ity grade
SAE SW40 is no t ava ilable, you can a lso use
viscosity grade SAE SW-30 or SAE OW -40 as
long as it meets Audi o il quality standard
VW 502 00 specifications .
Because engine oil that meets the Audi oil
standard may not be available everywhere
when you need it, we strongly recommend
that you always carry with you an ext ra quart (
li te r) of oil that exp ress ly con forms to the
VW 502 00 spec ification, in case you have to
top
off the oil while on the road.
Only if the level of the o il is a t or be low the
min imum mark on the o il dipstick - and no oi l
that expressly conforms to Aud i oi l standard
VW 502 00 spec ificat ions is ava ilable -may
you top
off with a high quality engine oi l, pref
erably syn thet ic-based, that meets ACEA A3
or AP I SM spec ificat ions, but even then, only
in v iscosity grades SAE SW-40, SAE SW-30, o r
SAE OW- 40. However, during the ent ire time
be twee n oil change intervals, never top
off
with more than a total of 0.5 q t/lite r engine
o il that does no t conform to Audi o il specifica
tion VW 502 00.
For more informa tion about eng ine oi l tha t
has been approved for your veh icle, ple ase
contac t either yo ur authorized Aud i deale r or
Audi C ustome r Re lations at 1 (800) 82 2-2834
or visit o ur web site at www .audiusa.com or
www.aud icanada .ca. Here you w ill also find a
current list of oils (manufacturers, brand
names e tc.) tha t conform to Audi oil s tanda rd
vw 502 00 .
Changing the engine oil
The eng ine oi l and oil fi lter m ust be changed
according to the mileage (kilometers) and
time intervals specified in your ve hicle's War
ranty
& Maintenance booklet. Do not exceed
these intervals -harmful deposits from old
engine oil ca n reduce eng ine performance and
can lead to expensive engine repa irs .
Changi ng the oil at the recommended inter
vals is so very important because the lubricat ing proper ties of oil decrease gradually during
norma l veh icle use . If you are not sure when
you have your oil changed, ask your author ized Audi Serv ice Adv isor.
Under some circumstances the engine oil
shou ld even be cha nged more frequent ly .
Change oil more often if you drive mostly
sho rt distances, operate the ve hicle in dusty
areas o r most ly unde r stop-and-go t raff ic con-
di tions, o r when you use your vehi cle where .,..
Page 222 of 292
220 Check ing and filling
Engine cooling system
Coolant
The engine coolant performs two functions: it
keeps the engine from overheating and it pro
tects the engine from freezing in the winter .
The cooling system is sealed and generally re
quires little attention.
The cooling system has been filled at the fac
tory with a permanent coolant which does not need to be changed. The coolant consists of a
mixture of specially conditioned water and the
manufacturer's glycol-based coolant addi-
tive G13 antifreeze with ant icorros ion addi
tives (50% for USA models; 60% for Canadian models) . This mixture both assures the neces
sary frost protection and protects metal com
ponents in the engine's cooling system from
corrosion and scaling.
It a lso raises the boil
ing point of the coo lant.
D o not reduce the concentration o f the coo l
ant in the summer by adding plain water .
The
proportion of coolant add it iv e mu st be at
lea st 50 % but not mo re than 60 %
to main
tain antifree ze protection and cooling efficien
cy. If the coolant frost protect ion is too low,
the coolant could freeze and damage the veh i
cle heating and eng ine cooling system .
For year-round driving, antifree ze is added at
the factory for temperatures down to:
- -31° F(-35°C)USA
- - 40 ° F ( -40 °C) Canada.
I f you must add coo lant, use a m ixture of wa
ter and coolant addit ive. Mixing the coolant
addit ive wi th dist illed wate r is recommended.
_& WARNING
Before yo u check any thing in the engine
compartment, always read and heed all
WARNINGS
¢ &. in Working in the engine
compartment on page 213.
(D Note
- Before winter se ts in, have the coolant
checked to see if the coolant additive in
-
your vehicle is sufficient to meet the cli mate conditions . This is especia lly impor
tant if you live in a reg ion where the win
ter is extreme ly cold. If necessary, in
crease the proportion of coolant add itive
to 60% .
- When adding coolant additive to your
cooling system , remember :
- We recommend us ing on ly coolant ad
d it ive G12 ++ or G1 3 (check the labe l)
for your vehicle . This coolant additive is
avai lable at autho rized Audi dea lers .
Other types of antifreeze can signifi
cantly reduce corrosion protection. The
resu lting corrosion can cause a loss of
coolant and serious engine damage .
- Do not add any type of rad iator leak seal
ant to your vehicle's engine coolant.
Add ing radiator repa ir flu id may adverse
ly affect the function and performance of
your cooling system and could resu lt in
damage not covered by you r New Ve hicle
Limited War ran ty.
Checking the engine coolant level
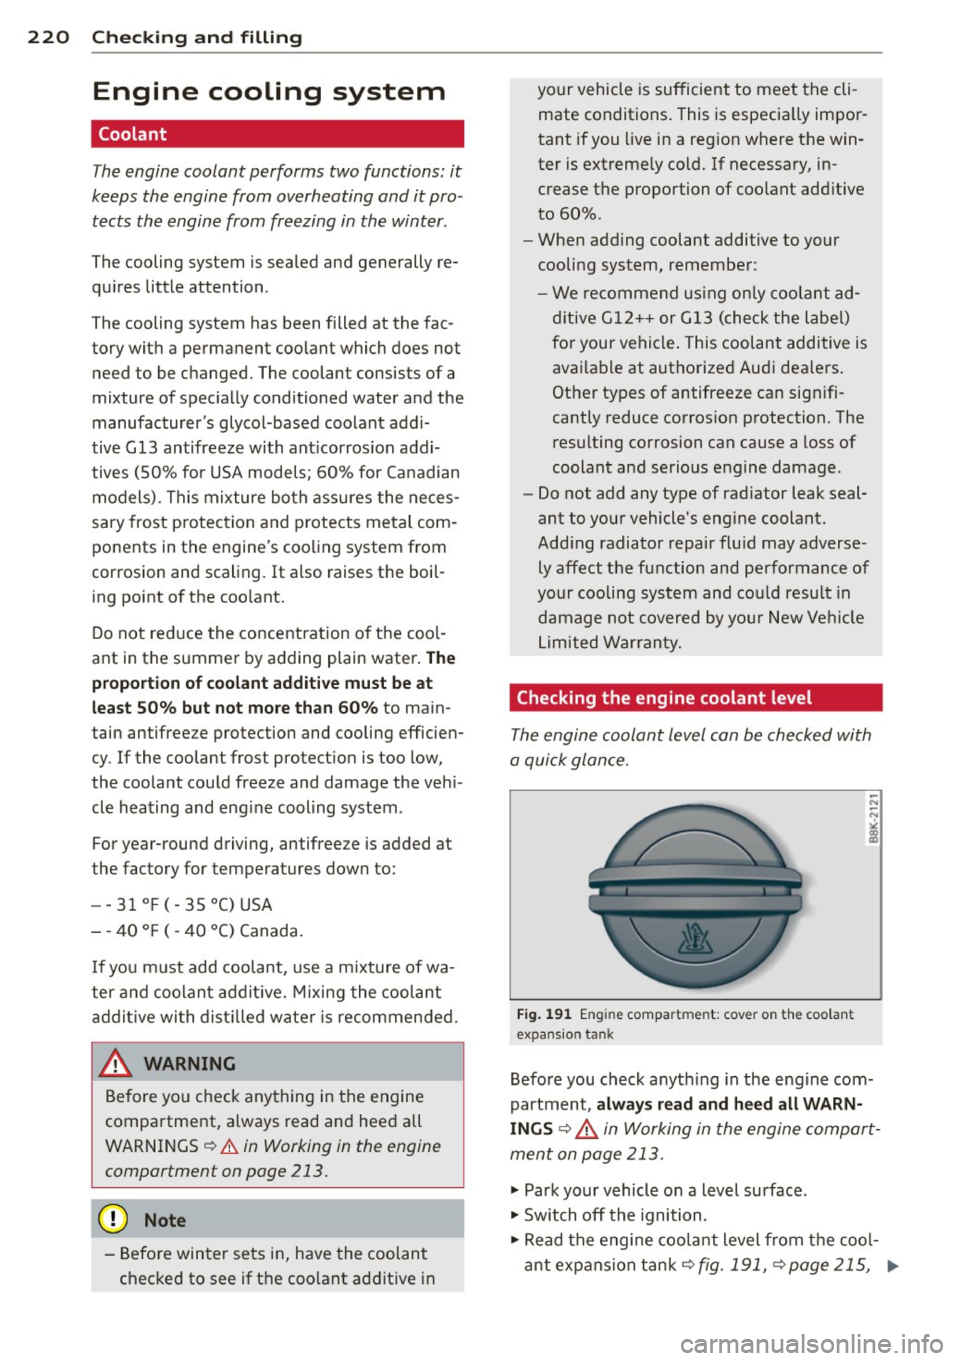
The engine coolant level can be checked with
a quick glance.
F ig . 1 91 Engin e compar tmen t: cover o n th e coolant
expans io n tank
Befo re you check anyth ing in the engine com
partment,
always r ead and he ed all WARN
INGS
¢ &_ in Working in the engine compart
ment on page 213.
.,. Park your vehicle on a level surface .
.,. Switch off the ignition .
.,. Read the engine coo lant level from the coo l
a nt expansion tank¢
fig . 191, ¢ page 215, ..,.
Page 225 of 292
Before you check anything in the engine com
partment,
always r ead and heed all W ARN
ING S ~ A in Working in the engine compart
ment on page 213.
.. Read the brake fluid level from the brake
fluid reservoir ¢
fig. 192, ~ page 215,
fig . 188.
The brake fluid level must be be
tween the "MIN" and "MAX" markings.
The location of the brake fl uid reservoir can be
seen in the engine compartment illustration
¢page 215.
The fluid level may drop slightly after some
time due to the automatic adjustment of the brake pads . This is not cause for alarm .
If the brake fluid level falls considerably be
l ow the "MIN" mark, the brake wa rning/indi
cator light
1111 (U .S . models)/ . (Canadian
models) will come on
~ page 14. Do not con
tinue to operate the vehicle. The comp lete
brake system shou ld be thoroughly checked
by an authorized Audi dealer or other quali
f ied fac ility and the cause corrected . If the
b rake fluid level is too low, the brake warn ing/
i ndicator light w ill illuminate . Contact an au
thor ized Audi dealer
imm ediately .
Changing brake fluid
Have the brake fluid changed by an experi
enced technician .
Brake fluid absorbs moisture from the a ir . If
the water content in the brake fluid is too
hi gh, cor rosion in the brake system may result
after a per iod of t ime . The bo iling po int of the
b rake fluid w ill also decrease considerab ly and
decrease braking performance.
Therefore, the brake flu id must be changed
ev ery two ye ars. A lways use new b rake fluid
which confo rms to Federal Motor Vehicle
Standard "FMVSS
116 DO T 4".
The brake flu id rese rvoi r ca n be difficult to
r each, therefo re , we recommend that yo u
h ave the brake fl uid changed by you r autho r
i zed
Audi de aler . Your dea le r has the correct
Checkin g and fillin g 223
tools, the right brake fl uid and the know -how
to do this for you .
A WARNING
-Brake flu id is poisonous. It must be stor
ed only in the closed or iginal container
out of the reach of children!
- Brake failure can resu lt from o ld or inap
propriate brake f lu id. Observe these pre
cautions:
- Use only b rake fluid tha t meets SA E
spe cificat ion
J 17 03 and conforms to
Federa l Moto r Ve hicl e Standard
116.
Always check with your authorized Audi
dealer to make sure yo u are using the
correct brake fluid. The correct type of
brake f luid is also ind icated on the
brake f luid reservoir .
- The brake fluid must be new. Heavy use
of the brakes ca n cause a vapor lock if
the brake fluid is left i n the system too
long. This can se riously affect the effi
c iency of the b rakes as well as your
safety , T his could result in an accident.
(!) Note
Brake fluid will damage the paint of your
vehicle.
@) For the sake of the environment
Because of the prob lem of proper disposal
of brake fluid as well as the spec ial too ls
r equired and the necessary expertise, we
r ecommend that you have th e brake flu id
changed by you r autho rized Aud i dea le r.
Battery
General information
Under normal operating cond itions, the bat
tery in your Audi does not need any ma inte
nance . With
high outside temperatu res or
lo ng da ily drives we recommend that you have
the e lectrolyte leve l che cked by a se rv ice fa
c il ity. The ele ctroly te leve l should also be
chec ked each t ime the battery is cha rged
~ page 226 . Iii>
•
•
Page 235 of 292
Tires an d wheel s 233
you have stored. The system does not recog
nize the load condition of your vehicle.
The effectiveness of the ti re pressu re monitor
ing sys tem w ill be impaired if you store no r
mal load pressures but then operate the vehi
cle at its maximum load¢,& .
See the illustration ¢
fig. 195 for the location
of the label on dr iver's side B-pillar (color of
the actual labe l and exact location on the ve
hicle wi ll vary slig htly) .
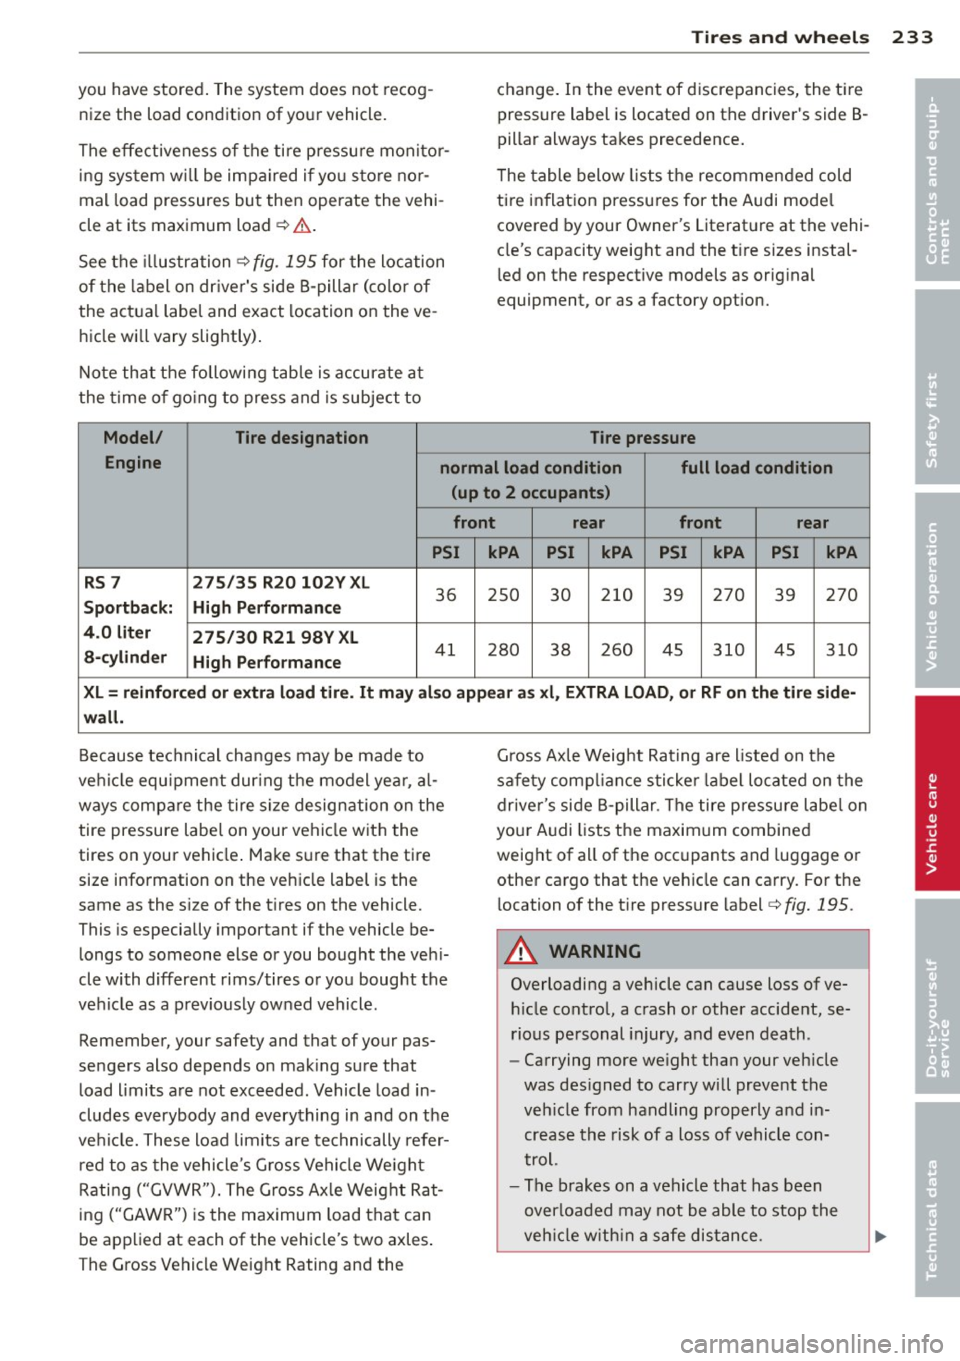
Note that the fo llowing tab le is accurate at
the t ime o f go ing to press and is subject to
Model/ Tire de
signation
c h ange. In the event of discrepancies, the ti re
pressure label is located on the driver's side B
pillar always takes precedence .
T he table below lists the recommended cold
ti re inflat ion pressures for the Audi mode l
covered by your Owner's Literat ure at the vehi
cle's capacity weight and the t ire sizes instal
l ed on the respective models as orig inal
equipment, or as a factory option.
Tire pressure
Engine normal load condition full load condition
(up to 2 occupants )
front r ear front rear
PSI kPA PSI kPA PSI kPA PSI kPA
RS 7 275/35 R20 102V XL
36 2S0 30 210 39 270 39 270 Sportback: High P erformanc e
4.0 lit er
275 /30 R21 98V XL
a -cy linder
High Performance
41 280 38 260 45 310 4S 3 10
X L = r einfor ced or extra load tir e. It ma y al so appear a s xl , EXTRA LOAD, or RF on th e tire side -
w all.
Because tec hnical changes may be made to
ve hicl e equ ipment dur ing the model yea r, a l
ways compare the tire s ize designation on the
tire pressure label on your vehicle with the
tires on your vehicle . Make s ure that the tire
size information on the vehicle label is the
same as the s ize of the t ires on the vehicle.
This is especially important if the vehicle be
longs to someone else or you bought the veh i
cle with different rims/tires or you bought the
veh icle as a previously owned vehicle.
Remember, your safety and that of your pas
sengers also depends on mak ing sure that
load limits are not exceeded . Vehicle load in
cludes everybody and everything in and on the
ve hicl e. These load limits are technically refer
r ed to as the vehicle's G ross Vehicle We ight
Rating ("GVWR"). The Gross Ax le Weight Rat
ing ("GAWR") is the maximum load that can
be applied at each of the vehicle's two axles .
The Gross Vehicle We ight Rating and the G
ross Ax le Weig ht Rating are listed on the
sa fety comp liance sticke r label lo cated on the
driver's side B-pillar . The tire pressu re labe l on
your A udi lists the maximum combined
weight of all of the occ upants and luggage o r
other cargo that the veh icle can carry. For the
location of the t ire pressure label ¢
fig. 195.
A WARNING
-Overloading a vehicle can cause loss of ve-
h icle contro l, a crash or other accide nt, se
rious personal injury, and even death.
- Carrying more we ight than your veh icle
was des igned to carry will prevent the
veh icle from handling properly a nd in
crease the risk of a loss of vehicle con
trol.
- The brakes on a vehicle that has been
overloaded may not be able to stop the
veh icle w ith in a safe distance.
•
•
Page 246 of 292
24 4 T ire s and wheel s
Snow chains
Snow chains may be fitted on ly to the front
wheels, and only to certain tire sizes. Ask your
authorized Audi dealer on whic h tire sizes
snow chains can be used.
I f you are going to use snow chains , then you
must install them on the front wheels at
l east.
The snow chains must have low-profile links
and must not be thicker than 0.4 inch (10 ,5 mm), including the lock .
Remove wheel center covers and tr im discs
before putting snow cha ins on your vehicle
c:;, Q) _ For safety reasons cover caps must the n
be fitted over the whee l bolts. These are ava il
ab le from authorized Audi dea lers.
A WARNING
Using the wrong snow chains for yo ur vehi
cle or installing them incorrectly can in
crease the risk of loss of control leading to
ser ious personal inj ury.
- Snow chains are ava ilable in different
sizes. Always make sure to follow the in
struct ions provided by the snow chain
manufacturer .
- When driving w ith snow chains never
dr ive faster than the speed permitted for
your specific snow cha ins.
- Always observe local regulat ions .
([) Note
-Remove snow cha ins before driving on
roads not covered with snow to avoid
damaging t ires and wear ing the snow
chains down unnecessar ily.
- Snow chains, wh ich come into d irect con
tact with the wheel rim, can scratch or
damage it . Therefore, make sure that the
snow chains are suitab ly covered . Check
the position of the snow chains after
driving a few yards and correct if neces
sa ry. Follow the i nstructions from the
snow cha in manufacture r when doing so.
- If the Adaptive Air Suspension* should
malfunction, do no t mo unt or use snow chains because the vehicle will be ex
treme ly low. If you do drive with snow
chains on while the vehicle is at this lev
el, the snow cha ins might severely dam
age the whee lhouse and other parts of
the vehicle .
(D Tips
Where snow chains are mandatory on cer
tain roads, th is normally a lso applies to
vehicles with all-wheel drive.
Wheel bolts
Wheel bol ts mus t alway s be tightened to the
correc t torque.
The design of wheel bolts is matched to the
factory installed rims . If different r ims are fit
ted, the correct wheel bol ts with the righ t
length and correct ly shaped bolt heads must
be used . T his ensures that wheels are fitted
securely and that the b rake system functions
co rrect ly.
In certa in circumstances, you may not use
wheel bolts from a different veh icle -even if it
is the same model
c:;, page 275 .
A WARNING
Imp rope rly t ightened or ma inta ined wheel
bo lts can become loose c ausing loss of
control, a col lision and serio us pe rsonal i n
jury .
- Always keep the wheel bo lts and the
threads in the wheel hubs clean so the
wheel bo lts can turn easily and be prop
erly tightened.
- Never g rease or oil the wheel bolts and
the threads in t he wheel hubs . They can
become loose while driv ing if greased or
oiled, even if t ightened to the specified
torque.
- On ly use wheel bolts that belong to the
rim being installed .
- Never use different wheels bolts on yo ur
veh icle.
- Always maintain the correct t ightening
torque for the whee l bolts to reduce the