Mode AUDI S3 2015 Service Manual
[x] Cancel search | Manufacturer: AUDI, Model Year: 2015, Model line: S3, Model: AUDI S3 2015Pages: 310, PDF Size: 76.15 MB
Page 116 of 310
114 Automatic transmission
Shifting manually (tiptronic mode)
Applies to vehicles: with S tron ic t ransmiss ion/ s hift pa d
d les
The tiptronic allow the driver to shift the
gears manually.
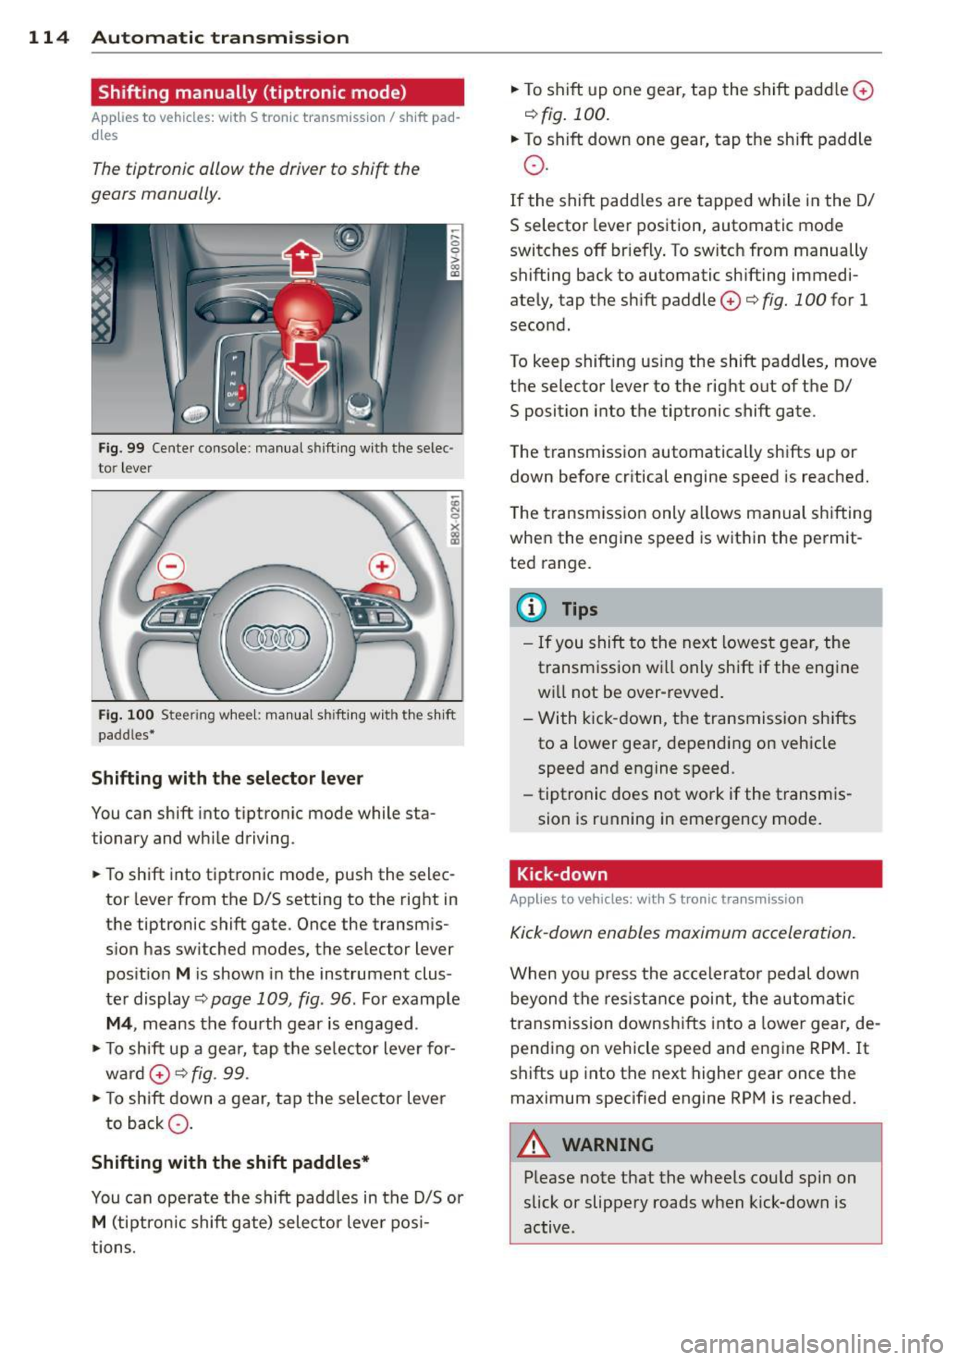
F ig. 99 Cente r console : manual shifting with the selec·
tor lever
Fi g. 100 Steer ing whee l: manua l sh ift ing w ith the s hift
paddles•
Shifting with the selector lever
You can shift into tiptronic mode while sta
tionary and while driving.
.. To shift into tiptronic mode, pus h the selec
tor lever from the D/S setting to the right in
the tiptronic shift gate . Once the transmis
s ion has switched modes, the selector lever
pos it ion
M is shown in the instrument clus
ter display
c:> page 109, fig. 96. For example
M4, means the fourth gear is engaged.
.. To shift up a gea r, tap the selector lever for
ward
0 c:>fig. 99.
.. To shift down a gear, tap the selector lever
to back Q.
Shifting with the shift paddles*
You can operate the shift paddles in the D/S or
M (tiptronic shift gate) selector lever posi
tions. ..
To shift up one gear, tap the shift paddle
0
c:> fig. 100.
.. To shift down one gear, tap the shift paddle
o.
If the shift padd les are tapped while in the D/
S selector lever position, automatic mode
switches
off briefly . To switch from manually
shifting back to automatic sh ifting immedi
ately, tap the shift paddle
0 c:> fig. 100 for 1
second.
To keep shifting using the shift paddles, move
the selector lever to the rig ht out of the D/
S position into the tiptronic shift gate.
The transmission automatically shifts up or
down before critical engine speed is reached.
T he transmission only allows manual shifting
when the engine speed is within the permit
ted range.
(D Tips
- If you shift to the next lowest gear, the
transmission w ill only shift if the engine
will not be over-revved.
- With kick-down, the transmission shifts
to a lower gear, depending on vehicle
speed and engine speed.
- tiptronic does not work if the transmis
sion is run ning in emergency mode.
· Kick-down
App lies to vehicles: wit h S t ronic tra nsmi ssio n
Kick-down enables maximum acceleration.
When yo u press the accele rator pedal down
beyond the resistance point, the automatic
transmission downshifts into a lower gear, de
pending on vehicle speed and engine RPM. It
shifts up into the next higher gear once the
maximum specified engine RPM is reached.
A WARNING
-Please note that the wheels could spin on
slick or slippery roads when kick-down is
active.
Page 117 of 310
M N
ci > co ,...., \!) ..,.,
M ..,., ,....,
Launch Control-Program
App lies to vehicles: with launch control
The Launch Control Program enables maxi
mum acceleration.
Requirement : The engine must be at operat
ing temperature and the steering wheel must
not be turned .
.. With the engine running, press the
!.$OFFI
button briefly one time 1) .
.. Pull the selector lever back out of the 0/S
position briefly to select the S position, or
press it toward the right into the t ipt ronic
pos ition or select the
d ynamic driv ing mode
i n drive select*
~ page 106.
.. Press the brake peda l firmly with your left
foot and hold it all the way down for at least
1 second.
.. At the same time, press the gas peda l all the
way down with your right foot unti l the en
gine reaches and stays at a high RPM level.
.. Remove your left foot from the brake.
A WARNING
- Always adapt your driving to the traffic
flow.
- Only use Launch Control when road and
t raff ic conditions a llow it and other driv
ers wi ll not be endangered or impacted
by yo ur driving and the veh icle's acceler
a tion.
- Please note tha t the dr ive whee ls can
spin and the vehicle can brea k away
when sport mode is switched on, espe
c ially when the road is sl ippery.
- Once the vehicle has started moving,
press the
I.$ OFF I button br iefly to turn
the sport mode off.
(j) Tips
- The transm ission tempe rat ure may in
crease significantly after using the
l ) In vehicles with a dr iver info rmat ion system, an ESC
light in the in stru m ent cl us ter stays on contin uo usly
and the m essage
Stabilizatio n cont rol (ESC): spor t.
W arning! Restricted stability
appears temporarily.
Automa tic tran sm iss ion 115
Launch Control Program . If that hap
pens, the program may not be availab le
for a few m inutes. It will be ava ilable
again after a cool-down per iod.
- When accelerating using the Launch
Contro l Program, all vehicle parts are
subject to heavy loads. Th is can lead to
increased wear .
Emergency mode
Applies to vehicles: with S tronic transm ission
In the event of a system malfunction, there is
an emergency program.
If all of the selector lever positions are high
li ghted with a light backgro und in the instru
ment cluster d isplay, there is a system mal
funct ion and the S tronic transmission is run
ning in the emergency program . The vehicle
can still be driven in emergency mode, but on
ly w ith reduced speed and not in all gears. In
some cases, the veh icle
c ann ot driv e in re
v e rs e .
(D Note
If the transmission runs in emergency
mode, drive to your author ized Audi dealer
or q ua lified repa ir facil ity immed iate ly to
have the ma lf u nction corrected.
Transmission malfunction
• Tran smiss ion malfuncti on! Please stop
the vehicle and select P
T here is a malfunction in the transmiss ion .
Park the vehicle securely and do not continue
driv ing. See an authorized Audi dealer or au
thorized Audi Service Facility for assistance.
• Tran smi ssion overh eatin g! Plea se stop
the vehicle!
The transm iss io n is too hot and can become
damaged . Stop and let the transmission cool .,.
•
Page 118 of 310
116 Automatic transmission
with the eng ine runn ing (a t id le) in the P se
lector lever position . Then the indicator light
and the message turn off, drive to an author
ized A udi dealer or qualified repair facility im
mediately to have the malfunct ion corrected.
If the indicator lig ht and the dr ive r message
do not tur n off, do not cont inue dr iv ing. See
a n author ized Audi d eal er or author ized A udi
S ervi ce Fa cili ty for a ssis tance.
Di] Transmiss ion malfunction: you can con
tinue driving
Drive to an autho rized Aud i dea le r or a uthor
ized A udi Service Facility immed iate ly to have
the ma lf u nction corrected .
Di] Transmission malfunction: no reverse
gear (you can continue driving)
D rive to an authorized Aud i dea le r or a uthor
ized A udi Service Facility immediate ly to have
the ma lf u nct ion co rrected .
Di] Transmi ssion malfunction: You can con
tinue dri ving in D until engine off
Drive the ve hicle away from mov ing traff ic and
p ar k. See an au thori zed A udi d ealer or author
iz ed A udi Service F acility for assis tance .
Di] Transmi ssion overheating! Please adapt
driving style
Continue driving moderate ly. When t he in di
cato r ligh t turns off, you can continue dr iving
normally .
Di] Transmission : Please press brake pedal
and select gear again
If t h e tra nsmission mal functions beca use the
temperature is too h igh , a message appears
when t he transmission is coo led.
Selector lever emergency release
Applies to vehicles: with S tronic transmission
If the vehicle 's power supply fails, the selec
tor lever can b e released in an emergency.
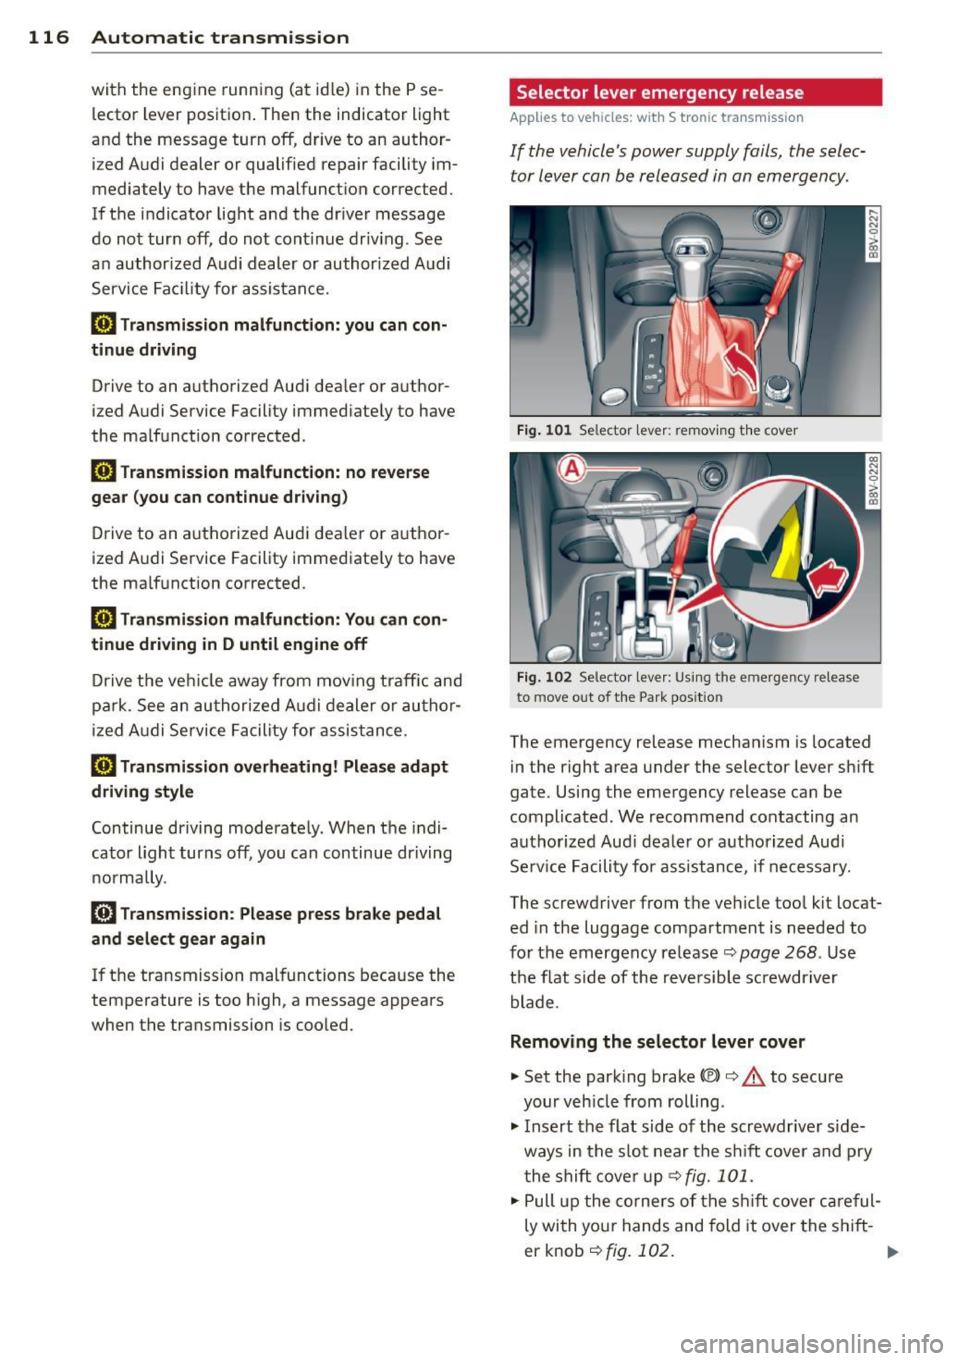
Fig. 101 Se lector leve r: remov ing t he cover
Fig. 10 2 Selector leve r: Us ing the emergency re lease
to move out of t he Park pos itio n
The emergency release mechanism is located
in the right a rea under the selector lever sh ift
gate. Using the eme rgency release ca n be
complicated. We recommend contacting an
au tho rize d Audi d eale r o r a uth o rized Aud i
Se rv ice Facility for assistance, if necessary.
The sc rewd river from t he ve hicle too l kit locat
ed in the luggage compartmen t is needed to
fo r the emergency release ¢ page
268 . Use
the f lat s ide of the reve rsible screwdriver
blade .
Removing the selector lever cover
"'Set the park ing brake «el)¢&. to secure
your veh icle from rolling .
"' Insert the flat side o f the scr ewdr ive r side
ways in the s lot near the s hift cove r and pry
t he shi ft cove r up <=> fig.
101 .
.,. Pull up the co rner s of the shift c over car eful
ly wi th yo ur hands and fold it over the s hift-
er knob ¢fig.
10 2. ..,.
Page 123 of 310
....,
N
0 > co
rl I.O
"' ....,
"' rl
General information
Applies to vehicles: with park ing system p lus wit h rear
view ca mera
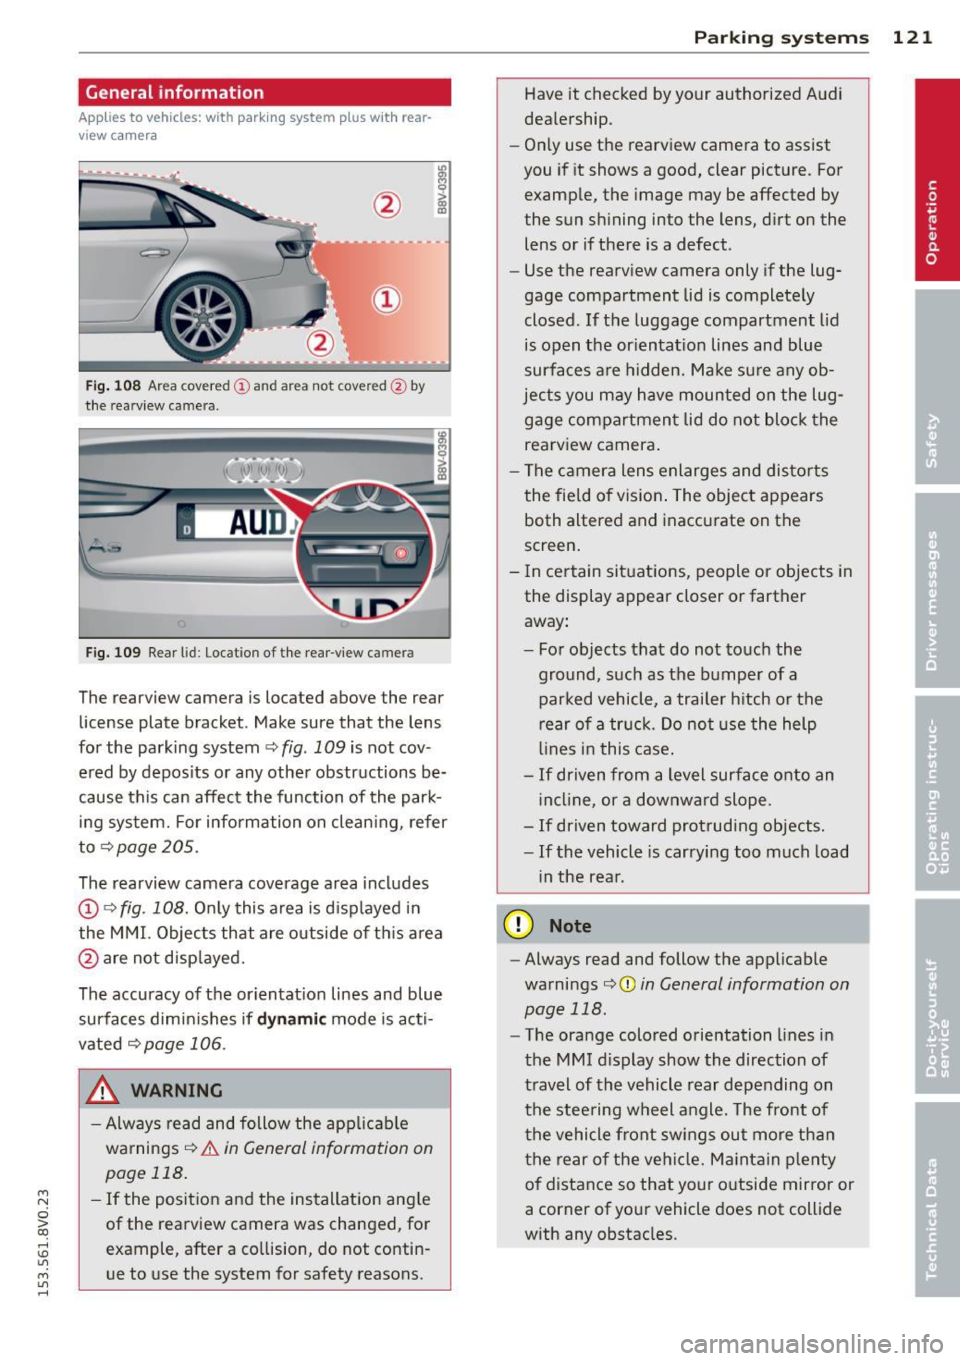
Fig. 108 Area covered
(D and area not covered @by
the rearv iew camera.
Fig. 109 Rear l id: Location of the rear-v iew camera
The rearview camera is located above the rear
license plate bracket . Make sure that the lens
for the parking system ~
fig. 109 is not cov
ered by deposits or any other obstructions be
cause this can affect the function of the park ing system. For information on cleaning, refer
to~page205.
The rearview camera coverage area includes
(D ¢ fig. 108. Only this area is displayed in
the MMI. Objects that are outside of this area
@ are not displayed.
The accuracy of the orientation lines and blue
surfaces diminishes if
dynamic mode is acti
vated
¢page 106.
_& WARNING
-Always read and follow the applicable
warnings¢
& in General information on
page 118.
- If the position and the installation angle
of the rearview camera was changed, for
example, after a collision, do not contin
ue to use the system for safety reasons .
Parking systems 121
Have it checked by your authorized Audi
dealership.
- Only use the rearview camera to assist
you if it shows a good, clear picture. For
example, the image may be affected by
the sun shining into the lens, dirt on the
lens or if there is a defect.
- Use the rearv iew camera only if the lug
gage compartment lid is completely
closed.
If the luggage compartment lid
is open the orientation lines and blue
surfaces are hidden. Make sure any ob
jects you may have mounted on the lug gage compartment lid do not block the
rearview camera.
- The camera lens enlarges and distorts
the field of vision. The object appears
both altered and inaccurate on the
screen.
- In certain situations, people or objects in
the display appear closer or farther away:
- For objects that do not touch the
ground, such as the bumper of a
parked vehicle, a trailer hitch or the
rear of a truck. Do not use the help
lines in this case.
-If driven from a level surface onto an
incline , or a downward slope.
- If driven toward protruding objects.
-If the vehicle is carrying too much load
in the rear.
(D Note
-Always read and follow the applicable
warnings
c:>(D in General information on
page 118.
- The orange colored orientation lines in
the MMI display show the direction of
travel of the vehicle rear depending on
the steering wheel angle. The front of
the vehicle front swings out more than
the rear of the vehicle. Maintain plenty
of distance so that your outside mirror or
a corner of your vehicle does not collide
with any obstacles.
Page 127 of 310
M N
0 > co ,...., \!) ..,.,
M ..,., ,....,
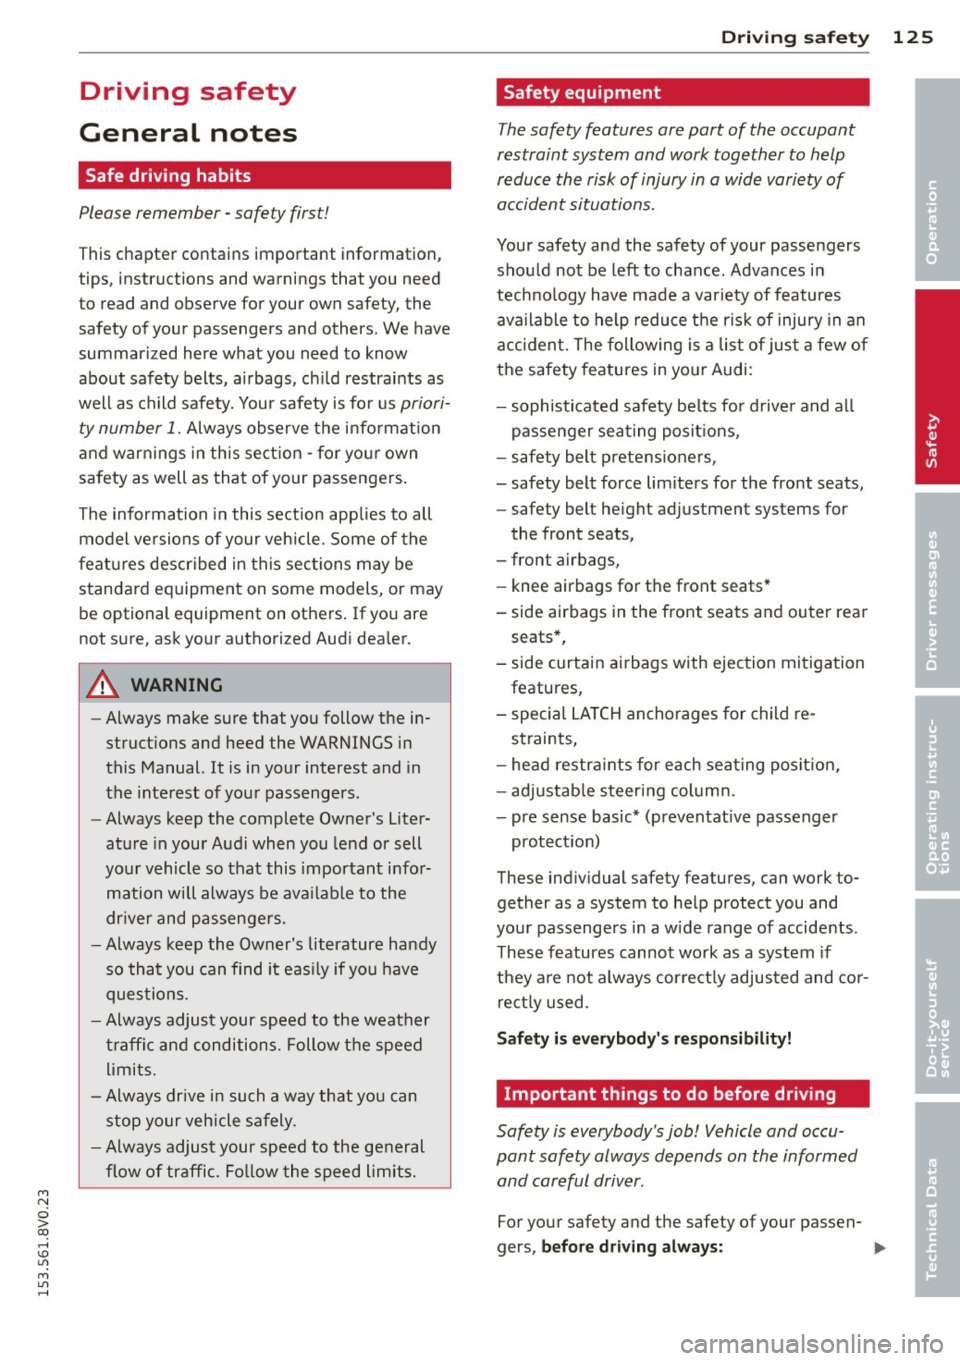
Driving safety
General notes
Safe driving habits
Please remember -safety first!
This chapter contains important information,
tips, instructions and warnings that you need
to read and observe for your own safety, the
safety of your passengers and others . We have
summarized here what you need to know
about safety belts, airbags, ch ild restraints as
well as child safety. Your safety is fo r us
priori
ty number 1.
Always observe the information
and warnings in this sect ion - for yo ur own
safety as well as that of your passengers.
The information in this section app lies to all
model ve rsions of your vehicle . Some of the
feat ures described in this sections may be
standard equipment on some models, or may
be optional equipment on others. If you are
not sure, ask your authorized Audi dea ler.
A WARNING
- Always make sure that you follow the in
struct ions and heed the WARNINGS in
this Manual. It is in your interest and in
the interest of your passengers.
- Always keep the complete Owner's Liter
ature in your Audi when you lend or sell
your vehicle so that this important infor
mation will always be ava ilable to the
dr iver and passengers.
- Always keep the Owner's literature handy
so that you can find it eas ily if you have
questions.
- Always adjust your speed to the weather
traffic and conditions. Follow the speed
limits.
- Always drive in such a way that you can
stop your vehicle safely .
- Always adjust your speed to the general
flow of traffic. Fo llow the speed limits.
Dri ving sa fe ty 12 5
Safety equipment
The safety features are part of the occupant
restraint system and work together to help
reduce the risk of injury in a wide variety of
accident situations.
Your safety and the safety of your passengers
should not be left to chance . Advances in
techno logy have made a variety of features
available to help reduce the risk of injury in an
acc ident. The following is a list of just a few of
the safety features in yo ur Audi :
- sophisticated safety be lts fo r driver and all
passenger seating posit ions,
- safety belt pretens ioners,
- safety belt force lim iters for the front seats,
- safety belt he ight adjustment systems for
the front seats,
- front airbags,
- knee airbags for the front seats*
- side airbags in the front seats and outer rear seats *,
- side curtain ai rbags with ejec tion mitiga tion
features,
- specia l LATCH an chorages for child re-
straints,
- head restra ints for each seating posit ion,
- adjustab le steer ing column.
- pre sense basic* (preventat ive passenger
protect ion)
These ind iv idual safety features, can work to
gether as a system to help protect you and
your passengers in a wide range of accide nts .
T hese features cannot work as a system if
they a re not always correctly adjusted and co r
rect ly used .
Safety is ev erybody' s respon sibil it y !
Important things to do before driving
Safety is everybody's job! Vehicle and occu
pant safety always depends on the informed and careful driver .
For your safety and the safety of your passen
gers,
b efor e driv ing alw ay s: ...
•
•
•
Page 162 of 310
160 Airbag system
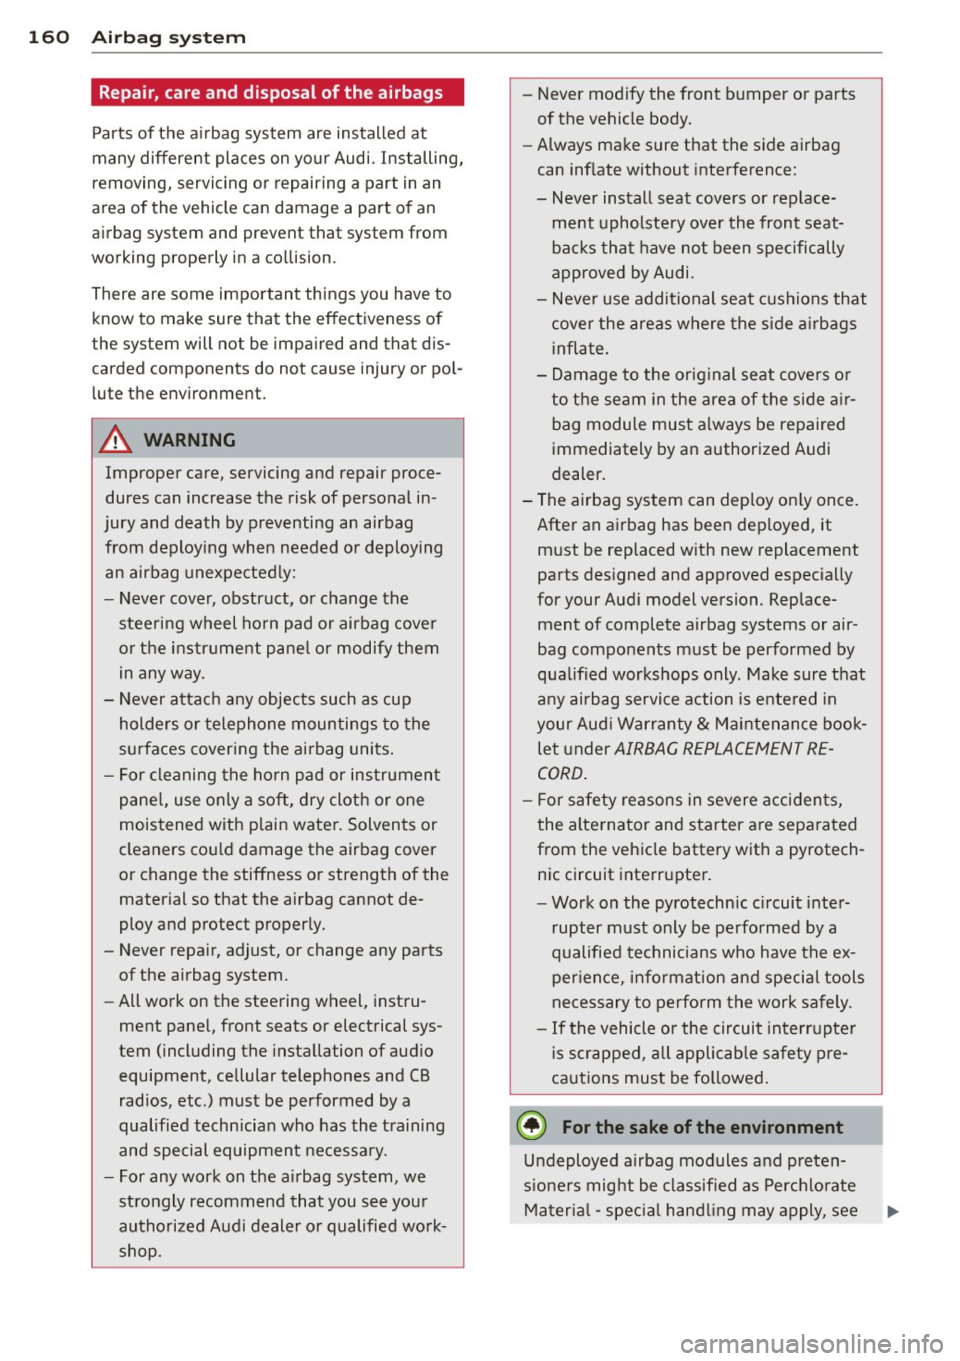
Repair, care and disposal of the airbags
Parts of the airbag system are installed at
many different places on your Audi. Installing,
removing, servicing or repairing a part in an
area of the vehicle can damage a part of an
airbag system and prevent that system from
working properly in a collision.
There are some important things you have to know to make sure that the effectiveness of
the system will not be impaired and that dis
carded components do not cause injury or pol lute the environment.
A WARNING
Improper care, servicing and repair proce
dures can increase the risk of personal in
jury and death by preventing an airbag from deploying when needed or deploying
an airbag unexpectedly:
- Never cover, obstruct, or change the
steering wheel horn pad or airbag cover
or the instrument panel or modify them
in any way.
- Never attach any objects such as cup
holders or telephone mountings to the
surfaces covering the airbag units.
- For cleaning the horn pad or instrument
panel, use only a soft, dry cloth or one
moistened with plain water. Solvents or
cleaners could damage the airbag cover
or change the stiffness or strength of the material so that the airbag cannot de
ploy and protect properly.
- Never repair, adjust, or change any parts
of the airbag system.
- All work on the steering wheel, instru
ment panel, front seats or electrical sys
tem (including the installation of audio
equipment, cellular telephones and CB
radios, etc .) must be performed by a
qualified technician who has the training
and special equipment necessary.
- For any work on the airbag system, we
strongly recommend that you see your
authorized Audi dealer or qualified work
shop. -
Never modify the front bumper or parts
of the vehicle body.
- Always make sure that the side airbag
can inflate without interference:
- Never install seat covers or replace
ment upholstery over the front seat
backs that have not been specifically
approved by Audi.
- Never use additional seat cushions that
cover the areas where the side airbags
inflate.
- Damage to the original seat covers or
to the seam in the area of the side air
bag module must always be repaired
immediately by an authorized Audi
dealer.
- The airbag system can deploy only once.
After an airbag has been deployed, it must be replaced with new replacement
parts designed and approved especially
for your Audi model version. Replace
ment of complete airbag systems or air
bag components must be performed by
qualified workshops only . Make sure that
any airbag service action is entered in
your Audi Warranty
& Maintenance book
let under
AIRBAG REPLACEMENT RE
CORD.
- For safety reasons in severe accidents,
the alternator and starter are separated
from the vehicle battery with a pyrotech nic circuit interrupter.
- Work on the pyrotechnic circuit inter
rupter must only be performed by a
qualified technicians who have the ex perience, information and special tools
necessary to perform the work safely.
- If the vehicle or the circuit interrupter
is scrapped, all applicable safety pre
cautions must be followed.
@) For the sake of the environment
Undeployed airbag modules and preten
sioners might be classified as Perchlorate
Material -special handling may apply, see
Page 174 of 310
172 Child Saf ety
c::> page 144, Airbag system and
c::> page 170 , Important things to
know.
Always rep lace child restraints that were
installed in a vehicle during a crash . Dam
age to a child restraint that is not visible
could cause it to fail in another collision
situation.
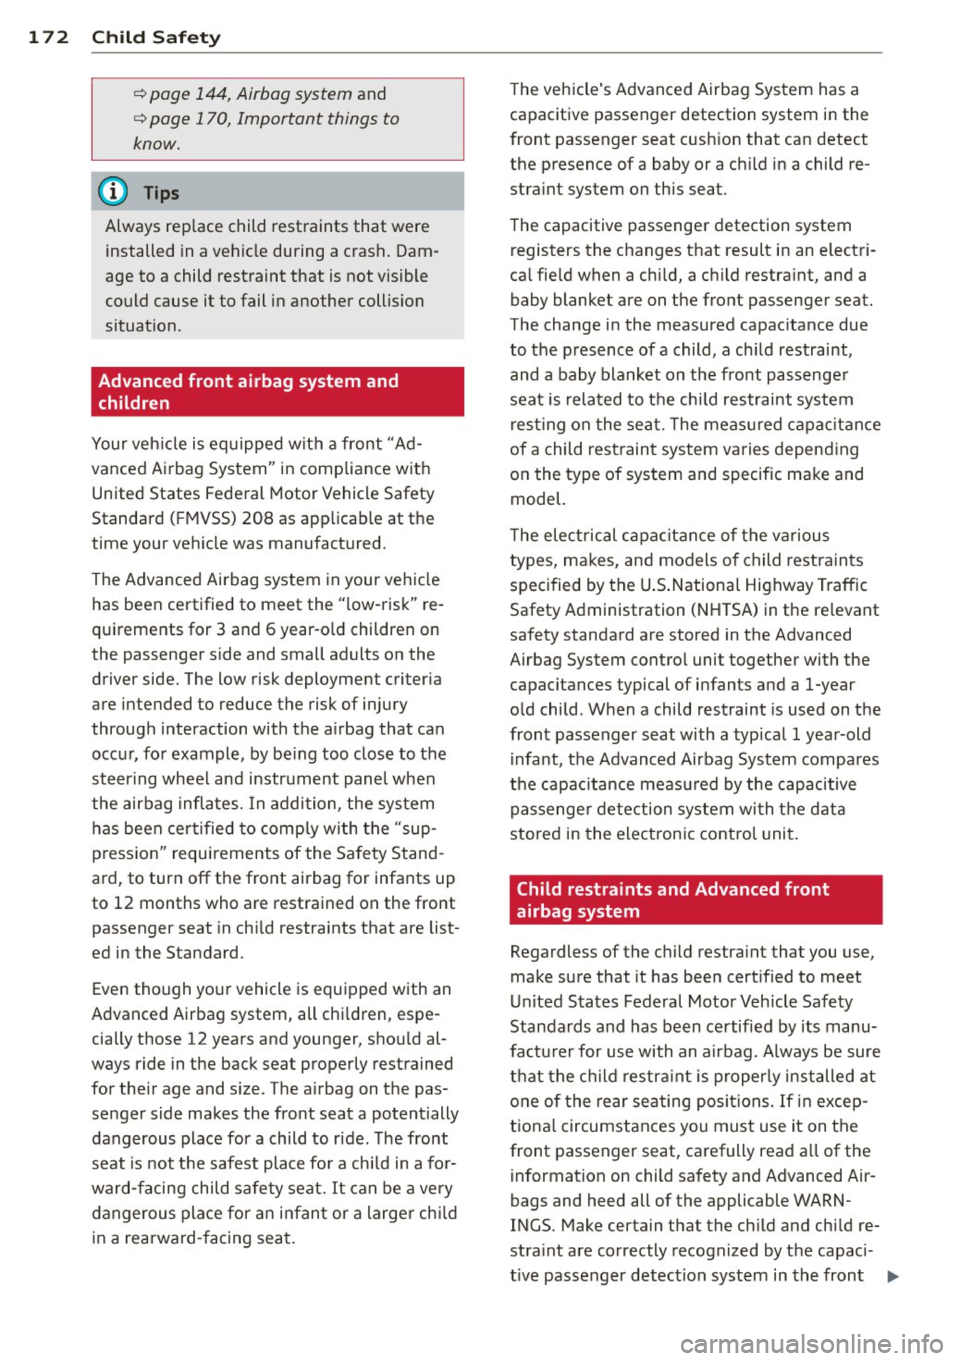
Advanced front airbag system and children
Your veh icle is eq uipped with a front "Ad
vanced Airbag System" in compliance with
United States Federal Motor Vehicle Safety
Standard ( FMVSS) 208 as applicab le at the
time your vehicle was manufactured.
The Advanced Airbag system in your vehicle has been certified to meet the " low -risk" re
quirements for 3 and 6 year-o ld children on
the passenger side and small adults on the
driver side. The low risk deployment criter ia
are intended to reduce the risk of injury
through interaction with the a irbag that can
occur, for example, by be ing too close to the
steering wheel and instrument panel when
the airbag inflates. In addi tion, the system
h as been certified to comply w ith the "sup
pression" requirements of the Sa fety Stand
ard, to turn
off the front airbag for infants up
to 12 months who a re restrained on the front
passenger seat in chi ld restraints that are list
ed in the Standard.
Even though yo ur vehicle is equipped with an
Advanced Airbag system, all chi ldren, espe
cially those 12 years and younger, shou ld al
ways ride in the back seat properly restrained
for the ir age and s ize . The a irbag on the pas
senger side makes the front seat a potentially
dangerous place for a child to ride. The front
seat is not the safest place fo r a ch ild in a fo r
ward-facing child safety seat. It can be a ve ry
dangerous place for an infan t or a large r ch ild
in a rearward- facing seat. The vehicle's Advanced Airbag System has a
capacitive passenger detection system i n the
front passenger seat cush ion that can detect
the presence of a baby or a ch ild in a child re
stra int system on this seat.
The capacitive passenger detection system registers the changes that result in an electri
ca l fie ld when a chi ld, a child restra int, and a
baby blanket are on the front passenger seat.
The change in the measured capac itance due
to the p resence of a child, a ch ild restraint,
and a baby blanket on the front passenge r
seat is related to the chi ld restraint system
rest ing o n the seat. The meas ured capa cit an ce
of a child restrain t system varies depend ing
on the type of system and specific make and
model.
T he electrical c apa citan ce of the various
types, makes, and models of child restraints
specified by the U .S . Nationa l Highway Traffic
Safety Administration (NH TSA) in the re levant
safety standard are stored in the Advanced
Airbag System contro l unit together with the
capacitances typical of infants and a 1-year
o ld child . When a child restraint is used on the
front passenger seat with a typical 1 year-old
infa nt, the Advanced Airbag System compa res
the capacitance measu red by the capacitive
passenge r de tection system wi th the data
stored in the electron ic cont ro l unit . Child restraints and Advanced front
airbag system
Regardless of the c hild restra int that you use,
make sure that it has been cert ified to meet
U nited States Federal Motor Vehicle Safety
Standards and has been ce rtified by its manu
factu rer for use with an airbag. A lways be sure
t h at the c hild restr aint is properly installed at
one of the rear seating posi tions. If in excep
t iona l circumstances yo u must use it on the
front passenger seat, carefully read a ll of the
information on child sa fety and Advanced Air
bags and heed all of the applicable WARN
INGS . Make certain that the c hild and chi ld re
stra int are correctly recognized by the capac i
t ive passenger detection system in the front .,.
Page 175 of 310
M N
0 > co ,...., \!) ..,.,
M ..,., ,....,
passenger seat, that the front passenger air
bag is turned off, and that the airbag status is
always correctly signaled by the
PASSENGER
AIR BAG OFF
li ght.
Many types and models of child restraints
have been avai lable over the years, new mod
e ls are introduced regular ly incorporating new
and improved designs and older models are
taken out of production. Child restraints are
not standardized. Ch ild restra ints of the same
type typically have different we ights and s izes
and d ifferent "footprints", the size and shape
of the bottom of the child restraint that sits
on the seat, when they are installed on a veh i
cle seat . These differences make it virtually
imposs ible to certify compliance with the re
quirements for advanced airbags with each
and every child restraint that has ever been
sold in the past or will be sold over the course
of the useful life of your vehicle.
F or this reason, the United States National
Highway Traffic Safety Administration has
published a list of specific type, makes and
models of child restraints that must be used
to certify compliance of the Advanced Airbag
System in you r vehicle with the supp ress io n
requirements of Federal Motor Vehicle Safety
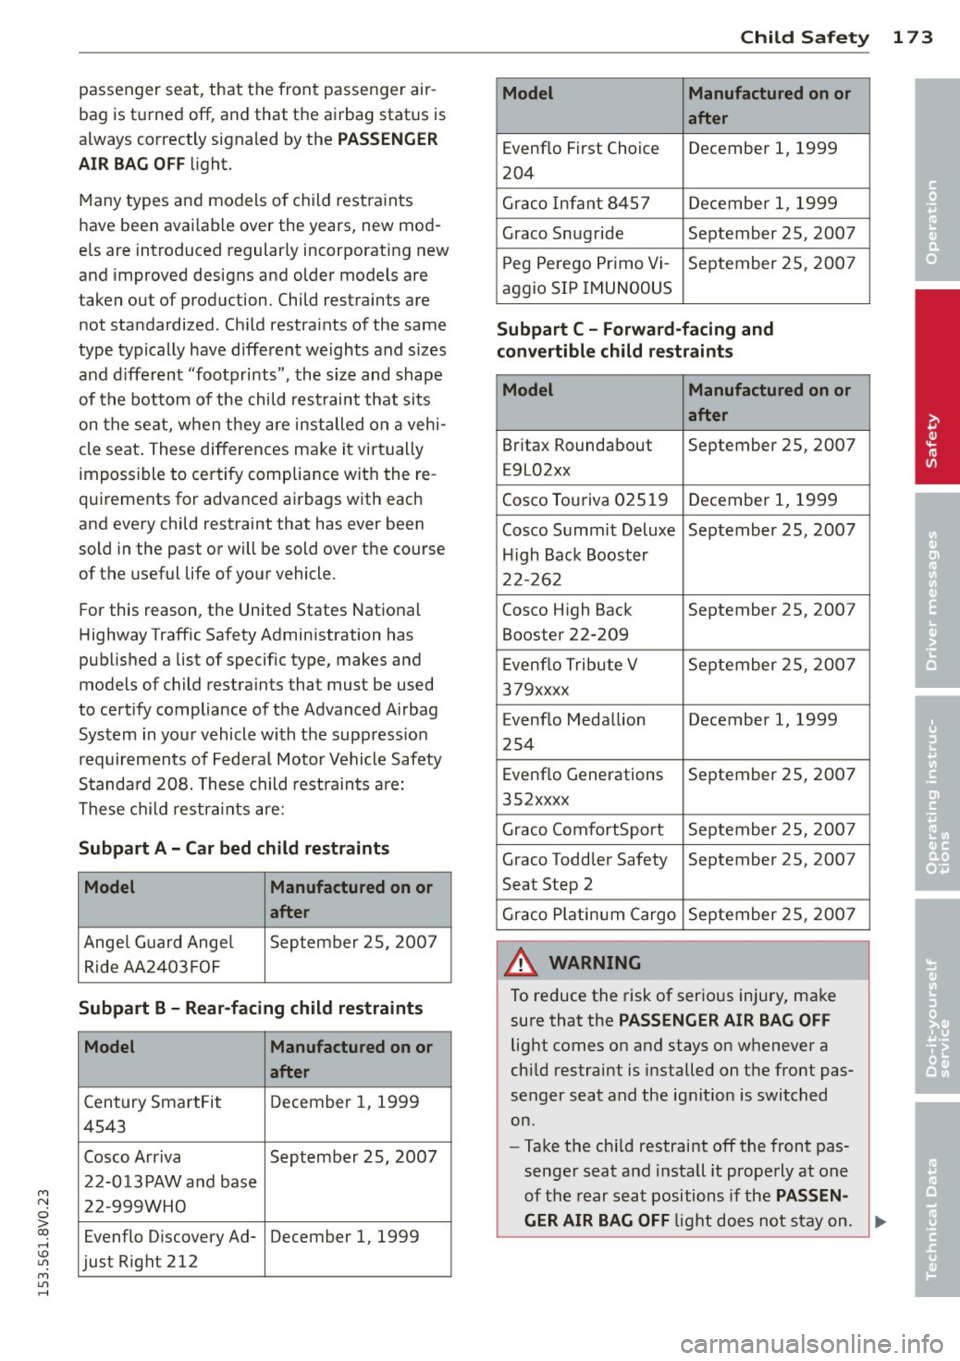
Standa rd 208. These child rest raints are:
These c hild restr aints are:
Subpart A -Car bed child rest raints
Model Manufactured on or
after
Angel G uard Ange l September 25, 200 7
Ride AA2403 FOF
Subpart B -Rear -facing child restraints
Model Manufactured on or
after
Century SmartFit December 1, 1999
4543
Cosco Arriva September 25, 2007
2 2-0 13PAW a nd base
22-999WHO
Evenflo Discovery Ad- December 1, 1999
just Right 212
Child Sa fet y 173
Model Manufactured on or
after
Evenflo First Choice December 1, 1999
204
Gr aco Infant 8457 December 1, 1999
Graco Snug ride September 25, 2007 P eg Perego Pr imo Vi-
September 2 5, 2007
aggio SIP IMUNOOUS
Subpart C -Forward-facing and
convertible child re straint s
Model Manufactured on or
after
Br itax Roundabout September 25, 2007
E9L02xx
Cosco Touriva 025 19
December 1, 1999
Cosco Summit Deluxe September 25, 2007 H igh Back Booster
22- 262
Cosco High Back September 25, 2007
Booster 22-209
E venflo T ribute V September 2 5, 2007
379xxxx
Evenflo Medallion December 1, 1999
254
Evenf lo Generations
September 25, 2007
352xxxx
Graco ComfortSport September 2 5, 200 7
Graco Toddler Safety September 25, 2007
Seat Step 2
Gr aco P lat inum Cargo September 25, 2007
_& WARNING
To reduce the risk of serious injury, make
sure that the
PASSENGER AIR BAG OFF
light comes on and stays on whenever a
chi ld restraint is installed on the front pas
senger seat and the ignit ion is switched
on.
- Take the chi ld restraint off the front pas
senger seat and install it prope rly at one
of the rear seat positions if the
PASSEN -
GER AIR BAG OFF
li ght does not stay on. ~
•
•
•
Page 192 of 310
190 Smart Technology
Steering r ecommendat ion
The ESC helps to stabilize the vehi cle by
changing the steering torque.
Select ive wh eel torqu e co ntrol
Select ive wheel torque control is used when
driving on curves . The front wheel on the in
side of the curve or both wheels on the inside
of the curve are braked selective ly as needed.
Th is a llows more precise driv ing in c urves.
Automatic post -collision braking system
The "Automatic post-collision braking system"
can he lp to reduce the risk of sliding and of
other coll is ions after an acc ident. If the airbag
control mod ule detects a collision above acer
tain vehicle speed, the vehicle is braked by the
ESC.
The vehicle does not brake automatically if:
- the driver presses the accelerator pedal , or
- the braking fo rce genera ted by the pressed
brake pedal is greater than the braking force
that would be initiated by the system, or
- the ESC, the brake system or the vehicle
electrical system are not functioning .
A WARNING ,.
- The ESC and its integrated systems can
not overcome the lim its posed by natural
physical laws. This is especia lly impor
tant on s lippery or wet roads. If the sys-
Switching on /off
terns begin acting to stabilize your vehi
cle, you should immediately a lter your
speed to match the road and traffic con
ditions . Do not let the increased safety
provided tempt you into taking r isks .
This could increase your risk of a co lli
sion .
- Please note the r isk of a coll is ion increas
es when driving fast, especially through
curves and o n slippe ry or wet roads, and
when dr iv ing too close to objects ahead.
The ESC and i ts integrated systems can
not a lways p revent collisions -there is
still a risk of accidents!
- Press the acce lerator pedal caref ully
when acce lerating on even, slippery sur
faces such as ice and snow. The drive wheels can spin even when these control
systems are installed and this can affect
driving stability and increase the risk of a
coll is io n.
(D Tips
- ABS and ASR only function correctly
when all four wheels are equ ipped w ith
identical t ires . Different t ire sizes can
lead to a reduction in engine power.
- You may hear noises when the systems
descr ibed are working .
- If the
DJ or [IJ indicator light appears,
there may be a malfunction¢
page 22.
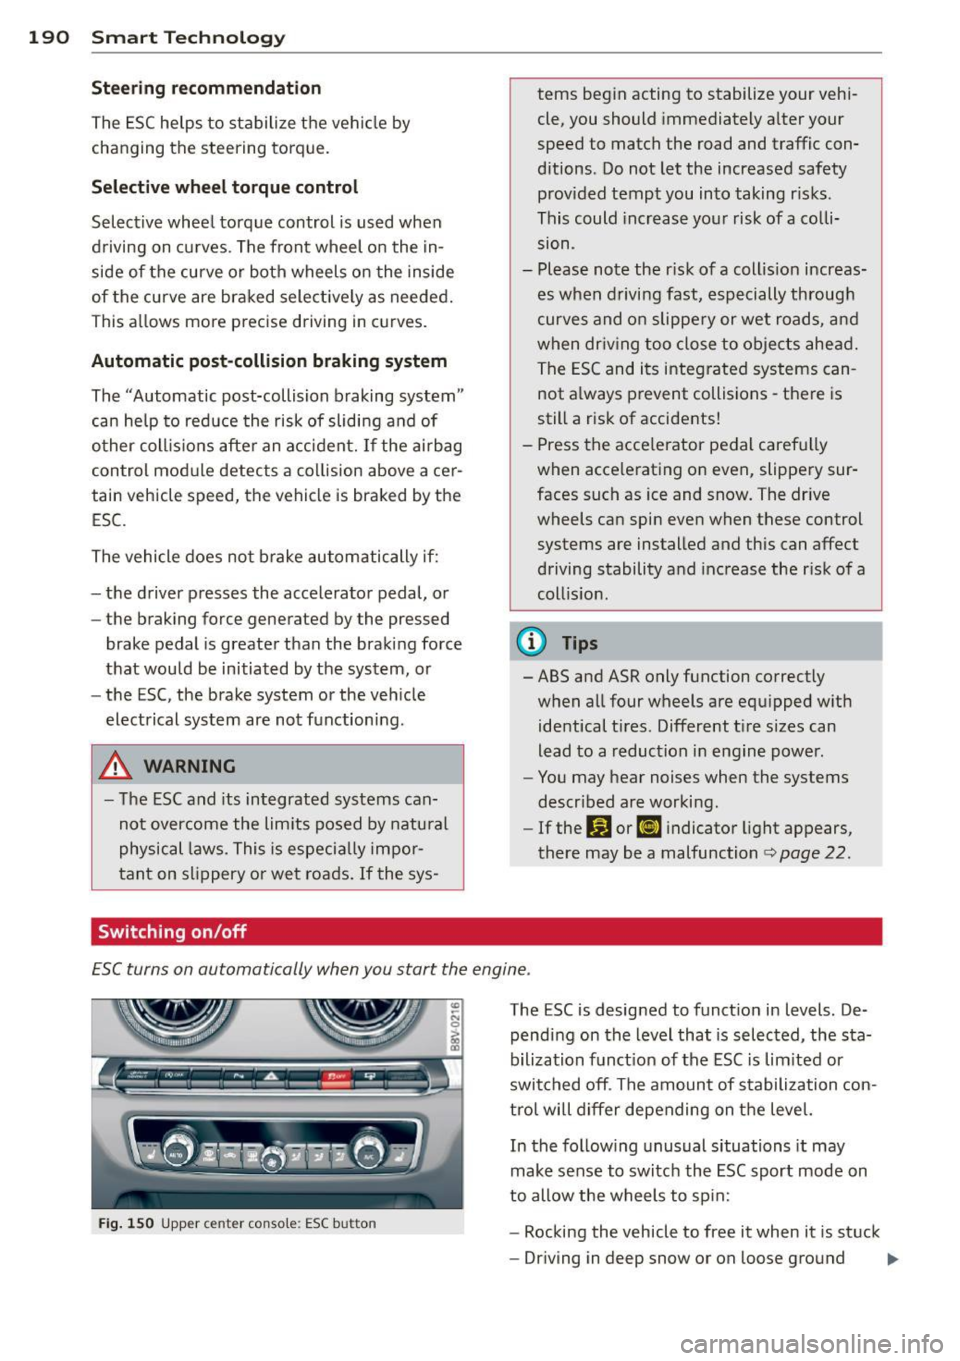
E SC turns on automatically when you start the engine .
Fig. 1 50 Upper c ente r conso le : ESC but to n
The ESC is designed to funct ion in levels . De
pending on the level that is selected, the sta
bilization funct io n of the ESC is lim ited or
swit ched off . The amoun t of stabilization con
tro l will differ depending on t he level.
In the follow ing unusual situations it may
make sense to switch the ESC sport mode on
to allow the wheels to sp in:
- Rocking the vehicle to free it when it is stuck
- Driving in deep snow or on loose ground
ll>
Page 193 of 310
M N
0 > co ,...., \!) ..,.,
M ..,., ,....,
Smart Technology 191
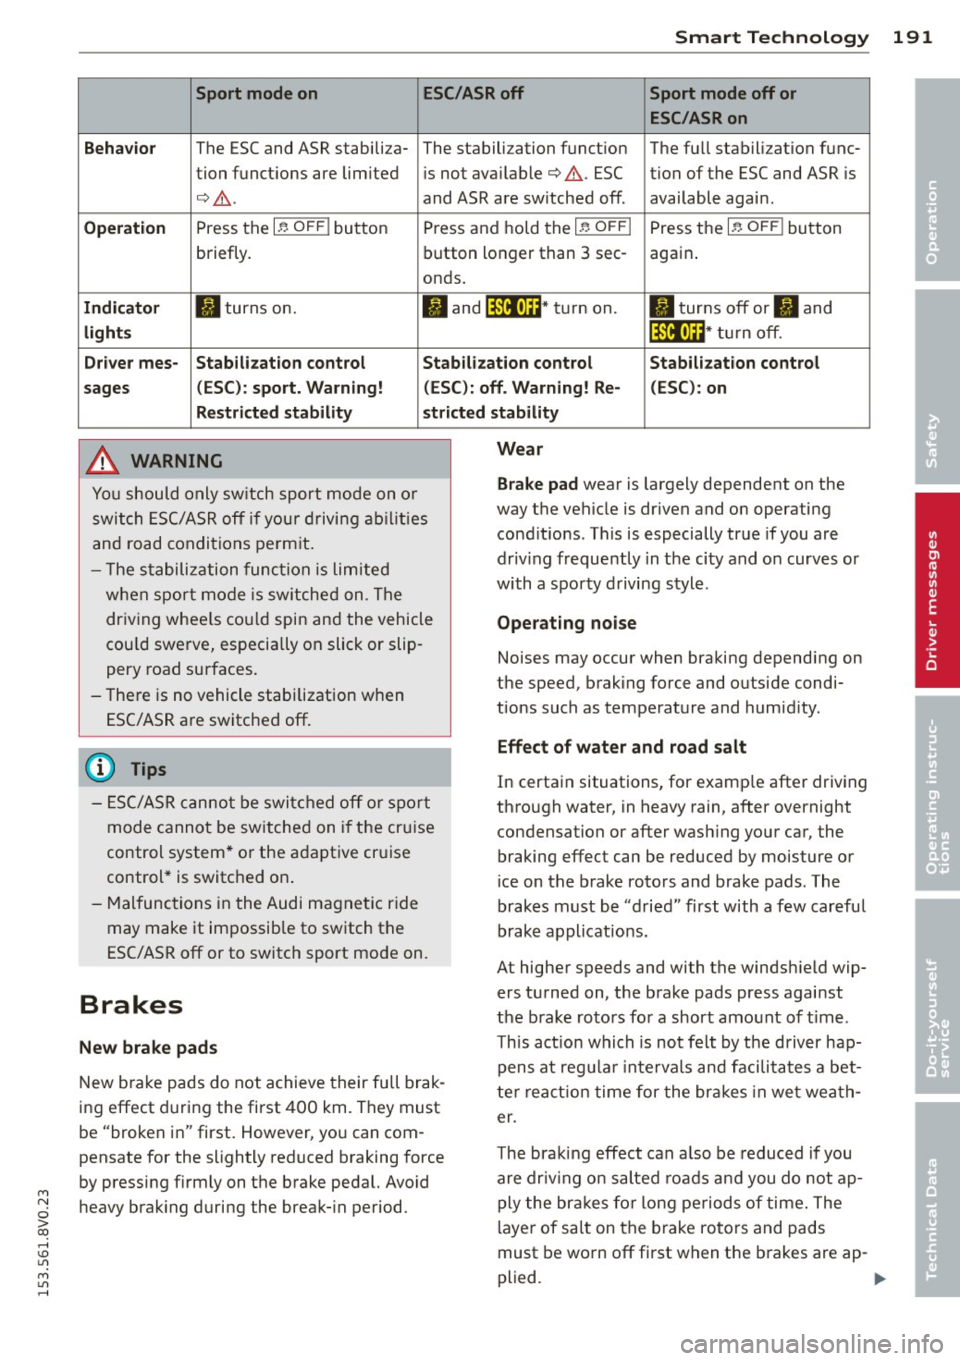
Sport mode on ESC/ASR off Sport mode off or
ESC /ASR on
Behavior
The ESC and ASR stabili za- The sta lbili zation funct ion The fu ll stabili zation f unc-
tion func tions are lim ited is not available¢ .&,.. ESC tion of the ESC and ASR is
¢ .&,. .
and ASR are switched off . available again .
Operation P ress the I~ OFF I button Press and ho ld the I~ OFFI Press the I~ OFF I button
briefly. b
utton lo nger than 3 sec-
again.
onds.
Indi cator II turns on. II and jf'illt)H * tu rn on. II tur ns off or II and
light s jf 'ilftli~ * tur n off.
Driv er mes -Stab ilization control Stab ilization control Stabilization control
sages (ESC ): sport. Warning! (ESC ): off. Warning! Re- (ESC) : on
Restricted stability st ricted stability
_& WARNING
Yo u should o nly sw itch spor t mode on o r
switch ESC/ASR o ff if your driving abilities
and road condi tions pe rm it .
- T he s tabili zation func tion is limited
when sp ort mode is sw itche d on . T he
dr iving w hee ls co uld spin and the vehicle
cou ld swerve, especia lly on slick or slip
pery road surfaces.
- The re is no vehicle stabilization when
ESC/ASR a re switc hed off.
@ Tips
-
- ES C/ASR canno t be swi tched off or spor t
mode cannot be sw itche d on i f the cr uise
control system * or the a daptive cr uise
control * is switc hed on .
- Malfunc tions in the Audi mag net ic r ide
may make it impossib le to sw itch the
ESC/ASR off or to switch sport mode on.
Brakes
New brake pads
New b ra ke pads do not achieve their full brak
i n g effect d uring the first
4 00 km. They must
be "broken in" first. However, yo u can com
pensate for the slightly reduced braking force
by pressing firmly on the brake pedal. Avoid
heavy brak ing duri ng the break- in period.
Wear
Brake pad
wear is largely dependent on the
way the vehicle is driven and on operating
cond it ions . This is especially true if you are
driv ing frequently in the city and on curves or
with a sporty d riving style .
Operating noise
Noises may occur when bra king depending on
the speed, brak ing force and outs ide condi
tions such as temperature and humid ity.
Effect of water and road salt
In certa in situations, for examp le after driv ing
th ro ugh water, in heavy rain, after overnight
condensation or after was hing your car, the
braking effect can be reduced by mois ture or
ice on the brake rotors and brake pads . The
brakes must be "d ried" first with
a few car eful
brake applications .
At higher speeds and with the windsh ield wip
ers turned on, the brake pads press against
the b rake ro to rs fo r a shor t amo unt of t ime .
T h is act ion whi ch is not felt by the driver hap
pens at reg ular intervals and facilita tes a bet
t e r r ea ct ion time for the br ake s in we t wea th
er.
T he bra king effect can a lso be reduced if you
are driv ing o n salted roa ds an d you do not ap
ply the br akes fo r long peri ods of time. The
l aye r of sa lt on the brake rotors and pads
must be wo rn off first when the b rakes are ap -
plied. .,.
•
•
•