wheel AUDI S3 2015 Owners Manual
[x] Cancel search | Manufacturer: AUDI, Model Year: 2015, Model line: S3, Model: AUDI S3 2015Pages: 310, PDF Size: 76.15 MB
Page 5 of 310
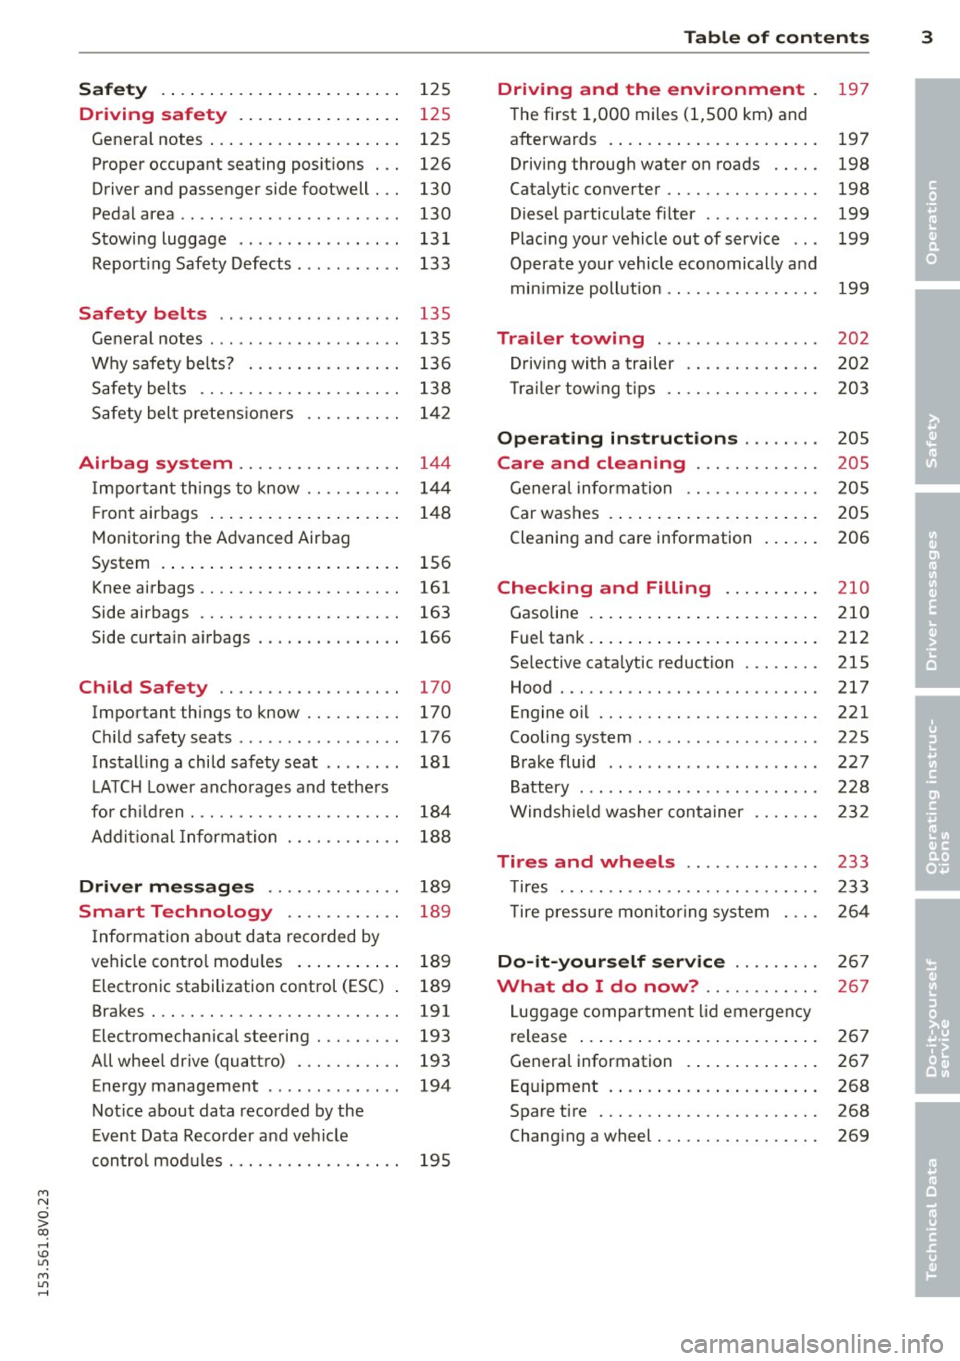
Safety . . . . . . . . . . . . . . . . . . . . . . . . . 125
Driving safety . . . . . . . . . . . . . . . . . 125
General notes . . . . . . . . . . . . . . . . . . . . 125
Proper occupant seating posit ions . . . 126
Driver and passenger side footwell . . . 130
Pedal area . . . . . . . . . . . . . . . . . . . . . . . 130
Stowing luggage . . . . . . . . . . . . . . . . . 131
R eport ing Safety Defects . . . . . . . . . . . 133
Safety belts . . . . . . . . . . . . . . . . . . . 135
General notes . . . . . . . . . . . . . . . . . . . . 135
Why safety bel ts? . . . . . . . . . . . . . . . . 136
Safety belts . . . . . . . . . . . . . . . . . . . . . 138
Safety belt p re tens ioners . . . . . . . . . . 1 42
Airbag system . . . . . . . . . . . . . . . . . 144
I mpor tan t th ings to know . . . . . . . . . . 1 44
Fr ont airbags . . . . . . . . . . . . . . . . . . . . 148
M onitoring the Advanced Airbag
System . . . . . . . . . . . . . . . . . . . . . . . . . 156
Knee airbags . . . . . . . . . . . . . . . . . . . . . 161
Side airbags . . . . . . . . . . . . . . . . . . . . . 163
Side curta in a irbags . . . . . . . . . . . . . . . 166
Ch ild Safety . . . . . . . . . . . . . . . . . . . 170
Important things to know . . . . . . . . . . 170
C hi ld safety seats ............ .... . 176
Install ing a chi ld safety seat . . . . . . . . 18 1
L A TC H L ower ancho rages and tethe rs
fo r ch ild ren . ............. .... .. . .
A ddit io nal Informa tion 184
188
Driver messages
. . . . . . . . . . . . . . 189
Smart Technology . . . . . . . . . . . . 189
I nforma tion abo ut data reco rded by
ve hicl e cont ro l mod ules . . . . . . . . . . . 189
Electron ic stabilization control (ESC) 189
Brakes . . . . . . . . . . . . . . . . . . . . . . . . . . 191
Electromechanical steering . . . . . . . . . 193
All whee l drive (quatt ro) . . . . . . . . . . . 193
Energy management . . . . . . . . . . . . . . 194
Not ice about data recorded by the
E vent Data Reco rder and ve hicle
con tro l mod ules . . . . . . . . . . . . . . . . . . 195
Table of contents 3
Driving and the environment
197
T he first 1,000 miles (1 ,500 km) and
afterwa rds . . . . . . . . . . . . . . . . . . . . . . 197
Driving through wate r on roads . . . . . 198
Catalytic converter . . . . . . . . . . . . . . . . 198
Diesel particulate filter . . . . . . . . . . . . 199
Plac ing you r vehicle ou t of service . . . 199
Operate yo ur v ehicl e economically and
min imi ze poll ution . . . . . . . . . . . . . . . . 199
Trailer towing . . . . . . . . . . . . . . . . . 202
Dr iving wit h a trailer . . . . . . . . . . . . . . 202
T rai le r tow ing t ips . . . . . . . . . . . . . . . . 203
Operating instructions . . . . . . . . 205
Care and cleaning . . . . . . . . . . . . . 205
Gener al infor mation . . . . . . . . . . . . . . 205
Car washes . . . . . . . . . . . . . . . . . . . . . . 205
Cleaning and care information . . . . . . 206
Checking and Filling . . . . . . . . . . 210
Gasoline . . . . . . . . . . . . . . . . . . . . . . . . 210
F uel tank . ... .. .... . ... ...... ... . 212
Se lective cata lytic reduction . . . . . . . . 215
Hood . . . . . . . . . . . . . . . . . . . . . . . . . . . 217
Engine o il . . . . . . . . . . . . . . . . . . . . . . . 221
Cooling system . . . . . . . . . . . . . . . . . . . 225
B rake fluid . . . . . . . . . . . . . . . . . . . . . . 227
Battery . . . . . . . . . . . . . . . . . . . . . . . . . 228
W indsh ie ld washer conta iner 232
Tires and wheels . . . . . . . . . . . . . . 233
T ires . . . . . . . . . . . . . . . . . . . . . . . . . . . 233
T ire pressu re mo nitor ing syste m 2 64
Do-it-yourself service . . . . . . . . . 2 67
What do I do now? . . . . . . . . . . . . 267
L uggage compartment lid emergency
r elease . . . . . . . . . . . . . . . . . . . . . . . . . 267
Genera l information . . . . . . . . . . . . . . 267
Eq uipment . . . . . . . . . . . . . . . . . . . . . . 268
Spare tire . . . . . . . . . . . . . . . . . . . . . . . 268
Changi ng a wheel . . . . . . . . . . . . . . . . . 269
•
•
M a N
0 > co ,...., \!) Ll'I
M Ll'I ,....,
Page 11 of 310
M N
0 > co ...... \!) ..,.,
M ..,., ......
CD
@
®
©
®
®
(J)
®
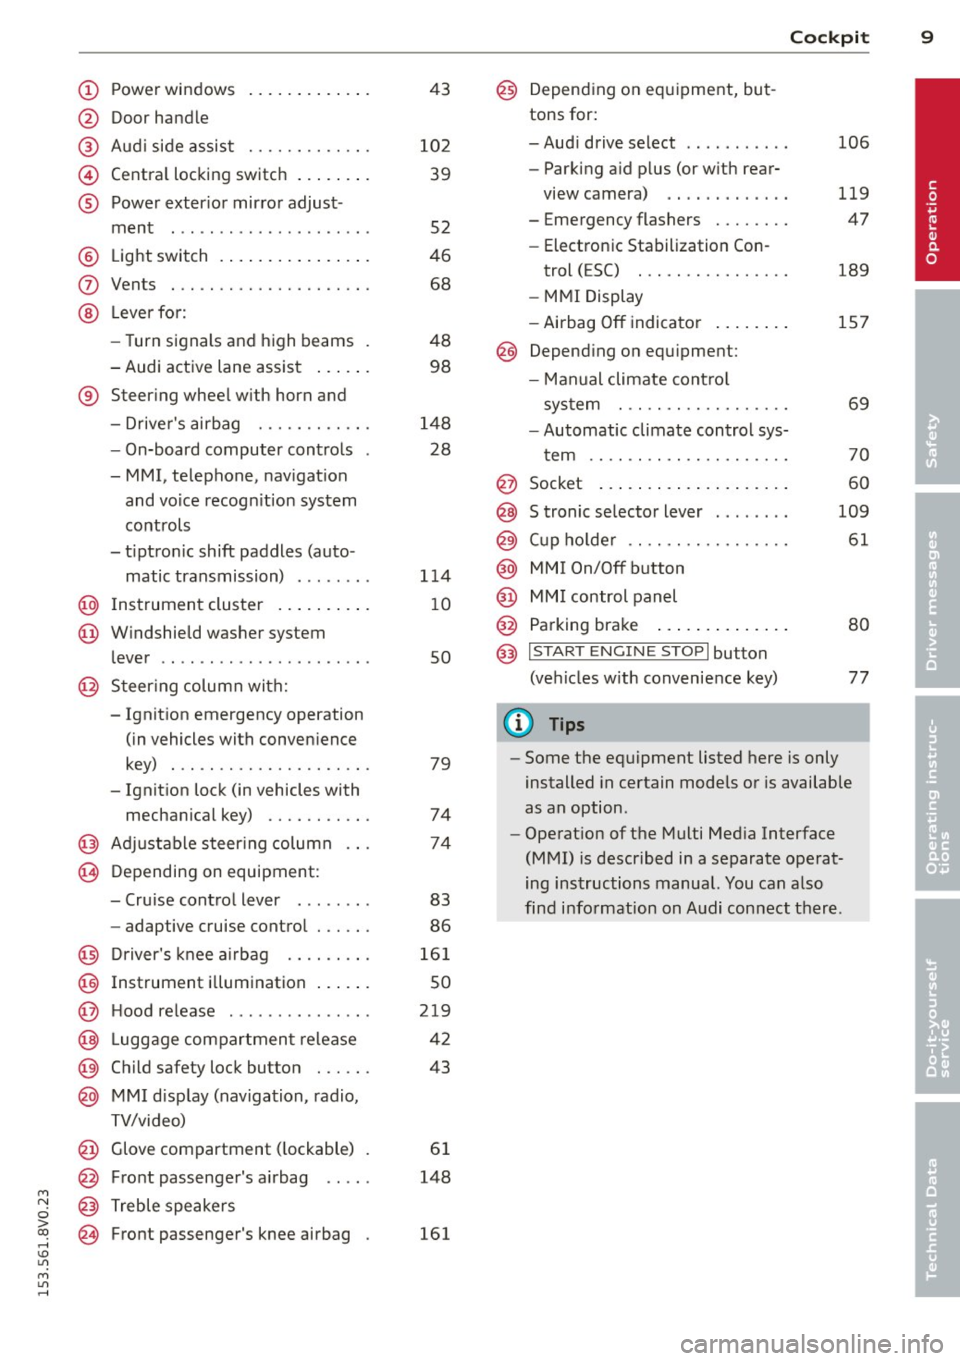
Power windows
Door handle
Aud i side assist
........ .... .
Centra l locking switch ... .. .. .
Powe r exter ior mirror adjust
ment
.. ... .............. ..
Light switch
Vents
L ever fo r:
- Turn signals and high beams
- Audi active lane assist ... .. .
® Steer ing wheel w ith horn and
- Drive r's airbag ....... .. .. .
- On-board computer controls
- MMI, telephone, nav igat ion
and voice recogn it ion system
controls
- tiptron ic shift paddles (auto-
matic transmission) ....... .
@ Instrument cluster .. ... .. .. .
@ W indshield washer system
l ever
' .. ... .............. . .
@ S teer ing column with:
- Ignit ion emergency operation
(in vehicles with conven ience
key) . .. ................. .
- Ignit ion lock (in vehicles with
mechanical key) ...... .. .. .
@ Adjustable s teer ing column
@ Depending on equipment :
- Cruise contro l lever . ...... .
- adaptive cruise contro l ... .. . 4
3
10 2
39
52
46
68
48 98
148 28
1 14
1 0
so
79
74
74
83
86
@ D river's knee a irbag . . . . . . . . . 161
@ Instrument i llumination . . . . . . 50
@ H ood re lease . . . . . . . . . . . . . . . 219
@ Lugg age compartmen t release 42
@ Child safety lock button . . . . . . 43
@ MMI d isp lay (navigation , radio,
TV/video)
@ Glove compartment ( lockable)
@ Front passenger's airbag .. .. .
@ Treble speakers
@ Front passenger's knee airbag 61
148
161
Cockpi t 9
@) Depending on eq uipment, but
tons for:
- Aud i drive select
- Parking a id p lus (or w ith rear-
view camera) .. . ... ...... .
- Emergency flashers ....... .
- Electron ic Stabilization Con-
trol ( ESC) . .. .... ........ .
- MMI Display
- Airbag
Off indicator ..... .. .
@ Depend ing on equ ipment:
- Manual climate cont ro l
system
- Automatic climate contro l sys
t em
. . .. .. .. .... .........
@ Socket
@ S tronic se lector lever ....... .
@ Cup ho lder .. .. .. . ......... .
@ MMI On/Off button
@ MM I control panel
@ Parking brake ... . ... ...... .
@ I START ENGI NE STOPI button
(ve hicles w ith convenience key)
(D Tips
106
119
47
189
157
69
70
60
109
61
80
77
- Some the eq uipment listed here is only
installed in certain models or is available
as an option.
- Operat ion of the Multi Med ia Interface
(MMI) is described in a separate operat
ing instructions manual. You can a lso
find info rmation on A udi con nect ther e.
•
Page 26 of 310
24 Instruments and indicator lamps
the filter. The indicator light will turn off
when the cleaning has completed successful
ly.
If the indicator light does
not turn off, drive
immediately to an authorized Audi dealer or
authorized Audi Service Facility to have the
malfunction corrected .
.&_ WARNING
Always adapt your speed to the current
weather, road and traffic conditions. You
should never disobey traffic laws in order
to follow driv ing recommendations .
(D Tips
For additional information on the diese l
particulate f ilter, refer to¢
page 199.
!?i Engine speed limitation
App lies to vehicles: with engine speed limitation
Ill Max. engine speed: XXXX rpm
-
The engine speed is automatically limited to
the speed displayed in the driver information
system. This protects the engine from over
heating .
The engine speed limitation deactivates once
the engine is no longer in the c ritical tempera
ture range and you have released the accelera
tor pedal.
If the engine speed limitation was activated
by an engine control malfunction, the
Di indi
cator light also turns on. Make sure the en
g ine speed does not go above the speed dis
played, for example when downsh ifting . Drive
to an authorized Audi dealer or author ized
Aud i Service Facility immediately to have the
malfunction corrected.
~"' Engine oil level (min.)
l!I Check oil level
You may continue driving for the time being.
Check the oil level as soon as possible
¢page 221.
-If the engine oi l level is too low, add engine
oil
¢ page 223.
-If the engine oi l level is correct and the indi
cator light still turns on, drive at low engine
speed to the nearest authorized Audi dealer
or qualif ied repair facility .
~w, Engine oil sensor
• Oil level sensor: system fault!
The sensor to check the engine oi l level has
failed. Drive to an author ized Audi dealer or
authori zed Aud i Service Facility immediately
to have the malfunction corrected.
• Oil level sens.: oil change necessary.
Please contact Service
T he eng ine oi l level is too high.
Drive to an authorized Audi dealer or author
ized Audi Serv ice Fac ility imm ediately to have
the malfunction corrected.
Bl Tank system
D Please refuel
If the indicator light turns first turns on and
t his message appears, the tan k contains the
following amount of fuel:
- Front wheel dr ive : approximately 1.8 gal
lons (7 liters)
- All wheel dr ive : approximately 2.2 gallons
(8 .5 liters)
II] Please refuel immediately
If the indicator light turns on the message ap
pears, the fuel tank is almost empty. Refuel
the vehicle immed iate ly.
D Fuel tank malfunction! Please contact
Service
If the indicator l ight turns on and the mes
sage appea rs:
- there is a malfunction in the fuel tank sys
tem, or
- in vehicles with diesel engines, water may
have collected in the fuel fi lter.
Page 29 of 310
....,
N
0 > co
rl I.O
"' ....,
"' rl
Driver information
system
Overview
Applies to vehicles: with dr iver information system
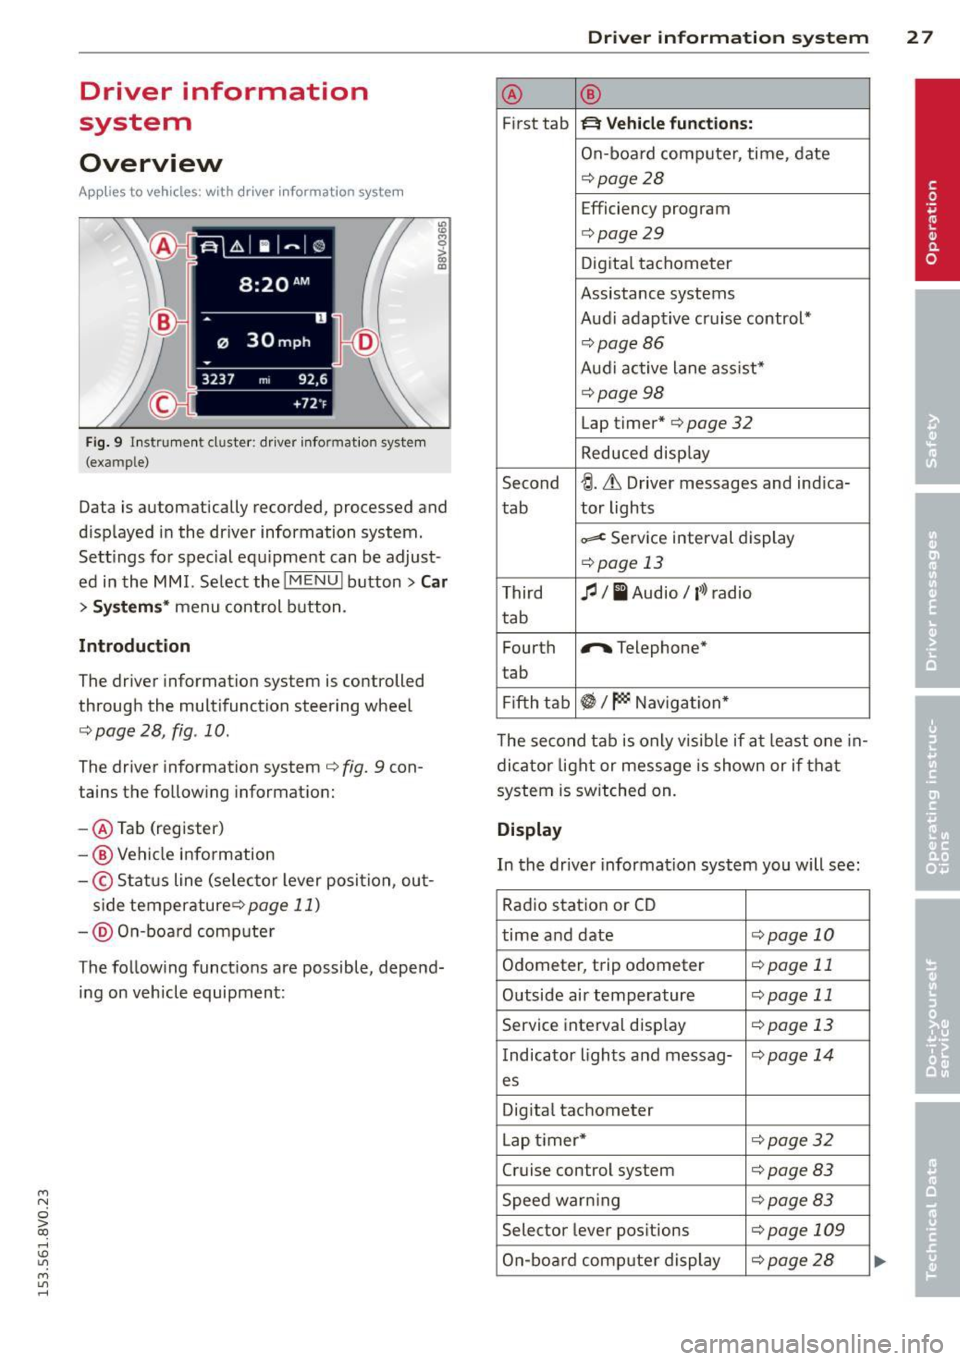
Fi g. 9 l nstrume nt cl uste r: dr ive r info rmatio n syste m
(ex am ple)
Data is automatica lly recorded , processed and
d isp layed in the dr iver information system .
Sett ings for special equ ipment can be adjust
ed in the MMI. Select the
! M ENU ! button> Car
> Systems * menu control button .
Introduction
The driver information system is controlled
through the mult ifunction steering wheel
c::;, page 28 , fig . 10 .
The driver information system c::;, fig. 9 con
tains the follow ing informat ion:
- @ Tab (register)
-@ Vehicle information
-© S ta tus line (se lecto r lever posi tion , ou t-
s ide temperature ¢page
11)
-@ O n-boa rd comp ute r
T he follow ing funct ions are possible , depend
i ng on vehicle equipment :
Driver in formation system 2 7
@ ®
First tab ~ Vehicle functions:
On-boa rd comp uter, time, date
¢ page28
Efficiency program
c=;, page29
Digita l tachometer
Assistance systems
Aud i adapt ive cruise control*
¢ page86
Aud i active lane ass ist*
¢ page 98
Lap timer* c::;, page 32
Reduced disp lay
Second
~ -Lh Driver messages and ind ica-
tab tor lights
~ Se
rv ice interval display
¢ page 13
Third fl I I Audio/ l'>l radio
tab
Fourth
r,. Telephone*
t ab
Fi fth tab
~I~ Naviga tion *
T he second tab is only v isib le if at least one in
dicator light or mess age is shown or if that
system is switched on.
Display
In the drive r information system you will see:
Rad io stat io n or CD
time and date
c:!;> page 10
Odometer, trip odometer c:!;> page 11
Outside air temperature c::;, page 11
Serv ice interva l disp lay ¢ page 13
Indicator lights and messag-<:!.> page 14
es
Dig ita l tachometer
L ap timer*
c:!;> page 32
Cruise control system ¢page 83
Speed war ning c:!;> page 83
Selec tor lever pos itions ¢page 109
On-bo ard comp uter display c:!;> page 2 8
Page 30 of 310
28 Driver information system
On-board computer display
The on-boa rd compute r display monitors the
different memory levels:
- Sho rt-term memo ry (on-board computer 1)
- Long-term memory (on-board computer
2)
-Efficiency program
The fo llow ing information can be displayed in
on-boa rd computer
1 and 2 one after the oth
er.
- Date
- Estimated range based on current fuel leve l
- T rave l time
- Average consumption
- Average speed
- Distance
- Current fuel consumption
- Engine oil temperature indicator*
On-board computer D (short-term
memory)
The sho rt-term memory co llects driving infor
mation from the time the ignit ion is switched
on until it is switched off. If you continue dr iv
ing
within two hours after switching the igni
tion off, the new values are included when cal
culating the current trip information. If stop ped for more the two hours, the short term
memory is automatically erased once you be
g in driving .
On-board computer fJ (long-term
memory)
Unlike the short-term memory, the long-term
memory is not erased automatically. You can
select the time period for evaluating trip in
formation yourself.
Efficiency program~
The efficiency program can help you to use
less fuel ~
page 29 .
(D Tips
-The on-board computer is controlled by
the left button f ields on the mult ifunc
t ion steering wheel. -
For information on using the other but
ton f ields, such as the audio, telephone*
and navigation* funct ions, see the MMI
owner's manual.
Operation
Appl ies to vehicles: wit h driver informatio n system
The driver information system is con trolled
with the multifunction steering wheel .
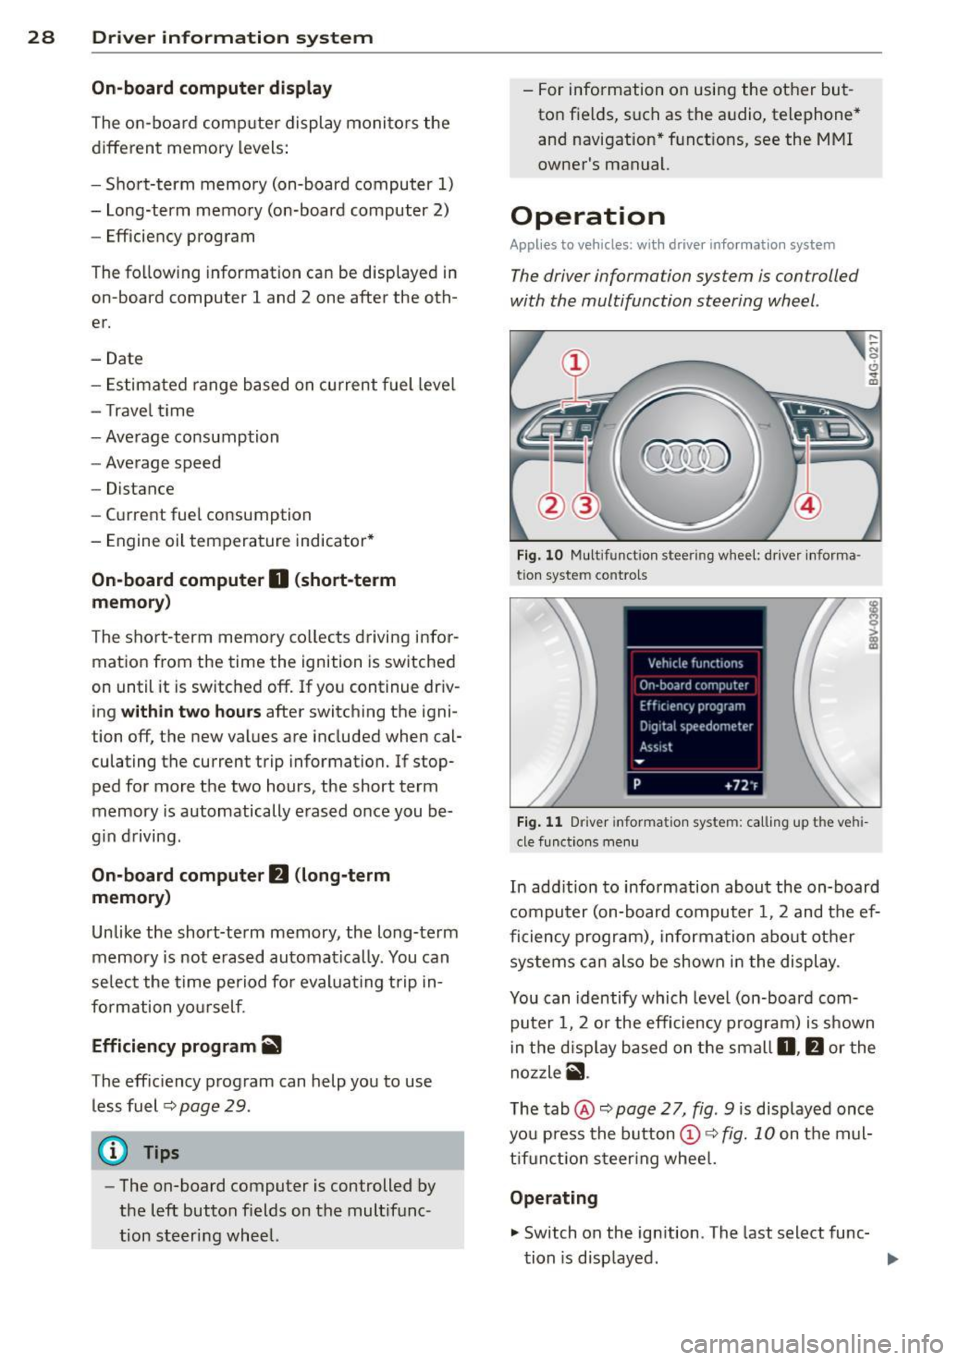
Fig. 10 Multi funct ion s teer ing w heel : driver informa ·
tio n syste m controls
Fig. 11 D river informa tion syste m: call ing up t he ve hi
cle func tion s men u
In add ition to info rmation about the on-board
computer (on-board computer 1 , 2 and the ef
ficiency program), information about other
systems can also be shown in the display .
You can identify which level (on-board com
puter 1, 2 or the efficiency program) is shown
in the d isp lay based on the small
0, fJ or the
nozzle
ii .
The tab@~ page 2 7, fig. 9 is displayed once
you press the button
(D ~ fig. 10 on the mul
tifunction steering wheel.
Operating
.,. Switch on the ignition . T he last select func-
tion is displayed . ..,_
Page 31 of 310
....,
N
0 > co
rl I.O
"' ....,
"' rl
.. To switch between the tabs, p ress the rocker
button ® to the left or right~
fig. 10.
.. To access additional information be low or
above, rotate the thumbwheel @down or
up .
.. To confirm a selection, press the thumb
wheel @.
.. To select a function programmed to a steer
ing wheel button, p ress the button@. Fo r
addi tional informa tion, see¢
page 29, As
signing a function to the programmable
steering wheel button
Calling up the Vehicle functions
.. Se lect the first tab w ith the button @ .
.. Press the button @. The
V eh icle fun ction s
menu is displayed 9fig. 11 .
.. To select a menu item, turn and press the
th umbwheel @.
Resetting values to zero
.. In the Vehicle function s menu, select On·
board computer or Efficien cy prog ram .
.,. Se lect a v alue in the desired trip computer
or in the efficiency program .
.. To reset the values in a memo ry, press and
hold the thumbwhee l@ for one second.
Recalling indicator lights and messages
.. Press the button (!) repeated ly until the Q
tab appears.
The
Q tab is only vis ible when there is a mal
function.
Assigning a function to the programmable steering wheel button
.. Select: the I MENU ! button >Car > Sy stem s*
control button > Vehi cle setting s > Stee ring
wheel button progr amming .
The Q tab is only vis ible when there is at
least one indicator light or message dis
p layed.
(0 Tips
- If the vehicle battery is d iscon nected, all
memo ry valu es a re e rased.
Dr iver in formation system 29
- In formation on the efficiency program
¢page 29 .
-There is more information on the multi
function stee ring wheel in the MMI *
owne r's man ual.
Boost indicator
Applies to vehicles: with boost pressure indicator
Fig. 12 Instrument cluste r: boost indicator
Boost pressure indicator (boost)
A bar graph that begins on the left and fills in
toward the right indicates the eng ine's cur
rent load (m ean ing the current boos t pres
su re).
Efficiency program
Description
Applies to vehicles: with driver information system
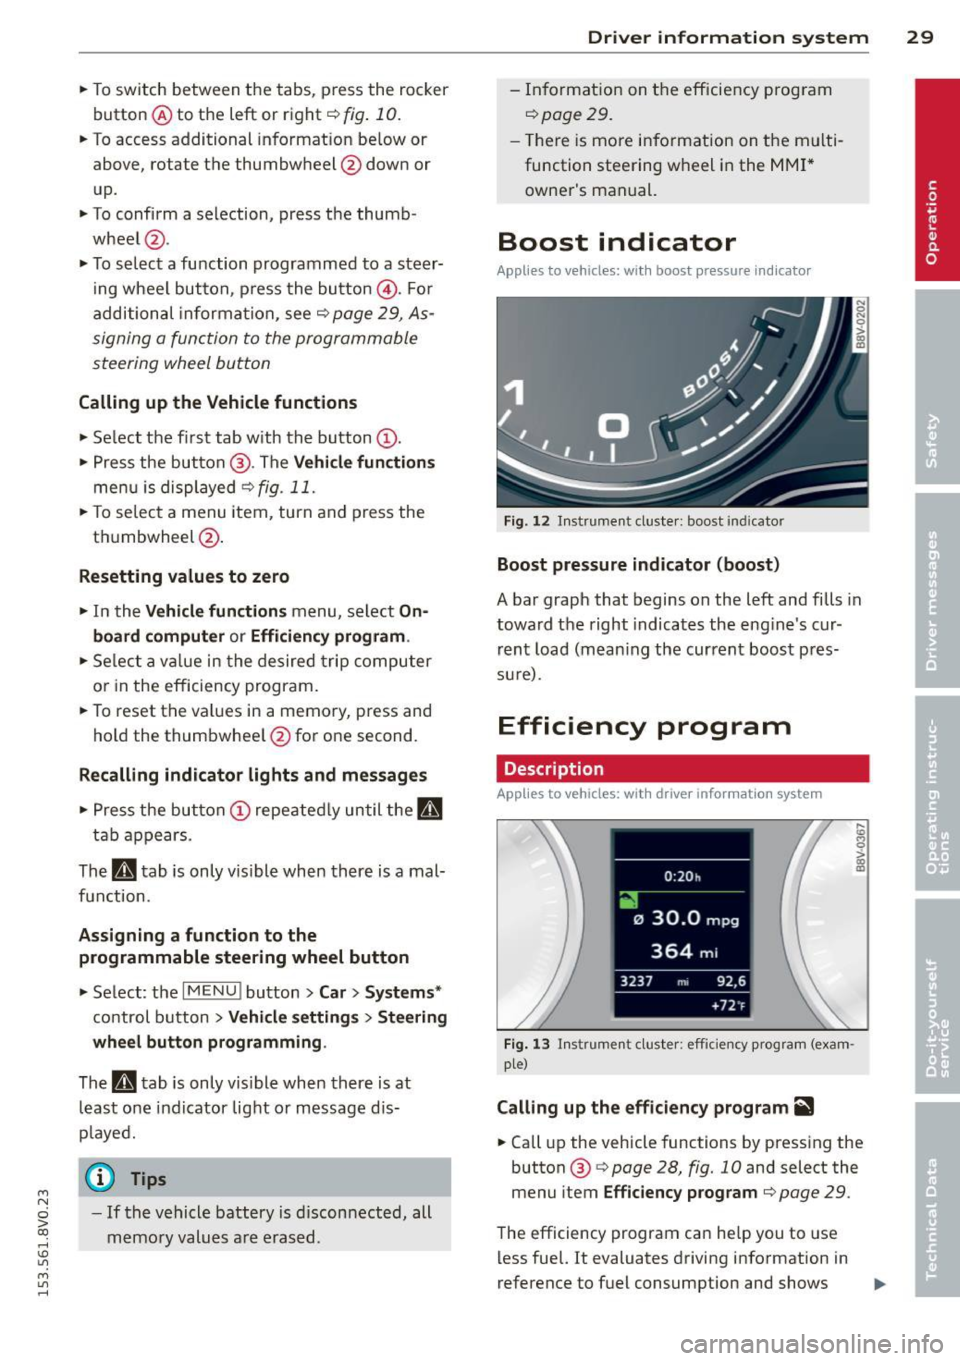
Fig. 1 3 In strument cluster: efficie ncy program (exam
ple)
Calling up the efficiency program~
.. Call up the vehicle functions by pressing the
button ®
9 page 28, fig. 10 and select the
menu item
Efficiency p rogram ¢page 29 .
The efficiency program can he lp you to use
less fuel.
It evaluates driving information in
reference to fuel consumption and shows .,..
Page 32 of 310
30 Driver in formation sy ste m
other equipment inf luencing consumpt ion
c::> page 30 . Fuel economy messages
c::> page 30 provide tips for efficient driving .
The effic iency program receives data about
the dis tance and fuel consumption from the
on-board computer
1. If the data in the effi
ciency program is de leted
c::> page 29, the val
ues in the on-board computer 1 are also reset .
Other equipment
Applies to vehicles: with driver informatio n system
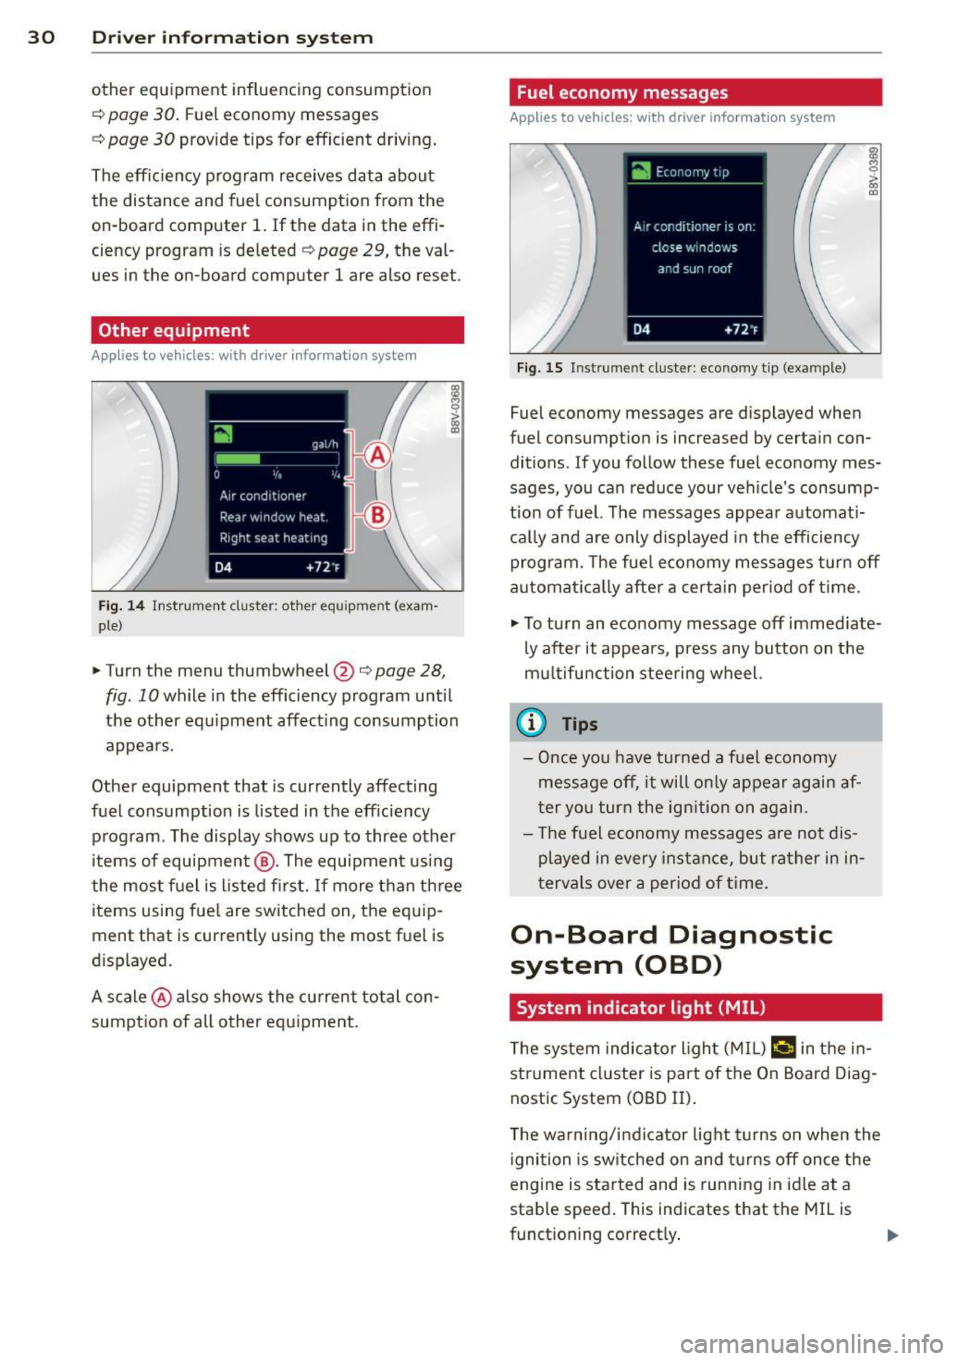
Fig. 14 Instrument cluster : other equ ipment (exam·
ple}
.,. Turn the menu thumbwheel@r:::> page 28,
fig. 10 while in the efficiency program until
the other eq uipment affect ing consumption
appea rs.
Other equipment that is currently affecting
fuel consumption is listed in the efficiency
program. The display shows up to three other
items of equipment @. The equipment us ing
the most f uel is listed fi rs t . If more than th ree
items using fue l are switched on, the equ ip
ment that is currently using the most fuel is
d isplayed.
A scale @ also shows the cu rrent total con
sumpt ion of all other equ ipment.
Fuel economy messages
Applies to vehicles: wit h drive r info rmation system
Fig. 15 Inst rume nt clus ter: economy tip (exa mple)
Fuel economy messages are displayed when
fuel consumpt ion is increased by certain con
ditions. If you follow these fuel economy mes
sages, you can reduce your ve hicle's consump
tio n of fuel. The messages appea r automat i
c a lly and are only d isplayed in the efficiency
program. The fue l economy messages turn off
automa tica lly after a certain per iod of t ime.
.,. To tu rn an eco nomy message off immed iate
ly after it appears, press any button on the
mu ltifu nction steering wheel.
(D Tips
- Once yo u have turned a fuel economy
message off, it wi ll o nly appear again af
ter yo u turn the ign ition on again.
- T he fue l economy messages are not d is
played in every in sta nce, but ra ther i n in ·
tervals over a period of time.
On-Board Diagnostic
system (OBD)
System indicator light {MIL)
T he system indicator l ight ( MIL) ¢4 in the in
strument cl uster is part of the On Board Diag
nostic System (OBD II) .
T he warn ing/ind icator light turns on when the
ignition is sw itche d on and tu rns off once the
engine is sta rted and is runn ing in idle at a
stab le speed . This indicates that the MI L is
funct ioning correct ly .
Page 34 of 310
32 Driver information system
Lap timer and engine
oil temperature
indicator
Introduction
Applies to vehicles: with lap timer (S mode ls)
The engine oil temperature is only shown in
the lap timer disp lay .
Lap timer
You can record and evaluate lap times with
the lap timer in the display
c:> page 32 ,
fig . 18. The time is measured in minutes, sec
onds and 1/10 seconds. With lap times longer
than 60 minutes, the hour is also shown and
the display of 1/10 seconds is removed .
The time measurement on an individual lap
ends after 99 hours 59 minutes and 59 sec
onds . A new lap starts automatically after
that .
The measu rement ends after a maximum of
30 laps . You can then evaluated the lap times
or start a new time measurement .
Engine oil temperature indicator
If the engine oil temperature is be low 60 ° (,
the 't::7-symbol followed by three hyphens" --
-" and the °C uni t is shown.
The engine has reached its operating temper
ature when the engine oil temperature is be
tween
80 °C and 120 °C under normal driving
conditions. The engine oil temperature may be h igher if there is heavy engine load and
high temperatures outs ide. This is not a cause
for concern as long as the.
c:> page 20 or
Ill c:> page 24 indicator lights in the display
do not b link.
.&, WARNING
Your focus should always be on driving
your vehicle safely. As the dr iver, you have
complete responsibility for safety in traf
fic. Only use the functions such as the lap
timer in such a way that you a lways main
tain complete control over your veh icle in
all traffic situations .
(D Tips
You can retrieve information from the trip
computer wh ile the lap timer stopwatch is
running.
Opening the lap timer and measuring
time
Applies to vehicles: with lap timer (S models)
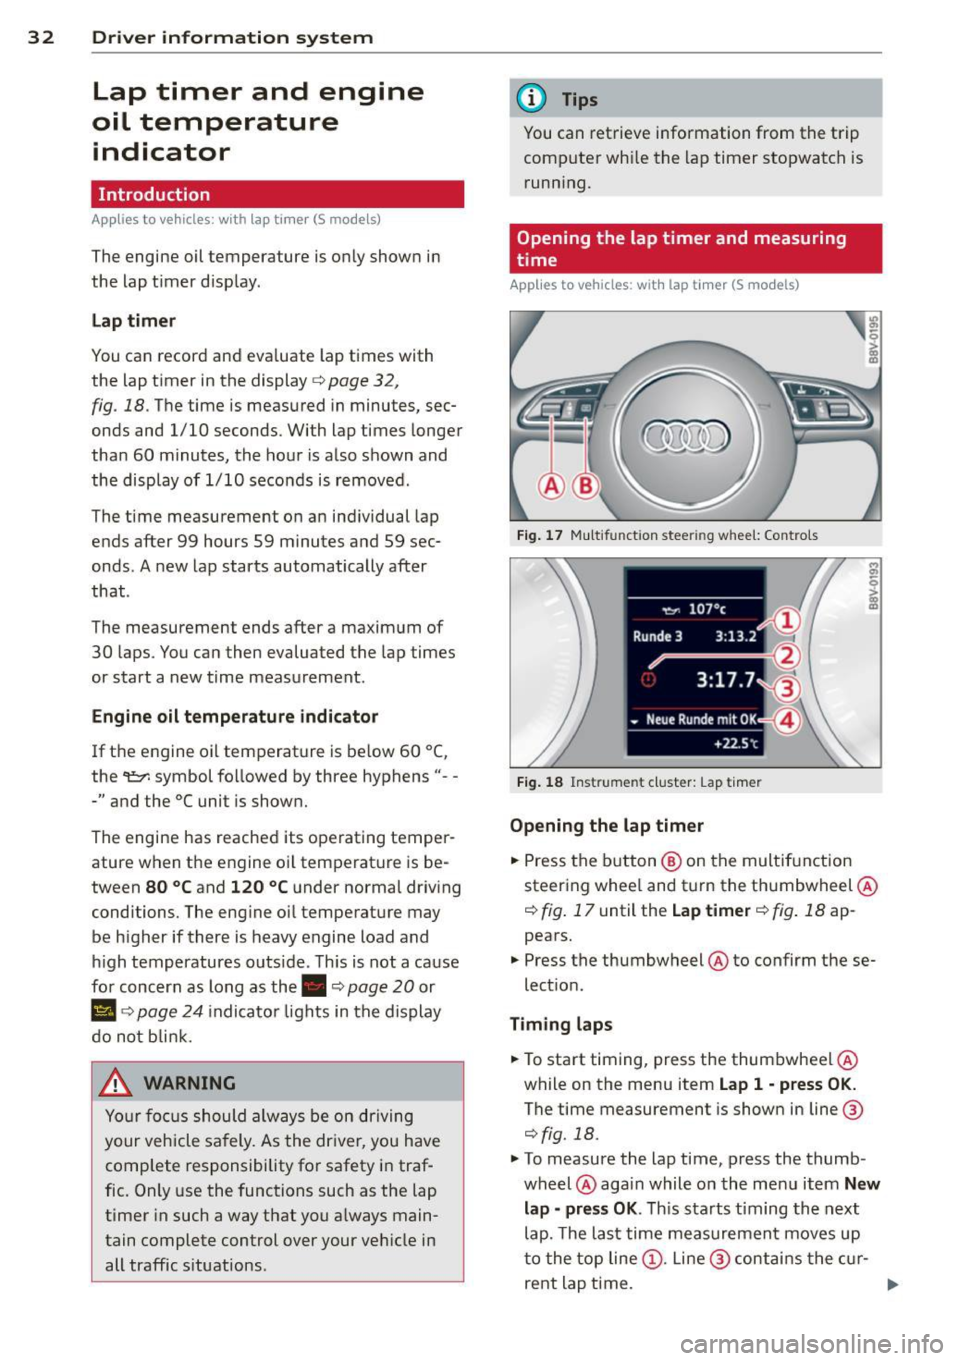
Fig. 17 Mult ifun ction stee ring w hee l: Con trols
Fig. 18 Instrume nt clust er: L ap timer
Opening the lap timer
... Press the button® on the multif unction
steering whee l and turn the thumbwheel @
¢ fig. 17 until the Lap timer ¢ fig. 18 ap
pears .
... Press the thumbwheel @to confirm these
lect ion.
Timing laps
... To start timing, press the thumbwheel @
while on the menu item
Lap 1 -press OK.
The time measurement is shown in line@
¢fig. 18.
... To measure the lap time, press the thumb
wheel @again while on the menu item
New
lap -press OK. This starts t iming the next
lap. The last time measurement moves up
to the top line@. Line @ contains the cur-
rent lap time. ..,.
Page 35 of 310
....,
N
0 > co
rl I.O
"' ....,
"' rl
If the symbol . is green d uring the current
l ap time measurement, the current time is
faster than the previous best time .
If the sym
bo l. is red, the current time is slower @.
Display ing split time and pausing timing
.,. To d isplay a split time r~J . turn the thumb -
wheel @ unti l
Split time appea rs in line @.
Press the thumbwhee l@ to confirm these
lection. The split t ime appears for approxi
mately 10 seconds in line@. The timing of
the current lap continues.
If yo u wou ld like to insert a pause
m immedi
ately after the split time, first press the
thumbwheel @and then the menu item
Press OK to go b ack to confirm.
.,. To insert a pause, turn the thumbwheel @
unt il
Pause appears in the line @. P ress the
thumbwheel @to confirm the selection .
T he pause symbol
m appears in line @.
.,. To con tinue t iming, press the th umb-
whee l@ .
I f timing is paused, you can contin ue it late r
even if you switch the ignitio n
off.
Meaning of the indicators in the center display
¢ fig. 18 :
CD Display of last time measu rement
@ Symbols:
-
[O]: Beginn ing of the time meas ure-
ment
- . : Slowes t time
- •: Fastest time
- [~]: Split time
-m : Pause
® Current t ime measurement
@ M
enu:
- lap 1 (start)
- New lap (start new lap)
- Split time (t ime within a section of a
l ap)
- Pause (pause in measurement)
- Statistics (eval uate lap times)
- Reset ( all data is de leted)
Dr iver in formation system 33
Evaluating or resetting recorded times
Applies to vehicles: wit h lap timer (S models)
You can evaluate the fastest, slowest and
average lap times .
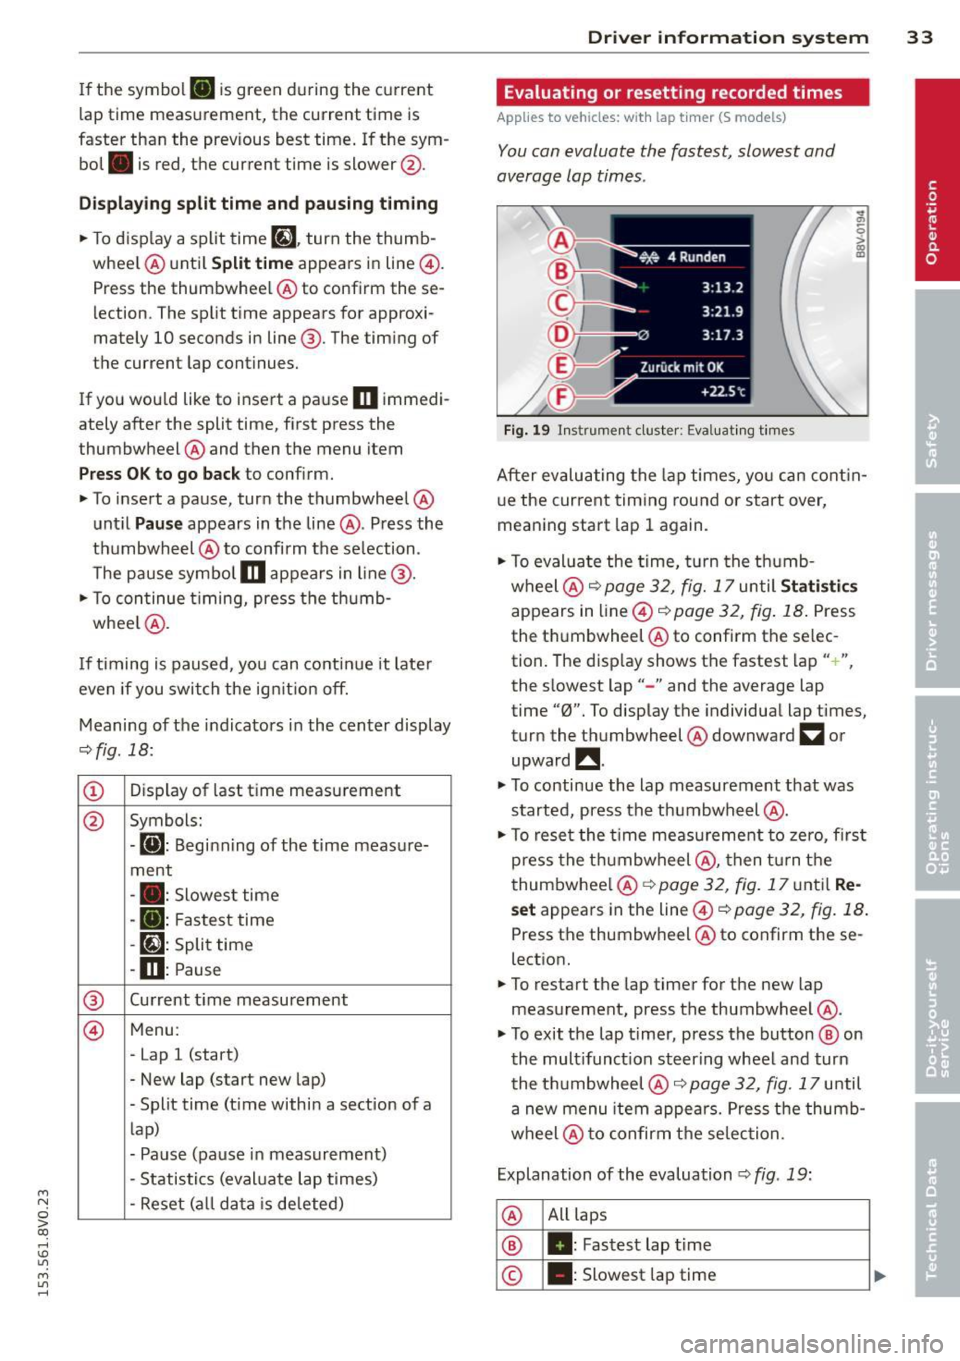
Fig. 1 9 In strument cluster: Evaluating t imes
.., a,
-0
~
After evalu ating the lap times, yo u can cont in
u e the current timing round or start over,
mean ing start lap 1 again .
.,. To eval uate the time, t urn the thumb
wheel @9
page 32, fig. 17 until Statistic s
appears in line @ c::> page 32, fig . 18 . Press
the t humbwheel @to confirm the se lec
tion. The disp lay shows the fastest lap" +",
the slowest lap"-" and the average lap
time "0". To display the individual lap times,
turn the thumbwheel @downward
a or
upward !!.
"' To continue the lap measurement that was
started, press the thumbwheel @.
.,. To rese t the time meas urement to zero, fi rst
press the th umbwheel @, then tu rn the
t humbwhee l@ c::>
page 32, fig. 17 unt il Re
set appears in the line @¢ page 32, fig. 18 .
Press the thumbwheel @to confirm these
lect ion.
"' To restart the lap timer for the new lap
measurement , press the thumbwheel @.
"' To exit the lap t imer, press the button @ on
the mult ifunct ion steering wheel and turn
the t humbwheel @9
page 32, fig. 17 until
a new menu item appea rs. Press the thumb
wheel @to confirm t he selec tion.
Explanation of the evaluation
c::> fig . 19:
@ All laps
® II: Fastest lap
time
© .: Slowest lap time
Page 58 of 310
56 Seat s a nd s tor ag e
Seats and storage
General information
Important information
& WARNING
Refer to the chapter Driving Safely
r::!>poge 125, Driving safety for important
information, t ips, suggestions and warn
ings that you should read and follow for
your own safety and the safety of your pas sengers.
Why is your seat adjustment so important?
The safety belts and the airbag system con
only provide maximum protection if the front
seats ore correctly adjusted.
There are various ways of adjusting the front
seats to provide safe and comfortable support
for the driver and the front passenger. Adjust
your seat properly so that :
- you can easily and quickly reach all the
switches and controls in the instrument
panel
- your body is properly supported thus reduc
ing physical stress and fatigue
- the safety belts and airbag system can offer
maximum protection
r::!> page 144 .
In the following sections, you will see exactly
how you can best adjust your seats .
There are special regulations and instructions
for insta lling a child seat on the front pas
senger's seat. Always follow the information regarding child safety provided in
r::!> page 170, Child Safety .
& WARNING
Incorrect seating position of the dr iver and
all other passengers can result in serious
personal in jury.
- Always keep your feet on the f loor when
the vehicle is in motion - never p ut your
feet on top of the instrumen t panel, out of the window or on top of the seat c
ush
ion. This applies espec ially to the passen
gers. If your seating position is incorrect,
you increase the risk of injury in the case
of sudden braking or an accident .
If the
airbag inflates and the seating position is incorrect, this could result in pe rsonal
inj ury or even death.
- It is important for both the drive r and
front passenger to keep a distance of at least 10 inches ( 25 cm) between them
selves and the steering wheel and/or in
strument panel. If you're sitting any
closer than this, the airbag system can not protect you properly. In addition, the
front seats and head restraints must be
adjusted to your body height so that they
can give you max imum protect ion.
- Always try to keep as much distance as
possible between yourself and the steer
ing wheel o r instrument panel.
- Do not adjust the driver's or front pas
senger's seat whi le the vehicle is moving.
Your seat may move unexpectedly, caus
ing sudden loss of veh icle cont ro l and
pe rsonal injury. If you adjust yo ur seat
while the veh icle is moving, yo u are ou t
of posit ion .
Driver's seat
The correct seat position is important for safe
and relaxed driving.
We recommend that you adjust the dr iver's
seat in the fo llow ing manne r:
.. Adjust the seat in fore and aft direction so
that you can easily push the peda ls to the
floor wh ile keeping your knees sl ightly bent
c::> &. in Why is your seat adjustment so im
portant? on page 56.
.. Ad just the bac krest so tha t when you sit
w ith your back against the backrest, you can
still grasp the top of the steering wheel.
.. For adjustab le head restraints: adjust the
head restra int so the upper edge is as even
as poss ible with the top of your head. If that
is not possible, try to adjust the head ..,.