warning light AUDI S6 2009 Repair Manual
[x] Cancel search | Manufacturer: AUDI, Model Year: 2009, Model line: S6, Model: AUDI S6 2009Pages: 398, PDF Size: 43 MB
Page 166 of 398
• ..__A_ u_ t _o_ m_ a_ t_ i_ c _ t_r _a _n_ s_ m_ is_ s_i o _ n ________________________________________________ _
Before you move the selector lever to R, press both, the button in the
handle of the selector lever
and the brake pedal at the same time .
When the ignition is on, the backup lights illuminate when the
selector lever is moved into R.
N -N eutr al
Sh ift to this position for standing with brakes applied=> page 164.
When the vehicle is stationary or at speeds below 3 mph (5 km/h),
you must always apply the footbrake before and while moving the
lever out of
N .
Do not use N for coasting downhill.
D -Normal dr iving po sition f or forward
Depending on the load on the engine, vehicle speed and the
dynamic control program, the transm ission will select the
optimal
gear ratio.
In certain circumstances it may be advantageous to temporarily
switch to the manua l shift program to manually select gear ratios to
match specific driving conditions=>
page 166.
When the vehicle is s tationary or at speeds below 3 mph (5 km/h),
you must always apply the footbrake before and while moving the
lever to
D ou t of N.
S -Spor t p osition
Select this position for sportier performance. In this position, the
transmission wil l not upshift as soon, allowing the vehicle to use the
increased power avai lable at higher engine speeds to achieve live
lier acceleration.
When the vehicle is stationary or at speeds below 3 mph (5 km/h),
you must always apply the foot brake before and whi le moving the
lever to
S out of N .
& WARNING
Re ad a nd follo w all WARNIN GS=> & in "Dr iv ing th e multitr oni c®"
on
page 16 2.
0 Note
Coasting downhill with the transm ission in N and the engine not
operating will result in damage to the automatic transmission and
possibly the catalytic converter. •
Applies to vehicles: with multitronic® Continuous ly Variable Transmission (CVT)
Automatic Shift Lock (ASL)
The Automatic Shift Lock safeguards you against acciden
tally shifting in to a forward or the reverse gear and
causing the vehicle to move unintentionally.
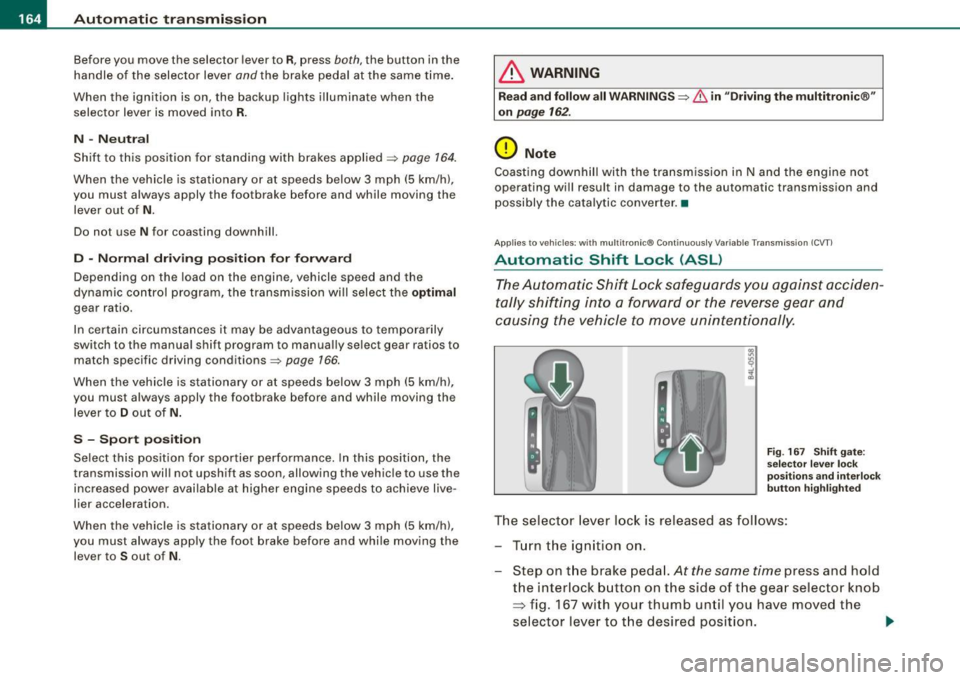
F ig . 167 S hift gate:
se lect or l ever loc k
pos it ions a nd int erl ock
butt on high lighted
The selector lever l ock is rel eased as f ollows :
T u rn the ignition on .
Step on the brake peda l.
At the same time press and hold
the interlock button on the side of the gear selector knob
=> fig. 167 with your thumb until you have moved the
selector lever to t he desired position.
~
Page 180 of 398
• .___A_ u_d_ i _P _a_ r_ k_ i_ n ..:g=-- S_ y=-- s_t _ e _m _____________________________________________ _
When the turn signal is switched on, only the necessary surfaces
and curves are shown. To change the side that is shown, simply
change the turn signal.
The displayed light blue® or dark blue © curved line identifies the
turn-around point when maneuvering to park. If the curved line
touches the curb, the steering wheel turn -around point has been
reached =>
page 177, fig. 182.
The distance from the rear bumper © to the red line@ is approxi
mately
1.3 ft (40 cm). Here, at the latest, you should stop backing up
=>
page 179.
& WARNING
Please note that objects not touching the ground can appear to be
further away than they really are (for example, the bumper of a parked vehicle, a trailer hitch, or the rear of a truck).
In this case,
you should not use the guide help lines to measure distance -
danger of accident!
0 Note
In the MMI Display, the direction of travel of the vehicle rear is repre
sented depending on the steering wheel angle. The vehicle front
swings out more than the vehicle rear .
[ i] Tips
• In order for the rear-view camera to function properly, the
camera lens=>
page 171, fig. 174 must be kept clean, and free of
snow and ice. Please follow the additional notes on=>
page 182.
• The positions of the orientation lines/ surfaces are displaced up
or down if the parking process is carried out with the rear-view
camera in Adaptive Air Suspension*=>
page 20 dynamic, off -road,
or lift mode. Therefore, the accuracy is reduced. •
Special parking situations
Applies to vehicles : with Audi Parkin g System (rea r) and rear-view camera
Parking next to obstacles
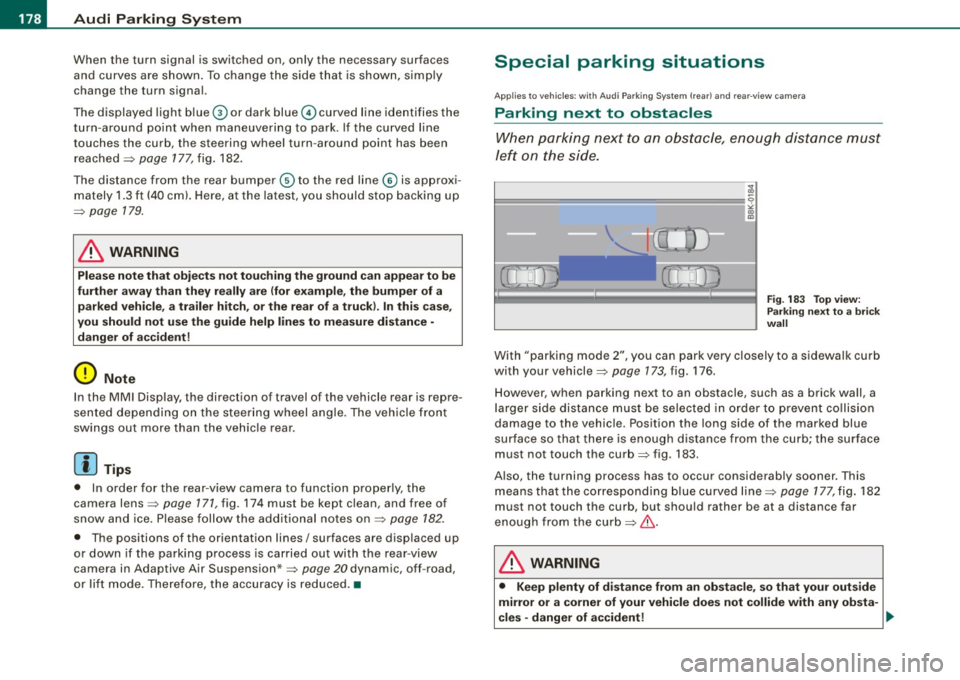
When parking next to an obstacle, enough distance must
left on the side.
=
Fig. 183 Top view:
Parking next
to a brick
wall
With "parking mode 2", you can park very closely to a sidewalk curb
with your vehicle=>
page 173, fig. 176.
However, when parking next to an obstacle, such as a brick wall, a
larger side distance must be selected in order to prevent collision
damage to the vehicle. Position the long side of the marked blue
surface so that there is enough distance from the curb; the surface
must not touch the curb=> fig.
183 .
Also, the turning process has to occur considerably sooner. This
means that the corresponding blue curved line=>
page 177, fig. 182
must not touch the curb, but should rather be at a distance far
enough from the curb=>&.
& WARNING
• Keep plenty of distance from an obstacle, so that your outside
mirror or a corner of your vehicle does not collide with any obsta-
cles -danger of accident! ..
Page 184 of 398
• .___A_ u_d_ i _P _a_ r_ k_ i_ n ..:g=-- S_ y=-- s_t _ e _m _____________________________________________ _
Applies to vehic les: with Audi Park ing System (rearl and rear-view camera
Rear-view camera tips
We recommend that you practice parking with t he rear -view camera
in a traff ic -free location, or parking lot, to become fami liar with the
system, the orientati on line s, a nd th eir functi on. When doi ng this,
there should be good light and weather conditions.
In the MMI Display, objects or vehicles ap pea r closer or further away
i f:
• you are driving in reverse gear from a level surface onto an
inc lin e, o r a downwa rd sl ope,
• you are driving in reverse gear toward protruding objects,
• the ve hicle is carrying too much load in the rear.
The accuracy of the orientation lines and blue surfaces diminishes if :
• the Adaptive Air Suspension* is defective, or th e dynamic, off
road, o r lift mode is swi tched on,
• the rear -view camera does not provide a reliable image, for
exam ple, in po or vi sibi lit y c ondi tio ns or if the lens is dirt y,
• the image on the screen is not visible due to sun g lare and reflec
t ion .
Caring for the rear-view camera lens:
• Dampen the lens with a household a lcoho l- based g lass c leaner,
and c lean th e lens wit h a dry cl oth.
• Remove snow with a hand brush.
• Remove ice, preferably with de -icing spray~
0.
& WARNING
• The rear-v iew camera does not replace the view to the rear and
the rear view mirrors .
• The rear-view camer a - because of technical limitat ions -does
not show the entire area behind the vehicle~
page 175 , fig. 178.
& WARNING (continued )
Be especially careful to che ck for small children and animals
before backing up . Small children and animals will not alway s be
shown in the rear-view display .
• The Audi Parking System is not a sub stitute for being careful
and alert when back ing up . Be especially careful during parking
and similar maneuver s. Always watch where you are driving and
make su re that nothing is in the way .
• Do not allow yourself to be distracted from traffic by the rear
view camera pi ctures .
• When maneuvering or parking , do not only u se the MMI Display
for orientat ion . Certain obje cts - depending on the screen resolu
tion -may not, or not entirely, be displayed ; for example tr ailer
hitches , cha ins , narrow posts , or fences .
• Only use the rear -view camera for aid if it shows a good , clear
picture . The image may be obscured , for example , by the sun
shining into the lens, dirt on the lens, or as the result of a defect -
danger of accident!
• If the image i s hazy when the MMI Display is switched on or the
area behind the vehicle is not visible (for e xample , as the result of
a dirty or defective lens ), the rear -view camera must not be used
for aid in maneuver ing - danger of accident!
• The rear -view camera generates two -dimensional images . For
this reason , please note that recesses in the ground and
protruding parts on another vehicle , or protruding objects fixed to
the ground , will be more difficult or impossible to recognize on the
MMI Di splay, due to the missing spacial depth .
• If the position and the installation angle of the camera has
changed, for example , after a rear end collision , do not continue to
use the system for safety reasons . Have it checked by an autho
rized Audi dealer or qualified work shop .
• Only use the rear-v iew camera when the rear lid is fully closed .
Make sure that objects mounted on the rear are not obscuring the
camera v iew .
Page 187 of 398
____________________________________________ A_ d_a--' p=-- t_iv _e_ A_ ir_ S_u_ s-=- p_e _ n_ s _ io_ n __ llll
Ap plies to vehicl es: wi th Adap tive Ai r Su sp ension
Chassis controls
Four different driving modes can be set by the driver.
The automatic contro l processes are speed -and time -dependent.
For example, it is not possib le to raise the suspension to the lift
mode above certain speeds.
L ev el a djustment
automatic
dynamic
aut om ati c Ground clearan
ce
about 4.7 - 4 .1 inches
(120 -105 mm)
about 4.7 inches (120 mm)
about 4.1 inches (105 mm)
a bo ut 5.3 inches ( 135 mm)
Se lect the automatic mode i f you p refer suspension and damping
settings emphasizing comfort .
• Low ering : When a speed of about 75 mph (120 km/h) is exceeded
for more than 30 seconds, the vehicle is automatically lowered by about 0.6 inch (15 mm) to the dynamic level which is more suitable
for highway speeds. Road holding is optimized as a result of the lower center of gravity and fuel consumption is reduced as a result
of reduced wind res istance.
• Rais ing : The vehicle is automatically raised again if the speed
falls below about 44 mph (70 km/h) for a period of 2 minutes . The
vehic le is raised immediate ly when speed falls below about 22 mph
(35 km/h).
s ta nd ard
Select the standard mode if you desire a suspension setting with a
special emphasis on comfort. In the standard mode there is
no
lowering of the suspension. Even a t high speeds, the vehicle stays
at the same level. Damping characteristics with a decided emphasis
on comfort are selected in this mode.
Controls and equip
ment d
y n ami c
Select the dynamic mode if you prefer a sporty suspension setting .
In this mode, the vehicle is lowered whi le it is still stationary and
spo rty damping characteristics are selected . The warn ing light
c.::i
in the instrument cluster will come on for a few seconds just to
remind you of the reduced ground clearance .
If y ou switch off the engine wh ile the ve hicle is in the dynamic mode
and then switch on the ignition once again, the
c.::i warning light
wi ll also come on again f or a few seconds as a reminder .
lift
Select the lift mode when you have to travel over poor sect ions of
road (e .g. trails). In the lift mode, the vehic le is raised by 0.6 inch (15
m m) compared to norma l leve l while it is stil l stationary and
damping characteristics are adjusted to emphasize comfort .
The lift mode can be activated only at speeds below 50 mp h (80
km/h) . When a speed of about 62 mph (100 km/h) is exceeded, the
system automatical ly leaves lift mode and the mode set previously
(standard, automat ic, dynam ic) is activated aga in. •
App lies to v ehic les : with Ada ptive Air Suspens io n
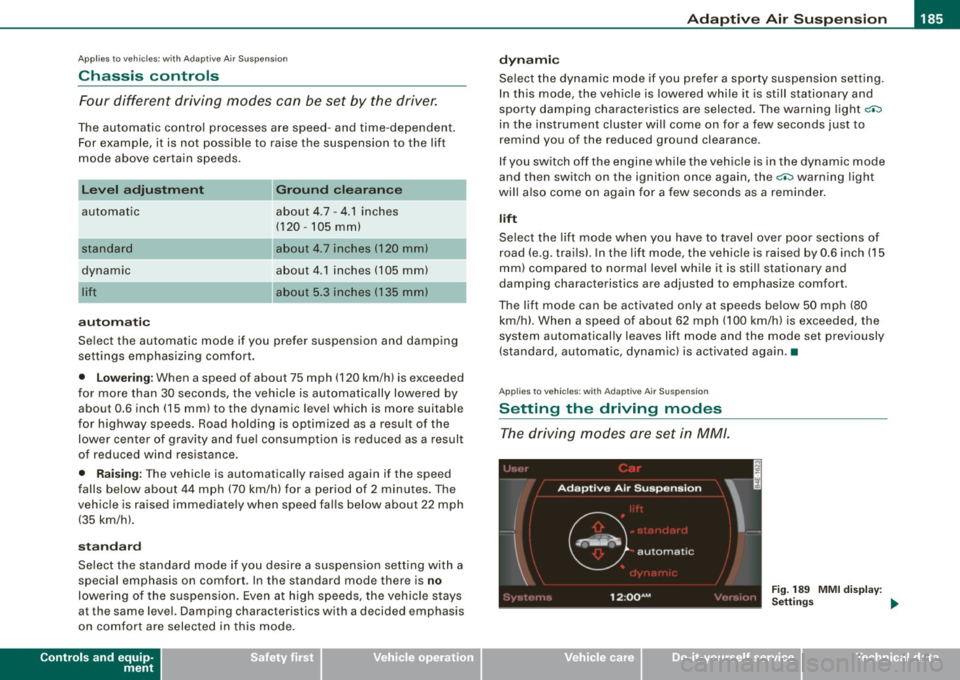
Setting the driving modes
The driving modes are set in MM/.
Fig . 189 MMI di splay:
Settin gs _,.
I • •
Page 190 of 398
• .___H_ o_ m _ e _L_i _ n _k _® ____________________________________________________ _
Homelink®
Universal remote control
Applies to vehic les: w ith Home link ® universal remote cont ro l
General information
The HomeLink® fe ature c an learn th e up to th re e r adio
fre que nc y c odes for m ost cu rrent t ransmi tters us ed for
operating gar age do ors, es tate gates , home o r out doo r
lighti ng sy stems, an d other de vice s.
Yo u must first pro gram t he Hom elink ® trans mitter b efor e you c an
use the system=>
page 189, "Pro gramm ing th e Home link® tra ns
mit ter".
In o rd er to pro gram t he Homelink® tra nsmitter fo r dev ices utiliz ing
ro lling code, a second person on a ladder who can safe ly reach the
ga rag e door o pener motor is reco m me nd ed. It is also necessa ry to
l ocate the "learn" button on yo ur garage do or opener moto r. R efer
to t he op era tin g instr uctions for the open er, as the loc ation and
co lor of th is button may vary by manufacturer .
Y o u c an still u se the o rigi na l r emo te c ontrol for th e dev ice at a ny
tim e.
& WARNING
• Never use the Homelinkl1JI transmitter with any garage door
opener that does have not the safety stop and reverse feature as
required by federal safety standards . This includes any garage
door opener model manufactured before April 1, 1982.
• A garage door opener which cannot detect an object , signaling
the door to stop and reverse does not meet current federal safety standards . Using a garage door opener without these features
increases risk of serious injury or death .
& WARNING (continued)
• For safety reasons never release the parking brake or start the
engine while anyone is standing in front of the vehicle.
• A garage door or an estate gate may sometimes be set in
motion when the Homelink ® remote control is being
programmed . If the device is repeatedly activated , this can over
strain motor and damage its electrical components -an over
heated motor is a fire hazard!
• To avoid possible injuries or property damage , please always
make absolutely certain that no persons or objects are located in
the range of motion of any equipment being operated.
[ i ] Tips
• If y ou wou ld l ik e mor e inf ormation o n Hom elink®, wh ere to
purchase the Homelink ® compatib le products, or wou ld li ke to
pu rchase th e Home link® Ho m e Lightin g Pack age, please call toll
fre e: 1 -8 0 0 -355 -3515.
• For Declara tion of Comp lia nc e to Un ited St ates FCC and Indust ry
C anada regulations=>
page 3 75. •
Page 197 of 398
________________________________________________ D_r_iv _ i _n_ g~ S_ a_ fe_ ly __ lffllll
Important things to do before driving
Safety is everybody's job! Vehicle and occupant safety
always depends on the informed and careful driver.
For your safety and the safety of your passengers, before
driving always:
-Make sure that all lights and signals are operat ing
correctly.
- Make sure that the tire pressure is correct.
- Make sure that all windows are clean and afford good
visibility to the outside.
- Secure all luggage and other items carefully =>
page 99.
-Make sure that noth ing can interfere w ith the pedals.
- Adjust front seat, head restraint and mirrors correctly for your height .
- Instruct passengers to adjust the head restraints
according to their height.
- Make sure to use the right ch ild restraint correctly to
protect children =>
page 238, "Child Safety ".
- Sit properly in your seat and make sure that your passen
gers do the same=>
page 80, "General recommenda
tions".
- Fasten your safety belt and wear it p roperly. Also instruct
your passengers to fasten the ir safety belts properly
=>
page 205. •
Controls and equip
ment Safety first
Vehicle operation
What impairs driving safety?
Safe driving is directly related to the condition of the
vehicle, the driver as well as the driver's ability to concen
trate on the road without being distracted.
The driver is responsible for the safety of the vehicle and all
of its occupants. If your ability to drive is impaired, safety
risks for everybody in the vehicle increase and you also
become a hazard to everyone else on the road =>& .There
fore:
Do not let yourself be distracted by passengers or by
using a cellular telephone .
NEVER drive when your driving ability is impaired (by
medications, alcohol, drugs, etc.).
- Observe all traffic laws, rules of the road and speed limits
and plain common sense .
- ALWAYS adjust your speed to road, traffic and weather
conditions.
- Take frequent breaks on long trips. Do not drive for more
than two hours at a stretch.
- Do NOT drive when you are tired, under pressure or when
you are stressed .
& WARNING
Impaired driving safety increases the risk of serious personal
injury and death whenever a vehicle is being used. •
Vehicle care Do-it-yourself service Technical data
Page 198 of 398
___ D_ ri_v _i_n -=g=--- S_ a_ f _e___, ly'---------------------------------------------------
Proper occupant seating positi ·ons
Proper seating position for the driver
The proper driver seating position is important for safe,
relaxed driving.
Fig. 195 The correct
distance between
driver and steering
wheel
Fig. 196 Correct head
restraint position for
driver
For your own safety and to reduce the risk of injury in the
event of an accident, we recommend that you adjust the
driver's seat to the following position:
- Adjust the driver's seat so that you can easily push the
pedals all the way to the floor while keeping your knee(s)
slightly bent=:>& . - Adjust the angle of the seatback so that it is in an upright
position so that your back comes in full contact with it
when you drive.
- Adjust the steering wheel so that there is a distance of at
least 10 inches (25 cm) between the steering wheel and
your breast bone=:> fig. 195. If not possible, see your
authorized Audi dealership about adaptive equipment.
- Adjust the steering wheel so that the steering wheel and
airbag cover points at your chest and not at your face.
- Grasp the top of the steering wheel with your elbow(s)
slightly bent.
- Adjust the head restraint so that the upper edge is as even with the top of your head as possible but no lower
than eye level and so that it is as close to the back of your
head as possible =:> fig . 196.
- Fasten and wear safety belts correctly=:>
page 209.
- Always keep both feet in the footwell so that you are in
control of the vehicle at all times.
For detailed information on how to adjust the driver's seat, see
=> page 81.
& WARNING
Drivers who are unbelted, out of position or too close to the airbag
can be seriously injured by an airbag as it unfolds. To help reduce
the risk of serious personal injury:
• Always adjust the driver's seat and the steering wheel so that
there are at least 10 inches
125 cm) between your breastbone and
the steering wheel.
• Always hold the steering wheel on the outside of the steering
wheel rim with your hands at the 9 o'clock and 3 o'clock positions ..
Page 207 of 398
_________________________________________________ S_ a_f _e _t .:..y _ b_ e_lt_ s __ lffllll
Safety belts
General notes
Always wear safety belts!
Wearing safety belts correctly saves lives!
This chapter explains why safety belts are necessary, how
they work and how to adjust and wear them correctly.
- Read all the information that follows and heed all of the
instruct ions and WARNINGS.
& WARNING
Not wearing safety belts or wearing them improperly increases
the risk of serious personal injury and death.
• Safety belts are the single most effective means available to
reduce the risk of serious injury and death in automobile acci
dents . For your protection and that of your passengers , always
correctly wear safety belts when the vehicle is moving.
• Pregnant women, injured, or physically impaired persons must
also use safety belts . Like all vehicle occupants, they are more
likely to be seriously injured if they do not wear safety belts . The
best way to protect a fetus is to protect the mother -throughout
the entire pregnancy. •
Number of seats
Your Audi has a total of five seating positions: two in the front and
three in the rear. Each seating position has a safety belt.
Controls and equip ment Safety first
Vehicle operation
& WARNING
Not wearing safety belts or wearing them improperly increases
the risk of serious personal injury and death .
• Never strap more than one person, including small children,
into any belt. It is especially dangerous to place a safety belt over
a child sitting on your lap.
• Never let more people ride in the vehicle than there are safety
belts available.
• Be sure everyone riding in the vehicle is properly restrained
with a separate safety belt or child restraint. •
Safety belt warning light ~
Your vehicle has a warning system for the driver and front
seat passenger (on USA models only) to remind you about
t he importance of buckling-up.
Before driving off, always:
Fig. 199 Safety belt
warning light in the
instrument cluster -
enlarged
- Fasten your safety belt and make sure you are wearing it
properly.
1J,,
Vehicle care Do-it-yourself service Technical data
Page 208 of 398
___ S_a_ f_ e_ t-= y_ b_e_ l_ t _s _______________________________________________ _
- Make sure that your passengers also b uckle up and prop
erly wea r th eir sa fety belts.
Protect children wit h a child restraint system appropriate
for the size and age.
The warning light i in the instrument cluster lights up when the
ignition is switched on as a reminder to fasten the safety belts. In
addition , you will hear a warning tone.
After the ignition is switched on, the warning light in the instrument cluster will a lways come on for about 6 seconds and if the driver has
not fastened the safety belt, a warning tone will also sound for
about 6 seconds . As soon as the driver has fastened the safety belt,
the warning tone will stop and the warning light will go out .
If the driver or front seat passenger have not buckled -up within
about 10 seconds after the warning tone has stopped and the
vehicle is moving faster than about 15 mph, the warning tone will
sound again for about 6 seconds and then stop for 24 seconds and
then repeat this reminder sequence for a maximum of 2 minutes. At
speeds be low 5 mph, the warning tone will not sound.
Fa sten your safe ty belt and m ake su re that your p assengers also
properl y put on th eir s afet y belts .
& WARNING
• Safety belt s are the single mo st effective mean s available to
reduce th e risk of ser ious injur y and death in a utomobile acci
dent s. For your prote ction and th at of your pas senger s, alwa ys
c orre ctl y we ar safety belt s when t he vehicle is moving .
• Failure t o pay att ention to th e warning light that co me on,
c ould lead to per sonal injury .•
Why safety belts?
Frontal co11isions and the law of physics
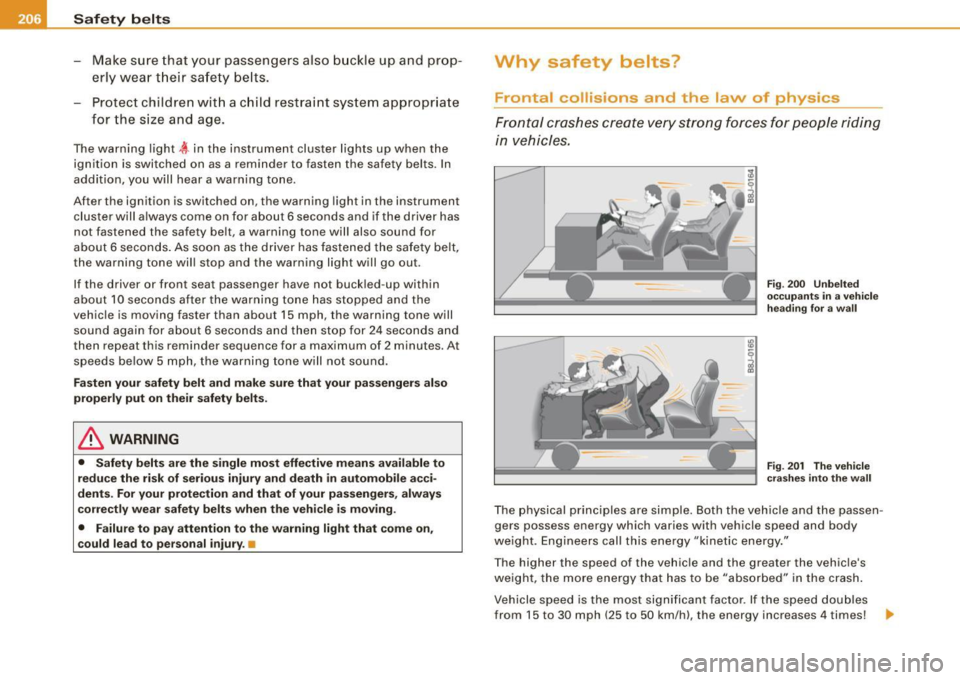
Front al crashes create very strong forces for pe ople riding
in vehicles.
F ig. 2 00 U nbel ted
o cc up ants i n a ve hicle
he ading for a wa ll
Fi g. 2 01 T he vehi cle
c ras hes in to t he wa ll
The physical principles are simple. Both the vehicle and the passen
gers possess energy which varies with vehicle speed and body
we ight . Engineers cal l this energy "kinetic energy ."
T he higher the speed of the vehicle and the greater the vehic le's
we ight, the more energy that has to be "absorbed" in the crash .
Vehicle speed is the most significan t factor. If the speed doubles
from 15 to 30 mph (25 to 50 km/h), the energy increases 4 times! .,
Page 212 of 398
___ S_a_ f_ e_ t-= y_ b_e_ l_ t _s _______________________________________________ _
-Insert t he tongue into the correct b uckle of y our seat
unt il you h ea r it la tc h securely~ fig. 205.
Pull on t he belt to make sure that it is securely latched in
the buckle.
Aut om ati c sa fe ty belt re tra cto rs
Eve ry safety be lt is equipped with an automatic belt retractor on the
shoulder belt. This feature locks the belt when the belt is pulled out
fast, during hard braking and in an accident. The belt may a lso lock
when you drive up or down a steep hill or through a sharp curve .
During normal driving the belt lets you move free ly.
Safety belt prete nsi oners
The safety belts are equipped with a be lt pretensioner that he lps to
tighten the sa fety be lt and remove slack when the pretensioner is
activated. The function of the pretensioner is monitored by a
warning light=>
page 18 .
Swit chable locking fe ature
Every safety belt except the one on the driver sea t is equipped with
a switchab le locking feature that
must be used when the safety belt
is used to a ttach a chi ld safe ty sea t. Be sure to read the important
information about this feature=>
page 248.
& WARNING
Improper ly positioned safet y belts can cause seriou s inj ury in an
accident =>
page 210 , "S afety belt po sitio n".
• Safet y belts offer opt imum protection on ly when the seat back
i s upright and belt s are properly po sition ed on t he bod y.
• Always make sure that the rear seat backrest to whi ch the
c enter r ear sa fet y belt i s atta ched i s sec ure ly lat ched whe nev er
the rear center saf ety belt i s being us ed. If the ba ckrest is not
s ecu rely lat ched, the pas senge r will mo ve fo rward with the back
rest dur ing sudden braking , in a sudden maneu ver and e spec iall y
in a cra sh.
& W AR N ING (continu ed )
• Never attach the safety belt to the buck le for anothe r seat .
Atta ch ing th e be lt to the wrong buckle will reduce safety belt
e ffe cti venes s and can ca use seriou s per son al injur y.
• A p assenger who i s not prope rly re str ained can be s eriousl y
injured by the saf ety belt it self wh en it m ove s from the stronger
p art s of the body into criti ca l area s like the abd omen .
• Alway s lock the convert ible lo ck ing retractor when you are
s ecu ring a ch ild safety se at in the v ehi cle
=> page 2 50. •
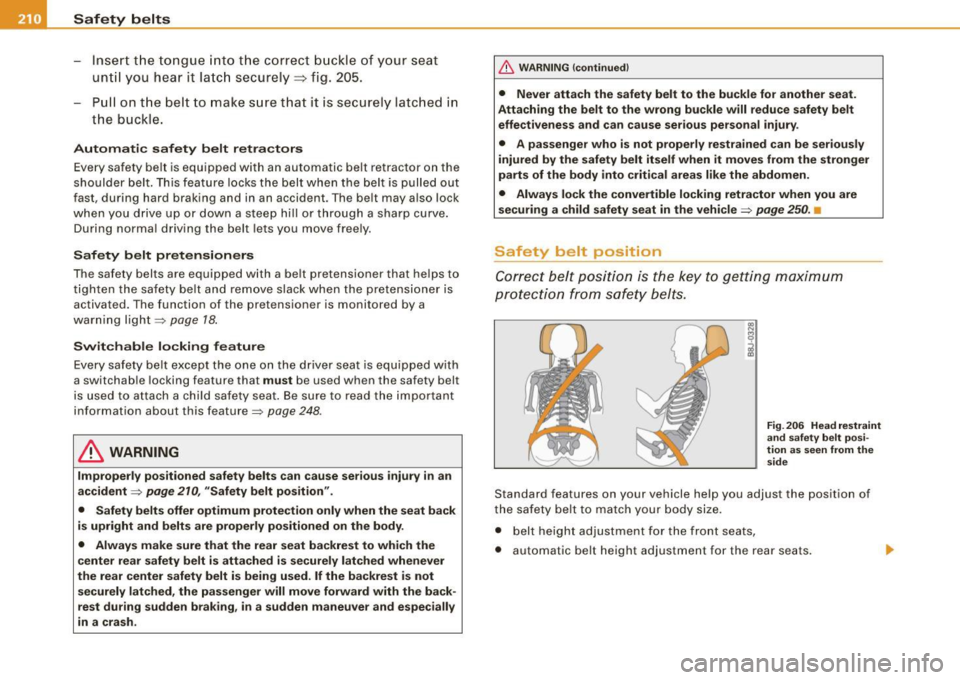
Safety belt position
Correct belt posi ti o n is the key to getting maximum
protecti on f rom safety be lts.
Fig . 2 06 He ad r est ra in t
an d sa fe ty b elt p osi
tion a s seen from th e
sid e
Standard features on your vehicle help you adjust the position of
the safety belt to match your body size .
• belt height adjustment for the front seats,
• automatic belt height adjustment for the rear seats.