warning light AUDI S6 2010 Repair Manual
[x] Cancel search | Manufacturer: AUDI, Model Year: 2010, Model line: S6, Model: AUDI S6 2010Pages: 368, PDF Size: 86.82 MB
Page 158 of 368
1111....__A_ u_ t_o _m_ a_ t_ic _ t_ r_ a_ n_s _m_ i _s_ s_ i_ o_ n ____________________________________________ _
warning appears in the instrument cluster display when the selector
is in
P and N:
When stationary apply footbrake while selecting gear
A time delay element prevents the selector lever from locking when
it is moved through the
N position (going from R to D). The locking
element will lock the selector lever if the lever is left in N (Neutral) for
more than approximately 1 second, without the brake pedal be ing
pressed .
At speeds above about 3 mph (5 km/h) the Automatic Shift Lock is
automatically deactivated in the
N position.
Interlock button
The lock button on the selector lever prevents the lever from being
accidentally shifted into certain positions. Pressing this button deac
tivates the selector lever lock. Depending on the direction of the
shift, the selector lever locks at different positions. The positions are
high light ed in the illustrat ion~
page 155 , fig. 148.
Ignition key safety interlock
The key cannot be removed from the ignition unless the selector lever
is in the
P park position. When the ignition key is removed, the
selector lever w ill be locked in the
P pos it ion .•
Ap plies to v ehicles : w ith mult itronic ® Contin uously Var iable Transm issio n (C VT)
Kick-down
The kick-down feature allows the vehicle to generate
maximum acceleration.
When you press the accelerator pedal beyond the resistance point
that is reached at full throttle, the transmission will select a lower
gear ratio based on vehicle speed and engine RPM . The engine RPM
w ill be contro lled to produce maximum vehicle acceleration as long
as you continue to press the accelerato r pedal beyond th is resistance
point .
& WARNING
Be careful when using the kick-down feature on slippery roads.
Rapid acceleration may cause the vehicle to skid. •
Applies to veh icl es: w it h mul tit ro nic® Con tin uous ly Va ria bl e Tran smis s io n ( CVT)
Dynamic shift program (DSP)
The multitronic ® transmission is electronically
controlled .
The transmission selects the appropriate gear ratio (upshifts and
downshifts) automatically based on preset d riving programs.
The transmission will select one of the
economy programs when you
drive at a steady speed or a gradua lly changing speeds without heavy
acceleration . Th is gives best fuel eff iciency, with early upshifting and
delayed downshifting.
Th e transmission will automatically select the
sporty shift programs
when you dr ive at higher speeds, or w ith heavy acceleration and
frequently changing speeds. Upshifts are delayed to make full use of
engine power . Downshifting takes place at higher engine speeds than
in the economy programs.
Th e selection of the most suitab le shift program is a continuous,
automatic process. The driver can a lso make the transmission switch
to a sporty program by
quickly pressing down the gas pedal.
This causes the transmiss ion to shift down into a lower gear ratio and
makes quick acceleration possible (to pass another vehicle) You do
not need to press the gas pedal into the kickdown range. After the
transmission has upshifted, the original program is selected
according to your driving style.
An additional shift prog ram allows the automatic t ransmission to
select the proper gear for uph ill and downh ill grad ients.
This prevents the transmiss ion from shifting up and down unneces
sari ly on hills. The transmission will shift down to a lower gear ratio _,,,
Page 163 of 368

______________________________________________________ P_a _ r_ k_ a_ s_s _i _ s _t __ _
Sensor s in the bumper (C anada mo del s)
Sensors are located in the rear bumpers. If these detect an obstacle,
audib le and visual signals warn you. The range at which the sensors
beg in to measure is approximately:
T o the side
2 ft (0.60 m)
Center rear 5.2 ft (1.60 m)
Distance warning when reversing starts when an obstacle is detected
in the range of the parking ass ist system. As the d istance decreases,
the time interval between the audib le tones becomes shorter .
When the distance is less than 1ft
(0.30 m), the tone becomes
continuous. At this point you should stop backing up.
If the dis tance to an obstacle stays the same, the volume of the
distance signal chime is gradually reduced after about
4 seconds
(does not affect the continuous signal tone) . Approach ing another
obstacle w ill cause the distance signal to sound again at the normal
vol ume.
Rear view camera co verage area
The MM I display shows the area covered by the rea r view camera
=>
page 160, fig. 156 G) . Objects that are not in the area covered@
are not shown on the MMI display .
We recommend that you practice parking w ith the rear v iew camera
in a traffic-free location or parking lot to become fam iliar with the
system, the or ientat ion lines, and their function . When doing this,
there should be good light and weather cond itions.
In the MM I disp lay, objects or vehicles appea r closer or further away
if:
• you are dr iv ing in reverse gear from a level surface onto an incline,
or a downward slope,
• you are driving in reverse gear toward protruding objects,
• the vehicle is carrying too much load in the rear.
T he accuracy of the orientation lines and blue surfaces dimin ishes if :
Controls and equip
ment Safety first
•
the rear view camera does not provide a re liable image, fo r
ex am ple, in poor visib ility condi tions or if the lens is dirty,
• the image on the screen is not visible due to sun glare and reflec
t ion.
Caring for the rear view camera lens
T he rear view camera is located above the rear license plate b racket.
For the parking ass ist to operate, the lens=>
page 160, fig. 157 must
be kept clean:
• Dampen the lens with a household alcohol-based glass cleaner,
and clean the lens with a d ry cloth => 0 .
• Remove snow with a hand brush and ice preferab ly w ith a de- icing
spray =>0.
& WARNING
• The parking aid cannot repla ce th e driv er' s attention . The
dri ver alon e is respons ibl e for parking and sim ilar dri ving maneu •
vers .
• Sensors ha ve blind sp ots in which obje cts cannot be detected .
Pay special attention to small children and animals be cau se the
sen so rs cannot alwa ys detect them .
• Always ke ep your e yes on the v ehicle 's surr ounding s, u sing th e
rear view mi rro r as well.
• Do not allow yours elf t o be distracted from traffic by the rear
v iew camera pictures.
• If th e position and the in stallation angle of the camera has
changed , for e xample, after a rear end collision , do n ot continue
to use the s ystem for safety r eason s. Have it checked b y a qualified
dealer ship .
0 Note
• Low obstacles already signaled by a warning can disappear from
the system's detection ra nge as they a re approached and will not
~
Vehicle care Technical data
Page 169 of 368
__________________________________________ A _d_ a __,_ p_t_ i_v _e _ A_i_ r _ S_ u_s __,_p _ e_ n_s _ i_ o _n _ __.fflll
A pplie s to veh icles : with Ad aptive Air Su spen sion
Chassis controls
Four different driving modes can be set by the driver.
The automatic control processes are speed- and time-dependent. For
example, it is not possible to raise the suspension to the lift mode
above certain speeds.
Level adjustment
Automatic
Comfort
Dynam ic
Lift
Automatic Ground clearance
about 4
. 7 -4.1 inches
(120 -105 mm)
about 4. 7 inches (120 mm)
about 4.1 inches (105 mm)
about 5.3 inches (135 mm)
Select the automatic mode if you prefer suspens ion and damping
sett ings emphasizing comfort .
• Lowering : When a speed of about 75 mph (120 km/h) is exceeded
for more than 30 seconds, the vehicle is automatically lowered by
about 0 .6 inch (15 mm) to the dynamic level which is more suitable
for highway speeds. Road holding is optimized as a result of the lower
center of gravity and fuel consumption is reduced as a result of
reduced wind resistance.
• Raising: The vehicle is automatically raised again if the speed falls
below about 44 mph (70 km/h) for a period of 2 minutes. The veh icle
is raised immediately when speed falls below about 22 mph (35
km/h).
Comfort
Select the comfort mode if you desire a suspension setting with a
special emphasis on comfort. In the standard mode there is
no
lowering of the suspension. Even at high speeds, the vehicle stays at
the same level. Damping characteristics with a decided emphasis on
comfort are se lected in this mode .
Contro ls a nd e quip
m en t Vehicle
OP-eration
Dynamic
Select the dynamic mode if you prefer a sporty suspension setting . In
this mode, the vehicle is lowered while it is st ill stationary and sporty
damping characteristics are se lected. The wa rning light
cw in the
instrument cluster will come on for a few seconds just to remind you
of the reduced ground clearance.
If you switch off the engine wh ile the vehicle is in the dynamic mode
and then switch on the ignition once again, the
cw warning light will
also come on again for a few seconds as a reminder.
Lift
Select the lift mode when you have to travel over poor sections of
road (e.g. trails) . In the lift mode, the vehicle is raised by 0.6 inch (15
mm) compared to normal level w hile it is still stationary and damping
characteristics are adjusted to emphasize comfort.
Th e lift mode can be activated only at speeds below 50 mph (80
km/h) . When a speed of about 62 mph (100 km/h) is exceeded, the
system automatically leaves lift mode and the mode set previously
(standard, automatic, dynamic) is activated again.•
App lies to veh icles: w ith Adaptive Air Suspens ion
Setting the driving modes
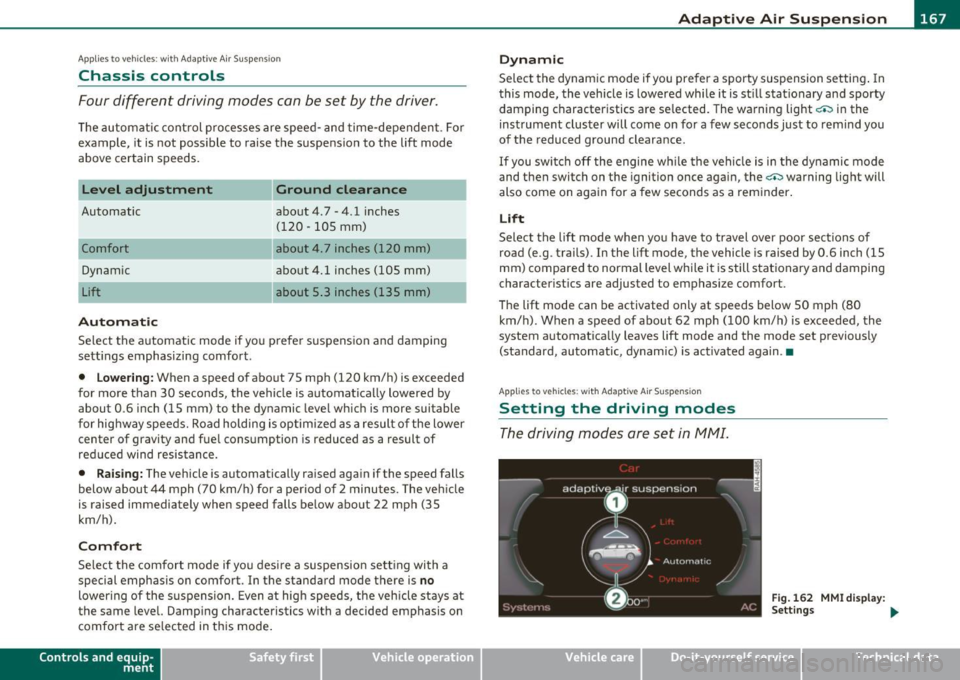
The driving modes are set in fv1fv1I.
Fig. 162 MMI display :
Settings ...
Vehicle care Do-it-yourselt service iTechnical data
Page 171 of 368
___________________________________________________ H_o_ m_ e_L_ i_ n _ k_ ® __ _
Homelink ®
Universal remote control
Applies to veh icles: w ith Hom eli nk ® universal remote control
General information
The Homelink ® feature can learn the up to three radio
frequency codes for most current transmitters used for
operating garage doors, estate gates, home or outdoor
lighting systems, and other devices.
You must first program the Homelink ® transm itter before you can
use the system=>
page 170, "Programming the Home link® trans
mitter".
I n order to program the Homelink ® transmitter for devices utilizing
rolling code, a second person on a ladder who can safe ly reach the
garage door opener motor is recommended. It is also necessary to
locate the "learn" button on your garage door opener motor. Refer to
the operating instructions for the opener, as the location and color of
this button may vary by manufacturer.
You can still use the original remote control for the device at any
time.
& WARNING
• Never use the Homelink'"' transmitter with any garage door
opener that does have not the safety stop and reverse feature as
required by federal safety standards. This includes any garage
door opener model manufactured before Aprill, 1982.
• A garage door opener which cannot detect an object, signaling
the door to stop and reverse does not meet current federal safety
standards. Using a garage door opener without these features
increases risk of serious injury or death.
Controls and equip
ment Safety first
& WARNING
(continued)
• For safety reasons never release the parking brake or start the
engine while anyone is standing in front of the vehicle.
• A garage door or an estate gate may sometimes be set in
motion when the Homelink ® remote control is being
programmed. If the device is repeatedly activated, this can over
strain motor and damage its electrical components -an over
heated motor is a fire hazard!
• To avoid possible injuries or property damage, please always
make absolutely certain that no persons or objects are located in
the range of motion of any equipment being operated.
rn Tips
• If you would like more informat ion on Homelink ®, where to
purchase the Homelink ® compatible products, or would like to
purchase the Homelink ® Home Lighting Package, please call toll
free: 1-800-355-3515.
• For Declaration of Compliance to United States FCC and Industry
Canada regulations=>
page 347 . •
Vehicle care Technical data
Page 177 of 368
Driving Safely ---------------------"~'---
Important things to do before driving
Safety is everybody's job! Vehicle and occupant safety
always depends on the informed and careful driver.
For your safety and the safety of your passengers, before
driving always:
- Make sure that all lights and signals are operating
correctly.
- Make sure that the tire pressure is correct.
- Make sure that all windows are clean and afford good visi-
bility to the outside.
- Secure all luggage and other items carefully::::>
page 93.
-Make sure that nothing can interfere with the pedals.
- Adjust front seat, head restraint and mirrors correctly for your height .
- Instruct passengers to adjust the head restraints according to their height.
- Make sure to use the right child restraint correctly to
protect children ::::,
page 217, "Child Safety".
- Sit properly in your seat and make sure that your passen gers do the same::::,
page 75, "General recommenda
tions".
- Fasten your safety belt and wear it properly. Also instruct
your passengers to fasten their safety belts properly
=:> page 185. •
Controls and equip
ment Safety first Vehicle operation
What impairs driving safety?
Safe driving is directly related to the condition of the
vehicle, the driver as well as the driver's ability to concen
trate on the road without being distracted .
The driver is responsible for the safety of the vehicle and all
of its occupants. If your ability to drive is impaired, safety
risks for everybody in the vehicle increase and you also
become a hazard to everyone else on the road::::,,& . There
fore:
Do not let yourself be distracted by passengers or by using
a cellular telephone.
NEVER drive when your driving ability is impaired (by
medications, alcohol, drugs, etc.).
- Observe all traffic laws, rules of the road and speed limits
and plain common sense .
- ALWAYS adjust your speed to road, traffic and weather
conditions.
- Take frequent breaks on long trips. Do not drive for more than two hours at a stretch.
- Do NOT drive when you are tired, under pressure or when
you are stressed .
& WARNING
Impaired driving safety increases the risk of serious personal
injury and death whenever a vehicle is being used.•
Vehicle care Do-it-yourself service Technical data
Page 178 of 368
-Driving Safely
·"'---=---"'----------------
Proper occupant seating positions
Proper seating position for the driver
The proper driver seating position is important for safe,
relaxed driving.
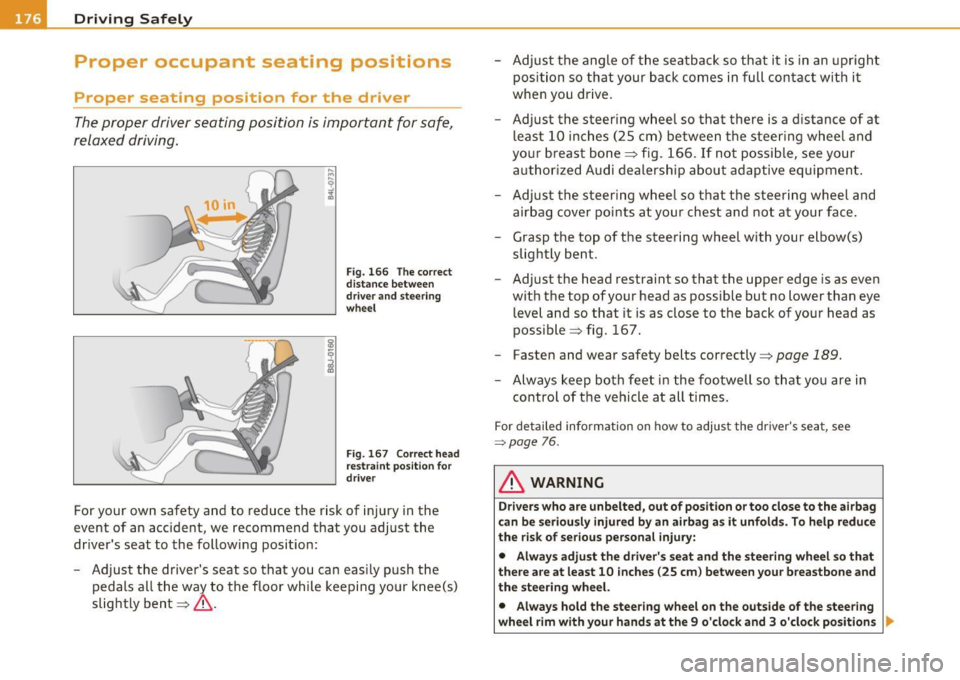
Fig. 166 The correct
distance between
driver and steering
wheel
Fig . 167 Correct head
restraint position for
driver
For your own safety and to reduce the risk of injury in the
event of an accident, we recommend that you adjust the
driver's seat to the following position:
- Adjust the driver's seat so that you can easily push the
pedals all the way to the floor while keeping your knee(s)
slightly bent==>& . -
Adjust the angle of the seatback so that it is in an upright
position so that your back comes in full contact with it
when you drive.
- Adjust the steering wheel so that there is a distance of at least 10 inches (25 cm) between the steering wheel and
your breast bone==> fig. 166. If not possible, see your
authorized Audi dealership about adaptive equipment.
- Adjust the steering wheel so that the steering wheel and airbag cover points at your chest and not at your face.
- Grasp the top of the steering wheel with your elbow(s) slightly bent.
- Adjust the head restraint so that the upper edge is as even
with the top of your head as possible but no lower than eye
level and so that it is as close to the back of your head as
possible ==> fig. 167.
- Fasten and wear safety belts correctly=>
page 189.
-Always keep both feet in the footwell so that you are in
control of the vehicle at all times.
For detailed information on how to adjust the driver's seat, see
=:>page 76 .
& WARNING
Drivers who are unbelted, out of position or too close to the airbag
can be seriously injured by an airbag as it unfolds. To help reduce
the risk of serious personal injury:
• Always adjust the driver's seat and the steering wheel so that
there are at least 10 inches (25 cm) between your breastbone and
the steering wheel.
• Always hold the steering wheel on the outside of the steering
wheel rim with your hands at the 9 o'clock and 3 o'clock positions ..
Page 187 of 368
_____________________________________________ S_a _f _e _t _y _b_ e_lt _ s __ _
Safety belts
General notes
Always wear safety belts!
Wearing safety belts correctly saves lives!
This chapter explains why safety belts are necessary, how
they work and how to adjust and wear them correctly.
- Read all the information that follows and heed all of the
instructions and WARNINGS.
& WARNING
Not wearing safety belts or wearing them improperly increases
the risk of serious personal injury and death.
• Safety belts are the single most effective means available to
reduce the risk of serious injury and death in automobile acci
dents. For your protection and that of your passengers, always
correctly wear safety belts when the vehicle is moving.
• Pregnant women, injured, or physically impaired persons must
also use safety belts. Like all vehicle occupants, they are more
likely to be seriously injured if they do not wear safety belts. The
best way to protect a fetus is to protect the mother - throughout
the entire pregnancy. •
Number of seats
Your Audi has a total of five seating positions: two in the front and
three in the rear . Each seating position has a safety belt .
Controls and equip
ment Safety first Vehicle operation
& WARNING
Not wearing
safety belts or wearing them improperly increases
the risk of serious personal injury and death.
• Never strap more than one person, including small children,
into any belt. It is especially dangerous to place a safety belt over
a child sitting on your lap.
• Never let more people ride in the vehicle than there are safety
belts available.
• Be sure everyone riding in the vehicle is properly restrained
with a separate safety belt or child restraint. •
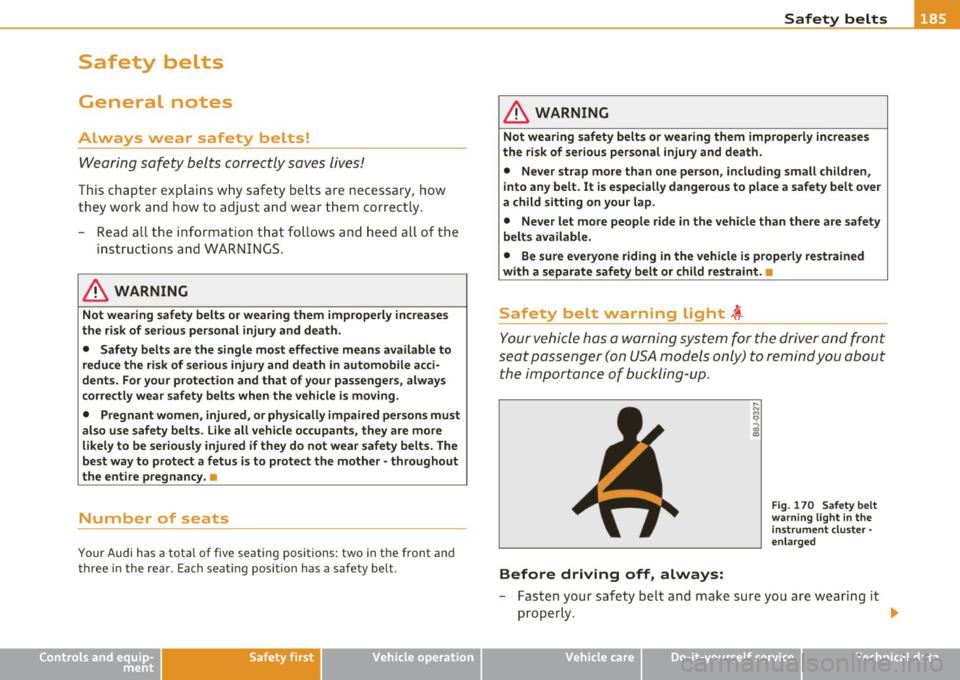
Safety belt warning light t
Your vehicle has a warning system for the driver and front
seat passenger ( on USA models only) to remind you about
the importance of buckling-up.
Before driving off, always:
Fig. 170 Safety belt
warning light in the
instrument cluster -
enlarged
- Fasten your safety belt and make sure you are wearing it
properly .
IJ,,
Vehicle care Do-it-yourself service Technical data
Page 188 of 368
___ S_a _f_e _t-=y '-- b_e_ l_ t _s _____________________________________________ _
-Make sure that your passengers also buckle up a nd prop
erly wear their safety belts .
- Protect c hildren with a child rest raint system appropria te
fo r the size and ag e.
The warn ing light ~ in the instrument cluster lights up when the igni
tion is sw itched on as a reminder to fasten the safety belts. In addi
tion, you will hear a warn ing to ne .
After the ignition is switched on, the warn ing light in the instrument
clu ster will alw ays come on fo r a bout 6 seconds and i f the driver has
not fastened the safety belt, a warning tone will also sound for about
6 seconds. As soon as the d rive r has fastened the safety belt, the
warning tone will stop and the war ning light w ill go out.
If the driver or front seat passenger have not buck led-up within about
1 0 se conds afte r th e war ning tone has stopped and the veh icle is
moving faster than about 15 mph, the warning tone will sound again
for a bout 6 se conds and then s to p for 24 seco nds and the n re pea t
this rem inder sequence for a max imum of 2 m inutes . At speeds
below 5 mph, the w arning tone will not sou nd.
Fa sten your safety belt and make sure that your passenger s also
properly put on their safety belts.
& WARNING
• Safety belt s are the single most effe ctiv e mean s available to
reduce the risk of serious injury and death in automobile a cci
dents . For your protection and that of your pa ssenger s, always
c orrectly wear safety belts when the vehicle is moving .
• Failure to pay attention to the warning light that come on,
could lead to person al injury .•
Why safety belts?
Frontal collisions and the law of physics
Frontal cr ashes cre ate very stron g forc es for people
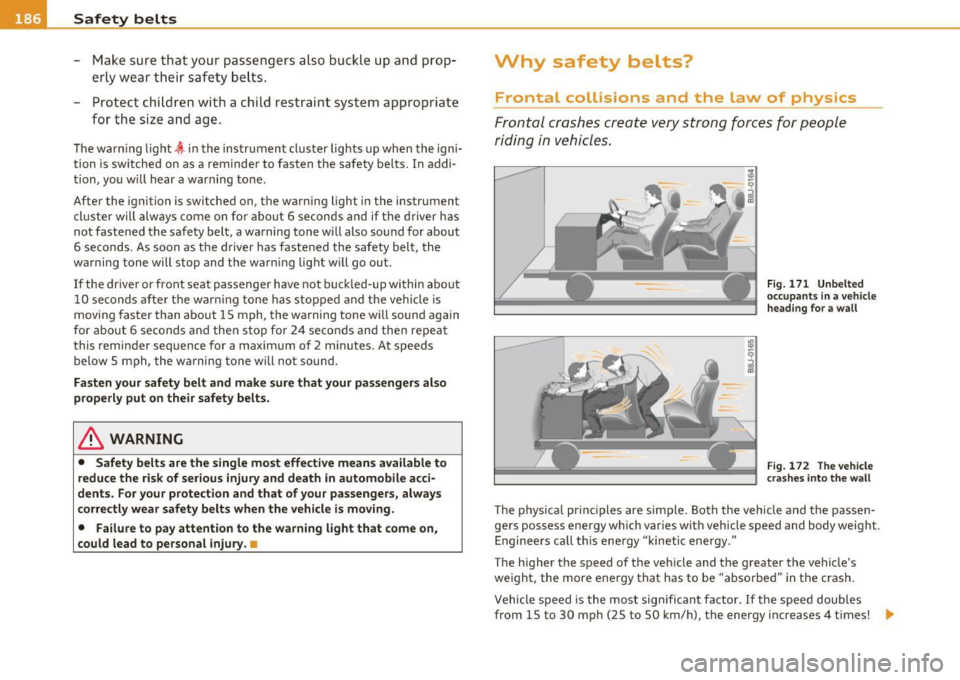
riding i n vehi cles.
Fig . 171 Unbe lted
o ccupa nts in a vehicle
h eading f or a w all
Fig . 1 72 Th e vehicle
cr as hes int o t he wall
The p hys ica l pr inc iples are simple. Both the vehicle and the passen
gers possess energy which var ies wit h veh icle speed and body weight.
E nginee rs ca ll t his ene rgy "kinetic energy."
The higher the speed of the veh icle and t he greater the vehicle's
we ight, the more energy that has to be "abso rbed" in the crash .
Vehicle speed is the most sig nifican t fa ctor. If t he speed doubles
from 15 to 30 mph (25 to 50 km/h), the energy increases 4 times! .,
Page 192 of 368
___ S_a_ f_ e_ t__, y,,__ b_ e _ lt_ s _______________________________________________ _
-Ins ert t he tongue into the correct buckle of your seat unti l
you hear it latch secure ly=> fig. 176 .
- Pull on t he be lt to make sure t hat it is secure ly latched in
the buck le.
Automatic safety belt retractors
Every safety be lt is equipped with an automatic be lt retractor on the
shoulder bel t. This fea ture locks the be lt whe n the belt is pulled out
fast, during hard braking and in an acc ident. The belt may also lock
w hen you dr ive up or dow n a s teep hill or throug h a sharp curve.
During norma l dr iving the belt lets you move freely.
Safety belt pretensioners
The safety bel ts are equipped w ith a belt pretensioner that helps to
t ighten the s afety be lt and remove sla ck when the pre tensioner is
act ivated. The function of the pretensioner is monitored by a warn ing
light =>
page 14.
Switchable locking featu re
Eve ry sa fe ty be lt exc ep t the one on the driver sea t is e quipped wi th a
switchable locking feature that
must be used when the safety belt is
used to attach a child safety seat. Be s ure to read t he import ant info r
mation about this feature=>
page 227.
& WARNING
Improperly positio ned safety belts can cause serious injury in a n
accident =>
page 190, "Safety belt po sition ".
• Safety belts offer optimum p rote ction onl y when the seat back
i s upright and belts are properly positioned on the body .
• Always make sure th at the rear seat backre st to which the
center rear safety b elt is attached i s securely latched whenever the
rear center safety belt is being used. If the ba ckrest is not securely
latch ed, the passenger will move forward with the ba ckrest during
sudden br aking, in a s udden maneu ve r and e speci ally in a crash.
& WARNING (contin u ed )
• Never atta ch the safety belt to the buckle fo r another seat.
Attaching the b elt to the w rong buckle will reduce safety belt
effecti veness and can cause serious personal injury.
• A pass enger who is not properly restr ained can be seriou sly
injured by the safety belt it self when it move s from the stronger
parts of th e body into critical areas like the abdomen.
• Alway s lock the convertible locking retractor when y ou are
securing a child safety seat in the vehicle=>
page 229. •
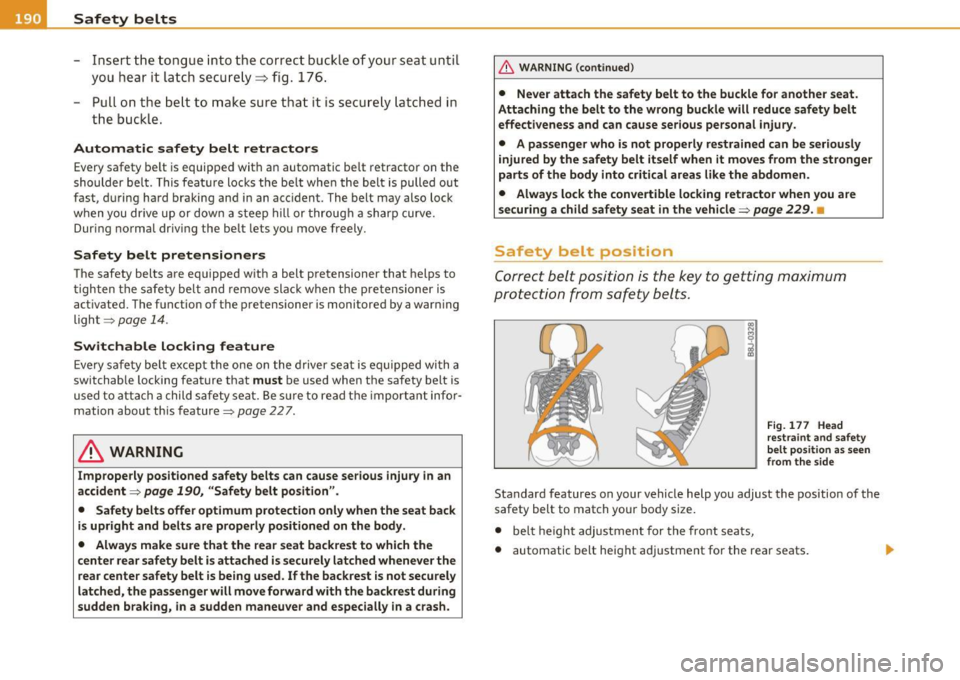
Safety belt position
Correct belt posi tion is the key to get ting maximum
protection from safety belts .
Fig. 17 7 Hea d
re stra int an d safe ty
belt posi tio n as se en
fro m the s ide
Standard features on your vehicle help you adjust the position of the
safety belt to match your body size.
• belt height adj ustment for the fro nt seats,
• automatic belt height adjustment for the rear seats .
Page 200 of 368
........ _A_ ir_ b_ a-=g :..- s.:o.y _s _t _e_ m _______________________________________________ _
defined in the elect ronic contro l unit~ page 207, "PASSE NGER AIR
BA G OFF l ight ".
Always r emembe r, a c hild safety seat o r infa nt ca rr ie r i nsta lled on th e
fro nt seat may be struc k and k noc ke d out of position by t he ra pidly
i nflat ing pass enge r's air ba g in a fr ontal c oll ision. Th e airba g could
g reat ly re duce the effectiveness o f th e ch ild restraint an d even seri
ousl y injur e th e child d uring inf lation .
For this r easo n, and b eca use the back seat is th e sa fest plac e for chil
dre n -whe n pro per ly restra ined acc ordin g to their age and size -we
s tr ong ly r ecommen d that childr en a lways sit in the back s eat
~ pa ge 2 17, "Child S afety".
& WARNING
A child in a rearward -facing child safety seat installed on the front
passenger seat will be seriously injured and can be killed if the
front airbag inflates - even with an Advanced Airbag System.
• The inflating airbag will hit the child safety seat or infant
carrier with great force and will smash the child safety seat and
child against the backrest, center armrest, door or roof .
• Always install rear-facing child safety seats on the rear seat.
• If you must install a rearward facing child safety seat on the
front passenger seat because of exceptional circumstances and
the PASSENGER AIR BAG OFF light does not come on and stay on,
immediately install the rear-facing child safety seat in a rear
seating position and have the airbag system inspected by your
Audi dealer.
• Forward-facing child safety seats installed on the front
passenger's seat may interfere with the deployment of the airbag
and cause serious personal injury to the child.
& WARNING
If , in exceptional circumstances , you must install a forward-facing
child restraint on the front passenger's seat:
& WARNING (continued)
• Always make sure the forward-facing seat has been designed
and certified by its manufacturer for use on a front seat with a
passenger front and side airbag.
• Never put the forward-facing child restraint up against or very
near the instrument panel.
• Always move the passenger seat into its rearmost position in
the seat's fore and aft adjustment range, as far away from the
airbag as possible before installing the forward-facing child
restraint. The backrest must be adjusted to an upright position.
• Make sure that the PASSENGER AIR BAG OFF light comes on
and stays on all the time whenever the ignition is switched on.
& WARNING
To reduce the risk of serious injury, make sure that the PASSENGER AIR BAG OFF light will be displayed whenever a child
restraint is installed on the front passenger seat and the ignition
is switched on .
• If the PASSENGER AIR BAG OFF light does not stay on, perform
the checks described
~ page 206 , "Monitoring the Advanced
Airbag System ".
• Take the child restraint off the front passenger seat and install
it properly at one of the rear seat positions if the PASSENGER AIR
BAG OFF light does not stay on .
• Have the airbag system inspected by your Audi dealer immedi
ately.
• Always carefully follow instructions from child restraint manu
facturers when installing child restraints.
& WARNING
If , in exceptional circumstances , you must install a forward or
rearward-facing child restraint on the front passenger 's seat: