engine AUDI S8 2009 Workshop Manual
[x] Cancel search | Manufacturer: AUDI, Model Year: 2009, Model line: S8, Model: AUDI S8 2009Pages: 408, PDF Size: 91.63 MB
Page 171 of 408
_______________________________________________ A_ u_t _o _ m_ a_ t _i_ c_ t_r _a _n _ s_ m __ is_s_ i _o _ n __ lfflll
Autom ati c selec to r l eve r lock
The se lector lever is locked in the P and N positions when the igni
tion is turned on. To move the lever from these positions the driver
must depress the brake pedal. As a reminder to the driver, the
follow ing warning appears in the instrument cluster disp lay when
the selector is in
P and N:
When stationary app ly foot brake while s electing gear
A time delay e lement prevents the selector lever from locking when
it is moved through the
N position (going from R to Dl. The locking
e lement will lock the selector lever if the lever is left in N (Neutral)
for more than approximately 1 second, without the brake peda l
being pressed.
At speeds above about 3 mph (5 km/h) the Automatic Shift Lock is
automatically deactivated in the
N posi tion .
Interl ock button
The lock button on the selector lever prevents the lever from being
accidentally shifted into certain positions. Pressing this button
deactivates the selector leve r lock. Dependi ng on the direction of
the shift, the selector lever locks at different positions. The positions
are highligh ted in the illus trati on =>
page 168, fig . 187.
Igniti on k ey saf ety in te rlo ck
The key canno t be removed from the ignition un less the selector
lever is in the
P park position. When the ignition key is removed, the
selector lever wil l be l ocked in the
P posi tion .•
Kick -down
T he kick-down feature allows the vehicle to genera te
maximum accelera tion.
When you press the acce lerator pedal beyond the resistance point
that is reached at ful l throttle, the transmission wi ll select a lower
gear ratio based on vehic le speed and engine RPM . The engine RPM
wil l be control led to produce maximum vehic le acceleration as long
Controls and equip
ment
as you continue to press the acce lerator pedal beyond this resis
t ance poin t.
& WARNING
Be careful when u sing the ki ck -down feature on slippery road s.
Rapid acceleration ma y cause the vehicle to skid . •
Dynamic shift program (DSP)
T he aut omatic tr ans mission is electro nically c ontrolle d.
The transmission is se lf adapting and will automaticall y select the
b est shi ft program su ited to the driving conditio ns and driving style.
The transmission will select one of the
e conomy programs when
you drive at a s teady speed or a g radually changing speed without
heavy acceleration. This achieves optimum fuel efficiency, with ear ly
upshifting and delayed downshifting .
The trans mission will au tomatically select the
sporty shift progra ms
when you drive at higher speeds, or with heavy acce leration and
frequent ly cha nging speeds . Upshifts ar e delayed t o make f ull use
of engine power . Downshifting takes place at higher engine speeds
than in t he ec onomy p rograms .
The selection of the most su itable shift program is a continuous,
automatic process . The driver can a lso make the transmission
sw itch to a sporty progra m by
quickly pressing down the gas peda l.
This causes the transmission to shift down to a lower gear to
achiev e rapid acc elerati on, e.g . fo r q uickly pass ing another vehicle .
You do not need to press the gas pedal into the kick-down range.
After the transm ission has upshifted, the original progra m is
selected according to your driving sty le.
An additiona l shift program allows the automatic transmission to
select the proper gear fo r uph ill and downhi ll gradients.
This prevents the transmission from upshifting and downshifting unnecessa rily o n hills . The transm ission wi ll shift down to a lower _,.
I • •
Page 172 of 408
• ..__A_ u_ t _o_ m_ a_ t_ i_ c _ t_r _a _n_ s_ m_ is_ s_i o _ n ________________________________________________ _
gear when the driver presses the brake pedal on a downhill
gradient. This makes use of the braking effect of the engine without
the need to shift down manually.•
Manual shift program
Using the manual shift program you can manually select
gears.
Fi g. 18 8 Ce nte r
co nso le: s hiftin g the
t ip tr on ic® ma nually
F ig . 18 9 Disp lay:
ma nua l shi ft prog ra m ,
selecte d gear high
l ig hte d
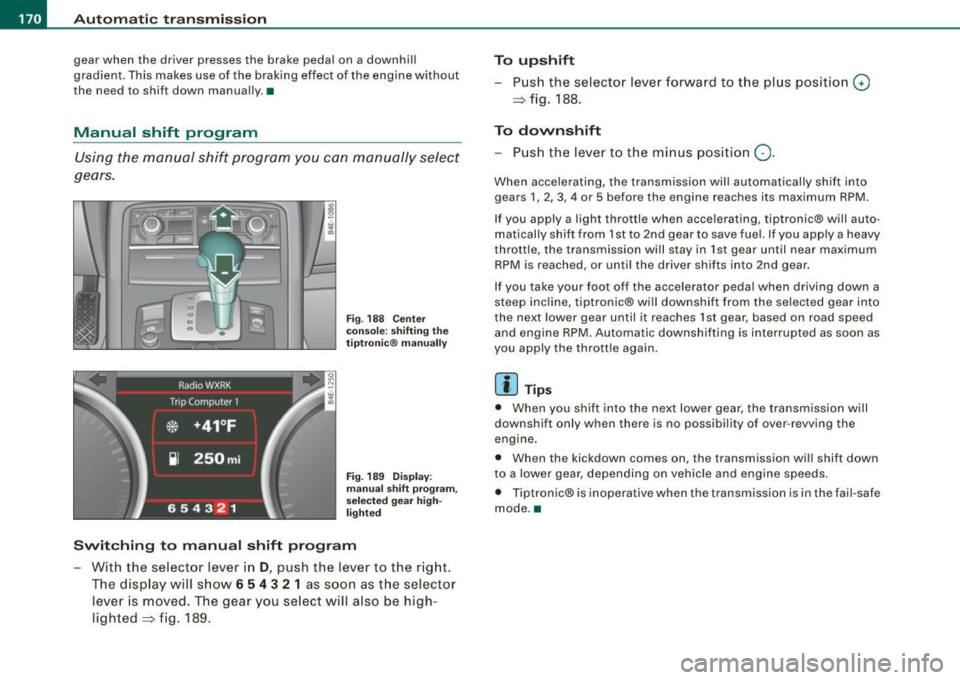
Swit ching to manual shift program
With the selecto r lever in D, push the lever to the rig ht.
T he d isplay will s how
6 5 4 3 2 1 as soon as the selector
lever is moved. The gear you se lect will also be high
lighted => fig . 189.
To upshift
Push the selector lever forward to the plus position 0
=> fig. 188.
To downshift
- Push the lever to the minus position Q.
When accelerating, the transmission will automatically shift into
gears 1 , 2, 3, 4 or 5 before the engine reaches its maximum RPM .
If you apply a light throttle when accelerating, tiptronic® will auto
matically shift from 1st to 2nd gear to save fuel. If you apply a heavy
throttle, the transmission will stay in 1st gear until near maximum
RPM is reached, or unti l the driver shifts into 2nd gear .
If you take your foot off the accelerator peda l when driving down a
steep incline, tiptronic® will downshift from the selected gear into
the next lower gear until it reaches 1st gear, based on road speed
and engine RPM. Automatic downshifting is interrupted as soon as
you apply the thrott le again .
[ i ] Tips
• When you shi ft into the next lower gear, the transmission will
downshift only when there is no possibi lity of over -revving the
engine.
• When the kickdown comes on, the transmission wil l shift down
to a lower gear, depending on vehicle and eng ine speeds.
• Tiptronic® is inoperative when the transmission is in the fai l-safe
mode. •
Page 173 of 408
Automatic transmi ssio n -
------------------'
Applies to vehi cles : wi th tip troni c-st eerin g wh eel
Steering wheel with tiptronic ®
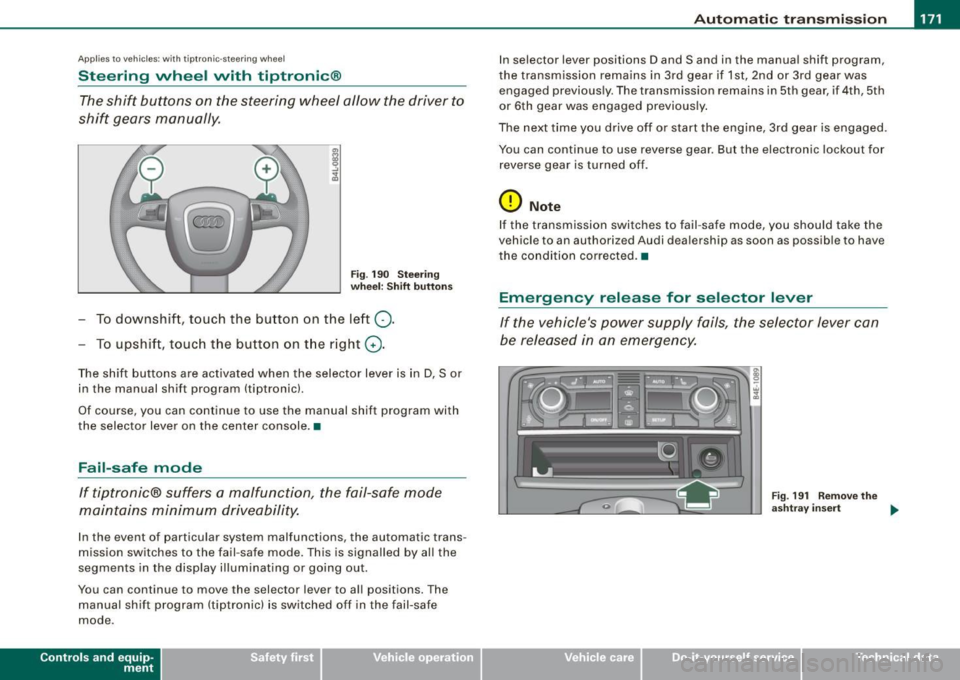
The shift buttons on the steering wheel allow the driver to
shift gears manually.
F ig . 190 Steering
whee l: S hift butt ons
- To downshift, touch the button on the left Q .
- To upshift , touch the button on t he right G) .
The shift buttons are activated when the selector lever is in D, Sor
in the manual shift program (tip tronic) .
Of course, you can continue to use the manual shift program with
the selector lever on the center console .•
Fail-safe mode
If tiptronic® suffers a malfunction, the fail-safe mode
maintains minimum driveability.
In the event of particular system malfunctions, the automatic trans
mission switches to the fail -safe mode. This is s ignalled by all the
segments in the display illuminating or going out .
You can continue to move the selector lever to all positions. The manual shift program (tiptronic) is switched off in the fail-safe
mode .
Contro ls and eq uip
ment
In selector lever positions D and Sand in the manual shift program ,
the transmission remains in 3rd gear if 1st, 2nd or 3rd gear was engaged previous ly. The transmission remains in 5th gear, if 4th, 5th
or 6th gear was engaged previously .
The next time you drive off or start the engine, 3rd gear is engaged .
You can continue to use reverse gear . But the electronic lockout for
reverse gear is turned off .
0 Note
If the transmission switches to fail -safe mode, you should take the
vehicle to an au thori zed Audi dea lership as soon as possib le to have
t he condition corrected .•
Emergency release for selector lever
If the vehicle's power supply fails, the selector lever can
be released in an emergency.
Fig . 19 1 Rem ove th e
as htray i nser t
~
Vehicle care I I Technical data
Page 191 of 408
____________________________________________ A_ d_a--' p=-- t_iv _e_ A_ ir_ S_u_ s-=- p_e _ n_ s _ io_ n __ JIIII
Chassis Controls
Four different driving modes can be set by the driver.
The automatic control processes are speed -and time -dependent.
For example, it is not possib le to raise the suspension to the lift
mode above certain speeds .
When a speed of about 75 mph ( 120 km/h) is exceeded for more than
30 seconds, the vehicle is automatically lowered approximately 1
inch (25 mm) to a level suitable for highway speeds, except in the
standard mode . Road holding is optim ized as a result of the lower
center of gravity and fue l consumption is reduced as a result of
reduced wind resistance .
Level adjustment
lift
automatic
dynamic
a utomati c Ground
clear ance
about 5 .7 inches (145 mm)
a bout 4.7 inches ( 120 mm)
about 4 .7 inches (120 mm)
about 3 .9 inches (100 mm)
Select the automatic mode if you prefer a suspension setting
e m phasizing comfort. Damping characteristics emphasizing
comfort are selected in this mode.
• Lower ing : When a speed of about 75 mph (120 km/h) is exceeded
for more than 30 seconds, the vehicle is automatically lowered by about 1 inch (25 mm) .
• Rais ing : The vehicle is automatically raised again if the speed
falls be low about 44 mph (70 km/h) for a period of 120 seconds. The
vehicle is raised immediately when speed falls below about 22 mph (35 km/h) .
dynami c
Select the sport mode if you prefer a sporty suspension setting. In
this mode, the vehic le is lowered whi le it is still stationary and
Controls and equip
ment
sporty damping characteristics are selected. The warning light ~
in the instrument cluster will come on for a few seconds just to
remind you of the reduced ground clearance .
I f you switch off the engine while the vehicle is in the dynamic mode
and then switch on the ignition once again, the~ warning light
wi ll also come on again for a few seconds.
• Lowering : When a speed of abou t 75 mph (120 km/h) is exceeded
for more than 30 seconds, the vehicle is automatically lowered by an addi tional 0 .2 in (5 mml.
• Raising : The vehicle is automatically raised again if the speed
falls bel ow about 44 mph (70 km/h) for a period o f 120 seconds . The
vehic le is raised immediately when speed falls below about 22 mph
(35 km/h).
s ta nd ard
Select the standard mode if you desire a suspension setting with a
special emphasis on comfort . In the standard mode there is
no
lowering o f the suspension. Even at high speeds, the veh icle stays
at the same level. Damping characteristics with a decided emphasis
on comfort are selected in this mode .
lift
Select the lift mode when you have to travel over poo r sections of
road (e .g . trai ls). In the lift mode, the vehic le is raised by 1 inch (25
mm) compared to norma l leve l while it is still stationary and
damping characteristics are adjusted to emphasize comfort.
The lift mode can be act ivated only at speeds be low 50 mph (80
km/h). When a speed of about 62 mph (100 km/h) is exceeded, the
system automatically leaves lift mode and the mode set previously
(standard, automa tic, dynamic) is activated again. •
I • •
Page 196 of 408
• .___H_ o_ m _ e _L_i _ n _k _® ____________________________________________________ _
Homelink®
Universal remote control
Applies to vehic les: w ith Home link ® universal remote cont ro l
General information
The HomeLink® fe ature can le arn up to th ree r adio
fre quency codes for m ost c urrent transmitters used for
operating garage doors, es tate gates , home or outdoor
ligh ting sy stems, and other devices .
You m ust first pro gram the H omel in k® trans mitter befor e you can
use the system=>
page 195, "Programm ing th e Homelink® trans
m itter".
In order to pro gram t he Homelink® transmitter fo r devices utilizing
ro lling code, a second person on a ladder who can safe ly reach the
ga rage door o pene r m oto r is rec omm ended . It is also necessa ry to
locate the "learn" button on your garage door opener motor. Refer
to t he op era ting instructions for the opene r, as the loca tion and
co lor of this button may vary by manufacturer .
Y ou can still use the o rigina l remote c ontrol fo r th e dev ice at any
time.
& WARNING
• Never use the Homelinkl1JI transmitter with any garage door
opener that does have not the safety stop and reverse feature as
requ ired by federal safety standards . This in cludes any garage
door opener model manufactured before April 1, 1982.
• A garage door opener which cannot detect an object , signaling
the door to stop and reverse does not meet current federal safety
standards . Using a garage door opener without these features
increases risk of serious injury or death .
& WARNING (continued)
• For safety reasons never release the parking brake or start the
engine while anyone is standing in front of the vehicle.
• A garage door or an estate gate may sometimes be set in
motion when the Homelink ® remote control is being
programmed . If the devi ce is repeatedly activated , this can over
strain motor and damage its electrical components -an over
heated motor is a fire hazard!
• To avoid possible injuries or property damage , please always
make absolutely certain that no persons or objects are located in
the range of motion of any equipment being operated.
[ i ] Tips
• I f you wou ld l ik e mor e infor mation o n Hom elink®, w here to
purchase the Homelink ® compatib le products, or wou ld li k e to
pu rchase the Homeli nk® Home Ligh ting Package, please call t oll
free: 1 -8 0 0 -355 -3515.
• F or Dec lara tion of Compliance to U nite d Sta tes FCC an d Indu stry
C anada regulations=>
page 385 . •
Page 214 of 408
-S
afe ty b elts ----=-----------------
- Make sure that your passengers also b uckle up and prop
erly wea r th eir sa fety belts.
Protect children wit h a child restraint system appropriate
for the size and age.
The warning light i in the instrument cluster lights up when the
ignition is switched on as a reminder to fasten the safety belts. In
addition , you will hear a warning tone.
After the ignition is switched on, the warning light in the instrument cluster will a lways come on for about 6 seconds and if the driver has
not fastened the safety belt, a warning tone will also sound for
about 6 seconds . As soon as the driver has fastened the safety belt,
the warning tone will stop and the warning light will go out .
If the driver or front seat passenger have not buckled -up within
about 10 seconds after the warning tone has stopped and the
vehicle is moving faster than about 15 mph, the warning tone will
sound again for about 6 seconds and then stop for 24 seconds and
then repeat this reminder sequence for a maximum of 2 minutes. At
speeds be low 5 mph, the warning tone will not sound.
Fa sten your safe ty belt and m ake su re that your p assengers also
properl y put on th eir s afet y belts .
& WARNING
• Safety belt s are the single mo st effective mean s available to
reduce th e risk of ser ious injur y and death in a utomobile acci
dent s. For your prote ction and th at of your pas senger s, alwa ys
c orre ctl y we ar safety belt s when t he vehicle is moving .
• Failure t o pay att ention to th e warning light that co me on,
c ould lead to per sonal injury .•
Why safety belts?
Frontal co11isions and the law of physics
Front al crashes create very strong forces for pe ople riding
in vehicles.
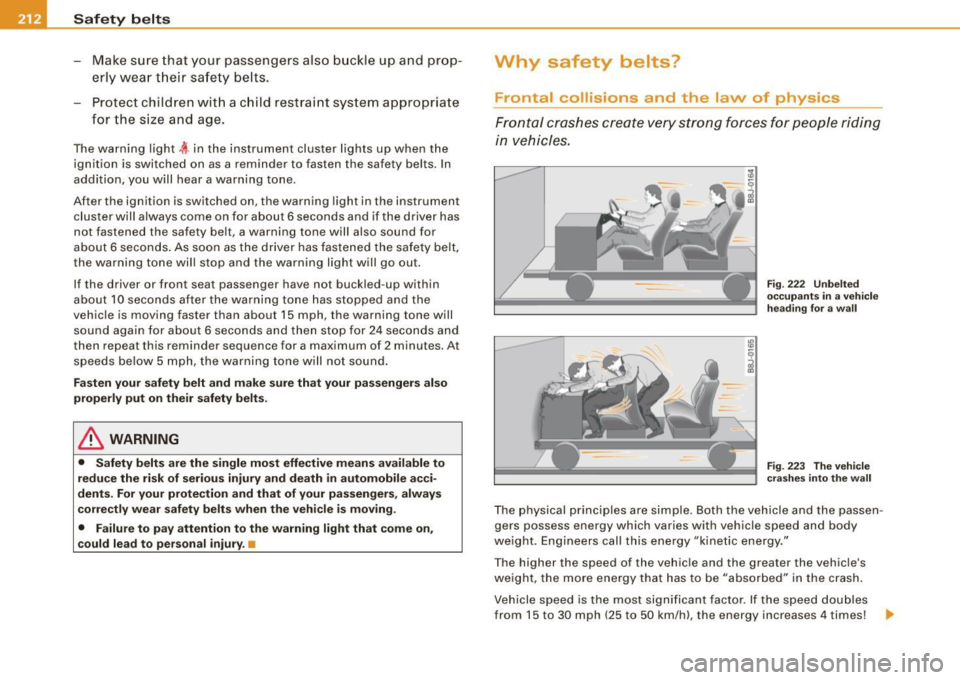
F ig. 222 U nbel ted
o cc up ants i n a ve hicle
he ading for a wa ll
Fi g. 223 T he vehicle
c ras hes in to t he wa ll
The physical principles are simple. Both the vehicle and the passen
gers possess energy which varies with vehicle speed and body
we ight . Engineers cal l this energy "kinetic energy ."
T he higher the speed of the vehicle and the greater the vehic le's
we ight, the more energy that has to be "absorbed" in the crash .
Vehicle speed is the most significan t factor. If the speed doubles
from 15 to 30 mph (25 to 50 km/h), the energy increases 4 times! .,
Page 216 of 408
llffl_....::S~a ~f ~e ~ty ~ b~ e~ l~ t ~s ____________________________________________ _
Safety belts protect
People think it's possible to use the hands to brace the
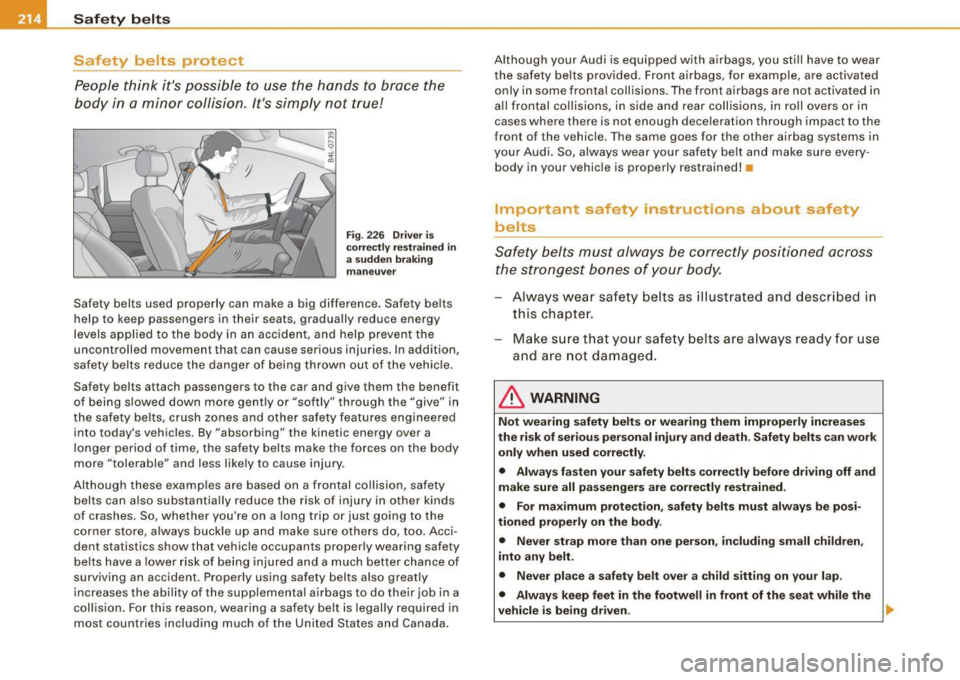
body in a minor collision. It's simply not true!
Fig . 22 6 Driv er is
cor rec tly r estrai ned in
a su dden b raking
m an euver
Safety belts used properly can make a big difference. Sa fety belts
help to keep passengers in their seats, gradually reduce energy
levels app lied to the body in an accident, and help prevent the
uncontrolled movement that can cause serious injuries. In addition,
safety be lts reduce the danger of being thrown out of the vehic le .
Safety belts attach passengers to the car and give them the benefit
of being s lowed down more gently or "softly" through the "give" in
the safety belts, crush zones and other safety features engineered
into today's vehicles. By "absorbing" the kinetic energy over a longer period of time, the safety belts make the forces on the body
more "tolerable" and less likely to cause injury .
Altho ugh these examples are based on a frontal co llision, safety
belts can a lso substantially reduce the risk of injury in other kinds
of crashes . So, whether you're on a long trip or just going to the
corner store, a lways buckle up and make sure others do, too. Acci
dent statistics show that vehicle occupants properly wearing safety
belts have a lower ris k of being injured and a much better chance of
surviving an accident. Properly using safety belts also greatly
increases the abi lity o f the supplementa l airbags to do their job in a
collision . For th is reason , wearing a safety belt is legally required in
most countries including much of the United States and Canada. Although your Audi is equipped with airbags, you sti
ll have to wear
the safety belts provided . Fron t airbags, for example, are activated
only in some frontal collisions . T he front airbags are not activated in
a ll frontal col lisions, in side and rear collisions, in roll ove rs or in
cases where there is not enough dece leration through impact to the
front of the vehicle . The same goes for the other airbag systems in
your Audi . So, always wear your safety belt and make sure every
body in your vehic le is properly restrained! •
Important safety instructions about safety
belts
Safety belts must always be co rrectly positioned across
t he strongest bones of your body.
Always wear safety belts as illustrated and described in
th is chapter.
Make s ure tha t your safe ty belts ar e always ready for use
and are not damaged .
& WARNING
Not wearing safety belts or w earing them improperl y increase s
the risk of seriou s per sonal injury and death . S afe ty belt s can work
onl y when used corre ctl y.
• Alway s fa sten your s afety belt s correctl y before dri ving off and
make sure all p assenger s ar e correctly restrain ed.
• For m aximum protect ion , safet y belt s must always be po si
ti oned properly on the body .
• Never strap more th an one person , includi ng sm all children ,
into any belt.
• Never pla ce a s afety belt ove r a child sitting on your lap .
• Alway s keep feet in t he foot well
in front of the seat while the
vehicle is being driven .
~
Page 272 of 408
___ ln_ t _e_ ll-'"ig ...,_ e_ n_t _t_ e_ c_ h _ n_o _ l_o _,.g= y,_ __________________________________________ _
Intelligent technology
Notice about data recorded by
vehicle control modu les
Your vehicle is not equipped with an Event Data Recorder (EDR),
installed by some manufacturers for the express purpose of
capturing data for retrieval after an accident or crash event . EDR's
are sometimes called "crash recorders" .
Some state laws restrict the retrieva l or downloading of data stored
by EDR's that were insta lled in a vehicle for the express purpose of
retrieving data after an accident or crash event without the owner's
consent.
Although your vehicle is not equipped with an EDR, it is equipped
with a number of electronic control modules for various vehicle systems such as, for example, engine function, emission control, as
well as for the airbags and safety belts.
These electronic control modules also record vehicle-related data during norma l vehicle operation for diagnost ic and repair purposes .
The recording capacity of the electronic control modules is limited
to data (no sound is recorded) and only a small amount of data is
actually recorded over a very limited period of time and stored when
a system fault or other condition is sensed by a control unit. Some
of the data then stored may relate to vehicle speed, direction, braking as well as restraint system use and performance in the
event of a crash or other condition . Stored data can only be read and
down loaded with special equipment .•
Electron ic Stabilizat ion Program (ESP)
General =nformation
The ESP improves the vehicle stability.
I~
"' " "'
- -
( ra I 5£ IA I -3, )
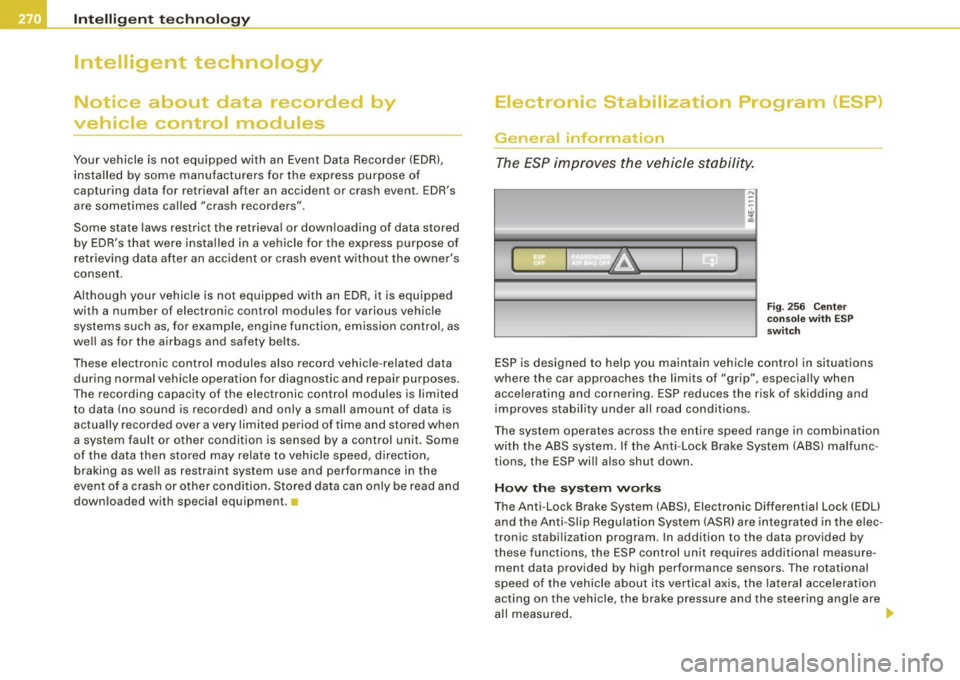
Fi g. 256 C ente r
co nso le w it h ES P
swi tch
ESP is designed to he lp you maintain vehic le control in situations
where the car approaches the limits of "grip", especia lly when
accelerating and cornering. ESP reduces the risk of skidding and
improves stabil ity under all road conditions .
T he system operates across the entire speed range in combination
with the ABS system. If the Anti-Lock Brake System (ABS) malfunc
tions, the ESP wil l also shut down .
How th e sys te m w ork s
The Anti -Lock Brake System (ABS) , Electronic Differential Lock (EDU
and the Anti-Slip Regulation System (ASR) are integrated in the e lec
tronic stabi lization program . In addition to the data provided by
these functions, the ESP control unit requires additional measure ment data provided by high performance sensors . The rotational
speed of the vehic le about its vertical axis, the lateral acce leration
acting on the vehicle, the brake pressure and the steering angle are
a ll measured .
Page 274 of 408
-Intelligent technology --=---=-=-------------
Overheating
of brakes
To prevent the disc brake of the braked wheel from overheating if
subjected to excessive loads, the EDL cuts out temporarily . The
vehicle remains operational and behaves in the same way as a
vehicle without EDL.
As soon as the brake has cooled down, EDL switches on again auto
matically.
& WARNING
• When accelerating on slippery surfaces, such as on ice or snow,
always be careful when depressing the accelerator pedal. Even
with the EDL working, the drive wheels can spin and reduce your ability to control your car. Risk of crash!
• The increased safety afforded by EDL does not mean that you
can take safety risks . Always adapt your driving style to the road
conditions and traffic situation.
[ i] Tips
If a fault occurs in the ABS, the EDL is also not functioning. This is
indicated by the ABS warning light=>
page 21. •
Anti-Slip Regulation System (ASR)
The Anti-Slip Regulation System prevents the driven
wheels from spinning when the car is accelerating.
General notes
The Anti-Slip Regulation System (ASR) is integrated in the electronic
stabilization program (ESP). When the vehicle starts up and acceler
ates, the wheels are prevented from spinning by adjusting the
engine power to match the amount of grip available from the road
surface.
How the system works
ASR performs automatically, i.e. without the driver's intervention.
With the aid of the ABS sensors=>
page 274, ASR monitors the
speed of the driven wheels. If the wheels start to spin, the engine
power is reduced automatically until the tires find enough grip to
lock onto the road surface. The system is active across the entire
speed range.
The ASR works in conjunction with the ABS. If a malfunction should
occur in the ABS, the ASR will also be out of action.
& WARNING
The increased safety afforded by ASR does not mean that you can
take safety risks. Always adapt your driving style to the road
conditions and traffic situation.
[ i] Tips
To ensure that the ASR works properly, all four wheels must be fitted
with identical tires Any differences in rolling radius of the tires can
cause the system to reduce engine power when this is not desired.
See also=>
page 338, "New tires and replacing tires and wheels".
Braking
General information
What affects braking efficiency?
Operating conditions and driving habits
The brakes on today's automobiles are still subject to wear,
depending largely on operating conditions and driving habits=>& .
On vehicles that are either driven mostly in stop-and-go city traffic
or are driven hard, the brake pads should be checked by your autho
rized Audi dealer more often than specified in the
Warranty & Main- ~
Page 275 of 408
tenance boo klet. Failure to have your brake pads inspected can
r esult i n reduce d brake pe rfor mance .
On steep slopes , you s hou ld use the braking effect of the engine .
T his way, you prevent unnecessary wear on the bra ke system . If you
must use your brakes, do not hold the brakes down con tinuo usly.
P ump the brakes at intervals.
Moisture or road salt
U nder ce rtain conditions, for example, when driving through water
or very heavy rain, or even after washing your vehicle, the brak ing
effect can be reduced due to moisture (or in freezing conditions ice)
on the b rake pads. A few carefu l brake appl icat io n s sh ould d ry o ff
the brake pads or remove any ice coatings.
Th e eff ectiveness of the b rakes ca n b e re d uce d whe n the ve hicle is
driven on a salt -covered road and the brakes are not used . Here too,
you sh ould clean off acc umulated sa lt coat ing from brake d iscs and
pads with a few careful app lications of the brake~&.
Corrosion
T here may be a tendency for dirt to build up on the brake pads and
co rrosion to form o n the discs if the car is not d rive n regu lar ly or
only for short trips with little use of the brakes .
I f the brakes are not used frequently, or if corrosion has fo rmed on
t he d iscs, i t is a dv isab le to clea n off th e pads an d discs by braking
firmly a few times from a moderate ly high speed~& .
Faults in the brake system
I f you shou ld notice a sudden increase in brake pedal trave l, then
one of the two brak e circu its may have failed~ &.
Low brake fluid level
Ma lfunctions can occur in the brake system if the brake fluid leve l is
t oo low. T he b rake fl uid level is mon ito red e lect ro nica lly .
Controls and equip ment Safety first
Vehicle operation
Intelligent technology
Brake lining wear status
Brake l ini ng w ear may be checke d by visua l ins pec tion of the co nd i
tion of the brake pads throu gh the open ings in the wheel. If neces
sa ry, the wheel may be removed for this i nspectio n
~ page 353,
"Changin g a whee l".
& WARNING
• You should perform braking maneuvers for the purpose of
cleaning the brake system only if road conditions permit . Other
road use rs must not be put at r isk -you may cause an accident !
• Before descending a steep grade , reduce speed and shift trans
mi ssion into a lower gear or lower driving range . Do not ride the
brakes or hold the pedal down too long or too often . This could
cau se the brakes to get hot and diminish braking efficiency .
• Do not "ride the brakes" by resting your foot on the pedal when
you do not intend to brake. This may cause the brakes to overheat ,
premature wear and increased stopping distance.
• Under certain climati c and operating conditions such as
passing through water , driving in heavy rain or after washing the
vehi cle , the effectiveness of the brakes can be reduced. In winter ,
ice can accumulate on the brake pads , linings , discs and drums .
Carefully apply brakes for a test. Brakes will dry and ice coatings
will be cleaned off after a few careful brake applications .
• Driving for an extended period of time on salt -covered roads
without using your brakes can also affect braking efficiency. Clean off accumulated salt coating from brake disc s and pads with a few
careful brake applications .
• If you damage the front spo iler , or if you install a different
spoiler, be sure the air flow to the front brakes is not obstructed.
Otherwise the brake sy stem could overheat reducing the effective
ness of the entire brake system.
• Failure of one brake cir cuit will impair the braking capability
resulting in an increased stopping distance. Avoid driving the
Vehicle care Do-it-yourself service Technical data