low oil pressure AUDI S8 2009 Owners Manual
[x] Cancel search | Manufacturer: AUDI, Model Year: 2009, Model line: S8, Model: AUDI S8 2009Pages: 408, PDF Size: 91.63 MB
Page 31 of 408
If a component is malfunctioning or if the need for an urgent repair
has been detected, this will appear in the instrument cluster display.
You will also hear an audible warning tone. The displays are color
coded in either red or yellow depending on their level of priority.
A red symbol means
Danger, a yellow symbol indicates Warning . In
certain situations, information message for the driver appear in
addition to the red and yellow symbols.
Function test: automatic transmission
The Auto-Check Control will automatically perform a test each time
you switch on the ignition. With the selector lever in
P or N, the
following message appears in the display:
When stationary apply foot brake while selecting gear.
When you a select a different gear (for example: R, D, etc.), the
message will disappear and the Auto-Check function is displayed.
I f there is a malfunction, then the malfunction message will appear
about 15 seconds after the you start the vehicle. At the same time
you will hear a warning tone. •
Driver information messages
Driver information messages are shown in the instrument
cluster display in addition to the red and yellow symbols.
Controls and equip
ment
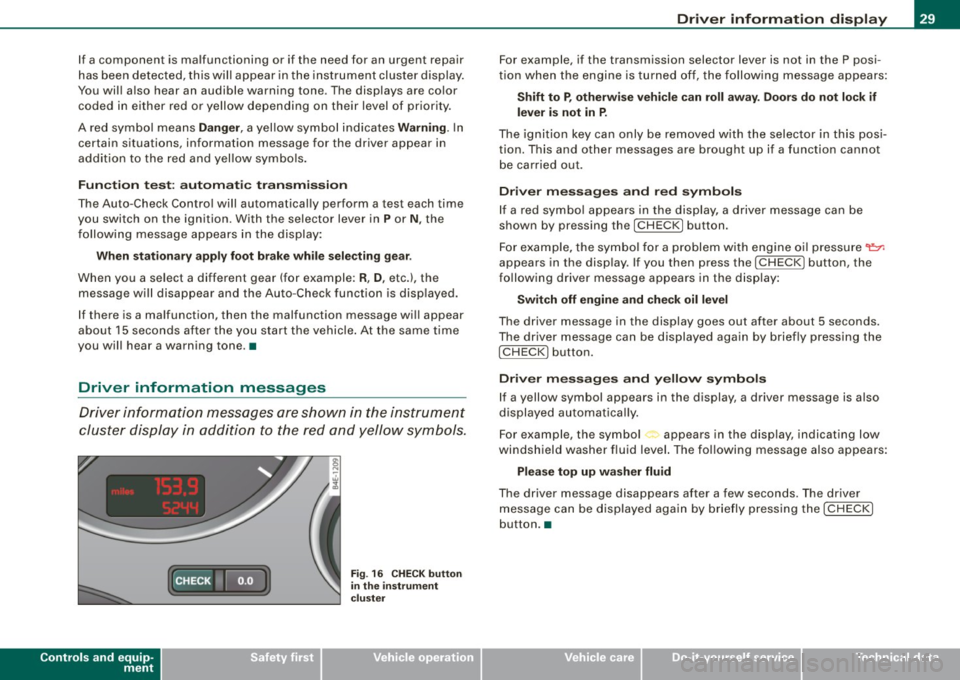
Fig . 16 CHECK button
in the instrument
cluster
Driver information display
For example, if the transmission selector lever is not in the P posi
tion when the engine is turned off, the following message appears:
Shift to P, otherwise vehicle can roll away. Doors do not lock if
lever is not in P.
The ignition key can only be removed with the selector in this posi
tion. This and other messages are brought up if a function cannot
be carried out.
Driver messages and red symbols
If a red symbol appears in the display, a driver message can be
shown by pressing the
I CHECK] button.
For example, the symbol for a problem with engine oil pressure~
appears in the display. If you then press the !CHECK ] button, the
following driver message appears in the display:
Switch off engine and check oil level
The driver message in the display goes out after about 5 seconds.
The driver message can be displayed again by briefly pressing the
I CHECK] button.
Driver messages and yellow symbols
If a yellow symbol appears in the display, a driver message is also
displayed automatically.
For example, the symbol<., appears in the display, indicating low
windshield washer fluid level. The following message also appears:
Please top up washer fluid
The driver message disappears after a few seconds. The driver
message can be displayed again by briefly pressing the
I CHECK]
button. •
I • •
Page 34 of 408

Driver information display
-Pull off the road.
- Stop the veh icle.
- Turn off the engine.
- Check coolant level~
page 317.
-Add coolant if necessary ~ page 318.
-Continue dr iving only after the eng ine coolant
warning/ indicator light goes out .
- Contact your authorized Audi dealer for assistance if
necessary .
If the engine coolant le ve l is correct, then the radiator fan may be
the cause of the malfunction.
If the generator warning/indicator light should also illuminate
~ page 18, then the fan belt may be damaged.
& WARNING
• If your vehicle should break down for mechanical or other
reasons, park at a safe distance from moving traffic, turn off the
engine and turn on the hazard warning lights
~ page 73, "Emer
gency flasher
A".
• Never open the hood if you see or hear steam or coolant
escaping from the engine compartment -you risk being scalded.
Wait until you can no longer see or hear steam or coolant escaping.
• The engine compartment of any vehicle is a dangerous area.
Before you perform any work in the engine compartment, turn of
the engine and allow it to cool. Follow the warning stickers
~ page 301, "Engine compartment".
0 Note
Do not continue driving if the -~- symbol illuminates. There is a
malfunction in the engine cooling system -you could damage your
engine. •
Engine oil pressure malfunction "t=:?:
The red engine oil pressure warning symbol requires
immediate service or repair. Driving with a low -oil -pres
sure indication is likely to inflict severe damage to the
engine.
If the ~ symbol appears in the display and blinks, the oil
pressure is too low. An additional driver message can also
be displayed by pressing the
I CHECK] button:
Switch off engine and check oil level
Immediate actions
- Pull off the road.
- Stop the vehicle.
- Turn off the eng ine.
- Check the engine oil level
with the dipstick~ page 313.
Dipstick readings checks too low
- Top off oil to the proper level~ page 314.
-Make sure that the oil pressure warning symbol~
appears no longer in the display before you start driving
again. .,,,
Page 35 of 408

Dipstick reading checks OK
-If the oil pressure warning symbol "t=:7: starts flashing
again even though the engine oil level checks OK on the
dipstick,
do not continue driving and do not let the
engine run in idle.
Instead, contact your authorized Audi
dealer for assistance.
[ i] Tips
• The engine oil pressure symbol ~ is not an indicator for a low
engine oil level. Do not rely on it . Instead, check the oil level in your
engine at regular intervals, preferably each time you refuel, and
always before going on a long trip .
• The yellow oil level warning indication .: requires oil refill or
workshop service without delay. Do not wait until the red oil pres
sure warning
~ starts to flash before you respond to the low oil
level warning . By then, your engine may already have suffered
serious damage. •
Steering malfunction i
If there is a malfunction in the electronic steering column
lock, the steering cannot be unlocked.
If the i symbol in the display blinks, there is a malfunction
in the electronic steering column lock. An additional driver
message can also be displayed by pressing the [
CHECK]
button:
Do not drive vehicle: Steering defective
- Contact your nearest authorized repair facility.
- Do
not tow your vehicle.
Controls and equip
ment
Driver information display
& WARNING
Your vehicle must not be towed in the event of a malfunction in the
electronic steering column lock because it cannot be steered due
to the locked steering. If it is towed with the steering locked, there
is the risk of an accident. •
Ignition lock malfunction ~
A malfunction in the ignition lock must be repaired imme
diately.
If the -Pe symbol in the display blinks, there is a malfunction
in the electronic ignition lock. An additional driver message
can also be displayed by pressing the [
CHECK] button:
Ignition lock defective. Contact workshop !
- Do not turn the engine off.
-Drive immediately to an authorized Audi dealer to have
the malfunction corrected.
If there is a malfunction in the electronic ignition lock, the ignition
cannot be turned off. Drive immediately to an authorized Audi
dealer to have the cause of the malfunction corrected.
If your vehicle has a Conv eni enc e key *, th e n you should not use the
I STOP I button to shut off the engine. You will not be able to start the
engine again once th e ignition is switched off. •
I • •
Page 36 of 408
Driver information display
Yellow symbols
A yellow symbol means WARNING.
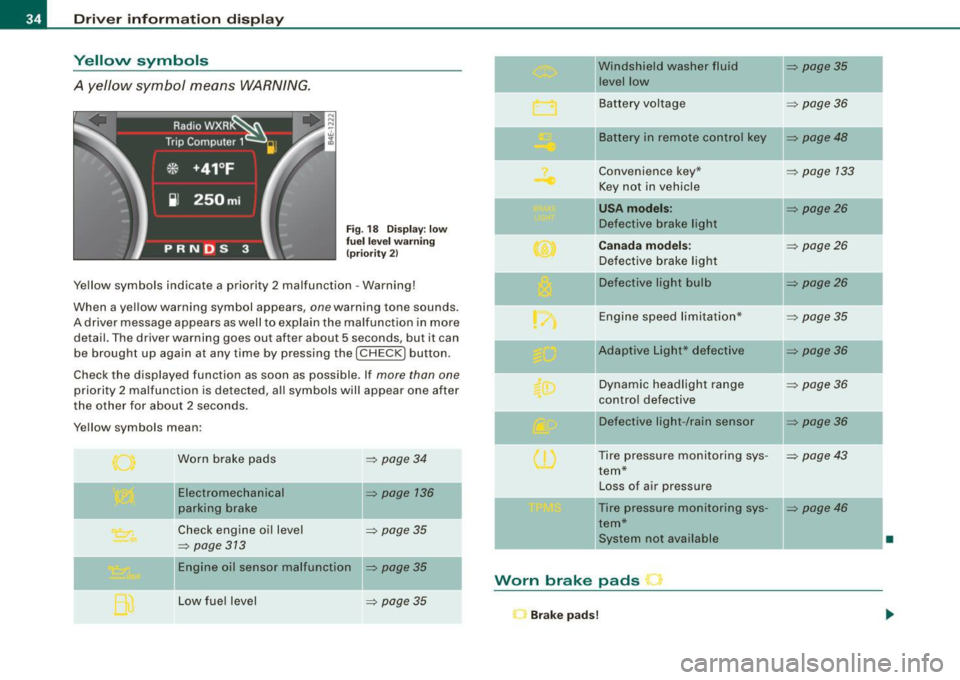
Fig. 18 Display: low
fuel level warning
(priority 2)
Yellow symbols indicate a priority 2 malfunction -Warning!
When a y ellow warning symbol appears,
one warn ing ton e sounds.
A driver message appears as well to explain the malfunction in more
detail. The dr iver warning goes out after about
5 s e conds, bu t it can
be brought up again at any time by pressing the [
CHECK I button .
Check the displayed function as soon as possible . If
more than one
priority 2 malfunction is detected, all symbols will appear one after
the other for about
2 seconds .
Yellow symbols mean :
Worn brake pads
Electromechanical
parking brake
=> page 34
=> page 136
Check engine oil level => page 35
=> page 313
Engine oil sensor malfunction => page 35
Low fuel level => page 35
Windshield washer fluid => page 35
level low
Battery voltage
=> page 36
-
II Battery in remote control key => page 48
Convenience key * => page 133
Key not in vehicle
USA models: => page26
Defect ive brake light
Canada models: => page26
Defective brake light
Defective light bulb
=> page26
Engine speed limitation* => page 35
-
IIAdaptive Light* defective => page 36
Dynamic headlight range => page 36
control defective
Defect ive light -/rain sensor
=> page 36
Tire pressure monitoring sys-=> page 43
tern*
Loss of air pressure
-Tire pressure monitoring sys -=> page 46
tern*
ll system not ava ilable
•
Worn brake pads r
Brake pads!
Page 134 of 408

-On th
e roa d --------------------
When s tarting a cold engine, the engine may be a bit noisy for a
s h or t while. This is because the hydraulic valves are working to
bring up the oil pressure. This is norma l and no cause for concern .
If the engine does not start immediately, stop cranking the engine
af ter 10 seconds . Wa it 30 seconds, then try to restart the eng ine .
& WARNING
Ne ver sta rt the en gine in an en clos ed area su ch a s in your gar age
with th e garage door clo sed . The exhau st fum es are poisonous!
0 Note
• Avoid high engine speeds, full gas or heavy engine loads if the
eng ine has not warmed up to its operating temperature. You cou ld
damage the engine.
• Do not try to start the engine by pulling or pushing .
<£> For the sake of the environment
Do not let your veh ic le stand and warm up . Be ready to drive off
right away. This way, you prevent unnecessary exhaust emissions .
[ i J Tip s
If you open th e driver 's door when the ignition is switched on , a
buzzer sounds and the message
Ignition i s on appears in the instru
ment clust er display. Pl eas e switch the ign ition off .•
Ap plies to vehicles: w it h C onve nience key
Stopping the engine using the [STOP] button
0
0
- Bring t he vehicle to a complete stop.
Fi g. 14 7 Co nve nie nce
key: S TOP butt on
Move t he s elect or in to the P or N posi tion .
Press the [STO P) button ~ fig. 147 .
Pressing the [ STOP) but ton once sw itches off the engine and the
ignition . If you press the [
STOP] button again for approximately 2
seco nds, the steering wi ll be locked, provided that the selector lever
is in the P position
=> & .
Emergen cy OFF fun cti on
I f necessary , th e engine can be switched off with the selector lever
in the R, Dor S pos it ions . To do so, step on the foot brake and press
and hold the [
ST OP] button (vehicle speed must be be low 6 mph/
10 km/h) .
& WARNING
• Never stop the engine until the vehi cle h as c ome to a c omplete
stop .
• The bra ke booster and the se rv otronic only work when the
engine i s running .
If you turn off the engine , more force will be
Page 315 of 408
Checkin g and fillin g -
--------------~-
•
the form of Service or Repair Orders that all schedu led maintenance
was performed in a time ly manner .•
Engine oil consumption
The engine in your vehicle depends on an adequate
amount of oil to lubricate and cool all of its moving parts.
In order to provide effective lubrication and cool ing of internal
engine components, all internal combustion engines consume a
certain amount of oil. Oil consumption varies from engine to engine
and may change significantly over the life of the engine. Typically,
engines with a specified break -in period (see~
page 279) consume
more oil during the break-in period than they consume after oi l
consumption has stabi lized .
Unde r normal conditions, the rate of oil consumption depends on
the quality and viscosity of the oil, the RPM (revolutions per minute)
at which the engine is operated, the ambient temperature and road
conditions . Further factors are the amount of oil dilution from water
condensation or fuel residue and the oxidation level of the o il. As
any engine is subject to wear as mileage builds up, the oil consump
tio n may increase over time unt il rep lacement of worn components
may become necessary.
With all these variables coming into play, no standard rate of oil
consu mption can be estab lished or specified. There is no a lternative
to regular and frequent checking of the oil level, see Note .
If the yellow engi ne oil level warning symbol in the instrume nt
cluster lights up, you should check the oil level as soon as
poss ible
with the oil dipstick~ page 313 . Top off the oil at your
earliest convenience~
page 314.
& WARNING
Before you che ck anything in the eng ine comp artment , alw ay s
read and heed all WARNINGS
~ & in "Working in the engine
c ompartment " on
page 309 .
0 Note
Driving with an insufficie nt o il level is l ikely to cause severe damage
to the engine.
[ i ] Tip s
• The oil pressure warning displ ay ce,. is not an indi cat or of the oil
level . Do not rely on it. Instead , check the oil level in your engine at
regular interv als , prefe rably ea ch time you refuel , and always before
going on a long trip.
• If you have the impression your engine consumes excessive
amoun ts of oi l, we recommend tha t you consult your Audi dealer to
have the cause of your concern properly diagnosed . Keep in mind
that the accurate measureme nt of oil consumption requires great
care and may take some time. Your Audi dealer has instructions
about how to measure oil consumption accurately. •
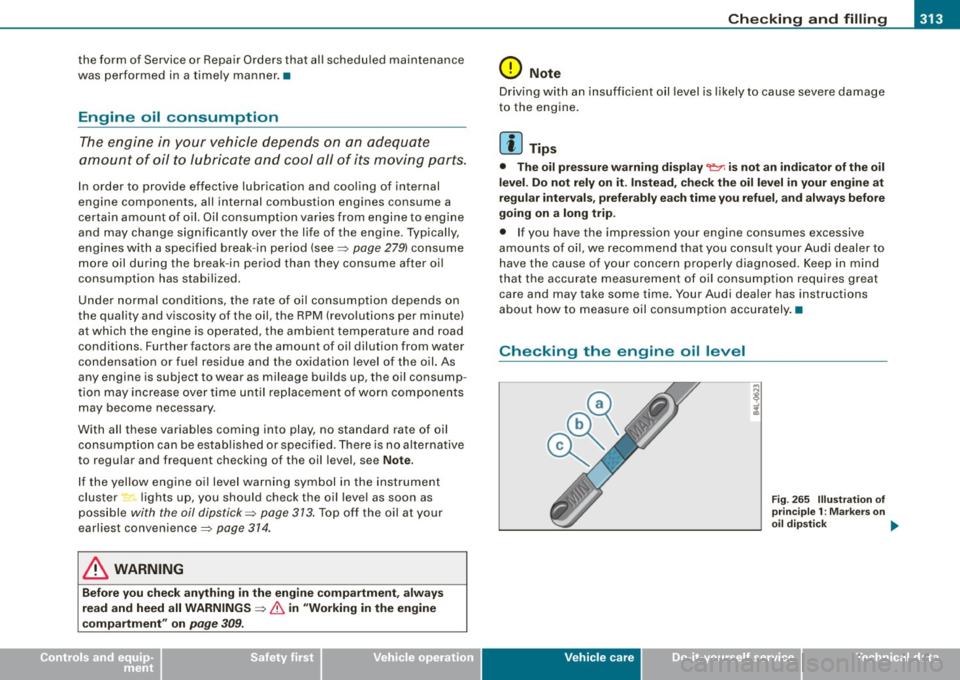
Checking the engine oil level
Vehicle care I t •
Fig. 2 65 Illu stra tion of
pri nciple 1 : Mar ker s on
oi l d ips tick ...
Page 319 of 408
Checking and filling -
------------------------------------------- -=----- =------
0 Note
• Before winter sets in, have the coolant checked to see if the
coolant additive in your vehicle is sufficient to meet the climate
conditions. This is especially important if you live in a region where
the winter is extremely cold. If necessary, increase the proportion of
coolant additive to 60%.
• When adding coolant additive to your cooling system,
remember:
-We recommend using only coolant additive G12+ + (check the
label) for your vehicle. This coolant additive is available at autho
rized Audi dealers. Other types of antifreeze can significantly
reduce corrosion protection . The resulting corrosion can cause a
loss of coolant and serious engine damage .
• Do not add any type of radiator leak sealant to your vehicle's
engine coolant. Adding radiator repair fluid may adversely affect the
function and performance of your cooling system and cou ld result
in damage not covered by your New Vehicle Limited Warranty .•
Checking the engine coolant level
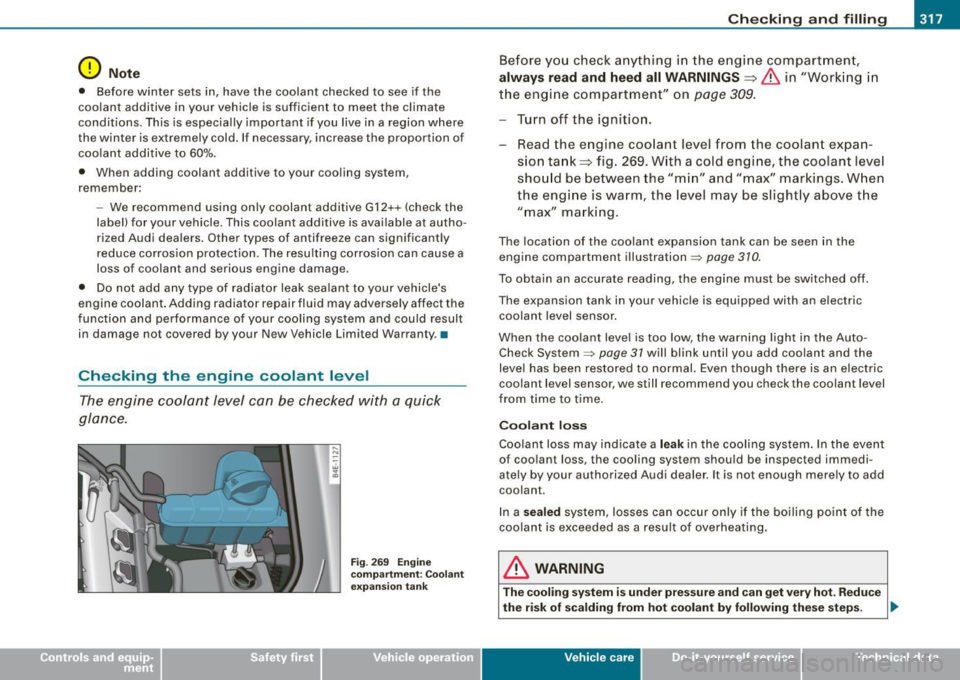
The engine coolant level can be checked with a quick
glance.
Fig . 269 Engine
compartment : Coolant
expansion tank
Before you check anything in the engine compartment,
always read and heed all WARNINGS==> & in "Working in
the engine compartment" on
page 309.
Turn off the ignition .
Read the engine coolant level from the coolant expan
sion tank==> fig. 269. With a cold engine, the coolant level
should be between the "min" and "max" markings. When
the engine is warm, the level may be slightly above the
" max" marking .
The location of the coolant expansion tank can be seen in the
engine compartment illustration=>
page 310.
To obtain an accurate reading, the engine must be switched off .
The expansion tank in your vehicle is equipped with an electric
coolant level sensor.
When the coolant level is too low, the warning light in the Auto
Check System =>
page 31 will blink until you add coolant and the
level has been restored to normal. Even though there is an electric
coolant level sensor, we still recommend you check the coolant level
from time to time.
Coolant loss
Coolant loss may indicate a leak in the cooling system. In the event
of coolant loss, the cooling system should be inspected immedi
ately by your authorized Audi dealer. It is not enough merely to add
coolant.
In a
sealed system, losses can occur only if the boiling point of the
coolant is exceeded as a result of overheating.
& WARNING
The cooling system is under pressure and can get very hot. Reduce
the risk of scalding from hot coolant
by following these steps. ~
Vehic le care I I Technical data
Page 337 of 408
Tires and wheels -
----------------
•
0 Note
Driving without valve stem caps can cause damage to the tire
valves. To prevent this, always make sure that factory installed valve
stem caps on all wheels are securely mounted on the valve .
W For the sake of the environment
Underinflated tires will also increase the fuel consumption. •
Tires and vehicle load limits
There are limits to the amount of load or weight that any vehicle and
any tire can carry . A vehicle that is overloaded will not handle well
and is more difficult to stop. Overloading can not only lead to loss
of vehicle control, but can also damage important parts of the
vehicle and can lead to sudden tire failure, including a blowout and
sudden deflation that can cause the vehicle to crash.
Your safety and that of your passengers also depends on making
sure that load limits are not exceeded. Vehicle load includes every
body and everything in and on the vehicle. These load limits are
technically referred to as the vehicle's
Gross Vehicle Weight Rating
("GVWR"l.
The "GVWR" includes the weight of the basic vehicle, all factory
installed accessories, a full tank of fuel, oil , coolant and other fluids
plus maximum load. The maximum load includes the number of
passengers that the vehicle is intended to carry ("seating capacity")
with an assumed weight of 150 lbs (68 kg) for each passenger at a
designated seating position and the total weight of any luggage in
the vehicle. If you tow a trailer, the weight of the trailer hitch and the
tongue weight of the loaded trailer must be included as part of the
vehicle load.
The
Gross Axle Weight Rating ("GAWR"l is the maximum load that
can be applied at each of the vehicle's two axles. The
Gross Vehicle Weight Rating and the Gross Axle Weight Rating
are listed on the safety compliance sticker label located either on
the driver's side 8-pillar or on the inside of the fuel filler flap. Your
Audi has 5 seating positions, 2 in the front and 3 in the rear for total
seating capacity of 5. Vehicles with power individual rear seats*
have 4 seating positions, 2 in the front and 2 in the rear for total
seating capacity of 4. Each seating position has a safety belt
~ page 211, "Safety belts".
The fact that there is an upper limit to your vehicle's Gross Vehicle
Weight Rating means that the total weight of whatever is being
carried in the vehicle (including the weight of a trailer hitch and the
tongue weight of the loaded trailer) is limited. The more passengers
in the vehicle or passengers who are heavier than the standard
weights assumed mean that less weight can be carried as luggage.
The tire pressure label on your Audi also lists the maximum
combined weight of all of the occupants and luggage or other cargo
that the vehicle can carry. For the location of the label
~ page 330,
fig. 274.
& WARNING
Overloading a vehicle can cause loss of vehicle control, a crash or
other accident, serious personal injury, and even death.
• Carrying more weight than your vehicle was designed to carry
will prevent the vehicle from handling properly and increase the
risk of the loss of vehicle control.
• The brakes on a vehicle that has been overloaded may not be
able to stop the vehicle within a safe distance.
• Tires on a vehicle that has been overloaded can fail suddenly,
including a blowout and sudden deflation, causing loss of control
and a crash.
• Always make sure that the total load being transported -
including the weight of a trailer hitch and the tongue weight of a
loaded trailer -does not make the vehicle heavier than the
vehicle's Gross Vehicle Weight Rating. •
Vehicle care
I t •
Page 347 of 408
Tires and wheels 1111111 ________________________________ ::..:..:....::.=.....::.:..:..:..::..:___:__ _ ___:,___
•
Wheel bolts
Wheel bolts mus t alwa ys be tighte ned to t he correct
to rq ue .
The design of wheel bo lts is matched to the factory installed rims. If
di fferent r ims are fitted , th e cor rect whe el bo lts wi th the rig ht l ength
and c orrec tly shaped bolt heads must be used . This ens ures that
w he els a re fitted se cur ely and th at the bra ke syste m functi ons
correctl y.
In cer ta in c ircums tances, yo u ma y not use w hee l bolts fr om a
differ ent vehicle - even if it is the same model~
page 384 .
& WARNING
Improperly tightened or maintained wheel bolts can become loose
causing loss of control, a collision and serious personal injury.
• Always keep the wheel bolts and the threads in the wheel hubs
clean so the wheel bolts can turn easily and be properly tightened .
• Never grease or oil the wheel bolts and the threads in the wheel
hubs. They can become loose while driving if greased or oiled,
even if tightened to the specified torque .
• Only use wheel bolts that belong to the rim being installed .
• Never use different wheels bolts on your vehicle.
• Always maintain the correct tightening torque for the wheel
bolts to reduce the risk of a wheel loss .
If the tightening torque of
the wheel bolts is too low, they can loosen and come out when the
vehicle is moving . If the tightening torque is too high, the wheel
bolts and threads can be damaged and the wheel can become
loose .
0 Note
The s pecified torque for the wheel bolts is 90 ft lb ( 120 N m) with a
to lerance o f± 7,4 ft lb(± 1 0 Nm). Torque whee l bolt s diago nally.
After chang ing a whee l, the torque must be checked as soon as possible with a torque wrench
-preferably by an authorized Audi
d e aler o r qua lifi ed wo rksho p.•
Low aspect ratio tires
You r A ud i is fac tory-eq uippe d w ith low aspect ra tio tire s. T hese tire s
have been thorough ly t ested and b een se lected specifica lly for your
mod el for thei r su p erb pe rf or manc e, r oad f eel an d ha nd ling under
a variety of driving con ditions . As k your authorized Audi d ealer for
m ore de ta ils.
The low aspect rat io o f th ese t ires is indicated by a numer al of 55 or
less in the t ire's size designation. The numeral rep resents the ratio
o f t he t ire's s idewa ll he ig ht in rel ati on to it s tread w idt h ex pressed
in percentage . Conventiona l tires have a height/width ratio of 60 or
mo re.
The performan ce of low -aspe ct-ratio tires is particularly sensitive to
improper inflation pressure . It is therefore important that low
aspect ratio tires are inflated to the specified pressure and that the
inflat ion pressure is regularly checked and ma intained. Tire pres
sures should be checked at least once a month and always before a
long trip~
page 333, "Checking tire pressure" .
What you can do to avoid tire and rim damage L ow aspect ratio tires can be damaged mo re easily by impact with
po tho les, cu rbs, gull ies o r rid ges o n th e road, particular ly if the t ire
is underinf lated .
I n or der to mini mize th e occurrence of i mpac t da mag e to t he tires
of your vehicle, we recommend that you observe the fol lowing
pr ecaut ions :
• Always ma intain recom mended inflatio n pr essu res . C heck you r
ti re p ressu re eve ry 2,000 mi les (3,000 k m) and add a ir if neces sary .
• D rive carefully on roads with potho les, deep gullies or ridges.
T he impact from d riving th rough or ove r such obstac les can
da mage y our tires. I mpact with a cu rb m ay a lso cause damage to
your tire s. ..,
Vehicle care
I t •
Page 363 of 408
_________________________________________________ F_ u_ s_ e_s _ a_n _d_ b_ u _ lb_ s _ __._
[ i J Tip s
You are wel l advised to keep a supply of spare fuses in your vehic le.
Fuses with the proper ampere ratings are available at your Audi
dealer. •
Fuse Location , Instrument Panel left
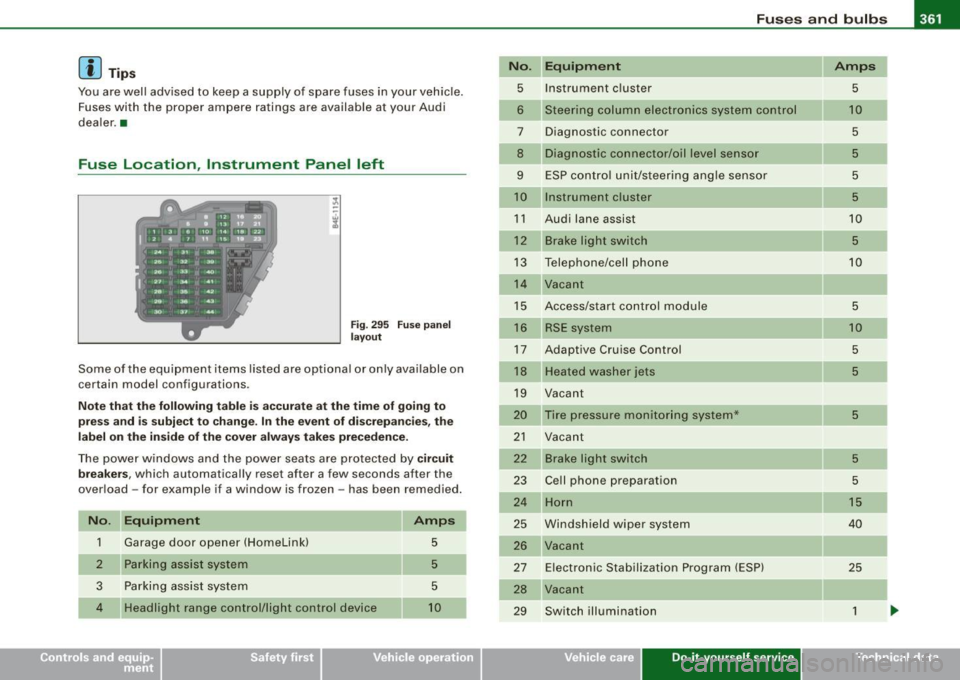
F ig. 295 Fuse pan el
l ayout
Some of the equipment items listed are optiona l or only available on
certain model configurations.
No te t hat th e fo llow ing t able is acc urate a t the time o f goin g to
p re ss an d is s ubject to c hang e. In the e vent of di screpancies, the
lab el on the insi de of th e cover alwa ys ta kes prece dence .
The power windows and the power seats are protected by cir cui t
bre akers,
which automatically reset after a few seconds after the
over load -for example if a window is frozen -has been remedied .
N o. Equipm ent
1 Garage door opener (HomeLinkl 5
Parking assist system 5
3
Parking assist system 5
4
Headlight range control/light control device 10
No .
5
6
7
8
9
10
11
12
13
14
15
16
17
18
19
20
21
22
23
24
25
26
27
28
29
Equipm ent Amps
Instrument c luster
5
Steering column electronics system control 1 0
Diagnostic connector 5
Diagnostic connector/oil level sensor 5
ESP contro l unit/steering angle sensor 5
Instrument cluster 5
Audi lane assist 10
Brake light switch 5
Telephone/cell phone 10
Vacant
Access/start control module
5
RSE system 10
Adaptive Cruise Control 5
Heate d washer jets 5
Vacant
Tire pressure monitoring system*
5
Vacant
Brake light switch
5
Ce ll phone preparation 5
Horn 1 5
Windshield wiper system 40
Vacant
E lectronic Stabilization Program (ESP)
25
Vacant
Switch illumination
1
Vehicle care Do-it-yourself service irechnical data