warning light AUDI TT COUPE 2009 Service Manual
[x] Cancel search | Manufacturer: AUDI, Model Year: 2009, Model line: TT COUPE, Model: AUDI TT COUPE 2009Pages: 316, PDF Size: 71.16 MB
Page 98 of 316

On the ro ad
Pote nt ial malf un cti ons
If a warning buzzer sounds for a few seconds when the ign ition is
switched on, there is a system malfunction with the acoustic park
assist. If the malfunction persists until the ignition is switched off,
there will be no acoustic warning at the next attempt to activate the system. Have the problem corrected.
There is no confirmation tone when reverse gea r is engaged if there
is a system malfunction .
For the parking assist to operate, the sensors must be kept clean
and free of ice.
& WARNING
• Sen sor s hav e blind spots in w hic h obj ec ts can not b e dete cted.
P ay s pecial attenti on to small childr en and anim als . They cannot
al ways be dete cte d b y the sensor s -dan ger of an accident !
• The p arking a ssis t cann ot r eplace th e driver' s attention . The
d rive r alone is re spon sible f or p ark ing an d simil ar d riv ing mane u
ver s. A lway s wat ch whe re you are driving .
(D Note
Low obstacles a lready signa lled by a warn ing can disappear from
the system's detection range as they are approached and wi ll not
continue to be signalled. Objects such as barrier chains, trailer draw
bars, thin pa inted vertical poles , or fences may not be detected by
the system -risk of damage.
[ i J Tip s
For the parking assist to operate, the sensors must be kept clean
and free of snow and ice. •
Cruise control
Switching the system on
The cruise control system makes it possible t o drive at a
constant speed sta rting at 20 mph (30 km/h) .
Ai------
I
Fig . 8 1 Contr ol l ever
w ith se t butt on
Fig . 8 2 Displ ay:
Se lec te d spee d
Pull the lever to position G) ~ fig. 8 1 to switch the
system on.
Drive at the speed y ou wis h to se t.
Press but ton
@ to set that speed.
The display~ fig. 82 will show the set speed. The display may vary
depending on the type of display in your vehicle . The indicator light
~
Page 99 of 316
CRUISE (US mod ell/ f-f (Canadian mod ell will also light up in the
instrument cluster .
& WARNING
• Always pay att enti on to traffic ev en whe n the c rui se control is
swi tched o n. Yo u are alway s resp onsi ble for your spe ed and the
di stanc e betw een your veh icle and other ve hic le s.
• Fo r sa fet y re as on s, th e c ruise control shou ld not be u sed in the
c it y, in stop -and -go traffic , on twi sting road s and when road condi
t ion s a re poor (such as ice, fog, gra vel, hea vy ra in and hydro
planing ) - risk of accid ent.
• Turn off the cr uis e control t empor arily when e nte ring turn
lane s, highwa y ex it lane s or in con stru ctio n z one s.
• Please note that inad vertentl y "re sting " your foot on the a ccel
er ato r ped al ca use s t he crui se control not to br ake . Thi s is because
the cru ise control i s overridden b y the dri ve r's acc eleration .
[ i] Tip s
• Vehicles w ith manua l transmission : You can at tain the set speed
only if the currently engaged gear allows it and the engine is not
stressed. Shifting to a higher or lower gear promptly will allow the
engine to run smooth ly .
• The cruise control cannot maintain a constant speed when
driving downhi ll. The vehicle will acce lerate under its own weight .
Downshift to a lower gear or use the brakes to s low down. •
Changing speed
-Press lever in the 0 or O direction => page 96, fig. 81 to
increase or decrease your speed.
- Release the lever to save that speed .
Controls and equip
ment
On th e road
Change speed in increments of 1 mph (1 km/h) by lightly pressing
the lever . If you keep the lever pressed down, you will a lter your
speed in 5 mph (10 km /h) increments .
You can a lso press the acce lerator pedal down to increase your
speed, e.g. if you want to pass someone. The speed you saved
earlier will resume as soon as you release the accelerator pedal.
I f , however, you exceed your saved speed by 5 mph (10 km/h) for
longer than 5 minutes, the cruise control will turn off temporarily .
The symbol will go ou t but the saved speed will be retained. •
Presetting your speed
You can preset your desired speed while the vehicle is not
moving.
Turn on the ignition.
P ull lever into posit ion
G) => page 96 , fig . 81.
Press the lever in the
0 or O direction to increase or
decrease your speed.
- Release the lever to save that speed .
This function makes it possible, for example, to save the speed you
want before driving on the highway . Once on the highway, activate
the cruise contro l by pulling the lever toward
(D . •
Switching the system off
Tempor ary d ea ctiv ati o n
Press the brake pedal, or
- Keep the c lutch pedal pressed down
longer, or
- Press th e l ever into position @ (n ot c licked into place)
=>
page 96 , fig. 8 1, or ~
I • •
Page 100 of 316
On the ro ad
- Drive for longer t han 5 minutes at more than 5 m ph
(10 km/h) above the st ored speed .
Switching off compl etely
Press lever into position @ (clicked into place), or
- Sw itch the ignition off .
The system retains the saved speed if you deactivate the cruise
control temporarily. To resume the saved speed, release the brake or
clutch peda l and pull the leve r to position
G) .
Switching the igni tion off erases the saved speed .
& WARNING
You should only return t o the saved speed if it i s not t oo f ast for
the current tr affi c c ondition s -ri sk of an accid ent! •
App lies t o vehic les: wit h magn etic rid e
Audi magnetic ride
Damping can be adjusted to the driver's preference and it
a dap ts automa tically t o the current driv ing si tuation.
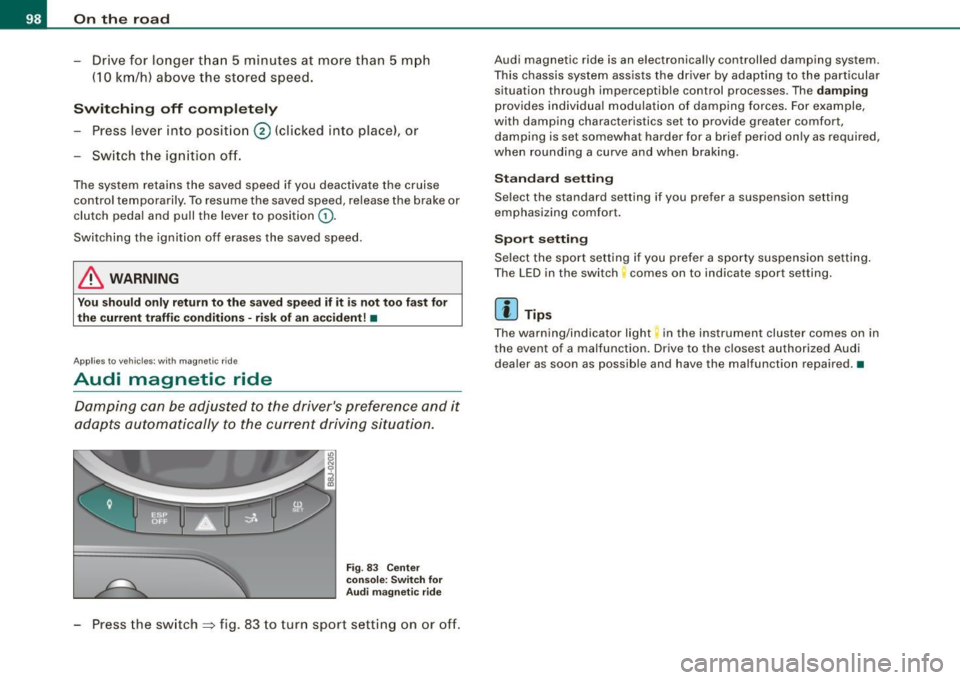
F ig . 83 C enter
co nsole: Sw itch for
A udi m agn etic ride
Press the switch ~ fig. 83 to turn sport setting on or off.
Audi magnetic ride is an e lectronically controlled damping system.
This chassis system assists the driver by adap ting to the particular
situation through imperceptib le control processes. The
damping
provides individua l modulation of damp ing forces. For example,
with damping characteristics set to provide greater comfort ,
damping is set somewhat harder for a brief period only as required,
when rounding a curve and when braking .
Standard setting
Select the standard setting if you prefer a suspension setting
emphasizing comfort .
Spo rt setting
Se lect the sport setting if you prefer a sporty suspension setting .
The LED in the switch comes on to indicate sport setting.
[ i ] Tip s
The warning/indicator light in the ins trument cluster comes on in
the event of a malfunction. Drive to the c losest authori zed Audi
dea ler as soon as possible and have the malfunction repaired. •
Page 102 of 316
_L_T ..:..:r.::a :.: n~ s:.:.m .:.:.:. i.:::s :.::S :.:i.::O :.:n..:.... _____________________________________________________ _
converter of conventional automatic transmissions and allow the
vehicle to accelerate without a noticeable break in the power flow.
With the aid of
tiptronic, the gears can optionally be shifted manu
ally => page 103. •
Applies to vehicles: wit h S tronic®
Selector lever positions
All the selector lever positions are explained in this
section.
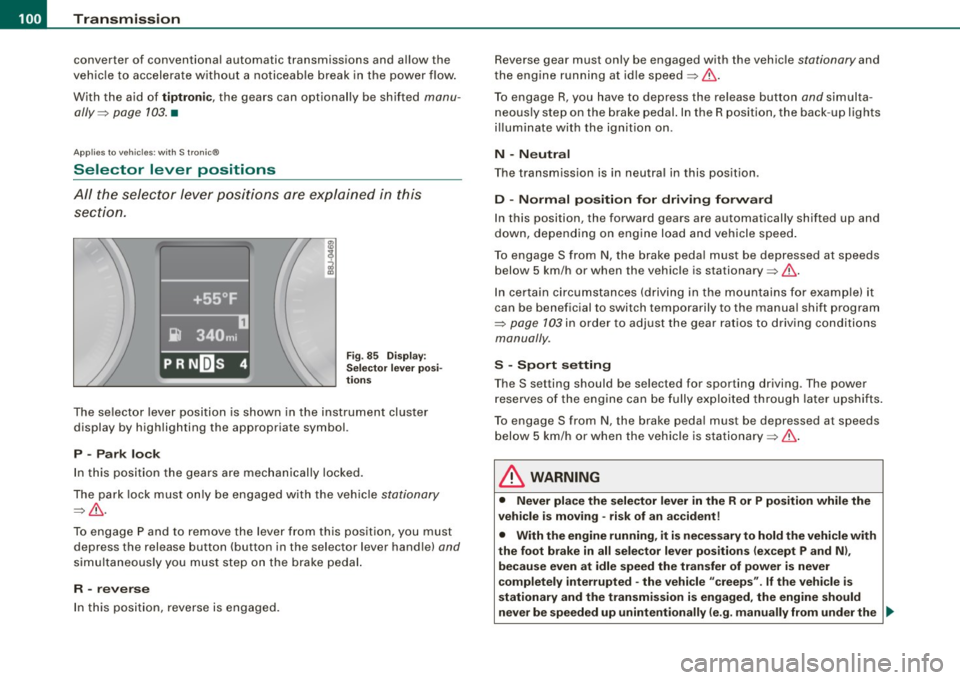
Fig. 85 Display:
Selector lever posi
tions
The selector lever position is shown in the instrument cluster
display by highlighting the appropriate symbol.
P -Park lock
In this position the gears are mechanically locked.
The park lock must only be engaged with the vehicle
stationary
=>& .
To engage P and to remove the lever from this position, you must
depress the release button (button in the selector lever handle)
and
simultaneously you must step on the brake pedal.
R -reverse
In this position, reverse is engaged. Reverse gear must only be engaged with the vehicle
stationary and
the engine running at idle speed=>& .
To engage R, you have to depress the release button
and simulta
neously step on the brake pedal. In the R position, the back -up lights
illuminate with the ignition on.
N -Neutral
The transmission is in neutral in this position .
D -Normal position for driving forward
In this position, the forward gears are automatically shifted up and
down, depending on engine load and vehicle speed.
To engage S from N, the brake pedal must be depressed at speeds
below 5 km/h or when the vehicle is stationary=>& .
In certain circumstances (driving in the mountains for example) it
can be beneficial to switch temporarily to the manual shift program
=>
page 103 in order to adjust the gear ratios to driving conditions
manually .
S -Sport setting
Th e S setting should be selected for sporting driving . The power
reserves of the engine can be fully exploited through later upshifts.
To engage S from N, the brake pedal must be depressed at speeds
below 5 km/h or when the vehicle is stationary =>& .
& WARNING
• Never place the selector lever in the R or P position while the
vehicle is moving -risk of an accident!
• With the engine running, it is necessary to hold the vehicle with
the foot brake in all selector lever positions (except P and Nl,
because even at idle speed the transfer of power is never
completely interrupted -the vehicle "creeps".
If the vehicle is
stationary and the transmission is engaged, the engine should
never be speeded up unintentionally (e.g. manually from under the _.,
Page 103 of 316
_______________________________________________________ T_ r _a_ n_s_ m __ is_ s_ io_ n _ __. _
& WA RN ING !continue d)
hood). Other wise the vehi cle will immediately start to move -
s ometime s even if the p arking brake is firmly applied -ris k of an
a ccident !
• Before you or other per sons open the hood and work on a
running e ngine , the sel ector le ver must be moved to P and the
parking brake applied firmly -ris k of an a cc iden t! Follow the
wa rning sti ck ers
~ pag e 209, "Engine compa rt me nt".
[ i ] Tips
If you have inadvertently shifting into N while the vehic le is moving ,
you shou ld remove y our foo t from the acce lerator and wait unti l the
engine speed has dropped to idle before shifting back to Dor S . •
Ap plies to ve hicles : with S tro ni c®
Selector lever lock
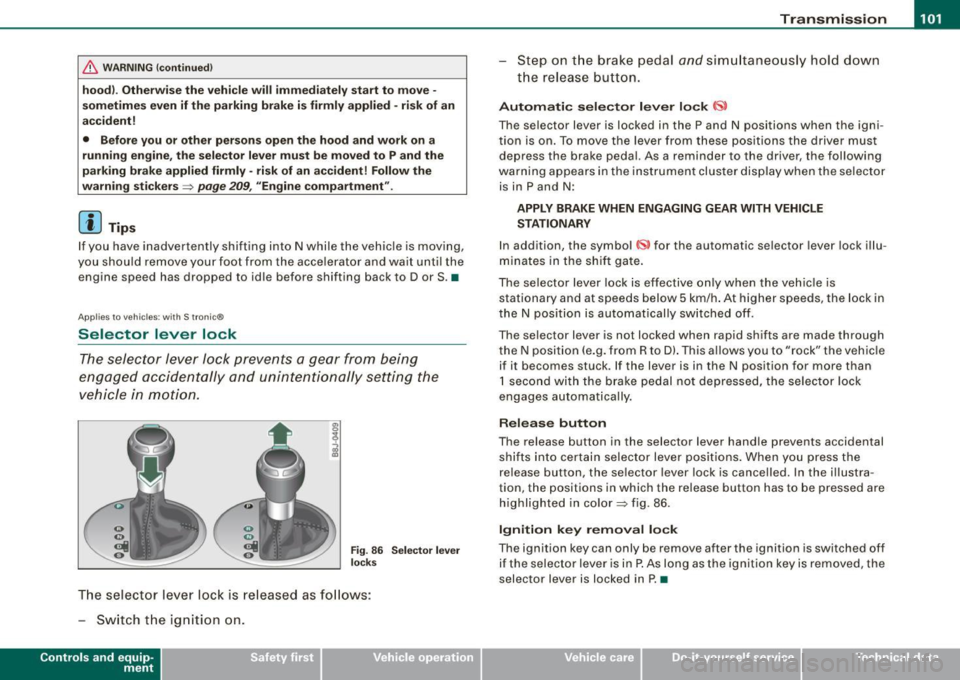
The selector lever lock prevents a gear from being
engaged accidentally and unin tentionally setting the
vehicle in motion.
F ig . 8 6 Sel ector l ever
l oc ks
The selector lever lock is released as fo llows:
- Switch the ign ition on .
Contro ls and eq uip
ment
St ep on t he br ake pedal and simu ltan eously hold down
the rel ease button.
Autom ati c sele ctor le ver lo ck 6ll
The selector lever is locked in the P and N positions when the igni
tion is on. To move the lever fr om these pos itions the driver mus t
depress the brake pedal. As a reminder to the driver, the fol lowing
warning appears in the ins trument cluster display when the selector
is in P and N:
APPLY BRAKE WHEN ENGAGING GEAR WITH VEHICLE
S TATIONAR Y
In addition, the symbol «s> for the automatic selector lever lock i llu
minates in the shif t gate .
The selector lever lock is effective only when the vehic le is
stationary and at speeds below 5 km/h . At higher speeds, the lock in
the N position is automatically sw itched o ff .
The selector lever is not locked when rapid shifts are made through
the N posi tion (e .g. from R to DI. This allows you to "rock" the vehicle
if it becomes stuck . If the lever is in the N position for more than
1 second with the brake pedal not depressed, the selector lock
engages automatically.
Release button
The release button in the selector lever handle prevents accidental shifts into certain selector lever positions . When you press the
re lease button, the selector lever lock is cancelled. In the i llustra
tion , the positions in which the release button has to be pressed are
h ighlighted in co lor~ fig. 86 .
Ignition key removal lock
The ignition key can only be remove after the ignition is switched off
if the selector lever is in P . As long as the ignition key is removed, the
selector lever is locked in P. •
Vehicle care I I irechnical data
Page 107 of 316
____________________________________________________ T_ r_a _n _ s_ m __ is_s_ i _o _ n __ llll
Ap plies to vehicles : wit h S tro ni c®
Kick -dovvn feature
The kick-down feature allows maximum acceleration.
If you depress the accelerator pedal fully beyond the full-throttle
position, the transmission automatically downshifts one gear,
depending on vehicle speed and engine rpm. The upshift into the
next higher gear takes place as soon as the maximum specified
engine speed is reached.
& WARNING
Please note that the drive wheels can spin if the kick-down is used
on a smooth slippery road -risk of skidding! •
Applies to vehicles : withs t ro ni c®
Launch Control Program
The Launch Control Program permits maximum accelera
tion .
In order to use Launch Control, the ASR (Anti-Slip Regula
tion) must be disabled. When ASR is disabled, the ESP
warning/indicator light 9 in the instrument cluster illumi
nates . So that Launch Control can be used, the engine must
be at operating temperature and the steering wheel must
not be turned .
- With the engine running, briefly press the ESP button.
The message "ASR off" appears in the instrument cluster
d isplay.
- Shift the gear lever to "S" or the tiptronic® position.
- Step on the brake pedal with your left foot and keep the
brake pedal fully depressed for at least one second.
Controls and equip
ment
- With your right foot, step on the accelerator to the wide
open throttle position or Kickdown. The engine speed
settles at about 3,200 rpm.
- Take your left foot off the brake.
The S tronic® in your vehicle is electronically controlled. A special
Launch Control Program provides the best acceleration from a
standing start .
& WARNING
• Always adapt your driving to the traffic flow.
• Only use Launch Control when road and traffic conditions allow
it and other drivers will not be endangered or annoyed by your
driving and the acceleration of the vehicle.
• Make sure that ESP remains enabled. With the ESP disabled,
the vehicle could brake away, particularly on a slick and slippery road -risk of skidding!
• Once acceleration is finished, switch ASR on again by briefly
pushing the ESP button. •
Applies to vehicles: with S tronic®
Back-up program
In the event of a system malfunction, there is an back-up
program.
In the event of system malfunctions, the automatic transmission
switches to the fail- safe mode. This is signalled by one segment or
all the segments in the display illuminating or going out .
Th e effect of a system malfunction can be one of the following:
• The program shifts only into certain gears.
• Reverse gear can no longer be engaged.
I • •
Page 109 of 316
___________________________________________________ H_ o_m_ e_ L_ i_ n _ k_ ® __ ,n
Homelink®
Universal remote control
A pplies to vehi cles: w ith Home link® unive rsa l re mo te cont ro l
General information
The Homelink® fea ture c an learn up to three radio
frequency codes for m ost current transmitters used for
operating garage doors, estate gates, home or outdoor
lighting systems, and other devices.
You must first pr ogram the Homelink® transmitter before you can
use the system=> page 108, "Programming the Homelink® trans
mitter".
In order to program the Homelink® transmitter for devices uti lizing
rolling code, a second person on a ladder who can safe ly reach the
garage door opener motor is recommended. It is also necessary to
locate the "learn" button on your garage door opener motor . Refer
t o the operating instructions for the opener, as the location a nd
color of this but ton may vary by manufacturer.
You can still use the origina l remote control for the device at any
time.
& WARNING
• Never use the Homelink"" transmitte r with any garage door
opener that does have not the safety stop and rever se feature as
required by federal safety standards . This includes any garage
door opener model manufactured before April 1 , 1982 .
• A garage door opener whi ch cannot detect an obje ct, signaling
the door to stop and rever se does not meet current federal safety
standard s. U sing a ga rage door opener without these features
increases risk of serious injury or death .
Controls and equip
ment
& W ARNIN G (continu ed )
• For safety re asons never relea se the p ark ing brake or st art the
engine while anyone i s standing in front of the vehi cle .
• A garage door or an estate gate may sometimes be set
in
motion when the Homelink ® remote control is being
programmed . If the d evice is repeated ly act ivated , this can over
strain motor and damage it s elec trical component s -an over
heated motor is a fire hazard !
• To avoid po ssible in juries or property damage, please alway s
make ab solutely certain that no persons or obje cts are located in
the range of motion of any equipment being operated.
[ i ] Tips
• If you wou ld like more in forma tion on Hom elink ®, where to
purchase the Homelink ® compatible products, or wou ld like to
p urchase the Homelink ® Home Light ing Package , please ca ll toll
free : 1-8 0 0-355 -3515.
• Fo r Declaratio n of Co mpliance to United S ta tes FCC a nd In dus try
Canada regulations=> page
296. •
I • •
Page 117 of 316

Driving Safely 1111
----------------
-Make sure that all lights and signals are operating
correctly.
- Make sure that the tire pressure is correct.
- Make sure that all windows are clean and afford good
visibility to the outside.
- Secure all luggage and other items carefully =>
page 83.
-Make sure that nothing can interfere with the pedals.
- Adjust front seat, head restraint and mirrors correctly for
your height.
- Instruct passengers to adjust the head restraints
according to their height.
- Make sure to use the right child restraint correctly to
protect children =>
page 157, "Child Safety".
- Sit properly in your seat and make sure that your passen
gers do the same=>
page 69, "General recommenda
tions".
- Fasten your safety belt and wear it properly. Also instruct
your passengers to fasten their safety belts properly
=>
page 125. •
What impairs driving safety?
Safe driving is directly related to the condition of the
vehicle, the driver as well as the driver's ability to concen
trate on the road without being distracted.
The driver is responsible for the safety of the vehicle and all
of its occupants. If your ability to drive is impaired, safety risks for everybody in the vehicle increase and you also
Controls and equip ment Safety first Vehicle operation
become a
hazard to everyone else on the road =>&, .There
fore:
- Do not let yourself be distracted by passengers or by
using a cellular telephone.
- NEVER drive when your driving ability is impaired (by
medications, alcohol, drugs, etc .).
- Observe all traffic laws, rules of the road and speed limits
and plain common sense.
- ALWAYS adjust your speed to road, traffic and weather
conditions.
- Take frequent breaks on long trips. Do not drive for more
than two hours at a stretch.
- Do NOT drive when you are tired, under pressure or when
you are stressed.
in. WARNING
Impaired driving safety increases the risk of serious personal
injury and death whenever a vehicle is being used. •
Vehicle care Do-it-yourself service Technical data
Page 118 of 316
___ D_ r_ i_v _in -= g;... S _ a_f _e _ly...._ ______________________________________________ _
Proper occupant seating positi·ons
Proper seating position for the driver
The proper driver seating position is important for safe,
relaxed driving.
"' N
;
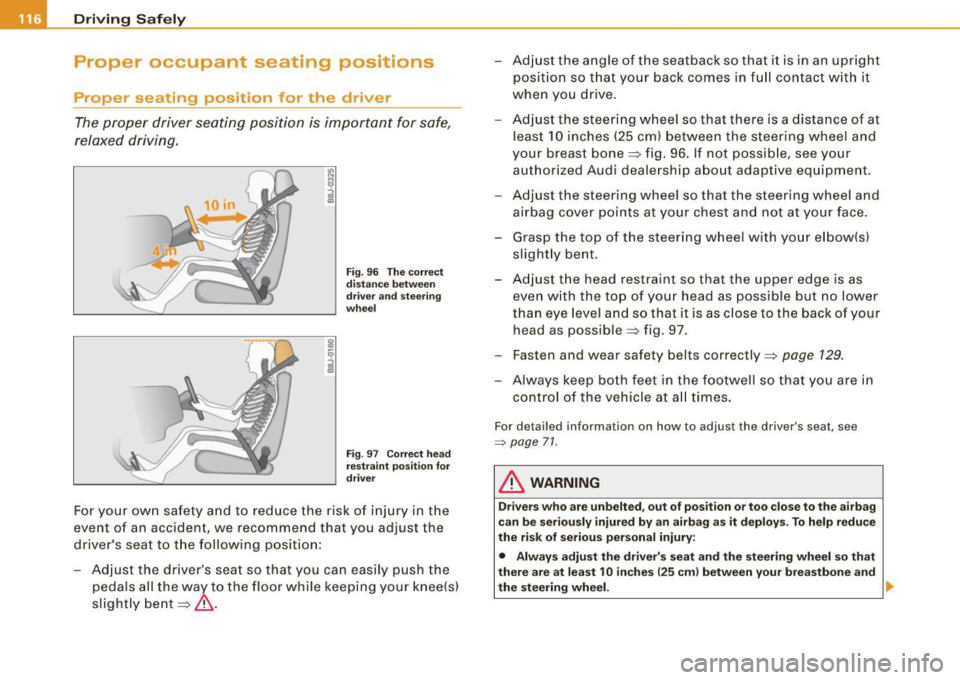
Fig . 96 The correct
distance between
driver and steering
wheel
Fig. 97 Correct head
restraint position for
driver
For your own safety and to reduce the risk of injury in the
event of an accident, we recommend that you adjust the
driver's seat to the following position:
- Adjust the driver's seat so that you can easily push the
pedals all the way to the floor while keeping your knee(s)
slightly bent=:>& . - Adjust the angle
of the seatback so that it is in an upright
position so that your back comes in full contact with it
when you drive.
- Adjust the steering wheel so that there is a distance of at
least 10 inches (25 cm) between the steering wheel and
your breast bone=:> fig. 96. If not possible, see your
authorized Audi dealership about adaptive equipment.
- Adjust the steering wheel so that the steering wheel and
airbag cover points at your chest and not at your face.
- Grasp the top of the steering wheel with your elbow(s)
slightly bent.
- Adjust the head restraint so that the upper edge is as
even with the top of your head as possible but no lower
than eye level and so that it is as close to the back of your
head as possible =:> fig. 97.
- Fasten and wear safety belts correctly=:>
page 129.
- Always keep both feet in the footwell so that you are in
control of the vehicle at all times.
For detailed information on how to adjust the driver's seat, see
=> page 71.
& WARNING
Drivers who are unbelted, out of position or too close to the airbag
can be seriously injured by an airbag as it deploys. To help reduce
the risk of serious personal injury:
• Always adjust the driver's seat and the steering wheel so that
there are at least 10 inches
125 cm) between your breastbone and
the steering wheel. ..
Page 128 of 316
___ S_a_ f_ e_ t-= y_ b_e_ l_ t _s _______________________________________________ _
Safety belt warning light 4
Your vehicle has a warn ing system for the driver and front
seat passenger to remind you about the importance of buckling-up.
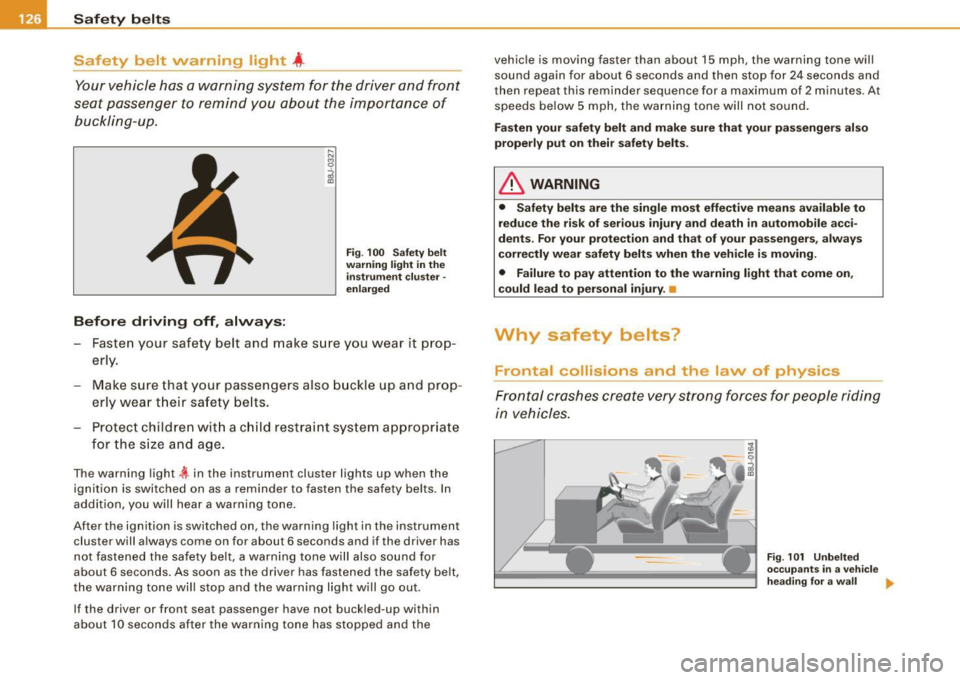
Before driving off , alw ays:
Fig . 100 Saf ety belt
w arn ing li ght in t he
in strum ent cluster -
e n la rge d
- Fasten your safety belt and make sure you wear it prop
erly.
Make sure that your passengers also buckle up and prop
erly wea r th eir safety be lts.
- Protect children wit h a c hild restraint sys tem appropria te
for the s ize and age.
The warning light tin the instrument cluster lights up when the
ignition is swi tched on as a reminder to fasten the safety belts. In
addition, you will hear a warning tone .
After the ignition is switched on , the warning light in the ins trumen t
cluster will a lways come on for about 6 seconds and if the driver has
not fastened the safety belt, a warning tone will also sound for
about 6 seconds. As soon as the driver has fastened the safety b elt,
the warning tone wil l stop and the warning light will go out.
If the driver or front seat passenger have not buckled-up within
about 10 seconds after the warning tone has stopped and the vehi
cle is moving faster than about 15 mph , the warning tone will
sound again for about 6 seconds and then stop for 24 seconds and
then repea t this reminder sequence for a maximum of 2 minu tes . At
speeds below 5 mph, the warning ton e will not sound .
Fas ten your safety belt and m ake sur e that your p as senger s al so
properly p ut o n the ir safety belt s.
& WARNING
• Saf ety belt s a re the single mo st effe ctive m ean s available to
r e d uc e the ri sk of ser iou s inj ury a nd death i n aut omobi le a cci
den ts. For your protection and that of your p assengers, always
corre ctly we ar sa fe ty belt s when the veh icle i s m oving.
• Failure to pay att ent ion t o th e w arning light that come on,
c ould l ead t o per sona l in jur y. •
Why safety be lts?
Frontal collisions and the law of physics
Frontal crashes create very strong forces for people riding
in vehicles.
--
Fig. 101 Unbe lt ed
o cc up ant s in a vehi cle
h ead ing fo r a w all
~