sensor AUDI TT ROADSTER 2017 Owners Manual
[x] Cancel search | Manufacturer: AUDI, Model Year: 2017, Model line: TT ROADSTER, Model: AUDI TT ROADSTER 2017Pages: 314, PDF Size: 76.54 MB
Page 12 of 314
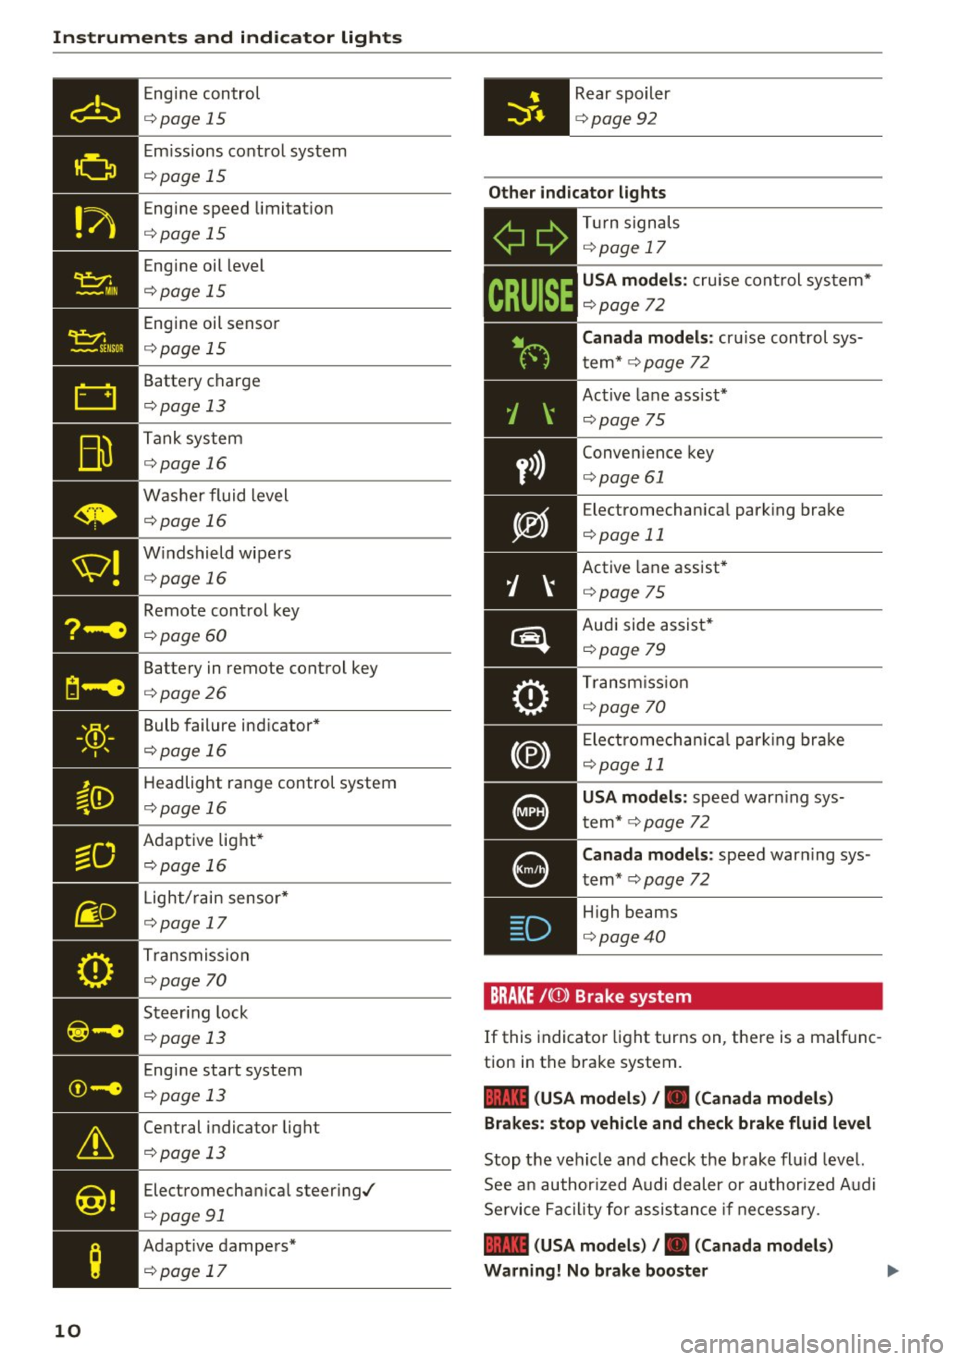
Instruments and indicator lights
Engine control
c::> page 15
Emi ssions control system
c::> page 15
Engine speed limitat io n
c::> page 15
Engine oil level
c::> page 15
Engine oil senso r
c::> page 15
Battery charge
c::> page 13
Tank system
c::> page 16
Washer fluid level
c::> page 16
W indshield wipe rs
c::> page 16
Remote control key
c::> page 60
Battery in remote control key
c::> page 26
Bulb failure ind icator *
c::> page 16
Headlight range control system
c::> page 16
Adaptive light*
c::> page 16
- •
Light/ rain sensor*
c::> page 17
T ransmiss ion
c::> page 70
- Steer ing lock
liliil c::> page 13
10
Engine start system
c::> page 13
Central indicator light
c::> page 13
Electromechan ical steer ing/
c::> page 91
Adapt ive dampers*
c::> page 17
Rear spoiler
c::> page 92
Other indicator lights
- ii
T
ur n signals
c::> page 17
CRUISE
USA model s: cruise control sys tem*
c::> page 72
Canada models :
cruise cont rol sys
t em*
c::> page 72
Active lane ass ist*
c::> page 75
Conven ience key
c::> page 61
E lectromechan ica l park ing brake
c::> page 11
Active lane assist*
c::> page 75
Audi side assist *
c::>page 79
Transm iss io n
c::> page 70
Electromechan ica l par king brake
c::> page 11
USA models: speed warn ing sys
tem*
c::> page 72
C anada models :
speed warning sys
tem*
c::> page 72
- H
igh beams
. c::> page 40
BRAKE / ((J)) Brake sy stem
If this indicato r light turns on, there is a malfunc
tion in the brake system.
1111 (USA mo del s) I. ( Canad a mode ls)
Brake s: stop vehicle and ch eck brake fluid level
Stop the vehicle and check the brake fl uid leve l.
See a n author ized Audi dealer or au thor ized Audi
Se rvice Facil ity for assis tance if necessary .
1111 (USA model s) /. (C anad a mode ls)
Warning! No brake boo ster
Page 17 of 314
co
co
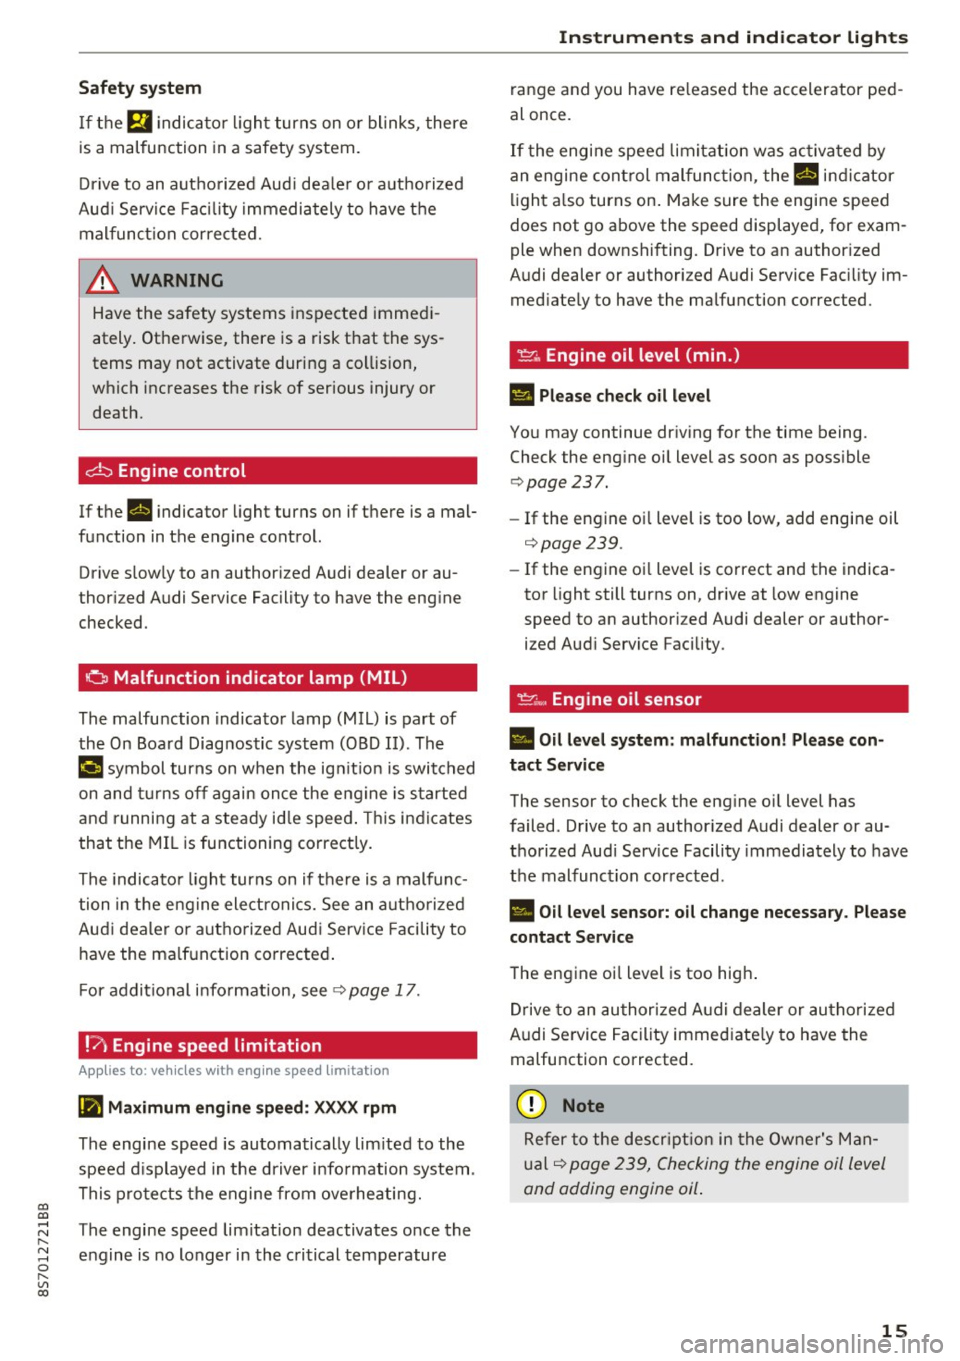
Safety system
If them indicator light turns on or blinks, there
is a malfunction in a safety system.
Drive to an authorized Audi dealer or authorized
Audi Service Facility immediately to have the
malfunction corrected.
_& WARNING
-
Have the safety systems inspected immedi
ately. Otherwise, there is a risk that the sys
tems may not activate during a collision,
which increases the risk of serious injury or death.
c±::, Engine control
If the II indicator light turns on if there is a mal
function in the engine control.
Drive slowly to an authorized Audi dealer or au
thori zed Audi Service Facility to have the engine
checked.
C Malfunction indicator lamp (MIL)
The malfunction indicator lamp (MIL) is part of
the On Board Diagnostic system (OBD II) . The
¢..ij symbol turns on when the ignition is switched
on and turns off again once the engine is started
and running at a steady idle speed. This indicates
that the MIL is functioning correctly.
The indicator light turns on if there is a malfunc
tion in the engine electronics. See an authorized
Audi dealer or authorized Audi Service Facility to
have the malfunction corrected.
For additional information, see¢
page 17.
!?) Engine speed limitation
Appl ies to: vehicles with engine speed li m itation
(ii Maximum engine speed: XXXX rpm
The engine speed is automatically limited to the
speed displayed in the driver information system .
This protects the engine from overheating.
;:::: The engine speed limitation deactivates once the
" ~ engine is no longer in the critical temperature 0
" "' c:o
Instruments and indicator lights
range and you have released the accelerator ped
al once.
If the engine speed limitation was activated by
an engine control malfunction, the
II indicator
light also turns on. Make sure the engine speed
does not go above the speed displayed, for exam
ple when downshifting. Drive to an authorized
Audi dealer or authorized Audi Service Facility im
mediately to have the malfunction corrected.
~ Engine oil level (min.)
Ill Please check oil level
You may continue driving for the time being.
Check the engine oil level as soon as possible
<=> page 237.
-If the engine oil level is too low, add engine oil
¢page 239.
-If the engine oil level is correct and the indica
tor light still turns on, drive at low engine
speed to an authorized Audi dealer or author
ized Audi Service Facility .
"'' Engine oil sensor
• Oil level system: malfunction! Please con
tact Service
The sensor to check the engine oil level has
failed . Drive to an authorized Audi dealer or au
thorized Audi Service Facility immediately to have
the malfunction corrected .
• Oil level sensor: oil change necessary. Please
contact Service
The engine oil level is too high.
Drive to an authorized Audi dealer or authorized
Audi Service Facility immediately to have the
malfunction corrected.
(D Note
Refer to the description in the Owner's Man
ual ¢
page 239, Checking the engine oil level
and adding engine oil.
15
Page 19 of 314
CD
CD
.... N
" N .... 0 r--. V, co
@:.D Light/rain sensor
l!I Automatic headlights: malfunction! See
owner' s manual
El Automatic wipers : malfun ction! See owner 's
manual
The light/ra in sensor is malf unct ion ing.
The low beams remain switched on at all times
for safety reasons when the light switch is in the
AUTO position. You can continue to turn the
lights on and off using the light switch . You can
still cont rol a ll wipe r functions that a re inde
pendent of the ra in se nsor.
Drive to an authorized Aud i dea ler or a ut horized
Audi Service Facility immediately to have t he
malfunction corrected .
; Adaptive dampers
Applies to: vehicles with Audi drive select
B Suspension : malfunction! You may continue
driving
There is an adaptive damper malf unct ion.
Drive to an aut horize d Aud i dea le r or a uthorized
Aud i Service Facility immediately to have t he
malfunct ion corrected.
¢i ¢ Turn signals
If t he B or Ill indicator light b links, a t urn sig
n a l is turned on. If both indicator lig hts are blink
i ng, the eme rgency flash ers a re on .
On-Board Diagnostic
system (OBD)
Malfunction indicator lamp (MIL)
The malfunction indica to r l amp (MIL) ¢.j in the
in str ument cluster is part of the O n Board Diag
n os tic Sys tem ( OBD II).
The warning/indicator light turns on w hen the ig
ni tion is switched o n and turns off once the e n
g ine is s tarted an d is runn ing in id le at a stab le
speed. This indica tes th at the MIL is functioning
cor re ct ly.
Instruments and indicator lights
If the light does not turn off after starting the
engine
or turns on while driving, this may in di
cate there is a malfunction in the engine.
If the
indicato r turns on, the cata lytic conve rter may be
damaged .
Drive
with reduced engine performan ce (avo id
high speeds for extended per io d s of t ime and/o r
fast acceleration) and have the ma lfunction cor
rected. See an author ized Audi dealer or author
ized Audi Service Facility.
The in dicator may turn on if the e lectron ic speed
li miter is faulty. For add it iona l information, see
¢ page 72, Electronic speed limiter.
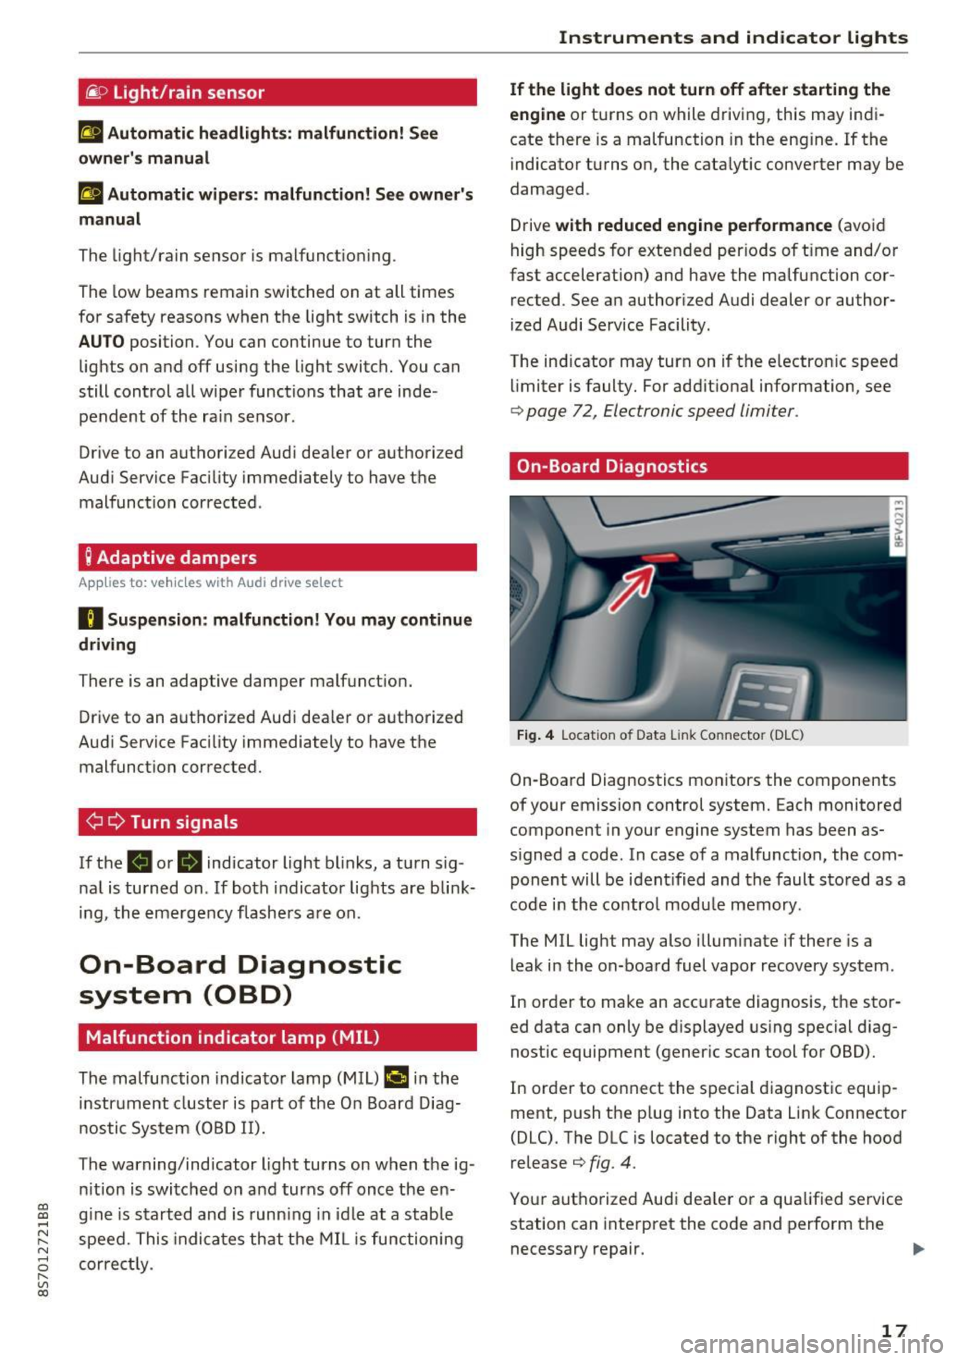
On-Board Diagnostics
Fig. 4 Location of Data Link Connector (DLC)
On-Boa rd Diagnostics mo nitors the components
of your emission control system. Each monitored
component in your engine system has been as
s igned a code. In case o f a malfunction, the com
ponent will be i dent ified and the faul t st o red as a
co de i n t he co ntro l mo dule mem ory.
The MIL lig ht may also illum inate if there is a
leak in the on-boa rd fuel vapor recovery system .
In or de r to ma ke an acc urate diagnosis, the sto r
ed data can only be d isplayed using special d iag
nostic equipment (gener ic scan to ol for OBD).
In order to co nnect the s pecial diagnost ic equi p
ment, push the p lug into the Data Link Connector
(DLC). T he DLC is located to the right of the hood
re lease
¢ fig. 4.
You r aut horize d Aud i dea le r or a qua lified se rvice
station can inte rpret the code and perform the
necessary repair.
IJJI,
17
Page 26 of 314
Opening and clo sin g
Opening and closing
Central locking
Description
You can lock and u nlock the veh icle centrally. You
have the following options:
- Remote control key
c::> page 26,
-Sensors in the door handles* c::> page 27,
- Lock cylinder on the driver 's door c::> page 29,
o r
- Central locking switch inside
c::> page 28.
Auto Lo ck
The A uto Lock f unct ion locks all doors and the
luggage compartment lid once the speed has ex
ceeded approx imately 9 mph (1S km/h) .
The vehicle can be unlocked if the openi ng func
tion in the centra l locking system sw itch is used
or one of the door handles is pulled. The A uto
L ock function can be switched on and off in the
Infotainment system
c::> page 28.
I n t he event of a crash with a irbag deployment ,
t he doors will a lso automat ically unlock to allow
access to the veh icle .
Selective unlocking
The doors and luggage compartment lid w ill lock
when they close. You can set in the Infotainment
system whether
only the driver's door or the en
tire veh icle should be unlocked when unlocking
c::> page 28 .
Turn signals
The turn s ignals flash tw ice when you unlock the
veh icle and flash once when you lock the vehicle .
I f the bli nking continues, one of the doo rs or the
luggage compartment lid is not closed or the ig
nition is still switched on .
Unintentionally locking yourself out
The follow ing cond itions prevent you from lock
ing your remo te contro l key in the vehicle :
- If the driver's door is open, the vehicle cannot
be locked by pressing the
I@ button on the re-
24
mote contro l key or touching the locking sen
sor* on a door.
- When lock ing using the
Im button in the central
locking switch, the vehicle will not lock if a door
is open
c::> page 28 .
-On veh icles with a convenience key *, the lug
gage compartment lid unlocks again after clos
ing if the most recent ly used key is in the lug
gage compartment. The emergency f lashers
blink four times.
Do not lock your vehicle with the remote cont rol
key or convenience key* until all doors and the
l uggage compartment lid are closed. This helps
to prevent you from locking yourself out acciden
tally .
¢j) Tips
- Do not leave va luables unattended in the ve
hicle. A locked veh icle is not a safe!
- The LED in the driver's door rail blinks when
you lock the vehicle. If the LED lights up for
approximate ly 30 seconds after locking,
there is a malfunction in the centra l locking
system . Have the problem corrected by an
authorized Audi dealer or au tho rized Aud i
Service Facili ty.
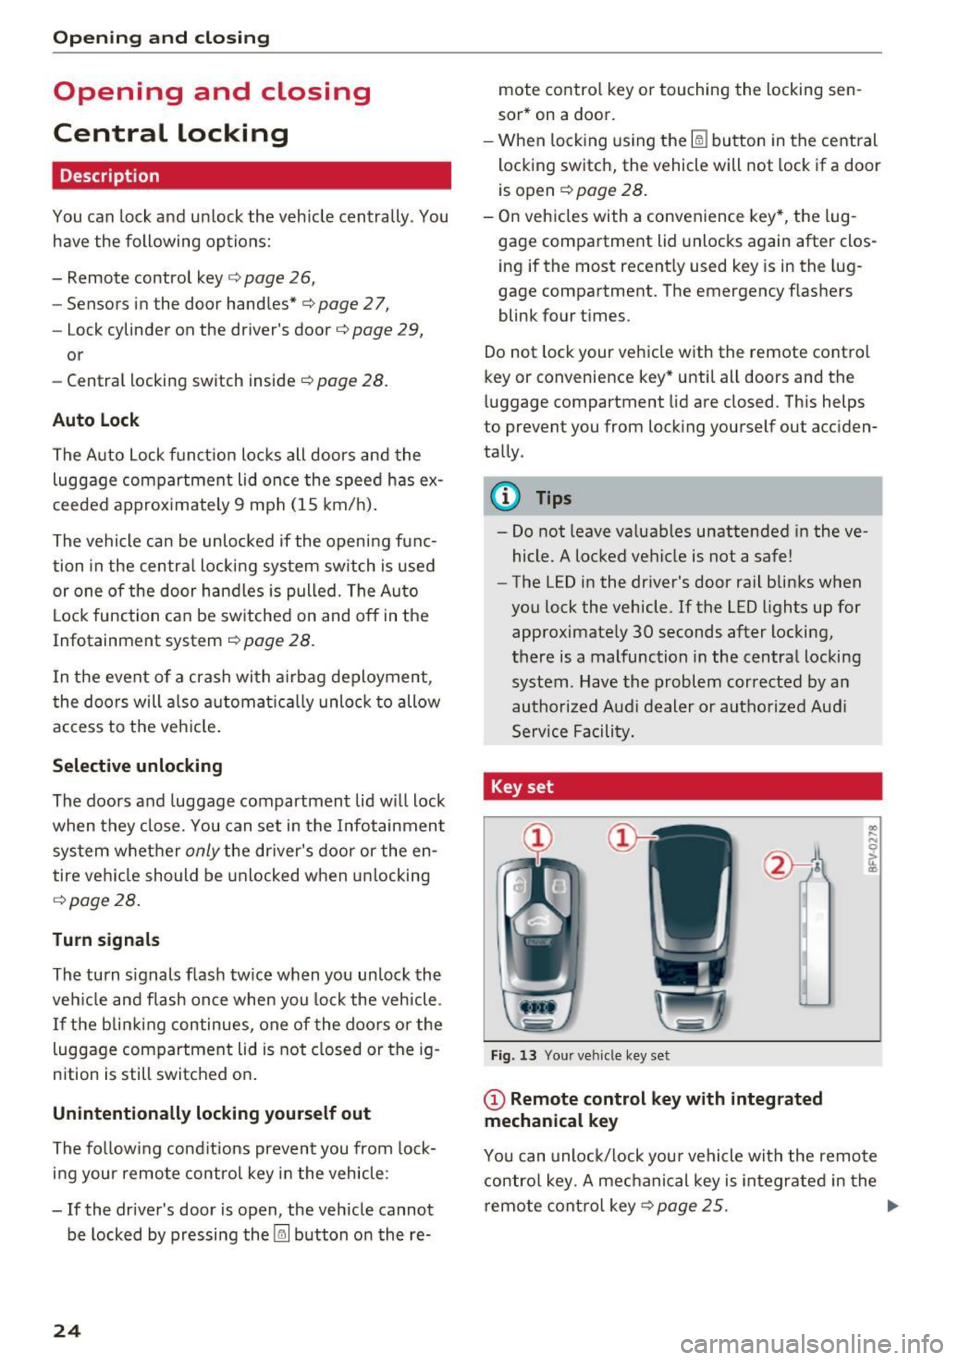
Key set
• J
-- --
Fig. 13 Your ve hicle key set
(D Remote control key with integrated
mechanical key
.. .... N 0 :l, u. CD
You can unloc k/lock you r vehicle with the remo te
contro l key. A mechanical key is integr ated in the
remote cont rol key
c::>page 25 . ..,.
Page 29 of 314
co
co
.... N
" N .... 0
" "' c:o
A WARNING ,~
No one, especially children, sho uld stay in the
veh icle w he n i t is locked from the outside, be
cause the w indows can no longer be opened
from th e inside
c::> page 29. Locked doors
ma ke it more difficult for eme rgency workers
t o get into the vehicle, which puts lives at
r isk.
@ Tips
- Only use the remote control key when you
are within view of the vehicle.
- Do not use the remote control when you are
inside the vehicle. Otherwise, yo u could un
i ntent io nally loc k the vehicle. If you then
tried to start the eng ine or open a door, the
alarm wou ld be triggered . If this happens,
press the un lock button@ .
- The selector leve r must be in the P position
on vehicles with a convenience key*. Other
wise the vehicle will not be ab le to lock .
- Only use the panic function in an emergen
cy .
Unlocking and locking with the
convenience key
Appl ies to: ve hicles with co nve nien ce key
The doors and luggage compartment lid can be
unlocked/locked without using the remote con
trol key.
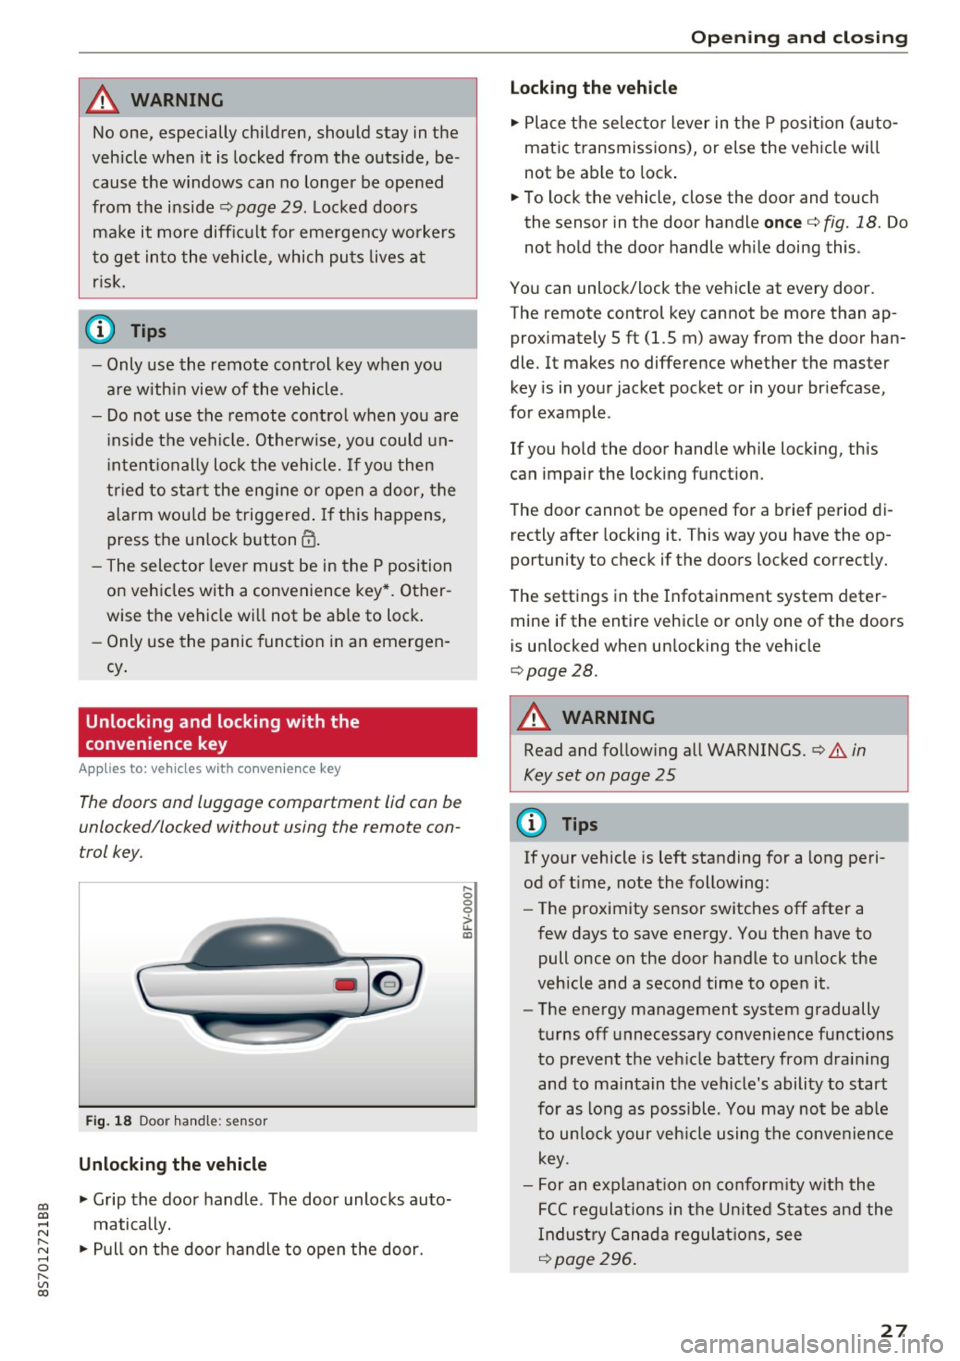
F ig . 18 Door han dle: senso r
Unlocking the vehicle
.,. Grip the door handle . The door unlocks auto
matically .
.,. Pull on the door handle to open the door.
.... 0 0 0
ii: IXl
Op ening and cl osing
Locking the v ehicle
.,. Place the se lecto r lever in t he P posi tion (a uto
matic transmiss ions), or else the vehicle wi ll
not be able to lock .
.,. To lock the vehicle, close the door and touch
the sensor in the door handle
once c::> fig. 18. Do
not hold the door handle wh ile doing this .
You can unlock/lock the ve hicle at every door.
The remote control key cannot be more than ap
prox imately 5 ft (1.5 m) away from the door han
dle. It makes no difference whether the master
key is in your jacket pocket or in your br iefcase,
for example .
If you ho ld the door handle wh ile lock ing, this
can impair the locking function.
The door cannot be opened for a brief period di rectly after locking it. This way you have the op
portunity to check if the doors locked correctly.
The settings in the Infotainment system deter mine if the entire vehicle or only one of the doors
is unlocked when un locking the vehicle
c::> page28.
A WARNING
-Read and follow ing all WARNINGS. c::> .&. in
Key set on page 25
0) Tips
If your vehicle is left standing for a long peri
od of t ime, note the follow ing:
- The proximity sensor sw itches off after a
few days to save energy. You then have to
pull once on the door handle to un lock the
vehicle and a second time to open it.
- The energy management system gradually
turns off unnecessary convenience functions
to prevent the veh icle battery from drain ing
and to ma intain the vehicle's ability to start
for as lo ng as poss ible. You may no t be ab le
to un lo ck your veh icle using the conve nience
key.
- For an explanat ion on co nfo rm ity w ith the
FCC regulat ions in the U nited S ta tes an d the
Indus try Canad a regulat ions, see
c::> page296 .
27
Page 30 of 314
Opening and clo sin g
Central locking switch
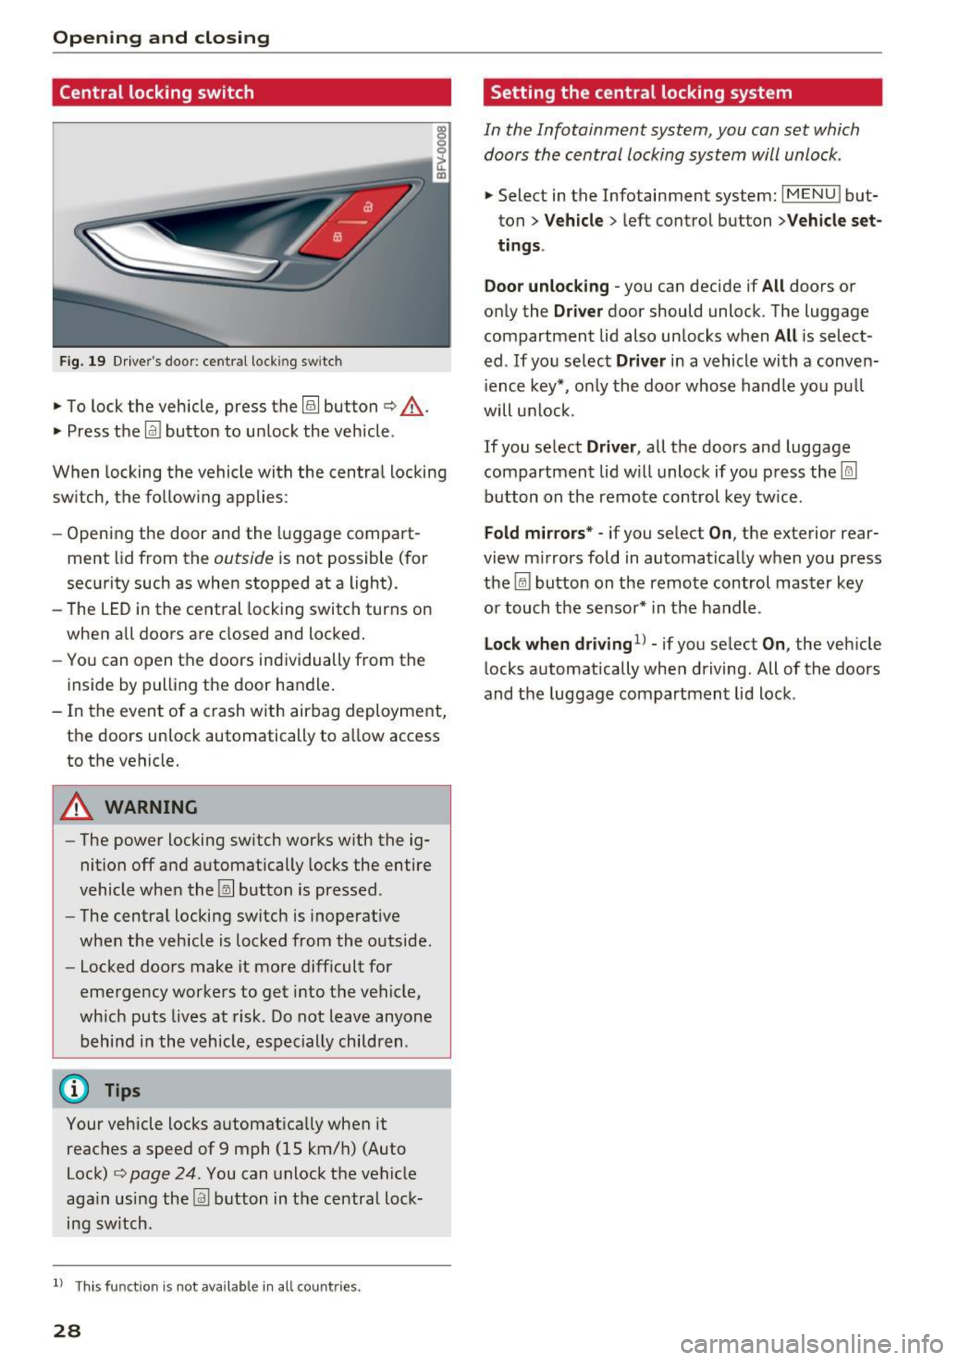
Fig. 19 D rive r's door : central lock ing switch
• To lock the vehicle, press the~ button c> .&,.
• Press t he !ill button to unlock the vehicle.
When locking the vehicle with the centra l locking
switch, the follow ing applies:
- Opening the door and the luggage compart
ment lid from the
outside is not possible (for
security such as when stopped at a light).
- The LED in the central locking switch turns on
when all doors are closed and locked.
- You can open the doors ind ividually from the
inside by pulling the door handle .
- In the event of a c rash with airbag deployment,
the doors unlock automat ically to a llow access
to the vehicle.
& WARNING
- The power locking sw itch works with the ig
nition off and automatically locks the entire
vehicle when the~ button is pressed.
- The centra l locking switch is inoperative
when the vehicle is locked from the outside.
- Locked doors make it more difficult for
emergency worke rs to get into t he vehicle,
wh ich puts lives at risk. Do not leave anyone
behind in the vehicle, especially children .
(D Tips
Your vehicle locks automatically when it
reaches a speed of 9 mph (15 km/h) (Auto Lock)
c> page 24 . You can unlock the vehicle
aga in using the
!ill b utton in the central lock
ing sw itch.
l) Th is fun ctio n is not a vailab le in a ll coun tries.
28
Setting the central locking system
In the Infotainment system, you can set which
doors the central locking system will unlock .
• Select in the Infotainment system: IMENU ! but
ton>
V eh icle > left control button >Vehicle set
t ings.
Door unloc king -
you can decide if All doors or
only the
Dr ive r door should unlock . The luggage
compartment lid also unlocks when
All i s select
ed . If you select
D riv er in a vehicle with a conven
i ence key*, on ly the door whose handle you pu ll
will unlock .
If you se lect
Dri ver , all the doors and luggage
compartment lid w ill unlock if you press the
I@
button on the remote control key tw ice .
Fold m irrors* -if you select On, the exterior rear
view m irrors fold in automatically when you press
the ~ button on the remote control master key
or touch the sensor* in the handle.
Lock whe n driving1l -if you select On , the veh icle
locks automatically when driving. All of the doors
and the luggage compartment lid lock .
Page 33 of 314
CD
CD
.... N
" N ,-I 0 r--. V, co
@ Tips
-You can still open and close the windows for
approximately 10 minutes after turn ing the
ignition off. The power windows do not
switch off until the driver's door or front passenger's door has been opened.
- When opening the doors and when open
i ng/closing the power top, the windows au
tomatically lower approximately 10 mm.
Convenience opening/closing
All windows can be opened and closed at the
same time.
Convenience opening feature
• Press the Im button on the remote control key
until all windows reach the desired position.
Convenience closing feature
• Press the {D button on the remote control key
u nti l all windows are closed¢
A or
Convenience closing with the convenience
key*
• Touch the sensor* on the door handle long
enough until all windows and the power top*
are closed . Do not place your hand in the door
hand le when doing this.
Setting convenience opening in the
Infotainment system
• Select in the Infotainment system: !MENUI but
ton
> Vehicle> left control button >Vehicle set
tings .
To enable the convenience window opening func
tion, the
Long press to open windows function
must be switched
on.
.&_ WARNING
- Never close the windows or power top* care lessly or in an uncontrolled manner, be
cause this increases the risk of injury.
- For security reasons, the windows and the
power top* can only be opened and closed
with the remote control key at a maximum
distance of approximately 6 ft (2 m) away
Open ing and closing
from the vehicle . Always pay attention when
pressing the
Im button to close the w indows
and the power top* so that no one is
pinched. The closing process w ill stop im
mediately when the
Im button is released .
Correcting power window malfunctions
You can reactivate the one-touch up/down func
tion if it malfunctions.
• Pull the power window switch up until the win
dow is completely raised.
• Release the switch and pull it up aga in for at
least one second .
Garage door opener
(Homelink)
Description
Applies to : veh icles w ith garage door o pen er (Home link)
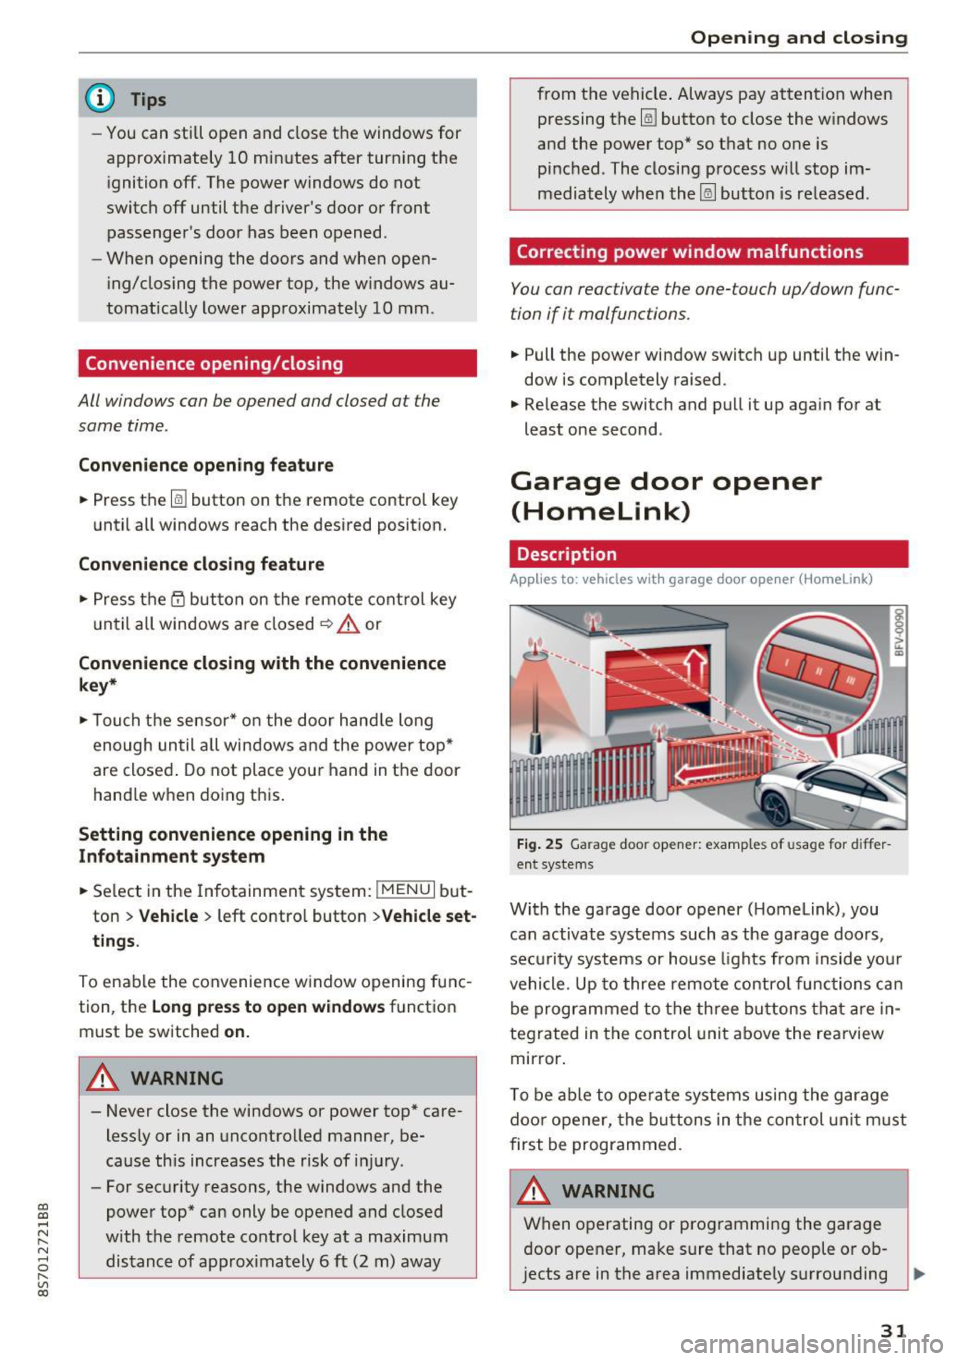
Fig. 25 Garage door opener: examples of usage for differ
ent systems
With the garage door opener ( Homelink), you
can activate systems such as the garage doors,
security systems or house lights from inside your
vehicle. Up to three remote control functions can
be programmed to the three buttons that are in
tegrated in the control unit above the rearview
mirror.
T o be able to operate systems using the garage
door opener, the buttons in the control unit must
first be programmed.
A WARNING ~
When operating or programming the garage
door opener, make sure that no people or ob
jects are in the area immediately surrounding ..,.
31
Page 41 of 314
CD
CD
.... N
" N ...... 0
" V, co
Lights and Vision
Exterior Lighting
Switching lights on and off
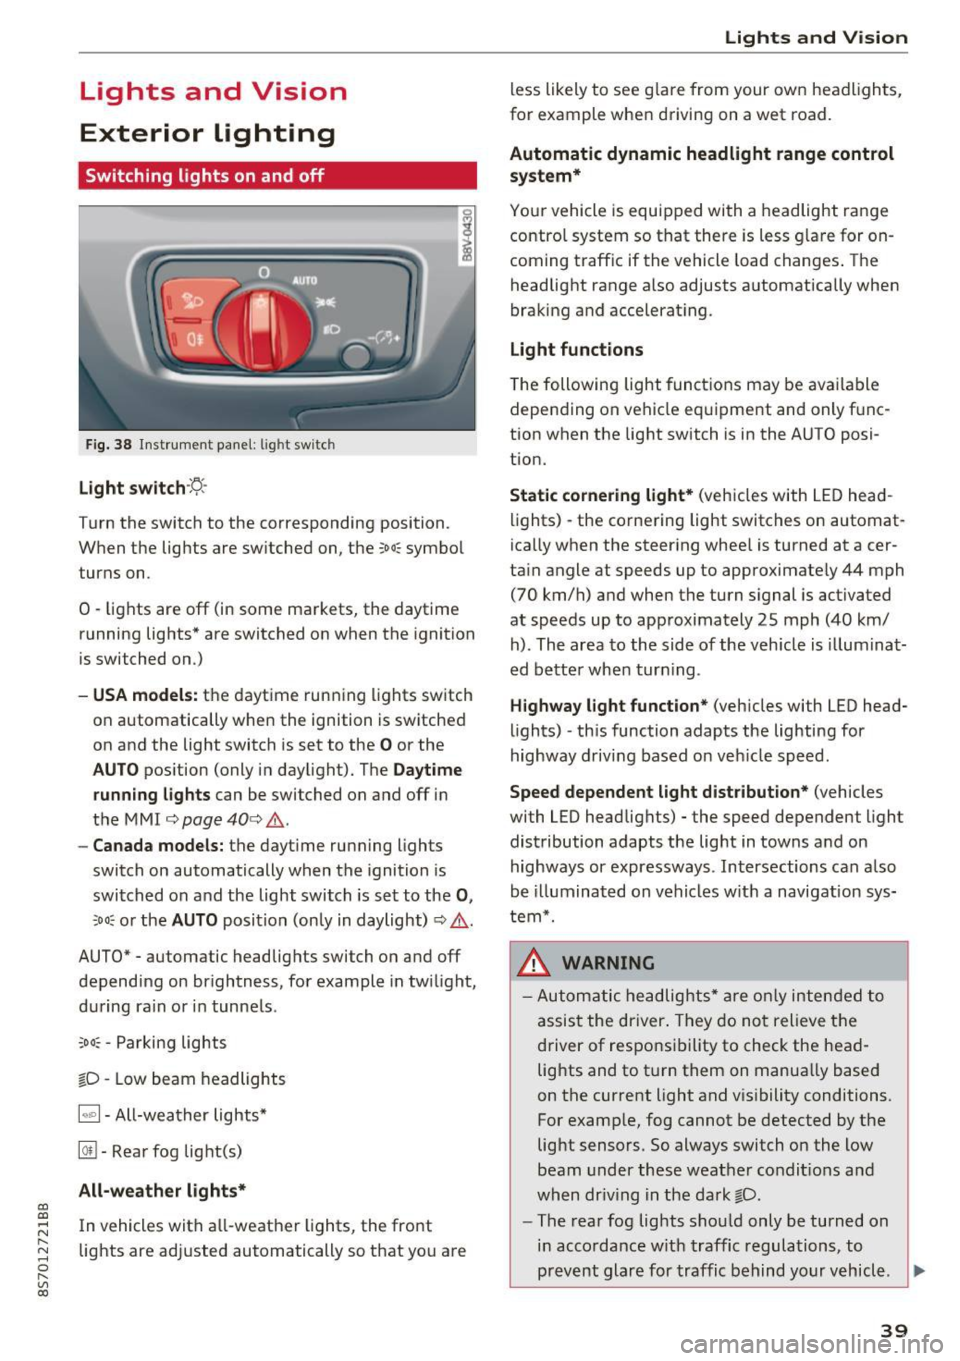
Fig. 38 Instrument panel: l ig ht switc h
Light switch ·:<'>'.·
Turn the switch to the corresponding position.
When the lights are switched on, the
;oo: symbol
turns on.
0 · lights are off (in some markets, the daytime
running lights* are switched on when the ignition
is switched on.)
-USA model s: the daytime running lights sw itch
on automatically when the ignition is switched
on and the light switch is set to the
O or the
AUTO pos ition (only in daylight). The D aytime
runn ing lights
can be switched on and off i n
the MMI
¢ page 40 ¢ &.
- Canada models: the dayt ime running lights
switch on automatically when the ignition is
switched on and the light switch is set to the
0 ,
;oo: or the AUTO posit ion (only in daylight) ¢ & .
AUTO* - automatic headlig hts switch on and off
depending on brightness, for example in tw ilight,
during ra in or in tunne ls .
~oo: -Parking lights
gD -Low beam headlights
IQ., 1-All-weather lights*
@il -Rear fog lig ht(s)
All-weather light s*
In vehicles with all-weather lights, the front
lights are adjusted automatically so that yo u are
Lights and V ision
less likely to see g lare from your own headlights,
for example when driving on a wet road.
Automatic dynamic headlight range control
system*
Your vehicle is equipped with a headlight range
contro l system so that there is less g lare for on
coming traff ic if the vehicle load changes . The
headlight range also adjusts automatically when
braking and accelerat ing .
Light function s
The following light funct ions may be avai lable
depending on vehicle eq uipment and only f unc
tion when the lig ht switch is in the AUTO posi
tion.
Static cornering light * (vehicles with LED head
li ghts) - the cornering light switches on automat
ica lly when the steer ing whee l is turned at acer
ta in angle at speeds up to approximate ly 44 mph
(70 km/h) and when the turn signal is activated
at speeds up to approximately 25 mph (40 km/
h) . The area to the side of the veh icle is illumina t
ed bette r when turn ing .
Highway l ight function * (vehicles with LED head
lights) -th is function adapts the lighting for
highway driving based o n veh icle speed.
Speed dependent light distribution* (vehicles
with LED headlights) - the speed dependent l ight
distribution adapts the lig ht in towns a nd on
highways or expressways . Intersections can a lso
be illuminated on vehicles w ith a navigation sys
tem*.
_& WARNING
- Autom atic headlights * are only inten ded to
a ssis t the driver . They do no t relieve t he
d river of respo nsibility to check the head
lig hts and to t urn them on manua lly based
on the current light and v is ibility conditions.
For example, fog cannot be detected by the
light sensors . So always switch on the low
beam under these weather condit ions a nd
when dr iv ing in the da rk
gD .
-The rear fog lights shou ld only be turned on
i n acco rdanc e w ith traffic regulations, to
prevent glare for traffic behind yo ur v ehicl e.
~
39
Page 42 of 314
Lights and Vision
-If the battery has been discharging for a
wh ile, the parking light may switch off auto
matically. Always make sure your vehicle is
parked and adequately lit according to the
laws. Avo id using the parking lights for sev
era l hours.
- Always observe legal regulations when us ing the light ing systems described.
(D Tips
- The light sensor for the automatic head
lights* is in the rearview m irror mount. Do
not place any stickers in th is area on the
windsh ield.
- Some exterior lighting functions can be ad
ju sted
c:::;, page 40.
-If you turn off the ignition wh ile the exter ior
lights are on and open the-door, a warning
tone so unds.
- In some markets, the tail lights will sw itch
on when the daytime runn ing lights sw itch
on .
- In cool or damp weather, the inside of the
headlights, turn s ignals and tail lights can
fog over due to the tempe rature d ifference
betwee n the inside and ou ts ide. They will
clea r short ly after sw itch ing them on. This
does not affect the service life o f the light
i ng.
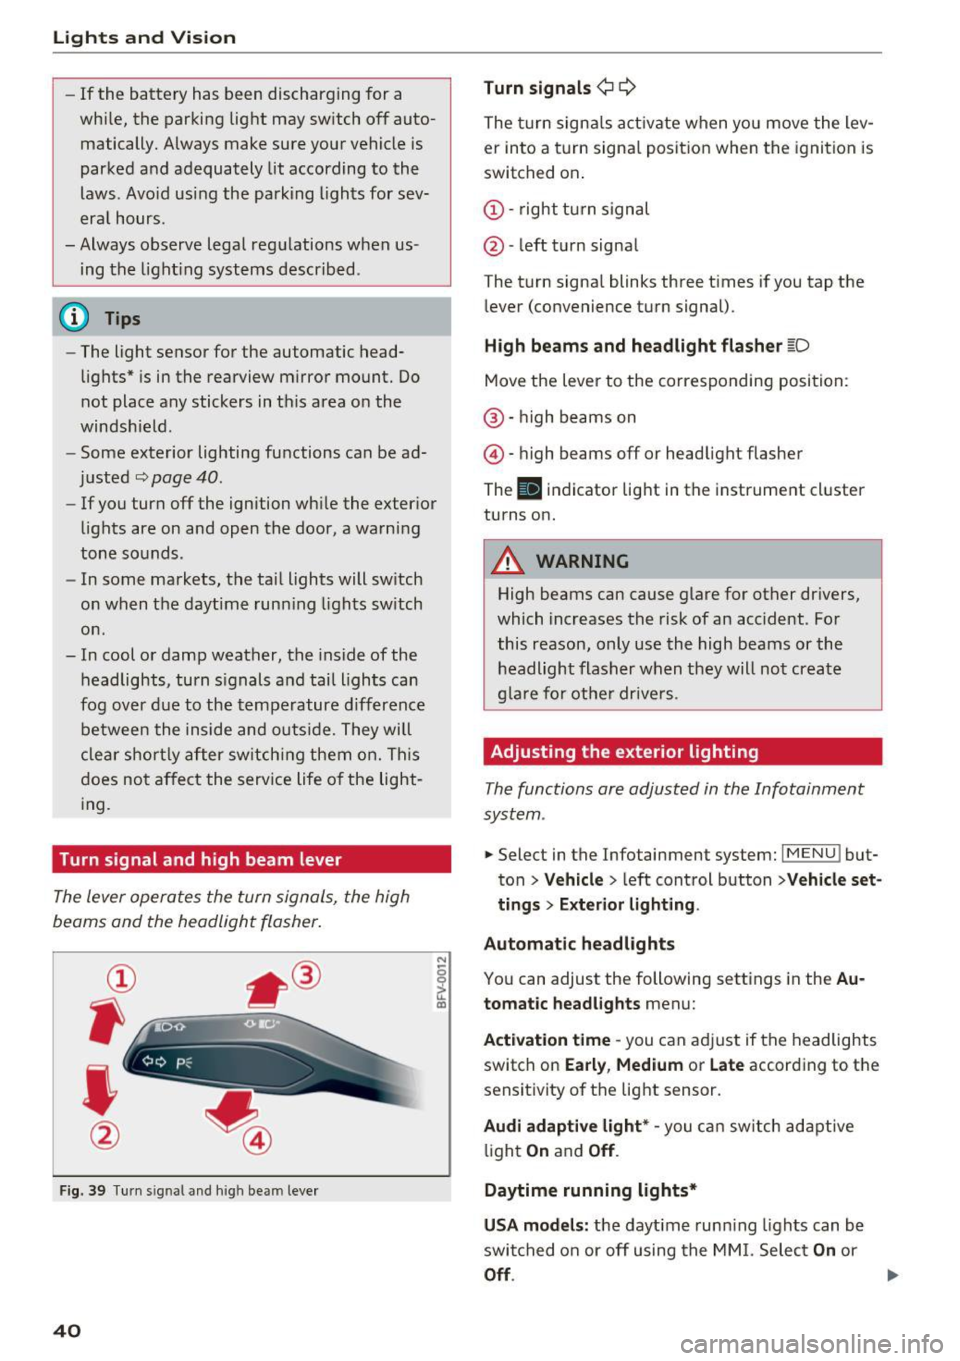
Turn signal and high beam lever
The lever operates the turn signals, the high
beams and the headlight flasher.
®
,
I
@
F ig . 39 Tu rn sig nal a nd high beam lever
40
N
c 0
ct a,
Turn signals ¢ Q
The turn sign als act ivate when yo u move the lev
er into a turn signa l posit ion when the igni tion is
switched on.
(D -right tu rn signal
@ -left t urn signa l
The tu rn signa l blinks three t imes i f you tap the
l ever (convenience t urn signal).
High beams and headlight fla sher l[D
Move the lever to the correspondin g position:
@ · high beams on
@ · high beams off or head light flasher
The
El i ndicator lig ht in the instrume nt cl uster
turns on.
_8 WARNING
High beams can cause glare for other dr ivers,
which inc reases the risk of an accident . Fo r
this reason, only use the high beams or the headlight flasher when t hey will no t create
g la re for ot he r drive rs.
Adjusting the exterior lighting
The functions are adjusted in the Infotainment
system .
.. Select in the Infotainment system: IMENU! but
ton>
Veh icle > left control button >Vehicle set
tings > Exterior light ing.
Automatic headlights
You can adjust the following sett ings in the Au
tomatic headlights
menu:
Act ivation time -you can a dju st if the headlights
switch on
Early , Medium or Late according to the
sensit ivity of th e lig ht sensor.
Audi adaptive light* -you c an switch adapt ive
li ght
On an d Off .
Daytime running lights*
USA models: the daytime runn ing lights can be
swi tched on or off using the MM I. Selec t
On or
Off.
Page 46 of 314
Lights and Vi sion
Move the windshield wiper lever to the corre
sponding position:
@ -windshield w ipers off
(D -interval mode. To increase/decrease the wip
er intervals , move the sw itch @ to the left/right .
I n vehicles with a rain sensor*, the wipe rs turn on
i n the rai n once the vehicle speed exceeds ap
p roximate ly 2 mph (4 km/h) . T he higher the sen
sitivity of the rain sensor * is set (switch @ to the
right), the earlier the windshield wipers react to
mo isture on the windshield. You can deact ivate
the rain sensor mode* in the Infotainment sys
tem, which switches the intermittent mode on .
Select in the Infotainment system:
I MENU I but
ton>
V ehicle > left control button >Dri ver a ssis
tan ce > Rain sensor> Off.
@-slow wip ing
@ -fast wiping
©-sing le w ipe If yo u ho ld the leve r in th is posi
tion longer, the wipers sw itch from s low w iping
to fast wiping .
®-clean the windsh ie ld To elim inate water
droplets, the winds hield wipers pe rform one af
terwipe after several seconds w hile driving in
temperatures above 39 °F (4 °C) . You can switch
this function off by moving the lever to position
@ within 10 seconds of the afterwipe. The after
wipe function is reactivated the next t ime you
sw itch the ignition on.
C leaning the headlights *. T he headlight washer
system* on ly functions when the lights are
sw itched on. The headlights are automat ica lly
cleaned the first t ime and every f ifth time the
lever is moved to position
® ·
A WARNING
- The rain senso r* is o nly intended to ass ist
the d river . The drive r may st ill be responsi
ble fo r manua lly switching t he wipe rs on
based on v is ibility conditions.
- T he w indshield may not be treated with wa
te r-repell ing windsh ield coa ting age nts . U n
favor able conditions, such as wetness, dark
ness, and when the s un is low, can cause in
creased g lare, which increases the risk of an
44
-
accident. Wiper b lade chatter is also possi
ble.
- Properly functioning windshield wiper
blades are required for a clear v iew and safe
driving
¢ page 45, Replacing windshield
wiper blades.
(D Note
- If there is frost, make sure the windshield
wiper blades are not frozen to the wind
shield. Switching on the w indshield w ipers
when the blades are frozen to the wind shield can damage the w iper blades .
- Pr ior to us ing a car wash, the w indshield
wiper system must be sw itched off (lever in
posit ion 0) . This prevents the wipers from
switching on unintentionally and causing
damage to the windsh ield wiper system.
('O Tips
- The windshield w ipers sw itch off when the
ignition is switched off . You can activate the
windshield wipe rs after the ignition is
switched back on by moving the windshield
wiper lever to any posi tion.
- Wor n or dirty w indshie ld w iper blades resu lt
in streaking. This can affect the rain senso r*
function. Check your w indshield wiper
blades regularly.
'
- T he washer fluid noz zles in t he windsh ie ld
washer system are heated* at low tempera
tures when the ignition is on .
- When s topping temporar ily, such as at a
traffic light, the speed of the windshield
wipers automatica lly reduces by one level.
Cleaning windshield wiper blades
Clean the wiper blades when you see w iper
streaks. Clean the wiper blades with a soft towel
and glass cleaner.
.,. Place the windshie ld wiper arms in the serv ice
position
¢ page 45.
.,. Fold the windshie ld w iper arms away from the
w indshield. ..,.