sport mode AUDI TT ROADSTER 2017 Owners Manual
[x] Cancel search | Manufacturer: AUDI, Model Year: 2017, Model line: TT ROADSTER, Model: AUDI TT ROADSTER 2017Pages: 314, PDF Size: 76.54 MB
Page 16 of 314
Instruments and indicator lights
Drive to an autho rized Aud i dea ler or a uth orized
Aud i Service Facility immediately to have t he
malfunct ion corrected .
11111 Engine start sy stem: malfunction! Plea se
contact Service
There is a malfunction in the eng ine start ing sys
tem.
Dr ive to an authorized Aud i deale r or authorized
Aud i Serv ice Facility immediately to have the
malfunct io n corrected.
f;. 11) Electronic stabilization control (ESC )
and
( 8) anti-lock braking system (ABS )
If the DJ indicato r light b links whi le driving, the
E SC or ASR (Anti-Slip Reg ulation) is actively reg u
lating.
If the
DJ indicato r light turns on, the system has
switched the ESC off . In this case, you can switch
the ignition off and then on to switch the ESC on
again. The indicator light turns off when the sys
tem is functioning fully.
Stabili zation control (E SC ): sport. Warning! Re
duced stability
I f t he II indicator light turns on, ESC sport
mode was switched on using the
I -" O FF I button
¢
page 89 . You can turn the ESC on again by
press the
I -" OFFI b utton again.
Stabilization control (E SC): off. Warning ! Re
duced stabil ity
I f t he II indicato r light tur ns on, t he ESC was re
s tricted or switched off using the
I ~ OF FI button
¢ page 89 . The message ESC OFF also appears .
You can turn the ESC on again by press the
I -" OF FI button again .
The system switches on whe n the ign ition is
sw itched on. The
II indicato r light turns off
when the system is functioning fully .
Stabilization control (ESC ): malfun ction ! Se e
owner 's manual
Stabilization control (ESC / AB S): malfun ction!
See owner' s manual
ABS: malfunction! See ow ner 's manual
14
If the DJ indicator light and the ABS indicator
li ght
rJE (USA mode ls)/ ti] (Canada models)
turn on and this message appears, there is a mal
funct ion in the ABS system or electronic differen
tia l lock. This also causes the ESC to malfunction .
The brakes still function with their normal power, but ABS is not active .
Drive to an authorized A udi dealer or authori zed
Audi Service Facility immediate ly to have the
malfunction corrected .
,&. WARNING
If the ... (USA models) JII (Canada mod
e ls) brake system indicator light turns on to
gether with the ABS and ESC ind ic a tor lights,
the ABS/ESC regulating function may have
failed. Functions that s tabilize the vehicle are
no longer avai lab le . This could cause the vehi
cle to swerve, which increases the risk that
the vehicle will slide. Drive carefully to the nearest authorized Aud i dea ler or authorized
Audi Service Fac ility and have the malfunction
corrected .
0) Tips
For additional informat ion on ESC and ABS,
see¢
page 88.
(0) Brake pads
&J Brake pads: wear limit reached . You can con
t inue driv ing . Please contact Se rvice
The brake pads are worn.
Drive to an authorized A udi dealer or authorized
Audi Se rvice Facility immediate ly to have the
brake pads checked.
App lies to : USA mode ls
The &J i ndicator lig ht turns on together with the
... indicator light
!f Safety systems
The E,I indicator lig ht monitors the safety sys
tems.
Page 59 of 314
co
co
.... N
" N .... 0
" "' c:o
Driving
General information
Breaking in
A new vehicle must be broken in, and the break
in distance should be 1,000 mi les ( 1,500 km). Do
not drive at speeds that w ill exceed
2/3 of the
maximum permitted engine speed
(RPM) for the
first 600 miles (1,000 km) , and avoid full accel
eration during this period . You may gradually
start increasing the
RPM and the speed between
600 miles (1,000 km) and 1,000 miles (1,500
km).
During the first hours of use, the engine has a
higher internal friction than later on when all
moving parts have settled into place with each
other.
How the vehicle is driven during the first 1,000
miles (1,500 km) also affects the engine quality.
Drive at moderate engine speeds after the initial
break-in per iod, part icularly when running a cold
engine . This will reduce engine wear and improve
the mileage .
Do not drive at too low of an engine speed (rpm).
Shift down if the engine stops running "smooth
ly" . Extremely high eng ine speeds are automati
cally reduced .
Avoid damaging the vehicle
When you are driving on poor roads, or over
curbs, steep ramps, etc., make certain that low
lying parts such as spoilers and exhaust system
parts do not bottom out and get damaged.
This is especially true for vehicles with low-slung
chassis (sports chassis)* and fully loaded
vehicles.
Driving through water on roads
Note the following to reduce the risk of vehicle
damage when driving through water, for examp le
on flooded roads :
- The wate r must not be any higher than the bot
tom of the vehicle body .
Driving
- Do not drive faster than walking speed.
A WARNING
After driv ing through water or mud, the effec
tiveness of the brakes may be reduced due to moisture on the brake rotors and brake pads.
A few careful brake applications should dry
off the brakes .
(D Note
Vehicle components such as the engine,
transmission, suspension or electrical system
can be severely damaged by driving through
water.
(D Tips
- Determine the depth before driving through
water.
- Do not stop the vehicle, drive in reverse or
switch the engine off when driving through
water.
- Keep in mind that oncoming vehicles may create waves that raise the water level and
make it too deep for your vehicle to drive
through safely.
- Avoid dr iving through salt water, because
this can cause corrosion.
Economical and environmentally-friendly
driving
T he amount of fuel consumpt ion, the environ
menta l impact and the wear to the engine,
brakes and tires depends mostly on your driving
style. With an anticipatory and economic driving
style, fuel consumption can be reduced by ap
proximately 10-15%. The following tips will help
you conserve the environment and your money at
the same time .
Anticipatory driving
A vehicle uses the most fuel when accelerating.
When you drive with anticipation, you do not
need to brake as often and so you accelerate less.
When possible, let your vehicle coast with a
gear
engaged -
for example, when you notice that the
next traff ic light is red . .,,.
57
Page 66 of 314
Driving
vehicle to accelerate without a noticeable
interruption in traction.
The transm ission upshifts o r downshifts auto
mat ica lly . T he driving sty le con tinuo usly influen
ces the selection of the driving program.
W hen a
moderate driving style is used , the
t ra nsmission se lects the most e conomical d riving
mode. The t ransm iss io n upshifts a t a lower RPM
and downshifts at a higher RPM to improve fuel
efficiency.
The transm ission switches to a spo rty mode after
a ki ck-down or when the drive r uses a
sp o rty
dri ving sty le
character ized by quick accelerator
pedal movements, heavy acce leration, frequent
changes in speed and traveling at the ma ximum
speed.
I f desired, the driver can a lso select the gears
manually ( tiptronic mode ).
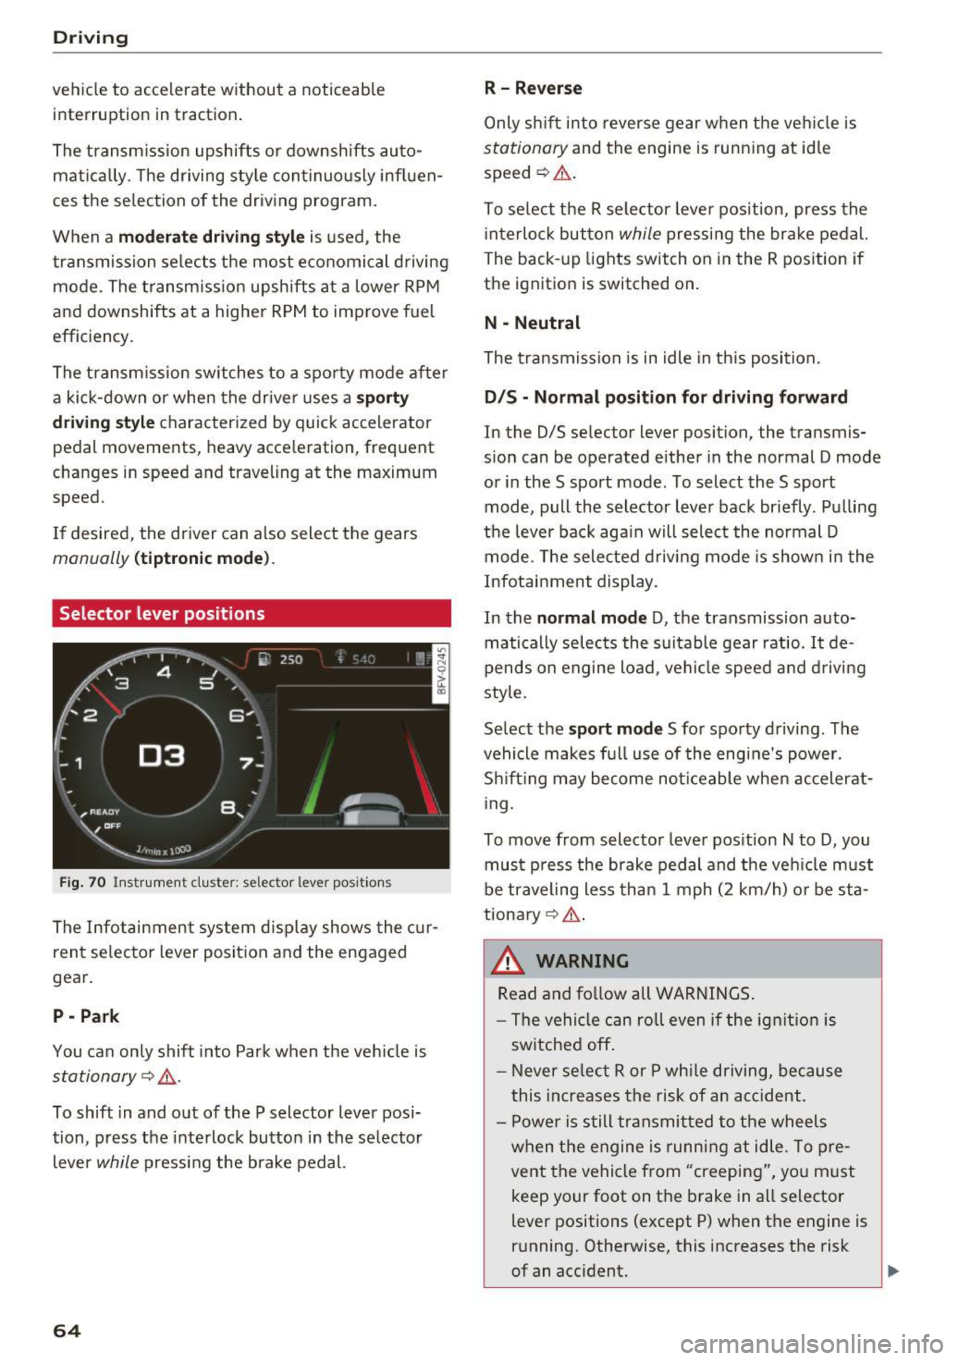
Selector lever positions
Fig. 70 Inst rument clus te r: s ele ctor leve r pos it io n s
The Infot ainment system d isplay shows the c ur
ren t selecto r lever position and the engaged
gear.
P -Park
You can only shift in to Par k when the ve hicle is
stationary ~,&. .
To shift in and out of the P selector lever posi
tion, press the inte rlock butto n in the se lector
lever
while pressi ng the brake pedal.
64
R- Reverse
Only s hift into reverse gear w hen the ve hicle is
stationary and the engine is runn ing at idle
speed ~&. .
To se lect t he R sele ctor leve r pos ition, press the
i nterlo ck button
while p ressi ng the bra ke pedal.
The back -up lights switch on in the R pos ition if
the ignit ion is switched on.
N -Neutral
The tra nsmission is in idle in th is position.
D IS -Normal position for driving forward
In the D/S se lector lever position, the transmis
s ion can be operated either in the normal D mode
or in the S sport mode. To select the S sport
mode, pull the selector lever bac k br iefly . Pu lling
the leve r bac k aga in will select the normal D
mode. The selec ted drivi ng mode is show n in t he
Infotai nment display.
In the
normal mode D , the transmission auto
matically sele cts the s uitable gear ratio.
It de
pends on engine load , vehi cle speed a nd driving
style.
Se lect the
sport mode S fo r spo rty d riving . The
vehicle makes f ull use of the engine's power.
Sh ift ing may become no ticeable whe n acceler at
i ng.
To move from selector leve r pos it ion N to D, you
mus t press the brake pedal and the veh icle m ust
be traveling less th an 1 mph (2 km/h) o r be sta
tiona ry ¢ ,&. .
&_ WARNING
Read and fo llow all WARNINGS .
- The vehi cle can roll even if the ig nitio n is
sw itched off .
- Never se lec t R or P whi le dr iving, because
this increases the risk of an ac cident .
- P owe r is still transmi tted to the wheels
w hen t he engine is runn ing at idle . To pre
vent the vehicle from "creeping", yo u m ust
keep your foot on the brake in a ll selector
lever positions (except P) when the engine is
r u nning. Otherwise, this increases the risk
of an accident.
Page 67 of 314
CD
CD
.... N
" N ...... 0 r--. V, co
-Do not inadvertently press the accelerator
pedal when the vehicle is stopped if a gear is
engaged. Otherwise the vehicle will start to
move immediately, even if the parking brake
is set . This could result in a crash .
- Do not press the accelerator pedal when
changing the selector lever position while
the vehicle is stationary and the engine is
running.
- Never leave your vehicle with the engine running while in gear.
If you must leave
your vehicle when the engine is running, set
the parking brake and move the selector lev
er to the P position .
- To decrease the risk of an accident, these
lector lever must be in the P position and
the parking brake must be set before open
ing the hood and working on a running en
gine. Always read and follow the applicable
warnings¢
page 235, Working in the en
gine compartment.
{[) Note
Never let the vehicle roll downhill with engine
off and the selector lever in the
N position,
because this could damage the automatic
transmission and catalytic converter.
@ Tips
- Drive select: sporty shifting characteristics
can be selected using the
Dynamic driving
mode. The Infotainment display shows 5 as
the selector lever position instead of D.
- If you accidentally select N while driving,
take your foot off the accelerator pedal im
mediately and wait for the engine to slow
down to idle before selecting Dor 5 .
- If there is a power failure, the selector lever
will not move out of the P position. The
emergency release can be used if this hap
pens. Left-hand drive vehicles
q page 71.
Driving
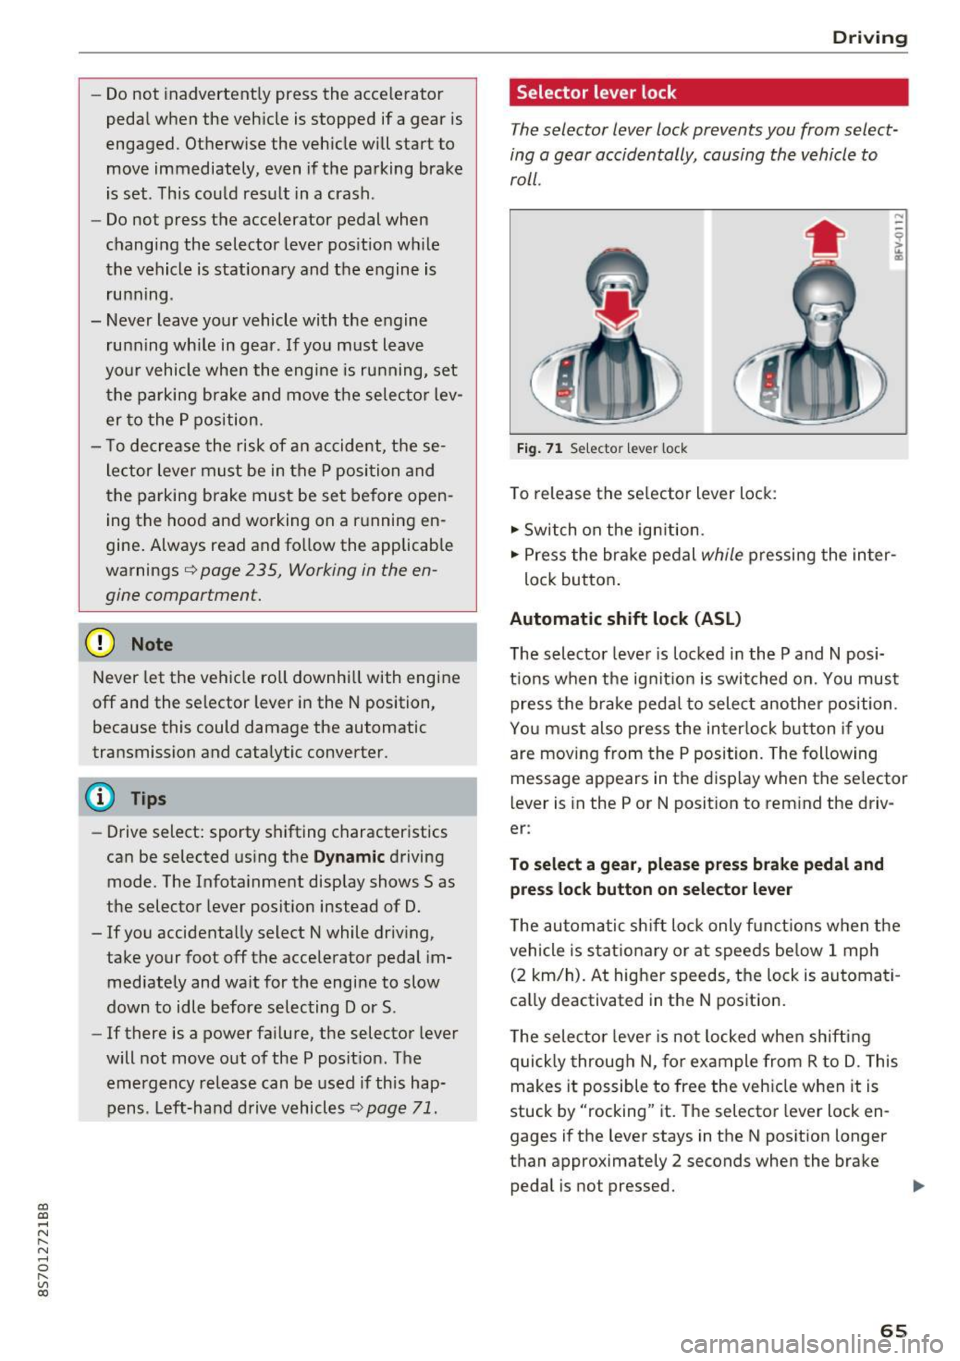
Selector lever lock
The selector lever lock prevents you from select
ing a gear accidentally, causing the vehicle to
roll.
Fig. 71 Selecto r lever lock
To release the selector lever lock:
.,. Switch on the ignition.
.,. Press the brake pedal
while pressing the inter-
lock button.
Automatic shift lock (ASL)
The selector lever is locked in the P and N posi
tions when the ignition is switched on. You must press the brake pedal to select another position.
You must also press the interlock button if you
are moving from the
P position. The following
message appears in the display when the selector
lever is in the P or
N position to remind the driv
er:
To select a gear, please press brake pedal and press lock button on selector lever
The automatic shift lock only functions when the
vehicle is stationary or at speeds below 1 mph
(2 km/h). At higher speeds, the lock is automati
cally deactivated in the N position.
The selector lever is not locked when shifting
quickly through N, for example from R to D. This
makes it possible to free the vehicle when it is
stuck by "rocking" it. The selector lever lock en
gages if the lever stays in the N position longer
than approximately 2 seconds when the brake
pedal is not pressed.
II>-
65
Page 71 of 314
co
co
.... N
" N .... 0
" "' c:o
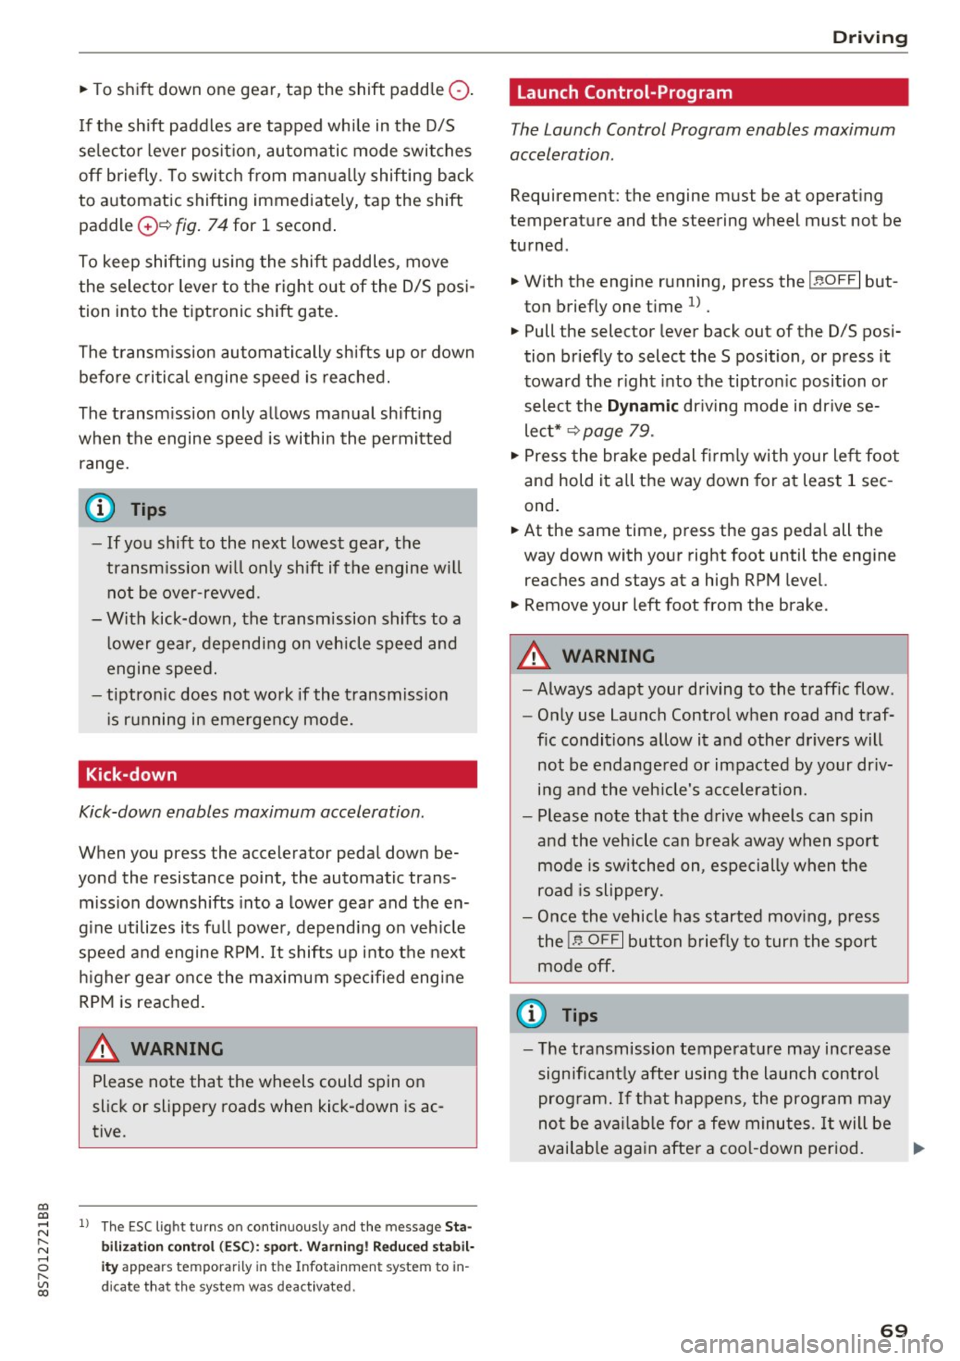
~ To shift down one gear, tap the shift paddle 0-
If the sh ift paddles are tapped while in the D/S
selecto r lever posit io n, automatic mode switches
off briefly . To switch from manually shifting back
to a utomatic shifting immediately, tap the shift
paddle
G) ¢ fig . 74 for 1 second .
To keep shifting using the shift paddles, move
the sele ctor lever to the right out of the D/S posi
tion into the t ipt ronic shift gate.
The transm ission automatically shifts up o r down
befo re critical engine speed is reached.
The transm ission only a llows manual sh ift ing
when the engine speed is within the permitted
range.
(D Tips
- If you sh ift to the next lowest gear, the
transm ission w ill only shift if the engine w ill
not be over-revved.
- With kick-down, the transmission shifts to a
l ower gear, depending on vehicle speed and
engine speed.
- tiptronic does not wo rk if the t ransmiss ion
i s r unning in emergency mode.
Kick-down
Kick-down enables maximum acceleration.
When you press the accelerator pedal down be
yond the resistance point , the automatic trans
m iss ion downshifts into a lower gear and the en
g ine utilizes its fu ll power , depend ing on veh icle
speed and engine R PM.
It shifts up into t he next
h igher gea r once the maximum spec ified engine
RP M is reached.
A WARNING
Please note that the wheels could spin on
slick or slippery roads when kick-down is ac
tive.
-
l ) T he ESC lig ht turn s on continuous ly and the mess age S ta·
b ili za tion co ntro l (E SC): sport. Warn ing! Red uced st abi l·
ity appe ars te mporar ily in th e I nfotainment syste m to in
di cate tha t the syste m wa s deact ivate d.
D riv ing
Launch Control-Program
The Launch Control Program enables maximum
acceleration .
Requirement: the engine must be at operating
temperature and the steering wheel must not be
turned .
~ With the engine running, press the l1' 0FF I but
ton briefly one t ime
l ).
~ Pull the selector lever back out of the D/S posi
tion briefly to select the S position, or press it
toward the r ight into the tiptron ic position or
select the
Dynamic dr iving mode in dr ive se
lect*
¢ page 79.
~ Press the brake pedal fi rm ly w ith your left foo t
and hold it all the way down for at least 1 sec
ond.
~ At the same time, p ress the gas peda l all the
way down with your right foot until the eng ine
reaches and stays at a high RPM level.
~ Remove your left foot from the brake.
A WARNING
- Always adapt your driving to the t raff ic flow.
- Only use Launch Control when road and traf-
f ic conditions allow it and other drivers will
not be endange red or impacted by your dr iv
ing and the vehicle's acceleration.
- Please note that the d rive wheels can spin
and the vehicle can b reak away when spo rt
mode is switched on, especially when the
road is slippery.
- Once the vehicle has started mov ing, press
the
! .P-O FF I button briefly to turn the spo rt
mode off.
(D Tips
- The transmission temperature may increase
significant ly after using the launch control
prog ram. If that happens, the prog ram may
no t be ava ilable for a few minutes.
It will be
avai lab le again afte r a cool -down period. ..,.
69
Page 81 of 314
co
co
.... N
" N .... 0
" "' c:o
Switching on and off
Applies to: vehicles with Audi side assist
The system ca n be switched on/off in the Info
t a in men t system.
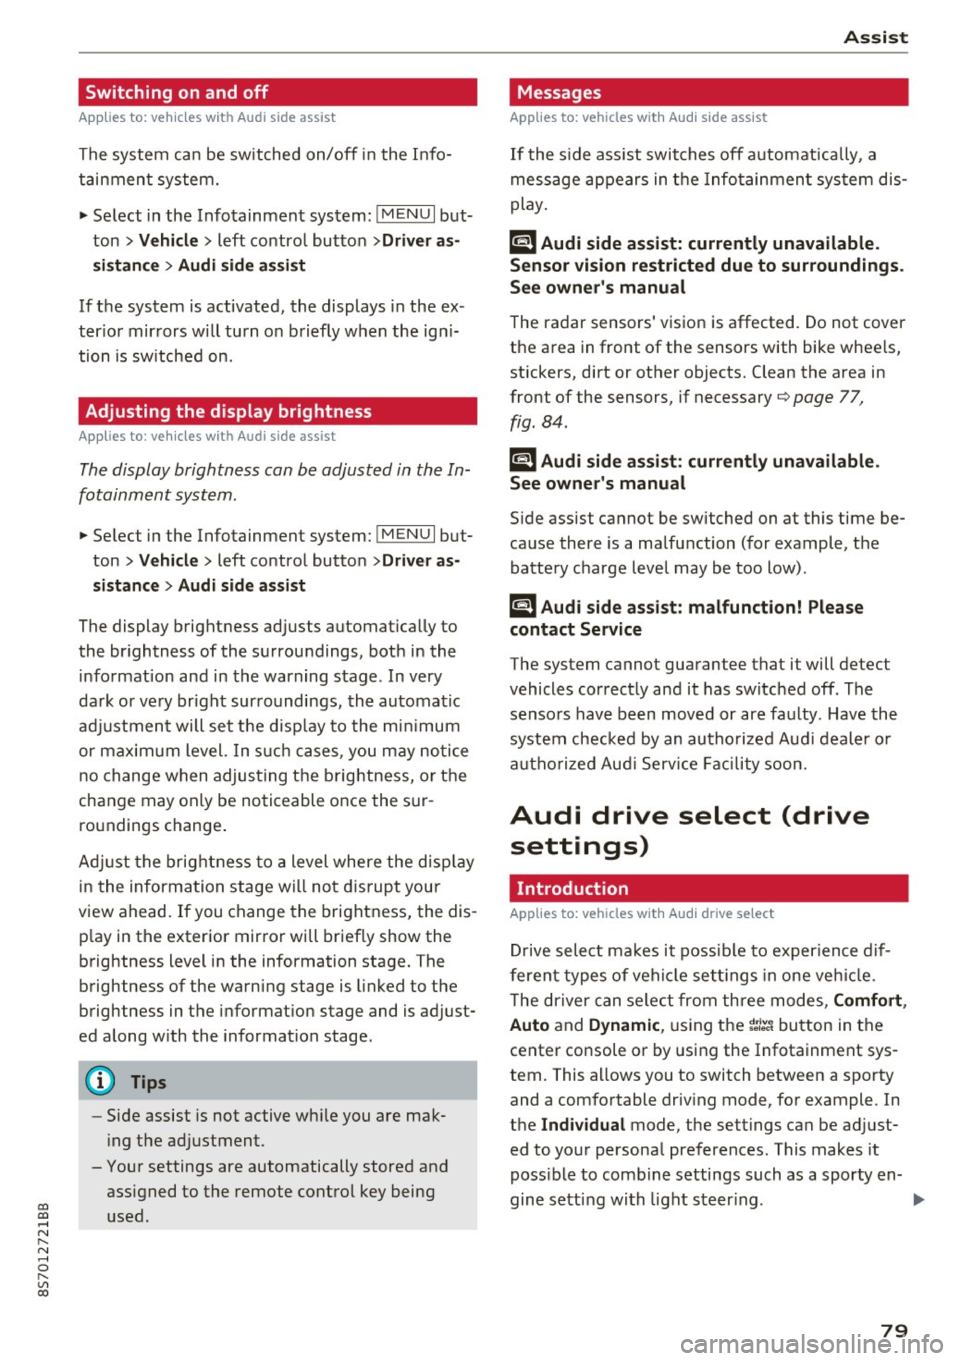
"' Select in the Info tainment sys tem:
iM ENUI but
ton
> Vehicle > left contro l butto n >Driver as
sistan ce > Audi side assist
If the system is activated, the displays in the ex
ter io r mir rors wi ll turn o n briefly when the ig ni
tion is sw itched on.
Adjusting the display brightness
Applies to: vehicles with Audi side assist
The display brightness can be adjusted in the In
fotainm ent system.
"' Se lect in the Infotainment system: i MENU I but
ton
> Vehicle > left contro l butto n >Driver as
sistance > Audi side assist
The display b rightness ad justs automat ica lly to
the br ightness of the s urrou ndings, both in the
in fo rmat ion and in the warning stage . In very
da rk or ve ry br igh t sur ro u ndings, the a utomat ic
ad ju st men t will se t th e d isp lay to the mini mum
or maxim um level. In s uch cases , you m ay no tice
no change w hen adjus ting t he br ightness, o r th e
change may on ly be no tic eable o nce the su r
ro undings change .
A dju st the br ightn ess to a level where the d isp lay
i n the inform ation stage wi ll no t di srupt your
v iew ahead. If you change the brightness, the dis
p lay in the exter ior mir ror will briefly show the
b rightness level i n the information stage . The
b rightness of the warning stage is linked to the
b rightness in t he info rmat ion stage and is ad just
ed along w ith the information stage .
- Side assist is not active wh ile you are ma k
i ng the ad justment.
- Your settings are automatically stored and ass igned to the remote cont rol key being
used.
Assist
Messages
Applies to: vehicles with Audi side assist
I f the s ide ass is t swi tches off automat ically, a
mess age app ear s in t he In fota in men t sys tem dis
play.
@j Audi side assist: currently unavailable.
Sensor vision restricted due to surroundings.
See owner 's manual
The radar sensors ' v is ion is affected. Do not cover
the a rea in front of the sensors with bike whee ls,
stickers, dirt or other objects. Clean the area in
front of the sensors, if necessary
q page 77,
fig. 84.
@j Audi side a ssist: currently unavailable.
See owner's manual
S ide assist cannot be switched on at this time be
ca use there is a ma lfu nction ( for example, the
battery c harge leve l may be too low) .
@j Audi side assist: malfunction! Please
contact Service
The system cannot guarantee that it will detect
vehicles cor rect ly and it has switc hed off. The
senso rs have been move d or are fa ulty. Have the
syste m chec ked by an au tho riz ed Au di deale r or
a uthor iz e d Au di S ervice Faci lity s oon.
Audi drive select (drive
settings)
Introduction
Applies to: vehicles with Audi drive select
Dr ive select ma kes it possib le to e xper ience dif
fere nt types of ve hicl e sett ings in one ve hicle.
T he driver can sele ct from th ree mo des,
Comfort ,
Auto
and Dynamic , using the r.~;\,1 bu tton in the
center console o r by using the Infotainment sys
tem. This allows you to switch between a sporty
and a comfo rtable driv ing mode, fo r example. In
t h e
Individual mode, the sett ings can be ad just
ed to yo ur persona l pre ferences . This makes it
poss ible to com bine settings such as a sporty en-
gine sett ing wi th light s teer ing. .,._
79
Page 82 of 314
Ass is t
_& WARNING
Using Audi drive select incorrectly can lead to
collisions, other accidents and serious inju
ries.
Description
App lies to: ve hicles w ith Aud i d rive select
The vehicle setup in each mode depends on the
veh icle's features . However, the engine and
steer ing are always affe cted.
E ngine and automatic tr an smi ssi on
Depending on the mode, the engine and auto
matic transmiss ion respond more qu ickly or in a
more balanced manner to accelerator pedal
movements .
Adaptive damper s (Audi m agnetic ride )*
The adaptive dampers use sensors to record in
formation regarding steering movements, brak
ing and accelerat ion operat ions by the driver,
road surface, driving speed, and load. With dr ive
select, you can adjust the adaptive dampers to
sporty (dynamic), comfortable (comfort) or ba l
a nced (auto).
Stee ring
The power steer ing adapts . Indirect steering that
moves eas ily as in comfort mode is especially
suited to long drives on a highway. The dynam ic
mode provides sporty, direct steering.
Torque distribution
The sport d ifferent ial d istr ibutes the dr ive power
to the rear axle based on the situation . The distri
bution of power varies depend ing on the selected
mode from mode rate
( Comfort ) to sporty ( D y
nami c). The goal is a high leve l of agility and ab il
ity to acce lerate o n curves . The vehicle is very re
sponsive to steering.
Engine sound *
The engine sound adapts to the current mode
and can be subtle to sporty.
80
@ Tips
In some models, the maximum vehicle speed
can only be reached in the auto and dynamic
modes.
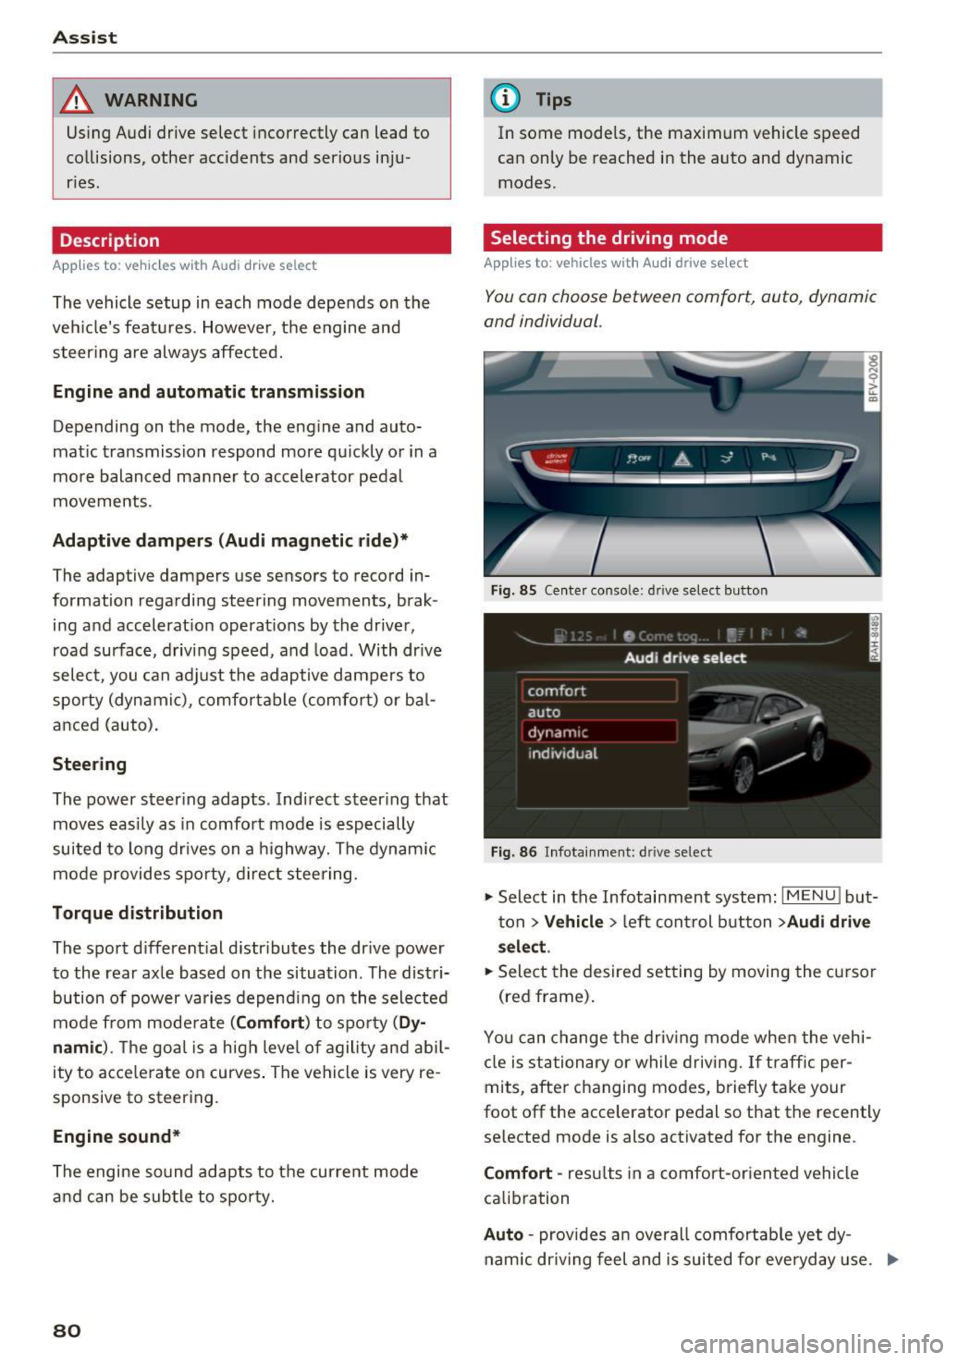
Selecting the driving mode
App lies to : vehicles with A udi drive se lect
You can choose between comfort, auto , dynamic
and individual.
Fig. 85 Center conso le: drive select button
Fig. 86 Infotainment: driv e select
., Select in the Infotainment system : IMENU! but
ton
> V ehicle > left control button > Audi drive
sel ec t.
.. Select the desired setting by moving the cursor
(red frame) .
You can change the dr iv ing mode whe n the vehi
cle is st ationary or while driving. If traff ic per
mits, after changing modes, b riefly take your
foot off the accelerator pedal so that the recently
selected mode is also activated for the engine .
Comfort -res ults in a comfort-or ien ted vehicle
calib ration
Auto -provides an overa ll comfortab le yet dy
nam ic dr iv ing feel and is suited for everyday use. ..,.
Page 83 of 314
co
co
.... N
" N .... 0
" "' c:o
Dynamic -gives the driver a sporty driving feel
and is suited to a sporty driving style .
Individual -¢ page 81.
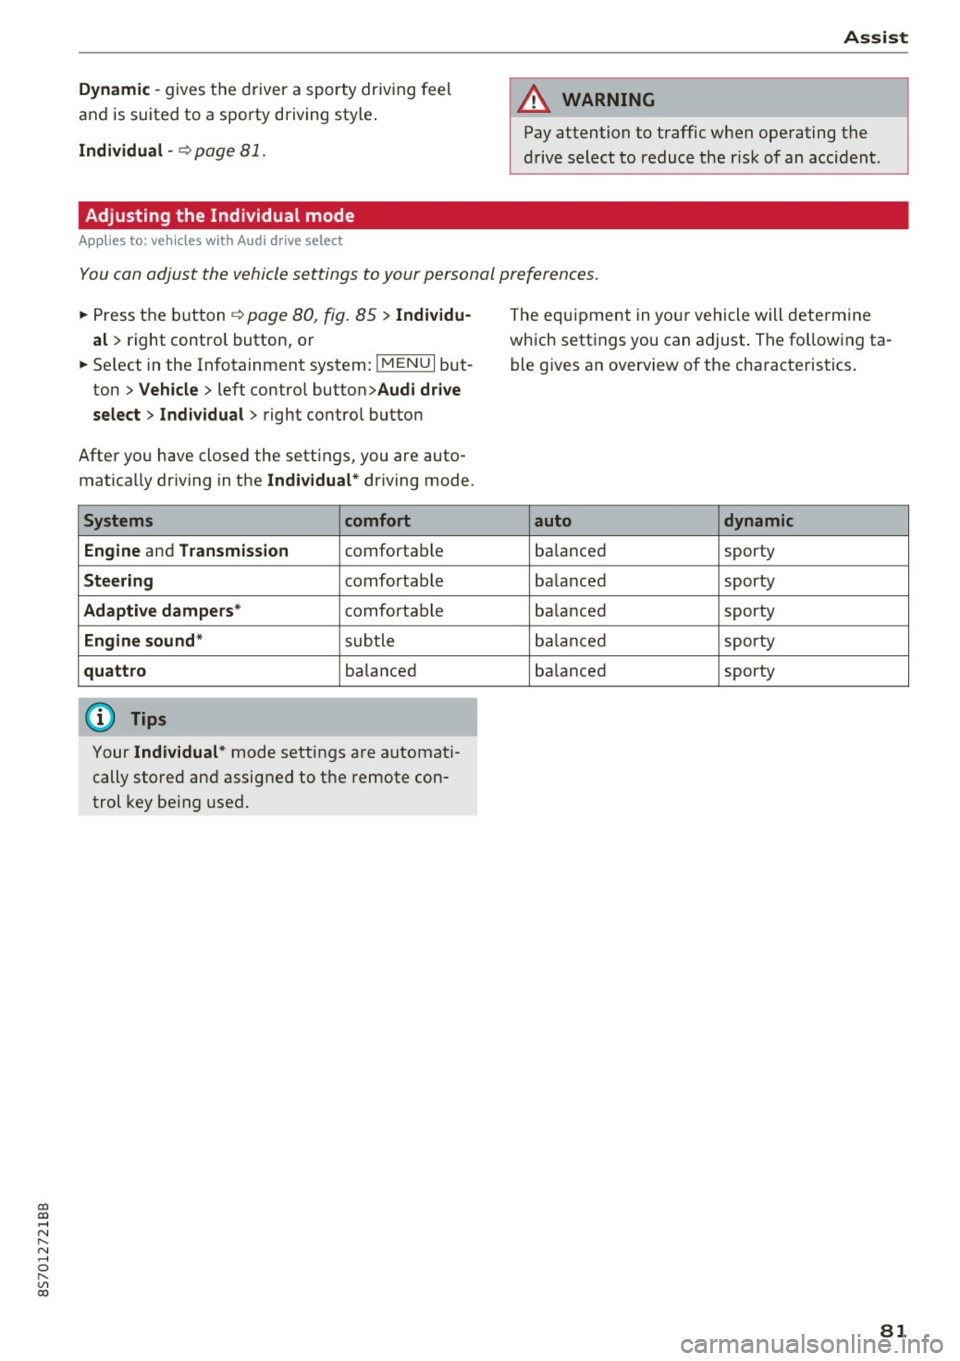
Adjusting the Individual mode
Applies to: vehicles with Audi drive select
Assist
A WARNING
Pay attention to traffic when operating the
drive select to reduce the r isk of an accident.
-
You con adjust the vehicle settings to your personal preferences .
.,. Press the b utton ¢ page 80, fig. 85 > Indi vidu
al
> right contro l button, or
.,. Se lect in the Infotainment system:
! MENUI but
ton
>V ehicle > left contro l button> Audi drive
select > Indi vidual >
right contro l button
After you have closed the settings, you are auto
matica lly dr iving in the
Indi vidual * driving mode.
Systems comfort
Engine
and T ransm ission comfortable
St ee ring comfortable
Adapti ve dampers * comfortable
Engine sound * subtle
quattro balanced
{!) Tips
Your Individual* mode settings are automat i
cally stored and assigned to the remote con
trol key be ing used. T
he equipment in your vehicle will determine
which settings you can adjust . The fo llowing ta
ble g ives an overview of the characteristics .
auto dynamic
balanced sporty
ba lanced sporty
ba lanced sporty
ba lanced sporty
ba lanced
sporty
81
Page 91 of 314
CD
CD
.... N
" N ...... 0 r--. V, co
Intelligent Technology
Switching on and off
ESC turns on automatically when you start the engine.
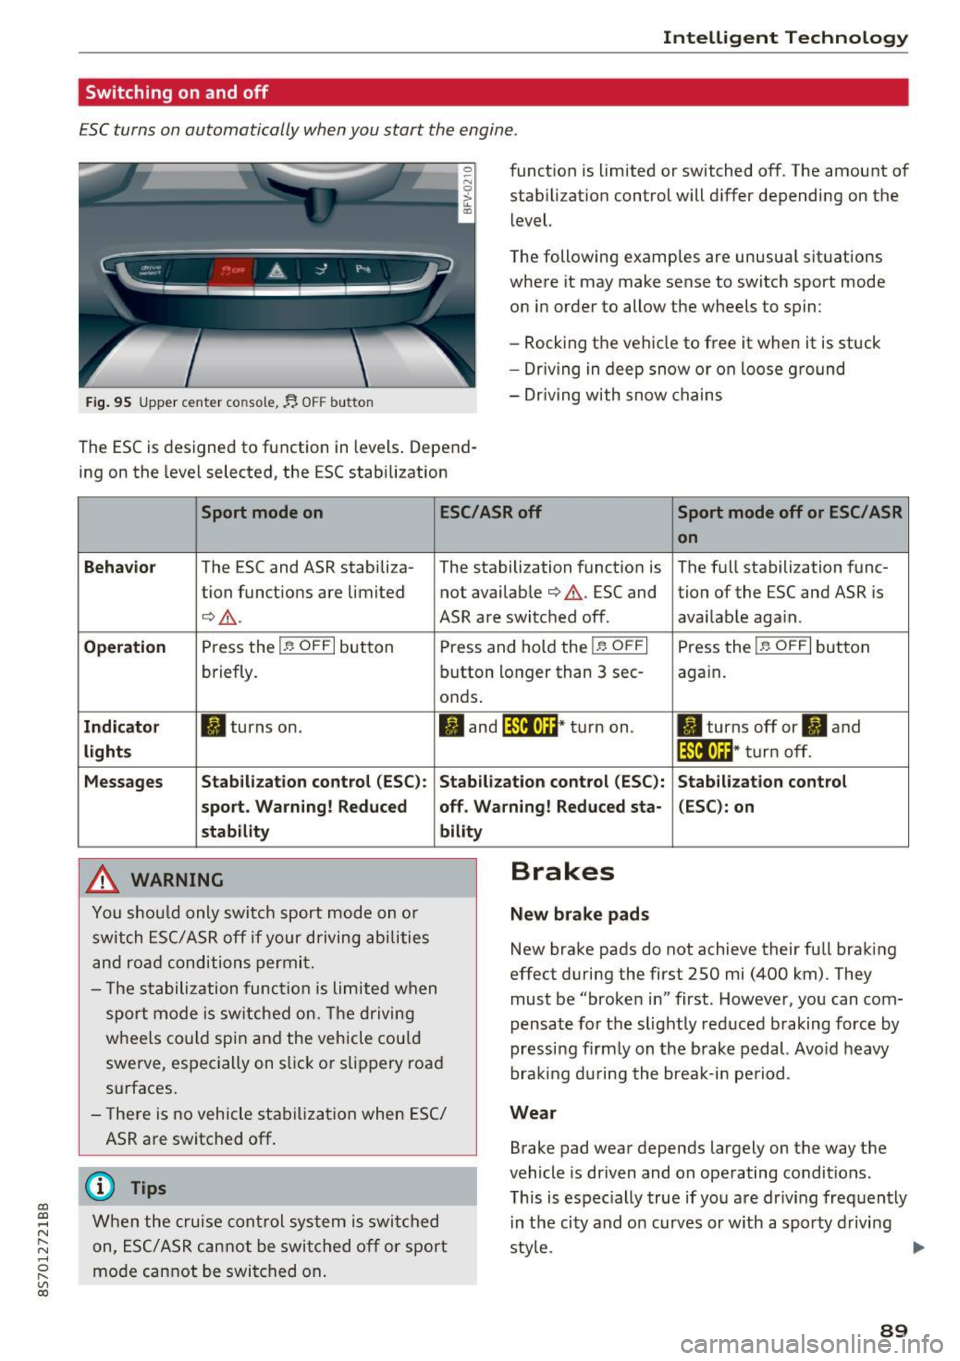
Fig. 95 Upper center console, fj. OFF b utton
The ESC is designed to function in levels . Depend
ing on the level selected, the ESC stabilization funct
ion is limited or switched off. The amount of
stab ilizat ion control will d iffer depending on the
level.
T he following examples are unusua l situat ions
where it may make sense to switch sport mode
o n in order to allow the wheels to spin:
- Rocking the vehicle to free it when it is stuck
- Dr iving in deep snow or on loose g round
- Dr iving with snow chains
Sport mode on ESC/ASR off Sport mode off or ESC/ ASR
on
Behavio r
The ESC and ASR stabiliza- The stabilization funct ion is The f ull stabilization func-
tion funct ions are limited not availab le
¢ .&. . ESC and tion of the ESC and ASR is
¢ .&.. ASR are switched off. availab le aga in.
Operation Press the l.e OFFI but ton Press and hold the l.e OFFI Press the l .e OFFI but ton
briefly. button longer than 3 sec- aga in .
onds .
Indicator II turns on. II and l*JJ•U~* tu rn on. II turns off or II and
liil•IH * tu rn off. light s
Messages Stab
ilization control (ESC ): Stab ilization con trol (ESC ): Stab ilization cont rol
sport . Warning! Reduced off. Wa rning! Reduced sta -(ESC): on
stability
A WARNING
Y ou shou ld only swit ch spo rt m ode on or
switch ESC/ ASR off if your driving ab ilities
a n d roa d conditions permi t.
bility
- T he s tabiliz ation func tion is li mite d when
s por t mode is sw itched on. The driving
whee ls co uld spi n and the vehicle cou ld
swerve, espec ially on s lick or s lippery roa d
surfaces.
- There is no vehicle stabi lization when ESC/
ASR are switched off.
(D Tips
Wh en the cruise cont rol sys tem is swi tched
on, ESC/ ASR can not be swi tched o ff or sport
mo de can not be swit ched on .
Brakes
New brake pads
New brake pads do not achieve their fu ll braking
effect duri ng the first 250 mi (400 km) . They
must be "broke n in" first. Howeve r, you can com
pensate fo r th e slightly reduced braking force by
pressing f irm ly on the b rake pedal. Avo id heavy
bra king d urin g the brea k-in pe riod .
Wear
Brake pad wear depends largely on the way the
vehicle is driven and on operating conditions.
T his is espec ially true if yo u are dr iv ing freq uently
in t he ci ty and o n curves or w ith a spo rty d rivi ng
sty le.
IJI,,
89
Page 223 of 314
co
co
.... N
" N .... 0
" "' c:o
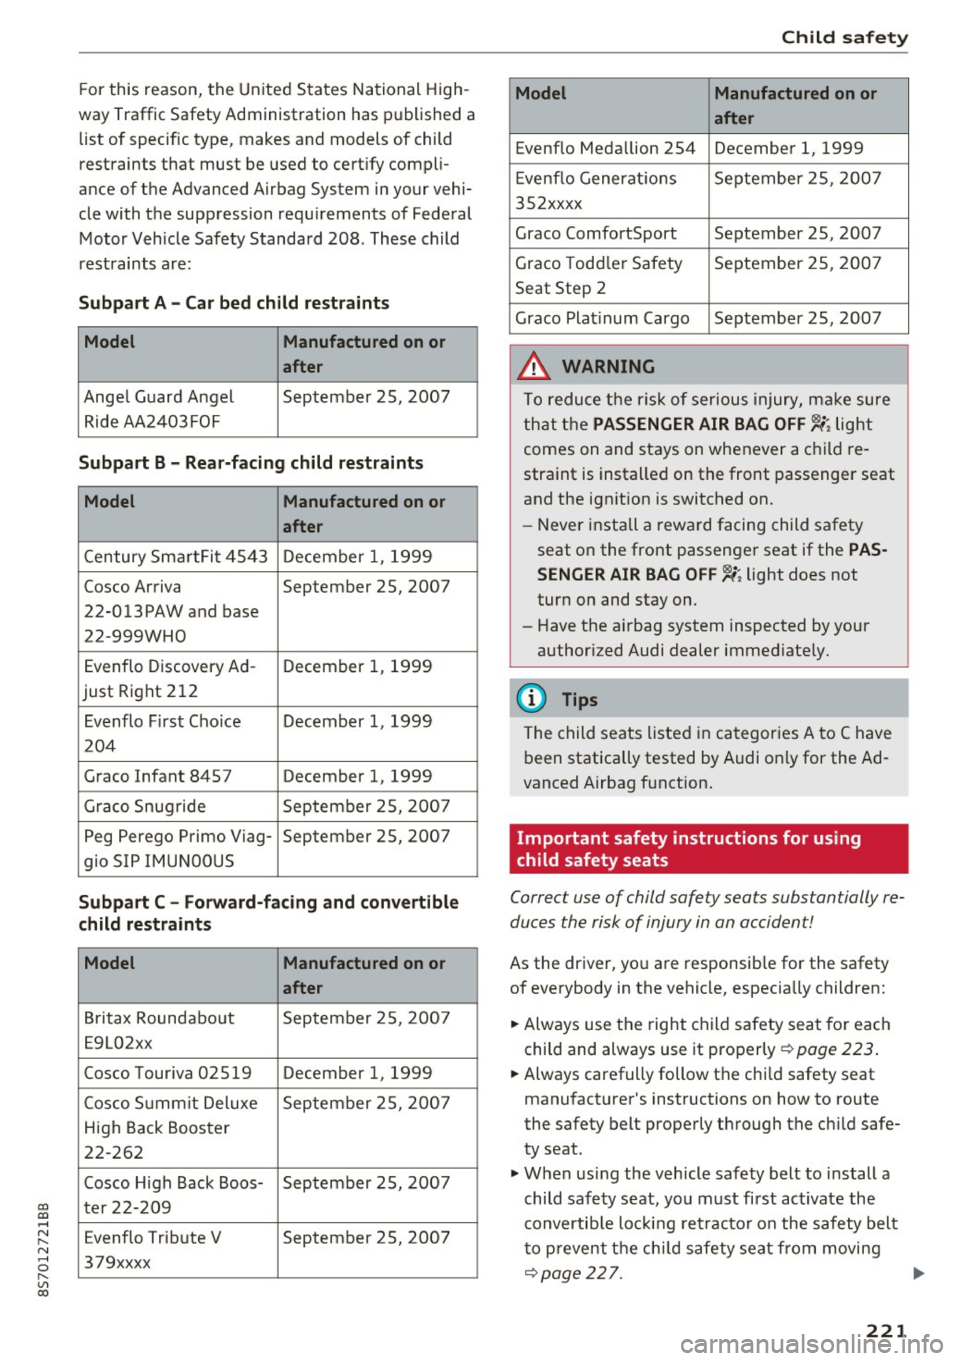
For this reason, the United States National High
way Traffic Safety Administration has published a
list of specific type, makes and models of child
restraints that must be used to certify compli
ance of the Advanced Airbag System in your vehi
cle with the suppression requirements of Federal Motor Vehicle Safety Standard 208. These child
restraints are:
Subpart A - Car bed child restraints
Model Manufactured on or
after
Angel Guard Angel September 25, 2007
Ride AA2403 FOF
Subpart B -Rear-facing child restraints
Model Manufactured on or
after
Century SmartFit 4543 December 1, 1999
Cosco Arriva September 25, 2007
22-013PAW and base
22-999WHO
Evenflo Discovery Ad- December 1, 1999
just Right 212
Evenflo Fir st Cho ice December 1, 1999
204
Graco Infant 8457 December 1, 1999
Graco Snug ride September 25, 2007
Peg Perego Primo Viag- September 25, 2007
gio SIP IMUNOOUS
Subpart C - Forward-facing and convertible
child restraints
Model Manufactured on or
after
Britax Roundabout September 25, 2007
E9L02xx
Cosco Touriva 02519 December 1, 1999
Cosco Summit Deluxe September 25, 2007
High Back Booster
22-262
Cosco High Back Boos- September 2S, 2007
ter 22-209
Evenflo Tribute V September 25, 2007
379xxxx
Child safety
Model Manufactured on or
after
Evenflo Medallion 2S4 December 1, 1999
E venflo Generations September 2S, 2007
352xxxx
Graco ComfortSport September 25, 2007
Graco Todd ler Safety September 25, 2007
Seat Step 2
Graco Plat inum Cargo September 25, 2007
_&. WARNING
To reduce the risk of serious injury, make sure
that the
PASSENGER AIR BAG OFF '1,;; light
comes on and stays on whenever a child re
straint is installed on the front passenger seat
and the ignition is switched on.
- Never install a reward facing child safety
seat on the front passenger seat if the
PAS
SENGER AIR BAG OFF
'1,;; light does not
turn on and stay on.
- Have the airbag system inspected by your
authorized Audi dealer immed iately.
(D Tips
The child seats listed in categories A to C have
been statically tested by Audi only for the Ad
vanced Airbag function.
Important safety instructions for using
child safety seats
Correct use of child safety seats substantially re
duces the risk of injury in an accident!
As the driver, you are responsible for the safety
of everybody in the vehicle, especially children:
.. Always use the right child safety seat for each
child and always use it properly ¢
page 223.
.. Always carefully follow the chi ld safety seat
manufacturer's instructions on how to route
the safety belt properly through the child safe
ty seat.
.. When using the veh icle safety belt to install a
child safety seat, you must first activate the
convertib le loc king retractor on the safety belt
to prevent the chi ld safety seat from moving
¢page 227. ..,.
221