change wheel AUDI TT ROADSTER 2018 Owners Manual
[x] Cancel search | Manufacturer: AUDI, Model Year: 2018, Model line: TT ROADSTER, Model: AUDI TT ROADSTER 2018Pages: 310, PDF Size: 46.95 MB
Page 6 of 310
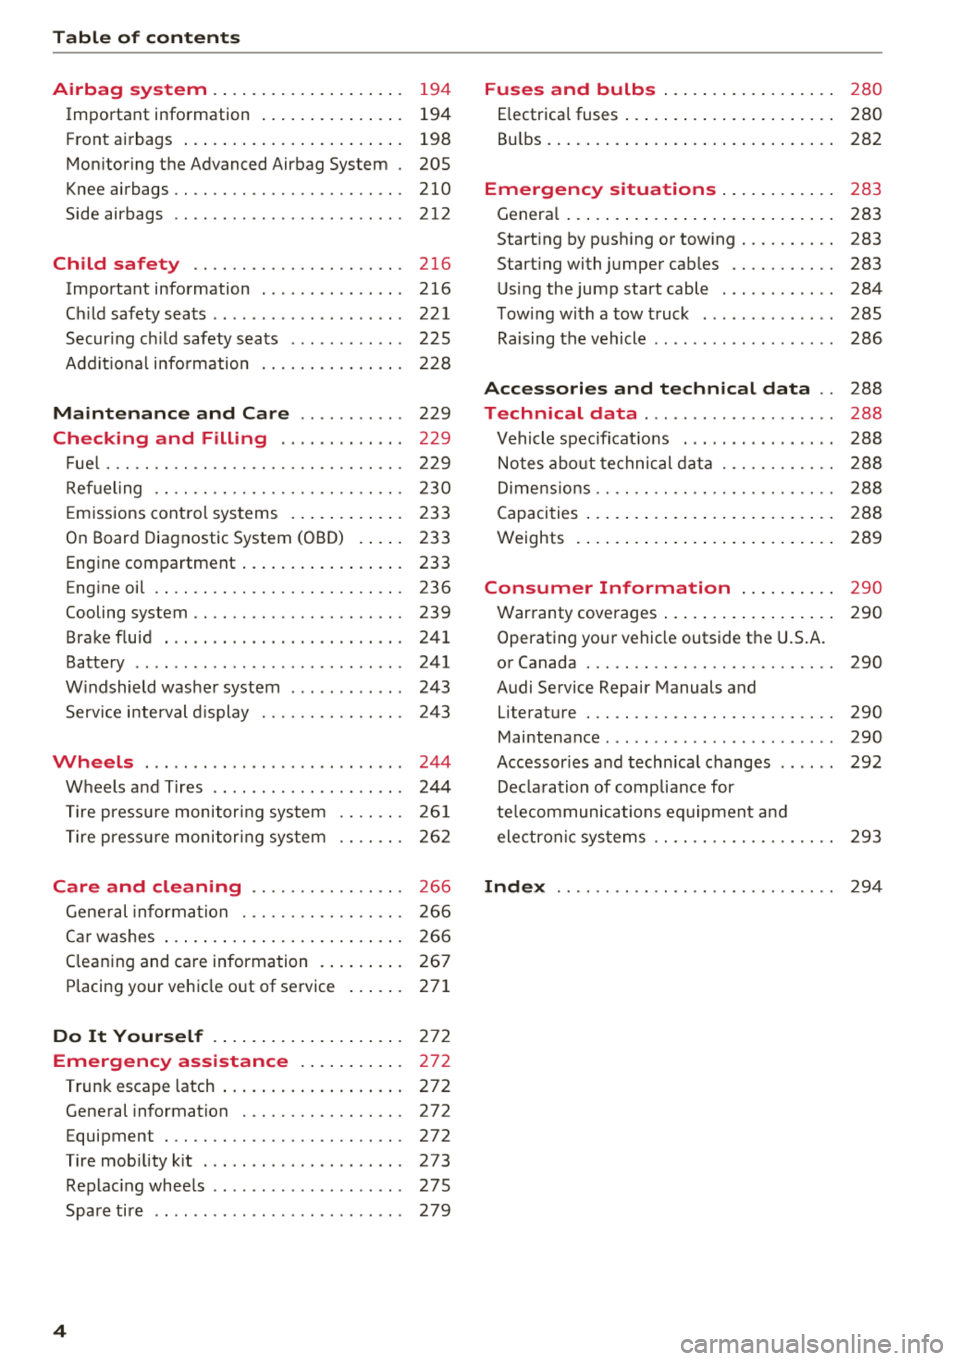
Table of contents
Airbag system . . . . . . . . . . . . . . . . . . . .
194
Important information . . . . . . . . . . . . . . . 194
Front a irbags . . . . . . . . . . . . . . . . . . . . . . . 198
Mon itoring the Advanced Airbag System . 205
Knee airbags .. .. ............. .... .. . 210
Side airbags . . . . . . . . . . . . . . . . . . . . . . . . 212
Child safety . . . . . . . . . . . . . . . . . . . . . . 216
Important information . ....... .. .. .. . 216
C hi ld safety seats . . . . . . . . . . . . . . . . . . . . 221
Secur ing ch ild safety seats . . . . . . . . . . . . 225
Add it io nal info rmation . . . . . . . . . . . . . . . 228
Maintenance and Care . . . . . . . . . . . 229
Checking and Filling . . . . . . . . . . . . . 229
F ue l..... .. .. .. ............. .... .. . 229
Ref ueling . . . . . . . . . . . . . . . . . . . . . . . . . . 230
E m issions cont ro l sys tems . . . . . . . . . . . . 233
On Board Diagnostic System (OB D) . . . . . 233
Engine compartment . . . . . . . . . . . . . . . . . 233
Eng ine oil . . . . . . . . . . . . . . . . . . . . . . . . . . 236
Cooling system . . . . . . . . . . . . . . . . . . . . . . 239
Brake fluid . . . . . . . . . . . . . . . . . . . . . . . . . 241
Battery . . . . . . . . . . . . . . . . . . . . . . . . . . . . 241
W indshield washe r system . . . . . . . . . . . . 243
Service i nterval d isplay 24 3
Wheels ... .. .. ................ ... . 244
Wheels and T ires . . . . . . . . . . . . . . . . . . . . 244
T ire press ure monitor ing system
T ire press ure monitor ing sys tem 26
1
26 2
Care and cleaning . . . . . . . . . . . . . . . . 266
Gene ral informa tion . . . . . . . . . . . . . . . . . 266
Ca r washes . . . . . . . . . . . . . . . . . . . . . . . . . 266
C leaning and care information . . . . . . . . . 267
P lacing your vehicle o ut of service . . . . . . 271
Do It Yourself . . . . . . . . . . . . . . . . . . . . 272
Emergency assistance . . . . . . . . . . . 272
Trun k escape latch . . . . . . . . . . . . . . . . . . . 272
Gene ral information . . . . . . . . . . . . . . . . . 272
Equipment . . . . . . . . . . . . . . . . . . . . . . . . . 272
T ire mob ility k it . . . . . . . . . . . . . . . . . . . . . 273
Replac ing whee ls . . . . . . . . . . . . . . . . . . . . 27S
Spare tire . . . . . . . . . . . . . . . . . . . . . . . . . . 279
4
Fuses and bulbs . . . . . . . . . . . . . . . . . . 280
E lectrica l fuses . . . . . . . . . . . . . . . . . . . . . . 280
B ul bs. . . . . . . . . . . . . . . . . . . . . . . . . . . . . . 282
Emergency situations . . . . . . . . . . . . 283
Genera l . . . . . . . . . . . . . . . . . . . . . . . . . . . . 283
Start ing by push ing or tow ing . . . . . . . . . . 283
Start ing with jumper cables . . . . . . . . . . . 283
U sing the jump start cable . . . . . . . . . . . . 284
T ow ing with a tow truck . . . . . . . . . . . . . . 285
Raising the vehicle . . . . . . . . . . . . . . . . . . . 286
Accessories and technical data . . 288
Technical data . . . . . . . . . . . . . . . . . . . . 288
Vehicle spec ificat ions . . . . . . . . . . . . . . . . 288
Notes abo ut te chnical data . . . . . . . . . . . . 288
D imens io ns . . . . . . . . . . . . . . . . . . . . . . . . . 288
Capacities . . . . . . . . . . . . . . . . . . . . . . . . . . 2 88
Weights . . . . . . . . . . . . . . . . . . . . . . . . . . . 289
Consumer Information . . . . . . . . . . 290
Warranty coverages . . . . . . . . . . . . . . . . . . 290
Operating your vehicle outside t he U.S.A.
or Canada . . . . . . . . . . . . . . . . . . . . . . . . . . 290
Audi Service Repair Manuals and Literature . . . . . . . . . . . . . . . . . . . . . . . . . . 290
Maintenance . . . . . . . . . . . . . . . . . . . . . . . . 290
Accessor ies a nd techn ica l changes . . . . . . 292
De clara tion of compliance for
te lecommunications eq uipment a nd
electron ic sys tems . . . . . . . . . . . . . . . . . . . 293
Index ...... .. .. .. .. ............. .. 294
Page 65 of 310
Cl co .... N ,....
N ...... 0 ,....
Vl co
Automatic transmission
Introduction
Your vehicle is equipped with an electronically
controlled DSG transmiss ion called S tronic. Two
independent clutches transfer the power be
tween the engine and transmission . It allows the
vehicle to accelerate without a noticeab le inter
ruption in traction.
The transmission upshifts or downsh ifts auto
mat ica lly. The driving style continuously influen
ces the selection of the driving program.
When a
mod erat e d rivin g sty le is used, the
transmission selects the most economical d riving
mode. The transmiss ion upsh ifts at a lower RPM
and downshifts at a higher RPM to improve fuel
efficiency.
The transm ission switches to a spo rty mode after
a kick-down or when the driver uses a
s po rt y
d riv ing sty le
characterized by quick accelerator
pedal movements, heavy acce leration, frequent
changes in speed and traveling at the maximum
speed.
If desired, the driver can also select the gears
manually ( tipt roni c mod e).
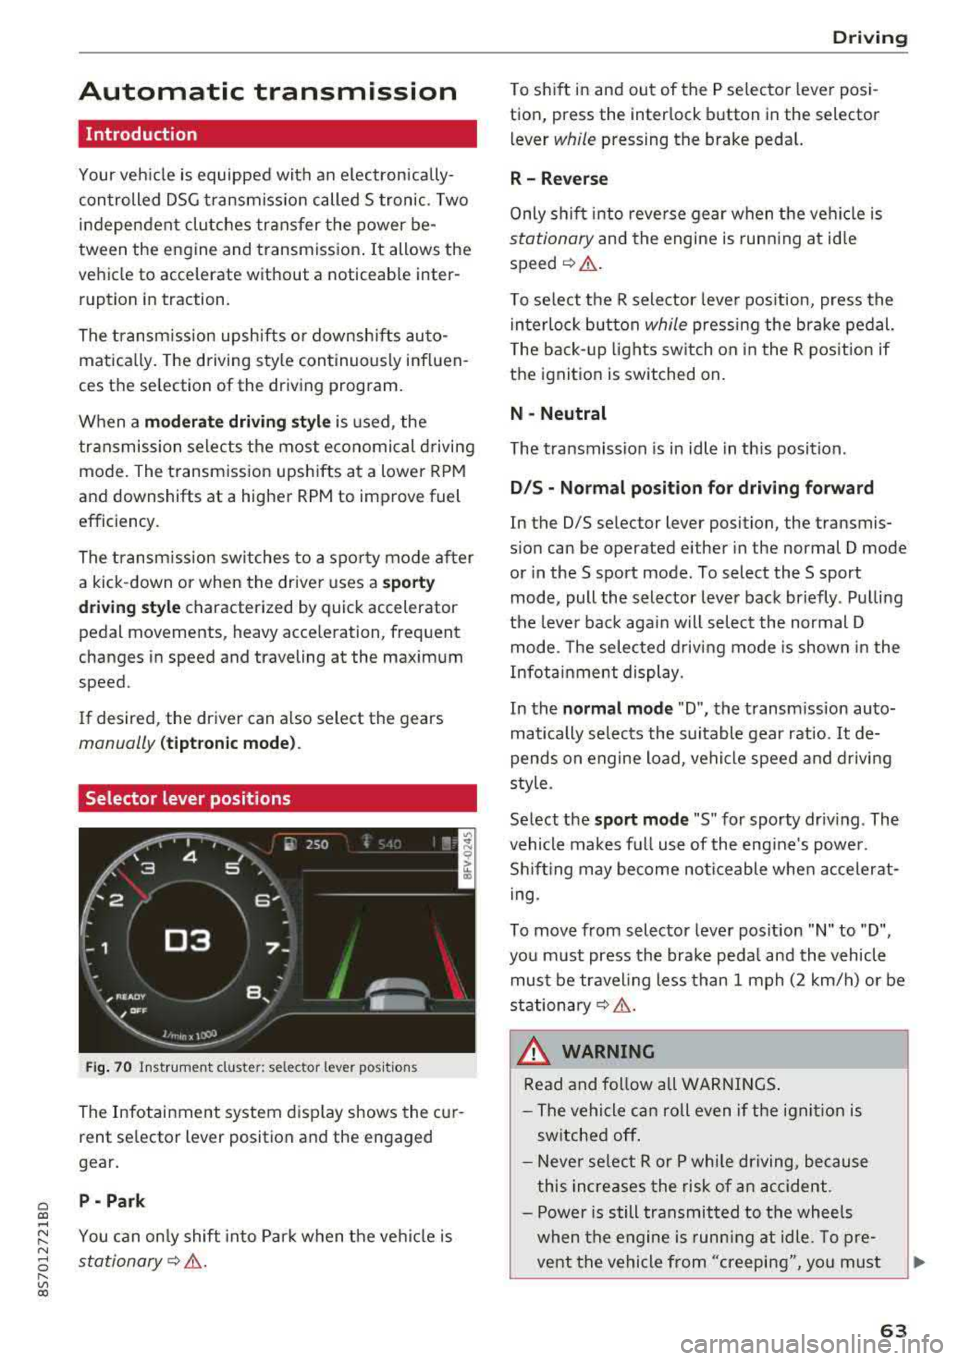
Selector lever positions
Fig . 70 Instrumel'lt cluster: selector lever positions
The Infotainment system d isplay shows the cur
rent se lector lever position and the engaged
gear.
P -Pa rk
You can on ly shift into Park when the vehi cle is
stationary¢ &.
Drivi ng
To shift in and out of the P selector lever posi
tion, press the inter lock button in the selector
lever
while pressing the brake pedal.
R- Reverse
Only s hift into reverse gear when the vehicle is
stationary and the engine is runn ing at id le
speed¢ &.
To se lect the R selector leve r pos ition, press the
in terlock button
while press ing the brake pedal.
T he back-up lights sw itch on in the R pos ition if
the ignition is switched on.
N -Neutral
The t ransmission is in idle in th is posit ion.
D IS -Norm al position fo r driving forward
In the D/S se lector lever position, the transmis
s ion can be operated either in the normal D mode
or in the S sport mode . To select the S sport
mode, pull the selector lever back briefly . Pulling
the leve r back aga in will selec t the normal D
mode. The selected d riving mode is shown in the
Infotainment display.
In the
n ormal mode "D", the transm ission auto
matically selects the suitable gear ratio.
It de
pends on engine load, vehicle speed and driving
sty le.
Select the
s p o rt mod e "S" for sporty driving . The
vehicle makes full use of the eng ine 's powe r.
Shifting may become noticeable whe n accelerat
i ng.
To move from selector lever pos ition
"N" to "D",
you m ust press the brake peda l and the vehicle
must be traveling less than 1 mph (2 km/h) or be
stationary¢ &.
A WARNING
Read and fo llow all WARNI NGS .
- The vehicle can roll even if the ignit ion is
switched off .
- Never se lect R or P whi le driving, because
this increases the risk of an accident .
- Power is still transmitted to the wheels
when the engine is runn ing at idle. To pre
vent the vehicle from "creeping", yo u must
63
Page 75 of 310
Cl co .... N ,....
N
wheel will vibrate lightly. In order for this warn
ing vibration to occur, it must first be switched
on in the Infotainment system. Active lane assist
is ready for operation when the lane marker line
is detected on a t least one side of the vehicle.
The system is design ed for driving on express
ways and highways and so it only activates at
speeds above approximately 40 mph (65 km/h)
(depending on the market).
Applies to vehicles with side assist* : if you acti
vate a turn s ignal when active lane assist is ready
and it classifies a lane change as critical because
of vehicles traveling alongside you or approach ing you, there will be noticeable corrective steer
in g shortly before you leave the lane . This will at
tempt to keep your vehicle in the lane.
Applies to vehicles without side assist *: the sys
tem does not warn when it is ready if you activate
the turn signal before crossing the lane marker line. In this case , it assumes that you are chang
ing lanes intentionally .
A WARNING
- The system warns the driver that the vehicle
is leaving the lane using corrective steer ing.
The driver is always responsible for keeping
the vehicle within the lane.
- The system can assist the driver in keeping
the vehicle in the lane, but it does not drive
by itself. Always keep your hands on the
steering wheel.
- Corrective steering may not occur in certain
situations, such as during heavy braking .
-There may be cases where the camera does
not recognize all lane marker lines . Correc
tive steering can only take place on the side
of the vehicle where lane marker lines are
detected .
-Other road structures or objects could possi
bly be identified unintentionally as lane
marker lines . As a result, corrective steering
may be unexpected or may not occur .
8 1l The corrective stee rin g func tion is not avail able in all mar,..._
~ ket s.
Assistance systems
-The camera view can be restricted, for ex
ample by vehicles driving ahead or by rain,
snow, heavy spray light shining into the
camera or by dirt on the window . This can
result in active lane assist not detecting the
lane marker lines or detecting them incor
rectly.
- In certain situations where visibility is low,
the vehicle may switch internally from "ear
ly " to "late" steering correction
l).
-Under certain conditions such as ruts in the
road, an inclined roadway or crosswinds, the
corrective steer ing alone may not be enough
to keep the vehicle in the middle of the lane .
- For safety reasons, act ive lane assist must
not be used when there are poor road and/
or weather conditions such as slippery roads, fog, gravel, heavy rain, snow and the
potential for hydroplaning. Using active lane
assist under these conditions may increase
the risk of a crash.
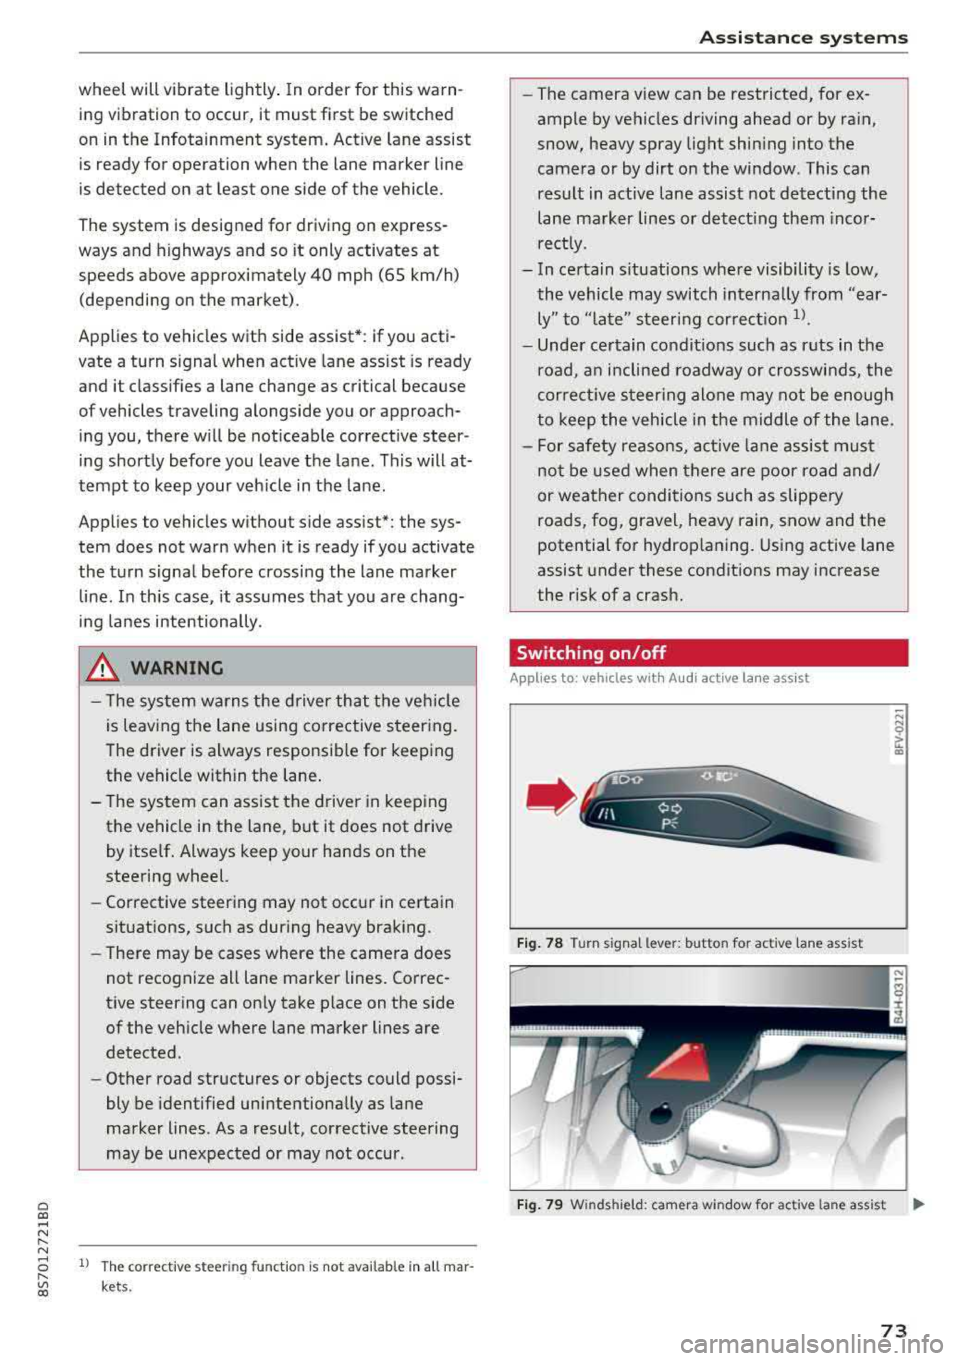
Switching on/off
Applies to : vehicles wit h Aud i act ive la ne ass ist
Fig. 78 Turn s ignal lever: but ton for activ e lane ass ist
"' N 0 > u. CD
Fig. 79 W inds hield: camera w indow for ac tive la n e ass ist ..,.
73
Page 77 of 310
Cl co .... N ,....
N
This message appears if you are not stee ring by
yourse lf . If this is th e case, active lane ass ist does
not switch off, but it is "not ready" to provide a
warning . The system can he lp you keep the veh i
cle in the lane. However, you are responsible for
driving the vehicle and must steer it yourself .
A WARNING
Note that messages may be delayed or not
displayed on vehicles with accessor ies mount
ed on the steer ing whee l, such as a stee ring
wheel sp inner knob. Always keep you r hands
on t he steering whee l.
Adjusting the steering time and vibration
warning
Appl ies to: vehicles with Audi act ive lane ass ist
You con adjust individual act ive lone assist set
tings in the Infotainment system.
Selec t in the Infotai nment system : I MENUI but
ton>
Vehicle > left con trol button > Driv er a ssis
tance > Audi acti ve lane assist
Steering time
1>
Early : in this setting, the correct ive steering hap
pens continuously to help keep the vehicle in the
center of the lane .
Late : in this setting, the system provides correc
tive steering just before a vehicle whee l touches a
detected lane ma rker line .
Vibration warning
You can switch the additional vibration warning
in the steering wheel o n or off.
(I) Tips
In certain markets: your settings are stored
automatically and assigned to the remote
cont rol key in use .
8 1l The co rrect ive stee rin g fu nctio n is not ava ilabl e in all mar ,..._
~ kets.
A ssi st a nce systems
Audi side assist
Description
Applies to: veh icles w ith Audi side assist
0, :;; 0
it m
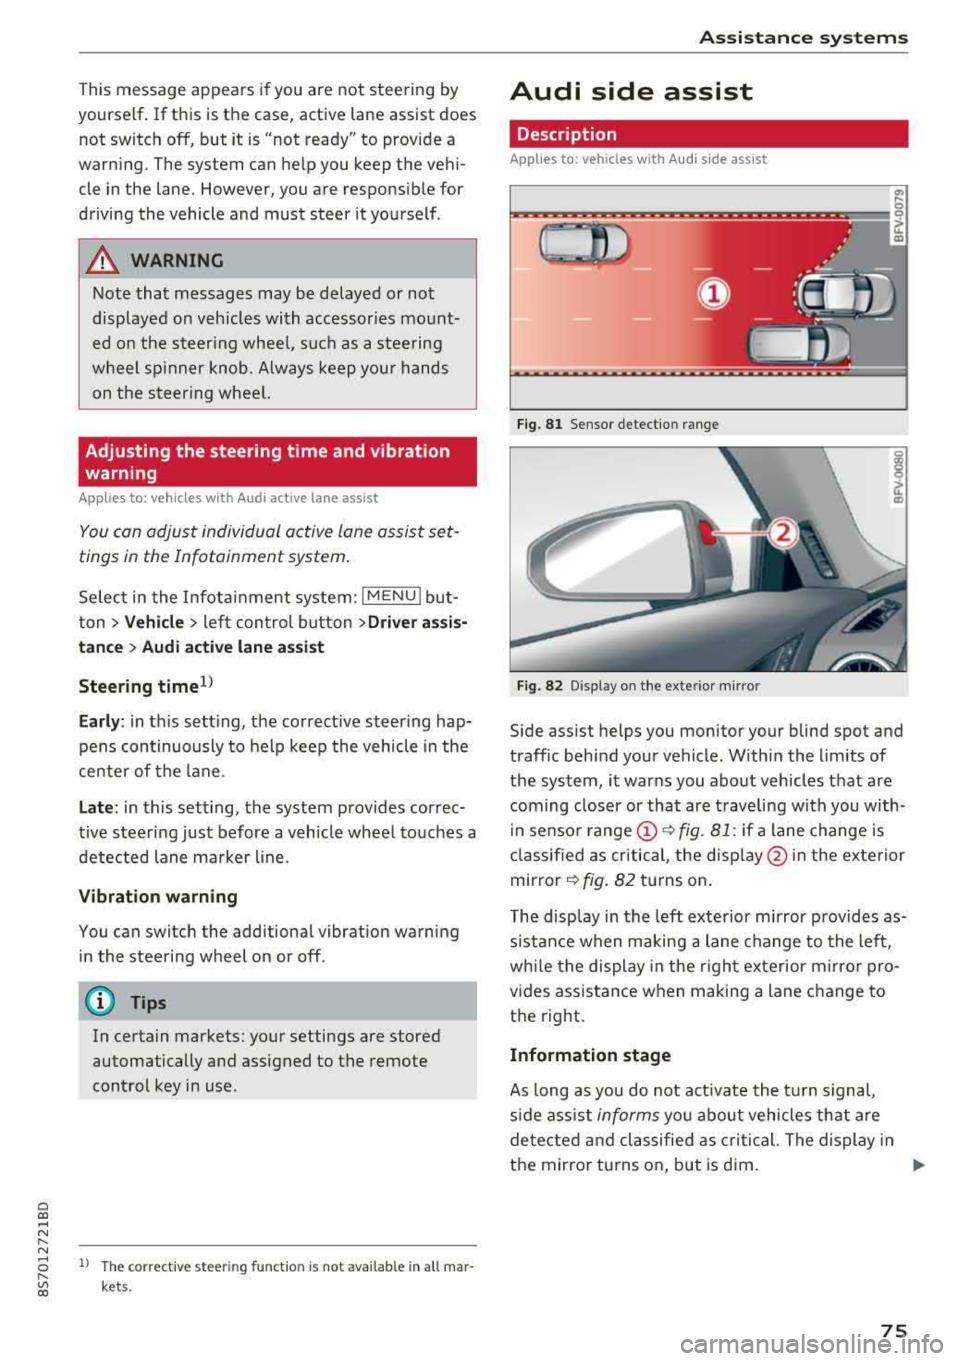
Fig . 81 Senso r de tect io n range
Fi g. 82 Disp lay on t he ex te ri or m irro r
Side assist helps you monitor your blind spot and
traff ic beh ind your vehicle . Withi n the limits of
the system , it warns you abo ut vehicles that are
coming closer or that a re t raveling with you with
i n senso r
range @~ fig. 81: if a lane change is
cla ssified as critical , the disp lay @ in the e xte rior
mirror
~ fig . 82 turns on .
T he display in the left exterio r m irror p rovides as
s istance when making a lane change to the left,
whi le the display in the r ight exterior mirro r pro
vides ass istance when m aking a lane change to
the right.
Information stage
As long as you do not act ivate the tu rn s igna l,
s ide ass ist
informs you about vehicles tha t are
detec ted and classifie d as critical. The display in
t h e mirror tu rns on, but is d im.
75
Page 82 of 310
Parking syste m s
Parking systems
General information
A pplies to: ve hicles w ith rear park in g syste m/pa rk in g system
p lus
Depending on your vehicle 's equipment , various
parking aids will help you when parking and ma
neuvering.
The
r ea r p arki ng sys te m is an aud ible parking a id
that warns you of obstacles
behind the vehicle
¢ page 81.
The parki ng sys te m plu s assists you when park
ing by aud ibly and visually indicating objects de
tected
in front of and behind the veh icle
¢ page 81.
The rea rv iew ca mera shows the area behind the
veh icle in the Infotainment system d isplay . The
lines in the rearv iew camera image he lp you to
pa rk or maneuve r
¢page 82.
_& WARNING
-Always look for traff ic and check the area
around your vehicle by looking at it direct ly
as well. The parking system cannot replace
the driver's attention . The driver is always
responsib le when entering or leaving a park
ing space and during similar maneuvers.
- Please note that some surfaces, such as
clothing, are not detected by the system.
-
- Sensors and cameras have blind spots in
which people and objects cannot be detect
ed . Be especially cautious of small children
and animals.
- The sensors can be displaced by impacts or
damage to the radiator gr ille, bumper,
wheel housing and the underbody . The park
i ng system may be impa ired as a result .
Have an authorized Audi dealer or author
ized Audi Serv ice Facility check their func
t ion.
- Make su re the senso rs a re not obst ructed by
st ickers, depos its or othe r ma ter ia ls.
If they
are, the senso r funct io n could be impai red .
For additiona l information on cleaning, see
¢ page 266 .
80
@ Note
-Some objects are not detected or disp layed
by t he system under certain c ircumstances:
- objects such as barrier cha ins, tra iler draw
bars, vertical po les or fences
- objects above the sensors such as wall ex
tensions
- objects with certain surfaces or structures
such as cha in link fences or powder snow
- If you continue driving closer to a low ob
ject, it may disappear from the sensor range . Note that you will no longer be
wa rned about th is obstacle.
- Keep enough distance from the curb to re
duce the risk of damage to the rims .
(D Tips
-The system may provide a warning even
though there are no obstacles in the cover
age area in some situations, such as :
- certain road surfaces or when there is tall grass
- externa l ultrasonic sources such as from
cleaning vehicles
- in heavy rain, snow, or th ick vehicle ex
h a u st
- We recommend that you practice par king in
a traffic -free location or parking lot to be
come familiar with the system . When doing
this, there shou ld be good light and weath
er conditions.
- You can change the vo lume of the signa ls.
- What appea rs in the disp lay is slight ly de -
layed.
- Th e sensors m ust be kept clean and free of
snow and ice for the parking aid to operate .
Page 85 of 310
Cl co .... N ,....
N ...... 0 ,....
Vl co
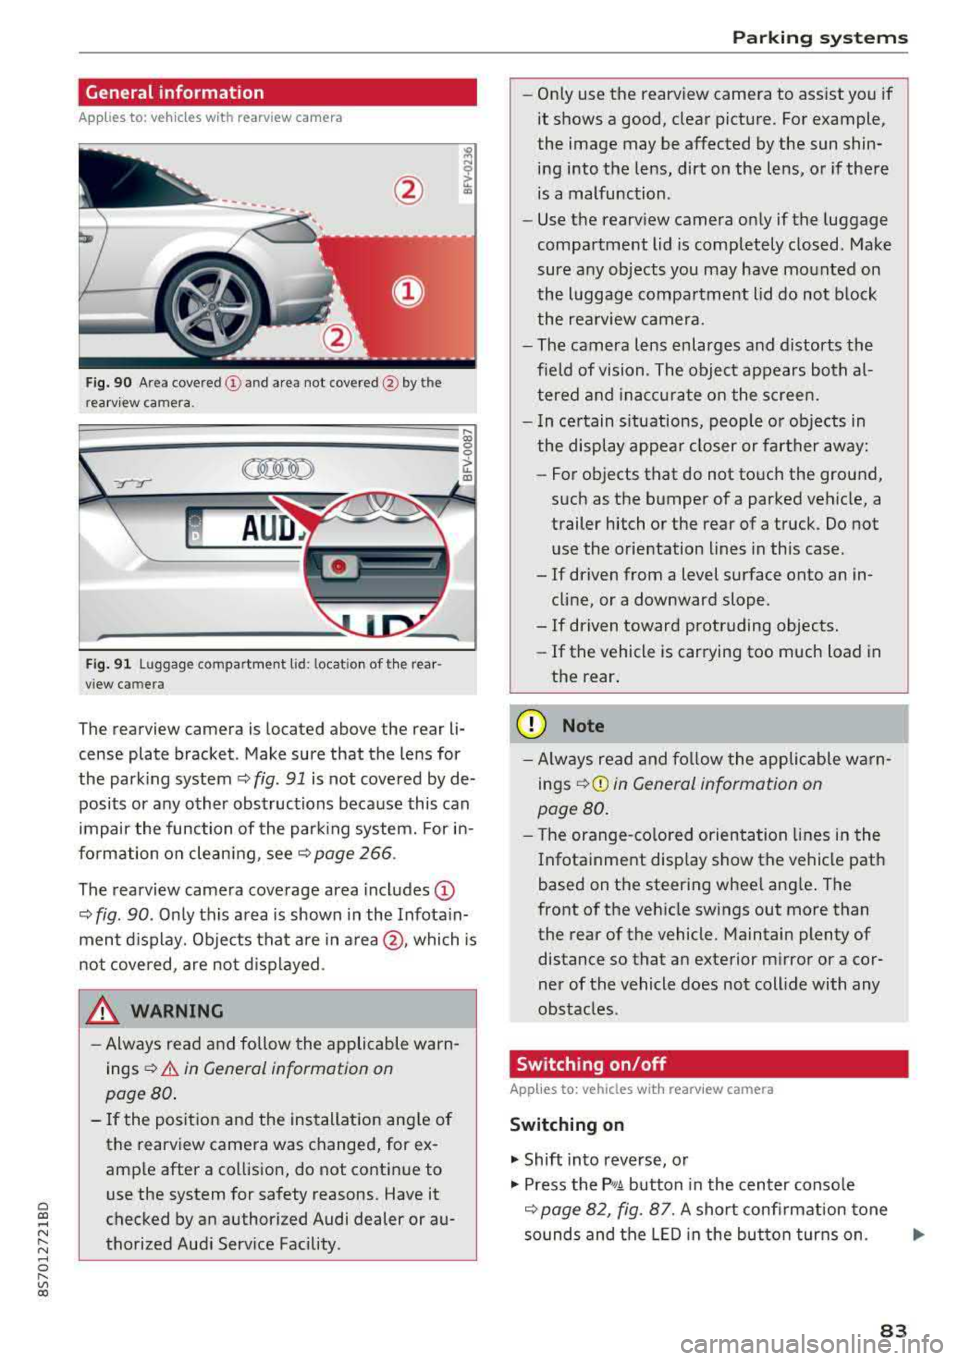
General information
Applies to: ve hicles with rearview camera
Fig . 90 Area covered (!) and area not covered @ by the
rea rview camera.
:;,
~;..------: :.·~- ---~ _.,- ,.,,.--------g
(Jo00oD ~
Fig. 91 Luggag e compartment lid: locat ion of the rear
view camera
The rearview camera is located above the rear li
cense plate bracket. Make sure that the lens for
the parking system¢
fig. 91 is not covered by de
posits or any other obstructions because this can
impair the function of the parking system. For in
formation on cleaning, see¢
page 266 .
The rearview camera coverage area includes
(D
¢ fig. 90. Only this area is shown in the Infotain
ment display. Objects that are in
area @, which is
not covered, are not displayed.
A WARNING
-Always read and follow the applicable warn
ings ¢
A in General information on
page 80.
- If the position and the installation angle of
the rearv iew camera was changed, for ex
ample after a collision, do not continue to
use the system for safety reasons. Have it
checked by an authorized Audi dealer or au
thorized Audi Service Facility .
Parking systems
-Only use the rearview camera to assist you if
it shows a good, clear picture. For example,
the image may be affected by the sun shin
ing into the lens, dirt on the lens, or if there
is a malfunction.
- Use the rearview camera only if the luggage
compartment lid is completely closed. Make
sure any objects you may have mounted on
the luggage compartment lid do not block
the rearview camera.
- The camera lens enlarges and distorts the
field of vision. The object appears both al
tered and inaccurate on the screen.
- In certain situations, people or objects in
the display appear closer or farther away:
- For objects that do not touch the ground,
such as the bumper of a parked vehicle, a
trailer hitch or the rear of a truck. Do not use the orientation lines in this case.
- If driven from a level surface onto an in cline, or a downward slope .
- If driven toward protruding objects.
- If the vehicle is carrying too much load in
the rear.
(D Note
-Always read and follow the applicable warn
ings
¢ (D in General information on
page 80.
- The orange-colored orientation lines in the
Infotainment display show the vehicle path
based on the steering wheel angle. The
front of the vehicle swings out more than
the rear of the vehicle. Maintain plenty of
distance so that an exterior mirror or a cor
ner of the vehicle does not collide with any
obstacles.
Switching on/off
App lies to : vehicles wi th rearv iew camera
Switching on
.,. Shift into reverse, or
.,. Press the P,q.A button in the center console
¢ page 82, fig. 87. A short confirmation tone
sounds and the LED in the button turns on.
..,.
83
Page 86 of 310
Parking systems
Switching off
~ Drive faster than 6 mph (10 km/h), or
~ Press the P"'il button, or
~ Switch the ignition off .
(D Tips
-The visual display in the left part of the dis
play should help you detect the critical vehi
cle areas .
- You can change the volume of the signals
and the display
¢page 84.
Perpendicular parking
Applies to: vehicles with rearview camera
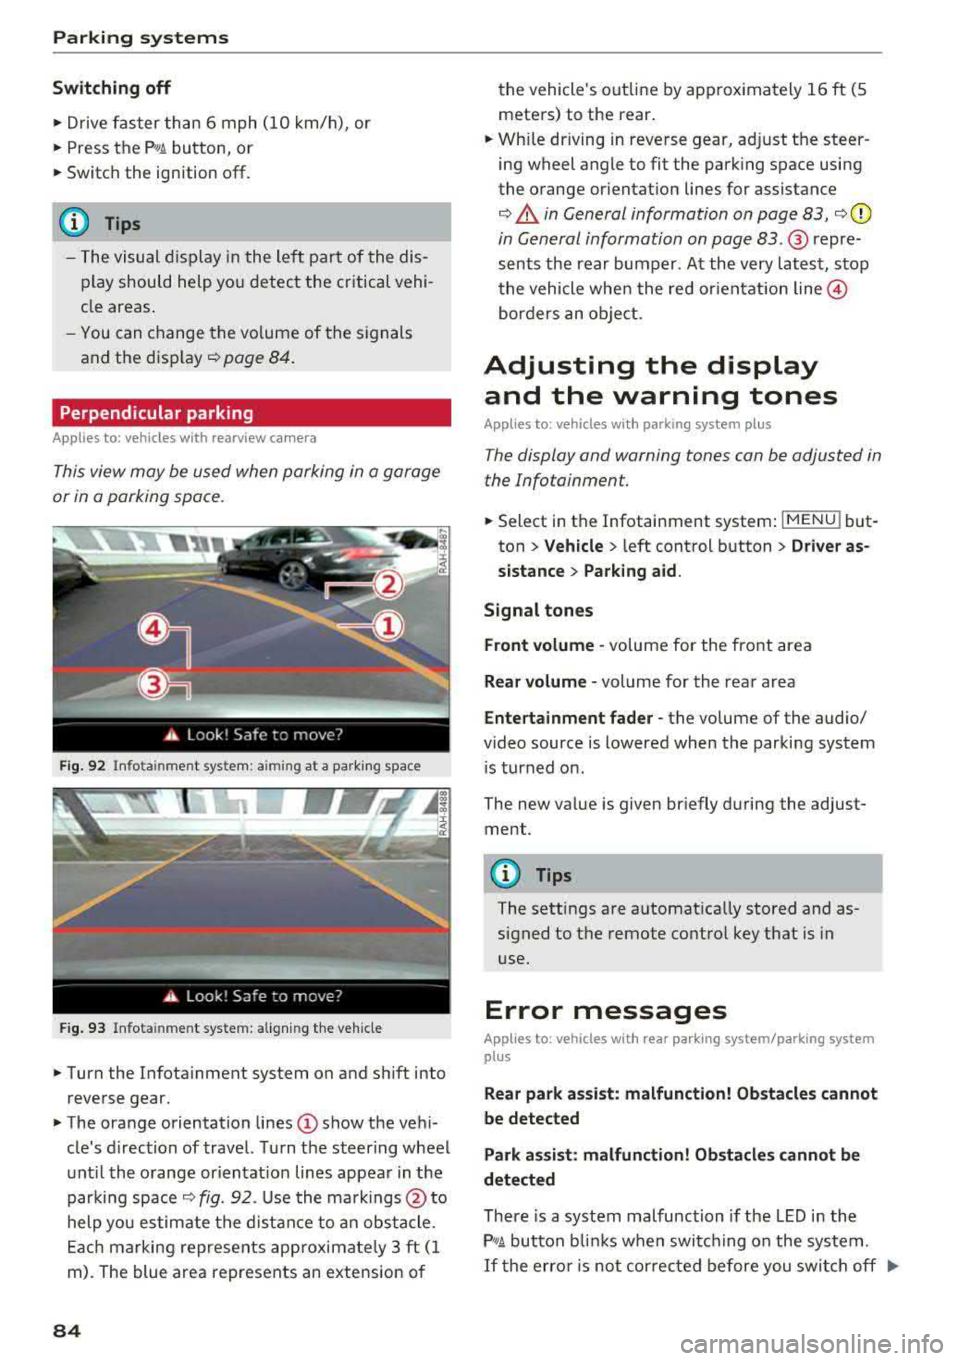
This view may be used when parking in a garage
or in a parking space.
F ig. 92 Info ta in ment system: a im ing at a park ing space
Fig. 93 Infota inme nt system: aligning the vehicle
~ Turn the Infota inment system on and shift into
reverse gear.
~ The orange orientation lines (D show the vehi
cle's d irection of travel. Turn the steering wheel
until the orange or ientat ion lines appear in the
parking space
¢ fig. 92. Use the markings @to
help you estimate the distance to an obstacle.
Each marking represents app roximate ly 3 ft (1
m). The blue area represents an extension of
84
the vehicle 's out line by approximately 16 ft (5
meters) to the rear.
~ Wh ile driving in reverse gear, adjust the steer
ing wheel angle to fit the parking space using
the orange orientation lines for assistance
¢ .&. in General information on page 83, ¢(D
in General information on page 83. ® repre
sents the rear bumper. At the very latest, stop
the vehicle when the red or ientat ion
line @
borders an object.
Adjusting the display
and the warning tones
Applies to: vehicles with parking system plus
The display and warning tones can be adjusted in
the Infotainment.
~ Select in the Infotainment system : IMENU! but
ton
> Vehicle > left control button > Driver as
sistance> Parking aid.
Signal tones
Front volume -
volume for the front area
Rear volume -volume for the rear area
Entertainment fader -the volume of the audio/
video source is lowered when the parking system
i s turned on.
The new value is given briefly during the adjust ment.
{!) Tips
The settings are automat ically stored and as
signed to the remote control key that is in
use.
Error messages
App lies to: vehicles with rear park ing system/parking system
plus
Rear park assist: malfunction! Obstacles cannot
be detected
Park assist: malfunction! Obstacles cannot be
detected
There is a system malfunction if the LED in the
P'1
1 .ll button blin ks when switc hing on the system .
If the error is not corrected before you switch off Ill-
Page 92 of 310
Intelligent Technology
snow and ice. Always read and follow safety pre
cautions
¢ .&. .
Winter tires
By using all wheel drive, your vehicle has good
forward motion with standard tires in winter con
ditions. However, in winter we recommend using
winter or all season tires on
all four wheels, be
cause this will improve the
broking effect.
Snow chains
If there are snow chain laws, snow chains must
also be used on vehicles with all wheel drive
c::> page 259, Snow chains.
Replacing tires
For vehicles with all wheel drive, only wheels with
the same rolling circumference should be used .
Avoid using tires with different tread depths
c::> page 251, New tires or wheels.
Offroad vehicle?
Your Aud i is not an offroad vehicle - there is not
enough ground clearance. For this reason, avoid
difficult terrain.
,& WARNING
- Also, in vehicles with all wheel drive, adapt
your driv ing style to the current road and
t ra ffic conditions. Do not let the increased
safety provided tempt you into taking risks,
because this increases the r isk of an acci
dent.
- The braking ability of your vehicle is limited
to the traction of the wheels. In this way, it
is not different from a two wheel drive vehi
cle. Do not be tempted to accelerate to a
high speed when the road is slippery, be
cause this increases the risk of an accident.
- Note that on wet streets, the front wheels
can "hydroplane" if driving at speeds that
are too high. Unlike front whee l drive
vehicles, the engine does not rev higher sud
denly when the vehicle begins hydroplaning.
For this reason, adapt your speed to the
road conditions to reduce the risk of an acci
dent.
90
Rear spoiler
Applies to: vehicles with retractable rear spoile r
The extendoble rear spoiler increases driving sta
bility.
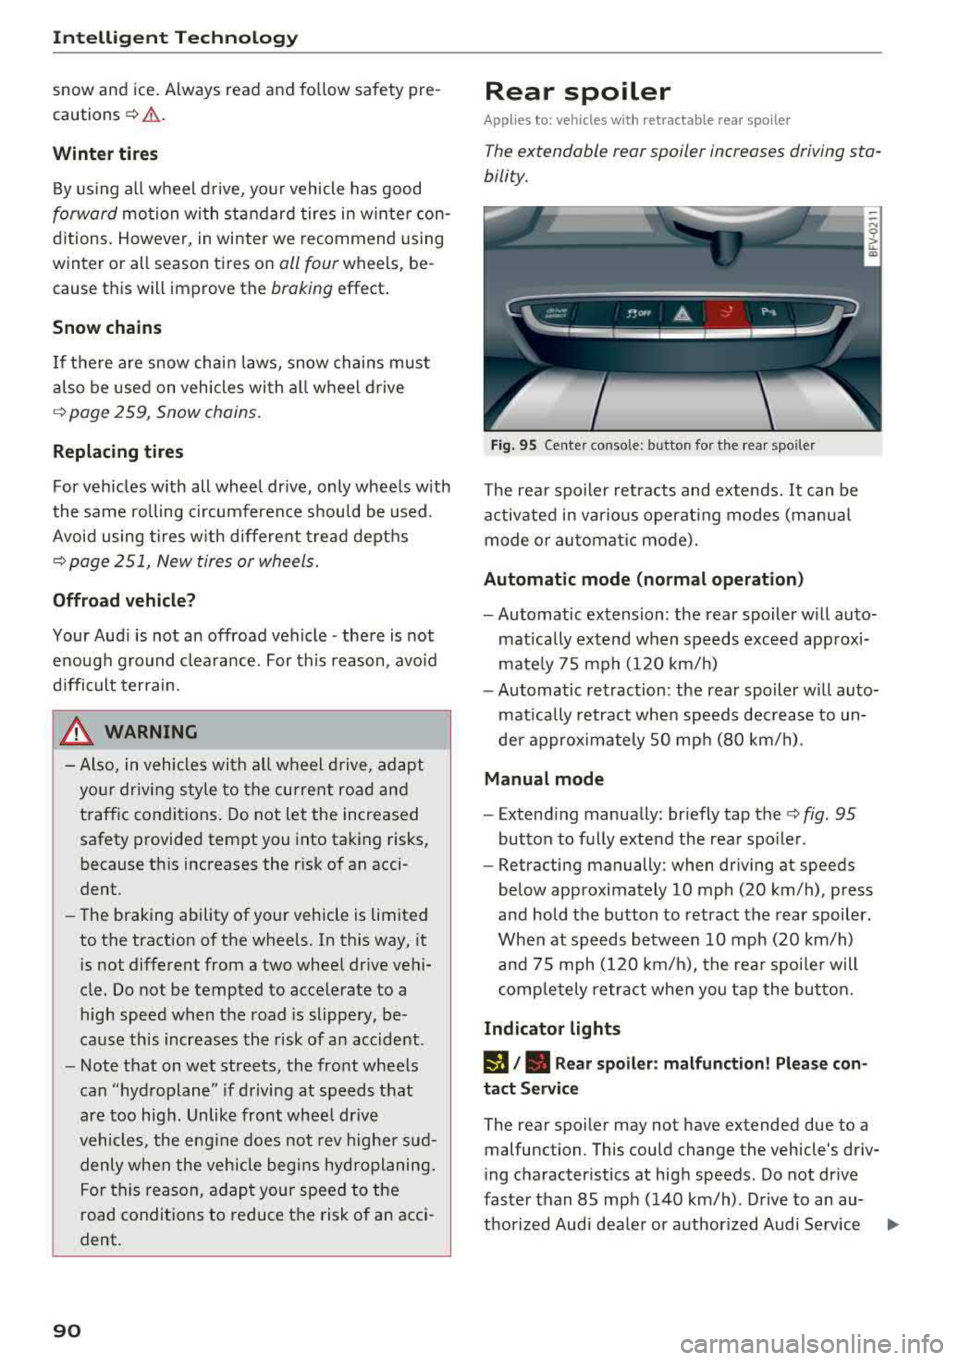
Fig. 95 Center conso le: button for the rear spoiler
The rear spoiler retracts and extends. It can be
activated in various operat ing modes (manua l
mode or automatic mode).
Automatic mode (normal operation)
- Automatic extension: the rear spoiler w ill auto
matically extend when speeds exceed approxi
mately 75 mph (120 km/h)
- Automatic retraction: the rear spoiler w ill auto
matically retract when speeds decrease to un
der approximately 50 mph (80 km/h).
Manual mode
- Extend ing manually : briefly tap the
c::> fig. 95
button to fully extend the rear spoiler .
- Retracting manually: when driving at speeds
below approximately 10 mph (20 km/h), press
and hold the b utton to retract the rear spoiler.
When at speeds between 10 mph (20 km/h)
and 75 mph (120 km/h), the rear spoiler will
completely retract when you tap the button.
Indicator lights
I), . Rear spoiler: malfunction! Please con
tact Service
The rear spoiler may not have extended due to a
malfunction . This could change the vehicle's driv
ing characteristics at high speeds . Do not drive
faster than 85 mph (140 km/h) . Drive to an au-
thorized Audi dea ler or authorized Audi Service
..,.
Page 210 of 310
Airbag syste m
the system inspected immediately by your
authorized Aud i dealer. It is possible that
the a irbag will inflate when it is not sup
posed to, or will not inflate when it should.
A WARNING
If the front airbag inflates, a child without a
child restra int, or in a rearward-facing child
safety seat, or in a forward-facing child re
st raint that has not been p roperly installed
w ill be seriously injured and can be killed.
- If you must install a rearward-fac ing child
seat on the front passenger seat because of
exceptional c ircumstances and the
PA SSEN
GER AIR BAG
OFF ,;; light does not appear
and stay on, have the airbag system inspect
ed by your Audi dealer.
- If, in exceptiona l circumstances, you must
install a forward-facing chi ld restraint on
the front passenger seat, always move the
seat into its rearmost pos ition in the seat's
fore and aft adjustment range, as far away
from the airbag as possible. The backrest
must be adjusted to an upright posit ion .
Make sure that the PASSENGER AIR BAG
OFF ,;; light comes on and stays on a ll the
t ime whenever the ignition is switched on.
A WARNING
If the PASSENGER AIR BAG OFF ~; ligh t does
not go o ut when an adult is s itting on the
front passenger seat after taking the steps described above, have the airbag system in
spected by your Audi dealer before transport
ing anyone on the front passenger seat.
(D Tips
If the capacitive passenger detection system
determines that the front passenger seat is
empty, the frontal airbag on the passenger
side w ill be turned off, and the
PA SSENGER
AIR BAG
OFF ~; light will stay on.
Repair , care and disposal of the airbags
Parts of the a irbag system are installed at many
d ifferent p laces on your Aud i. Insta lling, remov-
208
ing, servicing or repair ing a part in an area of the
vehicle can damage a part of an airbag system
and prevent that system from work ing properly
i n a coll is ion.
There are some important things you have to know to make sure that the effectiveness of the
system will not be impaired and that discarded
components do not cause injury or pollute the
environment .
A WARNING
Improper care, servicing and repair proce
du res can increase the risk of personal in jury
and death by p reventing an airbag from de
p loying when needed or deploy ing an a irbag
unexpectedly:
-
- Never cover, obstruct, or change the steer
ing wheel ho rn pad or airbag cover or the in
s trumen t panel or modify them in any way.
- Never attach any objects s uch as c up ho lde rs
or telephone mountings to the surfaces cov
ering the a irbag un its.
- For cleaning the horn p ad or instr ument
panel, use only a soft, dry doth or one mois
tened w ith plain water . Solvents or cleaners
could damage the airbag cover or change
the stiffness o r strength of the material so
that the airbag cannot deploy and protect properly.
- Never repair, ad just, or change any parts o f
the airbag system.
- All work on the steering wheel, instrument
panel, front seats or e lectr ica l system ( in
cluding the installation of a udio eq uipment,
cellular te lephones and CB radios, etc.)
m ust be performed by a qualified techn ician
who has the training and spec ial equipment
necessary.
- For any work on the airbag system, we
strong ly recommend tha t you see you r au
thori zed A udi dealer or qualified wo rkshop.
- Never modify the front bumper or pa rts of
the vehicle body.
- Always make sure that the side a irbag can
inflate w ithout interfe rence:
Page 220 of 310
Child sa fety
Advanced front airbag system and children
Your veh icle is equipped w ith a front "Advanced
A irbag System" in comp liance w it h United States
F edera l Motor Vehicle Safety Standard ( FMVSS)
208, as well as Canada Motor Vehicle Safety
Standard (CMVSS) 208 as applicable at the time
your vehicle was manufactured.
The Advanced Airbag system in your veh icle has
been certified to meet the " low-risk" require
ments for 3- and 6-year old children on the pas
senger side and small adults on the driver side.
The low risk deployment criteria are intended to
reduce the risk of injury through interaction with
the airbag that can occur, for example, by being
too close to the steering wheel and instrument
panel when the a irbag inflates. In addit ion, the
system has been certified to comply w ith the
" su ppress io n" req uirements of the Safety S tand
ard, to tu rn off the front airbag for infants up to
12 months who are restrained on the front pas
senger seat in child restraints that are listed in
the Standard.
E ven tho ugh yo ur vehicle is equipped with an
Ad a
vanced Airbag system, a chi ld should a lways ride
in the seat proper ly restrained for its age and
size. The airbag on the passenger side makes the
front seat a potentially dangerous p lace for a
child to r ide . The front seat is not the safest place
for a child in a forward-facing child safety seat .
It
can be a very dange rous place for a n infant or a
larger child in a rearward-fac ing seat.
The vehicle's Advanced Airbag System has a ca
pac itive passenger detect ion system in the front
passenger seat cush ion that ca n detect the pres
ence of a baby or a child in a ch ild restraint sys
tem on t his seat .
The capac it ive passenger detect ion system regis
ters the changes that result in an electr ical field
when a c hild, a child restra int, and a baby blanket
a re on the front passenge r seat. The change in
t he meas ured capacitance due to t he p resence o f
a child, a chi ld restraint, and a baby b lanket on
the front passenger seat is re lated to the chi ld
restraint system resting on the seat . The meas
ured capacitance of a ch ild restraint system var-
218
ies depending on the type of system and specific
make and mode l.
The elect rical capac ita nce of the va rious types,
makes, and models of child restra in ts speci fied
by the U.S . National Highway Tra ffic Safety Ad
ministration (NHTSA) in the relevant safety
standard are stored in the Advanced Airbag Sys
tem control unit together with the capacitances
typ ica l of infants and a 1-year old child. When a
c hi ld restraint is used on the front passenger
seat w it h a typical 1 year-old infant, t he Ad
vanced Airbag System compares the capacitance measured by the capacitive passenge r detect ion
system wi th the data stored in the e lec tronic co n
tro l unit .
Child restraints and Advanced front airbag
system
Regardless of the ch ild restraint that you use,
make sure that it has been certified to meet Safe
ty Standards and has been cert ified by its manu
factu rer for use w ith an airbag . If in exceptional
c ir cumstances you m ust use it on the front pas
senger seat, ca refully read all of the information
o n chi ld safety and Advanced Airbags and heed
a ll of th e app licab le WARNINGS . Make certain
that the chi ld and chi ld restraint are correctly
recognized by the capacitive passenger detection
system in the front passenger seat, that the front passenger a irbag is turned off, and that the air
bag status is always correct ly signa led by the
PASSENGER AIR BAG OFF ~; light.
Many types and models of child restra ints have
been available over the years, new models are in
troduced regularly incorporating new and im
proved designs and older models are taken out of
production . Ch ild rest rai nts are not standa rdized .
Child res tra ints of the same type typically have
d iffe rent weights and sizes and diffe re nt "foot
pr ints", the size and shape o f th e bo ttom of the
ch ild restraint that sits on the seat, w hen they
are installed on a vehicle seat . These differences
make it virtua lly impossib le to certify comp liance
with the requirements for advanced a irbags w ith
each and every child restra int that has ever been
sold in the past or will be sold over the course of
the useful life of your veh icle .
.,.