engine control system BMW 528i 1998 E39 User Guide
[x] Cancel search | Manufacturer: BMW, Model Year: 1998, Model line: 528i, Model: BMW 528i 1998 E39Pages: 1002
Page 70 of 1002
Downloaded from www.Manualslib.com manuals search engine
100-4
I Engine-General
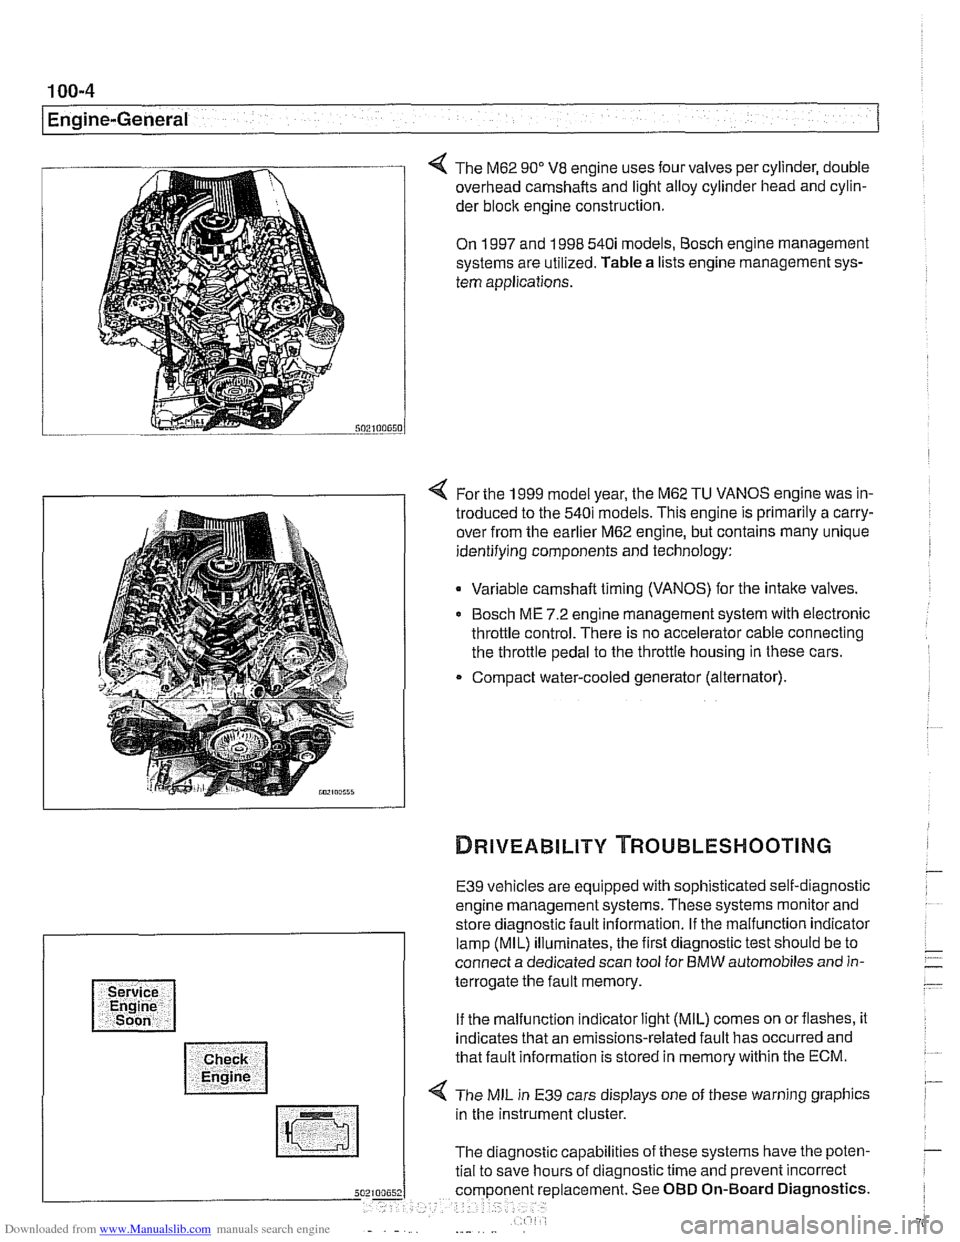
The M62 90" V8 engine uses four valves per cylinder, double
overhead camshafts and light alloy cylinder head and cylin-
der
bloclc engine construction.
On 1997 and 1998 540i models, Bosch engine management
systems are utilized. Table a lists engine management sys-
tem applications.
4 For the 1999 model year, the M62 TU VANOS engine was in-
troduced to the 540i models. This engine is primarily a carry-
over from the earlier M62 engine, but contains many unique
identifying components and technology:
Variable camshaft timing (VANOS) for the intake valves.
Bosch ME 7.2 engine management system with electronic
throttle control. There is no accelerator cable connecting
the throttle pedal to the throttle housing in these cars.
Compact water-cooled generator (alternator).
E39 vehicles are equipped with sophisticated self-diagnostic
engine management systems. These systems monitor and
store diagnostic fault information. If the malfunction indicator
lamp (MIL) illuminates, the first diagnostic test should be to
connect a dedicated scan tool for BMW automobiles and in-
terrogate the fault memory.
If the malfunction indicator light (MIL) comes on orflashes, it
indicates that an emissions-related fault has occurred and
that fault information is stored in memory within the ECM.
4 The MIL in E39 cars displays one of these warning graphics
in the instrument cluster.
The diagnostic capabilities of these systems have the poten-
tial to save hours of diagnostic time and prevent incorrect
5 placement. See OBD On-Board Diagnostics.
Page 96 of 1002
Downloaded from www.Manualslib.com manuals search engine
11 3-2
Cylinder Head Removal and Installation
This group covers cylinder head removal and installation as
well as cylinder
headlvalve diagnostic procedures.
In the procedures in this repair group, engines are referred to
by engine code. If necessary, see
100 Engine-General for
engine code and application information.
The information given in this repair group assumes that the
engine is installed in the engine bay. On the
6-cylinder en-
gines, the VANOS control unit must be removed in orderto re-
move the cylinder head from the engine block. On
M52TU
and M54 engines, camshafts must be removed from the cylin-
der head before the head is removed.
The cylinder head removal and installation procedures for the
M62 V-8 are also included, butthe proceduresforthe M62TU
V-8 with VANOS are not provided.
For cylinder head and valvetrain reconditioning information,
see
116 Cylinder Head and Valvetrain.
For specific repair procedures, refer to the appropriate repair
group:
020 Maintenance
116 Cylinder Head and Valvetrain
117 Camshaft Timing Chain
170 Radiator and Cooling System
610 Component locations
NOTE-
If a head gasket problem is suspected, a compression test or
leak-down test will usually detect the fault See Diagnostic
Testing later
in this group.
Special tools
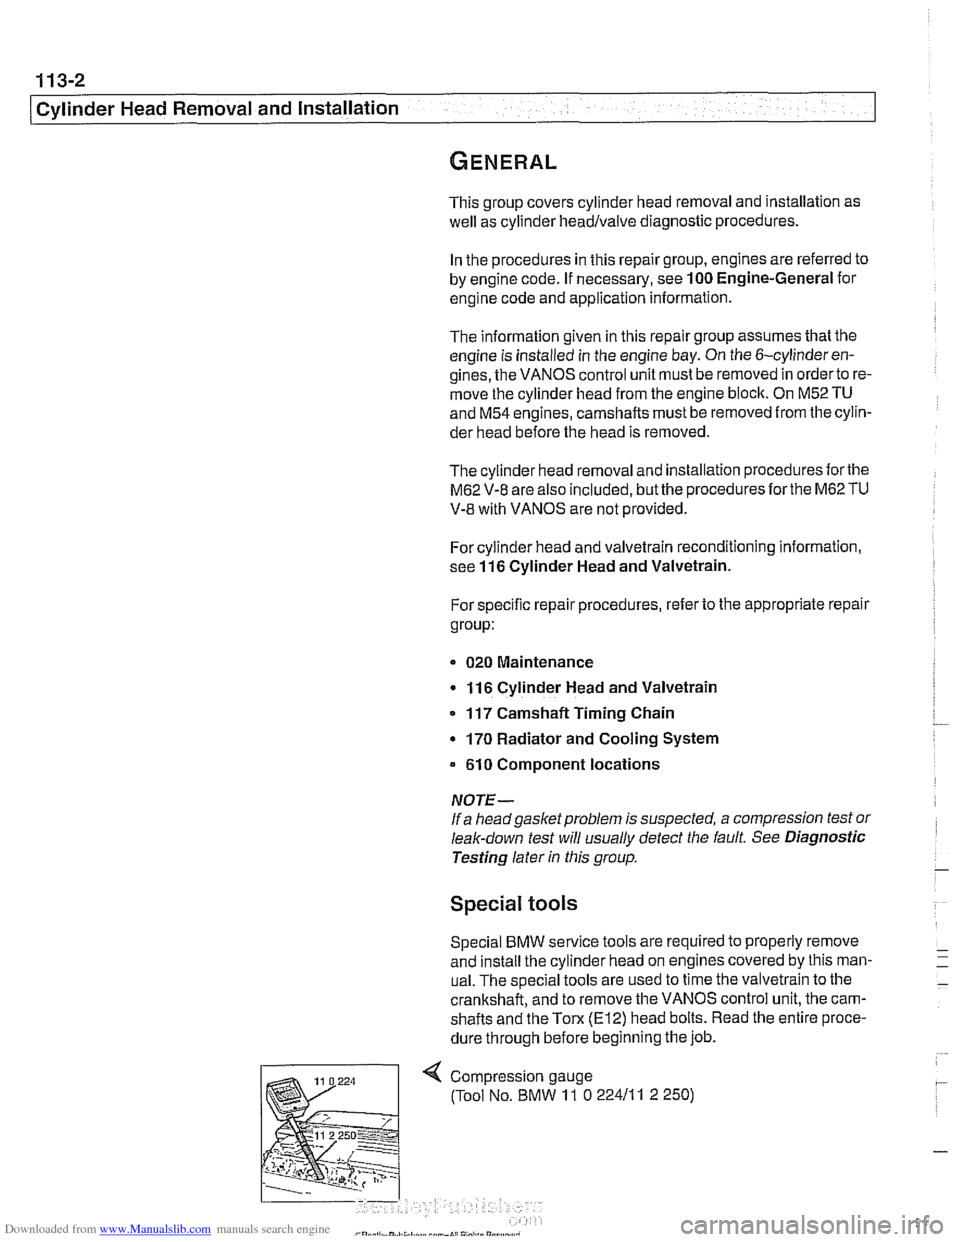
Special BMW service tools are required to properly remove
and install the cylinder head on engines covered by this man-
ual. The special tools are used to time the valvetrain to the
crankshaft, and to remove the VANOS control unit, the cam-
shafts and the
Tom (El2) head bolts. Read the entire proce-
dure through before beginning the job.
Page 100 of 1002
Downloaded from www.Manualslib.com manuals search engine
11 3-6
Cylinder Head Removal and Installation
- Disable ignition system by removing DME main relay. See
610 Component Locations for relay location.
WARNING-
. The ignition system produces high voltages that can be fa-
tal. Avoid contact with exposed terminals and use
exfreme
caution when working on a car with the ignition switched on
or the engine running.
Do not touch or disconnect ignition
components while
the engine is running or being cranked by the starter.
Failure to remove the DME main relay or attempting to
disa-
bie the fuel andignition systems by other methods may result
in damaoe to the enoine control module
(ECM).
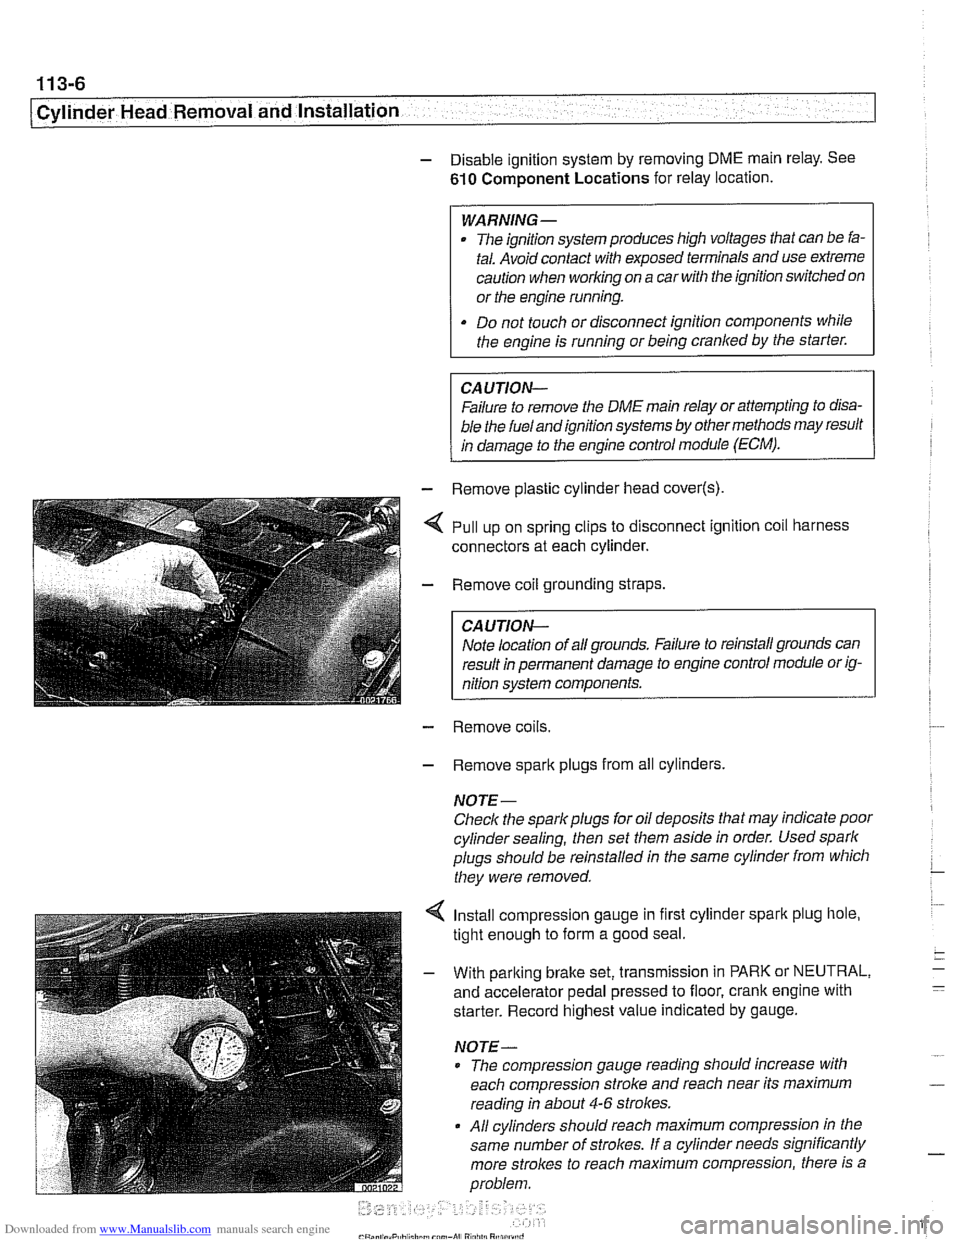
- - Remove plastic cylinder head cover(s)
,,I . ,. .*,.,,&- - Remove coil grounding straps.
I CAUTION-
I nition system components. I
- Remove coils.
- Remove spark plugs from all cylinders.
NOTE-
Check the spark plugs for oil deposits that may indicate poor
cylinder sealing, then set them aside in order. Used spark
plugs should be reinstalled in the same cylinder from which
they were removed.
4 Install compression gauge in first cylinder spark plug hole,
tight enough to form a good seal.
- With parking brake set, transmission in PARK or NEUTRAL,
and accelerator pedal pressed to floor, crank engine with
starter. Record highest value indicated by gauge.
NOTE-
* The compression gauge reading should increase with
each compression stroke and reach near its maximum
reading in about
4-6 strokes.
All cylinders should reach maximum compression in the
same number of
strolces. If a cylinder needs significantly
more strokes to reach
maximum compression, there is a
problem.
Page 109 of 1002
Downloaded from www.Manualslib.com manuals search engine
Cylinder Head Removal and Installation / -
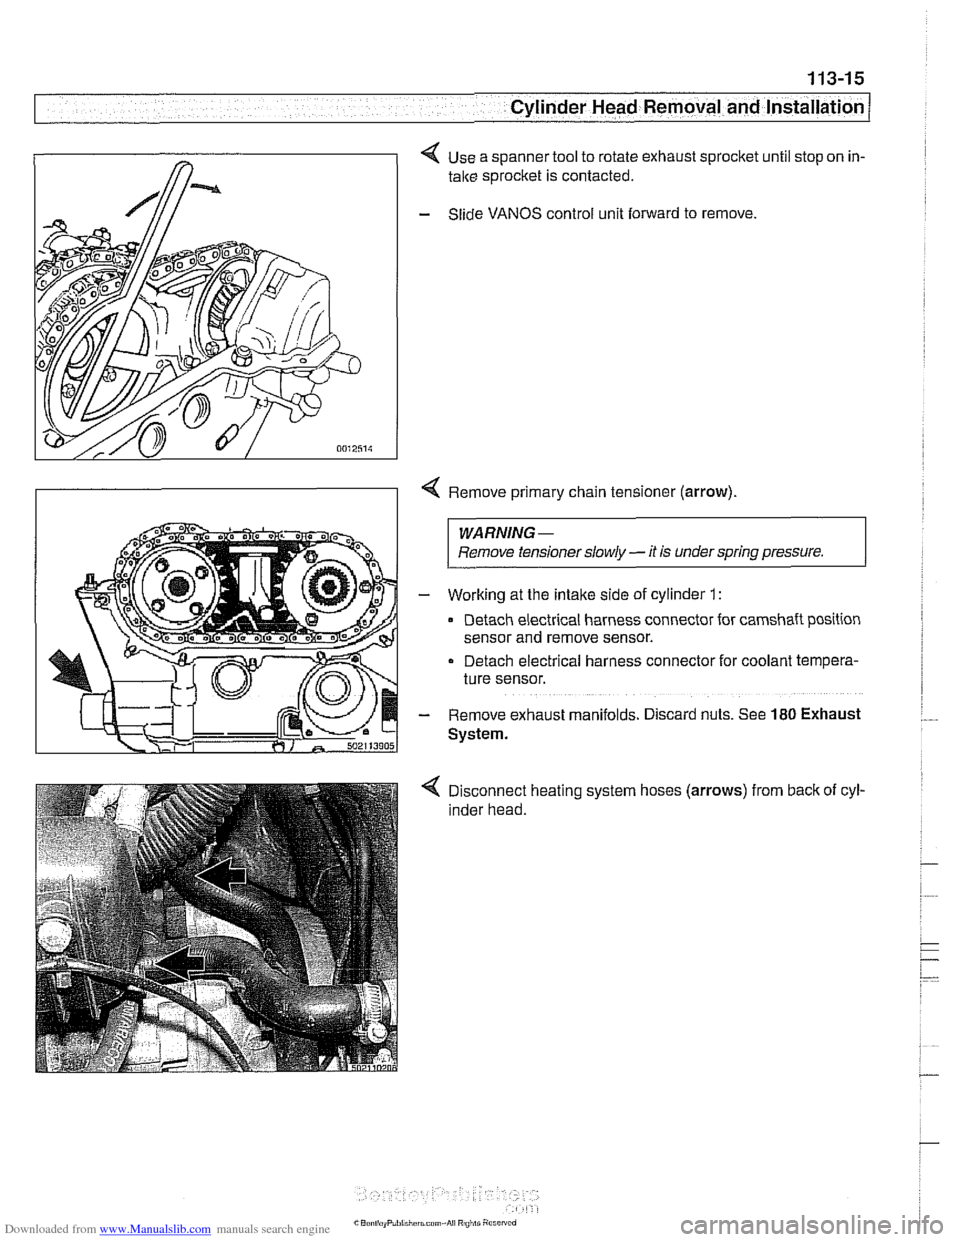
< Use a spanner tool to rotate exhaust sprocket until stop on in-
take sprocket is contacted.
- Slide VANOS control unit forward to remove
Remove primary chain tensioner (arrow)
WARNING -
Remove tensioner slowly - it is under spring pressure. I
- Working at the intake side of cylinder 1 :
Detach electrical harness connector for camshaft position
sensor and remove sensor.
Detach electrical harness connector for coolant tempera-
ture sensor.
- Remove exhaust manifolds. D~scard nuts. See 180 Exhaust
System.
Disconnect heating system hoses (arrows) from back of cyl-
inder head.
Page 115 of 1002
Downloaded from www.Manualslib.com manuals search engine
- -.
Cylinder Head Removal and lnstallation
NOTE-
Be Sure the secondary timing chain tensioner is locked down
and the exhaust
camshaif mounting bolts are loose before
proceeding.
- Install VANOS control unit. See VANOS control unit, install-
ing
(M52 engine) in 117 Camshaft Timing Chain.
CAUTION--
Incorrect installation ofthe VANOS control may result in dam-
age to the engine valvefrain.
- Install exhaust manifolds using new gaskets and nuts. Coat
manifold studs with copper paste prior to installing nuts.
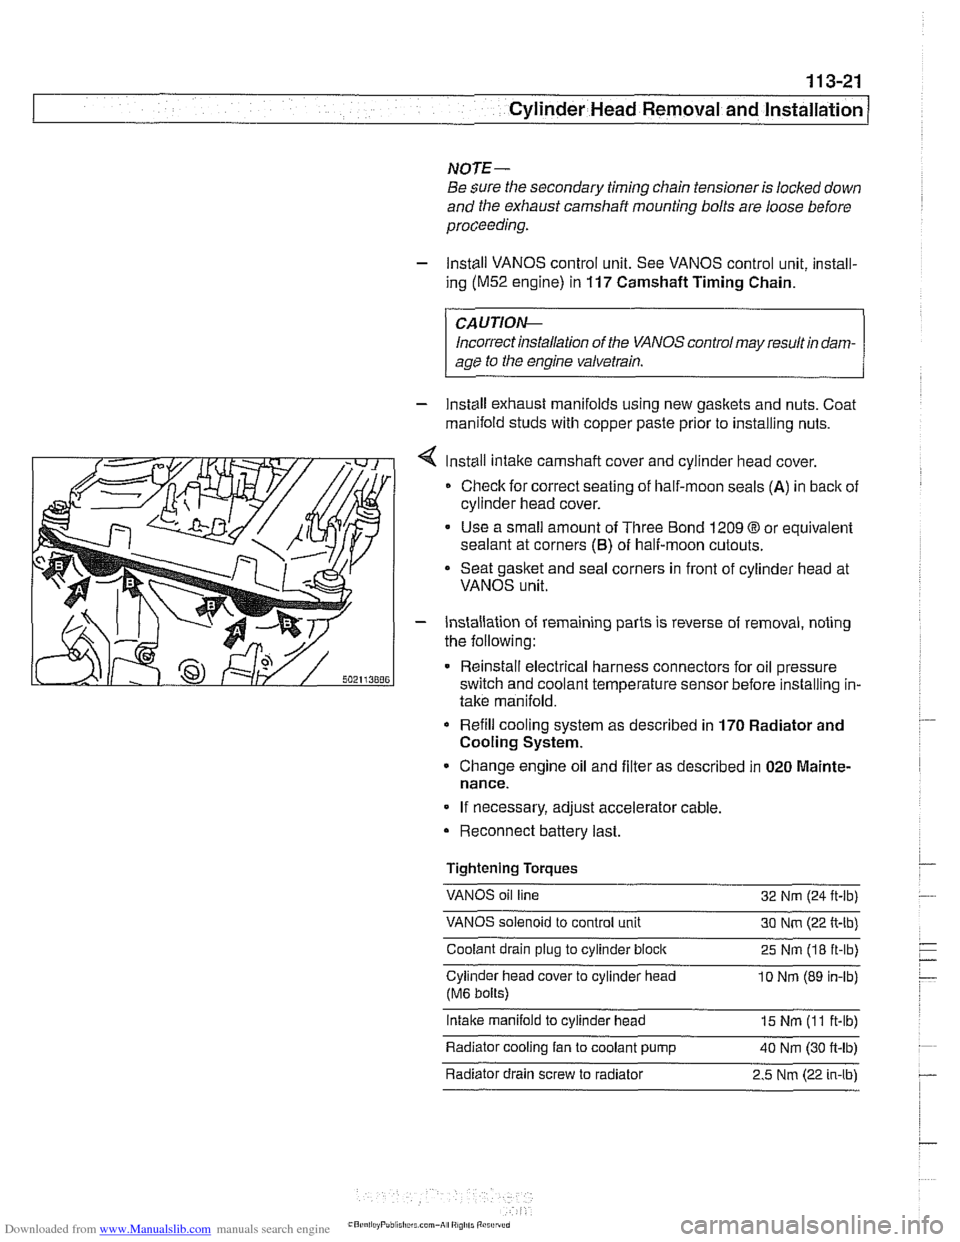
Install intake camshaft cover and cylinder
head cover.
Check for correct seating of half-moon seals
(A) in back of
cylinder head cover.
Use a small amount of Three Bond 1209
O or equivalent
sealant at corners
(6) of half-moon cutouts.
Seat gasket and seal corners in front of cylinder head at
VANOS unit.
- Installation of remaining parts is reverse of removal, noting
the following:
Reinstall electrical harness connectors for oil pressure
switch and coolant temperature sensor before installing in-
take manifold.
Refill cooling system as described in 170 Radiator and
Cooling System.
Change engine oil and filter as described in 020 Mainte-
nance.
If necessary, adjust accelerator cable.
Reconnect battery last.
Tightening Torques
VANOS oil line
32 Nm (24
ft-lb)
VANOS solenoid to control unit 30 Nm (22 ft-lb)
Coolant drain plug to cylinder
block 25 Nm (18 ft-lb)
Cylinder head cover to cylinder head
10 Nrn (89 in-lb)
(M6 bolts)
intake manifold to cylinder head 15 Nm (I 1 ft-lb)
Radiator cooling fan to coolant pump
40 Nm (30 ft-lb) - . .
Radiator drain screw to radiator 2.5 Nm (22 in-lbl
Page 117 of 1002
Downloaded from www.Manualslib.com manuals search engine
- --
Cylinder Head Removal and Installation 1 --
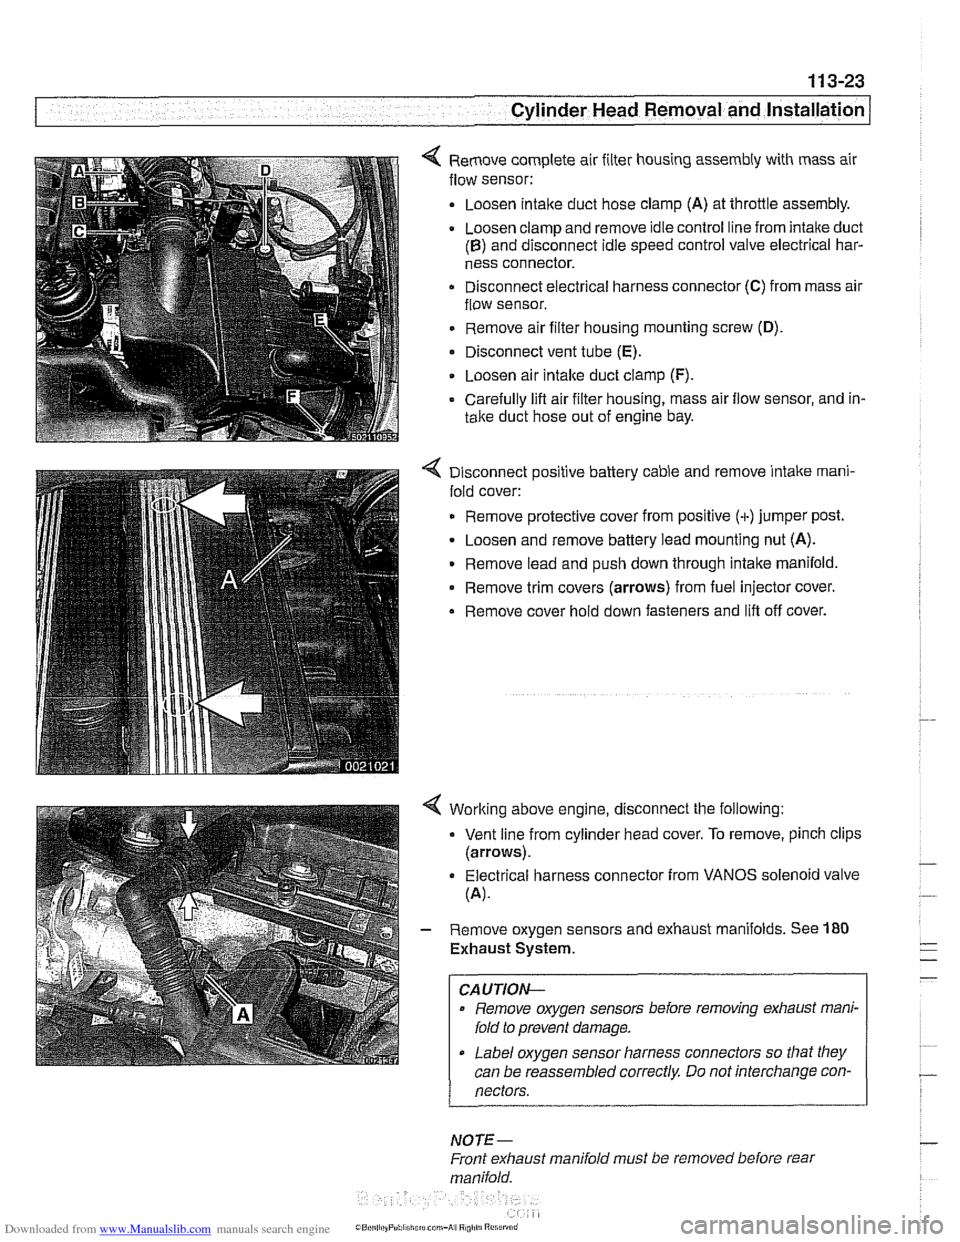
< Remove complete air filter housing assembly with mass air
flow sensor:
Loosen
intalte duct hose clamp (A) at throttle assembly.
Loosen clamp and remove idle control line from intake duct
(B) and disconnect idle speed control valve electrical har-
ness connector.
Disconnect electrical harness connector
(C) from mass air
flow sensor.
Remove air filter housing mounting screw
(D).
Disconnect vent tube (E).
. Loosen air intalte duct clamp (F).
Carefully lifl air filter housing, mass air flow sensor, and in-
take duct hose out of engine bay.
4 Disconnect positive battery cable and remove intake rnani-
fold cover:
Remove protective cover from positive (+)jumper post.
Loosen and remove battery lead mounting nut (A).
Remove lead and push down through intake manifold.
* Remove trim covers (arrows) from fuel injector cover.
Remove cover hold down fasteners and lifl off cover.
4 Worlting above engine, disconnect the following:
Vent line from cylinder head cover. To remove, pinch clips
(arrows).
Electrical harness connector from VANOS solenoid valve
(A).
- Remove oxygen sensors and exhaust manifolds. See 180
Exhaust System.
CAUTION-
Remove oxygen sensors before removing exhaust mani-
fold to prevent damage.
Label oxygen sensor harness connectors so that they
can be reassembled correctly Do not interchange con-
nectors.
NOTE-
Front exhaust manifold must be removed before rear
manifold.
Page 123 of 1002
Downloaded from www.Manualslib.com manuals search engine
Cylinder Head Removal and Installation
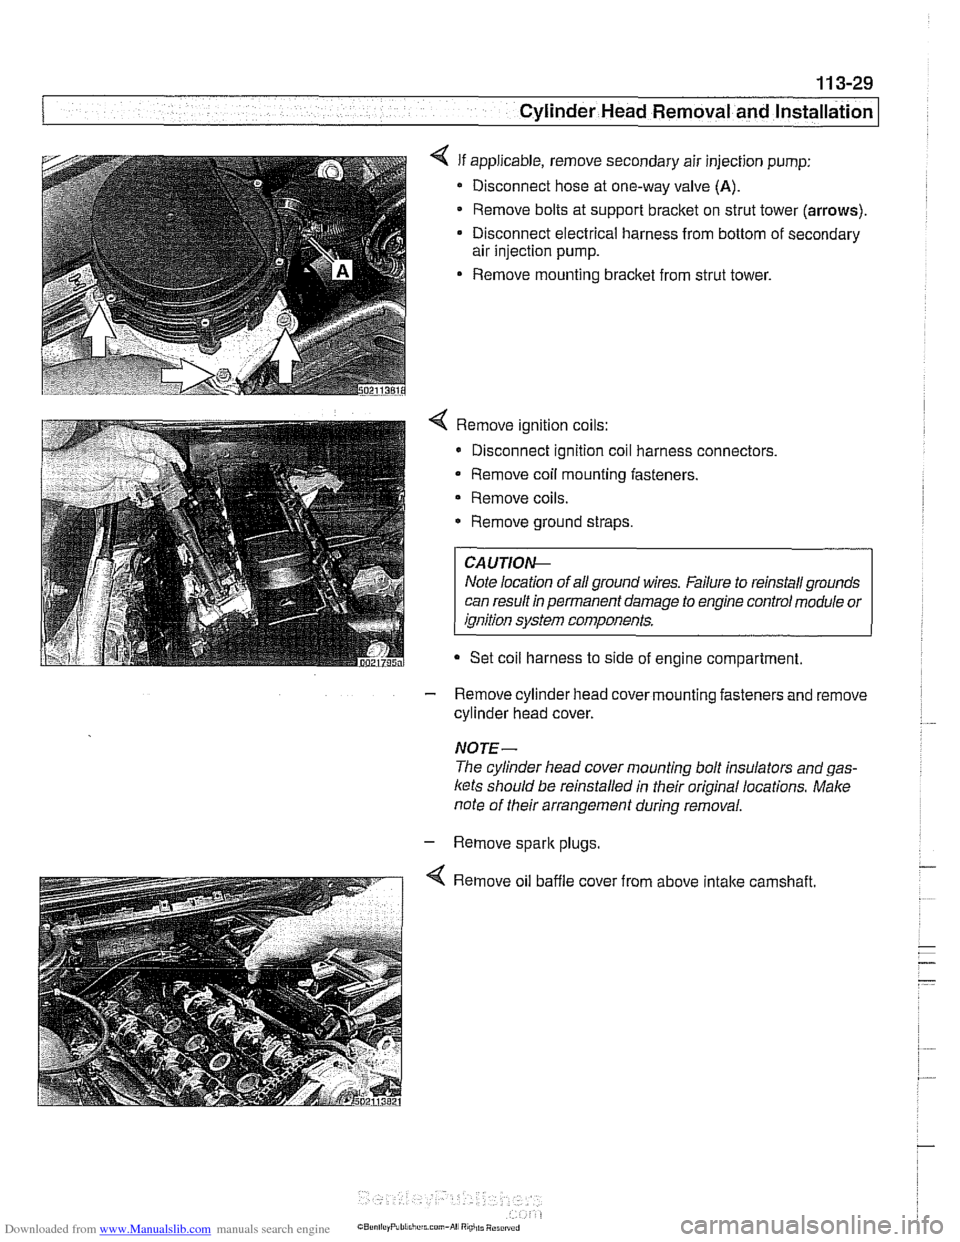
4 If applicable, remove secondary air injection pump:
Disconnect hose at one-way valve
(A).
Remove bolts at support bracket on strut tower (arrows).
Disconnect electrical harness from bottom of secondary
air injection pump.
Remove mounting bracket from strut tower.
4 Remove ignition coils:
* Disconnect ignition coil harness connectors.
Remove coil mounting fasteners.
Remove coils.
* Remove ground straps.
CA UTIOI\C
Note location of all ground wires. Failure to reinstall grounds
can result in permanent damage to engine control module or
ignition system components.
Set coil harness to side of engine compartment
- Remove cylinder head cover mounting fasteners and remove
cylinder head cover.
NOTE-
The cylinder head cover mounting bolt insulators and gas-
ltets should be reinstalled in their original locations. Male
note of their arrangement during removal.
- Remove spark plugs
4 Remove oil baffle cover from above intake camshaft.
Page 237 of 1002
Downloaded from www.Manualslib.com manuals search engine
11 7 Camshaft Timing Chain
General ........................... .I I 7-2 Double VANOS System
Special tools ........................ .I 17-2 (M52 TU and M54 engines) ......... 11 7-34
Crankshaft Oil Seal, Front ........... I 17-6
Crankshaft oil seal, front,
replacing
(M52 engine) ................ .I1 7-6
Crankshaft oil seal, replacing
(M52 TU and M54 engines) ............ .I 17-9
Crankshaft oil seal, replacing
(M62 and M62 TU engines) ........... .I1 7-1 1
VANOS Control Unit and
Timing Chain
(M52 engine) ........ ,117-14
VANOS control unit, removing
(M52 engine) ...................... ,117-1 4
VANOS control unit, installing
(M52engine) ....................... 117-19
VANOS timing, checking and adjusting
(M52 engine) ...................... .I1 7-22
Timing chains, removing (M52 engine) . . ,117-26
Timing chain, installing (M52 engine) .... ,117-30
bouble VANOS system Tunctidn ........ 11 7-34
Double VANOS control unit ............ 117-36
VANOS control unit, removing
(M52 TU and M54 engines) ............ 11 7-37
VANOS control unit, installing
(M52 TU and M54 engines) ............ 1 17-41
VANOS timing, checking and adjusting
(M52 TU and M54 engines) ............ 1 17-43
Timing chains assembly
(M52 TU and M54 engines) ............ 1 17-50
Timing chains, removing
(M52 TU and M54 engines) ............ 11 7-51
Timing chains, installing
(M52 TU and M54 engines) ............ 11 7-57
Timing Chain (M62 engine to 9/98) . . 117-66
Timing chains, removing
(M62 engine to 9/98) ................. 11 7-66
Timing chains, installing
(M62 engine to 9/98) ................. 1 17-74
Camshaft timing, checking and adjusting
(M62engine) ....................... 117-79
Page 242 of 1002
Downloaded from www.Manualslib.com manuals search engine
Camshaft Timing Chain
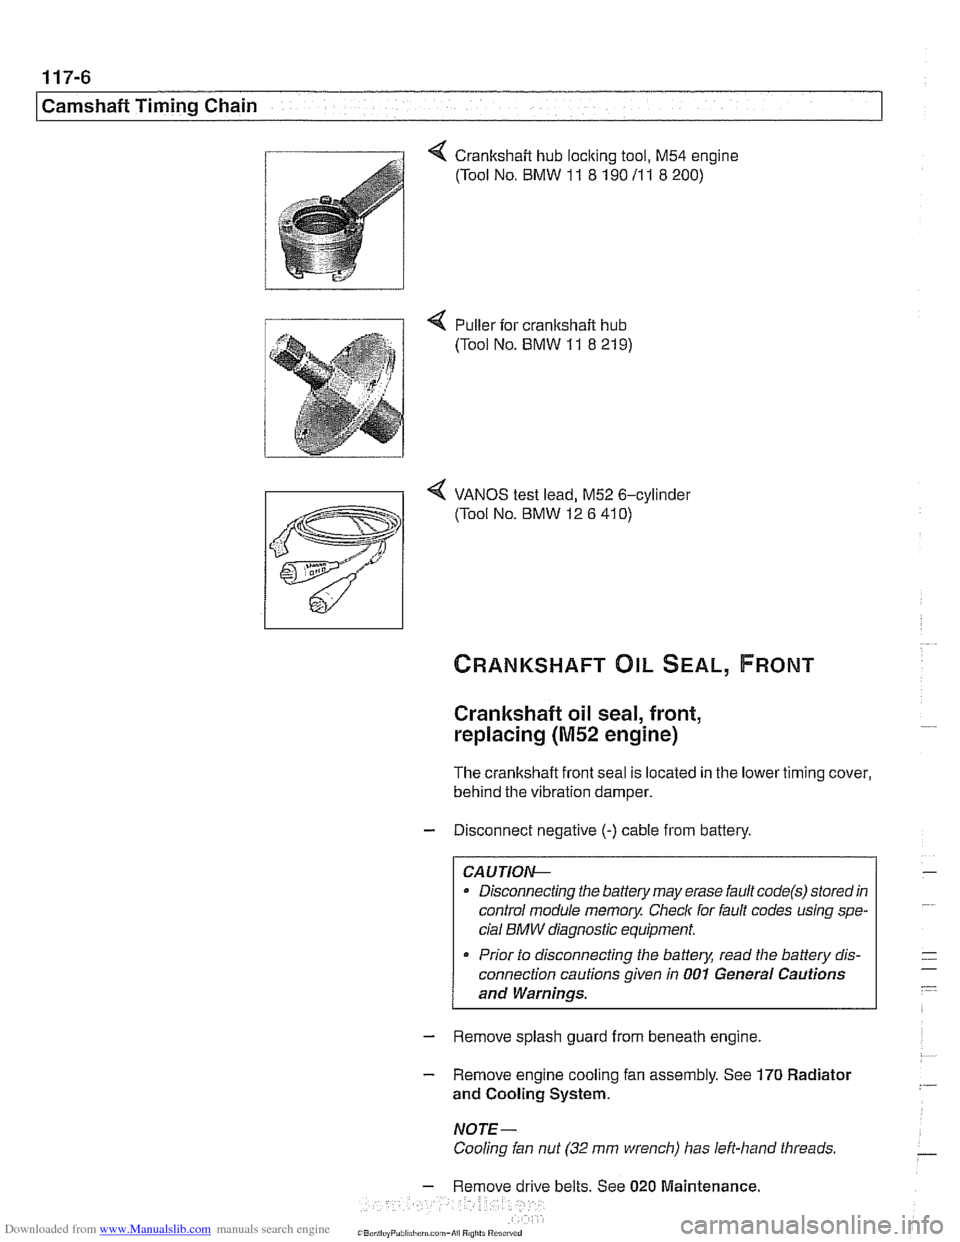
4 Crankshaft hub loclting tool. M54 engine
(Tool No.
BMW 11 8 190 11 1 8 200)
4 VANOS test lead, M52 6-cylinder
(Tool No.
BMW 12 6 410)
Crankshaft oil seal, front,
replacing
(M52 engine)
The crankshaft front seal is located in the lower timing cover,
behind the vibration damper.
- Disconnect negative (-) cable from battery.
CAUTIOIG
a Disconnecting the battery may erase fault code(s) stored in
control module memory Check
for fault codes using spe-
cial
BMW diagnostic equipment.
Prior to disconnecting the battery, read
the battery dis-
connection cautions given in
001 General Cautions
and
Warninqs.
- Remove splash guard from beneath engine.
- Remove engine cooling fan assembly. See 170 Radiator
and Cooling System.
NOTE-
Cooling ian nut (32 mm wrench) has left-hand threads.
- Remove drive belts. See 020 Maintenance.
,~R,~",,,~"P,,,,!,.,,,.,"?,,m-A,, P,",,,s
Page 245 of 1002
Downloaded from www.Manualslib.com manuals search engine
Camshaft Timing Chain
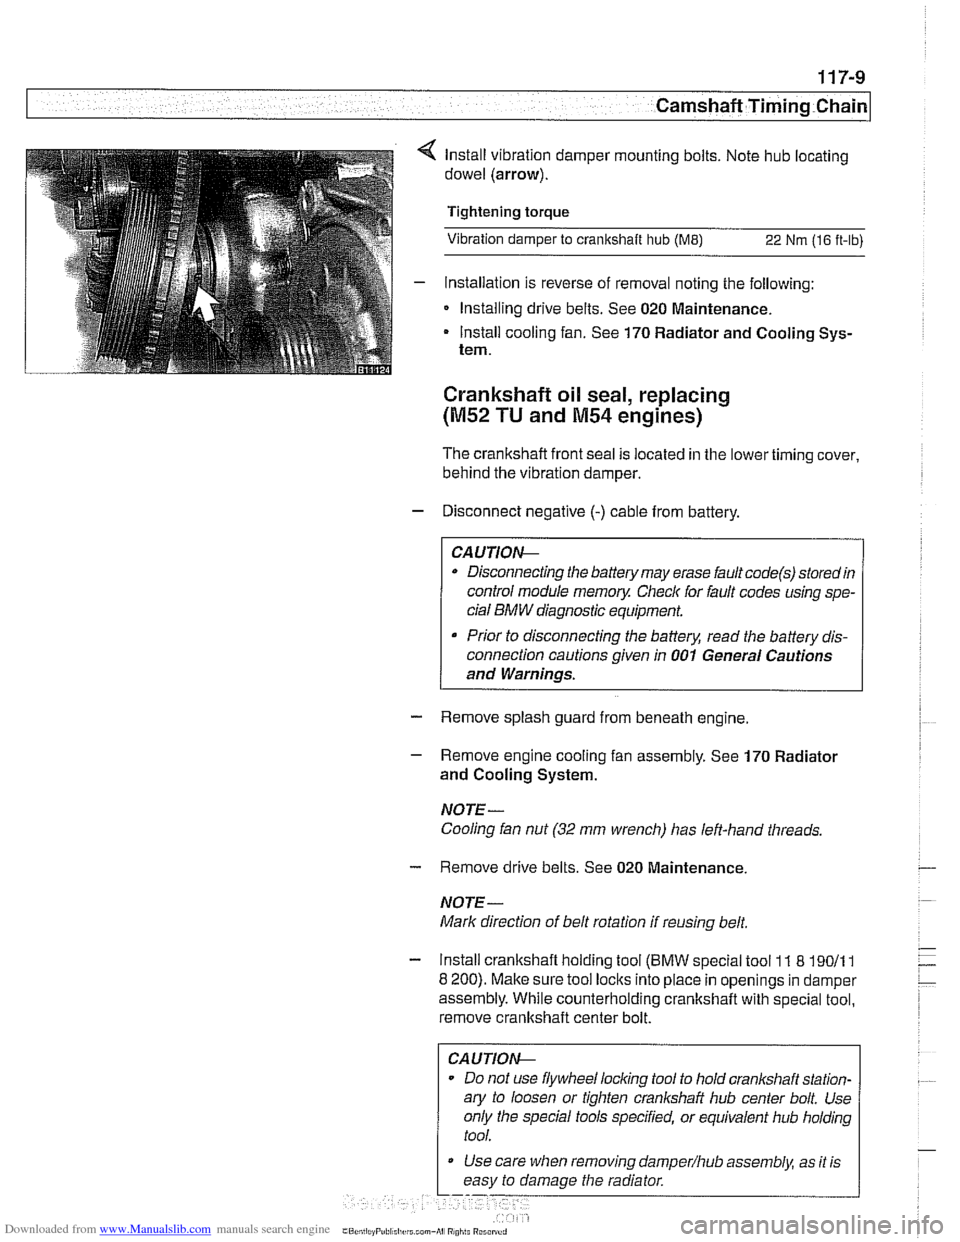
lnstall vibration damper mounting bolts. Note hub locating
dowel (arrow).
Tightening torque
Vibration damper to crankshaft hub
(ME) 22 Nm (16 ft-lb)
- Installation is reverse of removal noting the following:
Installing drive belts. See 020 Maintenance.
Install cooling fan. See 170 Radiator and Cooling Sys-
tem.
Crankshaft oil seal, replacing
(M52 TU and M54 engines)
The crankshafl front seal IS located in the lower timing cover,
behind the
vibrat~on damper.
- Disconnect negative (-) cable from battery.
Disconnecting the battery may erase fault
code(s) storedin
control module memoy Checlc for fault codes using spe-
cial
BMW diagnostic equipment.
Prior to disconnecting the battery, read the battery dis-
connection cautions given in
001 General Cautions
and Warnings.
- Remove splash guard from beneath engine
- Remove engine cooling fan assembly. See 170 Radiator
and Cooling System.
NOTE- Cooling fan nut
(32 mm wrench) has left-hand threads.
- Remove drive belts. See 020 Maintenance
NOTE-
Mark direction of belt rotation if reusing belt.
- Install crankshaft holding tool (BMW special tool 11 8 19011 1
8 200). Make sure tool locks into place in openings in damper
assembly. While counterholding crankshafl with special tool,
remove crankshaft center bolt.
CAUTIOI\C
Do not use flywheel locling tool to hold crankshaft station-
ary to loosen or tighten
cranl(shaft hub center bolt. Use
only the special tools specified, or equivalent hub holding
tool.
Use care when removing
damper/hub assembly, as ~t is
easy to damage the radiator