check engine BMW 528i 1998 E39 Owner's Manual
[x] Cancel search | Manufacturer: BMW, Model Year: 1998, Model line: 528i, Model: BMW 528i 1998 E39Pages: 1002
Page 60 of 1002
Downloaded from www.Manualslib.com manuals search engine
020-28
1 Maintenance
- When replacing fuel filter:
Use appropriate hose clamping device to clamp off filter
inlet and outlet hoses to lessen fuel spillage.
Loosen center clamping bracket and hose clamps on
either end of filter.
Note arrow or markings indicating direction of flow on
new filter.
Install new filter using new hose clamps
- Drain fuel filter from inlet side into a container and inspect
drained fuel.
Checlc for rust, moisture and contamination.
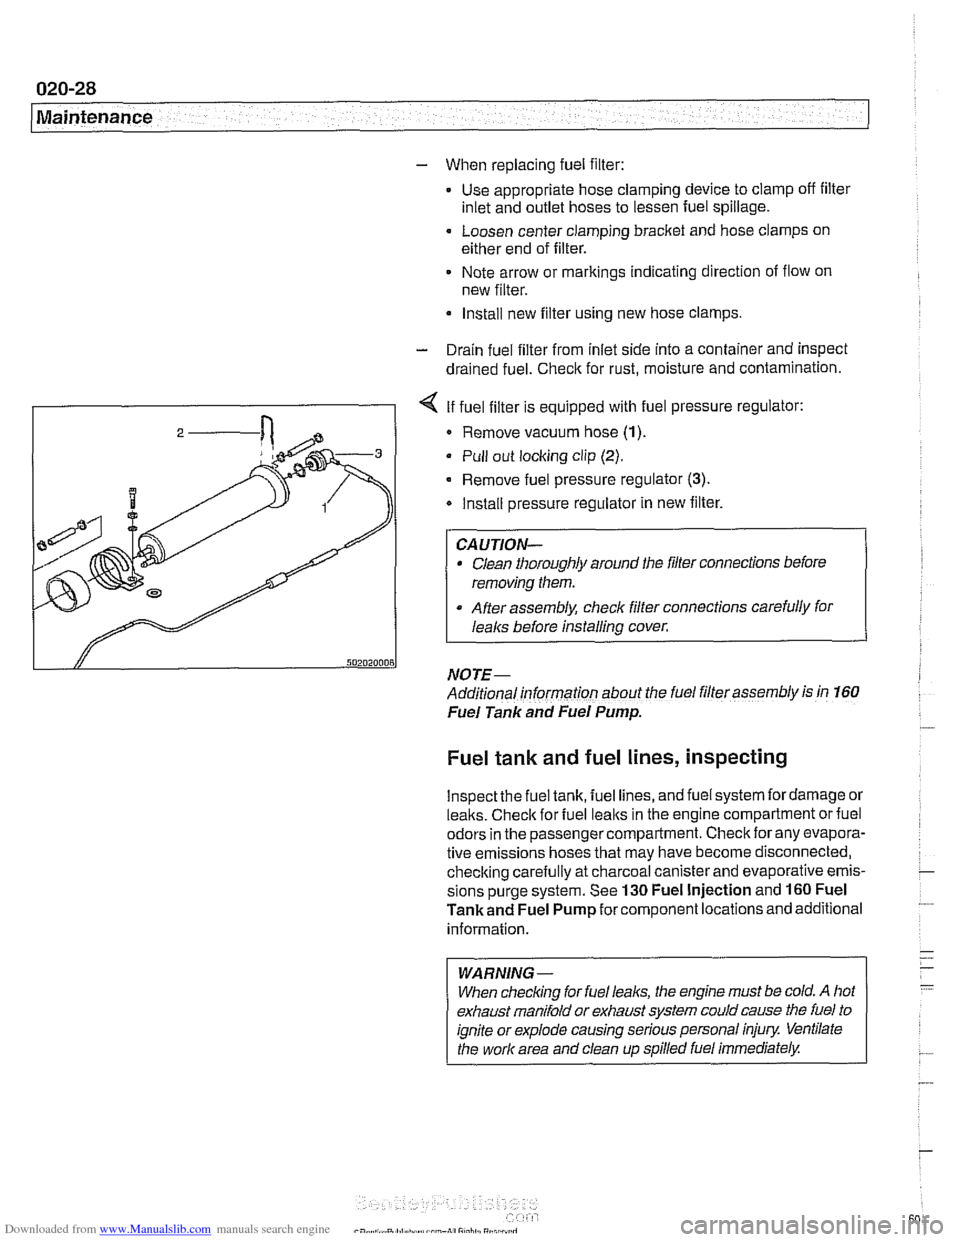
I - I < If fuel filter is equipped with fuel pressure regulator:
I 2 / Remove vacuum hose (1)
Pull out locking clip (2).
- Remove fuel pressure regulator (3).
Install pressure regulator in new filter.
Clean thoroughly around the filler connections before
removing them.
After assembly, check filter connections carefully for
I
I lealcs before installing cover.
NOTE- ~-
Additional informarion about the fuel filler assembly is in 160
Fuel Tank and Fuel Pump.
Fuel tank and fuel lines, inspecting
lnspectthe fuel tank, fuel lines, and fuel system fordamage or
lealts. Checlc for fuel lealts in the engine compartment or fuel
odors in the passenger compartment. Check for any evapora-
tive emissions hoses that may have become disconnected,
checking carefully at charcoal canister and evaporative emis-
sions purge system. See
130 Fuel Injection and 160 Fuel
Tankand Fuel Pump for component locations and additional
information.
WARNING-
When checlcing for fuel leal(s, the engine must be cold. A hot
exhaust manifold or exhaust system could cause the fuel to
ignite or explode causing serious personal injury Ventilate
the work area and clean up spilled fuel immediately.
Page 61 of 1002
Downloaded from www.Manualslib.com manuals search engine
Maintenance
Suspension, front, inspecting
Inspection of the front suspension and steering includes a
check of all moving parts
forwear and excessive play. Inspect
ball joint and tie-rod rubber seals and boots for cracks
ortears
that could allow the entry of dirt, water, and other
contaminants. See
310 Front Suspension.
Suspension, rear, inspecting
Differential and rear drive axle service consists of checking
and changing the gear oil, inspecting for leaks, and checking
the drive axle
CV joint boots for damage.
The areas where
lealts are most likely to occurare around the
drive shaft and drive axle mounting flanges. For more infor-
mation on identifying oil leaks and theircauses, see
330 Rear
Suspension and
331 Final Drive.
Tires, checking inflation pressure
Correct tire pressures are important to handling and stability,
fuel economy, and tire wear. Tire pressures change with tem-
perature. Pressures should be
checked oRen during season-
al temperature changes. Correct inflation pressures can be
found on the driver's door pillar and in the owner's manual.
Note that tire pressures should be higher when the car is
more heavily loaded.
WARNING-
Do not inflate any tire to a pressure higher than the tire's max-
imum inflation pressure listedon the sidewall. Use care when
adding air to warm tires. Warm tire pressures can increase as
much as
4 psi (0.3 bar) over their coldpressures.
Tires, rotating
BMW does not recommend tire rotation. Due to the car's sus-
pension design, the front tires begin to wear first at the outer
shoulder and the reartires begin to wearfirst at the middle of
the tread or inner shoulder. Rotating the tires may adversely
affect road handling and tire grip.
Transmission service, automatic
The automatic transmissions installed in E39 models are
filled with special automatic transmission fluid. The transmis-
sion lubricant type can be found on the "type-plate" on the
side of the transmission. The recommended lubricants are
listed earlier in this repair group. See Fluids and lubricants.
If in doubt, consult an authorized BMW dealer for alternate
Page 62 of 1002
Downloaded from www.Manualslib.com manuals search engine
020-30
Maintenance
fluid use and the most-up-to-date information regarding
transmission operating fluids.
The automatic transmission is not equipped with a dipstick.
Therefore, checking the ATF level is an involved procedure
which includes measuring and maintaining a specified ATF
temperature during the checking procedure.
For more complete
ATF service information, including
checking
ATF level and ATF filter replacement procedures,
see
240 Automatic Transmission.
Transmission service, manual
Manual transmission service consists of inspecting for leaks
and checking the fluid. Evidence of transmission leaks is
like-
ly to be seen around the driveshaft mounting flange and at the
bottom of the bellhousing.
NOTE-
For more information on identifying oil
leaks and their
causes, see 230 Manual Transmission and210 Clutch.
Transmission fluid, checking and filling
(manual transmission)
Tne manual transmss'on inslalleo 'n rne E39 models s f;lled
with a special liierime iluid (ivlTF-LT-I). oi. ordinarily
does
not need to be changed.
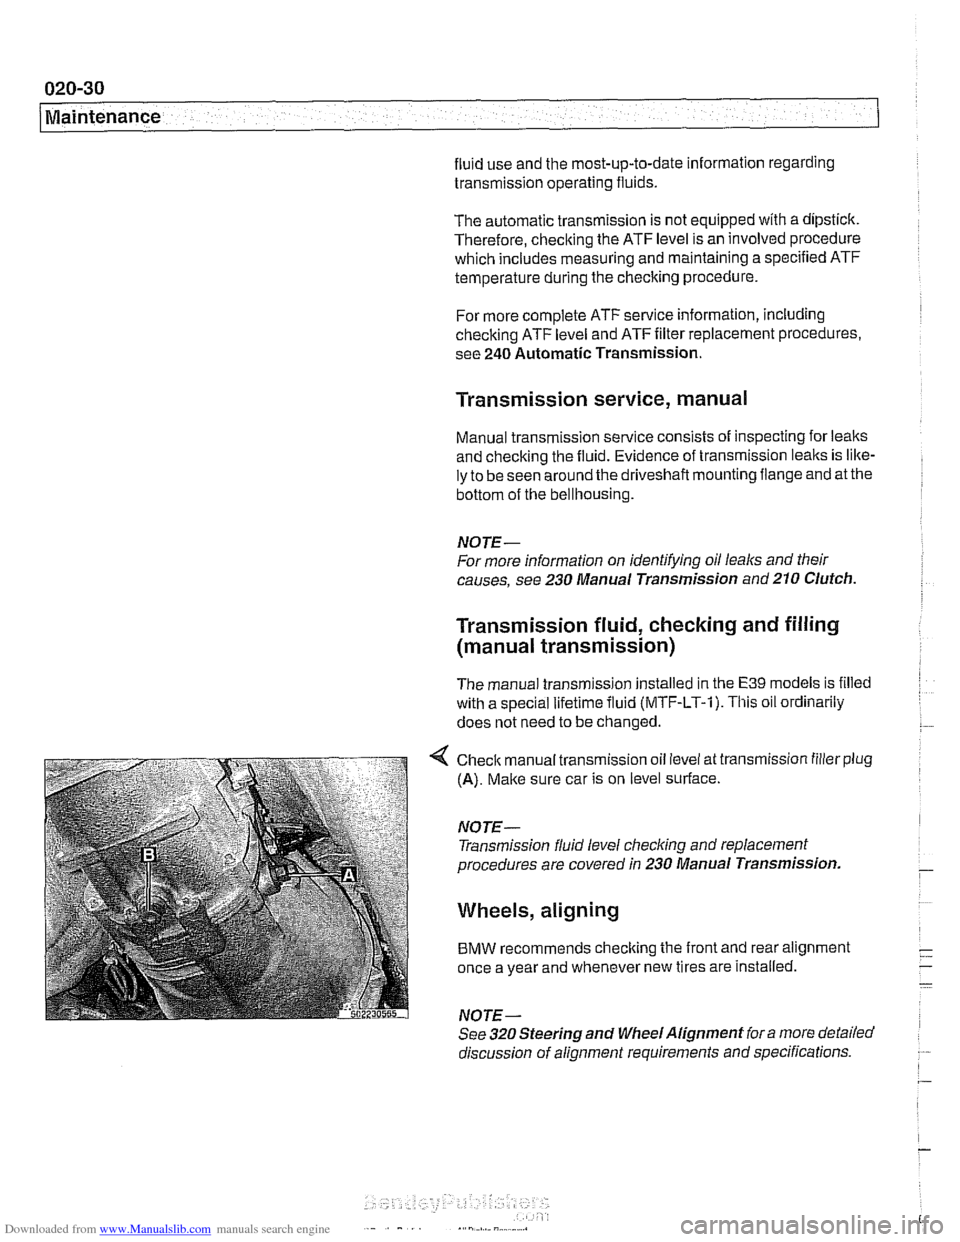
< Check manual transmission oil level at transmission filler plug
(A). Make sure car is on level surface.
NOTE- Transmission fluid level
checking and replacement
procedures are covered in 230 Manual Transmission.
Wheels, aligning
BMW recommends checking the front and rear alignment
once a year and whenever new tires are installed.
NOTE-
See 320 Steering and Wheel Alignment for a more detailed
discussion of alignment requirements and specifications.
Page 71 of 1002
Downloaded from www.Manualslib.com manuals search engine
Two common causes of driveability problems are incorrect
system voltage and bad grounds.
System voltage
Digital motor electronics (DME) requires that the system (bat-
tery) voltage be maintained within a narrow range of DC volt-
age.
DC voltage levels beyond or below the operating range,
or any
AIC voltage in the electrical system can cause havoc.
When troubleshooting an illuminated MIL, make sure the bat-
tery is fully charged and capable of delivering all its power to
the electrical system. An undercharged battery can amplify
AIC alternator output ripple.
To
make a quick check of the battery charge, measure the
voltage across the battery terminals with all cables attached
and the ignition off.
Afully charged battery will measure 12.6
volts or slightly more, compared to 12.1 5 volts for a battery
with a 25% charge.
The DME system operates at low voltage and current levels,
making it sensitive to small increases in resistance. The elec-
trical system is routinely subjected to corrosion, vibration and
wear, so faults or corrosion in the wiring harness and connec-
tors are not uncommon. Check the battery terminals
forcorro-
sion or loose cable connections. See 121 Battery, Starter,
Alternator for additional information.
If a battery cable connection has no
v~sible faults but is still
suspect, measure the voltage drop across the connection. A
large drop indicates excessive resistance, meaning that the
connection is corroded, dirty, or damaged. Clean or repairthe
connection and retest.
NOTE-
For instructions on conducting a voltage drop test and other
general electrical troubleshooting information, see
600 Elec-
trical System-General.
Visually inspect all wiring, connectors, switches and fuses in
the system. Loose or damaged connectors can cause inter-
mittent problems, especially the small terminals in the ECM
connectors. Disconnect the wiring harness connectors to
check for corrosion, and use electrical cleaning spray to re-
move contaminants.
Main grounds
Good grounds are critical to proper DME operation. If a
ground connection has no visible faults but is still suspect.
measure the voltage drop across the connection. A large volt-
age drop means high resistance. Clean or repair the connec-
tion and retest.
LBuntr.yP~sbhnllcn.can#-AII A,~iltl Rcsrwsd
Page 75 of 1002
Downloaded from www.Manualslib.com manuals search engine
110-3
Engine Removal and lnstallationl
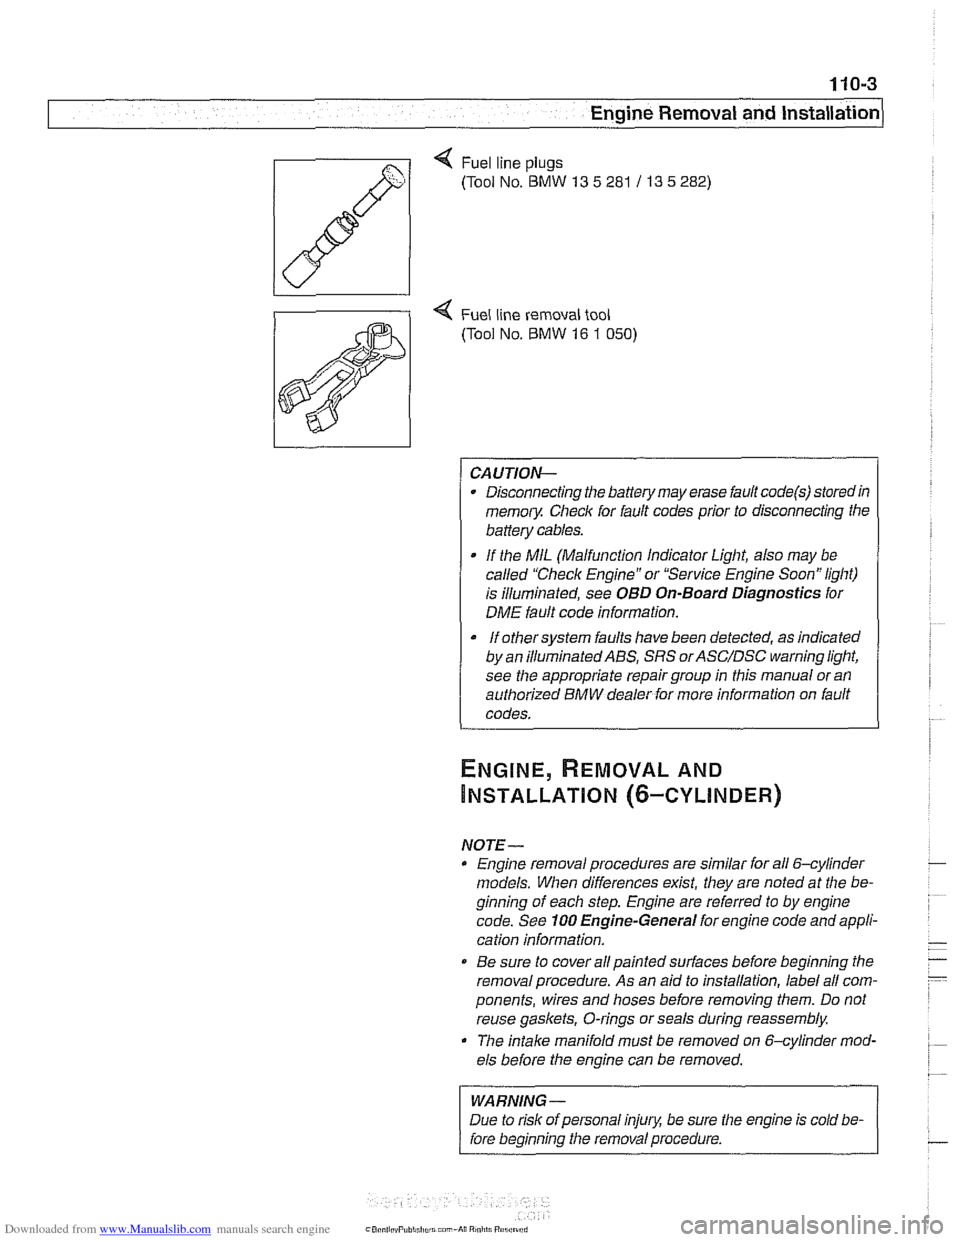
Q Fuel line plugs
(Tool No.
BMW 13 5 281 / 13 5 282)
4 Fuel line removal tool
(Tool No.
BMW 16 1 050)
CAUTION-
Disconnecting the battery may erase fault code@) storedin
memoiy Check for fault codes prior to disconnecting the
battery cables.
If the MIL (Malfunction Indicator Light, also may be
called "Check Engine" or "Service Engine Soon" light)
is illuminated, see
OBD On-Board Diagnostics for
DME fault code information.
It orhersysrem faults have been detected, as indicated I
by an ~llum~nated ABS, SRS orASC/DSC ~arning light,
see the appropriate repair group in this manual or an
authorized BMW dealer for more information on fault
codes.
NOTE- Engine removal procedures are similar for all 6-cylinder
models. When differences
exist, they are noted at the be-
ginning of each step. Engine are referred to by engine
code. See
100 Engine-General for engine code and appli-
cation information.
@ Be sure to cover all painted surfaces before beginning the
removal procedure. As an aid to installation, label all com-
ponents, wires and hoses before removing them. Do not
reuse
gaskets, O-rings or seals during reassembly.
The
intake manifold must be removed on &cylinder mod-
els before the engine can be removed.
WARNING-
Due to risk of personal injury, be sure the engine is cold be-
fore beginning the removal procedure.
Page 82 of 1002
Downloaded from www.Manualslib.com manuals search engine
.-
-6val and Installation -
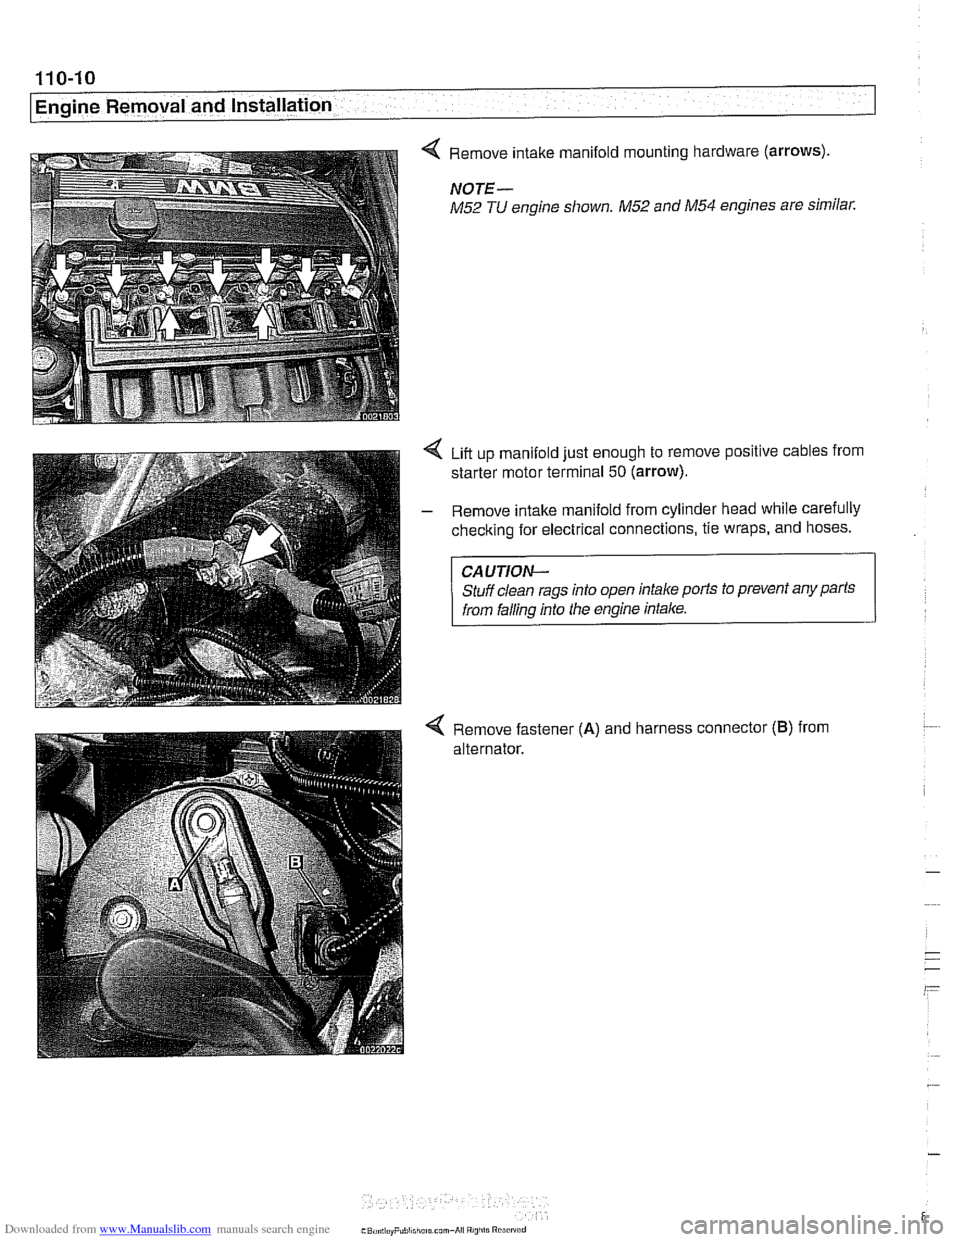
< Remove intake manifold mounting hardware (arrows).
NOTE-
M52 TU engine shown. M52 and M54 engines are similar.
Liit up manifold just enough to remove positive cables from
starter motor terminal
50 (arrow).
- Remove intake manifold from cylinder head while carefully
checking for electrical connections, tie wraps, and hoses.
CAUTION-
Stuff clean rags into open intake ports to prevent any parts
from falling into the engine intake.
4 Remove fastener (A) and harness connector (B) from
alternator.
Page 86 of 1002
Downloaded from www.Manualslib.com manuals search engine
110-14
I Engine Removal and Installation
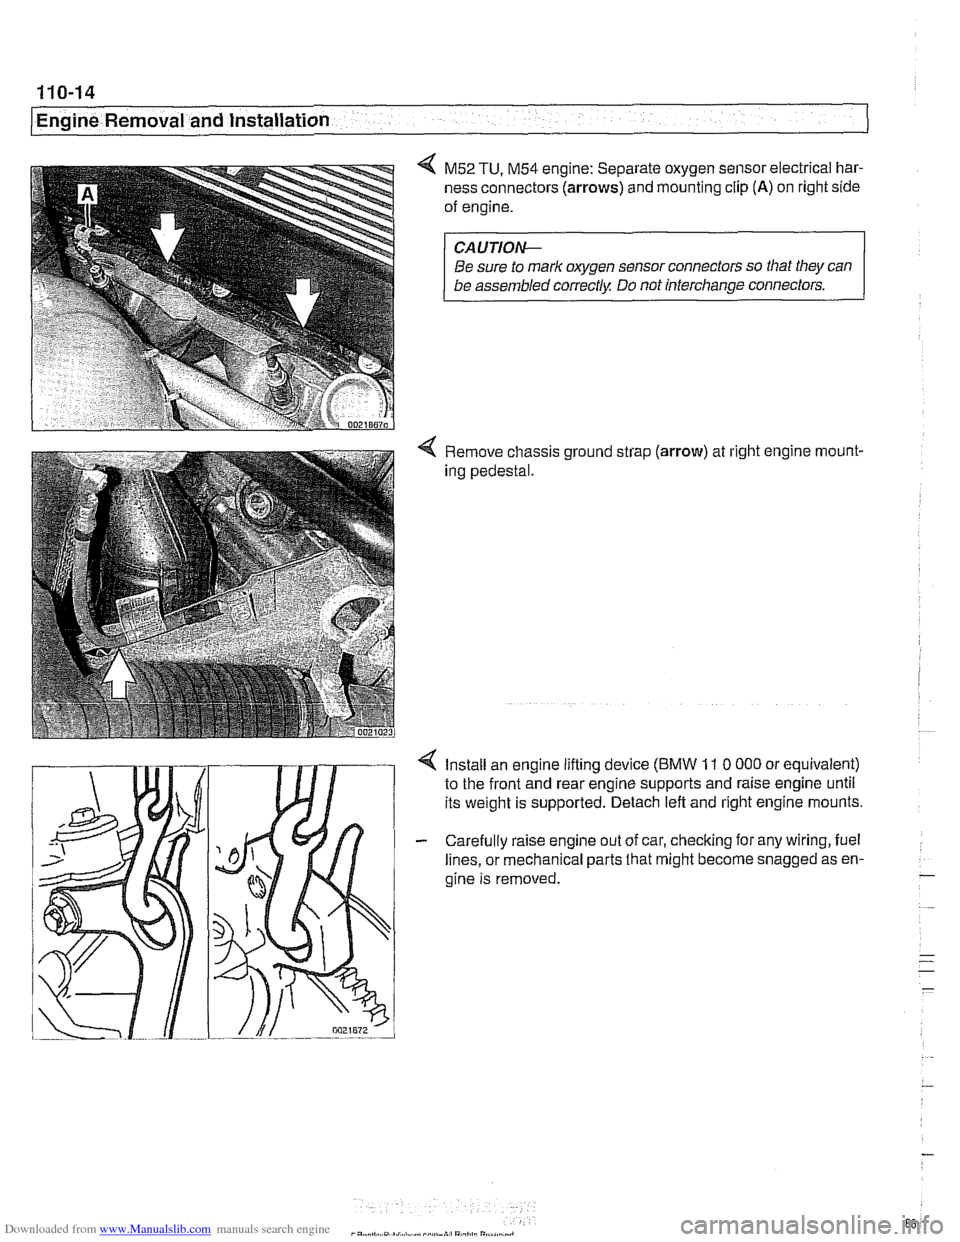
4 M52 TU, M54 engine: Separate oxygen sensor electrical har-
ness connectors
(arrows) and mounting clip (A) on right side
of engine.
CA UTIOW
Be sure to mark oxygen sensor connectors so that they can
be assembled correctly Do not interchange connectors.
4 Remove chassis ground strap (arrow) at right engine rnount-
ing pedestal.
4 Install an engine lifting device (BMW 11 0 000 or equivalent)
to the front and rear engine supports and raise engine until
its weight is supported. Detach left and right engine mounts.
- Carefully raise engine out of car, checking for any wiring, fuel
lines, or mechanical parts that might become snagged as en-
gine is removed.
-
. ..
- .- -
-
Page 87 of 1002
Downloaded from www.Manualslib.com manuals search engine
110-15
Engine Removal and lnstallation
- Installation is reverse of removal, noting the following:
Replace all gaskets. O-rings and seals.
Use new fuel injector seals
Check that engine drive belts properly engage pulley
grooves.
Inspect O-ring seal between mass air flow sensor and air
filter housing. To facilitate reassembly, coat seal with acid-
free grease.
Change engine oil and filter and
check all other fluid levels.
See
020 Maintenance.
Refill and bleed cooling system. See
170 Radiator and
Cooling System.
CAUTION--
When reattaching throttle assembly harness connectoc con-
nector is
fuNy tightened when arrows on connector and plug
line up.
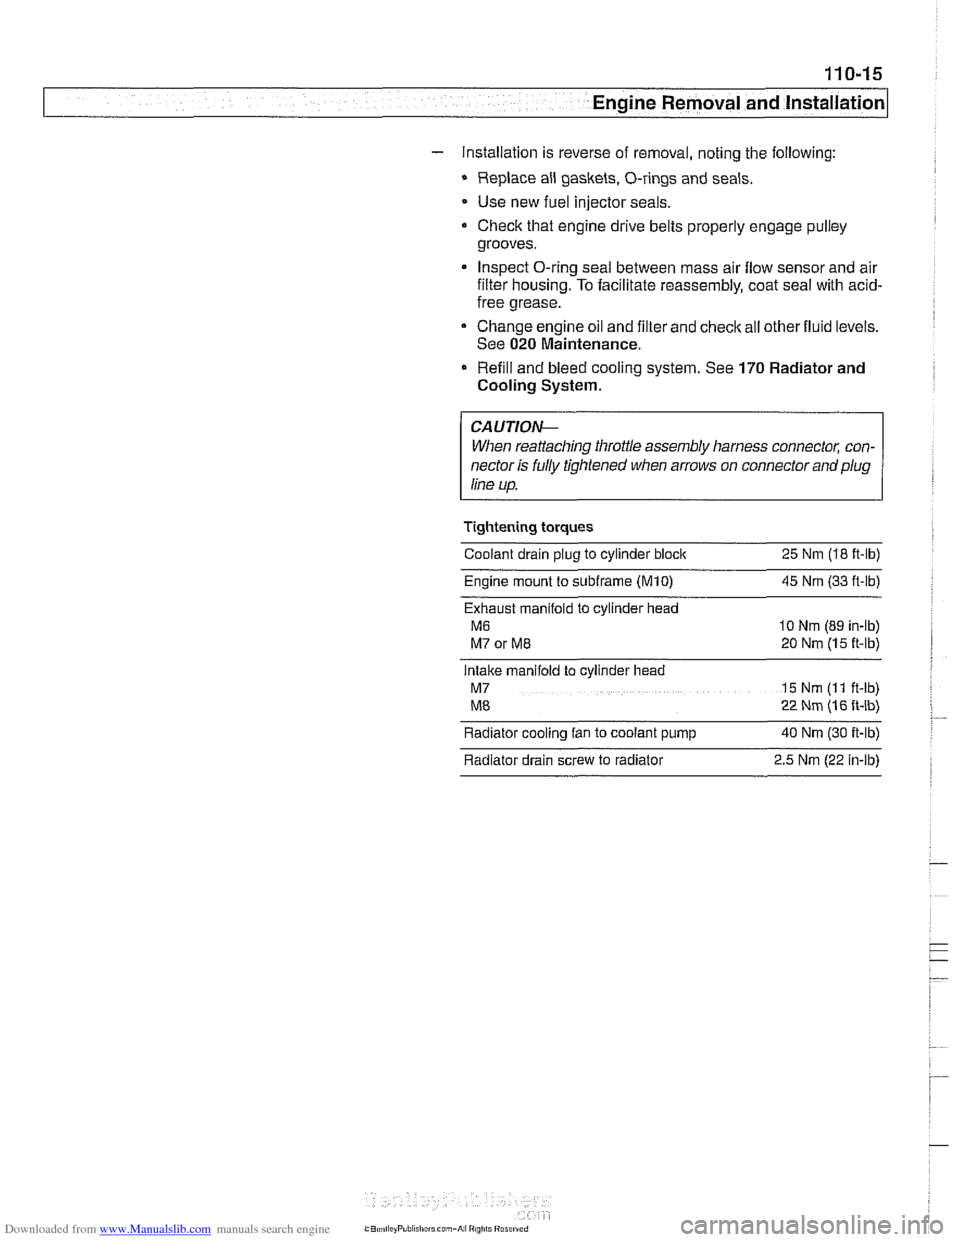
Tightening torques
Coolant drain plug to cylinder block
25 Nm (18 ft-lb)
Engine mount to
subframe (M10) 45 Nm (33 ft-ib)
Exhaust manifold to cylinder head
M6 10 Nm (89 in-lb)
M7 or ME 20 Nm (15 ft-lb)
Intake manifold to cylinder head
M7 15 Nm (I 1 ft-lb)
ME 22 Nm (16 ft-lb)
Radiator cooling fan to coolant pump
40 Nm (30 ft-lb)
Radiator drain screw to radiator
2.5 Nm (22 in-lb)
Page 93 of 1002
Downloaded from www.Manualslib.com manuals search engine
--
-- Engine Removal and installation' -
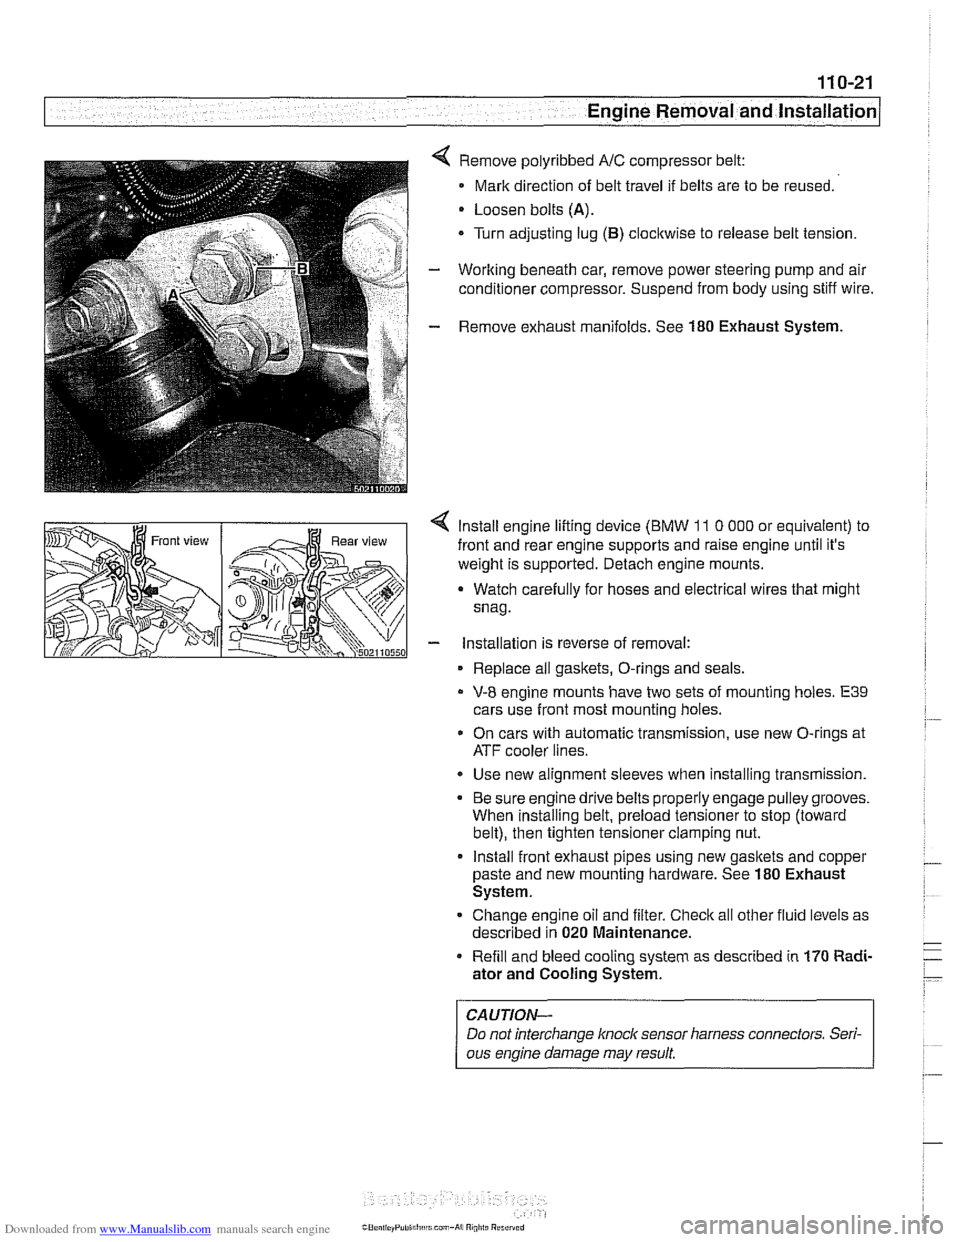
Remove polyribbed A/C compressor belt:
Mark direction of belt travel if belts are to be reused.
Loosen bolts
(A).
Turn adjusting lug (B) clocltwise to release belt tension.
Working beneath car, remove power steering pump and air
conditioner compressor. Suspend from body using stiff wire.
Remove exhaust manifolds. See
180 Exhaust System.
< lnstall engine lifting device (BMW 11 0 000 or equivalent) to
front and rear engine supports and raise engine until it's
weight is supported. Detach engine mounts.
a Watch carefully for hoses and electrical wires that might
snag.
- installation is reverse of removal:
Replace all gaskets, O-rings and seals.
V-8 engine mounts have two sets of mounting holes. E39
cars use front most mounting holes.
* On cars with automatic transmission, use new O-rings at
ATF cooler lines.
Use new alignment sleeves when installing transmission.
Be sure engine drive belts properly engage pulley grooves.
When installing belt, preload tensioner to stop (toward
belt), then tighten tensioner clamping nut.
lnstall front exhaust pipes using new gasltets and copper
paste and new mounting hardware. See
180 Exhaust
System.
Change engine oil and filter. Check all other fluid levels as
described in
020 Maintenance.
Refill and bleed cooling system as described in
170 Radi-
ator and Cooling System.
CAUTION-
Do not interchange knoclc sensor harness connectors. Seri-
ous engine damage may result
Page 95 of 1002
Downloaded from www.Manualslib.com manuals search engine
113-1
11 3 Cylinder Head
Removal and Installation
General ........................... .I 13-2
Special tools ........................ .I 13-2
Diagnostic Testing. ................ .I1 3-5
Cylinder compression, checking ......... ,113-5
Wet compression test ................. .I1 3-7
Cylinder leak-down test. ................ 11 3-8
Cylinder Head Removal and Installation
(M52 Engine) ...................... .I1 3-8
Cylinder head, removing, M52 engine .... ,113-8
Cylinder head, installing, M52 engine ... ,113-17
Cylinder Head Removal and Installation
(M52 TU and M54 Engines). ........ ,113-22
Cylinder head, removing, M52 TU
and
M54 engines. ................... .I1 3-22
Cylinder head, installing, M52 TU
and
M54 engine. .................... .I1 3-39
Double VANOS Timing
Chain Components
................ 11 3-46
Double VANOS timing chain components,
installing,
M52 TU and M54 engines ..... 113-46
Cylinder Head Removal and Installation
(M62 Engine). ..................... 11 3-56
Intake manifold, removal and installation,
M62 engine. ........................ 11 3-66
Left cylinder head, removing,
M62 engine. ........................ 11 3-61
Left cylinder head, installing,
M62 engine. ........................ 11 3-66
Right cylinder head, removing,
M62 engine ........................ 11 3-72
Right cylinder head, installing,
M62 engine ........................ 11 3-77