check engine BMW 528i 1998 E39 Service Manual
[x] Cancel search | Manufacturer: BMW, Model Year: 1998, Model line: 528i, Model: BMW 528i 1998 E39Pages: 1002
Page 147 of 1002
Downloaded from www.Manualslib.com manuals search engine
Cylinder Head Removal and Installation /
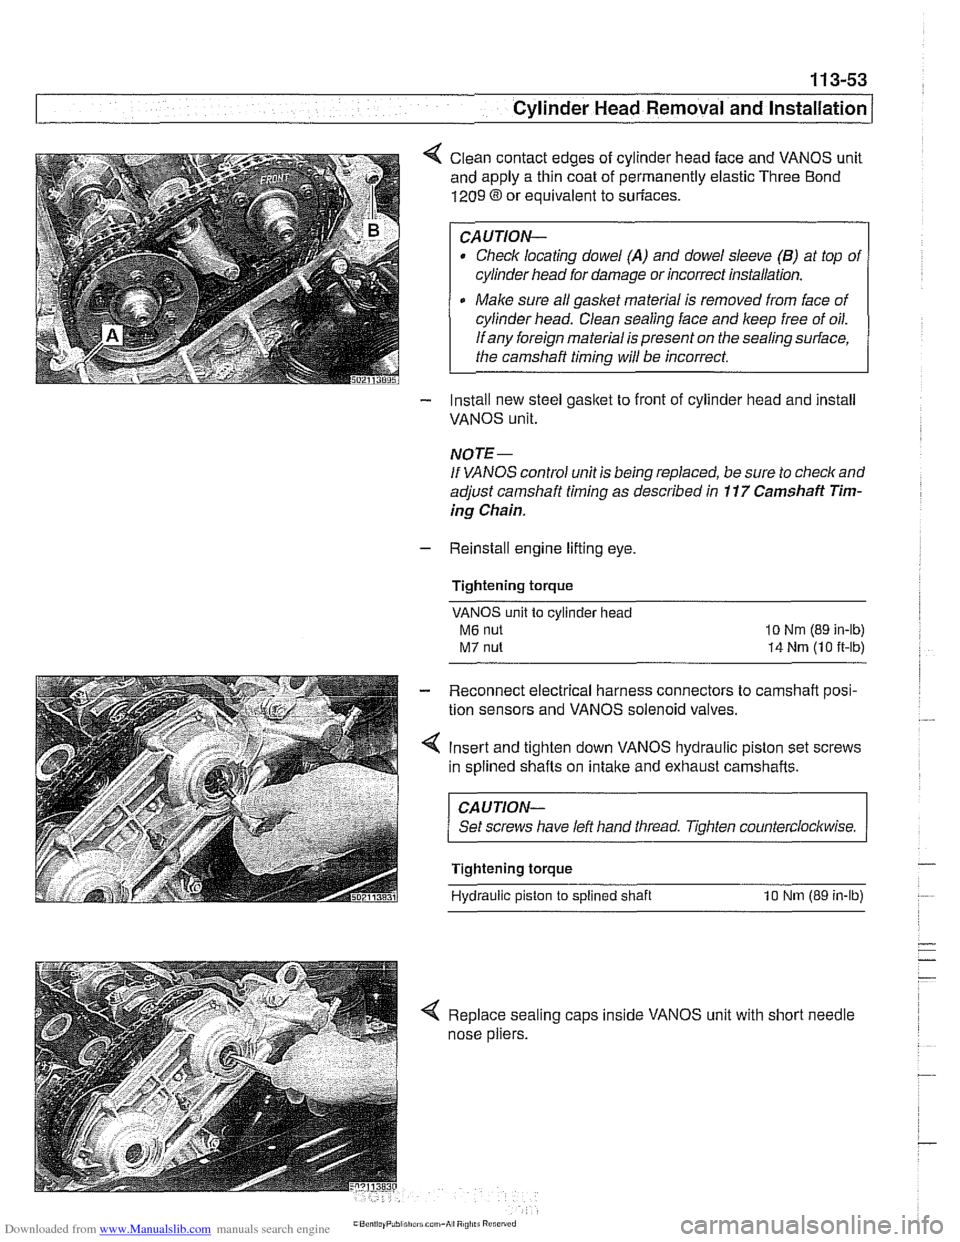
< Clean contact edges of cylinder head face and VANOS unit
and apply a thin coat of permanently elastic Three Bond
1209 8 or equivalent to suriaces.
CAUTION-
Check locating dowel (A) and dowel sleeve (B) at top of
cylinder head for damage or incorrect installation.
Make sure all gasket material is removed from face of
cylinder head. Clean sealing face and keep free of oil.
If any foreign material is present on the sealing surface,
the camshaft timing will be incorrect.
- Install new steel gasket to front of cylinder head and install
VANOS unit.
NOTE -
If VANOS control unit is being replaced, be sure to check and
adjust camshaft timing as described in
11 7 Camshaft Tim-
ing Chain.
- Reinstall engine lifting eye.
Tightening torque
VANOS unit to cylinder head
M6 nut
M7 nut
lo Nm (89 in-lb)
14 Nrn (10 it-lb)
- Reconnect electrical harness connectors to camshaft posi-
tion sensors and VANOS solenoid valves.
4 Insert and tighten down VANOS hydraulic piston set screws
in splined shafts on
intake and exhaust camshafts.
CAUJION-
Set screws have left hand tliread. Tighten counterclockwise.
Tightening torque
Hydraulic piston
to splined shaft 10 Nm (89 in-lb)
< Replace sealing caps inside VANOS unit with short needle
nose pliers.
Page 148 of 1002
Downloaded from www.Manualslib.com manuals search engine
. ." ".
[Cylinder Head Removal and Installation - .. - -1 -
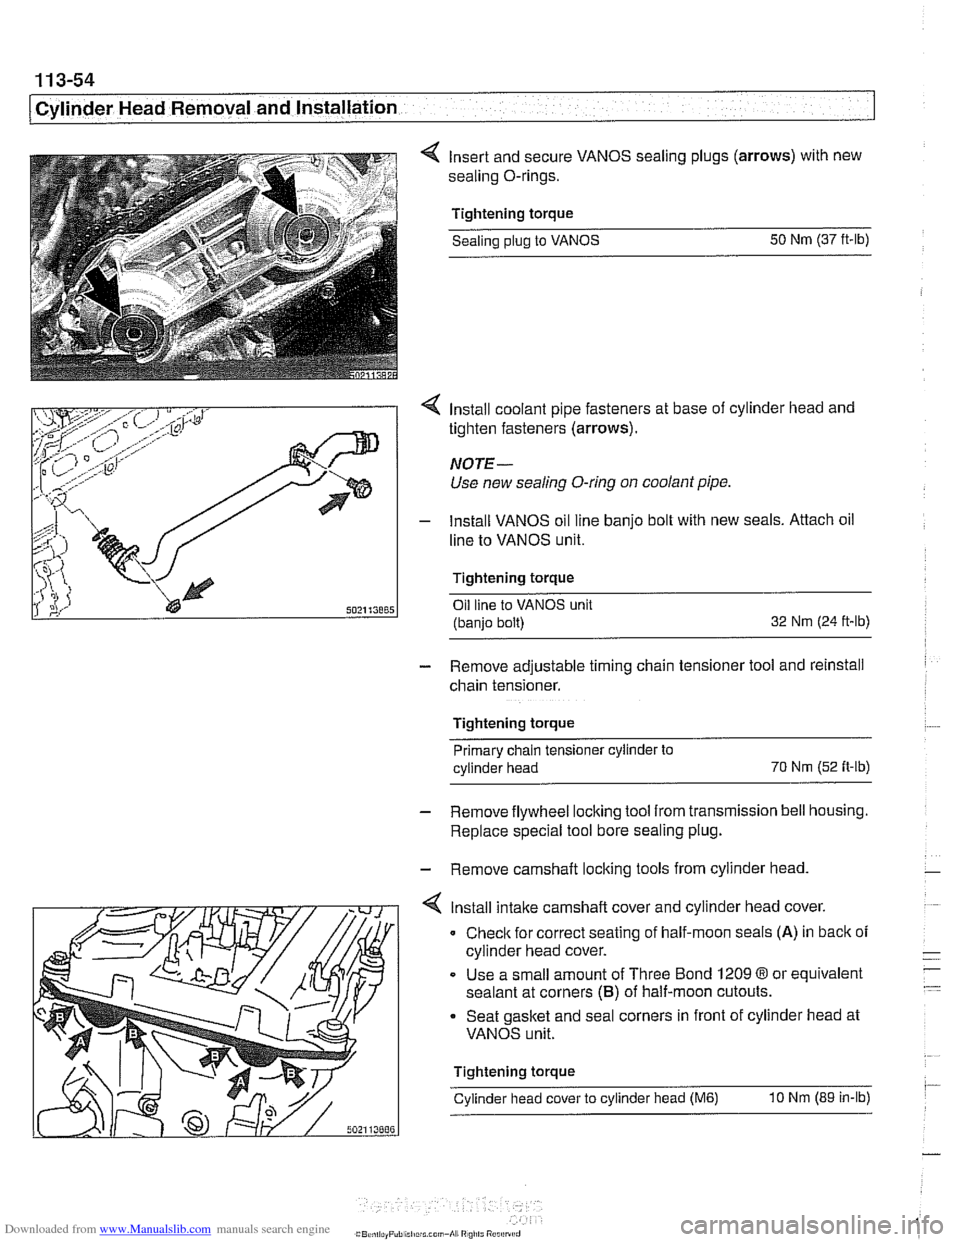
4 Insert and secure VANOS sealing plugs (arrows) with new
sealing O-rings.
Tightening torque Sealing
plug to VANOS 50
Nm (37 ft-lb)
4 Install coolant pipe fasteners at base of cylinder head and
tighten fasteners (arrows).
NOTE-
Use new sealing O-ring on coolant pipe.
- lnstall VANOS oil line banjo bolt with new seals. Attach oil
line to VANOS unit.
Tightening torque Oil line to VANOS unit
(banjo bolt) 32
Nm (24 ft-ib)
- Remove adjustable timing chain tensioner tool and reinstall
chain tensioner.
Tightening torque Primary chain tensioner cylinder to
cylinder head 70
Nm
(52 fi-ib)
- Remove flywheel locking tool from transmission bell housing.
Replace special tool bore sealing plug.
- Remove camshaft locking tools from cylinder head
4 lnstall intake camshaft cover and cylinder head cover.
0 Check for correct seating of half-moon seals (A) in back of
cylinder head cover.
Use a small amount of Three Bond
1209 8 or equivalent
sealant at corners
(B) of half-moon cutouts.
Seat gasket and seal corners in front of cylinder head at
VANOS unit.
Tightening torque
Cylinder head cover to cylinder head
(M6) 10 Nm (89 in-lb)
Page 149 of 1002
Downloaded from www.Manualslib.com manuals search engine
Cylinder Head Removal and Installation
- Install exhaust manifolds using new gaskets and nuts. Coat
manifold studs with copper paste prior to installing nuts.
Tightening torque Exhaust
maniiold to cylinder head (M7)
20 Nm (15 ft-lb)
- Install electrical harness connectors for oil pressure sender
and coolant temperature sensor before installing
intalte man-
ifold.
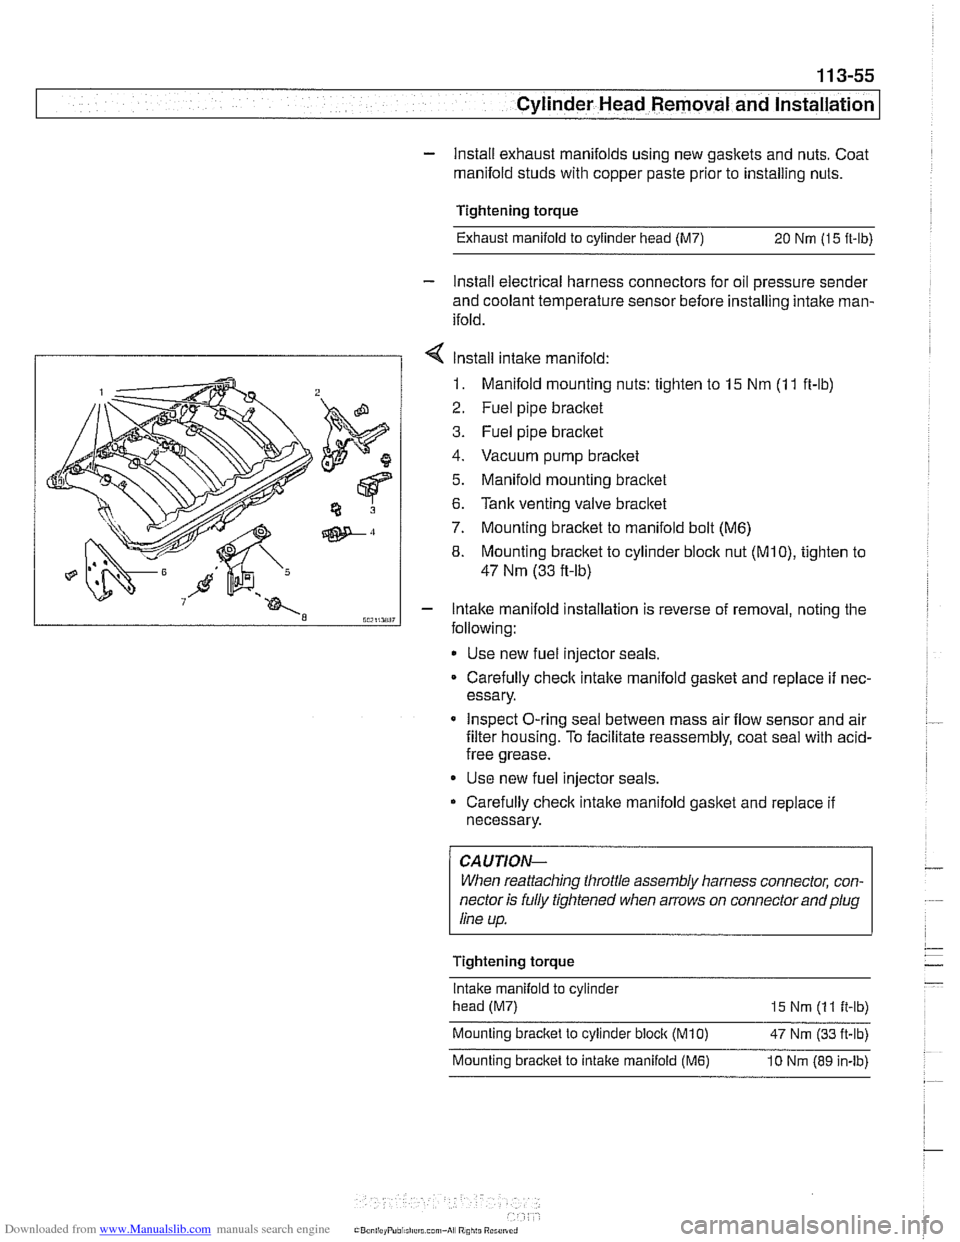
7 Install intake manifold:
1. Manifold mounting nuts: tighten to 15 Nm (1 1 ft-lb)
2. Fuel pipe bracltet
3. Fuel pipe bracltet
4. Vacuum pump bracltet
5. Manifold mounting bracltet
6.
Tank venting valve bracltet
7. Mounting bracket to manifold bolt (M6)
8. Mounting bracket to cylinder block nut (MIO), tighten to
47 Nm (33 fi-lb)
Intake manifold installation is reverse of removal, noting the
following:
* Use new fuel injector seals.
Carefully
check intake manifold gasket and replace if nec-
essary.
Inspect O-ring seal between mass air flow sensor and air
filter housing. To facilitate reassembly, coat seal with
acid-
free grease.
Use new fuel injector seals.
Carefully check intake manifold gasket and replace if
necessary.
CA UTIOPI-
When reattaching throttle assembly harness connector, con-
nector is fully tightened when arrows on connector
andplug
line up.
Tightening torque
lntalte manifold to cylinder
head (M7)
15 Nm (1 1 it-lb) ~ ~- Mounting bracket to cylinder bloclt (M10) 47 Nm (33 ft-lb)
Mounting bracket to intake manifold (MI?) 10 Nm (89 in-lb)
Page 155 of 1002
Downloaded from www.Manualslib.com manuals search engine
11 3-61
Cylinder Head Removal and installation I
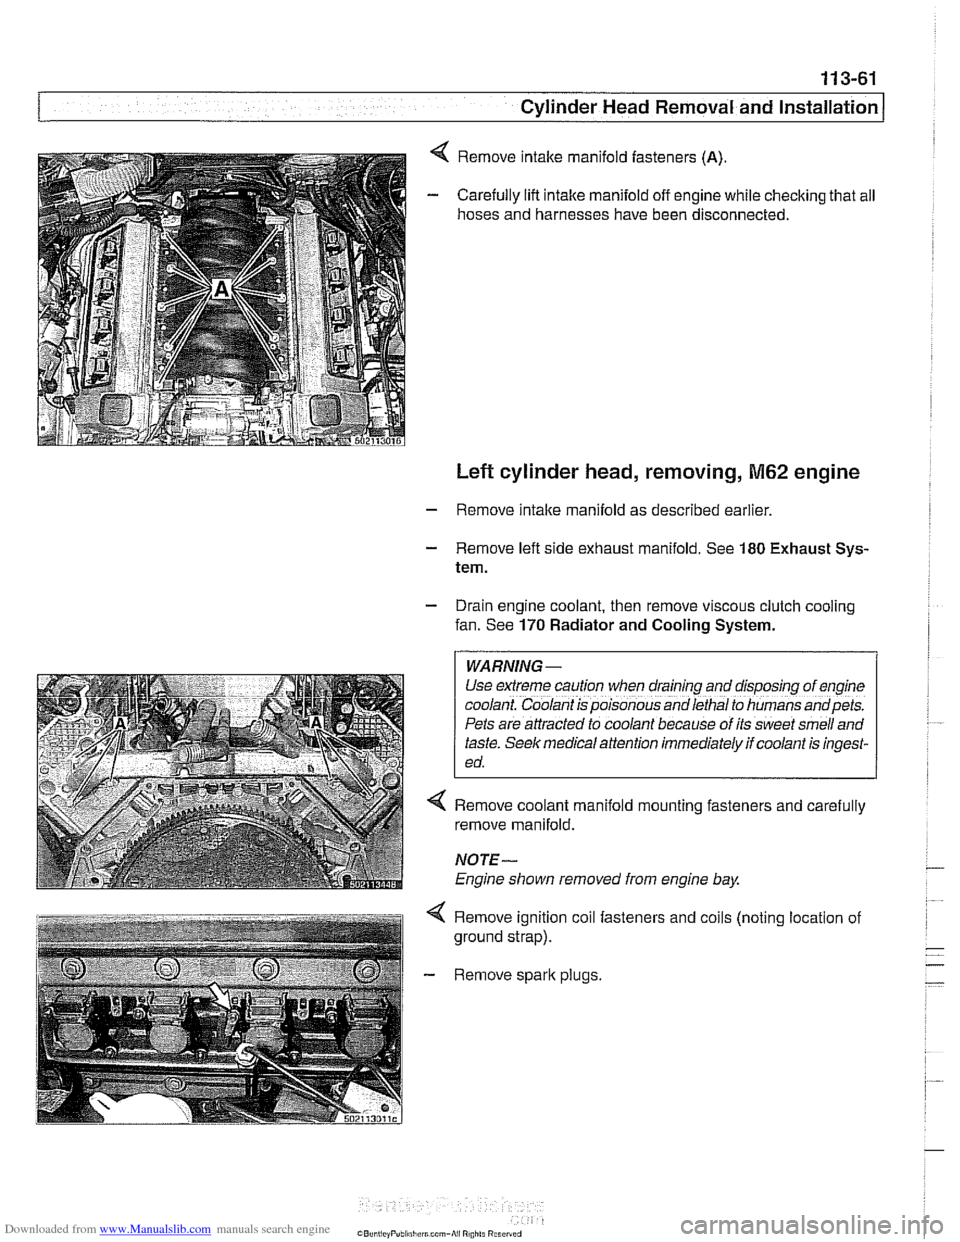
Remove intake manifold fasteners (A).
Carefully lift intake manifold off engine while checking that all
hoses and harnesses have been disconnected.
Left cylinder head, removing, M62 engine
- Remove intake manifold as described earlier
- Remove left side exhaust manifold. See 180 Exhaust Sys-
tem.
- Drain engine coolant, then remove viscous clutch cooling
fan. See
170 Radiator and Cooling System.
WARNING -
Use extreme caution when draining and disposfng of eng~ne
coolant. Coolant is poisonous and lethal to humans andpets.
Pets are attracted to coolant because of its sweet smell and
taste.
Seek med~cal attention immediately if coolant is ingest-
ed.
4 Remove coolant manifold mounting fasteners and carefully
remove manifold.
NOTE-
Engine shown removed from engine bay
4 Remove ignition coil fasteners and coils (noting location of
ground strap).
- Remove spark plugs.
Page 160 of 1002
Downloaded from www.Manualslib.com manuals search engine
. .- --
I Cylinder Head Removal and Installation
- Evaluate cylinder head as described in 116 Cylinder head
and valvetrain.
Left cylinder head, installing, M62 engine
- Clean cylinder head and block sealing surfaces of gasket
debris, making sure no debris drops into coolant or oil pas-
sages.
- Clean cylinder head bolt holes and check condition of
threads.
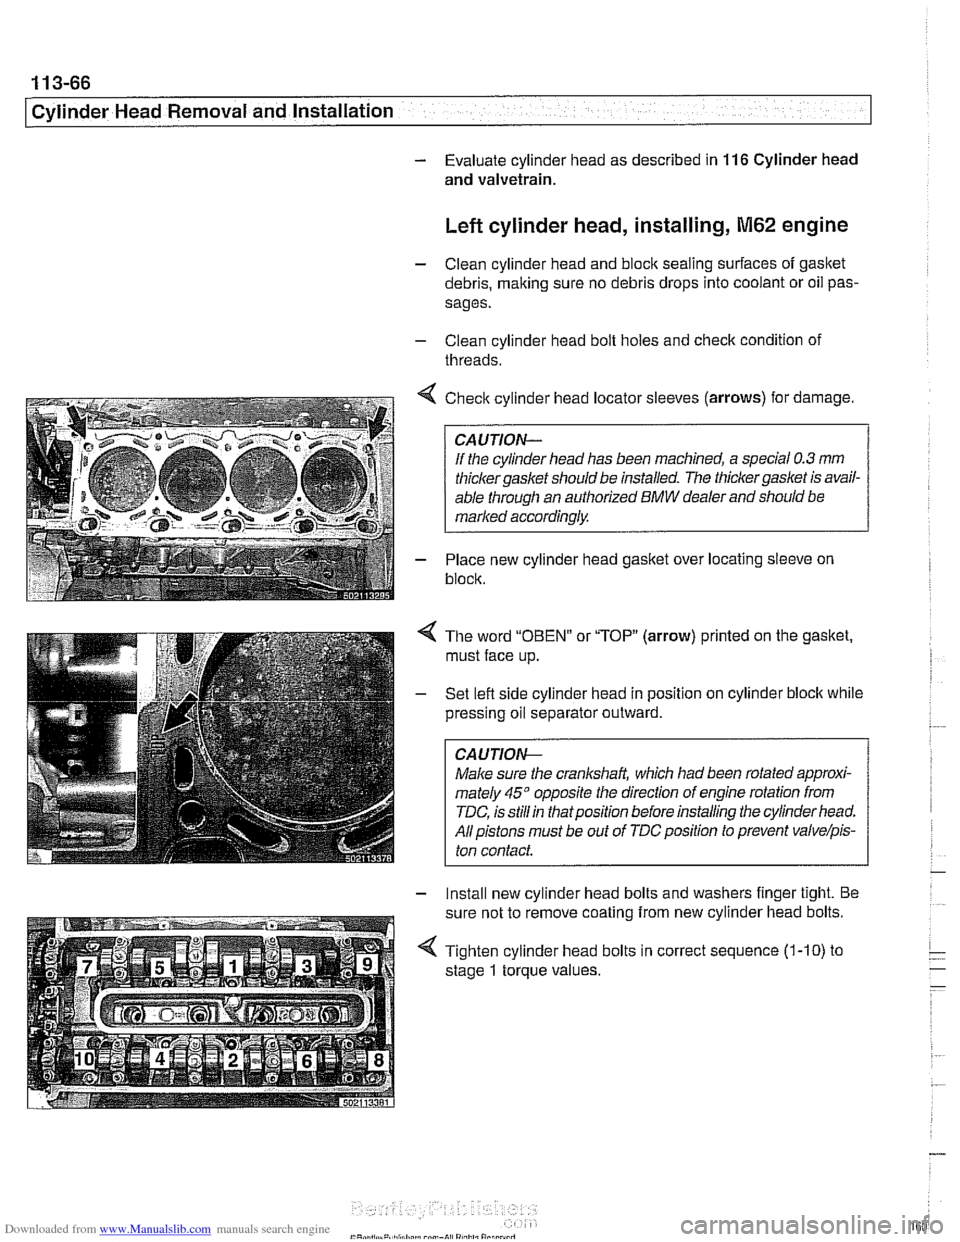
< Check cylinder head locator sleeves (arrows) for damage.
If the cylinder head has been machined, a special
0.3 mm
thicker gasket should be installed. The thicker gasket is avail-
able through an authorized
BMW dealer and should be
marked accordingly.
- Place new cylinder head gasket over locating sleeve on
block.
The word
"OBEN" or "TOP" (arrow) printed on the gasket,
must face up.
Set lefl side cylinder head in position on cylinder block while
pressing oil separator outward.
CAUJION-
Male sure the crankshaft, which had been rotated approxi-
mately
45" opposite the direction of engine rotation from
TDC, is still in thatposition before installing the cylinder head.
All pistons must be out of
TDCposition to prevent valvelpis-
ton contact.
- Install new cylinder head bolts and washers finger tight. Be
sure not to remove coating from new cylinder head bolts.
4 Tighten cylinder head bolts in correct sequence (1-10) to
stage
1 torque values.
Page 165 of 1002
Downloaded from www.Manualslib.com manuals search engine
. ." . .
I - Cylinder Head Removal - and instard --
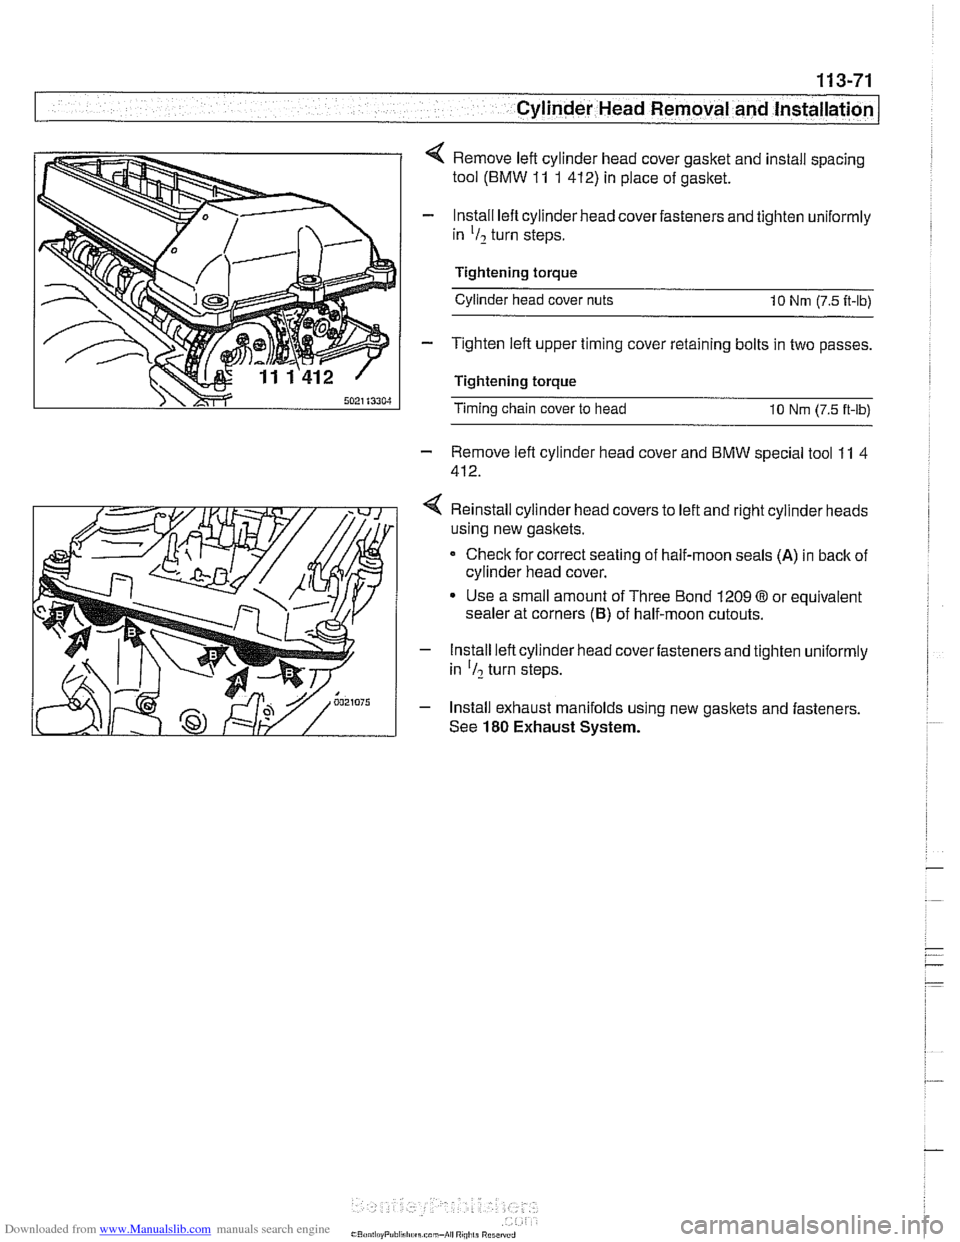
4 Remove left cylinder head cover gasket and install spacing
tool (BMW
11 1 412) in place of gasket.
- lnstall lefl cylinder head cover fasteners and tighten uniformly
in
'I2 turn steps.
Tightening torque Cylinder head cover nuts
10 Nrn (7.5 it-lb)
- Tighten left upper timing cover retaining bolts in two passes.
Tightening torque
Timing chain cover to head 10 Nrn (7.5 ft-lb)
- Remove lefl cylinder head cover and BMW special tool 11 4
412.
4 Reinstall cylinder head covers to left and right cylinder heads
using new gaskets.
Check for correct seating of half-moon seals
(A) in back of
cylinder head cover.
Use a small amount of Three Bond 1209
03 or equivalent
sealer at corners
(6) of half-moon cutouts.
- Install left cylinder head cover fasteners and tighten uniformly
in
'I? turn steps.
- Install exhaust manifolds using new gaskets and fasteners.
See
180 Exhaust System.
Page 171 of 1002
Downloaded from www.Manualslib.com manuals search engine
Cvlinder Head Removal and Installation /
Right cylinder head, installing, M62 engine
- Clean cylinder head and block sealing surfaces of gasket de-
bris, making sure no debris drops into coolant or oil passag-
es.
CA UTIOW-
To prevent valve to piston contact when tightening camshaft
sprocket fasteners, counterhold camshaft with
27 mm open-
end wrench. If
necessarq: grind outer side of wrench jaws to
prevent damaging cylinder head.
- Check cylinder head bolt holes and condition of threads. Re-
move debris and liquids from holes.
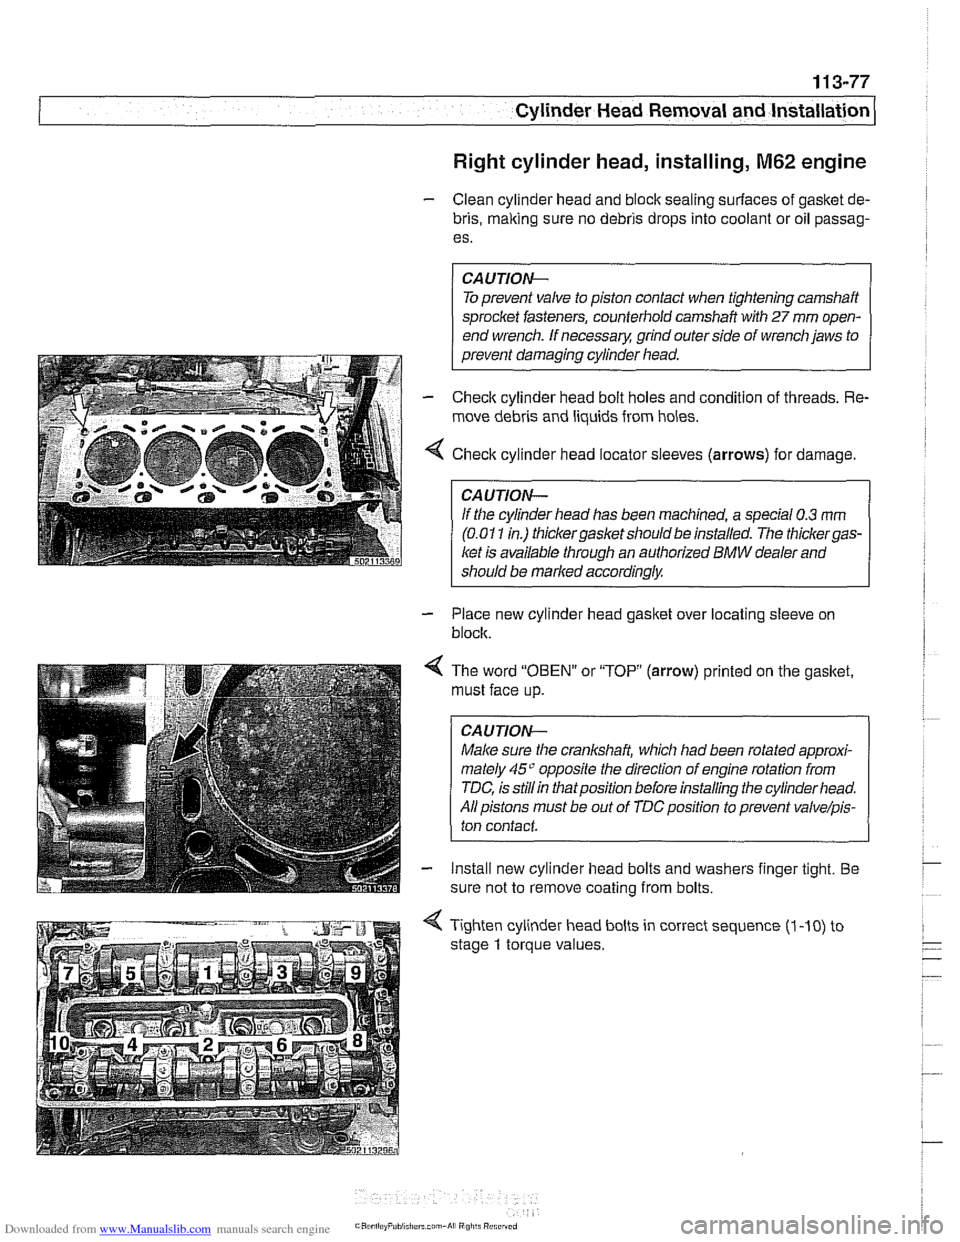
4 Check cylinder head locator sleeves (arrows) for damage
CAUTION-
lithe cylinder head has been machined, a special 0.3 rnm
(0.01 1 in.) thickergasket should be installed. The thickergas-
ket is available through an authorized BMW dealer and
should be marked
accordinglw
- Place new cylinder head gasket over locating sleeve on
block.
< The word "OBEN" or "TOP (arrow) printed on the gasket.
must face up.
CAUTION-
Male sure the crankshaft, which had been rotated approxi-
mately
45" opposite the direction of engine rotation from
TDC, is
stillin thatposition before installing the cylinder head.
All pistons must be out of
TDCposition to prevent valve/pis-
ton contact
- Install new cylinder head bolts and washers finger tight. Be
sure not to remove coating from bolts.
4 Tighten cylinder head bolts in correct sequence (1 -10) to
stage
1 torque values.
Page 173 of 1002
Downloaded from www.Manualslib.com manuals search engine
-8" ."
Cylinder Head Removal and Installation --
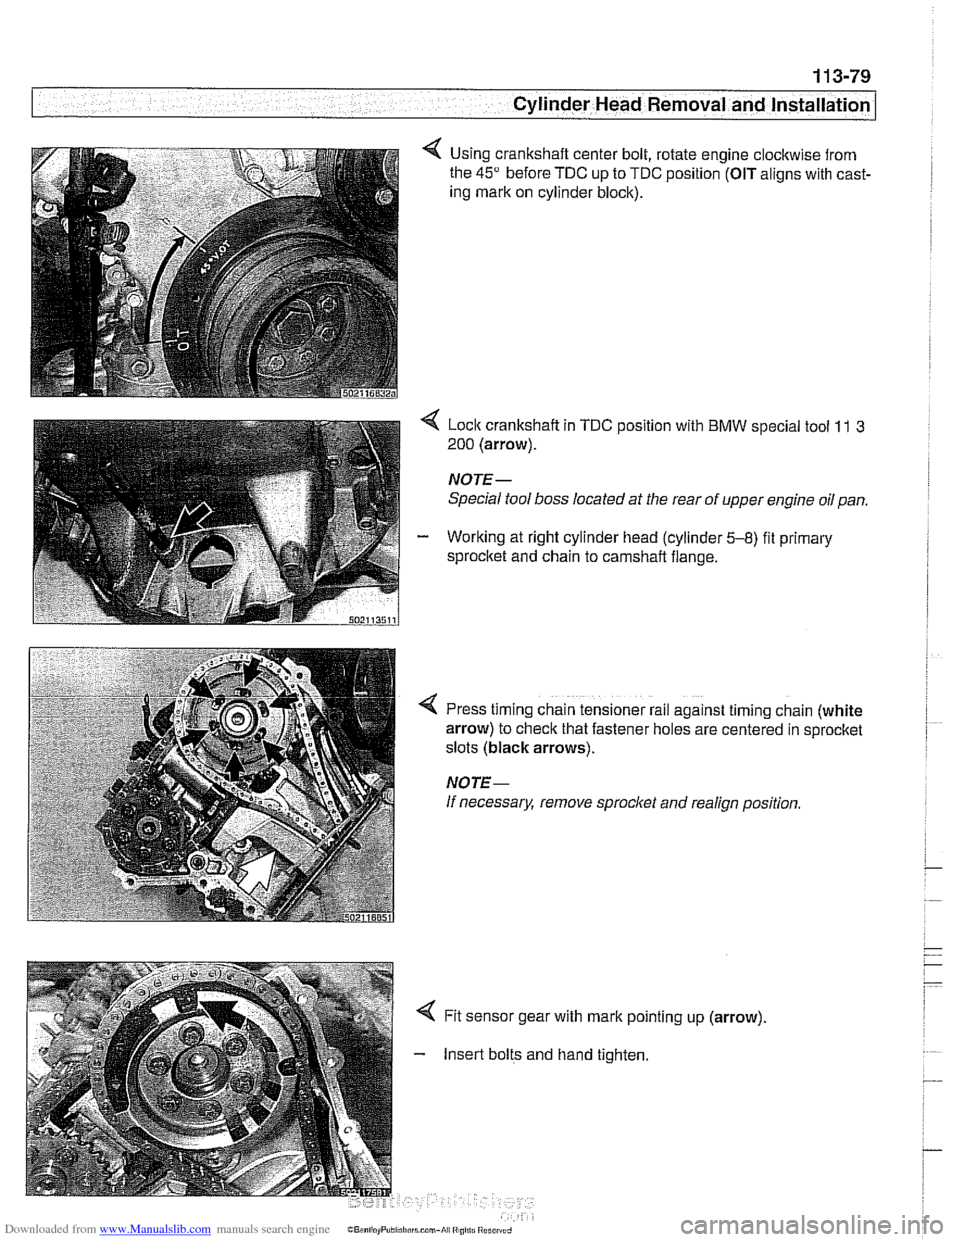
Using crankshaft center bolt, rotate engine clockwise from
the
45" before TDC up to TDC position (OIT aligns with cast-
ing mark on cylinder block).
< Lock crankshaft in TDC position with BMW special tool 11 3
200 (arrow).
NOTE-
Special tool boss located at the rear of upper engine oil pan.
- Working at right cylinder head (cylinder 5-8) fit primary
sprocltet and chain to camshaft flange.
!
I
4 Press timing chain tensioner rail against timing chain (white
arrow) to check that fastener holes are centered in sprocket
slots (black arrows).
NOTE-
If necessary, remove sprocl
Insert bolts and hand tighten.
Page 176 of 1002
Downloaded from www.Manualslib.com manuals search engine
1 13-82
1 Cylinder Head Removal and Installation
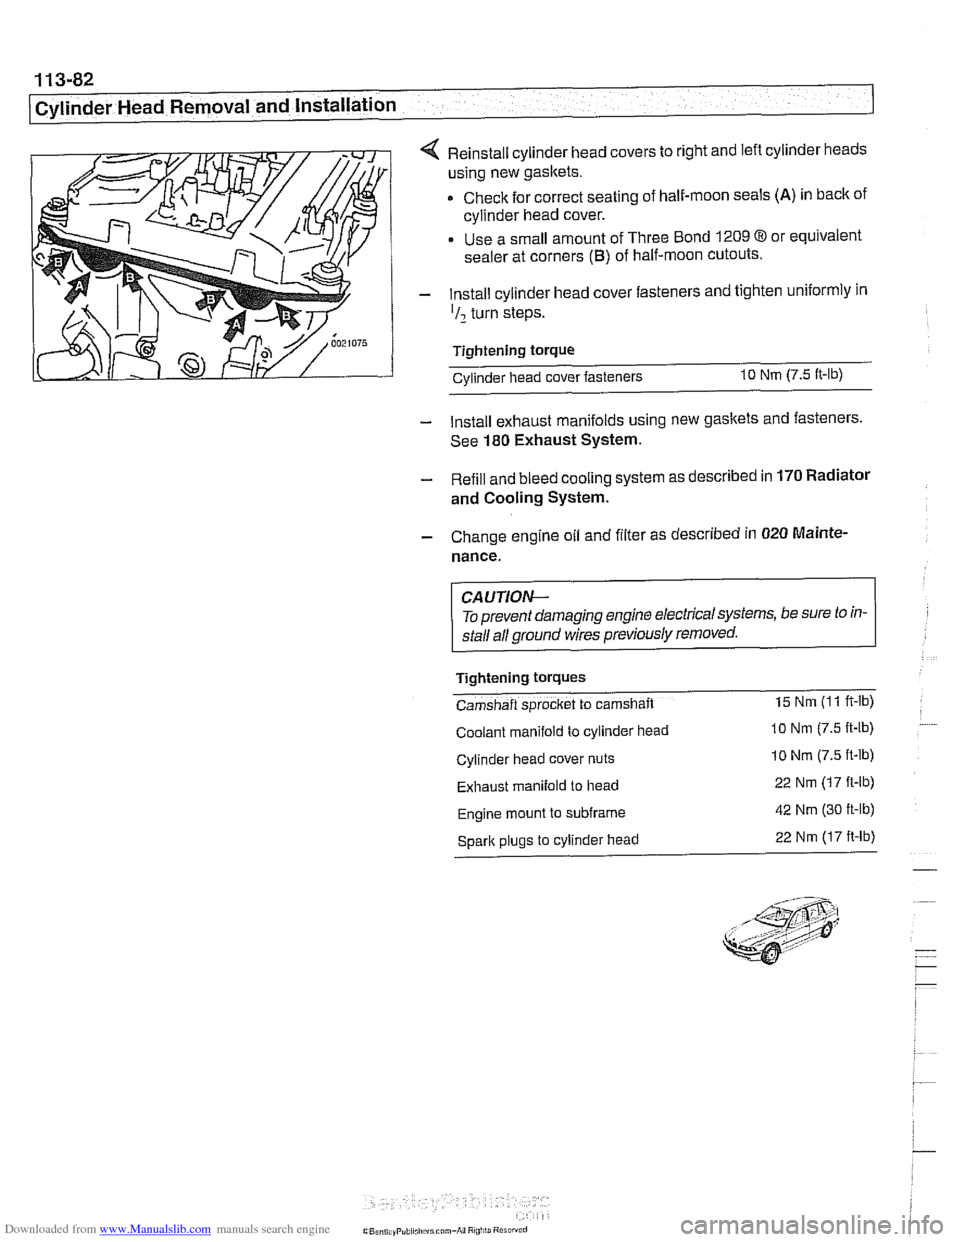
4 Reinstall cylinder head covers to right and left cylinder heads
using new gaskets.
Check for correct seating of half-moon seals
(A) in back of
cylinder head cover.
Use a small amount of Three Bond
1209 8 or equivalent
sealer at corners
(B) of half-moon cutouts.
- Install cylinder head cover fasteners and tighten uniformly in
'I2 turn steps.
Tightening torque Cvlinder head cover fasteners
10 Nm (7.5 It-lb)
- Install exhaust manifolds using new gaskets and fasteners.
See
180 Exhaust System.
- Refill and bleed cooling system as described in 170 Radiator
and Cooling System.
- Change engine oil and filter as described in 020 Mainte.
nance.
CA UTIOW-
To prevent damaging engine electricalsystems, be sure to in-
stall all ground wires previously removed.
Tightening
tOrqUeS
Camshaft sprocket to camshaft 15 Nm (1 1 ft-lb)
Coolant manifold to cylinder head lo Nm (7.5 It-lb)
Cylinder head cover nuts 10 Nm (7.5 ft-lb)
Exhaust manifold to head 22 Nm (17 ft-lb)
Engine mount to subframe 42 Nm (30 ft-lb)
Spark plugs to cylinder head 22 Nm (17 ft-lb)
Page 177 of 1002
Downloaded from www.Manualslib.com manuals search engine
11 6 Cylinder Head and Valvetrain
........................... General ............................ 1 16-2 Valves 116-56
.................... Special Tools ........................ 11 6-2 Valves. leak test 11 6-56
......... Valves. removing and installing 11 6-56 Cylinder Head ..................... .I1 6.5 ....................... Valve guides 11 6-57
Valves. leak test ...................... 11 6-6
Valve stem oil seals .................. 11 6-58 ...... ..""""."""ll 6.6 Valveseats ........................ 116-59 Hydraulic lifters, checking and replacing .. .I1 6-7 Valve ....................... 6-60 . .
Camshaft andLifter Removal
and Installation
.................... 11 6-1 1
Camshaft and lifter removal and
installation
(M52 engine) ............. .I1 6.12
Camshaft and lifter. removal and
installation (M52
TU and M54 engine) .... 11 6-1 9
Double VANOS timing chain components
. 11 6-28
Camshaft removal and installation
(M62 engine)
....................... 11 6-39