check engine BMW 528i 1998 E39 Manual PDF
[x] Cancel search | Manufacturer: BMW, Model Year: 1998, Model line: 528i, Model: BMW 528i 1998 E39Pages: 1002
Page 273 of 1002
Downloaded from www.Manualslib.com manuals search engine
Camshaft Timing Chain
VANOS control unit, removing
(M52 TU and M54 engines)
This procedure includes removal of the Double VANOS con-
trol unit.
NOTE-
If the Double VANOS control unit is being replaced, camshaft
timing must be checked. This procedure requires multiple
special tools. Be sure to read the procedures through before
beginning the repair.
- Working inside luggage compartment, disconnect negative
(-) battery cable.
Prior to disconnecting the
batteg read the battery discon-
nection cautions given in
001 General Cautions and
Remove engine cooling fan assembly. See 170 Radiator
and Cooling System.
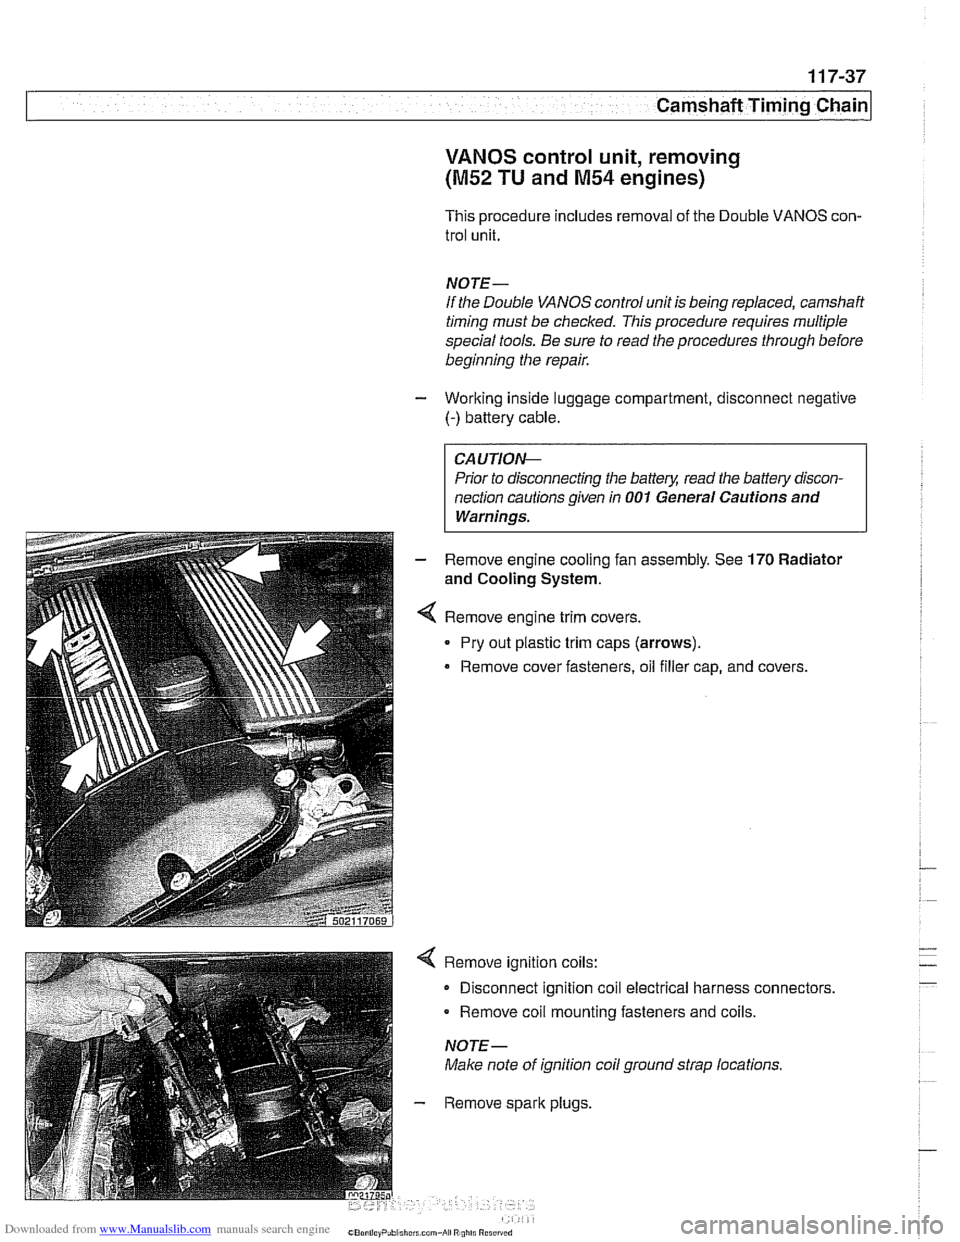
Remove engine trim covers.
Pry out plastic trim caps (arrows).
Remove cover fasteners, oil filler cap, and covers.
Remove ignition coils:
Disconnect ignition coil electrical harness connectors.
Remove coil mounting fasteners and coils.
NOTE-
Make note of ignition coil ground strap locations.
Remove spark plugs,
Page 277 of 1002
Downloaded from www.Manualslib.com manuals search engine
Camshaft Timing Chain
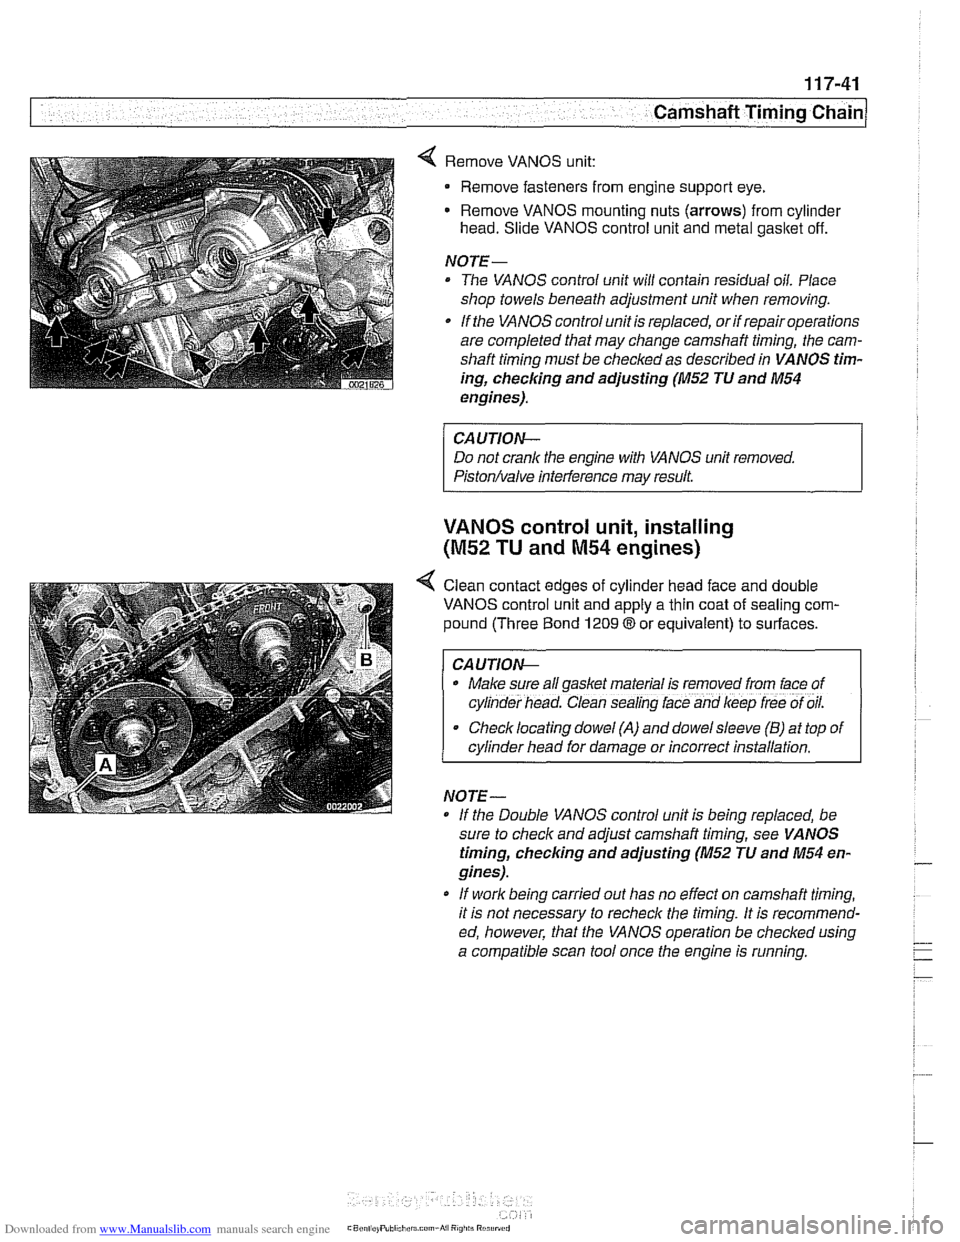
4 Remove VANOS unit:
Remove fasteners from engine support eye.
Remove VANOS mounting nuts (arrows) from cylinder
head. Slide VANOS control unit and metal gasltet off.
NOJE-
The VANOS control unit will contain residual oil. Place
shop towels beneath adjustment unit when removing.
If the VANOS control unit is replaced, or if repair operations
are completed that may change camshaft timing, the cam-
shaft timing must be checked as described in VANOS tim-
ing,
checlcing and adjusting (M52 JU and M54
engines).
CAUJION-
Do not crank the engine with VANOS unit removed.
Piston/valve interference may result.
VANOS control unit, installing
(M52 TU and M54 engines)
< Clean contact edges of cylinder head face and double
VANOS control unit and apply a thin coat of sealing com-
pound (Three Bond
1209 8 or equivalent) to surfaces.
I CAUJION-
. Make sure all gaskel material is removed from lace of
cyl~nder head. Clean sealing lace and keep lree of oil.
Checklocating dowel (A) and dowelsleeve (B) at top of
cylinder head for damage or incorrect installation.
NO
JE -
If the Double VANOS control unit is beino reolaced. be -.
sure to check and adjust camshaft timing, see VA NOS
timing, checking and adjusting (M52 JU and M54 en-
gines).
* If work being carried out has no effect on camshaft timing,
it is not necessary to recheck the timing. It is recommend-
ed, however, that the VANOS operation be checked using
a compatible scan tool once the engine is running.
Page 279 of 1002
Downloaded from www.Manualslib.com manuals search engine
Camshaft Timing Chain
- Connect electrical harness connectors to camshaft position
sensors and VANOS solenoid valves.
- Remove BMW special locking tools from rear of cylinder
head.
- Remove cranltshaft locking tool and replace sealing plug.
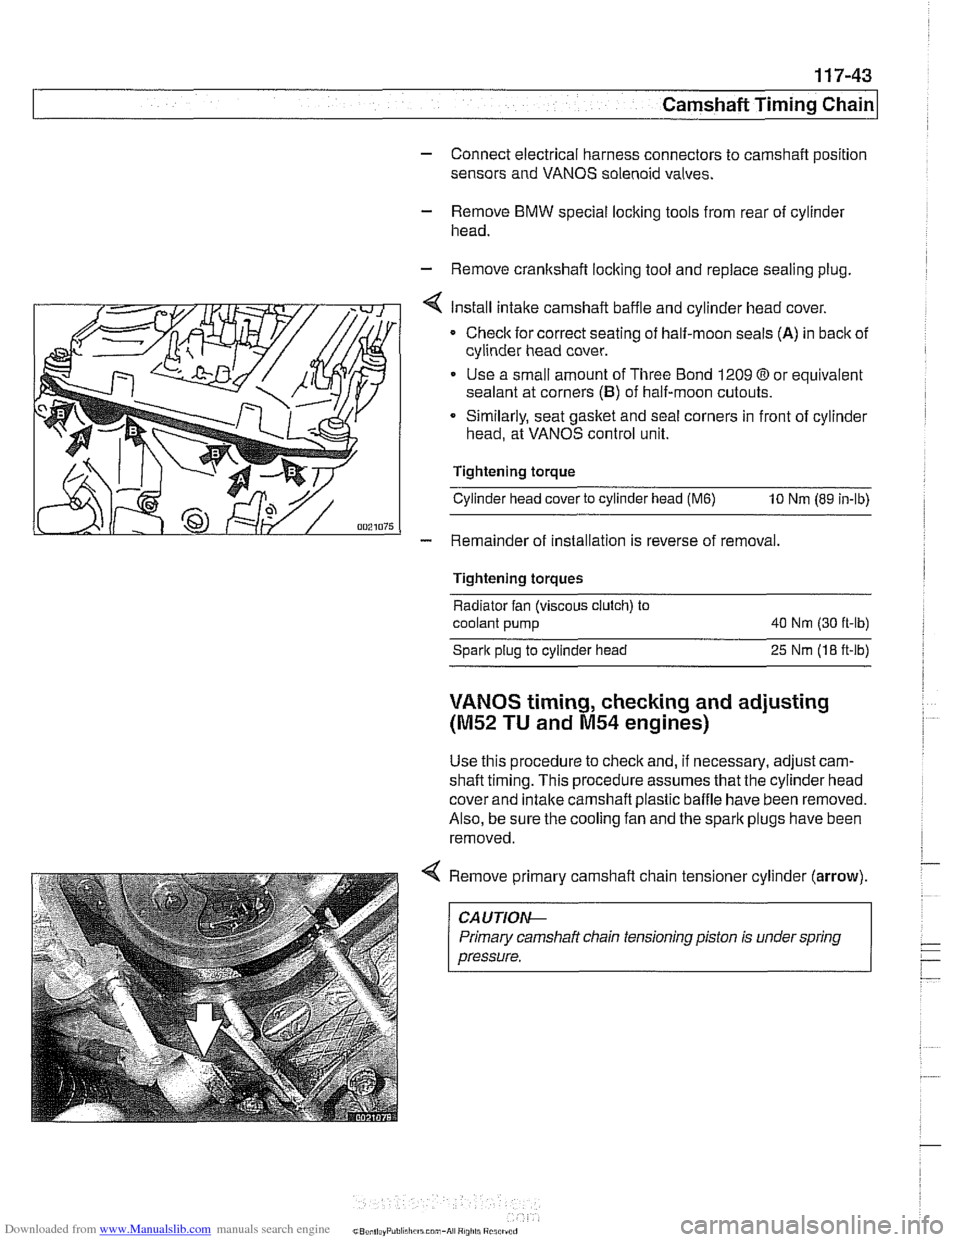
Install intake camshaft baffle and cylinder head cover.
Checlc for correct seating of half-moon seals (A) in back of
cylinder head cover.
Use a small amount of Three Bond 1209
O or equivalent
sealant at corners
(B) of half-moon cutouts.
Similarly, seat gasket and
seal corners in front of cylinder
head, at VANOS control unit.
Tightening torque
Cylinder head cover to cylinder head
(M6) 10 Nm (89 in-lb)
- Remainder of installation is reverse of removal.
Tightening torques
Radiator fan (viscous clutch) to
coolant pump 40
Nm (30 ft-lb)
Spark plug to cylinder head
25 Nrn (18 ft-lb)
VANOS timing, checking and adjusting
(M52 TU and M54 engines)
Use this procedure to check and, if necessary, adjust cam-
shaft timing. This procedure assumes that the cylinder head
cover and intake
camshaft plastic baffle have been removed.
Also, be sure the cooling fan and the spark plugs have been
removed.
Remove primary camshaft chain tensioner cylinder
(arrow).
~~ ~ ~~ ~--~
CA UTlOAC
Primary camshaft chain tensioning piston is under spring
pressure.
Page 287 of 1002
Downloaded from www.Manualslib.com manuals search engine
... -.
Camshaft Timing chain1
Timing chains, removing
(M52 TU and M54 engines)
Camshaft timing chain removal requires that the oil pan be re-
moved. See
119 Lubrication System. Also required is re-
moval of the VANOS control
unit and disassembly of the
intake and exhaust camshaft sprocket assemblies as de-
scribed earlier in this repair group.
Special BMW
service tools are needed for timing chain re-
moval and installation. The special tools assure proper timing
of the valvetrain. Precise
marlts to set the timing on the cam:
shafts are not provided for reassembly. Read the procedures
through before beginning the job.
CA
UTION-
If the camshafts are not properly timed, the pistons can con-
tact the valves.
- D~sconnect negative (-) cable from battery.
CAUTION-
* Disconnecting the battery may erase fault code@) stored in
control module memory. Check for fault codes using spe-
cial
BMW diagnostic equipment.
Prior to disconnecting the battery, read the battery dis-
connection
cautfons given in 001 General Cautions
and
Warninqs.
- Remove VANOS control unit. See VANOS control unit, re-
moving
(M52 TU and M54 engines).
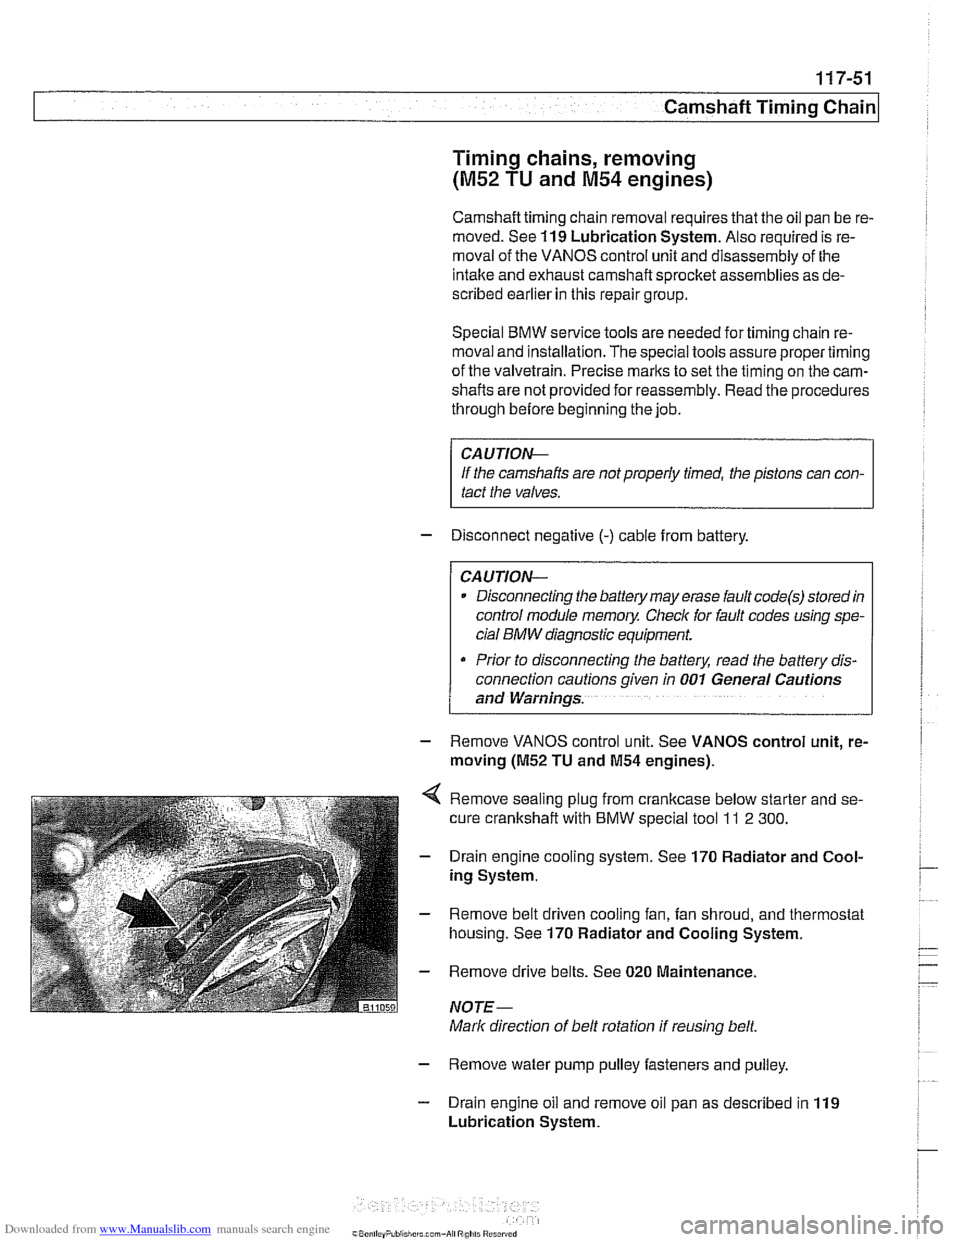
Remove sealing plug from crankcase below starter and se-
cure crankshaft with
BMW special tool ll 2 300.
Drain engine cooling system. See 170 Radiator and Cool-
ing System.
Remove belt driven cooling fan, fan shroud, and thermostat
housing. See
170 Radiator and Cooling System.
Remove drive belts. See
020 Maintenance.
NOTE-
Mark direction of belt rotation if reusing belt.
- Remove water pump pulley fasteners and pulley.
- Drain engine oil and remove oil pan as described in 119
Lubrication System.
Page 301 of 1002
Downloaded from www.Manualslib.com manuals search engine
Cp-- Camshaft -- Timing Chain
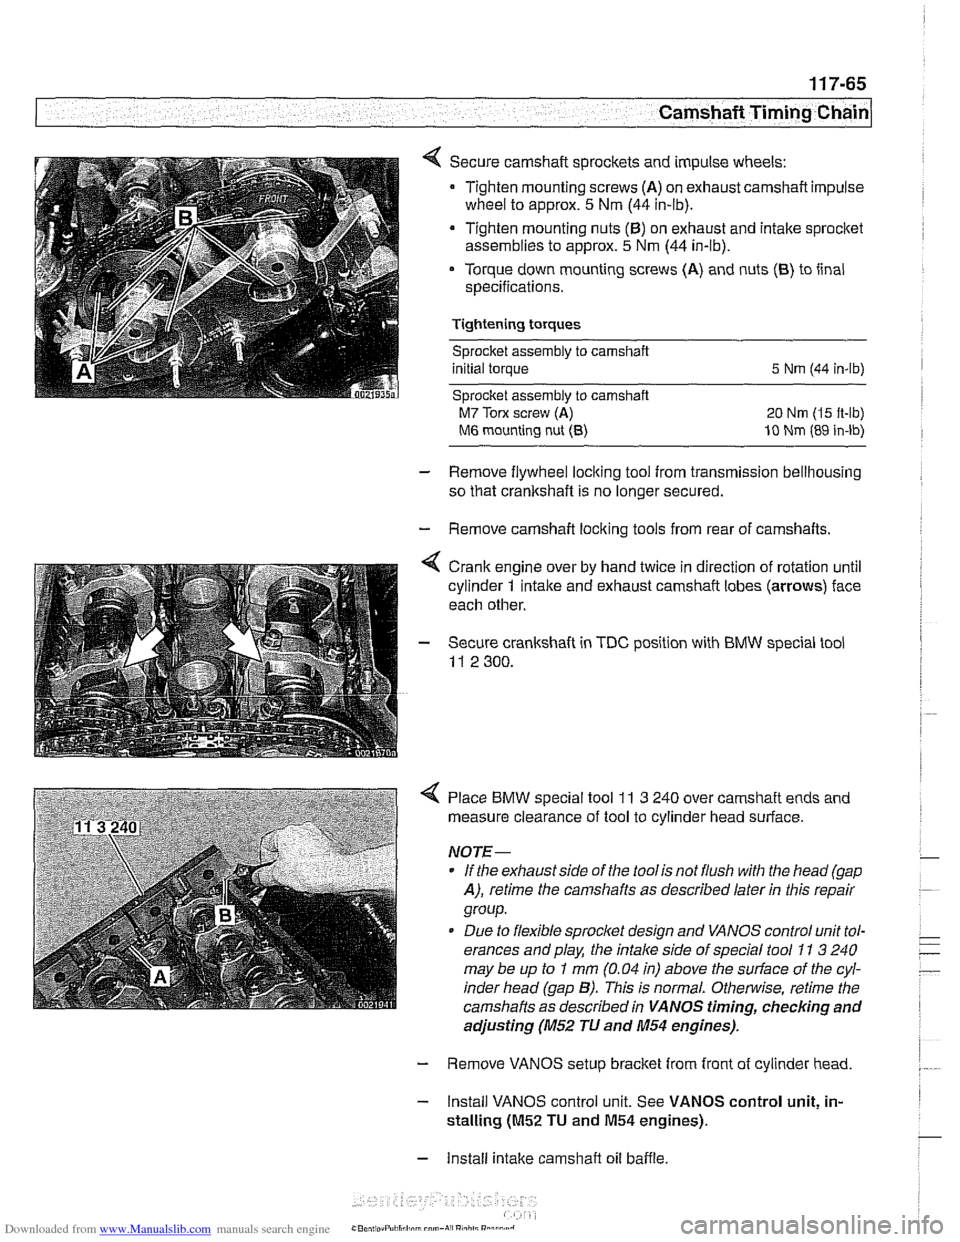
Secure camshaft sprockets and impulse wheels:
Tighten mounting screws
(A) on exhaust camshaft impulse
wheel to approx.
5 Nm (44 in-lb).
Tighten mounting nuts
(6) on exhaust and intake sprocket
assemblies to approx.
5 Nm (44 in-lb).
Torque down mounting screws (A) and nuts
(6) to iinal
specifications.
Tightening torques Sprocket assembly
to camshaft
initial torque
5 Nrn (44 in-lb)
Sprocket assembly to camshaft
M7 Torx screw (A) 20 Nm (I5 it-lb)
M6 mounting nut (8) 10 Nm (89 in-lb)
- Remove flywheel locking tool from transmission bellhousing
so that crankshaft is no longer secured.
- Remove camshaft loclting tools from rear of camshafts.
4 Crank engine over by hand twice in direction of rotation until
cylinder
1 intake and exhaust camshaft lobes (arrows) face
each other.
- Secure crankshaft in TDC position with BMW special tool
11 2 300.
4 Place BMW special tool 11 3 240 over camshaft ends and
measure clearance of tool to cylinder head surface.
NOTE-
* If the exhaust side of the tool is not flush with the head (gap
A), retime the camshafts as described laler in this repair
group.
Due to flexible sprocket design and VANOS control unit tol-
erances and play, the
intake side of special tool 71 3 240
may be up to
I mm (0.04 in) above the suriace of the cyl-
inder head (gap
B). This is normal. Otherwise, retime the
camshafts as described in
VANOS timing, checking and
adjusting (M52 TU and 11154 engines).
- Remove VANOS setup bracket from front of cylinder head
- Install VANOS control unit. See VANOS control unit, in-
stalling
(01152 TU and M54 engines).
- Install intake camshaft oil baffle
Page 302 of 1002
Downloaded from www.Manualslib.com manuals search engine
11 7-66
I Camshaft Timing Chain
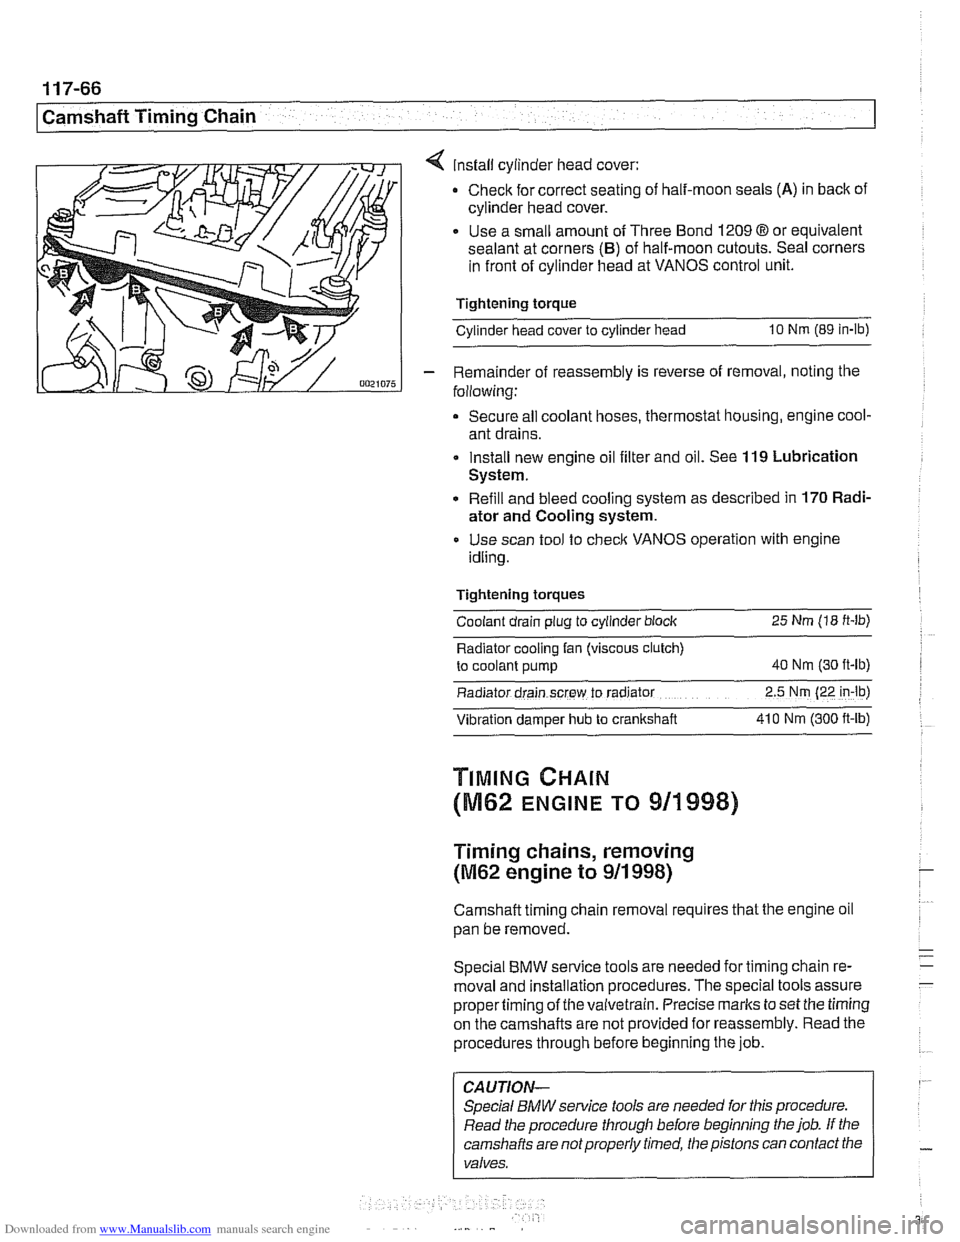
4 install cylinder head cover:
Check for correct seating of half-moon seals
(A) in back of
cylinder head cover.
Use a small amount of Three Bond
1209 8 or equivalent
sealant at corners
(B) of half-moon cutouts. Seal corners
in front of cylinder head at VANOS control unit.
Tightening torque
Cylinder head cover to cylinder head
10 Nm (89 in-lb)
- Remainder of reassembly is reverse of removal, noting the
following:
Secure all coolant hoses, thermostat housing, engine cool-
ant drains.
Install new engine oil filter and oil. See
119 Lubrication
System.
Refill and bleed cooling system as described in
170 Radi-
ator and Cooling system.
Use scan tool to check VANOS operation with engine
idling.
Tightening torques Coolant drain plug to cylinder block
25 Nm (18 ft-lb)
Radiator cooling fan (viscous clutch)
to coolant pump
40 Nm (30 ft-lb)
Radiator drain screw to radrator 2.5 Nm (22 in-lb)
Vibration damper hub to crankshaft 41 0 Nm
(300 ft-ib)
TIMING CHAIN
(M62 ENGINE TO 911998)
Timing chains, removing
(M62 engine to 911 998)
Camshaft timing chain removal requires that the engine oil
pan be removed.
Special
BMW service tools are needed for timing chain re-
moval and installation procedures. The special tools assure
propertiming of thevaivetrain. Precise marks to set the timing
on the camshafts are not provided for reassembly. Read the
procedures through before beginning the job.
CAUTION-
Special BMW service tools are needed for this procedure.
Read the procedure through before beginning the job. If the
camshafts are notproperly timed, the pistons can contact the
valves.
Page 311 of 1002
Downloaded from www.Manualslib.com manuals search engine
Camshaft Timing Chain1
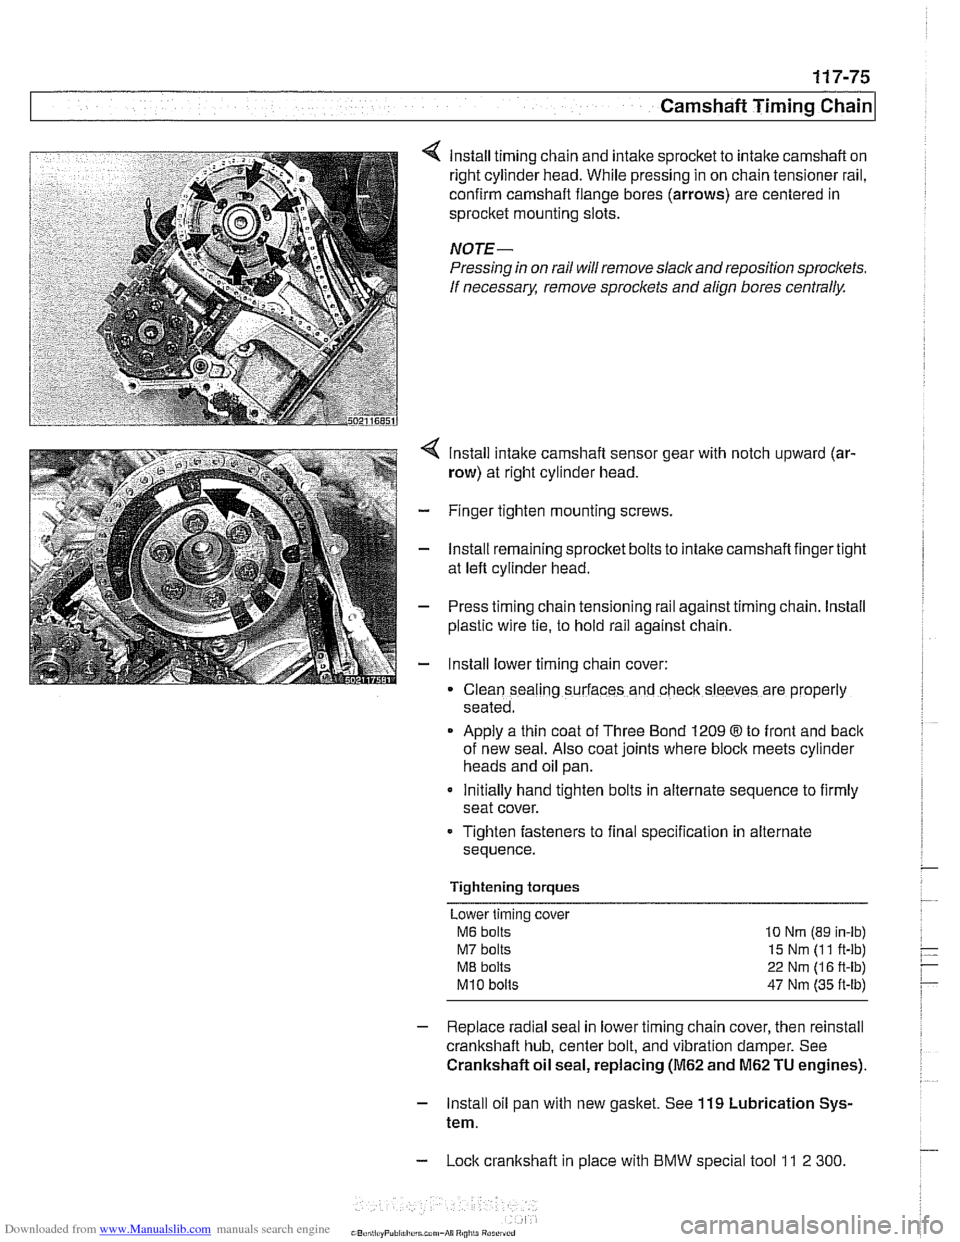
lnstall timing chain and intake sprocket to intake camshaft on
right cylinder head. While pressing in on chain tensioner rail,
confirm camshaft flange bores (arrows) are centered in
sprocket mounting slots.
NOTE-
Pressing in on rail will remove slack and reposition sprockets.
If
necessarx remove sproclets and align bores centrally.
lnstall intake camshaft sensor gear with notch upward (ar-
row) at right cylinder head.
- Finger tighten mounting screws.
- lnstall remaining sprocket bolts to intake camshaft finger tight
at left cylinder head.
- Press timing chain tensioning rail against timing chain. lnstall
plastic wire
tie, to hold rail against chain.
- lnstall lower timing chain cover:
Clean sealing surfaces and check sleeves are properly
seated.
Apply a thin coat of Three Bond 1209
8 to front and back
of new seal. Also coat joints where block meets cylinder
heads and oil pan.
Initially hand tighten bolts in alternate sequence to firmly
seat cover.
Tighten fasteners to final specification in alternate
sequence.
Tightening torques Lower timing cover
M6 bolts 10 Nrn (89 in-lb)
M7 bolts 15 Nm (1 1 ft-lb)
ME bolts 22 Nm (1 6 ft-lb)
M10 bolts 47 Nm (35 ft-lb)
- Replace radial seal in lower timing chain cover, then reinstall
crankshaft hub, center bolt, and vibration damper. See
Crankshaft oil seal, replacing
(M62 and M62 TU engines).
- lnstall oil pan with new gasket. See 119 Lubrication Sys-
tem.
- Lock crankshaft in place with BMW special tool 11 2 300
Page 315 of 1002
Downloaded from www.Manualslib.com manuals search engine
Camshaft Timing chain/
Camshaft timing, checking and adjusting
(M62 engine)
WARNING -
Allow engine to cool before beginning this procedure. 1
- Working inside luggage compartment, disconnect negative
battery cable.
CAUTIOI\C
Prior to disconnecting battery cable, read the battery discon-
nection cautions given
in 001 General Cautions and
Warninss.
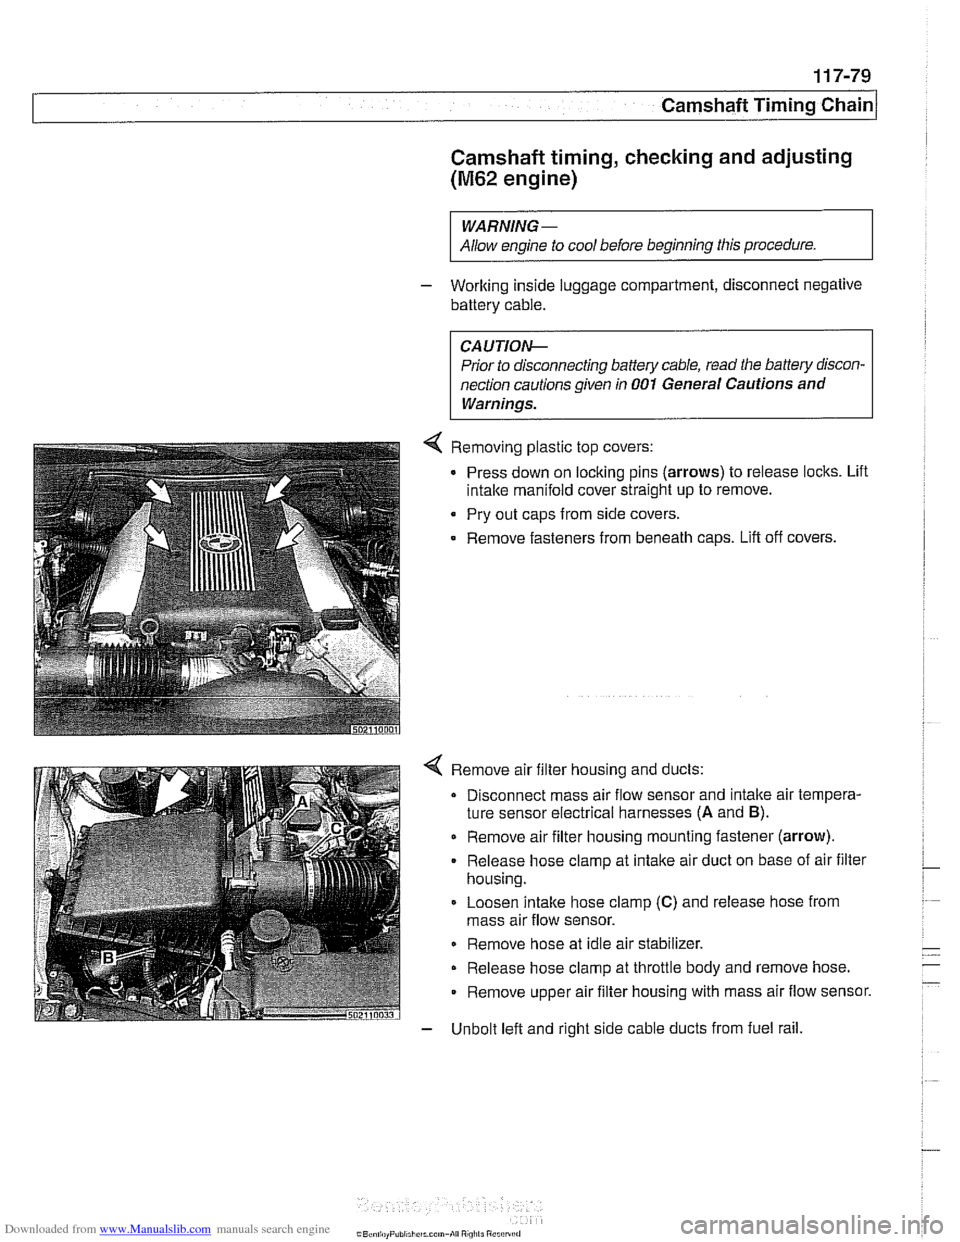
4 Removing plastic top covers:
Press down on locking pins (arrows) to release locks. Lift
intake manifold cover straight up to remove.
Pry out caps from side covers.
Remove fasteners from beneath
caDs. Lift off covers.
4 Remove air filter housing and ducts:
Disconnect mass air flow sensor and intake air tempera-
ture sensor electrical harnesses
(A and B).
Remove air filter housing mounting fastener (arrow).
Release hose clamp at intake air duct on base of air filter
housing.
Loosen intake hose clamp
(C) and release hose from
mass air flow sensor.
Remove hose at idle air stabilizer.
Release hose clamp at throttle body and remove hose.
Remove upper air filter housing with mass air flow sensor.
- Unbolt left and right side cable ducts from fuel rail.
Page 321 of 1002
Downloaded from www.Manualslib.com manuals search engine
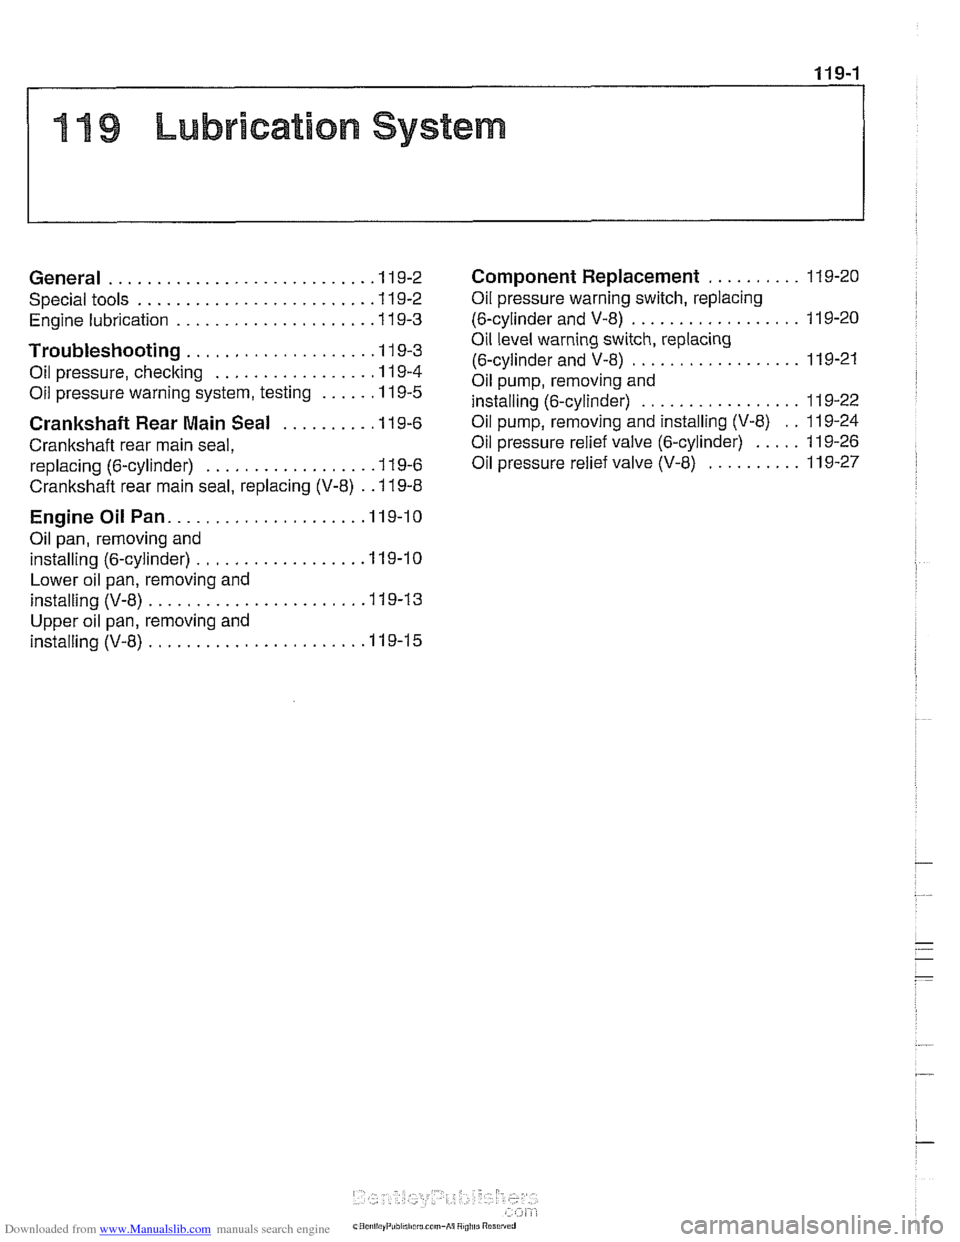
11 9 Lubrication System
General ............................ 11 9-2
Special tools
......................... 11 9-2
..................... Engine lubrication 11 9-3
Troubleshooting .................... 11 9-3
................. Oil pressure. checking 11 9-4
...... Oil pressure warning system. testing 11 9-5
Crankshaft Rear Main Seal ......... .I1 9-6
Crankshaft rear main seal.
replacing (6-cylinder)
.................. 11 9-6
Crankshaft rear main seal. replacing (V-8)
. . 11 9-8
Engine Oil Pan .................... .I1 9-10
Oil pan. removing and
................. installing (6-cylinder) .I1 9-10
Lower oil pan. removing and
installing (V-8)
....................... 1 19-1 3
Upper oil pan. removing and
installing (V-8)
....................... 11 9-1 5
.......... Component Replacement 11 9-20
Oil pressure warning switch. replacing
.................. (6-cylinder and V-8) 11 9-20
Oil level warning switch. replacing
.................. (6-cylinder and V-8) 11 9-21
Oil pump. removing and
................. installing (6-cylinder) 11 9-22
Oil pump. removing and installing (V-8)
. . 11 9-24
..... Oil pressure relief valve (6-cylinder) 119-26
.......... Oil pressure
relief valve (V-8) 11 9-27
Page 322 of 1002
Downloaded from www.Manualslib.com manuals search engine
11 9-2
Lubrication System
This repair group covers lubrication system troubleshooting
as well as oil pan removal and oil pump replacement.
In 6-cylinder models, removal of the oil pan requires the re-
moval of the exhaust system and some front suspension
components. Those procedures are fully covered in:
180 Exhaust System
210 Clutch
230 Manual Transmission
0 240 Automatic Transmission
310 Front Suspension
320 Steering and Wheel Alignment
NOTE-
Oil change procedure and oil filter replacement are covered
in
020 Maintenance.
CAUTIOG
V8 engines: The oil pump fasteners (including the sprocket
retaining nut) are known to vibrate loose. This can result in oil
starvation and engine failure. Be sure to check oil bolts and
nut tightness whenever the
oilpump is accessible. If any fas-
teners are found to be loose, remove them and reinstall with
Loctite
Band torque to specifications.
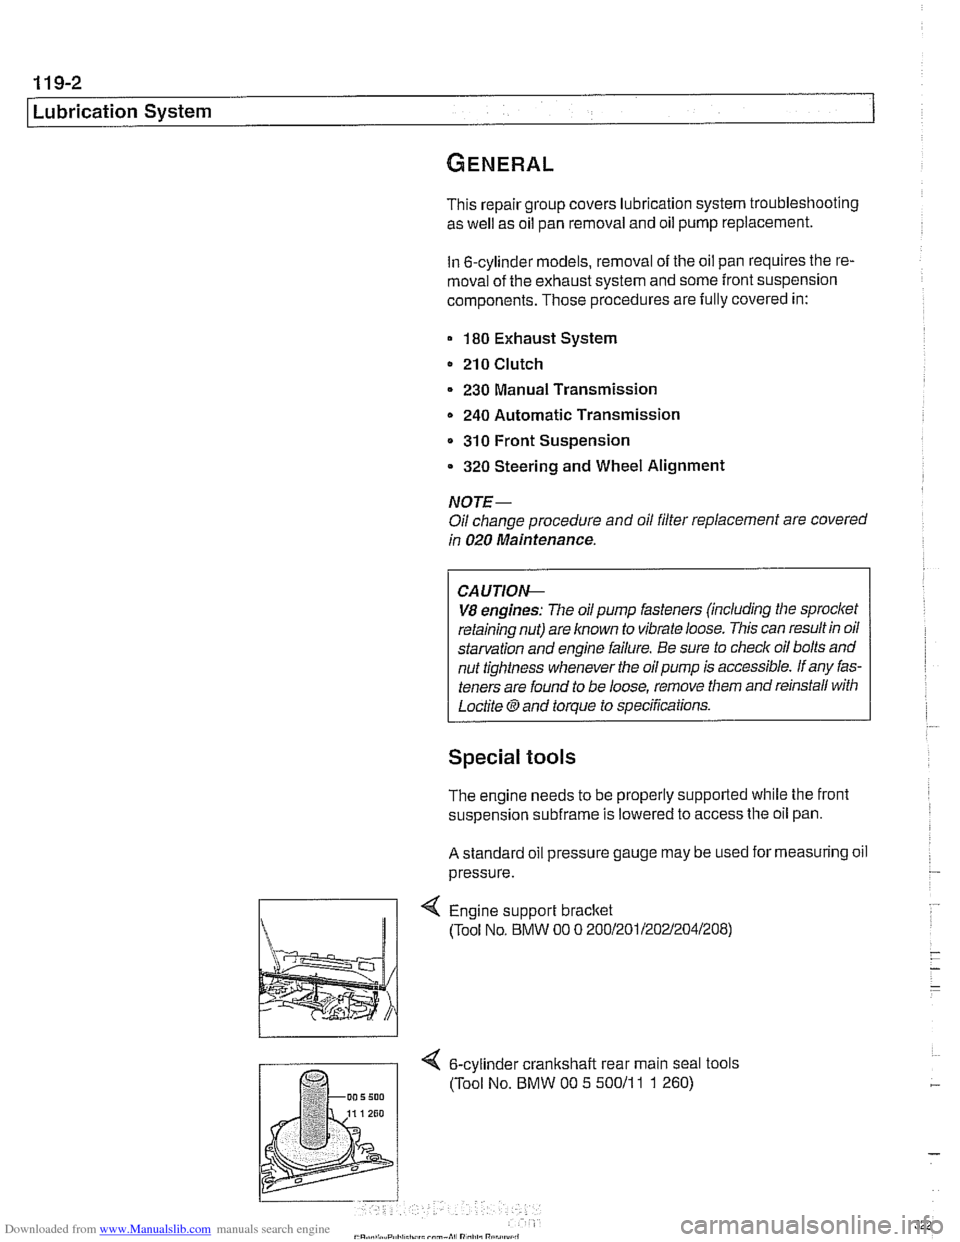
Special tools
The engine needs to be properly supported while the front
suspension
subframe is lowered to access the oil pan.
A standard oil pressure gauge may be used for measuring oil
pressure.
Engine support bracket
(Tool No, BMW 00 0 20012011202~2041208)
4 6-cylinder crankshalt rear main seal tools
(Tool No. BMW 00 5 50011
1 1 260)