low BMW 740LI SEDAN 2015 Repair Manual
[x] Cancel search | Manufacturer: BMW, Model Year: 2015, Model line: 740LI SEDAN, Model: BMW 740LI SEDAN 2015Pages: 314, PDF Size: 7.9 MB
Page 121 of 314
Display
The following is displayed in the instrument
cluster:
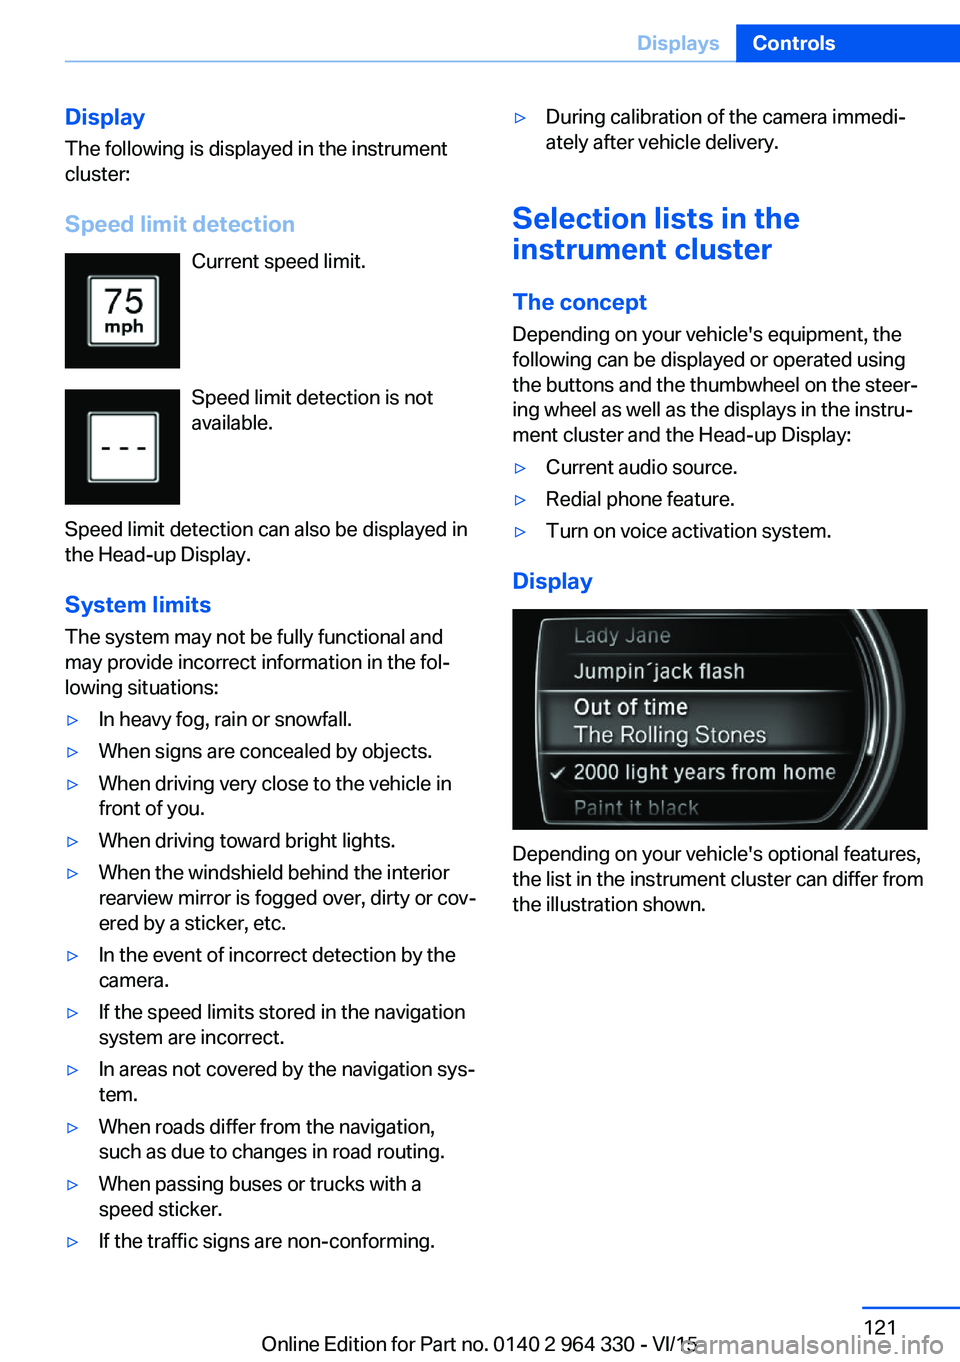
Speed limit detection Current speed limit.
Speed limit detection is not
available.
Speed limit detection can also be displayed in
the Head-up Display.
System limits
The system may not be fully functional and
may provide incorrect information in the fol‐
lowing situations:▷In heavy fog, rain or snowfall.▷When signs are concealed by objects.▷When driving very close to the vehicle in
front of you.▷When driving toward bright lights.▷When the windshield behind the interior
rearview mirror is fogged over, dirty or cov‐
ered by a sticker, etc.▷In the event of incorrect detection by the
camera.▷If the speed limits stored in the navigation
system are incorrect.▷In areas not covered by the navigation sys‐
tem.▷When roads differ from the navigation,
such as due to changes in road routing.▷When passing buses or trucks with a
speed sticker.▷If the traffic signs are non-conforming.▷During calibration of the camera immedi‐
ately after vehicle delivery.
Selection lists in the
instrument cluster
The concept Depending on your vehicle's equipment, the
following can be displayed or operated using
the buttons and the thumbwheel on the steer‐
ing wheel as well as the displays in the instru‐
ment cluster and the Head-up Display:
▷Current audio source.▷Redial phone feature.▷Turn on voice activation system.
Display
Depending on your vehicle's optional features,
the list in the instrument cluster can differ from
the illustration shown.
Seite 121DisplaysControls121
Online Edition for Part no. 0140 2 964 330 - VI/15
Page 122 of 314
Activating a list and adjusting the
setting
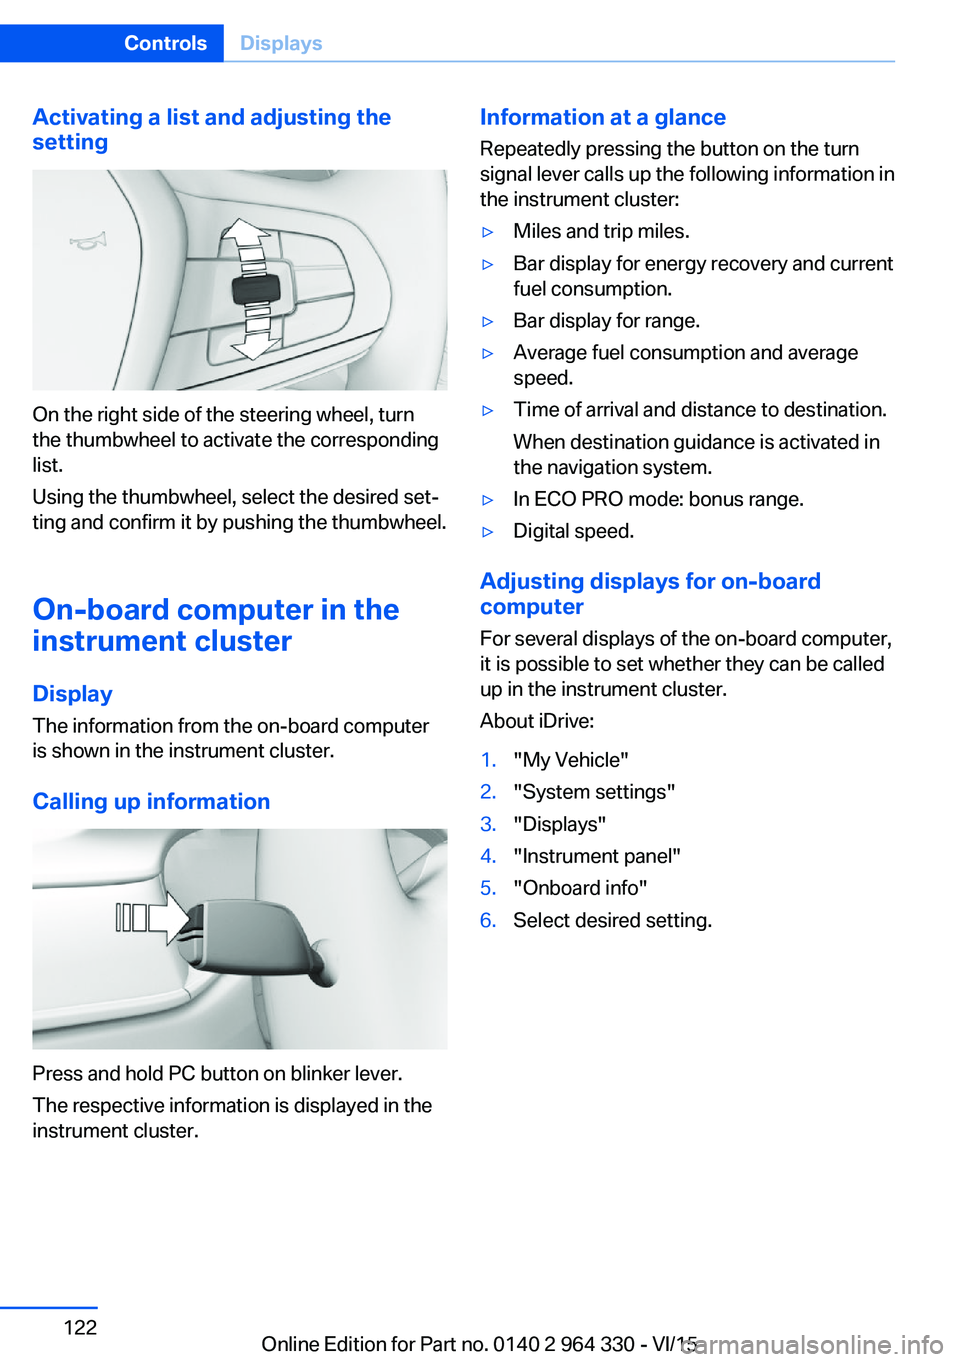
On the right side of the steering wheel, turn
the thumbwheel to activate the corresponding
list.
Using the thumbwheel, select the desired set‐
ting and confirm it by pushing the thumbwheel.
On-board computer in the
instrument cluster
Display
The information from the on-board computer
is shown in the instrument cluster.
Calling up information
Press and hold PC button on blinker lever.
The respective information is displayed in the
instrument cluster.
Information at a glance
Repeatedly pressing the button on the turn
signal lever calls up the following information in
the instrument cluster:▷Miles and trip miles.▷Bar display for energy recovery and current
fuel consumption.▷Bar display for range.▷Average fuel consumption and average
speed.▷Time of arrival and distance to destination.
When destination guidance is activated in
the navigation system.▷In ECO PRO mode: bonus range.▷Digital speed.
Adjusting displays for on-board
computer
For several displays of the on-board computer,
it is possible to set whether they can be called
up in the instrument cluster.
About iDrive:
1."My Vehicle"2."System settings"3."Displays"4."Instrument panel"5."Onboard info"6.Select desired setting.Seite 122ControlsDisplays122
Online Edition for Part no. 0140 2 964 330 - VI/15
Page 124 of 314
▷Total range, arrow 2.
With a low remaining range, a Check Control
message is briefly displayed. With a dynamic
driving style, e.g. taking curves aggressively,
the engine function is not always ensured.
The Check Control message appears continu‐
ously below a range of approx. 30 miles/50 km.
CAUTION
With a range of less than 30 miles/50 km
it is possible that the engine will no longer have
sufficient fuel. Engine functions are no longer
ensured. There is risk of property damage. Re‐
fuel promptly.◀
Average speed and average fuel
consumption
General information
Average speed and average fuel consumption
are calculated for the distance traveled since
the last reset in the onboard computer.
Periods in which the vehicle is parked with the
engine manually stopped are not included in
the calculation of the average speed.
Display
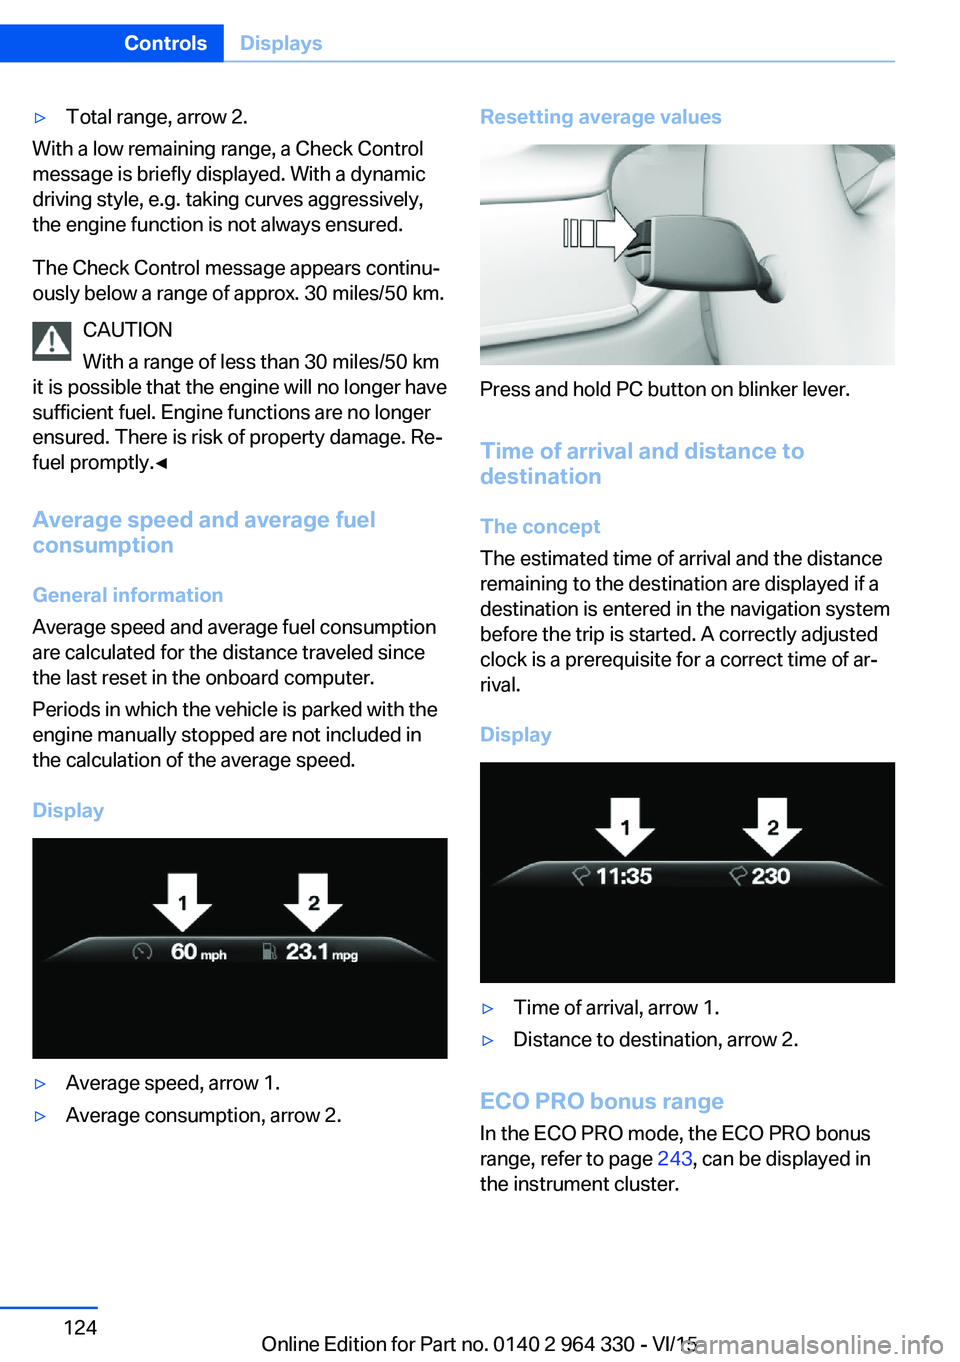
▷Average speed, arrow 1.▷Average consumption, arrow 2.Resetting average values
Press and hold PC button on blinker lever.
Time of arrival and distance to
destination
The concept
The estimated time of arrival and the distance
remaining to the destination are displayed if a
destination is entered in the navigation system
before the trip is started. A correctly adjusted
clock is a prerequisite for a correct time of ar‐
rival.
Display
▷Time of arrival, arrow 1.▷Distance to destination, arrow 2.
ECO PRO bonus range In the ECO PRO mode, the ECO PRO bonus
range, refer to page 243, can be displayed in
the instrument cluster.
Seite 124ControlsDisplays124
Online Edition for Part no. 0140 2 964 330 - VI/15
Page 125 of 314
Onboard computer on the
Control Display
General information
Two types of onboard computers are available
on the Control Display:▷"Onboard info": the values can be reset as
often as necessary.▷"Trip computer": the values provide an
overview of the current trip.
Calling up the onboard computer or
trip computer
About iDrive:
1."My Vehicle"2."Driving information"3."Onboard info" or "Trip computer"
Resetting the trip on-board computer
About iDrive:
1."My Vehicle"2."Driving information"3."Trip computer"4.▷ "Reset": all values are reset.▷ "Automatic reset": all values are
reset approx. 4 hours after the vehicle
came to a standstill.
Resetting the fuel consumption or
speed
About iDrive:
1."My Vehicle"2."Driving information"3."Onboard info"4."Consumption" or "Speed"5."OK"Sport displays
The concept
On the Control Display, the current values for
performance and torque can be displayed if
the vehicle is appropriately equipped.
Displaying sport displays on the
Control Display
About iDrive:1."My Vehicle"2."Technology in action"3."Sport displays"
Speed warning
The concept Displays a speed, when reached, should cause
a warning to be issued.
The warning is repeated if the vehicle speed
drops below the set speed once by at least
3 mph/5 km/h.
Displaying, setting or changing the
speed warning
About iDrive:
1."My Vehicle"2."Vehicle settings"3."Speed warning"4."Warning at:"5.Turn the controller until the desired speed
is displayed.6.Press the controller.
Speed warning is stored.
Seite 125DisplaysControls125
Online Edition for Part no. 0140 2 964 330 - VI/15
Page 126 of 314
Activating/deactivating the speed
warning
About iDrive:1."My Vehicle"2."Vehicle settings"3."Speed warning"4."Speed warning"5.Press the controller.
Setting your current speed as the
speed warning
About iDrive:
1."My Vehicle"2."Vehicle settings"3."Speed warning"4."Select current speed"5.Press the controller.
The current vehicle speed is stored as the
speed warning.
Vehicle status
The concept The status can be displayed and actions per‐
formed for several systems.
Opening the vehicle status
About iDrive:
1."My Vehicle"2."Vehicle status"
Information at a glance
▷ "Flat Tire Monitor": Status of the Flat
Tire Monitor, refer to page 269.▷ "Tire Pressure Monitor": Status of the
Tire Pressure Monitor, refer to page 265.▷Reset the Tire Pressure Monitor, refer to
page 265.▷ "Engine oil level"Electronic engine
oil level check, refer to page 273.▷ "Check Control": Display of stored
Check Control messages, refer to
page 117.▷ "Service required"Display of service
requirements, refer to page 119.▷ "Service Request": Service request.
Head-up Display
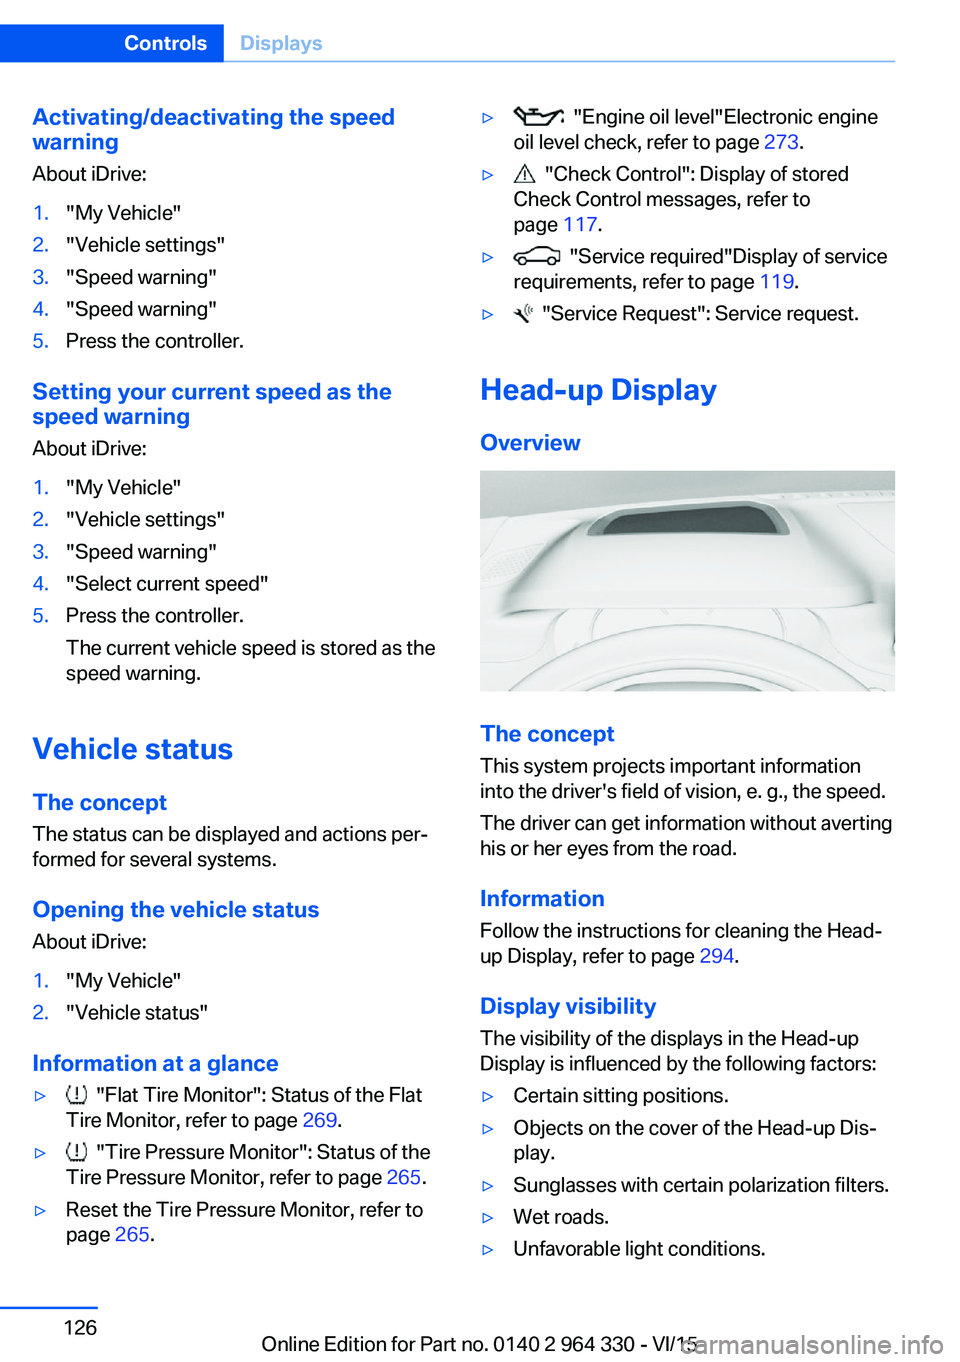
Overview
The concept
This system projects important information
into the driver's field of vision, e. g., the speed.
The driver can get information without averting
his or her eyes from the road.
Information Follow the instructions for cleaning the Head-
up Display, refer to page 294.
Display visibility The visibility of the displays in the Head-up
Display is influenced by the following factors:
▷Certain sitting positions.▷Objects on the cover of the Head-up Dis‐
play.▷Sunglasses with certain polarization filters.▷Wet roads.▷Unfavorable light conditions.Seite 126ControlsDisplays126
Online Edition for Part no. 0140 2 964 330 - VI/15
Page 127 of 314
If the image is distorted, have the basic set‐
tings checked by a dealer’s service center or
another qualified service center or repair shop.
Switching on/off
About iDrive:1."My Vehicle"2."System settings"3."Displays"4."Head-Up Display"5."Head-Up Display"
Display
Overview
The following information is displayed on the
Head-up Display:
▷Speed.▷Navigation system.▷Check Control messages.▷Selection list in the instrument cluster.▷Driver assistance systems.
Some of this information is only displayed
briefly as needed.
Selecting displays in the Head-up
Display
About iDrive:
1."My Vehicle"2."System settings"3."Displays"4."Head-Up Display"5.Select desired setting.
The setting is stored for the drive profile cur‐
rently used.
View Three different views are available for the
Head-up Display:
About iDrive:1."My Vehicle"2."System settings"3."Displays"4."Head-Up Display"5.Select desired setting.▷"STANDARD": all displays in the Head-
up Display are active.▷"REDUCED": the displays in the Head- up Display are reduced to the absolute
necessary.▷"INDIVIDUAL": all displays in the Head-
up Display are active. Individual dis‐
plays, e.g. Check Control messages,
can be individually configured.
The setting is stored for the drive profile cur‐
rently used.
Setting the brightness The brightness is automatically adjusted to the
ambient brightness.
The basic setting can be adjusted manually.
About iDrive:
1."My Vehicle"2."System settings"3."Displays"4."Head-Up Display"5."Brightness"6.Turn the controller until the desired bright‐
ness is set.7.Press the controller.
When the low beams are activated, the bright‐
ness of the Head-up Display can be addition‐
ally influenced using the instrument lighting.
The setting is stored for the drive profile cur‐
rently used.
Seite 127DisplaysControls127
Online Edition for Part no. 0140 2 964 330 - VI/15
Page 129 of 314
LightsVehicle features and optionsThis chapter describes all standard, country-
specific and optional features offered with the
series. It also describes features that are not
necessarily available in your car, e. g., due to
the selected options or country versions. This
also applies to safety-related functions and
systems. The respectively applicable country
provisions must be observed when using the
respective features and systems.
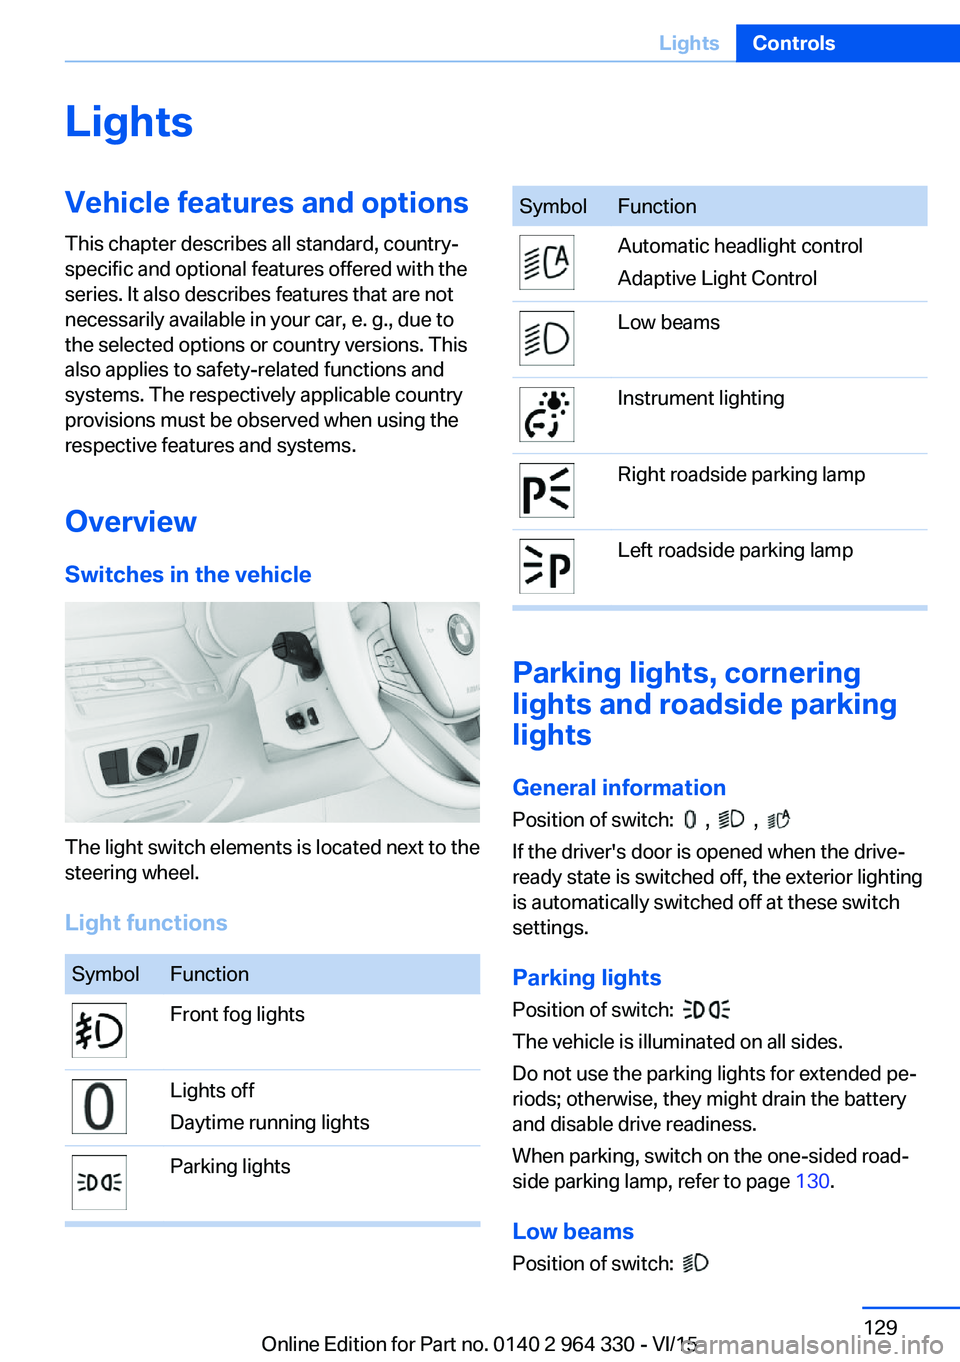
Overview Switches in the vehicle
The light switch elements is located next to the
steering wheel.
Light functions
SymbolFunctionFront fog lightsLights off
Daytime running lightsParking lightsSymbolFunctionAutomatic headlight control
Adaptive Light ControlLow beamsInstrument lightingRight roadside parking lampLeft roadside parking lamp
Parking lights, cornering
lights and roadside parking
lights
General information Position of switch:
, ,
If the driver's door is opened when the drive-
ready state is switched off, the exterior lighting
is automatically switched off at these switch
settings.
Parking lights
Position of switch:
The vehicle is illuminated on all sides.
Do not use the parking lights for extended pe‐
riods; otherwise, they might drain the battery
and disable drive readiness.
When parking, switch on the one-sided road‐
side parking lamp, refer to page 130.
Low beams Position of switch:
Seite 129LightsControls129
Online Edition for Part no. 0140 2 964 330 - VI/15
Page 130 of 314
The low beams light up when the drive-ready
state is switched on.
Roadside parking lights When the vehicle is parked, a one-sided road‐
side parking lamp can be switched on.Press buttonFunctionRight roadside parking lamp
on/offLeft roadside parking lamp
on/off
Welcome lights and
headlight courtesy delay
feature
Welcome lights
General information
Depending on the equipment, the exterior
lighting of the vehicle can be set individually.
Activating/deactivating About iDrive:
1."My Vehicle"2."Vehicle settings"3."Lighting"4."Exterior lighting"5.Select desired setting:▷"Welcome lights"
Parking lights and tail lamps are
switched on for a limited time.▷"Door handle lighting"
Door handles and the ground in front of
the doors are illuminated for a limited
time.▷"Light carpet"
The area next to the vehicle is illumi‐
nated for a limited time.Headlight courtesy delay feature
General information
The low beams stay lit for a particular time if
the high beams are switched on after opera‐
tional readiness is switched on.
Setting the duration
About iDrive:1."My Vehicle"2."Vehicle settings"3."Lighting"4."Exterior lighting"5."Pathway lighting"6.Select desired setting.
Automatic headlight control
The concept
The low beams are switched on and off auto‐
matically depending on the ambient bright‐
ness, e.g. in tunnels, in twilight or if there is
precipitation.
General information
A blue sky with the sun low on the horizon can
cause the lights to be switched on.
When emerging from a tunnel during the day,
the low beams are not switched off immedi‐
ately but instead only after approx. 2 minutes.
ActivatingPosition of switch:
The indicator lamp in the instrument cluster
lights up when the low beams are switched on.
System limits
The automatic headlamp control cannot serve
as a substitute for your personal judgment of
lighting conditions.
Seite 130ControlsLights130
Online Edition for Part no. 0140 2 964 330 - VI/15
Page 131 of 314
E. g. the sensors are unable to detect fog or
hazy weather. To avoid safety risks under
these conditions, you should always switch on
the lights manually.
Daytime running lights General information
Position of switch:
, ,
The daytime running lights light up when the
drive-ready state is switched on. After the
drive-ready state is switched off, the parking
lights light up in position
.
Activating/deactivating
In some countries, daytime running lights are
mandatory, so it may not be possible to deacti‐
vate the daytime running lights.
About iDrive:
1."My Vehicle"2."Vehicle settings"3."Lighting"4."Exterior lighting"5.Select desired setting.
The setting is stored for the drive profile cur‐
rently used.
Adaptive Light Control The conceptAdaptive Light Control is a variable headlight
control system that enables dynamic illumina‐
tion of the road surface.
General information
Depending on the steering angle and other pa‐ rameters, the light from the headlight follows
the course of the road.
To avoid blinding oncoming traffic, the Adap‐
tive Light Control does not swivel to the driv‐
er's side when the vehicle is at a standstill.
Depending on the equipment version, Adap‐
tive Light Control consists of one or several systems:▷Cornering light, refer to page 131.▷Adaptive headlight range control, refer to
page 131.
Activating
Switch setting
with switched-on drive-
ready state.
Corner-illuminating lights
In tight curves, e.g., on mountainous roads or
when turning, an additional, corner-illuminating
lamp is switched on that lights up the inside of
the curve when the vehicle is moving below a
certain speed.
The turning lights are automatically switched
on depending on the steering angle or the use
of turn signals.
When driving in reverse, the turning lights may
be automatically switched on regardless of the
steering angle.
Self-leveling headlights
The self-leveling headlights compensate for
acceleration and braking operations in order
not to blind the oncoming traffic and to achieve
optimum illumination of the roadway.
Malfunction
A Check Control message is displayed.
Adaptive Light Control is malfunctioning or has
failed. Have the system checked as soon as
possible.
Seite 131LightsControls131
Online Edition for Part no. 0140 2 964 330 - VI/15
Page 132 of 314
High-beam AssistantThe concept
The high-beam Assistant detects other traffic
participants early on and automatically
switches the high beams on or off depending
on the traffic situation. The assistant ensures
that the high beams are activated whenever
the traffic situation allows. In the low speed
range, the high beams are not switched on by
the system.
General information
The system responds to light from oncoming
traffic and traffic driving ahead of you, and to
adequate illumination, e.g., in towns and cities.
The driver can intervene at any time and switch
the high beams on and off as usual.
Depending on the version of the system in the
vehicle, the high beams may not switch off for
oncoming vehicles, but may only be dimmed in
the areas that blind oncoming traffic. In this
case, the blue indicator light will stay on.
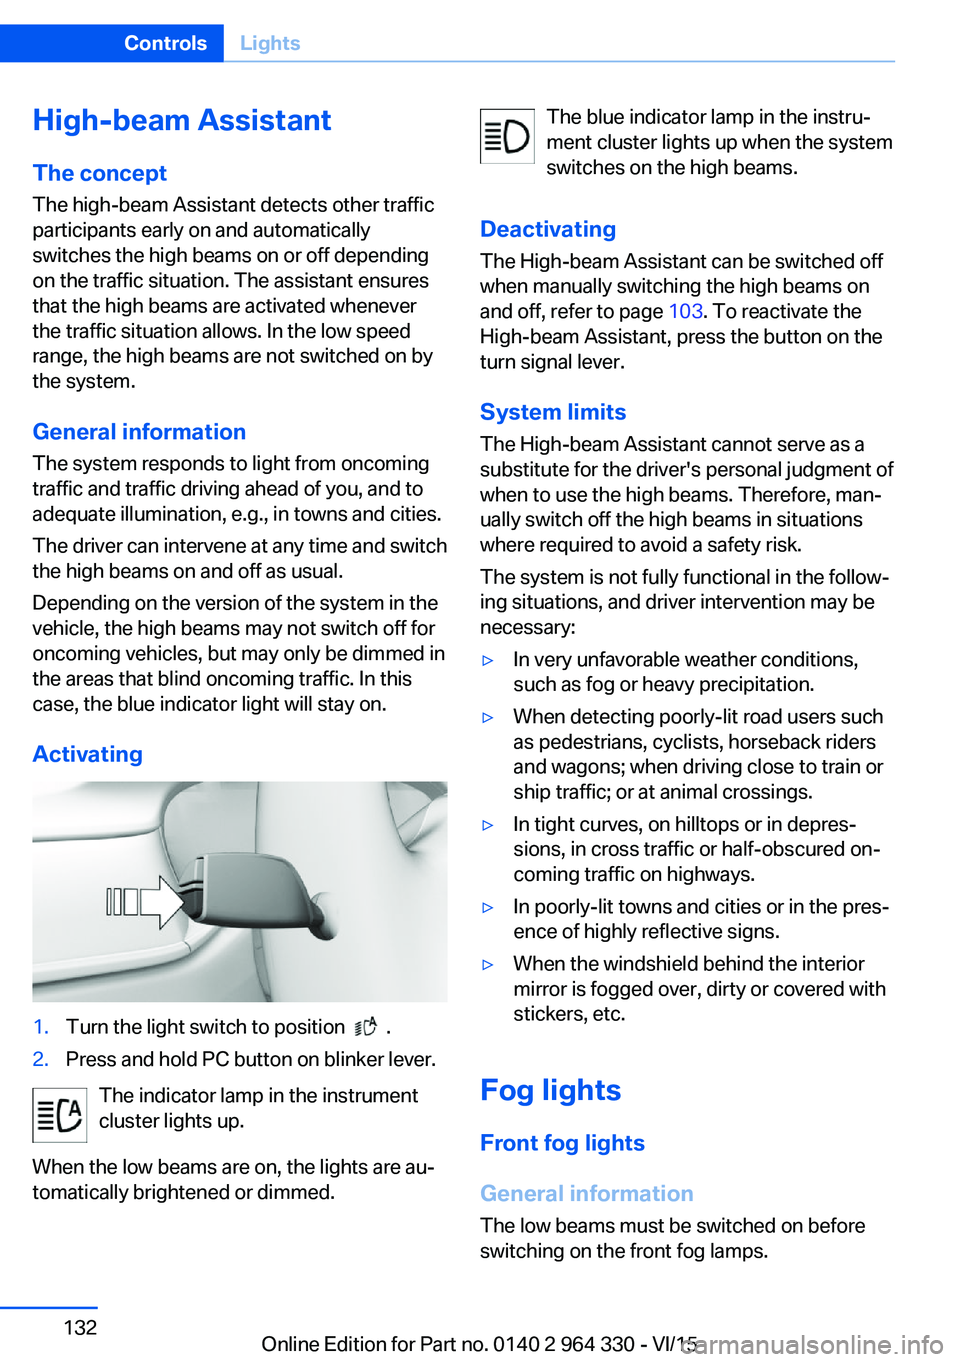
Activating1.Turn the light switch to position .2.Press and hold PC button on blinker lever.
The indicator lamp in the instrument
cluster lights up.
When the low beams are on, the lights are au‐
tomatically brightened or dimmed.
The blue indicator lamp in the instru‐
ment cluster lights up when the system
switches on the high beams.
Deactivating The High-beam Assistant can be switched off
when manually switching the high beams on
and off, refer to page 103. To reactivate the
High-beam Assistant, press the button on the
turn signal lever.
System limits The High-beam Assistant cannot serve as a
substitute for the driver's personal judgment of
when to use the high beams. Therefore, man‐
ually switch off the high beams in situations
where required to avoid a safety risk.
The system is not fully functional in the follow‐
ing situations, and driver intervention may be
necessary:▷In very unfavorable weather conditions,
such as fog or heavy precipitation.▷When detecting poorly-lit road users such
as pedestrians, cyclists, horseback riders
and wagons; when driving close to train or
ship traffic; or at animal crossings.▷In tight curves, on hilltops or in depres‐
sions, in cross traffic or half-obscured on‐
coming traffic on highways.▷In poorly-lit towns and cities or in the pres‐
ence of highly reflective signs.▷When the windshield behind the interior
mirror is fogged over, dirty or covered with
stickers, etc.
Fog lights
Front fog lights
General information
The low beams must be switched on before
switching on the front fog lamps.
Seite 132ControlsLights132
Online Edition for Part no. 0140 2 964 330 - VI/15