display BMW 745LI SEDAN 2002 User Guide
[x] Cancel search | Manufacturer: BMW, Model Year: 2002, Model line: 745LI SEDAN, Model: BMW 745LI SEDAN 2002Pages: 208, PDF Size: 6.33 MB
Page 20 of 208
At a glanceControlsDriving tipsCommunicationsNavigationEntertainmentMobilityReference
19
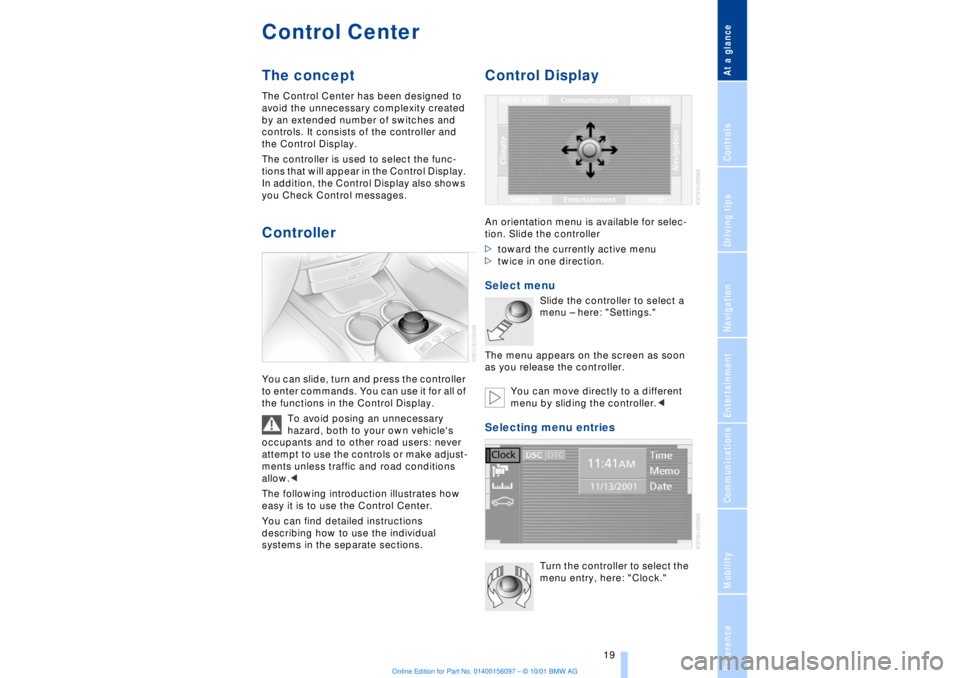
Control CenterThe concept The Control Center has been designed to
avoid the unnecessary complexity created
by an extended number of switches and
controls. It consists of the controller and
the Control Display.
The controller is used to select the func-
tions that will appear in the Control Display.
In addition, the Control Display also shows
you Check Control messages.Controller You can slide, turn and press the controller
to enter commands. You can use it for all of
the functions in the Control Display.
To avoid posing an unnecessary
hazard, both to your own vehicle's
occupants and to other road users: never
attempt to use the controls or make adjust-
ments unless traffic and road conditions
allow.<
The following introduction illustrates how
easy it is to use the Control Center.
You can find detailed instructions
describing how to use the individual
systems in the separate sections.
Control DisplayAn orientation menu is available for selec-
tion. Slide the controller
>toward the currently active menu
>twice in one direction. Select menu
Slide the controller to select a
menu Ð here: "Settings."
The menu appears on the screen as soon
as you release the controller.
You can move directly to a different
menu by sliding the controller.<
Selecting menu entries
Turn the controller to select the
menu entry, here: "Clock."
Page 21 of 208
Control Center
20 Among the available menu entries:
>Adjustment options
>Program
>Function
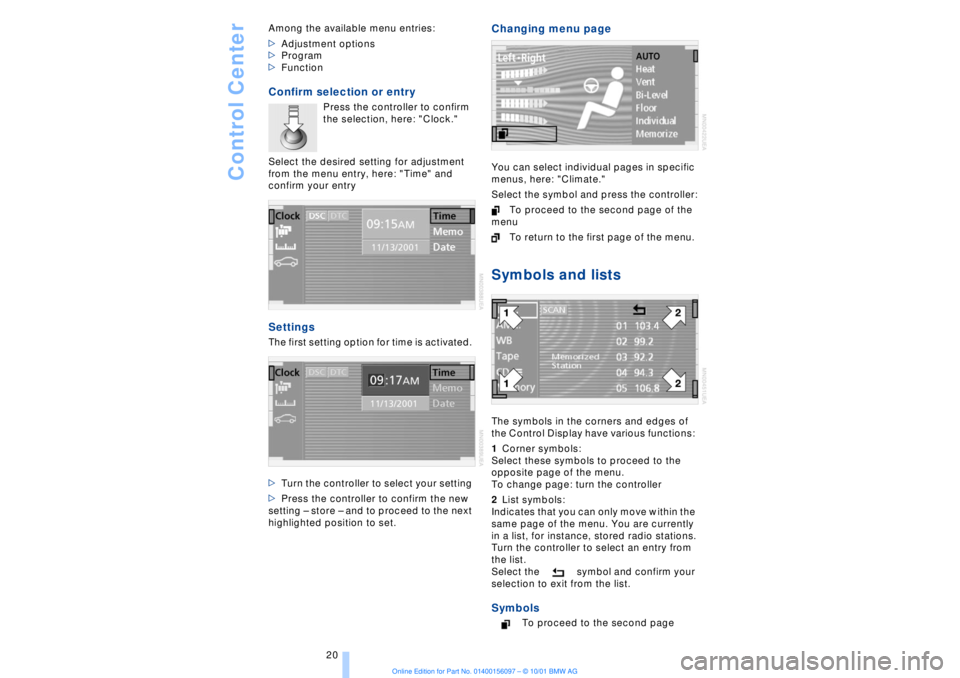
Confirm selection or entry
Press the controller to confirm
the selection, here: "Clock."
Select the desired setting for adjustment
from the menu entry, here: "Time" and
confirm your entry
Settings The first setting option for time is activated.
>Turn the controller to select your setting
>Press the controller to confirm the new
setting Ð store Ð and to proceed to the next
highlighted position to set.
Changing menu page You can select individual pages in specific
menus, here: "Climate."
Select the symbol and press the controller:
To proceed to the second page of the
menu
To return to the first page of the menu. Symbols and listsThe symbols in the corners and edges of
the Control Display have various functions:
1Corner symbols:
Select these symbols to proceed to the
opposite page of the menu.
To change page: turn the controller
2List symbols:
Indicates that you can only move within the
same page of the menu. You are currently
in a list, for instance, stored radio stations.
Turn the controller to select an entry from
the list.
Select the symbol and confirm your
selection to exit from the list. Symbols
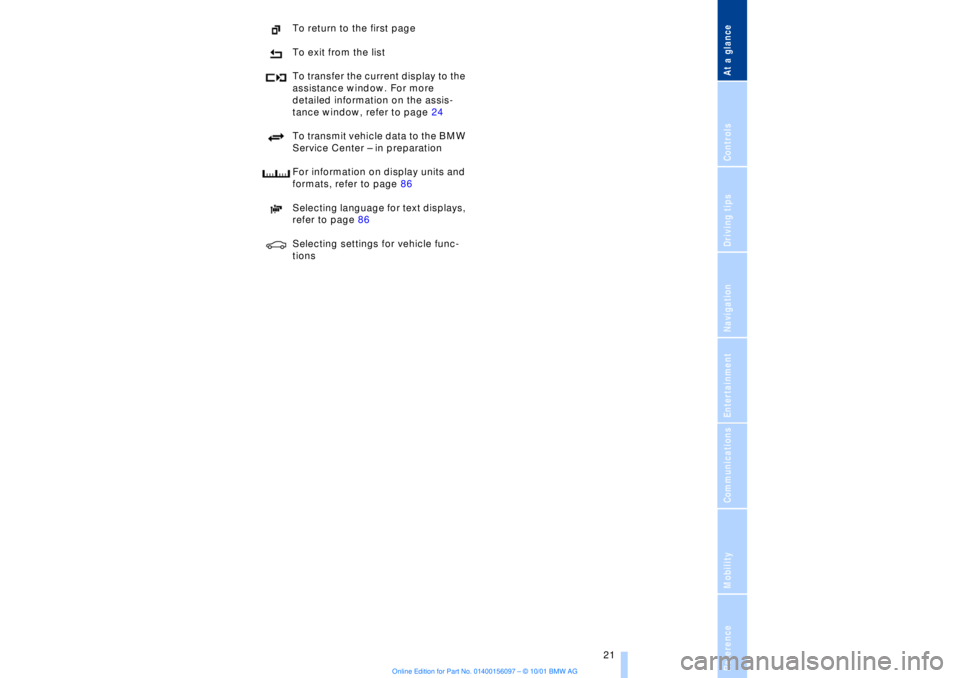
To proceed to the second page
Page 22 of 208
At a glanceControlsDriving tipsCommunicationsNavigationEntertainmentMobilityReference
21
To return to the first page
To exit from the list
To transfer the current display to the
assistance window. For more
detailed information on the assis-
tance window, refer to page 24
To transmit vehicle data to the BMW
Service Center Ð in preparation
For information on display units and
formats, refer to page 86
Selecting language for text displays,
refer to page 86
Selecting settings for vehicle func-
tions
Page 23 of 208
Control Center
22
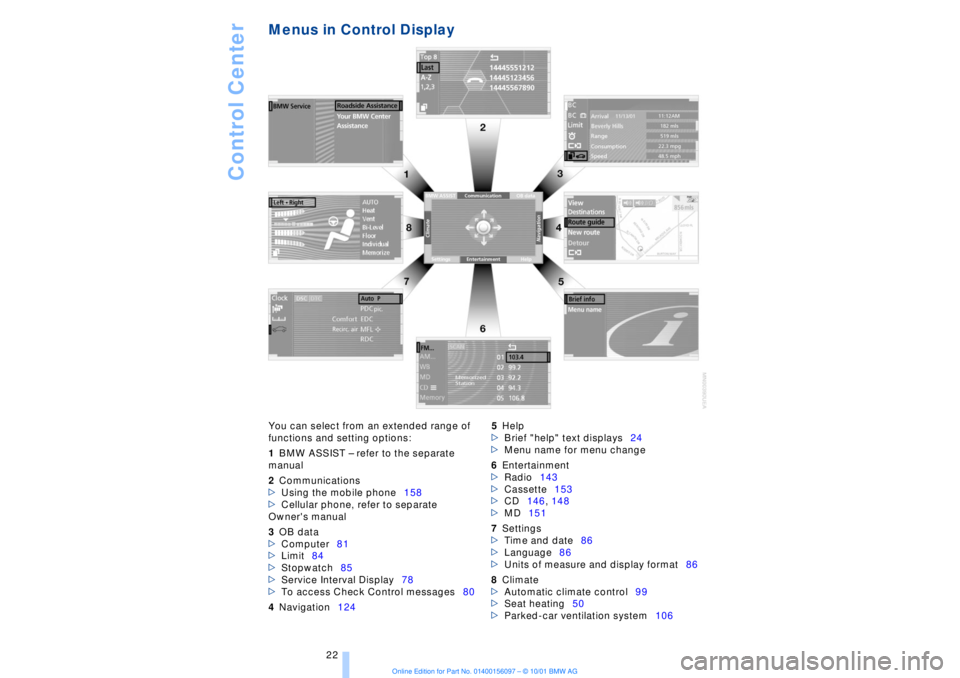
Menus in Control Display You can select from an extended range of
functions and setting options:
1BMW ASSIST Ð refer to the separate
manual
2Communications
>Using the mobile phone158
>Cellular phone, refer to separate
Owner's manual
3OB data
>Computer81
>Limit84
>Stopwatch85
>Service Interval Display78
>To access Check Control messages80
4Navigation1245Help
>Brief "help" text displays24
>Menu name for menu change
6Entertainment
>Radio143
>Cassette153
>CD146, 148
>MD151
7Settings
>Time and date86
>Language86
>Units of measure and display format86
8Climate
>Automatic climate control99
>Seat heating50
>Parked-car ventilation system106
Page 24 of 208
At a glanceControlsDriving tipsCommunicationsNavigationEntertainmentMobilityReference
23
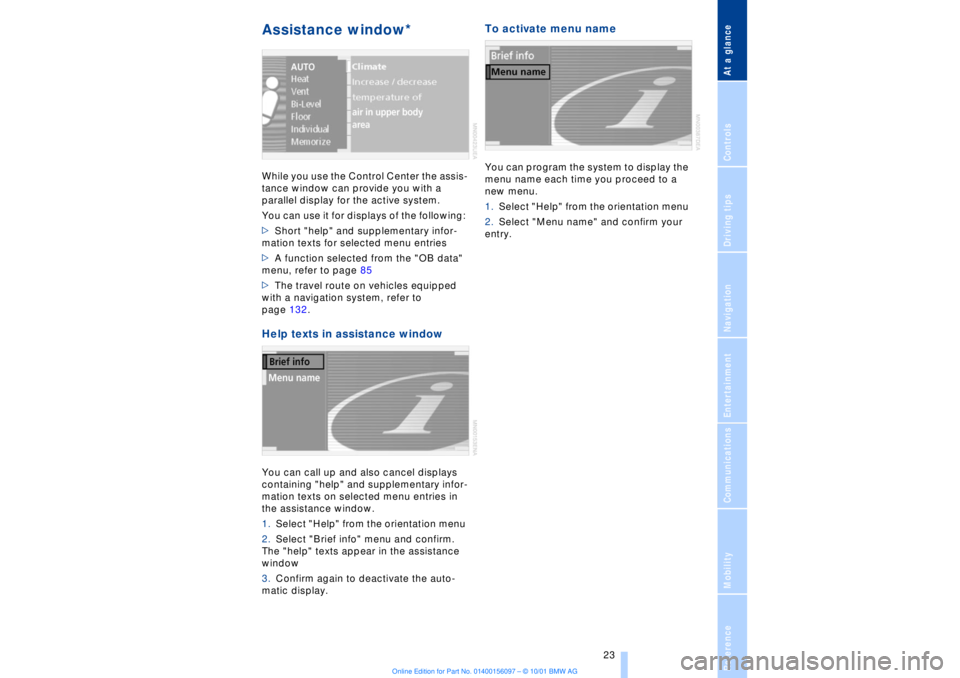
Assistance window* While you use the Control Center the assis-
tance window can provide you with a
parallel display for the active system.
You can use it for displays of the following:
>Short "help" and supplementary infor-
mation texts for selected menu entries
>A function selected from the "OB data"
menu, refer to page 85
>The travel route on vehicles equipped
with a navigation system, refer to
page 132.Help texts in assistance windowYou can call up and also cancel displays
containing "help" and supplementary infor-
mation texts on selected menu entries in
the assistance window.
1.Select "Help" from the orientation menu
2.Select "Brief info" menu and confirm.
The "help" texts appear in the assistance
window
3.Confirm again to deactivate the auto-
matic display.
To activate menu nameYou can program the system to display the
menu name each time you proceed to a
new menu.
1.Select "Help" from the orientation menu
2.Select "Menu name" and confirm your
entry.
Page 25 of 208
Control Center
24
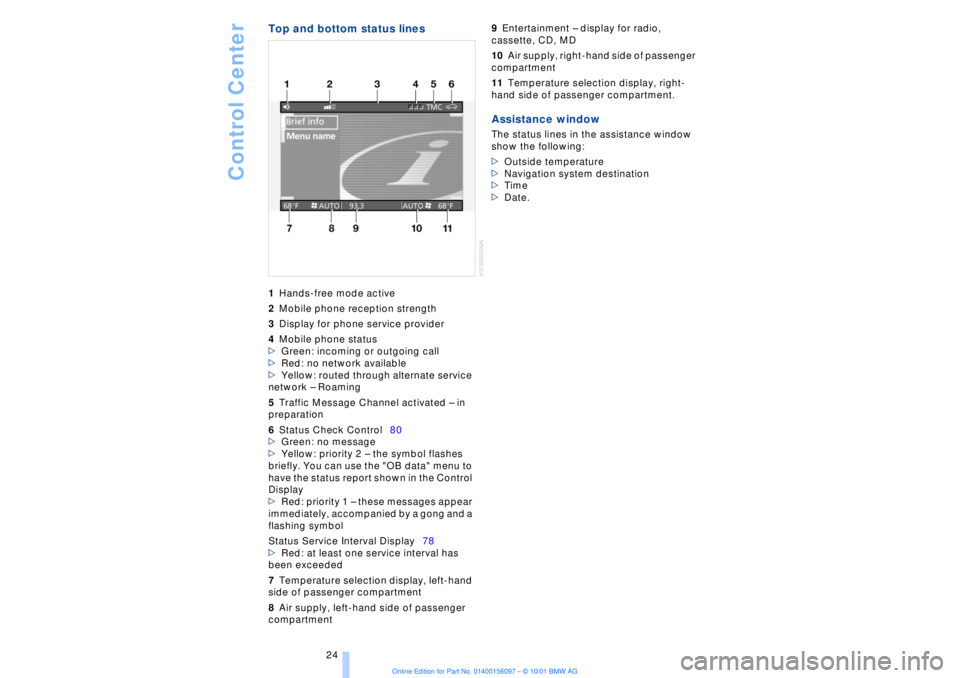
Top and bottom status lines1Hands-free mode active
2Mobile phone reception strength
3Display for phone service provider
4Mobile phone status
>Green: incoming or outgoing call
>Red: no network available
>Yellow: routed through alternate service
network Ð Roaming
5Traffic Message Channel activated Ð in
preparation
6Status Check Control80
>Green: no message
>Yellow: priority 2 Ð the symbol flashes
briefly. You can use the "OB data" menu to
have the status report shown in the Control
Display
>Red: priority 1 Ð these messages appear
immediately, accompanied by a gong and a
flashing symbol
Status Service Interval Display78
>Red: at least one service interval has
been exceeded
7Temperature selection display, left-hand
side of passenger compartment
8Air supply, left-hand side of passenger
compartment 9Entertainment Ð display for radio,
cassette, CD, MD
10Air supply, right-hand side of passenger
compartment
11Temperature selection display, right-
hand side of passenger compartment. Assistance windowThe status lines in the assistance window
show the following:
>Outside temperature
>Navigation system destination
>Time
>Date.
Page 26 of 208
At a glanceControlsDriving tipsCommunicationsNavigationEntertainmentMobilityReference
25
Voice commandVoice command system*The conceptThe voice command system allows you to
control operation of various vehicle
systems without ever removing your hands
from the steering wheel. The system oper-
ates on the basis of voice commands that
you will learn easily after using them a few
times. You issue your commands in the
form of instructions or in dialogs. The
dialog functions provide you with additional
support in the form of questions and infor-
mation.
The voice command system transforms
your commands and dialog answers into
control signals for the selected systems.
Please take the time to acquaint your-
self with how a particular system
operates before proceeding to control it
using the voice command system. At the
time of publication the voice command
system was available for use with the
English and German languages. Other
languages are currently in preparation.
When the voice command system is active
you can adjust the volume, refer to
page 141.
command system.<
>>...<< identifies commands used in the
voice command system. It is not necessary
to speak the words in parentheses.
>...< identifies the answers provided by the
voice command system.
Systems available for use with voice
command>Mobile phone, refer to page 158
>>Telephone (menu)<<
>Navigation system, refer to page 124
>>Navigation (menu)<< or
>>Navi (menu)<<>Radio, refer to page 140
>>Radio (menu)<<
>CD, refer to page 146
>>CD (menu)<<
>CD changer, refer to page 148
>>CD changer (menu)<<
>MiniDisc, refer to page 151
>>MiniDisc (menu)<<
>Cassette, refer to page 153
>>Tape (menu)<<
>Notebook, refer to page 28
>>Notepad (menu)<< or
>>Notebook (menu)<< or >>Note
recorder (menu)<<
Either the system that you are now control-
ling, or any current error messages will
appear in the Info Display, refer to page 14.
Voice commandsTo activate voice command systemActivate by briefly pressing the
button in the steering wheel.
A signal tone and "SVS" in the Info Display
indicate that the system is ready for use.
You automatically proceed to the orienta-
tion menu.
Except in dialogs, always press
the button again before issuing voice
commands.
During dialogs that include entry of text or
numbers, the information that the voice
command system has registered will
appear on the Info Display screen, refer to
page 14.To cancel voice command entryYou can terminate execution of a command
or dialog with >>Cancel<<, >>Exit<< or by
pressing the button in the steering
wheel.
Page 27 of 208
Voice command
26 The button must be used to terminate
unrestricted, open dialogs in which any text
might occur, such as those containing
names, notes, etc.
The system automatically switches
over to its telephone mode if you
receive a call during a dialog. The system
issues the voice message >Cancelled< and
"PROCESS TERMINATED" appears in the
Info Display, see Status displays below.<
Voice commandsThe voice command system operates on
the basis of specific, predefined
commands; these commands should be
spoken precisely as indicated. You can
listen to a selection from the command list
by activating the system, refer to page 26
and issuing the command >>Options<< or
>>What now<<.
The voice command system also features
an entry-level >>Main menu<< that allows
you to select individual accessories, refer
to page 26.Brief commandsAt the >>Main menu<< level you can use
"brief commands," refer to page 30 to
initiate direct execution of selected func-
tions without first proceeding to the
"systems" level.Special commands Special commands are available for
specific systems. In this Owner's Manual
you will find these commands in the
sections describing the individual systems.
Instructions for using the voice
command system are always identi-
fied by this pictogram.
>>>Pardon<< or >>Repeat<<
Repeats the last message issued by the
voice command system>>>Cancel<< or >>Exit<<
Terminates the voice command system
>>>Standard dialog<<
or >>Extended dialog<<
Comprehensive instructions and error
reports guide you through the system
>>>Short dialog<<
In this setting your guidance through the
system is provided exclusively in the form
of brief statements
>>>Help<<
Allows you to request information on
various systems
>>>Options<< or >>What now<<
Provides you with a listing of the
commands available for the selected
system. A corresponding list simulta-
neously appears in the Info Display, see
Status displays below
>>>Main menu<<
Provides access to submenus.
To make it easier for you to become
acquainted with the system, it is
preset to the >>Standard dialog<< or
>>Extended dialog<< mode at the
factory.<
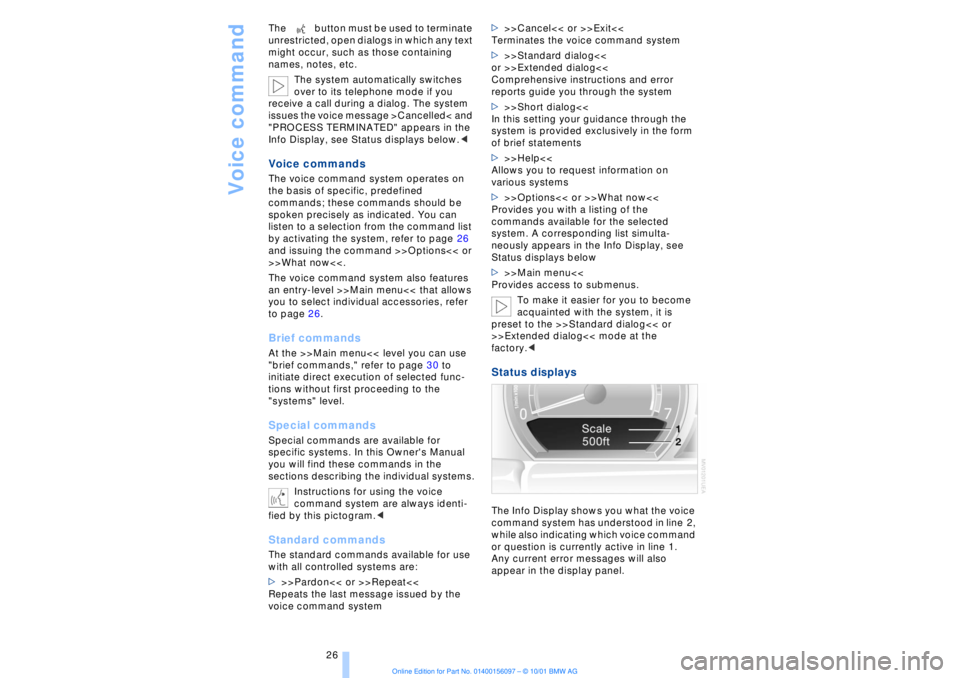
Status displaysThe Info Display shows you what the voice
command system has understood in line 2,
while also indicating which voice command
or question is currently active in line 1.
Any current error messages will also
appear in the display panel.
Page 30 of 208
At a glanceControlsDriving tipsCommunicationsNavigationEntertainmentMobilityReference
29
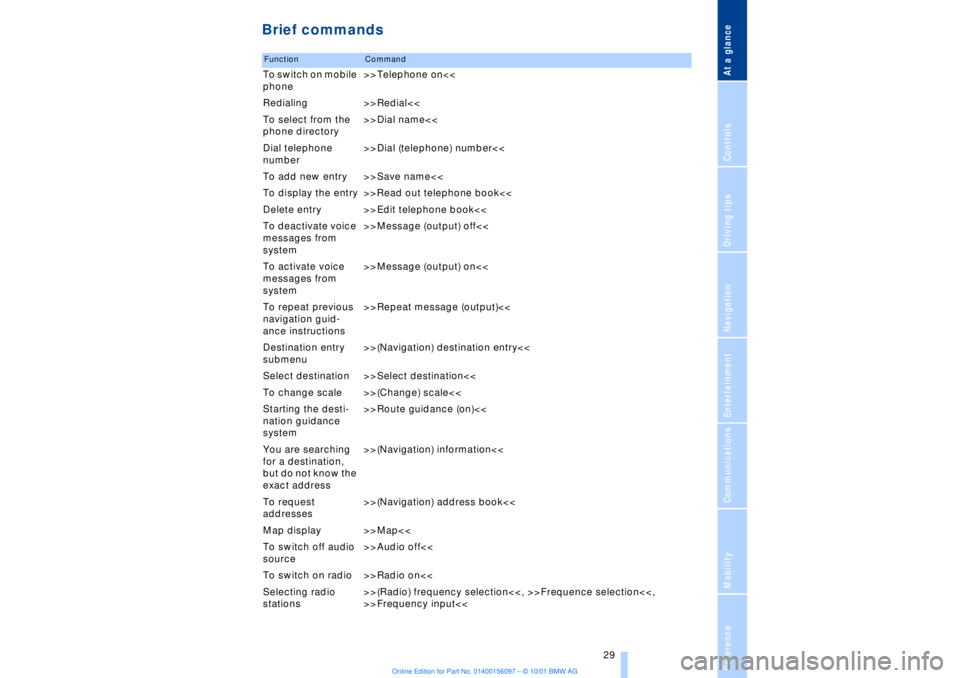
Brief commandsFunction
Command
To switch on mobile
phone>>Telephone on<<
Redialing >>Redial<<
To select from the
phone directory>>Dial name<<
Dial telephone
number>>Dial (telephone) number<<
To add new entry >>Save name<<
To display the entry >>Read out telephone book<<
Delete entry >>Edit telephone book<<
To deactivate voice
messages from
system>>Message (output) off<<
To activate voice
messages from
system>>Message (output) on<<
To repeat previous
navigation guid-
ance instructions>>Repeat message (output)<<
Destination entry
submenu>>(Navigation) destination entry<<
Select destination >>Select destination<<
To change scale >>(Change) scale<<
Starting the desti-
nation guidance
system>>Route guidance (on)<<
You are searching
for a destination,
but do not know the
exact address>>(Navigation) information<<
To request
addresses>>(Navigation) address book<<
Map display >>Map<<
To switch off audio
source>>Audio off<<
To switch on radio >>Radio on<<
Selecting radio
stations>>(Radio) frequency selection<<, >>Frequence selection<<,
>>Frequency input<<
Page 42 of 208
At a glanceControlsDriving tipsCommunicationsNavigationEntertainmentMobilityReference
41
>The hazard warning flashers for approx.
five minutes
>The high beams, which flash on and off
in the same rhythm.To arm and disarm the alarm system When you lock (or unlock) the vehicle,
either with the remote control unit or at the
door lock, the alarm system is armed (or
disarmed) at the same time.
The system indicates that is has been
correctly armed by switching on the hazard
warning flashers for a single cycle and by
emitting an acoustic signal.
You can have different acknowledg-
ment signals set to confirm arming
and disarming.<
Even with the alarm system armed, you can
open the luggage compartment lid using
the button 3on the remote control
unit, refer to page 36. The alarm system will
start to monitor the luggage compartment
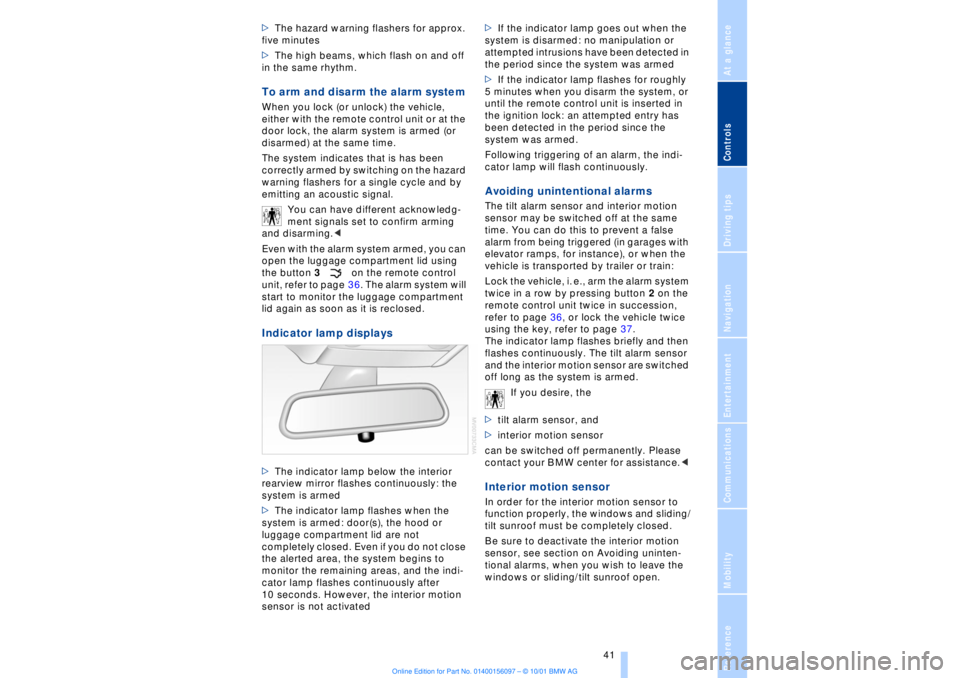
lid again as soon as it is reclosed. Indicator lamp displays>The indicator lamp below the interior
rearview mirror flashes continuously: the
system is armed
>The indicator lamp flashes when the
system is armed: door(s), the hood or
luggage compartment lid are not
completely closed. Even if you do not close
the alerted area, the system begins to
monitor the remaining areas, and the indi-
cator lamp flashes continuously after
10 seconds. However, the interior motion
sensor is not activated >If the indicator lamp goes out when the
system is disarmed: no manipulation or
attempted intrusions have been detected in
the period since the system was armed
>If the indicator lamp flashes for roughly
5 minutes when you disarm the system, or
until the remote control unit is inserted in
the ignition lock: an attempted entry has
been detected in the period since the
system was armed.
Following triggering of an alarm, the indi-
cator lamp will flash continuously.
Avoiding unintentional alarms The tilt alarm sensor and interior motion
sensor may be switched off at the same
time. You can do this to prevent a false
alarm from being triggered (in garages with
elevator ramps, for instance), or when the
vehicle is transported by trailer or train:
Lock the vehicle, i. e., arm the alarm system
twice in a row by pressing button 2 on the
remote control unit twice in succession,
refer to page 36, or lock the vehicle twice
using the key, refer to page 37.
The indicator lamp flashes briefly and then
flashes continuously. The tilt alarm sensor
and the interior motion sensor are switched
off long as the system is armed.
If you desire, the
>tilt alarm sensor, and
>interior motion sensor
can be switched off permanently. Please
contact your BMW center for assistance.< Interior motion sensor In order for the interior motion sensor to
function properly, the windows and sliding/
tilt sunroof must be completely closed.
Be sure to deactivate the interior motion
sensor, see section on Avoiding uninten-
tional alarms, when you wish to leave the
windows or sliding/tilt sunroof open.