display BMW 745LI SEDAN 2002 Workshop Manual
[x] Cancel search | Manufacturer: BMW, Model Year: 2002, Model line: 745LI SEDAN, Model: BMW 745LI SEDAN 2002Pages: 208, PDF Size: 6.33 MB
Page 94 of 208
At a glanceControlsDriving tipsCommunicationsNavigationEntertainmentMobilityReference
93
This symbol will appear in the
Check Control panel to inform you
when the inflation pressure varies
from that stored in the system. A text
message appears at the same time. Please
take note of the additional information in
the Control Display panel.
You can find more information on the
Check Control starting on page 80.
The RDC cannot alert you to severe
and sudden tire damage caused by
external factors.<
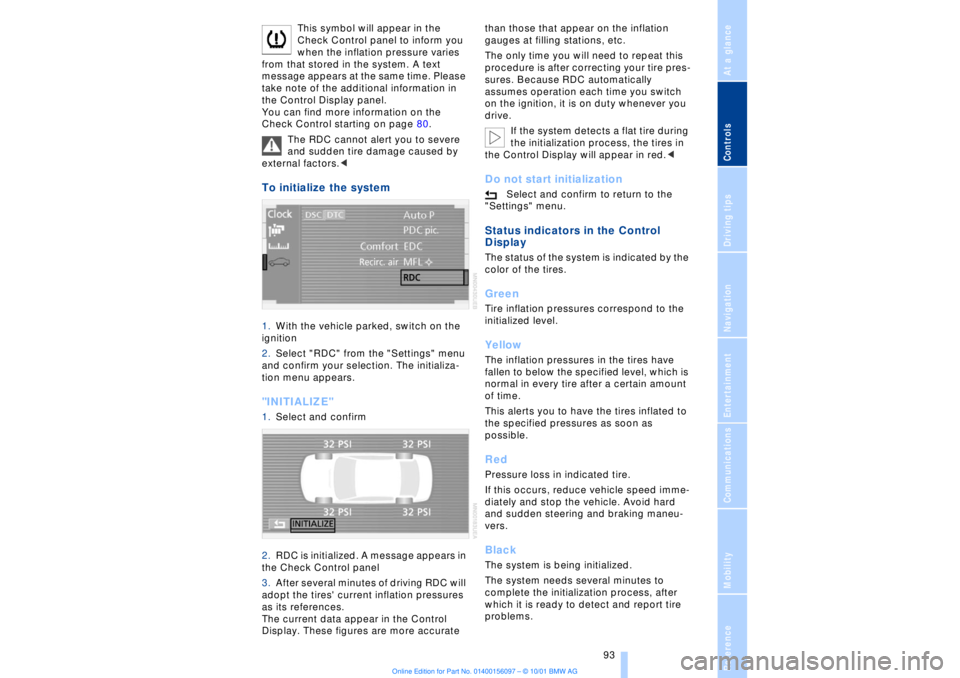
To initialize the system 1.With the vehicle parked, switch on the
ignition
2.Select "RDC" from the "Settings" menu
and confirm your selection. The initializa-
tion menu appears. "INITIALIZE" 1.Select and confirm
2.RDC is initialized. A message appears in
the Check Control panel
3.After several minutes of driving RDC will
adopt the tires' current inflation pressures
as its references.
The current data appear in the Control
Display. These figures are more accurate than those that appear on the inflation
gauges at filling stations, etc.
The only time you will need to repeat this
procedure is after correcting your tire pres-
sures. Because RDC automatically
assumes operation each time you switch
on the ignition, it is on duty whenever you
drive.
If the system detects a flat tire during
the initialization process, the tires in
the Control Display will appear in red.<
Do not start initialization
Select and confirm to return to the
"Settings" menu.
Status indicators in the Control
Display The status of the system is indicated by the
color of the tires. GreenTire inflation pressures correspond to the
initialized level.YellowThe inflation pressures in the tires have
fallen to below the specified level, which is
normal in every tire after a certain amount
of time.
This alerts you to have the tires inflated to
the specified pressures as soon as
possible. RedPressure loss in indicated tire.
If this occurs, reduce vehicle speed imme-
diately and stop the vehicle. Avoid hard
and sudden steering and braking maneu-
vers. BlackThe system is being initialized.
The system needs several minutes to
complete the initialization process, after
which it is ready to detect and report tire
problems.
Page 95 of 208
Technology for comfort, convenience and safety
94
In the event of loss in tire pressure If the indicator lamp symbol in the Check
Control lights up in yellow, and a message
also appears, this indicates that the infla-
tion pressures in the tires have fallen to
below the specified level, which is normal
in every tire after a certain amount of time.
This alerts you to have the tires inflated to
the specified pressures as soon as
possible.
Please take note of the additional informa-
tion in the Control Display panel.
If you are prompted to check the tire
pressure shortly after a correction has
been made, this indicates that the
corrected values were not accurate. Please
check the inflation pressure again and
make corrections according to the inflation
pressure table. Then reinitialize the
system.< Flat tire If you have a flat tire, the indicator lamp
symbol in the Check Control will light up in
red, and a message will appear. In addition,
a gong sounds.
If this occurs, reduce vehicle speed imme-
diately and stop the vehicle. Avoid hard
and sudden steering and braking maneu-
vers. Replace the damaged tire.
The spare tire provided with your
vehicle is equipped with the elec-
tronics required to support RDC operation;
once the spare tire is installed, the pressure
in this tire will also be monitored following
system initialization.
Have the tires changed at your BMW
center. Your BMW center has the informa-
tion needed for working with RDC and is
equipped with the necessary special
tools.
ference signals that may prevent the
system from operating as intended. The symbol will appear in yellow in the
Check Control panel and a message will
appear.
You will also see the same message
>in the event of a system fault
>if a wheel is mounted without the
appropriate electronics
>if, in addition to the spare tire, additional
wheels with RDC electronics are on board.
Please refer to the additional information
supplied in the Control Display, and have
the system inspected at your BMW center.
Self-leveling suspension*
In the event of malfunction
A Check Control message
appearing together with this symbol
indicates a malfunction in the self-
leveling suspension. Please take note of
the additional information in the Control
Display panel.
Stop and inspect the vehicle. If the rear of
the vehicle is visibly lower than the front,
possibly accompanied by a tilt noticeable
when you compare the left rear with the
right rear, you should respond by immedi-
ately proceeding to the nearest BMW
center. Drive with appropriate caution in
the meantime. The vehicle has reduced
ground clearance and driving comfort may
be noticeably reduced. Even if the attitude
of the vehicle is normal, you should consult
the nearest BMW center if the warning
lamp indicates a system fault.
Adaptive brake lamp The adaptive brake lamp indicates the
intensity with which you are applying your
brakes to drivers of following vehicles.
Page 96 of 208
At a glanceControlsDriving tipsCommunicationsNavigationEntertainmentMobilityReference
95
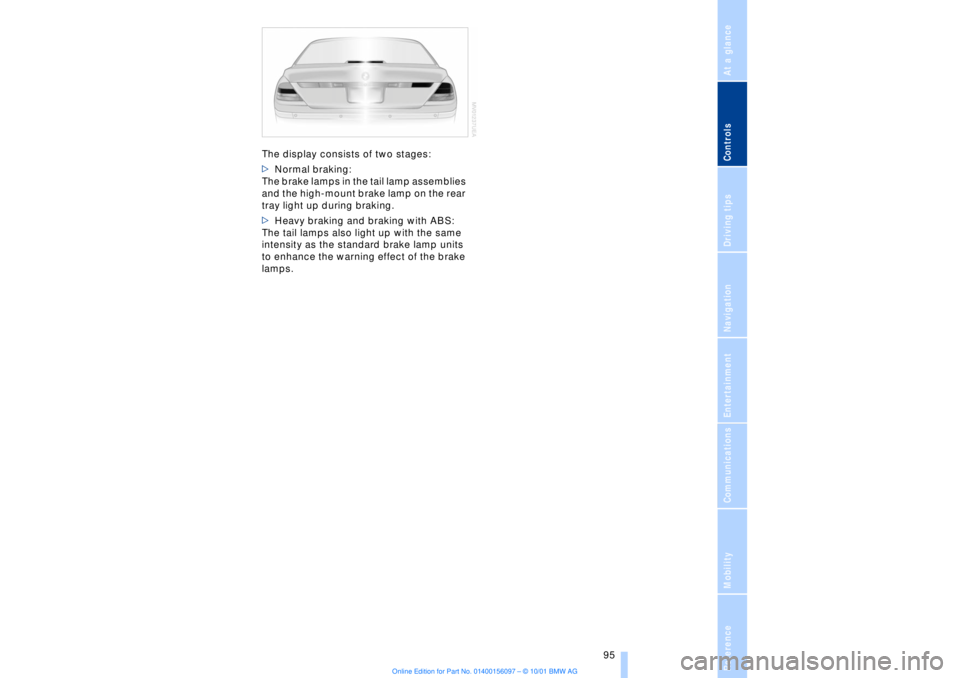
The display consists of two stages:
>Normal braking:
The brake lamps in the tail lamp assemblies
and the high-mount brake lamp on the rear
tray light up during braking.
>Heavy braking and braking with ABS:
The tail lamps also light up with the same
intensity as the standard brake lamp units
to enhance the warning effect of the brake
lamps.
Page 98 of 208
At a glanceControlsDriving tipsCommunicationsNavigationEntertainmentMobilityReference
97
Instrument lighting Turn the rotary dial to adjust the illumina-
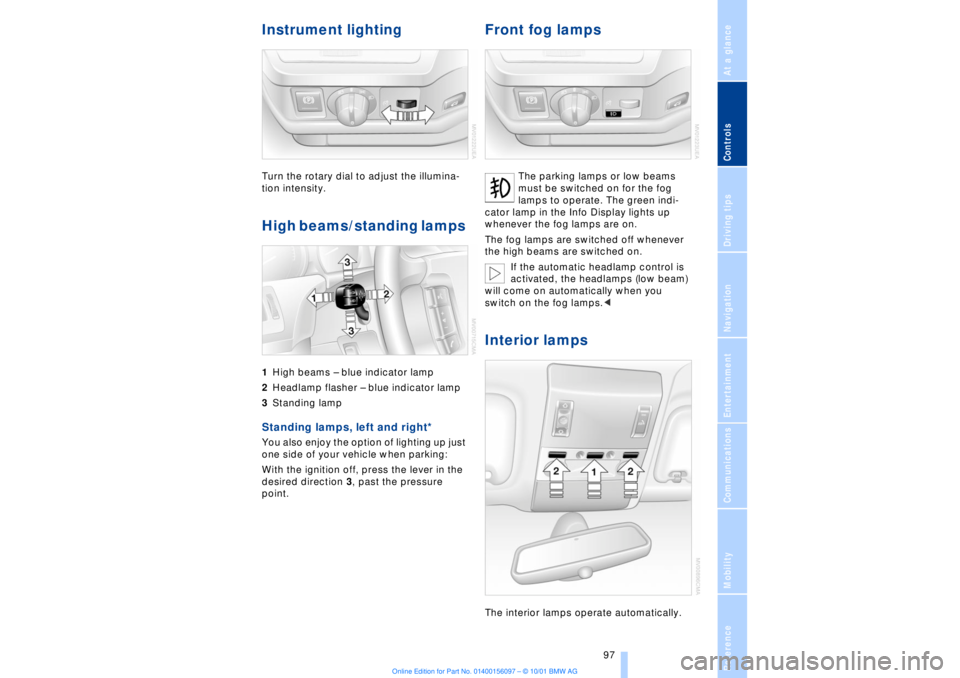
tion intensity. High beams/standing lamps 1High beams Ð blue indicator lamp
2Headlamp flasher Ð blue indicator lamp
3Standing lamp Standing lamps, left and right*
You also enjoy the option of lighting up just
one side of your vehicle when parking:
With the ignition off, press the lever in the
desired direction 3, past the pressure
point.
Front fog lamps
The parking lamps or low beams
must be switched on for the fog
lamps to operate. The green indi-
cator lamp in the Info Display lights up
whenever the fog lamps are on.
The fog lamps are switched off whenever
the high beams are switched on.
If the automatic headlamp control is
activated, the headlamps (low beam)
will come on automatically when you
switch on the fog lamps.<
Interior lamps The interior lamps operate automatically.
Page 99 of 208
Lamps
98
Switching the interior lamps on and
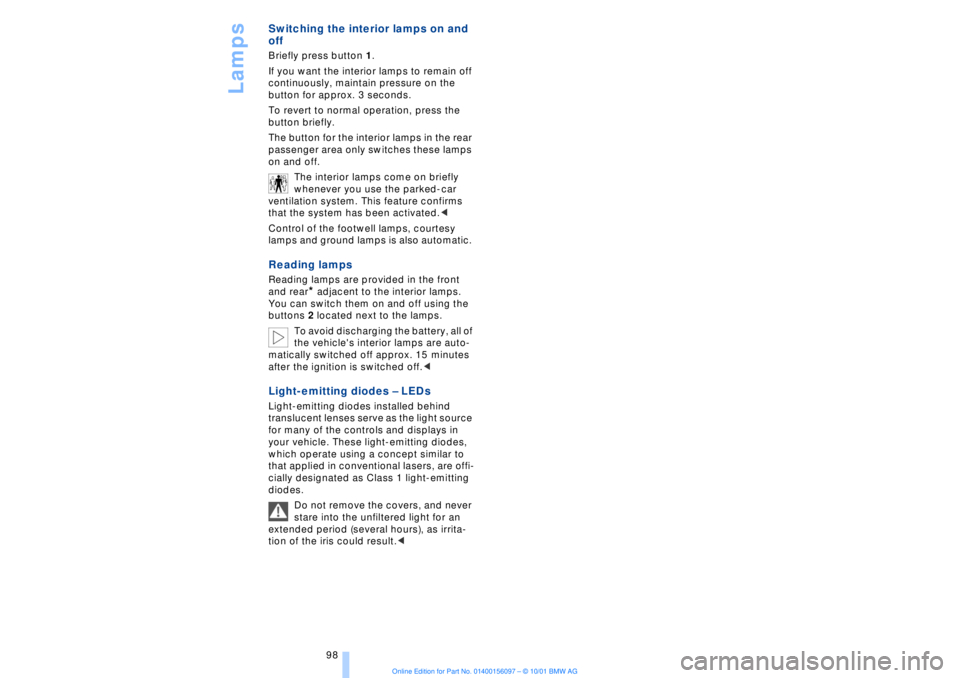
off Briefly press button 1.
If you want the interior lamps to remain off
continuously, maintain pressure on the
button for approx. 3 seconds.
To revert to normal operation, press the
button briefly.
The button for the interior lamps in the rear
passenger area only switches these lamps
on and off.
The interior lamps come on briefly
whenever you use the parked-car
ventilation system. This feature confirms
that the system has been activated.<
Control of the footwell lamps, courtesy
lamps and ground lamps is also automatic. Reading lamps Reading lamps are provided in the front
and rear
* adjacent to the interior lamps.
You can switch them on and off using the
buttons 2 located next to the lamps.
To avoid discharging the battery, all of
the vehicle's interior lamps are auto-
matically switched off approx. 15 minutes
after the ignition is switched off.<
Light-emitting diodes Ð LEDs Light-emitting diodes installed behind
translucent lenses serve as the light source
for many of the controls and displays in
your vehicle. These light-emitting diodes,
which operate using a concept similar to
that applied in conventional lasers, are offi-
cially designated as Class 1 light-emitting
diodes.
Do not remove the covers, and never
stare into the unfiltered light for an
extended period (several hours), as irrita-
tion of the iris could result.<
Page 101 of 208
A congenial climate
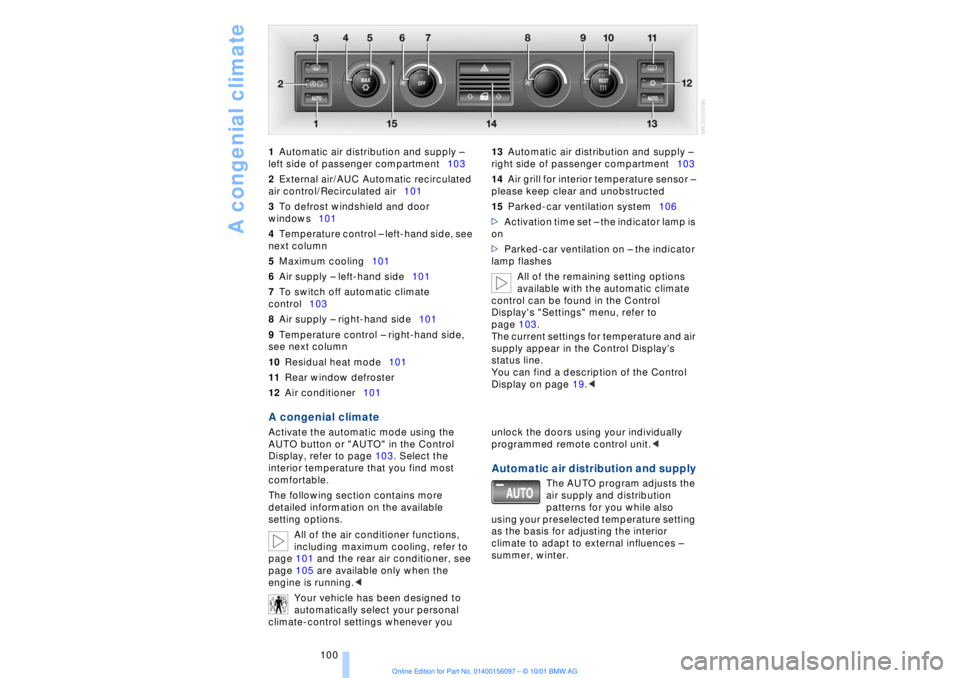
100 1Automatic air distribution and supply Ð
left side of passenger compartment103
2External air/AUC Automatic recirculated
air control/Recirculated air101
3To defrost windshield and door
windows101
4Temperature control Ð left-hand side, see
next column
5Maximum cooling101
6Air supply Ð left-hand side101
7To switch off automatic climate
control103
8Air supply Ð right-hand side101
9Temperature control Ð right-hand side,
see next column
10Residual heat mode101
11Rear window defroster
12Air conditioner101 13Automatic air distribution and supply Ð
right side of passenger compartment103
14Air grill for interior temperature sensor Ð
please keep clear and unobstructed
15Parked-car ventilation system106
>Activation time set Ð the indicator lamp is
on
>Parked-car ventilation on Ð the indicator
lamp flashes
All of the remaining setting options
available with the automatic climate
control can be found in the Control
Display's "Settings" menu, refer to
page 103.
The current settings for temperature and air
supply appear in the Control Display's
status line.
You can find a description of the Control
Display on page 19.<
A congenial climate Activate the automatic mode using the
AUTO button or "AUTO" in the Control
Display, refer to page 103. Select the
interior temperature that you find most
comfortable.
The following section contains more
detailed information on the available
setting options.
All of the air conditioner functions,
including maximum cooling, refer to
page 101 and the rear air conditioner, see
page 105 are available only when the
engine is running.<
Your vehicle has been designed to
automatically select your personal
climate-control settings whenever you unlock the doors using your individually
programmed remote control unit.<
Automatic air distribution and supply
The AUTO program adjusts the
air supply and distribution
patterns for you while also
using your preselected temperature setting
as the basis for adjusting the interior
climate to adapt to external influences Ð
summer, winter.
Page 102 of 208
At a glanceControlsDriving tipsCommunicationsNavigationEntertainmentMobilityReference
101
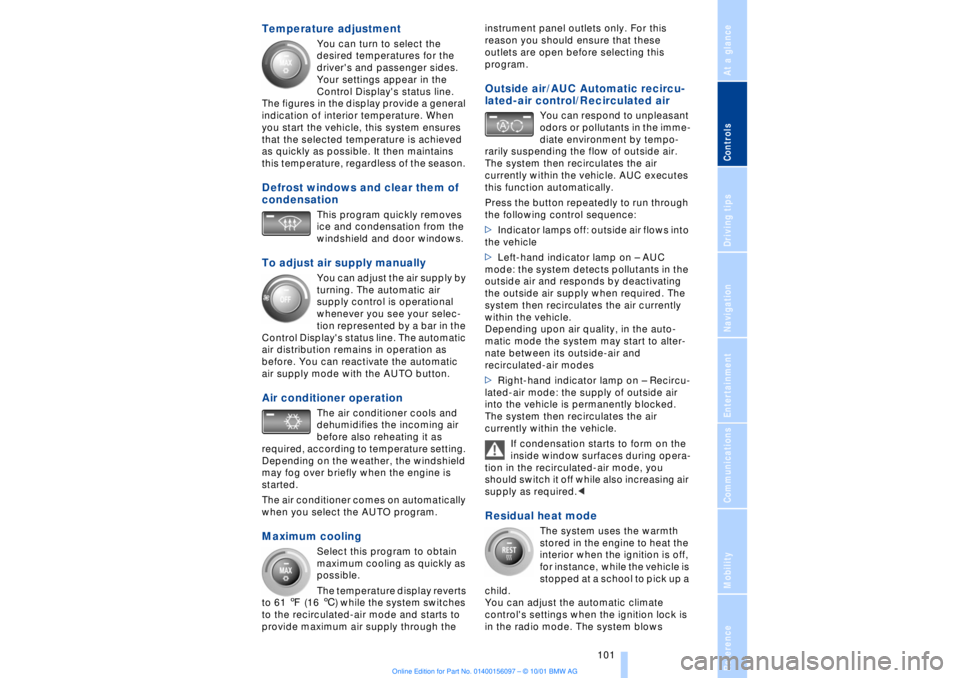
Temperature adjustment
You can turn to select the
desired temperatures for the
driver's and passenger sides.
Your settings appear in the
Control Display's status line.
The figures in the display provide a general
indication of interior temperature. When
you start the vehicle, this system ensures
that the selected temperature is achieved
as quickly as possible. It then maintains
this temperature, regardless of the season.
Defrost windows and clear them of
condensation
This program quickly removes
ice and condensation from the
windshield and door windows.
To adjust air supply manually
You can adjust the air supply by
turning. The automatic air
supply control is operational
whenever you see your selec-
tion represented by a bar in the
Control Display's status line. The automatic
air distribution remains in operation as
before. You can reactivate the automatic
air supply mode with the AUTO button.
Air conditioner operation
The air conditioner cools and
dehumidifies the incoming air
before also reheating it as
required, according to temperature setting.
Depending on the weather, the windshield
may fog over briefly when the engine is
started.
The air conditioner comes on automatically
when you select the AUTO program.
Maximum cooling
Select this program to obtain
maximum cooling as quickly as
possible.
The temperature display reverts
to 61 7 (16 6) while the system switches
to the recirculated-air mode and starts to
provide maximum air supply through the instrument panel outlets only. For this
reason you should ensure that these
outlets are open before selecting this
program.
Outside air/AUC Automatic recircu-
lated-air control/Recirculated air
You can respond to unpleasant
odors or pollutants in the imme-
diate environment by tempo-
rarily suspending the flow of outside air.
The system then recirculates the air
currently within the vehicle. AUC executes
this function automatically.
Press the button repeatedly to run through
the following control sequence:
>Indicator lamps off: outside air flows into
the vehicle
>Left-hand indicator lamp on Ð AUC
mode: the system detects pollutants in the
outside air and responds by deactivating
the outside air supply when required. The
system then recirculates the air currently
within the vehicle.
Depending upon air quality, in the auto-
matic mode the system may start to alter-
nate between its outside-air and
recirculated-air modes
>Right-hand indicator lamp on Ð Recircu-
lated-air mode: the supply of outside air
into the vehicle is permanently blocked.
The system then recirculates the air
currently within the vehicle.
If condensation starts to form on the
inside window surfaces during opera-
tion in the recirculated-air mode, you
should switch it off while also increasing air
supply as required.<
Residual heat mode
The system uses the warmth
stored in the engine to heat the
interior when the ignition is off,
for instance, while the vehicle is
stopped at a school to pick up a
child.
You can adjust the automatic climate
control's settings when the ignition lock is
in the radio mode. The system blows
Page 103 of 208
A congenial climate
102 heated air into the interior in accordance
with the selected distribution pattern while
the ignition is off.
Provided that the engine has warmed
to its normal operating temperature
and the battery is charged, you can use this
function for up to 15 minutes after
switching off the ignition. The LED within
the button lights up to confirm compliance
with both of these conditions.<
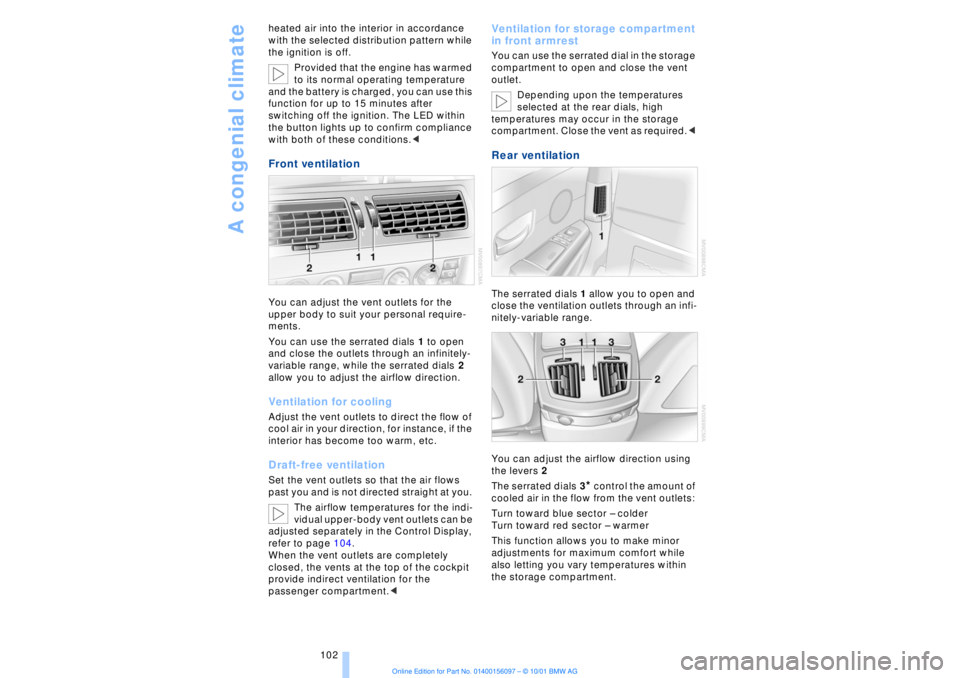
Front ventilation You can adjust the vent outlets for the
upper body to suit your personal require-
ments.
You can use the serrated dials 1 to open
and close the outlets through an infinitely-
variable range, while the serrated dials 2
allow you to adjust the airflow direction. Ventilation for cooling Adjust the vent outlets to direct the flow of
cool air in your direction, for instance, if the
interior has become too warm, etc.Draft-free ventilationSet the vent outlets so that the air flows
past you and is not directed straight at you.
The airflow temperatures for the indi-
vidual upper-body vent outlets can be
adjusted separately in the Control Display,
refer to page 104.
When the vent outlets are completely
closed, the vents at the top of the cockpit
provide indirect ventilation for the
passenger compartment.<
Ventilation for storage compartment
in front armrest You can use the serrated dial in the storage
compartment to open and close the vent
outlet.
Depending upon the temperatures
selected at the rear dials, high
temperatures may occur in the storage
compartment. Close the vent as required.< Rear ventilation The serrated dials 1 allow you to open and
close the ventilation outlets through an infi-
nitely-variable range.
You can adjust the airflow direction using
the levers 2
The serrated dials 3
* control the amount of
cooled air in the flow from the vent outlets:
Turn toward blue sector Ð colder
Turn toward red sector Ð warmer
This function allows you to make minor
adjustments for maximum comfort while
also letting you vary temperatures within
the storage compartment.
Page 104 of 208
At a glanceControlsDriving tipsCommunicationsNavigationEntertainmentMobilityReference
103
Switching off the automatic climate
control*
The air supply, the heater and
the air conditioner are all
switched off. You can restart
the automatic climate control
by pressing any of its buttons
except the REST button.
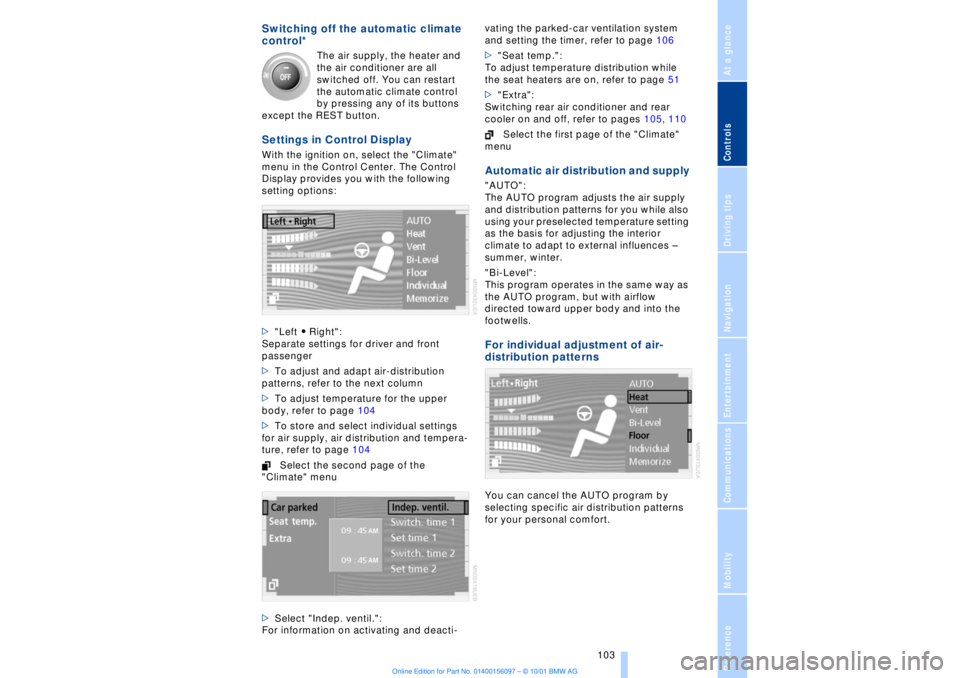
Settings in Control Display With the ignition on, select the "Climate"
menu in the Control Center. The Control
Display provides you with the following
setting options:
>"Left A Right":
Separate settings for driver and front
passenger
>To adjust and adapt air-distribution
patterns, refer to the next column
>To adjust temperature for the upper
body, refer to page 104
>To store and select individual settings
for air supply, air distribution and tempera-
ture, refer to page 104
Select the second page of the
"Climate" menu
>Select "Indep. ventil.":
For information on activating and deacti-vating the parked-car ventilation system
and setting the timer, refer to page 106
>"Seat temp.":
To adjust temperature distribution while
the seat heaters are on, refer to page 51
>"Extra":
Switching rear air conditioner and rear
cooler on and off, refer to pages 105, 110
Select the first page of the "Climate"
menu
Automatic air distribution and supply "AUTO":
The AUTO program adjusts the air supply
and distribution patterns for you while also
using your preselected temperature setting
as the basis for adjusting the interior
climate to adapt to external influences Ð
summer, winter.
"Bi-Level":
This program operates in the same way as
the AUTO program, but with airflow
directed toward upper body and into the
footwells. For individual adjustment of air-
distribution patternsYou can cancel the AUTO program by
selecting specific air distribution patterns
for your personal comfort.
Page 105 of 208
A congenial climate
104
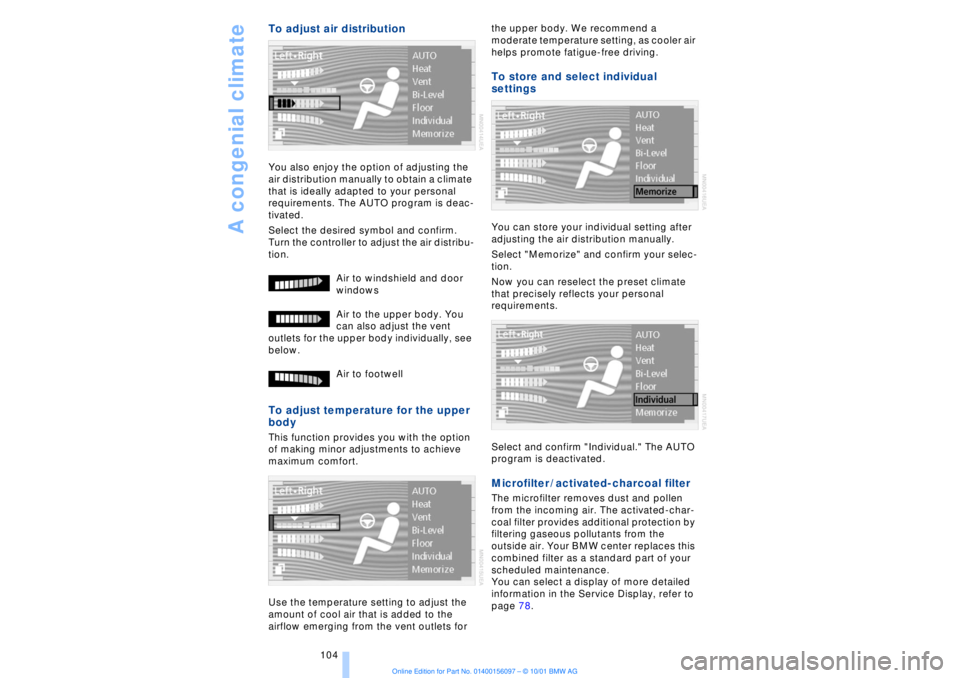
To adjust air distribution You also enjoy the option of adjusting the
air distribution manually to obtain a climate
that is ideally adapted to your personal
requirements. The AUTO program is deac-
tivated.
Select the desired symbol and confirm.
Turn the controller to adjust the air distribu-
tion.
Air to windshield and door
windows
Air to the upper body. You
can also adjust the vent
outlets for the upper body individually, see
below.
Air to footwell To adjust temperature for the upper
body This function provides you with the option
of making minor adjustments to achieve
maximum comfort.
Use the temperature setting to adjust the
amount of cool air that is added to the
airflow emerging from the vent outlets for the upper body. We recommend a
moderate temperature setting, as cooler air
helps promote fatigue-free driving.
To store and select individual
settings You can store your individual setting after
adjusting the air distribution manually.
Select "Memorize" and confirm your selec-
tion.
Now you can reselect the preset climate
that precisely reflects your personal
requirements.
Select and confirm "Individual." The AUTO
program is deactivated. Microfilter / activated-charcoal filter The microfilter removes dust and pollen
from the incoming air. The activated-char-
coal filter provides additional protection by
filtering gaseous pollutants from the
outside air. Your BMW center replaces this
combined filter as a standard part of your
scheduled maintenance.
You can select a display of more detailed
information in the Service Display, refer to
page 78.