headlamp BMW 750IL SEDAN 1998 Owners Manual
[x] Cancel search | Manufacturer: BMW, Model Year: 1998, Model line: 750IL SEDAN, Model: BMW 750IL SEDAN 1998Pages: 211, PDF Size: 1.68 MB
Page 11 of 211

Contents
Overview
Controls and features
Cockpit16
Instrument cluster18
Indicator and warning lamps20
Multifunction steering wheel
(MFL)23
Hazard warning flashers24
Warning triangle24
First-aid kit24
Refueling25
Fuel specifications25
Tire inflation pressure26
Locks and security systems:
Keys30
Electronic vehicle
immobilizer31
Central locking system32
Door locks – outside32
Radio remote control33
Door locks – inside36
Luggage compartment lid37
Luggage compartment39
Alarm system40
Electric power windows42
Security glass43
Sliding/Tilt sunroof44
Adjustments:
Seats46
Steering wheel49
Mirrors50
Seat, mirror and steering wheel
memory51
Car Memory, Key Memory53
Passenger safety systems:
Safety belts54
Airbags55
Child restraints57
Child restraint installation58
Child-safety locks58
Driving:
Steering/Ignition lock59
Starting engine59
Switching off engine60Parking brake61
Automatic transmission62
Automatic transmission with
Steptronic65
Turn signal/Headlamp flasher68
Washer/Wiper system/Rain
sensor68
Rear window defroster70
Cruise control70
Everything under control:
Odometer, outside temperature
display72
Tachometer72
Energy control73
Fuel gauge73
Temperature gauge74
Service Interval Display74
Check Control 75
Multi-Information Display
(MID)78
Digital clock79
Onboard computer84
Technology for safety and
convenience:
Park Distance Control PDC90
Automatic Stability Control plus
Traction (ASC+T)/Dynamic Sta-
bility Control (DSC)92
Electronic Damper Control
(EDC)93
Tire Pressure Control (RDC)94
Page 18 of 211

17n
RepairsIndexOverview Controls Car care Technology Data
1 Parking lamps/Low beams96
2
>
Turn signal68
>
Parking lamp97
>
High beams97
>
Headlamp flasher68
>
Onboard computer89
3 Horn: The entire surface
4 Fog lamps97
5 Wiper/Washer lever68
6 Central locking system32
7 Hazard warning system24
8 Rear window defroster70
9 Electric steering wheel
adjustment49
10 Parking brake release handle61
11 Parking brake pedal61
Cockpit
Page 20 of 211
19n
RepairsIndexOverview Controls Car care Technology Data
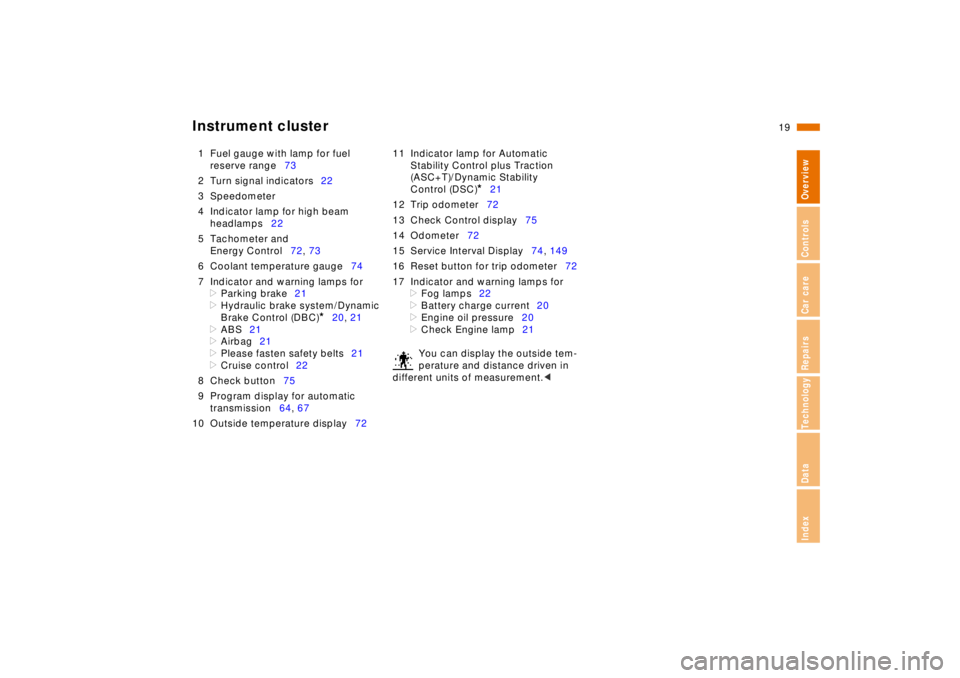
Instrument cluster
1 Fuel gauge with lamp for fuel
reserve range73
2 Turn signal indicators22
3 Speedometer
4 Indicator lamp for high beam
headlamps22
5 Tachometer and
Energy Control72, 73
6 Coolant temperature gauge74
7 Indicator and warning lamps for
>
Parking brake21
>
Hydraulic brake system/Dynamic
Brake Control (DBC)
*
20, 21
>
ABS21
>
Airbag21
>
Please fasten safety belts21
>
Cruise control22
8 Check button75
9 Program display for automatic
transmission64, 67
10 Outside temperature display7211 Indicator lamp for Automatic
Stability Control plus Traction
(ASC+T)/Dynamic Stability
Control (DSC)
*
21
12 Trip odometer72
13 Check Control display75
14 Odometer72
15 Service Interval Display74, 149
16 Reset button for trip odometer72
17 Indicator and warning lamps for
>
Fog lamps22
>
Battery charge current20
>
Engine oil pressure20
>
Check Engine lamp21
You can display the outside tem-
perature and distance driven in
different units of measurement.
<
Page 23 of 211

22n
Indicator and warning lamps
Green: For your information
Turn signal
Flashes when the turn signals
are in operation. Rapid flashing
indicates a system malfunction.
For additional information: Refer to
page 68.
Cruise control
Lights up when the cruise con-
trol is activated. Available for
operation via the multi-function steering
wheel.
For additional information: Refer to
page 70.
Fog lamps
Lights up whenever you switch
on the fog lamps.
For additional information: Refer to
page 97.
Blue: For your information
High beam
Lights up when the high beams
are on or the headlamp flasher
is actuated.
For additional information: Refer to
pages 68, 97.
Page 30 of 211
Overview
Controls and features
Operation, care
and maintenance
Owner service procedures
Technical data
Index Advanced technology
29n
RepairsIndexOverview Controls Car care Technology Data
Parking brake61
Automatic transmission62
Automatic transmission with
Steptronic65
Indicator/Headlamp flasher68
Washer/Wiper system/Rain
sensor68
Rear window defroster70
Cruise control70
Everything under control:
Odometer, outside temperature
display72
Tachometer72
Energy control73
Fuel gauge73
Temperature gauge74
Service Interval Display74
Check Control75
Multi-Information Display
(MID)78
Digital clock79
Onboard computer84
Technology for safety and
convenience:
Park Distance Control (PDC)90
Automatic Stability Control plus
Traction (ASC+T)/Dynamic Sta-
bility Control (DSC)92
Electronic Damper Control
(EDC)93
Tire Pressure Control (RDC)94Lamps:
Parking lamps/Low beams96
Instrument panel rheostat96
High beams/Parking lamps97
Fog lamps97
Interior lamps97
Reading lamps98
Controlling the climate
for pleasant driving:
Automatic climate control100
Rear passenger-area air
conditioning105
Seat heating106
Steering wheel heating106
Rear window blind107
Independent ventilation
system107
Cabin convenience:
Integrated Universal
Remote control108
Glove compartment110
Center armrests111
Additional storage areas113
Cup holder113
Cellular phone113
Ashtray114
Cigarette lighter115
Rear footrests115
Loading and transporting cargo:
Ski bag116
Cargo loading118
Roof-mounted luggage rack118
Page 51 of 211
50n
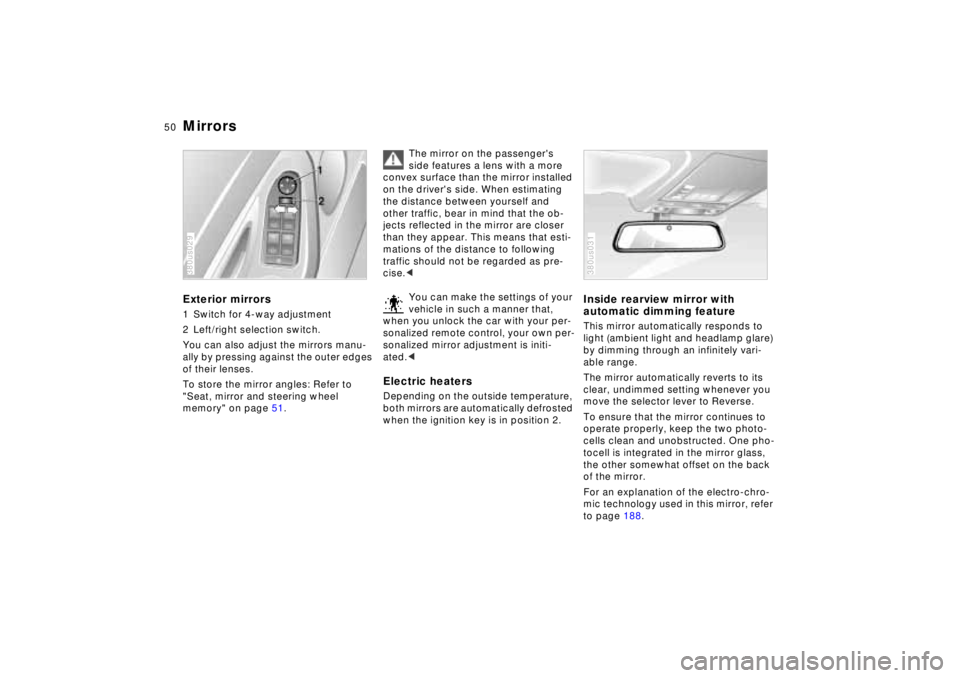
MirrorsExterior mirrors1 Switch for 4-way adjustment
2 Left/right selection switch.
You can also adjust the mirrors manu-
ally by pressing against the outer edges
of their lenses.
To store the mirror angles: Refer to
"Seat, mirror and steering wheel
memory" on page 51.380us029
The mirror on the passenger's
side features a lens with a more
convex surface than the mirror installed
on the driver's side. When estimating
the distance between yourself and
other traffic, bear in mind that the ob-
jects reflected in the mirror are closer
than they appear. This means that esti-
mations of the distance to following
traffic should not be regarded as pre-
cise.<
You can make the settings of your
vehicle in such a manner that,
when you unlock the car with your per-
sonalized remote control, your own per-
sonalized mirror adjustment is initi-
ated.<
Electric heatersDepending on the outside temperature,
both mirrors are automatically defrosted
when the ignition key is in position 2.
Inside rearview mirror with
automatic dimming featureThis mirror automatically responds to
light (ambient light and headlamp glare)
by dimming through an infinitely vari-
able range.
The mirror automatically reverts to its
clear, undimmed setting whenever you
move the selector lever to Reverse.
To ensure that the mirror continues to
operate properly, keep the two photo-
cells clean and unobstructed. One pho-
tocell is integrated in the mirror glass,
the other somewhat offset on the back
of the mirror.
For an explanation of the electro-chro-
mic technology used in this mirror, refer
to page 188.380us031
Page 69 of 211
68n
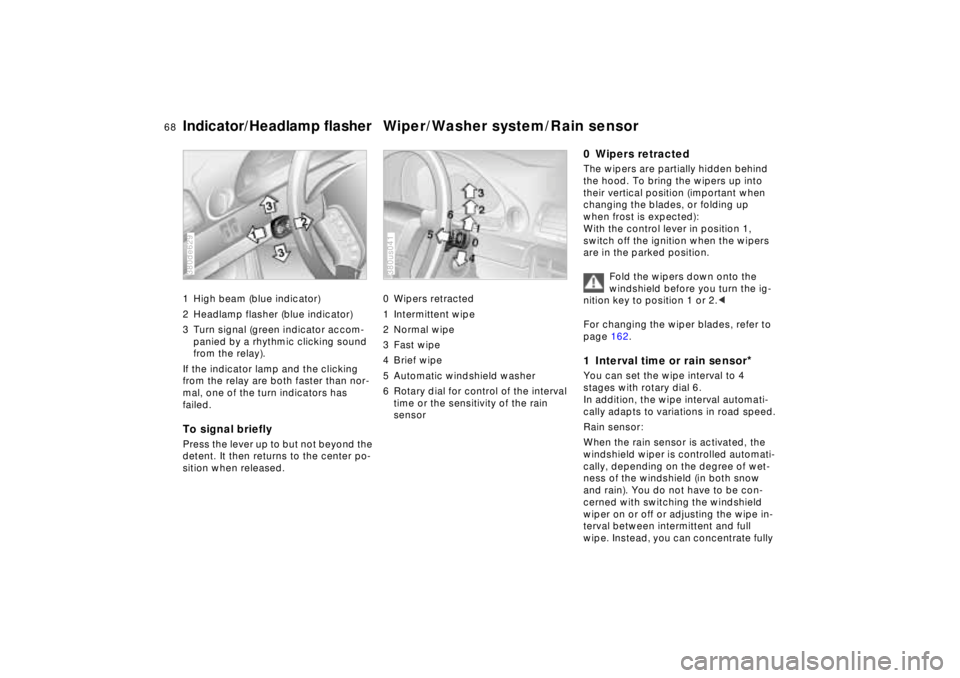
Indicator/Headlamp flasher Wiper/Washer system/Rain sensor1 High beam (blue indicator)
2 Headlamp flasher (blue indicator)
3 Turn signal (green indicator accom-
panied by a rhythmic clicking sound
from the relay).
If the indicator lamp and the clicking
from the relay are both faster than nor-
mal, one of the turn indicators has
failed.To signal brieflyPress the lever up to but not beyond the
detent. It then returns to the center po-
sition when released.380de629
0 Wipers retracted
1 Intermittent wipe
2 Normal wipe
3 Fast wipe
4 Brief wipe
5 Automatic windshield washer
6 Rotary dial for control of the interval
time or the sensitivity of the rain
sensor380us041
0 Wipers retractedThe wipers are partially hidden behind
the hood. To bring the wipers up into
their vertical position (important when
changing the blades, or folding up
when frost is expected):
With the control lever in position 1,
switch off the ignition when the wipers
are in the parked position.
Fold the wipers down onto the
windshield before you turn the ig-
nition key to position 1 or 2.<
For changing the wiper blades, refer to
page 162.1 Interval time or rain sensor
*
You can set the wipe interval to 4
stages with rotary dial 6.
In addition, the wipe interval automati-
cally adapts to variations in road speed.
Rain sensor:
When the rain sensor is activated, the
windshield wiper is controlled automati-
cally, depending on the degree of wet-
ness of the windshield (in both snow
and rain). You do not have to be con-
cerned with switching the windshield
wiper on or off or adjusting the wipe in-
terval between intermittent and full
wipe. Instead, you can concentrate fully
Page 70 of 211

69n
RepairsIndexOverview Controls Car care Technology Data
Wiper/Washer systemon the traffic conditions. This is espe-
cially important under adverse weather
conditions.
To activate the rain sensor:
From ignition key position 1 and up,
move the lever to position 1. The wipers
travel once across the windshield, re-
gardless of the weather.
You can leave the lever permanently in
position 1. It is then only necessary to
activate the rain sensor from ignition
key position 1 and up. To do this
>turn rotary dial 7 briefly or
>use either the automatic windshield
washer 5 or the automatic intensive
washer 6.
To modify the sensitivity of the rain
sensor:
Turn rotary dial 7.
Turn the rain sensor off in auto-
matic car washes.
If you do not, damage may occur if the
wipers switch on unintentionally.<
2 Normal wiper speedWhen the vehicle is stationary, the wip-
ers switch automatically to intermittent
wipe (not on vehicles with rain sensor).3 Fast wiper speedWhen the vehicle is stationary, the wip-
ers operate at normal speed (not on ve-
hicles with rain sensor).5 Automatic windshield washerThe system sprays washer fluid against
the windshield and activates the wipers
for a brief period.
If you only pull the lever briefly, the sys-
tem sprays washer fluid onto the wind-
shield without activating the wipers.Headlamp washers
*
If they are on, the headlamps will also
be cleaned every fifth time you activate
the automatic windshield washer.Do not use the washers if there is
any danger that the fluid will
freeze on the windshield, otherwise vi-
sion could be obscured. For this rea-
son, use an antifreeze agent. Refer to
page 142.
Do not use the washers when the reser-
voir is empty, since this could cause
damage to the washer pump.<
Windshield washer jetsThe windshield washer jets and the
windshield in the wiper sweep area are
defrosted automatically when the igni-
tion key is in position 2.
Page 97 of 211
96n
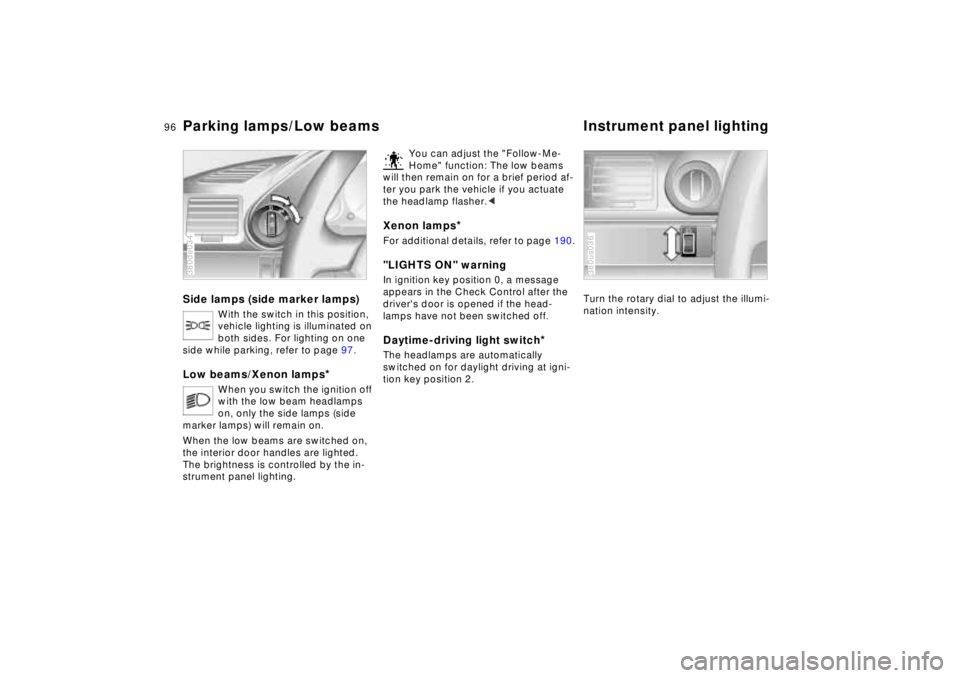
Parking lamps/Low beams Instrument panel lightingSide lamps (side marker lamps)
With the switch in this position,
vehicle lighting is illuminated on
both sides. For lighting on one
side while parking, refer to page 97.
Low beams/Xenon lamps
*
When you switch the ignition off
with the low beam headlamps
on, only the side lamps (side
marker lamps) will remain on.
When the low beams are switched on,
the interior door handles are lighted.
The brightness is controlled by the in-
strument panel lighting.
380de034
You can adjust the "Follow-Me-
Home" function: The low beams
will then remain on for a brief period af-
ter you park the vehicle if you actuate
the headlamp flasher.<
Xenon lamps
*
For additional details, refer to page 190."LIGHTS ON" warningIn ignition key position 0, a message
appears in the Check Control after the
driver's door is opened if the head-
lamps have not been switched off
.
Daytime-driving light switch
*
The headlamps are automatically
switched on for daylight driving at igni-
tion key position 2.
Turn the rotary dial to adjust the illumi-
nation intensity.380us036
Page 98 of 211
97n
RepairsIndexOverview Controls Car care Technology Data
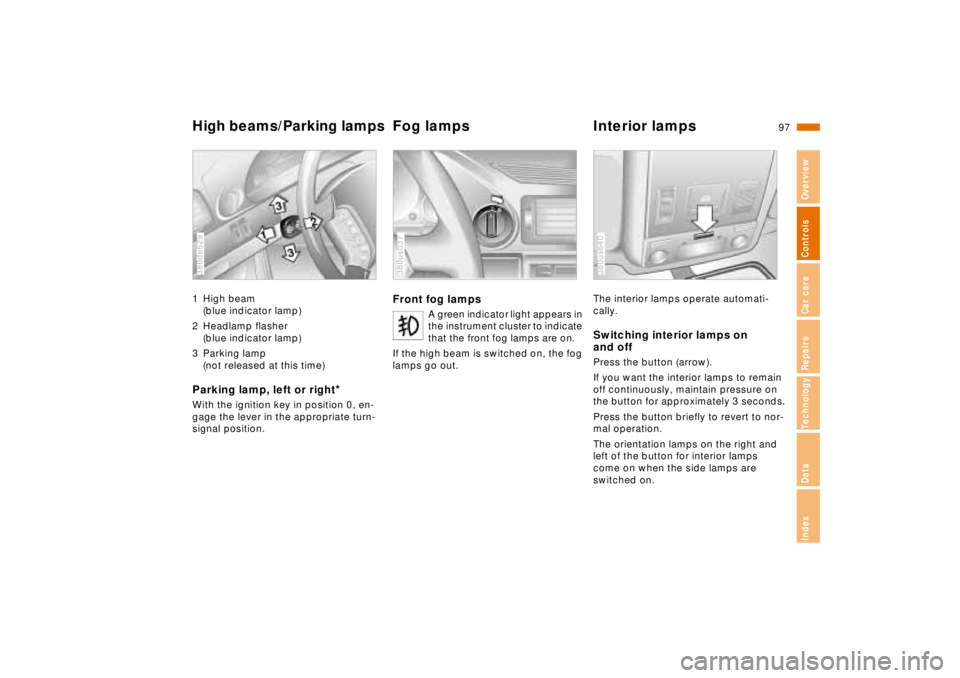
High beams/Parking lampsFog lamps Interior lamps1 High beam
(blue indicator lamp)
2 Headlamp flasher
(blue indicator lamp)
3 Parking lamp
(not released at this time)Parking lamp, left or right
*
With the ignition key in position 0, en-
gage the lever in the appropriate turn-
signal position.380de629
Front fog lamps
A green indicator light appears in
the instrument cluster to indicate
that the front fog lamps are on.
If the high beam is switched on, the fog
lamps go out.
380us037
The interior lamps operate automati-
cally.Switching interior lamps on
and offPress the button (arrow).
If you want the interior lamps to remain
off continuously, maintain pressure on
the button for approximately 3 seconds.
Press the button briefly to revert to nor-
mal operation.
The orientation lamps on the right and
left of the button for interior lamps
come on when the side lamps are
switched on.380us640